Connect with us

Vietnamese Cuisine

Nem Ran/Cha Gio (Fried Spring Rolls)

Keen on trying the crispy and flavorful fried spring rolls, known as Nem Ran or Cha Gio, that are a beloved Vietnamese street food? Discover more about this mouthwatering dish.

Published

on

vietnamese fried spring rolls

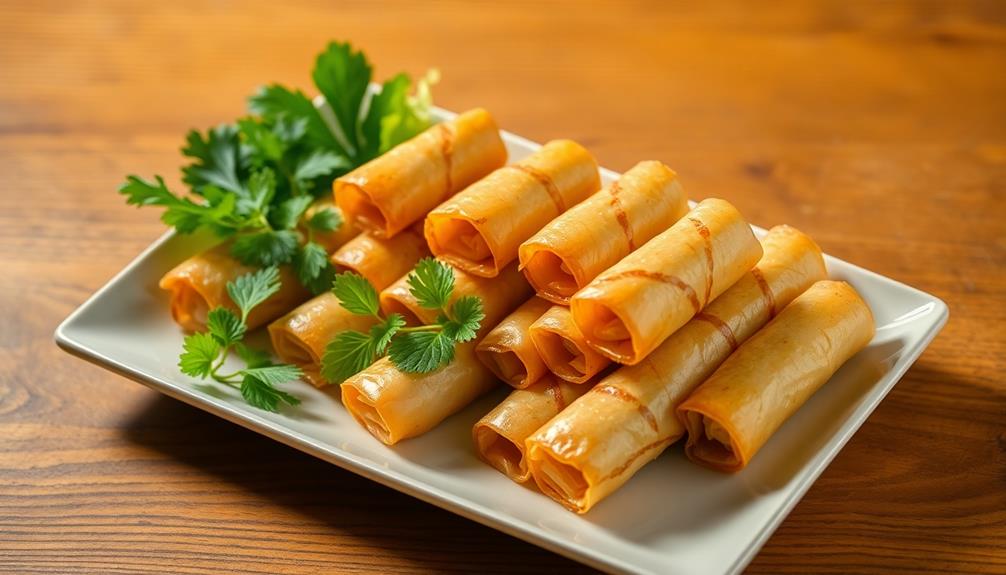
You'll love the crispy and flavorful fried spring rolls, known as Nem Ran or Cha Gio, that are a beloved Vietnamese street food! These tasty rolls feature a golden-brown exterior that gives way to a savory, veggie-packed filling – it's a mouthwatering contrast of textures and flavors that'll have you coming back for more. Traditionally served as an appetizer or snack, these spring rolls represent the vibrant culinary heritage of Vietnam. Dip them in a tangy sauce for an extra punch of flavor, and enjoy the aroma and anticipation before taking that first delightful bite. There's so much more to learn about this beloved Vietnamese dish!

Key Takeaways

  • Nem Ran/Cha Gio is a traditional Vietnamese fried spring roll dish, known for its crispy wrappers and flavorful fillings.
  • The dish originated in ancient China as a celebration of spring and has since spread and adapted to local cuisines.
  • Key ingredients include fresh vegetables, seasoned meat, and rice paper or wheat flour wrappers, which are deep-fried until golden brown.
  • Proper preparation involves soaking the wrappers, assembling the filling, and rolling the rolls tightly before frying for optimal crispiness.
  • Nem Ran/Cha Gio is often served with a tangy dipping sauce and is a popular street food and appetizer in Vietnam, reflecting its cultural heritage.

History

Spring rolls have a rich history that spans centuries and cultures. These delightful fried treats originated in ancient China, where they were first enjoyed as a way to celebrate the arrival of spring. Over time, the recipe spread to neighboring countries, each putting their own unique spin on the classic dish.

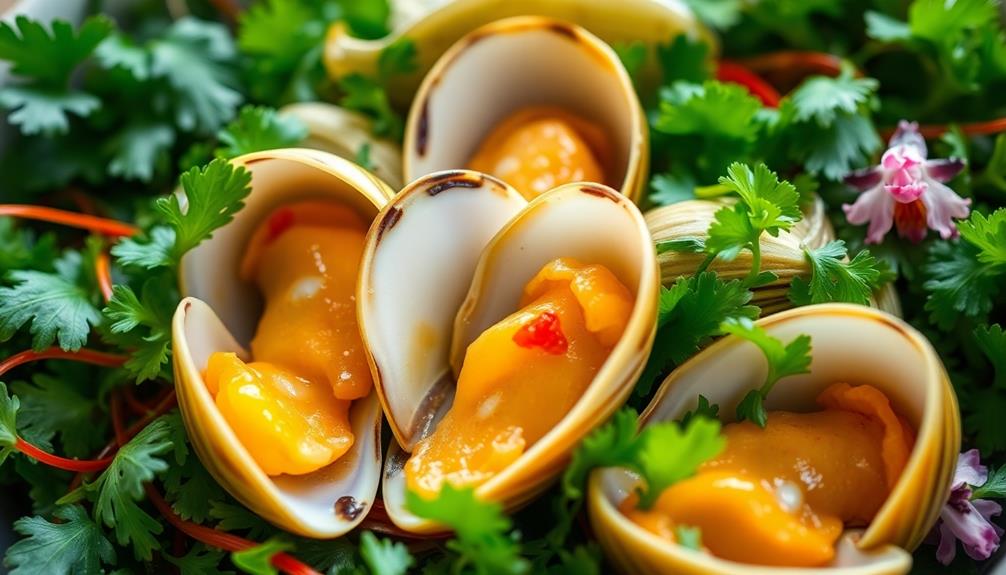
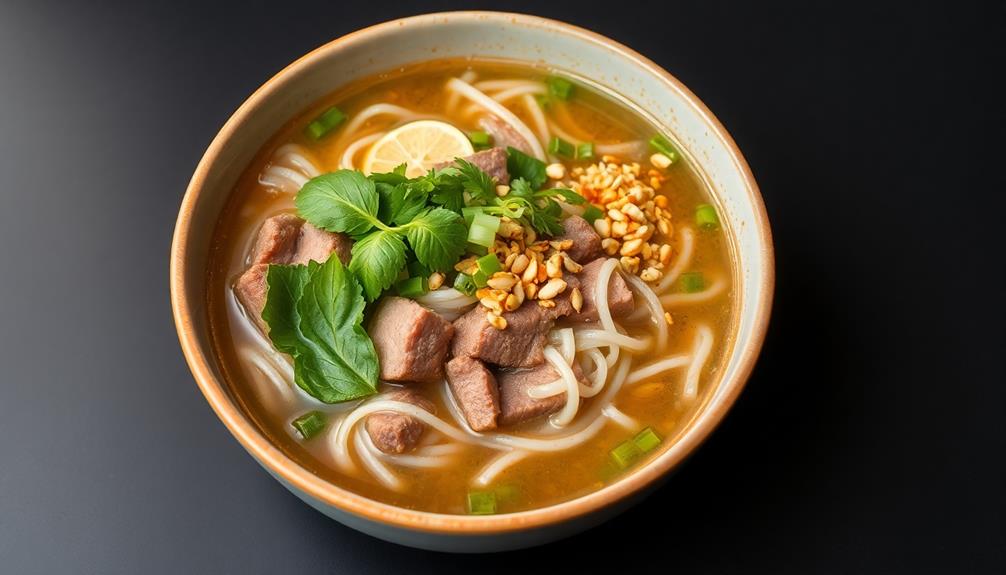
In Vietnam, for example, fried spring rolls are known as "Nem Ran" or "Cha Gio." These savory parcels are stuffed with a variety of ingredients, including shredded pork, carrots, and glass noodles, all wrapped in a crispy, golden-brown shell. Traditionally, Nem Ran is served as an appetizer or as part of a larger meal alongside fresh herbs and lettuce for wrapping. For those looking to try their hand at making this delicious dish at home, a nem chua recipe can be easily found online with step-by-step instructions on how to prepare and fry the spring rolls to perfection. Additionally, these savory parcels are a staple in Vietnamese cuisine and are enjoyed by people all over the world for their crispy texture and flavorful filling.

The flavors are a harmonious blend of salty, sweet, and tangy, making them irresistible to both young and old.

As you bite into a freshly fried spring roll, you'll be transported to faraway lands and ancient traditions. These delectable snacks are a testament to the rich culinary heritage of Asia, and they continue to delight and inspire people around the world.

Recipe

Fried spring rolls are a classic appetizer that can be enjoyed year-round. The combination of crispy fried wrappers and a savory, flavorful filling makes them a crowd-pleasing favorite. Whether you're hosting a party or looking for a tasty snack, this recipe will guide you through the process of creating delicious homemade fried spring rolls.

Advertisement

The key to successful fried spring rolls lies in the balance of the filling ingredients. The filling should be a mixture of fresh vegetables, proteins, and seasonings that complement each other perfectly. For inspiration on how to enhance the flavors and textures of your filling, consider adding elements similar to those found in a bread pudding which often incorporates various spices and fruits.

By carefully selecting and combining these components, you can achieve a filling that's both flavorful and satisfying.

  • Spring roll wrappers
  • Ground pork or chicken
  • Shredded cabbage
  • Shredded carrots
  • Diced onions
  • Minced garlic
  • Soy sauce
  • Rice vinegar
  • Sesame oil
  • Salt and pepper

To prepare the fried spring rolls, first, make the filling by sautéing the ground meat, vegetables, and seasonings until cooked through and fragrant. Allow the filling to cool slightly, then roll it up tightly in the spring roll wrappers.

Fry the rolls in hot oil until golden brown and crispy. Serve the fried spring rolls hot, accompanied by your favorite dipping sauce, such as sweet chili or soy sauce.

Cooking Steps

Soak the rice paper sheets in warm water until they're nice and soft.

Drain off any excess water, then get ready to assemble your tasty filling.

Advertisement

Fold the rice paper over the filling and gently press to seal, then fry the rolls in hot oil until they're golden brown and crispy.

Step 1. Soak Rice Paper in Warm Water

soak rice paper warm

To begin the assembly process, you'll want to soak the rice paper wrappers in warm water for a minute or two until they become pliable and easy to work with.

As the rice paper softens, it'll transform from a stiff, brittle sheet into a supple, translucent wrap that's perfect for rolling up your delicious filling.

Be careful not to leave the wrappers in the water for too long, or they'll become overly soft and tear easily.

Once they're just right, gently remove them one by one, letting any excess water drip off before laying them flat on a clean, dry surface.

This simple step sets the stage for you to assemble your spring rolls with ease.

Advertisement

With the rice paper prepped and ready, you can start building your tasty creations, layer by flavorful layer.

Get ready to roll up some springtime goodness!

Step 2. Drain Excess Water From Sheets

drain excess water sheets

After soaking the rice paper wrappers, you'll want to remove any excess water before assembling your spring rolls.

Gently lay the softened sheets on a clean, dry surface. Using your hands, lightly pat the wrappers to soak up any extra moisture. You don't want them dripping wet – just damp enough to be pliable.

Next, carefully peel the sheets off the surface, one by one. As you lift each one, allow any remaining water to drip off. You can also gently shake or wave the wrapper back and forth to help the water slide right off.

This step is important so your spring rolls don't get soggy when fried.

Advertisement

With your nicely drained wrappers, you're all set to start filling and rolling up your tasty spring rolls! The filling ingredients will stick beautifully to the slightly damp, pliable sheets.

Get ready for some crispy, golden brown perfection.

Step 3. Assemble Filling in Rice Paper

assemble filling in paper

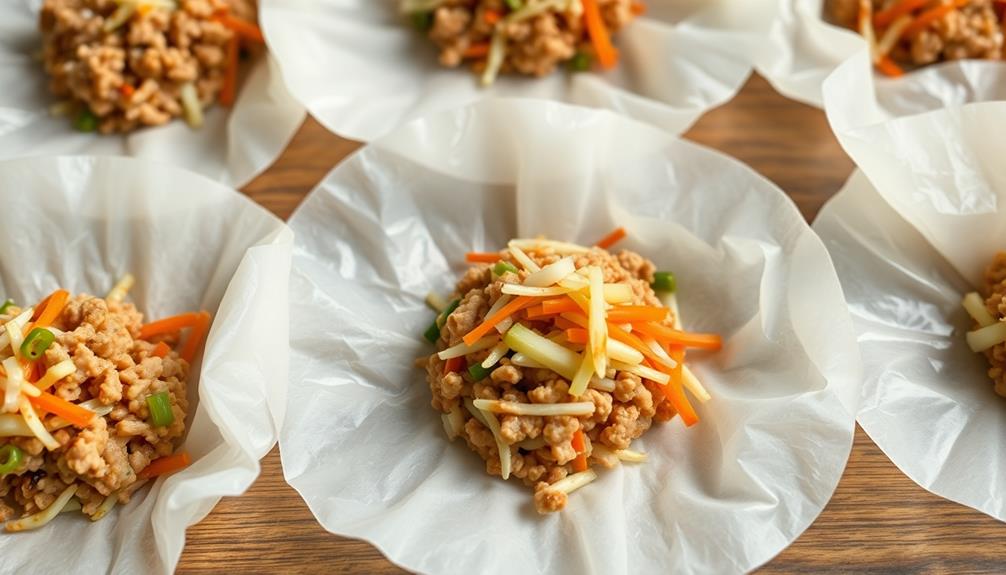
With your nicely drained wrappers, lay one sheet flat on a clean, dry work surface.

Place a heaping tablespoon of the cabbage and carrot filling in the center. For an extra kick of flavor, you might consider adding some fresh herbs, like cilantro or mint, to the filling, as they complement the savory aspect beautifully.

Fold the bottom edge up over the filling, then fold in the sides and continue rolling tightly to the top. Wet your fingertips and run them along the edge to seal the roll.

Repeat this process until you've used up all the filling.

Advertisement

Now, it's time to fry your spring rolls! Heat about an inch of oil in a large skillet over medium-high heat.

When the oil is shimmering, gently add the rolls, being careful not to overcrowd the pan. Fry for 2-3 minutes per side, until golden brown and crispy.

Drain the fried rolls on a paper towel-lined plate.

Once cooled slightly, your delicious homemade spring rolls are ready to enjoy! Serve them warm with your favorite dipping sauce.

The flaky wrappers and savory filling make every bite absolutely irresistible, reminiscent of the delightful flavors found in crab cakes.

Advertisement

Step 4. Fold Rice Paper Over Filling

fold rice paper filling

Take the neatly drained wrappers and lay one flat on a clean, dry work surface.

Grab the bottom third of the wrapper and fold it up, then fold in the sides. Next, tightly roll the wrapper up from the bottom, tucking the filling as you go. Roll it into a nice, tight cylinder.

Repeat this process with the remaining wrappers, being careful not to overstuff them.

You'll want to work relatively quickly, as the rice paper can dry out and become brittle if left sitting for too long.

When you're all done, you should have a lovely lineup of perfectly rolled spring rolls, just waiting to be fried up into crispy, golden perfection.

Now, let's get them sizzling!

Advertisement

Step 5. Fry Rolls Until Golden Brown

fry rolls golden brown

Heat a few inches of oil in a large, heavy-bottomed pot or Dutch oven over medium-high heat.

Once the oil is hot, gently lower the folded spring rolls into the bubbling oil. Fry them for 2-3 minutes, turning occasionally, until they're a beautiful golden brown all over.

Mmm, you can already smell that delicious aroma wafting through the air! Be careful – the oil will be very hot, so use tongs or a slotted spoon to flip the rolls.

As they cook, the rice paper will turn crispy and the filling will heat through. When they're done, use the tongs to transfer the fried spring rolls to a paper towel-lined plate to drain off any excess oil.

They'll be so crispy on the outside and warm and flavorful on the inside – your mouth is watering just thinking about it, isn't it?

Serve the fried spring rolls hot, with your favorite dipping sauce on the side.

Advertisement

Final Thoughts

After following the recipe carefully, you can now enjoy the crispy and flavorful fried spring rolls. The golden-brown exterior gives way to a delightful burst of flavors, with the savory filling complementing the crunchy texture perfectly.

The aroma of the fried spring rolls will have your mouth watering, and the first bite will transport you straight to the bustling streets of Vietnam.

These homemade spring rolls are a true delight, and you should feel proud of your culinary accomplishment. Share them with your family and friends, and watch their faces light up with joy as they savor each delicious morsel.

The combination of the fresh vegetables, seasoned meat, and the perfectly fried wrapper is simply irresistible. Dip them in the tangy dipping sauce, and let the flavors dance on your tongue.

Enjoy every moment of this authentic Vietnamese experience, and don't be surprised if you find yourself craving these fried spring rolls again and again.

Advertisement

Frequently Asked Questions

What Is the Difference Between Nem Ran and Cha Gio?

The difference between nem ran and cha gio is that nem ran refers to Vietnamese fried spring rolls, while cha gio is the term used in Vietnamese cuisine for the same dish. Both describe the same savory, crispy appetizer.

How Can I Make the Spring Rolls Less Greasy?

To make your spring rolls less greasy, you can try using a lighter oil for frying, like canola or vegetable oil, and ensuring the oil is hot enough before adding the rolls. You can also try baking them instead of frying.

Can I Use Frozen Spring Roll Wrappers?

You can use frozen spring roll wrappers, but you'll need to handle them carefully. Thaw them according to the package instructions, and be gentle when wrapping and rolling to prevent tearing. With proper prep, they can work well.

How Long Can I Store the Uncooked Spring Rolls?

You can store the uncooked spring rolls in the freezer for up to 3 months. Make sure to wrap them tightly in plastic or place them in a resealable bag to prevent freezer burn.

What Is the Best Dipping Sauce for Nem Ran/Cha Gio?

The best dipping sauce for your fried spring rolls is a combination of sweet, sour, and savory flavors. You can't go wrong with a simple fish sauce, lime juice, and chili sauce mixture.

Advertisement

Advertisement

Vietnamese Cuisine

Savory, Tender, and Authentic: Vietnamese Thịt Kho Tàu

Gaze upon the captivating Vietnamese dish, Thịt Kho Tàu, a savory and tender pork belly delicacy that has been a cherished part of the country’s culinary traditions for centuries.

Published

on

authentic vietnamese th t kho t u

You're in for a real treat with Thịt Kho Tàu, the iconic Vietnamese braised pork belly dish! This savory, tender, and authentic recipe has been part of Vietnamese culinary traditions for centuries, bringing families together during celebratory Lunar New Year feasts. The pork belly simmers in a caramelized sauce packed with umami flavors from fish sauce and brown sugar, creating a mouthwatering balance of sweet, salty, and savory. Enjoy this cherished comfort food over fragrant jasmine rice, and get ready to dive deeper into the rich history and flavors of this Vietnamese culinary treasure.

Key Takeaways

  • Thịt Kho Tàu is a treasured Vietnamese dish with a rich history, representing the country's culinary heritage and cultural significance.
  • The dish features savory and tender pork belly braised in a caramelized sauce, creating a unique balance of sweet, salty, and umami flavors.
  • The recipe involves marinating the pork, browning it, and simmering it in a sauce made with fish sauce, sugar, and coconut water until fork-tender.
  • Thịt Kho Tàu is traditionally served with steamed rice, and its communal dining experience strengthens family and social bonds.
  • The dish's enduring legacy as a culinary treasure ensures the continuation of Vietnamese culinary traditions for generations to come.

History

historical knowledge and events

Originating from the rich culinary traditions of Vietnam, Thịt Kho Tàu has a storied history that dates back centuries. This beloved dish has been a cherished part of Vietnamese culture, passed down through generations and celebrated during important festivals and gatherings.

The name "Thịt Kho Tàu" literally translates to "braised pork in caramel sauce," reflecting the dish's iconic flavors. The technique of caramelizing the sauce was likely introduced centuries ago, adding a delightful sweetness and depth of flavor to the tender pork.

Over time, regional variations emerged, each showcasing the ingenuity and culinary artistry of Vietnamese cooks.

Today, Thịt Kho Tàu remains a beloved comfort food, bringing families and communities together through shared meals and memories. Whether enjoyed during Tết, the Vietnamese New Year, or savored on any ordinary day, this dish continues to be a cherished part of Vietnam's vibrant and evolving culinary heritage.

Recipe

cooking instructions and ingredients

Tết Kho Tàu, also known as Vietnamese Braised Pork Belly, is a beloved dish that graces many Vietnamese tables during the Lunar New Year celebration. This savory and tender pork dish is a true delight, featuring the rich, caramelized flavors of pork belly simmered in a flavorful sauce.

The key to a successful Tết Kho Tàu lies in the slow, gentle braising process that allows the pork to absorb the complex layers of sweetness, saltiness, and umami. The dish is a testament to the culinary ingenuity of the Vietnamese people, who've perfected the art of transforming humble ingredients into a gastronomic masterpiece.

Advertisement
  • Pork belly, cut into 1-inch cubes
  • Shallots, thinly sliced
  • Garlic, minced
  • Fish sauce
  • Soy sauce
  • Brown sugar
  • Whole black peppercorns
  • Star anise
  • Water or chicken stock

In a large pot or Dutch oven, sauté the shallots and garlic until fragrant. Add the pork belly cubes and sear until browned on all sides. Stir in the fish sauce, soy sauce, brown sugar, peppercorns, and star anise. Pour in enough water or chicken stock to just cover the pork.

Bring the mixture to a boil, then reduce the heat to low, cover, and simmer for 1.5 to 2 hours, or until the pork is tender and the sauce has thickened.

When cooking Tết Kho Tàu, patience is key. The long, slow braising process is essential for developing the rich, caramelized flavors and ensuring the pork becomes meltingly tender.

Serve this dish with steamed rice, and enjoy the perfect balance of savory, sweet, and umami goodness that makes Tết Kho Tàu a true Vietnamese culinary treasure.

Cooking Steps

step by step cooking instructions

First, you'll need to marinate the pork in soy sauce to infuse it with flavor.

Then, brown the pork to get a nice sear on the outside.

Step 1. Marinate Pork in Soy Sauce

marinate pork with soy

To begin the marinating process, you'll want to grab a mixing bowl and combine the pork with the soy sauce. Gently toss the meat until it's evenly coated, ensuring each piece is thoroughly seasoned. This simple step adds a rich, savory flavor that will permeate the pork as it simmers.

Next, cover the bowl and let the pork marinate for at least 30 minutes, or up to 2 hours if you have the time. The longer you can let it sit, the more the flavors will develop. Be sure to give the mixture a stir every so often to redistribute the sauce.

Advertisement

Now that your pork is nicely marinated, you're ready to move on to the next step in creating this authentic Vietnamese dish.

Get excited, because the aromas are about to fill your kitchen and have your taste buds tingling in anticipation!

Step 2. Brown the Pork

brown the pork meat

With the marinated pork ready, heat a large skillet or wok over medium-high heat.

Once the pan is nice and hot, add a splash of oil and let it heat up.

Now, carefully add the pork to the pan. You'll hear that sizzle – that's the sound of deliciousness!

Spread the pork out in an even layer and let it brown, stirring occasionally.

Advertisement

You'll know it's ready when the edges start to get nice and crispy. This should take about 5-7 minutes.

Be patient and let the pork do its thing – you don't want to overcrowd the pan or the meat won't get that perfect golden-brown color.

Once the pork is beautifully browned, transfer it to a plate.

Don't worry, we're not done yet! The next step is to make the savory sauce that will bring all the flavors together.

Get ready for some serious Vietnamese comfort food magic!

Advertisement

Step 3. Add Fish Sauce and Sugar

incorporate fish sauce sugar

In the same pan, add the fish sauce and sugar. These two key ingredients will infuse the pork with a captivating blend of savory and sweet flavors. The fish sauce lends a umami depth, while the sugar helps to balance the saltiness and create a caramelized glaze.

Stir the mixture well, ensuring the pork is evenly coated. As the sauce simmers, it will thicken slightly, forming a sticky, appetizing coating on the meat. The aromas will fill your kitchen, making your mouth water in anticipation.

Once the pork has simmered for about 10 minutes, it's time to taste and adjust the seasoning. Add a bit more fish sauce if you'd like a stronger savory note, or sprinkle in some extra sugar for a sweeter touch.

Play with the flavors until they're perfectly balanced to your liking. The pork is now ready to be served, its tender chunks glistening with the delectable fish sauce-sugar glaze.

Get ready to enjoy the authentic, mouthwatering flavors of Vietnamese Thịt Kho Tàu!

Step 4. Add Coconut Water

incorporate coconut water now

After the pork has simmered in the flavorful fish sauce and sugar mixture, it's time to add the coconut water. This step infuses the dish with a delightful tropical twist. Simply pour in the refreshing coconut water and give it a gentle stir. The pork will immediately start to absorb the sweet and creamy coconut essence, creating an irresistible balance of savory and lightly sweet flavors.

As the coconut water simmers, you'll notice the sauce thickening and the pork becoming even more tender. This step is crucial for achieving the signature velvety texture of Thịt Kho Tàu. The coconut water also helps to tame any lingering fishiness from the sauce, resulting in a harmonious blend of tastes.

Advertisement

Keep a close eye on the pot, stirring occasionally, until the sauce has reached your desired consistency. The coconut water will work its magic, transforming this Vietnamese classic into an even more captivating and well-rounded dish.

Step 5. Simmer Until Pork Is Tender

simmer pork until tender

Once the coconut water has been added, let the pork simmer gently until it becomes fork-tender. This can take about 30-40 minutes, so be patient.

As the pork simmers, the flavors will meld together beautifully, creating a rich, savory sauce.

Stir the pot occasionally to prevent sticking. You'll know the pork is ready when it easily separates with a fork. The meat should be incredibly tender and practically fall apart.

Breathe in the mouthwatering aroma – the combination of soy sauce, fish sauce, and spices is simply divine.

Now, it's time to adjust the seasonings. Taste the braising liquid and add a touch more fish sauce or sugar if needed, to balance the flavors perfectly.

Advertisement

The pork should be glazed in a thick, glossy sauce that coats each bite. Serve the Thịt Kho Tàu over steamed rice for a complete, satisfying meal.

Get ready for your family to devour this Vietnamese classic!

Final Thoughts

concluding reflections and insights

As you reflect on this delectable Vietnamese dish, Thet Kho Tau, it's clear that its rich, complex flavors and satisfying textures make it a true culinary delight.

The long, slow simmer allows the pork to become meltingly tender, while the caramelized sauce coats each bite with a delightful balance of sweet, salty, and savory notes.

Whether enjoyed on its own or served over fragrant jasmine rice, this hearty and comforting meal is sure to delight the senses.

The vibrant colors and aromas of Thet Kho Tau also make it a wonderful centerpiece for family gatherings and festive celebrations.

Advertisement

With its ability to bring people together around the table, this dish truly embodies the heart and soul of Vietnamese cuisine.

As you savor the final bites, you can't help but feel a sense of satisfaction and appreciation for the depth of flavor and the rich cultural heritage that this dish represents.

Thet Kho Tau is a true treasure, and one that should be savored and shared with loved ones for years to come.

Frequently Asked Questions

What Is the Ideal Ratio of Ingredients for ThịT Kho Tàu?

The ideal ratio of ingredients for thịt kho tàu is generally 1 part pork to 2 parts fish sauce, with adjustments to taste. You'll want a flavorful, tender pork that's complemented by the savory fish sauce.

How Long Can ThịT Kho Tàu Be Stored For?

You can store thit kho tau for up to 5 days in the refrigerator. After that, the flavors may start to deteriorate, and the dish won't taste as fresh. Make sure to keep it tightly covered to maintain its delicious taste.

Advertisement

Can ThịT Kho Tàu Be Made With Other Types of Meat?

Yes, you can make thịt kho tàu with other types of meat. Pork is commonly used, but you can experiment with beef, chicken, or even fish to create your own unique version of this classic Vietnamese dish.

What Are Some Common Accompaniments for ThịT Kho Tàu?

Common accompaniments for thịt kho tàu include steamed rice, pickled vegetables, and fresh herbs like cilantro or mint. You can also serve it with crusty bread or a fried egg on top for a complete meal.

Is ThịT Kho Tàu Gluten-Free or Suitable for Special Diets?

Thiết kho tàu can be gluten-free, making it suitable for those with gluten sensitivities. The dish's primary ingredients, like pork and vegetables, don't typically contain gluten, allowing you to enjoy this authentic Vietnamese meal.

Continue Reading

Vietnamese Cuisine

Nems: The French Take on Vietnamese Fried Spring Rolls

Fusing Vietnamese and French culinary traditions, nems offer a delightful balance of flavors and textures that will leave you craving more.

Published

on

french vietnamese fried spring rolls

Nems – the beloved French take on Vietnamese fried spring rolls – blend delightful flavors and textures, showcasing the harmonious fusion of two distinct culinary traditions. Tracing back to the early 20th century during French colonization, nems evolved from Vietnamese spring rolls, incorporating local French ingredients like wheat flour and pork. Today, you'll enjoy the signature crunch as you bite into these golden-brown delights, savoring the perfect balance of crisp wrappers and flavorful fillings. From soaking the noodles to folding and frying, each step in the process contributes to the sensory experience. Discover the rich history and mouthwatering appeal of nems – a delectable treat that connects cultures.

Key Takeaways

  • Nems originated from the Vietnamese spring roll "cha gio," adapted by the French during colonial times with local ingredients like wheat flour and pork.
  • The dish blends Vietnamese and French culinary traditions, symbolizing the shared culinary history between the two cultures.
  • Nems are prepared by folding a filling of noodles, vegetables, and protein into a spring roll wrapper, then deep-frying until golden brown.
  • The careful handling of noodles, including soaking, draining, and squeezing, is crucial for achieving the desired crunchy texture of the final dish.
  • Nems represent the harmony of flavors and textures, reflecting the creativity and cultural significance of Vietnamese cuisine through a French-influenced lens.

History

historical events and narratives

The origins of nems, the French Vietnamese fried spring rolls, can be traced back to the early 20th century. When the French colonized Vietnam, they were introduced to the delicious Vietnamese spring rolls known as "cha gio."

The French fell in love with these crispy, flavor-packed rolls and decided to put their own spin on them. They used French ingredients like wheat flour and pork, creating a unique twist on the traditional Vietnamese recipe.

Over time, these French-influenced nems became a beloved part of Vietnamese cuisine, blending the best of both cultures.

Today, nems are enjoyed all over France and Vietnam, a tasty testament to the shared culinary history between the two nations. Whether you're biting into a savory nem at a Parisian bistro or a family-owned Vietnamese restaurant, you'll savor the delicious fusion of flavors that makes these fried spring rolls so special.

Cooking Steps

culinary preparation instructions

Once you've gathered all the necessary ingredients, the fun part of preparing the nems begins.

First, take a small amount of the filling mixture and place it in the center of a spring roll wrapper. Carefully fold the bottom of the wrapper up over the filling, then fold in the sides and continue rolling until you have a neat little package. Make sure to keep the rolls tightly wrapped to prevent them from unraveling during frying.

Advertisement

Next, heat a few inches of oil in a large pot or Dutch oven to 350°F. Gently lower the nems into the hot oil and fry for 2-3 minutes, turning occasionally, until they're golden brown and crispy.

Drain the fried nems on a paper towel-lined plate to remove any excess oil.

Step 1. Soak Noodles in Warm Water

soak noodles in water

Soaking the noodles in warm water is the next crucial step. You'll want to do this before adding them to your spring roll filling.

Simply fill a bowl with warm water and gently submerge the dried noodles. Let them soak for about 10-15 minutes, until they become soft and pliable. This step helps the noodles absorb flavors more easily when you add them to the filling.

Once the noodles have softened, drain them in a colander and give them a quick rinse under cool water. This stops the cooking process and ensures the noodles don't get too soft.

Now they're ready to be cut into bite-sized pieces and mixed with the other delicious ingredients like shredded cabbage, carrots, bean sprouts, and herbs. The warm, soaked noodles will bind everything together perfectly, creating that classic spring roll texture you know and love.

Advertisement

Just remember to work quickly, as you don't want the noodles to dry out.

Step 2. Drain and Squeeze Noodles

drain and squeeze noodles

After soaking the noodles, drain them thoroughly in a colander. Give them a good shake to remove any excess water.

Now, it's time to squeeze those noodles dry! Grab a handful and give them a good, firm squeeze. You want to get as much water out as possible. Keep squeezing until the noodles feel light and springy.

Don't worry, your hands won't get tired – this is an important step that will help your spring rolls stay crispy. Once all the noodles are squeezed, you can set them aside, ready for the next step.

Properly draining and squeezing the noodles is key to achieving that perfect, crunchy texture in your Vietnamese fried spring rolls. Take your time with this part, and you'll be well on your way to nailing this delicious French-Vietnamese dish.

Step 3. Add Vegetables and Protein

incorporate veggies and protein

Now that you've thoroughly drained and squeezed the noodles, it's time to start building the filling. Grab a big bowl and let's add the veggies!

You'll want to chop up some cabbage, carrots, and bean sprouts into bite-sized pieces. These crunchy veggies will give your nems that satisfying texture.

Advertisement

Next, let's add the protein. You can use ground pork, shrimp, or a mix of both. Sauté the protein in a pan until it's cooked through, then toss it into the veggie-filled bowl. Mmm, can you smell that savory aroma already?

Now, it's time to season everything up. Sprinkle in some minced garlic, a dash of soy sauce, a pinch of sugar, and a squeeze of fresh lime juice.

Give it all a good stir to combine the flavors. Your filling is now ready to be wrapped up in those delicate rice paper wrappers. Get ready to roll up some tasty nems!

Step 4. Fold and Roll Nems Tightly

fold and roll tightly

With your filling all set, it's time to start rolling up the nems.

First, take a rice paper wrapper and place it on a clean, damp surface. Dip your fingers in water and lightly moisten the wrapper to make it pliable.

Place a spoonful of the vegetable and protein filling near the bottom of the wrapper. Fold the bottom edge over the filling, then fold in the sides and continue rolling it up tightly.

Advertisement

Make sure to roll it snugly, without any gaps or air pockets. Once the nem is fully rolled, wet your fingertips and run them along the seam to seal it.

Repeat this process with the remaining wrappers and filling. Be gentle but firm as you roll, and watch out for any rips or tears in the paper.

With your nems all rolled up, they're ready to be fried to a golden-brown perfection!

Step 5. Fry Nems in Hot Oil

fry nems in oil

To fry the nems, heat about 2-3 inches of vegetable oil in a heavy-bottomed pot or Dutch oven over medium-high heat.

Once the oil is shimmering, it's time to add those delicious rolls! Gently lower the nems into the hot oil, being careful not to overcrowd the pot. Fry the nems for 2-3 minutes per side, or until they're golden brown and crispy.

Use a slotted spoon or tongs to transfer the fried nems to a paper towel-lined plate. This will help drain off any excess oil.

Advertisement

Repeat the process with the remaining nems, frying in batches to maintain the oil temperature.

Keep a close eye on the oil and adjust the heat as needed to prevent the nems from burning.

Once all the nems are fried, give them a final blot with paper towels to remove any lingering oil.

Now, you've got perfectly crispy, golden-brown nems ready to enjoy! Serve them hot and let the crunchy goodness delight your taste buds.

Final Thoughts

concluding reflections and insights

Why not take a moment to reflect on the joys of savoring these delectable Vietnamese fried spring rolls?

After all the careful preparation and frying, it's time to sit back, relax, and indulge. Imagine the satisfying crunch as you take that first bite, the filling bursting with vibrant flavors.

Advertisement

These nems are a true delight for the senses – the aroma, the texture, the taste. Each one is a little package of goodness, a testament to the culinary creativity of the Vietnamese people.

As you enjoy them, let your mind wander to the bustling streets of Saigon or the tranquil countryside. These fried spring rolls are more than just a snack; they're a cultural experience, a way to connect with a rich heritage.

Frequently Asked Questions

How Do Nems Differ From Traditional Vietnamese Spring Rolls?

Nems differ from traditional Vietnamese spring rolls as they're typically larger, heavier, and have a more crispy exterior due to the French influence in their preparation. The filling also tends to be more finely chopped and seasoned differently.

What Are the Typical Fillings Used in Nems?

The typical fillings used in nems often include minced pork, shredded cabbage, carrots, vermicelli noodles, and various seasonings. These ingredients are then wrapped in a thin, crispy rice paper or wheat-based wrapper before being fried to perfection.

How Do You Achieve the Perfect Crispy Texture in Nems?

To achieve the perfect crispy texture in nems, you'll need to use a combination of techniques. Make sure to fry the rolls at the right temperature, use a light and airy wrapper, and drain them well after cooking.

Advertisement

Can Nems Be Made in Advance for a Party or Event?

Yes, you can make nems in advance for a party or event. They can be fried, cooled, and stored in the fridge for up to 3 days. Just reheat them in the oven or air fryer before serving to ensure they're crispy.

Are There Any Variations or Regional Differences in Nems Recipes?

Absolutely! Nems can vary regionally in Vietnam, with different fillings, seasonings, and folding techniques. Some areas may use more pork, others emphasize shrimp or vegetables. Get creative and explore the diverse flavors of this classic Vietnamese dish.

Continue Reading

Vietnamese Cuisine

Bê Thui: Discover Vietnam’s Smoky Grilled Veal Dish

Flavorful, fragrant, and deeply satisfying, bê thui is a Vietnamese grilled veal dish that will captivate your senses and leave you craving more.

Published

on

vietnam s smoky grilled veal

Discover the smoky, tender delight of bê thui, a beloved grilled veal dish that's been captivating taste buds in Vietnam for centuries. Skilled cooks grill marinated veal over charcoal, infusing it with a delectable smoky flavor. Pair the succulent meat with fresh herbs, tangy pickled veggies, and sticky rice – it's a mouthwatering celebration of Vietnam's culinary heritage. Whether you're grilling at home or exploring a bustling Vietnamese market, bê thui offers a unique and unforgettable flavor experience that'll have you craving more. Dive deeper into this hidden gem of Vietnamese cuisine and uncover its rich history and delicious secrets.

Key Takeaways

  1. Bê Thui is a traditional Vietnamese dish dating back to the 18th century, featuring grilled veal with a smoky flavor from charcoal cooking.
  2. The dish showcases Vietnam's culinary heritage, with skilled cooks marinating veal in a flavorful mixture of fish sauce, garlic, shallots, sugar, and black pepper.
  3. Grilling the marinated veal over high heat results in a caramelized crust, while the meat remains tender and juicy on the inside.
  4. Bê Thui is often served with steamed jasmine rice, fresh herbs, and pickled vegetables, creating a harmonious balance of flavors and textures.
  5. The dish remains a beloved street food in Vietnam, reflecting the country's vibrant culinary culture and the evolution of local ingredients and preferences.

History

historical events and timelines

Bê thui, Vietnam's smoky grilled veal dish, has a rich history rooted in the country's culinary traditions. This beloved delicacy has been a part of Vietnamese cuisine for generations, with its origins dating back to the 18th century.

Back then, it was a common sight in open-air markets and street stalls, where skilled cooks would skillfully grill tender veal over charcoal fires, imparting a delicious smoky flavor.

Over the years, the recipe for bê thui has been passed down, evolving and adapting to local ingredients and preferences. Today, it remains a beloved staple, beloved by locals and travelers alike.

The dish's distinct aroma and mouthwatering taste have made it a must-try for anyone exploring the vibrant food scene of Vietnam. From the bustling streets of Hanoi to the coastal towns of the south, bê thui continues to delight and inspire, showcasing the rich culinary heritage of this captivating country.

Cooking Steps

step by step cooking instructions

Alright, let's dive into the cooking steps for Bê Thui, Vietnam's smoky grilled veal dish.

First, you'll need to marinate the veal in a savory blend of fish sauce, garlic, shallots, sugar, and black pepper. Let this sit for at least an hour, or up to 24 hours in the fridge for maximum flavor.

Advertisement

Next, fire up your grill to medium-high heat. Grill the marinated veal, turning occasionally, until it's nicely charred on the outside but still juicy on the inside. This should take around 10-12 minutes total.

Be sure to let the veal rest for a few minutes before slicing into it.

Serve the grilled veal with a side of steamed jasmine rice and some fresh herbs like mint, cilantro, and basil. Drizzle over a bit of the reserved marinade for extra zing.

Enjoy this smoky, flavorful Vietnamese classic!

Step 1. Soak Veal in Marinade Overnight

marinate veal overnight thoroughly

To start, let's soak the veal in the marinade overnight. This step is crucial to infusing the meat with the aromatic flavors of garlic, lemongrass, and fish sauce.

You'll want to use a large resealable bag or a shallow baking dish to hold the veal and the marinade. Gently massage the marinade into the veal, making sure every nook and cranny is coated.

Advertisement

Then, pop the veal into the fridge and let it soak up all those tasty Vietnamese flavors for at least 8 hours, or even better, overnight. This long soaking time allows the marinade to really work its magic, tenderizing the meat and imbuing it with a complex, smoky-sweet taste.

When you're ready to cook, the veal will be bursting with flavor, ready to be grilled to perfection. Just remember to reserve a bit of the marinade to baste the veal as it cooks for extra moisture and flavor.

Step 2. Grill Veal Over Charcoal

grill veal on charcoal

Preheat your charcoal grill to high heat, ensuring the coals are glowing red-hot.

Once the grill is scorching, carefully place the marinated veal steaks on the grate. Listen as they sizzle and watch the meat begin to char, creating that tantalizing smoky aroma.

Resist the urge to move the steaks too much – let them develop a nice crust on the first side before flipping. After about 3-4 minutes, use tongs to gently turn the veal over, allowing the other side to get that same delightful char.

Continue grilling, flipping occasionally, until the veal reaches your desired level of doneness, usually around 6-8 minutes total for medium-rare.

Advertisement

The key is to let the natural flavors shine through, allowing the marinade to caramelize and the smoke to infuse the meat.

Soon, you'll have tender, flavor-packed veal that's ready to transport your taste buds straight to the heart of Vietnam.

Step 3. Garnish With Fresh Herbs

garnish using fresh herbs

After grilling the veal to perfection, garnish the dish with vibrant fresh herbs. The aromatic blend of cilantro, mint, and Thai basil will add a burst of flavor and a touch of elegance to your Bê Thui.

Gently tear the leaves and sprinkle them over the top of the smoky veal, allowing the flavors to mingle. The cool, herbal notes will balance the rich, charred meat, creating a symphony of tastes.

For an extra pop of color, consider adding thinly sliced red chilies or drizzling a fragrant fish sauce and lime dressing over the top. The contrast of the spicy, tangy elements with the tender veal will awaken your senses.

Finish with a light sprinkling of toasted peanuts or sesame seeds for a satisfying crunch. The combination of textures and flavors will transport you straight to the lively street markets of Vietnam.

Advertisement

Enjoy this vibrant, flavor-packed dish with your family and friends.

Step 4. Serve With Pickled Vegetables

serve with pickled vegetables

Serving a plate of tangy pickled vegetables alongside the smoky grilled veal elevates this Vietnamese dish. The contrasting flavors and textures create a harmonious balance that will delight your taste buds.

To make the pickled veggies, simply thinly slice some crisp carrots, radishes, and cucumbers. Then, mix them in a bowl with a tangy vinegar dressing made from rice vinegar, a touch of sugar, and a pinch of salt. Let the vegetables marinate for about 30 minutes, allowing the flavors to meld.

The result is a refreshing, crunchy accompaniment that perfectly complements the rich, grilled veal. The cool, acidic notes of the pickled vegetables help cut through the meatiness of the bề thui, making each bite an exciting journey for your palate.

Serve the pickled veggies on the side, inviting your guests to build their own flavorful bites by combining the tender veal and the zesty, pickled crunch.

Step 5. Enjoy With Sticky Rice

savor with sticky rice

To truly savor the depth of flavors in this Vietnamese dish, you'll want to serve the smoky grilled veal atop a bed of warm, sticky rice. The glutinous texture of the rice perfectly complements the tender, juicy meat, creating a harmonious balance in every bite.

The stickiness of the rice allows it to soak up all the delicious juices and seasonings from the veal, infusing each grain with the aromatic blend of lemongrass, garlic, and spices. As you take a forkful, the soft, sticky rice will cling to the charred edges of the veal, delivering an explosion of savory, smoky notes in your mouth.

Advertisement

Enjoy this satisfying pairing by scooping the veal and rice onto your plate, then using your hands to shape the mixture into small bites. The tactile experience of eating with your fingers will only heighten the immersive, traditional feel of this beloved Vietnamese meal.

Savor each morsel, allowing the interplay of textures and flavors to transport you to the bustling streets of Vietnam.

Final Thoughts

concluding remarks and reflections

While Bê Thui may not be as widely known as other Vietnamese dishes, this smoky grilled veal delicacy is a true hidden gem.

You've learned about its unique preparation and how to enjoy it with sticky rice, but there's more to discover. This dish's rich, bold flavors and tender texture make it a must-try for any adventurous eater.

The smokiness from the charcoal grill adds an irresistible layer of complexity, complementing the succulent veal perfectly. And of course, the vibrant herbs and dipping sauce bring everything together in a harmonious burst of taste.

As you savor each bite, you'll be transported to the bustling markets of Vietnam, where this beloved specialty has been enjoyed for generations.

Advertisement

Frequently Asked Questions

Is Bê Thui Made With Beef or Veal?

Based on the Current Question, you can see that Bê Thui is made with veal, not beef. Veal is the meat of young calves, which is often used in Vietnamese cuisine for its tender and delicate flavor.

Does Bê Thui Use Any Special Marinades or Seasonings?

The grilled veal dish uses a unique marinade with aromatic herbs and spices to infuse it with bold, smoky flavors. It's typically seasoned with lemongrass, shallots, fish sauce, and other Vietnamese aromatics.

How Long Does the Grilling Process Typically Take?

The grilling process typically takes around 15-20 minutes. You'll want to grill the meat over high heat, turning it occasionally, until it's nicely charred and cooked through. This helps infuse the meat with that delicious smoky flavor.

Is Bê Thui a Common Dish Across All of Vietnam?

Is bê thui a common dish across all of Vietnam? No, it's not. This specialty dish is primarily found in the central region of the country, where the grilling and preparation techniques have been perfected over generations.

Can Bê Thui Be Made With Alternative Protein Sources?

You can certainly make bê thui with alternative protein sources. While veal is the traditional meat, you could experiment with other lean and tender cuts like beef, pork, or even chicken to create delicious variations.

Advertisement

Continue Reading

Affiliate Disclaimer
As an affiliate, we may earn a commission from qualifying purchases. We get commissions for purchases made through links on this website from Amazon and other third parties.

Advertisement

Vetted

top local car washes top local car washes
Vetted2 months ago

14 Best Car Washes Near You for a Sparkling Clean Ride

I discovered the 14 best car washes near you that promise a sparkling clean ride, and you won't want to...

top mops for 2024 top mops for 2024
Vetted2 months ago

The 15 Best Mops of 2025 – Your Ultimate Guide to a Spotless Home

Find the perfect mop for your cleaning needs in 2025, and discover how these top choices can revolutionize your home...

top women s fragrances 2024 top women s fragrances 2024
Vetted2 months ago

15 Best Perfumes for Women in 2025 – A Fragrance Guide You Can’t Miss

Keen to discover the top 15 perfumes for women in 2025? Uncover unique scents that will elevate your fragrance game!

top local bars guide top local bars guide
Vetted2 months ago

14 Best Bars Near You for an Unforgettable Night Out

Looking for the perfect bar to elevate your night out? Discover the 14 best spots that promise unforgettable experiences!

luxurious beard oil selection luxurious beard oil selection
Vetted2 months ago

15 Best Beard Oils for a Luxurious Grooming Experience in 2025

Shop the 15 best beard oils for a luxurious grooming experience in 2025 and discover which ones will elevate your...

top college laptops 2024 top college laptops 2024
Vetted2 months ago

15 Best College Laptops of 2025: The Ultimate Guide for Students

With our guide to the 15 best college laptops of 2025, discover which powerful models will elevate your academic experience...

waterproof mascaras for tears waterproof mascaras for tears
Vetted2 months ago

15 Best Waterproof Mascaras That Will Survive Any Tear-Jerker

Outstanding waterproof mascaras await to keep your lashes flawless through any emotional moment; discover which ones made the top 15...

top flavorful disposable vapes top flavorful disposable vapes
Vetted2 months ago

15 Best Disposable Vapes of 2025: Top Picks for Flavor and Convenience

Prepare to discover the 15 best disposable vapes of 2025 that blend exceptional flavor and convenience, but which ones truly...

refreshing lunch salad ideas refreshing lunch salad ideas
Vetted2 months ago

15 Best Salads Near You That Will Freshen Up Your Lunch Routine

Transform your lunch with the 15 best salads nearby that will tantalize your taste buds and leave you craving more...

top convertible car seats top convertible car seats
Vetted2 months ago

15 Best Convertible Car Seats of 2025 – Safety and Comfort for Your Little One

Get ready to discover the top 15 convertible car seats of 2025 that blend safety and comfort—find out which models...

delicious fast food breakfast delicious fast food breakfast
Vetted2 months ago

15 Best Fast Food Breakfast Options That Will Make Your Mornings Delicious

Uncover the 15 best fast food breakfast options that will transform your mornings into a delicious experience you won't want...

stylish contacts for vision stylish contacts for vision
Vetted2 months ago

14 Best America’s Contacts for Clear Vision and Style

Browse through the 14 best contact lenses in America for clear vision and style, and discover which one perfectly complements...

Trending