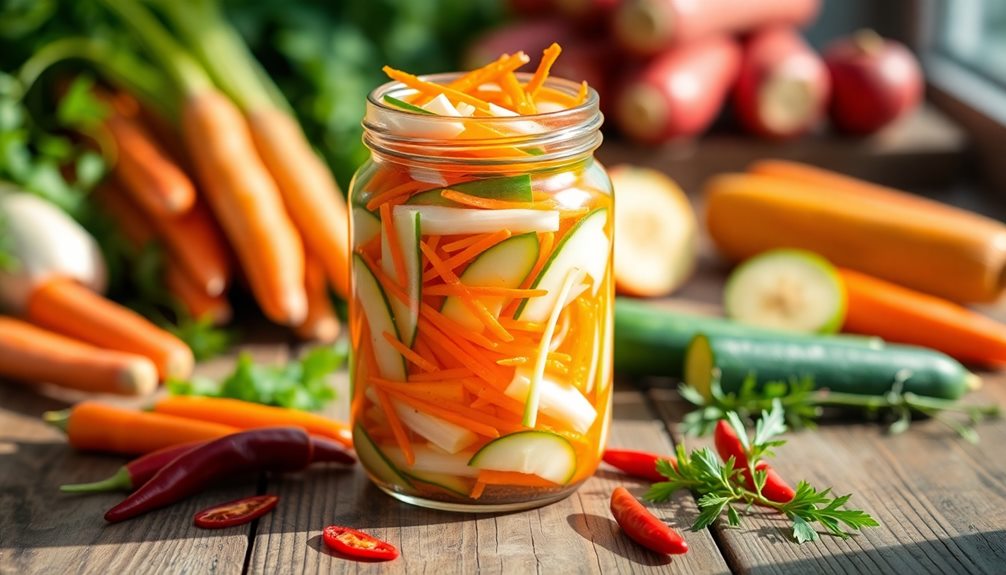
Dưa món, or Vietnamese pickled vegetables, is a delicious and vibrant addition to your Tết festivities! These colorful veggies, like carrots and daikon radish, are pickled in a tasty mix of vinegar, sugar, and salt. You start by prepping the vegetables, salting them, and then rinsing them for extra crunch. After mixing in the seasoning, pack them tightly in a jar. Not only do they taste amazing, but they also symbolize good fortune and happiness during the Lunar New Year! They're perfect as a side dish or topping. Stick around, and you'll discover even more about this tasty tradition!
Key Takeaways
- Dưa món is a traditional Vietnamese pickled vegetable dish, essential for Tết celebrations, symbolizing abundance and good fortune.
- Common ingredients include carrots, daikon radish, cucumbers, vinegar, sugar, and salt, with optional herbs for added flavor.
- The preparation involves salting, rinsing, mixing with seasoning, and packing in a jar to develop flavors over time.
- Dưa món offers a unique balance of zesty flavors and crunchy textures, enhancing various dishes like rice bowls and sandwiches.
- It's a healthy, low-calorie option, rich in vitamins and dietary fiber, promoting gut health and overall well-being.

Seoulmate Banh Mi Pickle – 3.5 lb, Sweet & Tangy Pickled Carrots and Daikon Radish, Authentic Vietnamese-Style Pickles, Vegan, Probiotic-Rich, Small-Batch Handcrafted, Perfect for Sandwiches, Tacos, Bowls & BBQ
Authentic Flavor: Bring the vibrant flavors of Vietnam and Korea to your table with our Banh Mi Pickle,…
As an affiliate, we earn on qualifying purchases.
As an affiliate, we earn on qualifying purchases.
History
Exploring the history of Vietnamese pickled vegetables reveals a rich culinary tradition influenced by various cultures. These delicious veggies, known as "dưa món," have roots going back centuries. They've been shaped by Vietnam's unique geography and climate, which makes the country perfect for growing a variety of fresh vegetables.
You might be surprised to learn that pickling started as a way to preserve food. Before refrigerators, people needed methods to keep their harvests from spoiling. So, they turned to vinegar, salt, and spices, creating tasty pickled vegetables that could last longer.
As Vietnam interacted with neighboring countries, new ingredients and techniques flowed in, mixing together wonderfully. Chinese, French, and even Indian influences can be found in many pickled recipes. Each culture added something special, making the flavors even more exciting! This rich culinary exchange not only broadened the spectrum of flavors but also inspired the creation of unique dishes that are now integral to Vietnam’s food culture. For example, the Vietnamese fried dumplings recipe blends local spices with techniques borrowed from Chinese cuisine, resulting in a crispy, savory treat. Such recipes are a testament to Vietnam’s ability to seamlessly merge diverse influences into its own vibrant gastronomic identity.
Today, you can find these vibrant pickled veggies in many Vietnamese meals, especially during celebrations like Tết, the Lunar New Year. They not only add a burst of flavor but also represent a beautiful blend of history and tradition. When you savor them, you're tasting a piece of Vietnam's story!

Badia Extra Fancy Pickling Spice Mix, 13 oz – Blend of Premium Spices for Pickling Vegetables, Brines & Marinades, Gluten Free
Premium Blend of Spices: Badia Pickling Spices is a versatile blend of high-quality ingredients, perfect for enhancing your…
As an affiliate, we earn on qualifying purchases.
As an affiliate, we earn on qualifying purchases.
Cooking Steps
Start by gathering all your ingredients, including fresh vegetables like carrots, daikon radish, and cucumbers.
You'll also need some sugar, salt, vinegar, and water to create the pickling solution. Now, let's get started!
First, wash and peel your vegetables. Cut the carrots and daikon into thin matchsticks, and slice the cucumbers into thin rounds. This helps them soak up that delicious pickling flavor.
Next, mix one cup of vinegar, one cup of water, and half a cup of sugar in a bowl. Stir until the sugar dissolves completely, then add a teaspoon of salt.
Now, it's time to combine everything! Place your cut vegetables in a clean jar and pour the pickling solution over them. Make sure the veggies are fully submerged.
Seal the jar tightly and give it a little shake.
Let your pickled vegetables sit at room temperature for a few hours. After that, pop them in the fridge.
They'll taste even better after a day or two! Enjoy your homemade Vietnamese pickled vegetables as a tasty side dish or a crunchy topping on your favorite meals.
Happy cooking!
Step 1. Prepare the Vegetables First

When preparing your pickled vegetables, you'll want to gather and clean your ingredients thoroughly to ensure the best flavor and texture. Start by choosing your favorite veggies. Carrots, daikon radishes, and cucumbers are popular choices! Rinse them under cold water to remove any dirt or pesticides.
Next, peel the carrots and daikon, if needed, and cut them into thin strips or slices. This helps them soak up the pickling brine better. For cucumbers, you can slice them into rounds or spears, depending on your preference. Remember, the more uniform the pieces, the quicker they'll pickle!
Once you've prepared your vegetables, arrange them neatly on a clean cutting board or plate. This makes it easier to see what you've got. If you want, you can add some fresh herbs like cilantro or mint for extra flavor.
Now that you've got all your ingredients ready, you're one step closer to making delicious pickled vegetables! Just think about how colorful and crunchy they'll be on your table during Tết celebrations. Exciting, right?
Let's move on to the next step!
Step 2. Add Salt to Vegetables

Adding salt to your prepared vegetables is a crucial step in the pickling process that enhances flavor and helps draw out excess moisture. This is where the magic begins! First, grab your salt—kosher or sea salt works best for this task. You'll want to sprinkle a generous amount over your veggies, making sure they're evenly coated. This process not only enhances the taste but also helps combat inflammation, as some ingredients like turmeric can reduce markers of inflammation.
Now, let the salt work its wonders! As the salt sits on your vegetables, it pulls moisture out, creating a brine that's packed with flavor. This usually takes about 20 to 30 minutes, so be patient! While you wait, give your veggies a little toss every now and then to ensure they're all getting equal attention from the salt.
Isn't it exciting to see how they start to soften and change? Once the time's up, you'll notice the vegetables have released a bit of water, which is exactly what you want. This step not only intensifies the taste but also preps them for the next stage of pickling, making them crunchy and delicious.
Step 3. Rinse and Drain Thoroughly

Rinsing and draining your salted vegetables is essential to achieving the perfect balance of flavor and texture in your pickled creation. After letting the vegetables sit with salt, you'll notice they've released some water. This is a great start, but now it's time to rinse them well.
Grab a colander and pour your salted veggies in. Rinse them under cold running water, gently tossing them with your hands. This step washes away the excess salt, making sure your pickles aren't too salty. It's like giving your veggies a refreshing shower!
After rinsing, let them drain thoroughly. You want to get rid of all that extra water, so the pickling liquid can soak in wonderfully later. If you have time, let them sit in the colander for about 10 minutes. If you're in a hurry, you can pat them dry with a clean kitchen towel or paper towels.
Once your veggies are rinsed and drained, they're ready for the next steps in your pickling adventure. You're doing an amazing job, and soon you'll have delicious, tangy pickled vegetables to enjoy!
Step 4. Mix Vegetables With Seasoning

Seasoning is the heart of your pickling process, and now it's time to mix your rinsed vegetables with a blend of flavors that will elevate their taste. Start by gathering your favorite seasonings. A mix of salt, sugar, and vinegar is a classic choice. The salt helps draw out moisture, while sugar adds a touch of sweetness. Vinegar gives that tangy kick we all love!
In a large bowl, toss your drained vegetables with the salt, sugar, and vinegar. You can also add garlic, chili, or ginger for an extra punch. Make sure to mix everything well, so every piece gets coated. You want all those delicious flavors to soak in. Don't be afraid to get your hands in there; it's fun!
Let the mixture sit for about 10 to 15 minutes. This waiting time helps the veggies absorb the seasoning, making them even tastier. Feel free to taste a piece or two; it's a great way to check if you need to add more salt or sugar.
Once you've got the flavor just right, you're one step closer to enjoying your homemade pickled vegetables! Get ready for the next exciting part!
Step 5. Pack Vegetables in Jar

How do you ensure your pickled vegetables stay fresh and flavorful? It all starts with packing them in a clean jar! First, grab a glass jar with a tight-fitting lid. Make sure it's washed and dried well because any leftover moisture can spoil your veggies.
Next, layer your seasoned vegetables inside the jar. You can use carrots, daikon, or even cucumbers—whatever you love! Press them down gently as you add them, but don't squish them too much. You want to create a fun, colorful display!
Once the jar's filled, pour the pickling liquid over the veggies. This liquid will soak into the vegetables, giving them that delicious tangy flavor. Leave a little space at the top, about an inch or so, to allow for expansion.
Seal the jar tightly, and give it a gentle shake to mix everything up. Finally, store it in the fridge. Let your pickled veggies sit for at least a day before you dive in. This way, the flavors meld together beautifully, and you'll have a tasty treat ready for any meal!
Enjoy your crunchy, zesty vegetables!
Seoulmate Banh Mi Pickle – 3.5 lb, Sweet & Tangy Pickled Carrots and Daikon Radish, Authentic Vietnamese-Style Pickles, Vegan, Probiotic-Rich, Small-Batch Handcrafted, Perfect for Sandwiches, Tacos, Bowls & BBQ
Authentic Flavor: Bring the vibrant flavors of Vietnam and Korea to your table with our Banh Mi Pickle,…
As an affiliate, we earn on qualifying purchases.
As an affiliate, we earn on qualifying purchases.
Final Thoughts
When it comes to Vietnamese pickled vegetables, the unique balance of flavors and textures can elevate any meal.
These colorful veggies aren't just tasty; they add a special crunch that makes your dishes pop with excitement! Whether you're enjoying a bowl of rice, a tasty sandwich, or even a simple salad, a scoop of pickled vegetables can make it even better.
Making these pickles is simple and fun! You can experiment with different vegetables like carrots, radishes, and cucumbers, creating a mix that suits your taste.
Plus, they're perfect for sharing with family and friends during special occasions, like Tết. Just imagine the smiles when everyone takes a bite of your homemade pickles!

Mrs. Wages Pickling & Canning Vinegar, Well-Balanced Vinegar, Great Tasting, Versatile for Canning & Cooking, Easy Storage, (1 Gallon Jug)
ONLY ONE INGREDIENT: Mrs. Wages Vinegar is just vinegar, versatile for canning, cooking and more.
As an affiliate, we earn on qualifying purchases.
As an affiliate, we earn on qualifying purchases.
Frequently Asked Questions
What Vegetables Are Commonly Used in DưA Món?
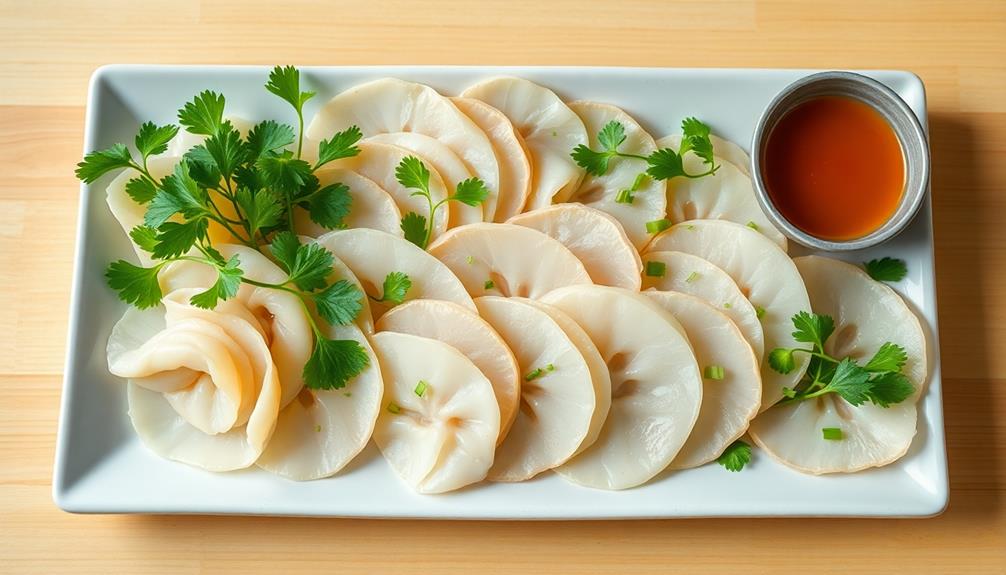
You'll commonly find carrots, daikon radish, and cucumbers in Vietnamese pickled vegetables. These ingredients add crunch and flavor, enhancing your dishes. Try mixing them for a refreshing side that brightens up any meal.
How Long Can DưA Món Be Stored?
You can store dưa món in the refrigerator for about one to two weeks. Just make sure it's in an airtight container to keep it fresh and maintain its delicious flavor during that time.
Is DưA Món Gluten-Free?
Yes, dưa món is gluten-free! You can enjoy it without worrying about gluten content, as it mainly consists of vegetables and seasonings that don't include gluten. It's a tasty option for gluten-sensitive diets.
Can I Adjust the Spice Level in DưA Món?
Absolutely, you can adjust the spice level to your liking! Just add more or less chili, or try different spices. Experimenting will help you find the perfect balance that suits your taste preferences. Enjoy!
What Dishes Pair Well With DưA Món?
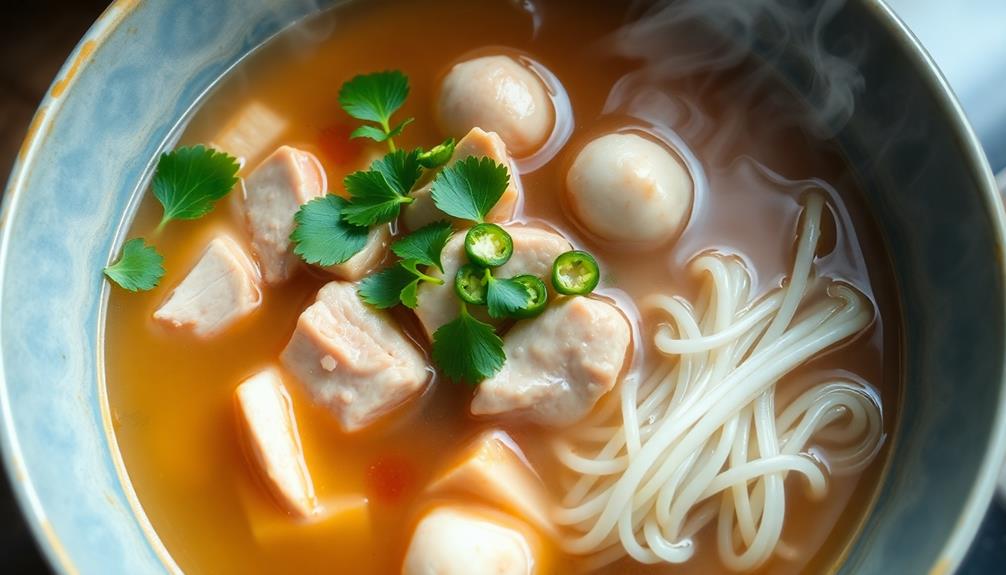
You can pair dưa món with grilled meats, rice dishes, or noodle soups. Its tangy crunch complements savory flavors perfectly, enhancing the overall meal experience. Don't hesitate to experiment with various dishes to find your favorite combination!