Connect with us

Vietnamese Cuisine

Bánh Dày: Vietnamese Glutinous Rice Cake for Festive Occasions

Get ready to discover the delightful world of Bánh Dày, a Vietnamese glutinous rice cake that brings families together during festive occasions!

Published

on

festive vietnamese rice cake

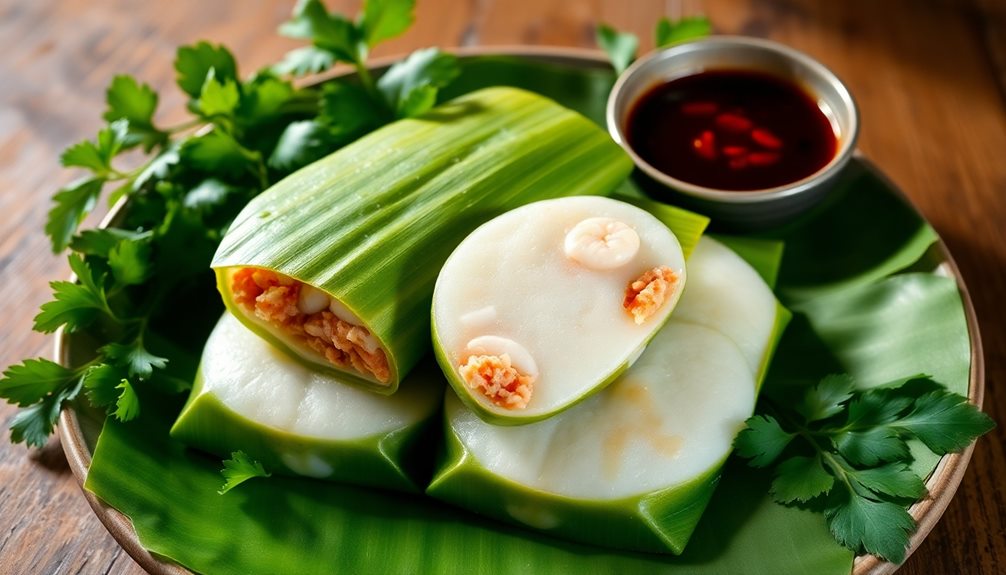
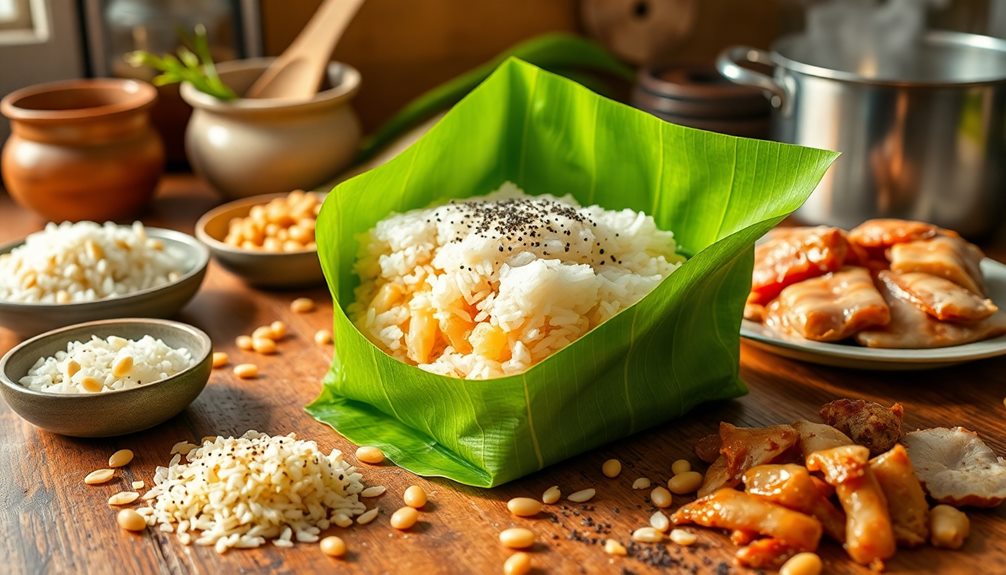
Bánh Dày is a tasty Vietnamese glutinous rice cake that's perfect for festive occasions like Tết, the Lunar New Year. It symbolizes family unity and connects you to ancestors. To make it, you soak glutinous rice overnight and then wrap it with fillings like mung beans in banana leaves. After steaming the cakes for about two hours, you let them cool before serving. They're soft and chewy, a delight for everyone! This treat brings people together, filling homes with warmth and happiness. Keep on exploring to discover even more fun facts and tips about this special cake!

Key Takeaways

  • Bánh dày is a traditional Vietnamese glutinous rice cake, symbolizing family unity and honoring ancestors during festive occasions like Tết.
  • The main ingredients include glutinous rice, mung beans, and pork, with variations in sweet or savory fillings depending on the region.
  • Preparation involves soaking rice overnight, steaming the wrapped cakes for two hours, and cooling before slicing for serving.
  • Bánh dày is gluten-free and can be customized for dietary preferences, though it should be consumed in moderation due to high calorie content.
  • The cake's soft, chewy texture and cultural significance make it a beloved treat for gatherings and celebrations in Vietnam.

History

Vietnamese glutinous rice cake, known as "bánh chưng" and "bánh tét," has deep roots in the culture of Vietnam, dating back over a thousand years.

These special cakes are more than just delicious treats; they're a symbol of family and togetherness, especially during the Tet holiday. Imagine gathering around the kitchen with your family, laughing and sharing stories while making these cakes.

The origins of bánh chưng and bánh tét come from a legendary tale about a prince who wanted to impress his father, the king. He created these cakes to represent the sky and the earth, showing his love for his family and country.

People in Vietnam believe that making these cakes helps honor their ancestors and brings good fortune for the new year.

Traditionally, bánh chưng is square, symbolizing the earth, while bánh tét is round, representing the sky. Both cakes are filled with tasty ingredients like mung beans and pork, wrapped in banana leaves, and then boiled for hours.

Advertisement

When you take a bite, you not only enjoy the flavors but also experience a piece of history and culture that has been passed down through generations.

Ingredients:

  • 2 cups glutinous rice
  • 1 cup mung beans (peeled)
  • 1 pound pork belly (cut into small pieces)
  • 1 tablespoon salt
  • 1 tablespoon black pepper
  • 6-8 banana leaves (washed and cut into large rectangles)
  • Kitchen twine or string (for tying)

Cooking Instructions:

Soak the glutinous rice and mung beans separately in water for at least 4 hours, or overnight for best results. After soaking, drain the rice and beans.

Cook the mung beans until soft, then mash them and mix with a pinch of salt. In a bowl, season the pork belly with salt and pepper.

To assemble, lay down a piece of banana leaf, add a layer of glutinous rice, followed by a layer of mung bean paste, then a layer of seasoned pork, and top it with another layer of mung bean and rice.

Fold the banana leaves over the filling to form a square package, securing it tightly with kitchen twine. Boil the cakes in a pot of water for around 4-6 hours, ensuring they're fully submerged, and then let them cool before serving.

Extra Tips:

Make sure to soak the glutinous rice and mung beans adequately; this step is crucial for achieving the right texture.

Advertisement

When wrapping the cake, ensure it's tightly packed to prevent any filling from leaking during boiling. If you want to add a unique flavor, consider including a few slices of salted egg yolk or mushrooms in the filling.

Cooking Steps

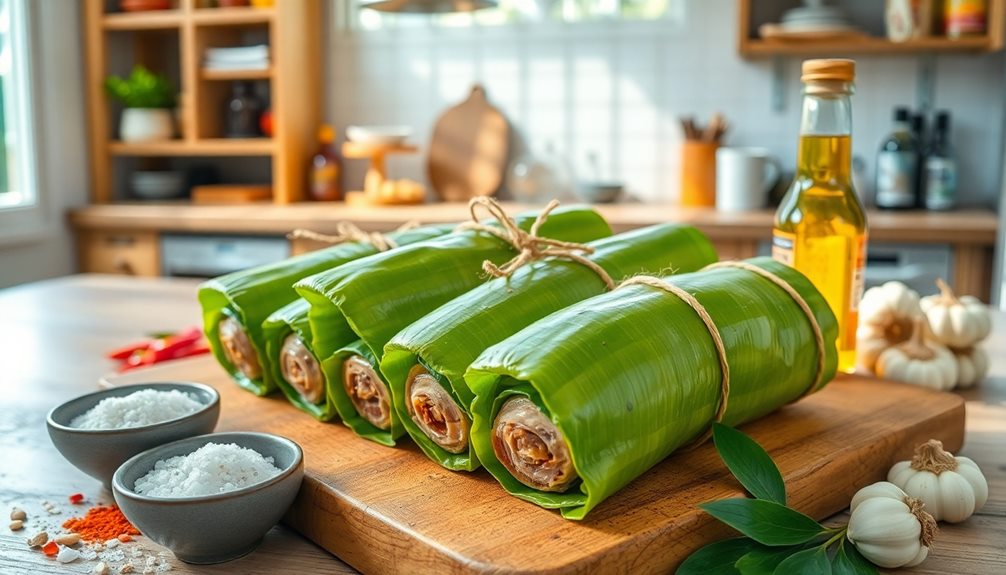
Starting with the right ingredients will set you up for success in making glutinous rice cake. First, gather glutinous rice, mung beans, coconut milk, and a pinch of salt. You'll also need banana leaves to wrap your cake, which adds that special touch!

Next, soak the glutinous rice and mung beans in water overnight. This helps them soften. The next day, steam the mung beans until they're nice and tender. Then, mash them up and mix in some coconut milk and a bit of salt for flavor.

Now, it's time to prepare the rice. Drain the soaked rice and mix it with coconut milk. Grab your banana leaves and cut them into squares. Lay a square down, put some rice on it, add the mung bean mixture, then top it with more rice. Fold the leaves over to create a little package.

Steam the wrapped cakes for about an hour. The smell will make your mouth water!

Advertisement

Once they're done, let them cool before unwrapping. Enjoy your delicious bánh dày with family and friends during your next festive occasion!

Step 1. Prepare Glutinous Rice Mixture
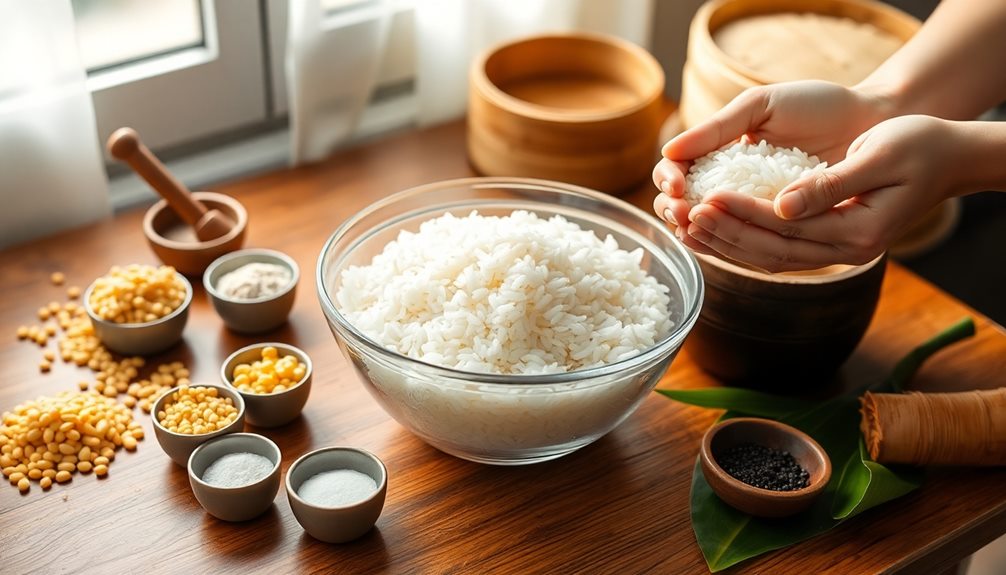
prepare glutinous rice mixture

To prepare the glutinous rice mixture, begin by rinsing the rice under cold water until the water runs clear, ensuring you remove excess starch. This step is super important because it helps your cake turn out perfectly sticky and delicious!

After rinsing, let the rice drain in a colander for a few minutes. You want to get rid of any extra water.

Next, it's time to mix in some flavor! In a large bowl, combine the rinsed rice with a pinch of salt. This little addition makes a big difference in taste. Give the rice a gentle stir to make sure the salt is evenly distributed.

Now, if you want to add a touch of sweetness, you can sprinkle in a bit of sugar! Just a teaspoon or two will do. Mix everything together again, making sure the sugar (if you added it) dissolves into the rice.

Once you've got your rice all mixed up, it's ready for the next step. You're doing great, and soon you'll have a beautiful Bánh Dày to share with family and friends! Keep up the good work!

Advertisement

Step 2. Soak Glutinous Rice Overnight

soak rice overnight thoroughly

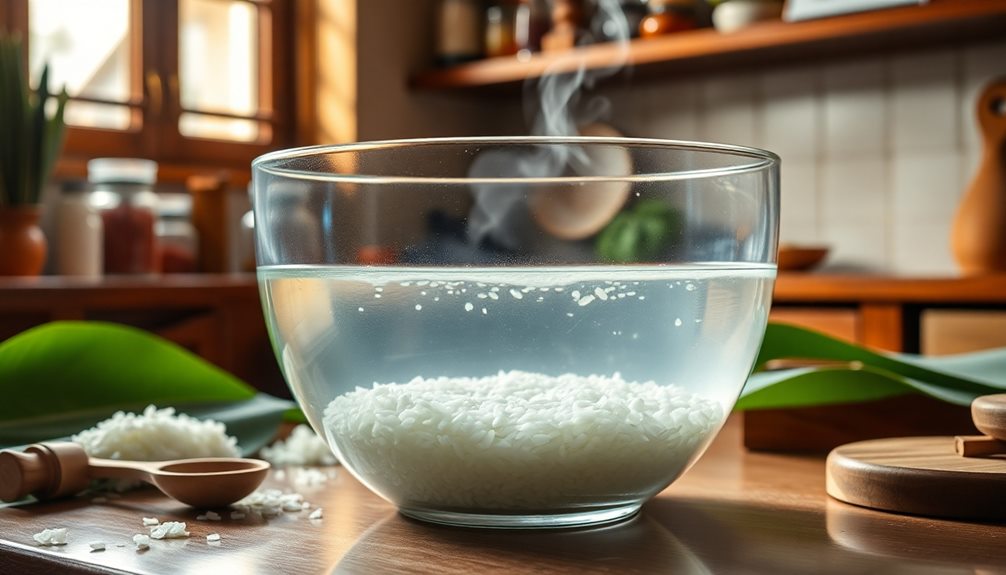
Now that your glutinous rice mixture is prepped, it's crucial to soak the rice overnight. Soaking the rice helps it absorb water, making it soft and sticky, just like you want for a delicious Bánh Dày!

Start by placing your rice in a large bowl and cover it with plenty of water. Make sure the water is at least a couple of inches above the rice, as it will swell as it soaks.

Let the rice sit in the water for at least eight hours, but overnight is best. This waiting time is super important, so don't skip it! You can even set a timer to remind yourself.

While you wait, you can think about all the yummy things you'll do next, like wrapping the rice in banana leaves and steaming it.

In the morning, you'll see that the rice has soaked up the water and expanded. Now it's ready for the next steps!

This soaking process is like giving your rice a warm hug, preparing it to become a delightful treat for your family and friends. Enjoy the anticipation, and get ready to create something special!

Advertisement

Step 3. Wrap in Banana Leaves

wrap food in leaves

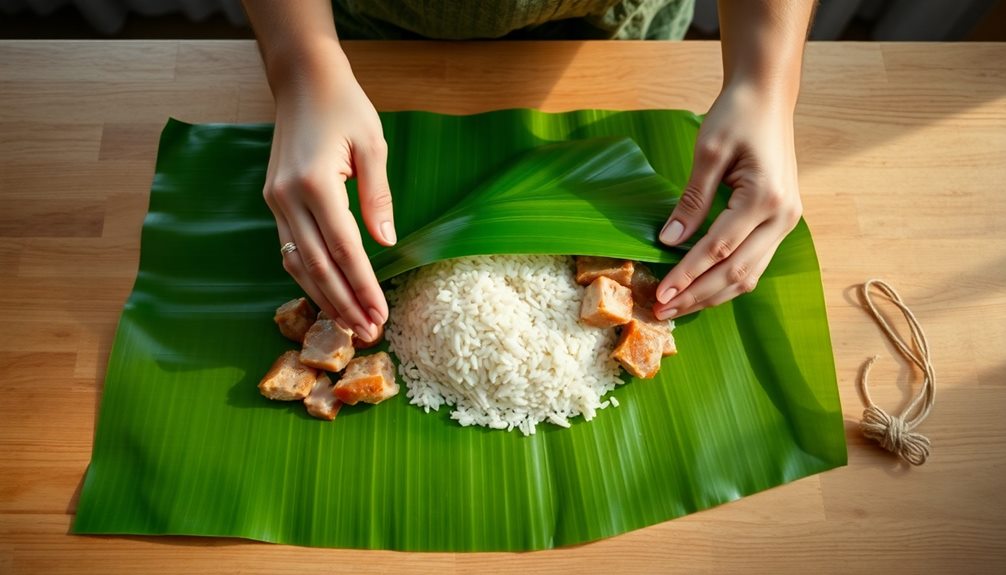
Wrapping your soaked glutinous rice in banana leaves is a key step that adds both flavor and a beautiful presentation to your Bánh Dày.

First, take a banana leaf and cut it into rectangular pieces, about 10 by 15 inches. Then, soften the leaves by quickly passing them over a flame or dipping them in hot water. This makes them easier to fold and less likely to tear.

Next, lay the banana leaf flat on your work surface, shiny side up. Place a scoop of soaked glutinous rice in the center, followed by any filling you like, such as mung bean paste or pork.

Now, carefully fold the sides of the leaf over the rice, tucking it in snugly. Make sure it's wrapped tightly, so nothing spills out during cooking.

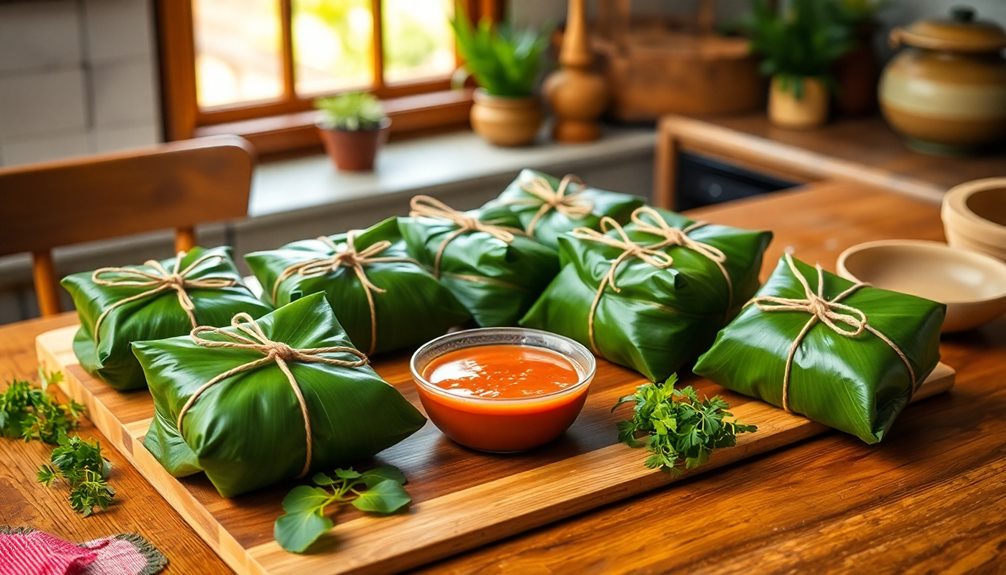
To secure your package, use kitchen twine or strips of banana leaf to tie it up. This step not only keeps everything together but also adds a lovely touch!

Repeat this for the remaining rice and fillings. Once you've wrapped them all, you're ready to move on to the next exciting phase of making your delicious Bánh Dày!

Advertisement

Step 4. Steam for Two Hours

steam for two hours

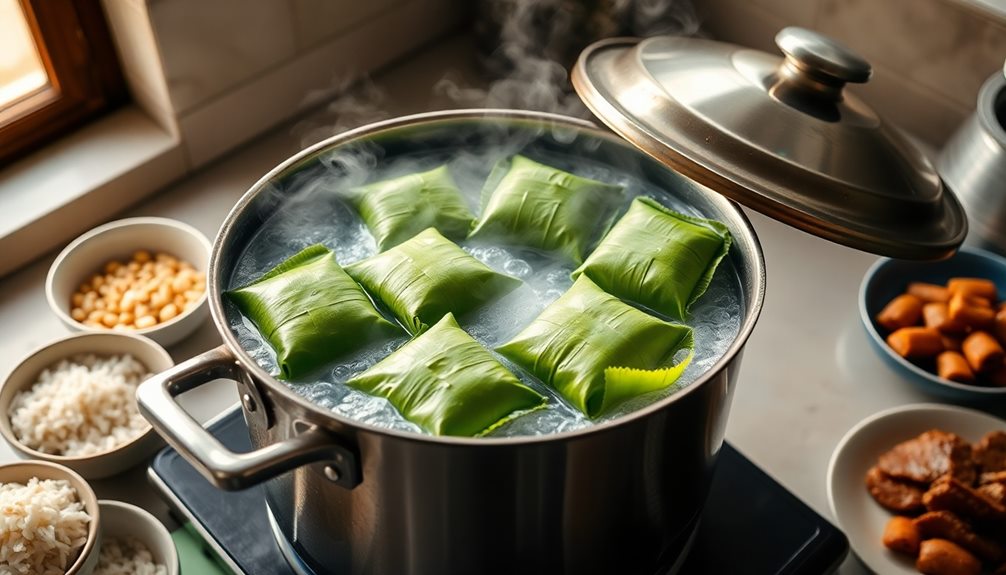
Once you've wrapped your glutinous rice cakes, it's time to steam them for two hours, ensuring they cook evenly and absorb all the wonderful flavors.

Get your steamer ready! If you don't have a steamer, you can use a large pot with a steaming rack or even a bamboo steamer. Just make sure the water doesn't touch the cakes.

Place your wrapped cakes in the steamer, making sure they've a little space between them so steam can circulate. Cover the steamer tightly with a lid to keep the heat in.

As the water starts to boil, you'll hear the gentle bubbling—this is where the magic happens! The steam will work its way into the rice, making it soft and sticky.

While they're cooking, the delightful aroma will fill your kitchen, making everyone excited for the tasty treat to come. You might want to check the water level occasionally; if it gets low, add more hot water to keep the steam going strong.

After two hours, your cakes will be ready! The wait is almost over, and soon you'll have delicious bánh dày to share with family and friends.

Advertisement

Step 5. Cool Before Serving

allow to cool completely

After steaming your glutinous rice cakes for two hours, it's important to let them cool before serving. This step is crucial because hot cakes can be sticky and hard to slice.

First, carefully remove the cakes from the steamer, using tongs or a spatula to avoid burns. Place them on a clean, flat surface like a cutting board.

Next, you'll want to let them sit at room temperature. Cooling can take about 30 minutes to an hour, depending on the size of your cakes. As they cool, their texture will firm up, making them easier to cut and serve.

Don't rush this part; patience pays off!

Once they're cool, you can slice the cakes into small squares or rectangles. This makes it easier for everyone to enjoy. You might want to serve them with a sprinkle of sesame seeds or a drizzle of coconut milk for extra flavor.

Final Thoughts

Vietnamese glutinous rice cake is more than just a treat; it's a cherished tradition that brings families together.

Advertisement

When you make or enjoy bánh dày, you're not just tasting something delicious; you're also connecting to a rich culture filled with warmth and joy. This cake is often made during special occasions, like Tet, where families gather to celebrate and share stories.

As you bite into the soft, chewy texture, you might feel the love and care that went into making it.

Each layer, filled with sweet or savory ingredients, tells a story of family recipes passed down through generations. It’s a reminder that food can create bonds and spark happiness. The scent of cinnamon and cloves wafts through the air as the batter sizzles in the pan. The aroma evokes memories of romantic Valentine’s Day recipes handed down from our grandparents, adding a touch of nostalgia to every bite. These recipes not only fill our bellies but also warm our hearts with the love and tradition of our family.

Frequently Asked Questions

What Ingredients Are Used in Traditional Bánh Dày?

To make traditional bánh dày, you'll need glutinous rice flour, water, and a filling like mung bean or pork. You'll also want banana leaves for wrapping, adding a lovely aroma and flavor during cooking.

How Long Can Bánh Dày Be Stored?

You can store bánh dày in an airtight container in the refrigerator for about a week. If you freeze them, they'll last up to three months, but make sure to thaw them properly before enjoying.

Advertisement

Can Bánh Dày Be Made Vegan?

Yes, you can definitely make bánh dày vegan! Simply substitute any non-vegan ingredients with plant-based alternatives. Use coconut milk instead of dairy and ensure any fillings align with your vegan preferences. Enjoy your delicious creation!

What Are Common Variations of Bánh Dày?

You'll find several variations of bánh dày, including those filled with mung beans, coconut, or even sweetened red beans. Each offers a unique twist, showcasing different flavors and textures that enhance your tasting experience.

Where Can I Purchase Authentic Bánh Dày?

You can purchase authentic bánh dày at local Vietnamese markets, specialty Asian grocery stores, or online retailers that focus on traditional foods. Check for reputable vendors to ensure quality and authenticity in your purchase.
Advertisement

Vietnamese Cuisine

Creamy and Unique: Discovering Vietnamese Sweet Potatoes

Khoai môn, the vibrant and creamy Vietnamese sweet potatoes, hold a captivating history and a unique blend of flavors that will tantalize your taste buds.

Published

on

exploring unique vietnamese sweet potatoes

Discover the vibrant, creamy world of Vietnamese sweet potatoes! These unique tubers, known as khoai môn, have a rich history woven into Vietnam's culinary tapestry. They're not only nutritious, packed with vitamins and minerals, but their delightful blend of sweet and savory flavors makes them a beloved staple. Whether roasted, steamed, or incorporated into traditional dishes, Vietnamese sweet potatoes lend a comforting warmth to family gatherings and celebrations. Their versatile nature allows them to shine, whether complementing grilled meats or starring in decadent desserts. Dive into the heart of Vietnamese cuisine and uncover the captivating story behind these delectable sweet potatoes.

Key Takeaways

  • Vietnamese sweet potatoes, known as khoai mỏn, are prized for their unique balance of sweet and savory flavors and creamy, velvety texture.
  • Originating in South America and embraced by Vietnamese farmers and home cooks, these sweet potatoes are an integral part of traditional celebrations and family gatherings.
  • Packed with vitamins, minerals, fiber, and antioxidants, Vietnamese sweet potatoes offer a healthy and nutritious alternative to other sweet potato varieties.
  • Versatile in culinary use, these sweet potatoes can be prepared in various ways, including roasting, steaming, and incorporation into traditional Vietnamese dishes.
  • The subtle sweetness and creamy texture of Vietnamese sweet potatoes make them a comforting and delightful addition to meals, offering a distinct twist on the classic root vegetable.

History

knowledge of past events

Although the origins of the sweet potato can be traced back to South America, the crop made its way to Vietnam through various trade routes and cultural exchanges over the centuries.

Vietnamese farmers and home cooks have since embraced the versatile vegetable, incorporating it into a wide array of traditional dishes. Known as khoai mùn, the sweet potato has become a beloved staple, often featured in festive celebrations and family gatherings.

Its creamy texture and unique flavor profile have made it a cherished ingredient in Vietnamese cuisine. From steaming khoai mùn as a side dish to blending it into silky desserts, the sweet potato has become an integral part of the country's rich culinary heritage.

Whether roasted, boiled, or stir-fried, this humble yet remarkable vegetable continues to delight and nourish Vietnamese families across generations.

Recipe

cooking instructions and ingredients

Vietnamese Sweet Potatoes

Vietnamese sweet potatoes are a beloved and versatile ingredient in Southeast Asian cuisine. These vibrant tubers are prized for their sweet, creamy flesh and unique flavor profile that sets them apart from their American counterparts.

Advertisement

Whether roasted, steamed, or incorporated into desserts, Vietnamese sweet potatoes are a delightful addition to any meal. This recipe showcases the simple yet delicious nature of Vietnamese sweet potatoes. By highlighting their natural sweetness and pairing them with complementary seasonings, this dish allows the true essence of these root vegetables to shine.

Ingredients:

  • 3 medium-sized Vietnamese sweet potatoes, peeled and cut into 1-inch cubes
  • 2 tablespoons vegetable oil
  • 1 teaspoon ground cinnamon
  • 1/2 teaspoon ground nutmeg
  • 1/4 teaspoon ground ginger
  • 1/4 teaspoon salt

Instructions:

Preheat the oven to 400°F (200°C). In a large bowl, toss the cubed sweet potatoes with the vegetable oil, cinnamon, nutmeg, ginger, and salt until the potatoes are evenly coated.

Spread the seasoned sweet potato cubes in a single layer on a baking sheet. Roast for 25-30 minutes, or until the potatoes are tender and lightly caramelized, flipping halfway through the cooking time.

When cooking Vietnamese sweet potatoes, it's important to keep a close eye on them to prevent overcooking. The natural sugars in these tubers can cause them to brown quickly, so be sure to check them regularly and adjust the cooking time as needed.

Advertisement

Enjoy these delightful Vietnamese sweet potatoes as a side dish or as a versatile ingredient in a variety of recipes.

Cooking Steps

step by step cooking instructions

Peel and cube the taro, then boil the taro cubes until tender.

Drain the cooked taro and return it to the pot, ready to mash.

Add creamy coconut milk and your favorite seasonings to give this dish its authentic Vietnamese flavor.

Step 1. Peel and Cube the Taro

peel cube prepare taro

Begin by carefully peeling the taro with a sharp knife. Cut off the tough, outer skin, revealing the starchy, white flesh underneath. Be cautious as the taro can be quite firm and unyielding.

Next, place the peeled taro on a clean cutting board and, using a sturdy chef's knife, slice it into even 1-inch cubes.

Take your time and focus on making each cube uniform in size. This will ensure they cook evenly when added to the dish. As you work, be mindful of your fingers – taro can be a bit slippery, so grip the knife firmly and use your free hand to steadily hold the taro in place.

Advertisement

Once you've cubed the entire taro, give the pieces a quick rinse under cool water to remove any debris or starch.

Now you're ready to add the taro cubes to your recipe and experience the delightful flavors of this beloved Vietnamese ingredient!

Step 2. Boil the Taro Cubes

boil taro cubes next

With the taro cubes prepped, it's time to get cooking! First, grab a large pot and fill it with enough water to cover the taro. Bring the water to a boil over high heat.

Once it's bubbling, carefully add the taro cubes. Let them cook for 15-20 minutes, until they're tender when poked with a fork.

Be sure to keep an eye on the pot – you don't want the taro to overcook and turn mushy! When they're done, drain the taro in a colander. Rinse the cubes with cool water to stop the cooking process.

Now they're ready for the next step in your Vietnamese feast. The boiled taro has a wonderfully creamy texture that pairs perfectly with the other flavors in this dish.

Advertisement

Get excited – the best is yet to come! With the taro cubes prepped, you're well on your way to creating an authentic and delicious Vietnamese meal.

Step 3. Drain and Return to Pot

drain and return pot

Once the taro cubes are tender, carefully drain them in a colander.

Be sure to hold the colander over the pot so you can catch any of that delicious cooking liquid – you'll want to use it later!

Gently shake the colander to remove excess water, then carefully pour the drained taro cubes back into the pot.

They're ready for the next step!

Now, you'll want to mash the taro cubes right in the pot using a potato masher or the back of a wooden spoon.

Advertisement

Mash them until they're nice and smooth, with no lumps.

This creamy texture is just perfect for our Vietnamese dish.

As you mash, you can add a bit of that reserved cooking liquid to reach your desired consistency.

Once the taro is perfectly mashed, you're all set to move on to the next tasty ingredient.

Get ready to add in the sweet potatoes – this is where the unique Vietnamese flavor really starts to shine!

Advertisement

Step 4. Mash the Boiled Taro Cubes

mash boiled taro cubes

Mashing the boiled taro cubes is the next crucial step. Simply grab a potato masher and get to work! You'll want to mash the cubes until they're nice and smooth, with no lumps remaining. This creamy, velvety texture is what makes Vietnamese khoai mủ so uniquely delightful.

As you mash, pay close attention to the consistency. You don't want it to be too thick or too thin – just right! Keep mashing until the mixture has a silky, spreadable quality. Feel free to add a splash of the cooking liquid if the mixture seems too dry. This will help achieve that perfect, luscious texture.

Once the taro is perfectly mashed, you're ready to move on to the next step. Get excited, because the best is yet to come!

This dish is about to take an amazing turn, transforming into a sweet, aromatic delight. With just a few more simple steps, you'll have an incredible Vietnamese dessert to share with family and friends.

Step 5. Add Coconut Milk and Seasonings

incorporate coconut milk seasonings

Now that you've perfectly mashed the taro, it's time to add the coconut milk and seasonings to take this dish to the next level. The rich and creamy coconut milk will infuse the taro with a delightful tropical flavor, while the seasonings will elevate the overall taste.

First, pour in the coconut milk and stir it in until the mixture is smooth and velvety. Next, add a pinch of salt, a dash of pepper, and a sprinkle of sugar to balance the flavors. Stir everything together until the seasonings are well incorporated.

For an extra burst of flavor, consider adding a teaspoon of vanilla extract or a pinch of cinnamon. These optional additions will complement the natural sweetness of the taro and coconut.

Advertisement

Taste the mixture and adjust the seasonings as needed, ensuring the perfect balance of sweet, savory, and creamy.

With the coconut milk and seasonings added, your Vietnamese taro dish is now ready to be enjoyed! Get ready for a truly unique and satisfying taste experience.

Final Thoughts

concluding reflections and insights

Vietnamese sweet potatoes offer a unique and delicious twist on a classic root vegetable. Their vibrant colors, creamy texture, and subtle sweetness make them a standout dish. The addition of coconut milk and aromatic spices elevates the flavors, creating a truly remarkable experience.

As you savor each bite, you'll be transported to the bustling markets of Vietnam, where these treasures are a beloved staple. The combination of sweet, savory, and comforting notes is sure to delight your taste buds and bring a smile to your face.

Whether you're serving them as a side dish or incorporating them into a larger meal, Vietnamese sweet potatoes are a versatile and crowd-pleasing ingredient. Their natural sweetness pairs beautifully with a variety of proteins, from grilled meats to sautéed tofu.

Embrace the unique flavors of Vietnamese cuisine and let these vibrant sweet potatoes become a new family favorite. Prepare to be captivated by their creamy, delectable goodness!

Advertisement

Frequently Asked Questions

Is Khoai Mỡ Suitable for Those With Lactose Intolerance?

As someone with lactose intolerance, you'll be pleased to know that khoai mỡ is dairy-free and suitable for your dietary needs. This versatile Vietnamese tuber can be enjoyed without worrying about any digestive issues.

What Is the Shelf Life of Freshly Made Khoai Mỡ?

The shelf life of freshly made khoai mo is typically 3-5 days when stored in the refrigerator. It's best to consume it within this time frame to enjoy its creamy texture and unique flavor.

Can Khoai Mỡ Be Frozen and Reheated Without Losing Its Texture?

Yes, you can freeze and reheat khoai mở without losing its texture. The key is to freeze it in an airtight container and reheat it gently, either on the stovetop or in the oven, until warmed through.

How Does Khoai Mỡ Compare to Other Vietnamese Desserts in Terms of Sweetness?

Compared to other Vietnamese desserts, khoai mỡ is less sweet. It has a subtle, delicate flavor that's not overpowering. You'll find it's a nice contrast to the more sugary treats in the Vietnamese dessert repertoire.

Is Khoai Mỡ a Traditional Dish or a Modern Invention?

Khoai mỡ is a traditional Vietnamese dish with a long history. It's not a modern invention but a beloved dessert that's been enjoyed for generations. The creamy texture and subtle sweetness make it a unique and beloved treat.

Advertisement

Continue Reading

Vietnamese Cuisine

Bê Thui: Discover Vietnam’s Smoky Grilled Veal Dish

Flavorful, fragrant, and deeply satisfying, bê thui is a Vietnamese grilled veal dish that will captivate your senses and leave you craving more.

Published

on

vietnam s smoky grilled veal

Discover the smoky, tender delight of bê thui, a beloved grilled veal dish that's been captivating taste buds in Vietnam for centuries. Skilled cooks grill marinated veal over charcoal, infusing it with a delectable smoky flavor. Pair the succulent meat with fresh herbs, tangy pickled veggies, and sticky rice – it's a mouthwatering celebration of Vietnam's culinary heritage. Whether you're grilling at home or exploring a bustling Vietnamese market, bê thui offers a unique and unforgettable flavor experience that'll have you craving more. Dive deeper into this hidden gem of Vietnamese cuisine and uncover its rich history and delicious secrets.

Key Takeaways

  1. Bê Thui is a traditional Vietnamese dish dating back to the 18th century, featuring grilled veal with a smoky flavor from charcoal cooking.
  2. The dish showcases Vietnam's culinary heritage, with skilled cooks marinating veal in a flavorful mixture of fish sauce, garlic, shallots, sugar, and black pepper.
  3. Grilling the marinated veal over high heat results in a caramelized crust, while the meat remains tender and juicy on the inside.
  4. Bê Thui is often served with steamed jasmine rice, fresh herbs, and pickled vegetables, creating a harmonious balance of flavors and textures.
  5. The dish remains a beloved street food in Vietnam, reflecting the country's vibrant culinary culture and the evolution of local ingredients and preferences.

History

historical events and timelines

Bê thui, Vietnam's smoky grilled veal dish, has a rich history rooted in the country's culinary traditions. This beloved delicacy has been a part of Vietnamese cuisine for generations, with its origins dating back to the 18th century.

Back then, it was a common sight in open-air markets and street stalls, where skilled cooks would skillfully grill tender veal over charcoal fires, imparting a delicious smoky flavor.

Over the years, the recipe for bê thui has been passed down, evolving and adapting to local ingredients and preferences. Today, it remains a beloved staple, beloved by locals and travelers alike.

The dish's distinct aroma and mouthwatering taste have made it a must-try for anyone exploring the vibrant food scene of Vietnam. From the bustling streets of Hanoi to the coastal towns of the south, bê thui continues to delight and inspire, showcasing the rich culinary heritage of this captivating country.

Cooking Steps

step by step cooking instructions

Alright, let's dive into the cooking steps for Bê Thui, Vietnam's smoky grilled veal dish.

First, you'll need to marinate the veal in a savory blend of fish sauce, garlic, shallots, sugar, and black pepper. Let this sit for at least an hour, or up to 24 hours in the fridge for maximum flavor.

Advertisement

Next, fire up your grill to medium-high heat. Grill the marinated veal, turning occasionally, until it's nicely charred on the outside but still juicy on the inside. This should take around 10-12 minutes total.

Be sure to let the veal rest for a few minutes before slicing into it.

Serve the grilled veal with a side of steamed jasmine rice and some fresh herbs like mint, cilantro, and basil. Drizzle over a bit of the reserved marinade for extra zing.

Enjoy this smoky, flavorful Vietnamese classic!

Step 1. Soak Veal in Marinade Overnight

marinate veal overnight thoroughly

To start, let's soak the veal in the marinade overnight. This step is crucial to infusing the meat with the aromatic flavors of garlic, lemongrass, and fish sauce.

You'll want to use a large resealable bag or a shallow baking dish to hold the veal and the marinade. Gently massage the marinade into the veal, making sure every nook and cranny is coated.

Advertisement

Then, pop the veal into the fridge and let it soak up all those tasty Vietnamese flavors for at least 8 hours, or even better, overnight. This long soaking time allows the marinade to really work its magic, tenderizing the meat and imbuing it with a complex, smoky-sweet taste.

When you're ready to cook, the veal will be bursting with flavor, ready to be grilled to perfection. Just remember to reserve a bit of the marinade to baste the veal as it cooks for extra moisture and flavor.

Step 2. Grill Veal Over Charcoal

grill veal on charcoal

Preheat your charcoal grill to high heat, ensuring the coals are glowing red-hot.

Once the grill is scorching, carefully place the marinated veal steaks on the grate. Listen as they sizzle and watch the meat begin to char, creating that tantalizing smoky aroma.

Resist the urge to move the steaks too much – let them develop a nice crust on the first side before flipping. After about 3-4 minutes, use tongs to gently turn the veal over, allowing the other side to get that same delightful char.

Continue grilling, flipping occasionally, until the veal reaches your desired level of doneness, usually around 6-8 minutes total for medium-rare.

Advertisement

The key is to let the natural flavors shine through, allowing the marinade to caramelize and the smoke to infuse the meat.

Soon, you'll have tender, flavor-packed veal that's ready to transport your taste buds straight to the heart of Vietnam.

Step 3. Garnish With Fresh Herbs

garnish using fresh herbs

After grilling the veal to perfection, garnish the dish with vibrant fresh herbs. The aromatic blend of cilantro, mint, and Thai basil will add a burst of flavor and a touch of elegance to your Bê Thui.

Gently tear the leaves and sprinkle them over the top of the smoky veal, allowing the flavors to mingle. The cool, herbal notes will balance the rich, charred meat, creating a symphony of tastes.

For an extra pop of color, consider adding thinly sliced red chilies or drizzling a fragrant fish sauce and lime dressing over the top. The contrast of the spicy, tangy elements with the tender veal will awaken your senses.

Finish with a light sprinkling of toasted peanuts or sesame seeds for a satisfying crunch. The combination of textures and flavors will transport you straight to the lively street markets of Vietnam.

Advertisement

Enjoy this vibrant, flavor-packed dish with your family and friends.

Step 4. Serve With Pickled Vegetables

serve with pickled vegetables

Serving a plate of tangy pickled vegetables alongside the smoky grilled veal elevates this Vietnamese dish. The contrasting flavors and textures create a harmonious balance that will delight your taste buds.

To make the pickled veggies, simply thinly slice some crisp carrots, radishes, and cucumbers. Then, mix them in a bowl with a tangy vinegar dressing made from rice vinegar, a touch of sugar, and a pinch of salt. Let the vegetables marinate for about 30 minutes, allowing the flavors to meld.

The result is a refreshing, crunchy accompaniment that perfectly complements the rich, grilled veal. The cool, acidic notes of the pickled vegetables help cut through the meatiness of the bề thui, making each bite an exciting journey for your palate.

Serve the pickled veggies on the side, inviting your guests to build their own flavorful bites by combining the tender veal and the zesty, pickled crunch.

Step 5. Enjoy With Sticky Rice

savor with sticky rice

To truly savor the depth of flavors in this Vietnamese dish, you'll want to serve the smoky grilled veal atop a bed of warm, sticky rice. The glutinous texture of the rice perfectly complements the tender, juicy meat, creating a harmonious balance in every bite.

The stickiness of the rice allows it to soak up all the delicious juices and seasonings from the veal, infusing each grain with the aromatic blend of lemongrass, garlic, and spices. As you take a forkful, the soft, sticky rice will cling to the charred edges of the veal, delivering an explosion of savory, smoky notes in your mouth.

Advertisement

Enjoy this satisfying pairing by scooping the veal and rice onto your plate, then using your hands to shape the mixture into small bites. The tactile experience of eating with your fingers will only heighten the immersive, traditional feel of this beloved Vietnamese meal.

Savor each morsel, allowing the interplay of textures and flavors to transport you to the bustling streets of Vietnam.

Final Thoughts

concluding remarks and reflections

While Bê Thui may not be as widely known as other Vietnamese dishes, this smoky grilled veal delicacy is a true hidden gem.

You've learned about its unique preparation and how to enjoy it with sticky rice, but there's more to discover. This dish's rich, bold flavors and tender texture make it a must-try for any adventurous eater.

The smokiness from the charcoal grill adds an irresistible layer of complexity, complementing the succulent veal perfectly. And of course, the vibrant herbs and dipping sauce bring everything together in a harmonious burst of taste.

As you savor each bite, you'll be transported to the bustling markets of Vietnam, where this beloved specialty has been enjoyed for generations.

Advertisement

Frequently Asked Questions

Is Bê Thui Made With Beef or Veal?

Based on the Current Question, you can see that Bê Thui is made with veal, not beef. Veal is the meat of young calves, which is often used in Vietnamese cuisine for its tender and delicate flavor.

Does Bê Thui Use Any Special Marinades or Seasonings?

The grilled veal dish uses a unique marinade with aromatic herbs and spices to infuse it with bold, smoky flavors. It's typically seasoned with lemongrass, shallots, fish sauce, and other Vietnamese aromatics.

How Long Does the Grilling Process Typically Take?

The grilling process typically takes around 15-20 minutes. You'll want to grill the meat over high heat, turning it occasionally, until it's nicely charred and cooked through. This helps infuse the meat with that delicious smoky flavor.

Is Bê Thui a Common Dish Across All of Vietnam?

Is bê thui a common dish across all of Vietnam? No, it's not. This specialty dish is primarily found in the central region of the country, where the grilling and preparation techniques have been perfected over generations.

Can Bê Thui Be Made With Alternative Protein Sources?

You can certainly make bê thui with alternative protein sources. While veal is the traditional meat, you could experiment with other lean and tender cuts like beef, pork, or even chicken to create delicious variations.

Advertisement

Continue Reading

Vietnamese Cuisine

Soup Cua: Vietnamese Crab Soup With a Rich Broth

Just imagine the rich, aromatic broth and the tender crab meat that come together in this Vietnamese culinary delight. Discover the secrets of Soup Cua.

Published

on

vietnamese crab soup recipe

Dive into a flavorful journey through Vietnamese culinary heritage with the rich and aromatic Soup Cua – a Vietnamese crab soup that's been perfected over centuries by resourceful cooks along the country's vibrant coastlines. You'll start by sautéing aromatic onions, garlic, and ginger in oil, then gently fold in lump crab meat and simmer it all in a savory broth. As the soup simmers, you'll add fresh mushrooms and seasonings, creating a well-balanced dish. Finally, you'll garnish it with a vibrant array of herbs, like cilantro and scallions, for an authentic taste of Vietnam. If you continue exploring, you'll uncover even more delicious secrets of this beloved soup.

Key Takeaways

  • Vietnamese crab soup, known as "Soup Cua," originates from the coastal regions of Vietnam, where seafood is a staple in the local cuisine.
  • The dish is made by simmering whole crabs in an aromatic broth, often enhanced with fresh herbs and vegetables for a well-balanced flavor profile.
  • The cooking process involves sautéing onions, garlic, and ginger to build a rich, savory foundation, followed by the addition of crab meat and seasonings.
  • Eggs are sometimes incorporated into the broth, creating a slightly thickened consistency and adding a creamy, luxurious texture to the soup.
  • Fresh herbs, such as cilantro, scallions, and Thai basil, are used as garnishes, providing a burst of flavor and visual appeal to the dish.

History

understanding past events context

The origins of Vietnamese crab soup can be traced back to the coastal regions of Vietnam, where seafood has long been a staple in the local diet.

Over the centuries, resourceful Vietnamese cooks have perfected the art of blending fresh crabs with a rich, flavorful broth. This hearty soup has become a beloved dish, reflecting the country's culinary heritage and the ingenuity of its people.

Traditionally, the soup was made using whole crabs, which were carefully cleaned and simmered in an aromatic broth. The resulting liquid was then strained, creating a delicate and complex base for the soup.

Cooks would then add the crab meat back into the broth, along with a variety of fresh herbs and vegetables to create a well-balanced and satisfying dish.

Today, Vietnamese crab soup continues to be a popular menu item, enjoyed by people across the country and around the world.

Advertisement

Its rich history and enduring popularity make it a true culinary treasure.

Cooking Steps

recipe preparation instructions

Begin by gathering all the necessary ingredients for the Vietnamese crab soup.

You'll need a large pot, some crab meat, chicken or vegetable broth, ginger, garlic, onion, mushrooms, and a few other key seasonings.

Once you have everything ready, start by sautéing the onion, garlic, and ginger in a bit of oil until they're fragrant and softened.

Next, pour in the broth and bring it to a simmer.

Add the crab meat and let it cook for a few minutes until heated through.

Advertisement

Toss in the sliced mushrooms and let them cook for another minute or two.

Season the soup with a dash of fish sauce, a sprinkle of white pepper, and a squeeze of fresh lime juice.

Taste and adjust the seasoning as needed.

Step 1. Sauté Aromatics in Oil

saut aromatics in oil

Sautéing the aromatic ingredients in oil is the first step in crafting this delectable Vietnamese crab soup.

First, you'll need to heat a couple tablespoons of oil in a large pot over medium heat. Once the oil is hot, add the thinly sliced onions and let them sizzle for a minute or two until they start to soften and become fragrant.

Next, toss in the minced garlic and ginger. Stir everything together and let the flavors meld for another minute or so, being careful not to let the garlic burn.

Advertisement

This simple sauté process is essential for building the foundation of the soup's rich, savory broth. The aromatic vegetables will infuse the oil with their natural sweetness and spice, setting the stage for the crab and other ingredients to shine.

With the aromatics prepped, you're now ready to move on to the next step in creating this authentic Vietnamese delicacy.

Step 2. Add Crab Meat

incorporate crab meat

With the aromatic foundation laid, you can now begin adding the star of the show – the crab meat. Gently fold the lump crab meat into the simmering broth. Be careful not to break up the delicate chunks as you incorporate them. The sweet, slightly briny flavor of the crab will instantly elevate the soup, creating a luxurious texture and depth of flavor.

Next, you'll want to taste the soup and adjust the seasoning as needed. Add a pinch more salt or a splash of fish sauce to balance the flavors. The crab meat should shine, so you don't want to overpower it.

Finish the soup by stirring in a handful of fresh cilantro leaves, adding a vibrant, herbal note that complements the crab beautifully.

Ladle the Vietnamese crab soup into bowls, making sure each portion gets an ample amount of succulent crab meat. Serve it piping hot, allowing your guests to savor the rich, satisfying broth and the tender bites of crab in every spoonful.

Advertisement

Step 3. Add Stock and Simmer

add stock simmer gently

Next, you'll want to add the stock to the pot. This is where the magic really starts to happen! Grab your prepared stock and carefully pour it in, making sure to get every last drop. The stock is going to infuse the soup with an incredible depth of flavor.

Once the stock is in, give everything a good stir. You'll start to see the liquid come together and take on a rich, golden hue.

Now, it's time to let the soup simmer. Turn the heat down to medium-low and let it gently bubble away for about 15-20 minutes. This allows all the flavors to meld together perfectly.

As the soup simmers, you'll notice the delightful aroma start to fill your kitchen. It's a scent that just can't be beat!

Keep an eye on it, stirring occasionally, until the broth has thickened slightly and the flavors have truly melded. Then, you're ready for the next step!

Step 4. Add Egg to Soup

incorporate egg into soup

To add the egg to the soup, crack the eggs directly into the simmering broth.

You'll want to do this gently, one at a time, allowing each egg to cook before adding the next. The eggs will poach right in the flavorful broth, creating soft, pillowy clouds that are so satisfying.

Advertisement

As the eggs cook, they'll release their rich, golden yolks, which will blend into the broth, thickening it ever so slightly and adding a luxurious texture.

Be sure to keep the heat at a gentle simmer – you don't want the eggs to overcook and become rubbery.

Once all the eggs are in, give the soup a gentle stir to incorporate the egg.

The finished dish will have delicate strands of egg floating in the aromatic broth, creating a truly comforting and nourishing meal.

Serve the Vietnamese crab soup hot, garnished with fresh herbs and a squeeze of lime juice for the perfect balance of flavors.

Advertisement

Step 5. Garnish With Fresh Herbs

garnish using fresh herbs

Finish garnishing the Vietnamese crab soup with a generous sprinkling of fresh herbs.

You'll want to add a mix of fragrant cilantro, bright green scallions, and lively Thai basil. The herbs will instantly elevate the soup, bringing a burst of fresh flavor and vibrant color.

Gently tear the leaves and scatter them over the top of the steaming broth. Their delicate aromas will waft up, enticing your senses.

Don't be shy – layer on those herbs! They'll complement the richness of the crab and balance out the soup's savory notes.

For the final touch, add a squeeze of fresh lime juice. The bright acidity will cut through the soup's creaminess, leaving you with a perfectly balanced and incredibly appetizing dish.

Now, ladle the Vietnamese crab soup into bowls and enjoy it with family and friends. The fresh herbs will make every spoonful a delight.

Advertisement

Final Thoughts

concluding reflections and insights

After exploring the flavors and preparations of Vietnamese crab soup, you can appreciate its complexity and versatility. This dish offers a unique culinary journey, blending the richness of crab with the aromatic depth of herbs and spices.

The final touch of garnishing with fresh herbs adds a delightful burst of flavor and visual appeal, making it a true feast for the senses.

Whether you're a seasoned soup enthusiast or new to Vietnamese cuisine, this crab soup is sure to become a new favorite. Its comforting warmth and complex flavors make it a perfect choice for any occasion, from a cozy family dinner to an elegant gathering with friends.

As you savor each sip, you'll be transported to the vibrant streets of Vietnam, where this beloved dish has its origins.

Frequently Asked Questions

What Is the Typical Serving Size for Soup Cua?

The typical serving size for this type of soup is usually around 8-12 ounces. It's meant to be a hearty, comforting dish, so you'll want to enjoy a full bowl to get the full flavor experience.

Can Soup Cua Be Made in Advance and Reheated?

Yes, you can make this soup in advance and reheat it. The broth will keep well in the fridge for up to 5 days, and the soup can be reheated on the stovetop or in the microwave when you're ready to serve it.

Advertisement

What Types of Crab Are Commonly Used in Soup Cua?

The most commonly used crabs in this type of soup are blue crab, dungeness crab, and lump crabmeat. They provide the rich, sweet flavor that makes this dish so delicious.

How Long Can Soup Cua Be Stored in the Refrigerator?

Soup can be stored in the refrigerator for 3-4 days. The richness of the broth and the delicate nature of the crab mean it's best to consume it within a few days for optimal freshness and flavor.

Is Soup Cua Suitable for Vegetarians or Vegans?

No, this soup wouldn't be suitable for vegetarians or vegans, as it's made with crab. The broth and other ingredients likely contain animal products, so it's not an option for those following plant-based diets.

Continue Reading

Affiliate Disclaimer
As an affiliate, we may earn a commission from qualifying purchases. We get commissions for purchases made through links on this website from Amazon and other third parties.

Advertisement

Vetted

top local car washes top local car washes
Vetted1 month ago

14 Best Car Washes Near You for a Sparkling Clean Ride

I discovered the 14 best car washes near you that promise a sparkling clean ride, and you won't want to...

top mops for 2024 top mops for 2024
Vetted1 month ago

The 15 Best Mops of 2025 – Your Ultimate Guide to a Spotless Home

Find the perfect mop for your cleaning needs in 2025, and discover how these top choices can revolutionize your home...

top women s fragrances 2024 top women s fragrances 2024
Vetted1 month ago

15 Best Perfumes for Women in 2025 – A Fragrance Guide You Can’t Miss

Keen to discover the top 15 perfumes for women in 2025? Uncover unique scents that will elevate your fragrance game!

top local bars guide top local bars guide
Vetted1 month ago

14 Best Bars Near You for an Unforgettable Night Out

Looking for the perfect bar to elevate your night out? Discover the 14 best spots that promise unforgettable experiences!

luxurious beard oil selection luxurious beard oil selection
Vetted1 month ago

15 Best Beard Oils for a Luxurious Grooming Experience in 2025

Shop the 15 best beard oils for a luxurious grooming experience in 2025 and discover which ones will elevate your...

top college laptops 2024 top college laptops 2024
Vetted1 month ago

15 Best College Laptops of 2025: The Ultimate Guide for Students

With our guide to the 15 best college laptops of 2025, discover which powerful models will elevate your academic experience...

waterproof mascaras for tears waterproof mascaras for tears
Vetted1 month ago

15 Best Waterproof Mascaras That Will Survive Any Tear-Jerker

Outstanding waterproof mascaras await to keep your lashes flawless through any emotional moment; discover which ones made the top 15...

top flavorful disposable vapes top flavorful disposable vapes
Vetted1 month ago

15 Best Disposable Vapes of 2025: Top Picks for Flavor and Convenience

Prepare to discover the 15 best disposable vapes of 2025 that blend exceptional flavor and convenience, but which ones truly...

refreshing lunch salad ideas refreshing lunch salad ideas
Vetted1 month ago

15 Best Salads Near You That Will Freshen Up Your Lunch Routine

Transform your lunch with the 15 best salads nearby that will tantalize your taste buds and leave you craving more...

top convertible car seats top convertible car seats
Vetted1 month ago

15 Best Convertible Car Seats of 2025 – Safety and Comfort for Your Little One

Get ready to discover the top 15 convertible car seats of 2025 that blend safety and comfort—find out which models...

delicious fast food breakfast delicious fast food breakfast
Vetted1 month ago

15 Best Fast Food Breakfast Options That Will Make Your Mornings Delicious

Uncover the 15 best fast food breakfast options that will transform your mornings into a delicious experience you won't want...

stylish contacts for vision stylish contacts for vision
Vetted1 month ago

14 Best America’s Contacts for Clear Vision and Style

Browse through the 14 best contact lenses in America for clear vision and style, and discover which one perfectly complements...

Trending