Crafting your own delectable dairy-free cheese at home is a rewarding and creative journey that allows you to explore a world of flavors and textures, catering to your unique dietary preferences and satisfying your culinary cravings. The history of vegan cheese dates back to the 1960s, evolving from limited soy-based options to a diverse range of plant-based materials. Not only are these homemade alternatives lower in saturated fat and cholesterol, but they also let you control the ingredients for healthier choices. From creamy cashew-based bries to sharp cheddar-style cheese, the possibilities are endless. Ready to uncover more about crafting your personalized vegan cheese experience?
Key Takeaways
- Vegan cheese has evolved from limited soy-based options to a diverse range of plant-based materials like nuts, seeds, and coconut.
- Homemade vegan cheese offers customization of flavors, control over ingredients, and potential cost savings compared to store-bought alternatives.
- The preparation process involves soaking, blending, and shaping the nut paste, then chilling it to allow flavors to develop.
- Techniques like aging, adding spices/herbs, and experimenting with fermentation can enhance the flavor and texture of homemade vegan cheese.
- Crafting dairy-free cheese at home encourages culinary exploration, satisfying diverse dietary preferences and promoting sustainable and ethical food choices.
Top picks for "vegan cheese craft"
Open Amazon search results for this keyword.
As an affiliate, we earn on qualifying purchases.
History
The history of vegan cheese alternatives can be traced back to the 1960s, when a growing interest in plant-based diets and animal welfare concerns sparked the development of these products.
Back then, the options were quite limited, with soy being the primary ingredient used to create the first vegan cheese-like foods.
As the years passed, innovators continued to explore new plant-based materials, such as nuts, seeds, and even coconut, to craft more diverse and flavorful vegan cheese alternatives.
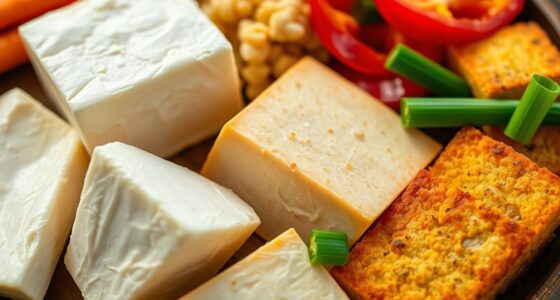
Today, the vegan cheese market has exploded, offering a wide variety of options that closely mimic the taste and texture of traditional dairy-based cheeses.
From sliceable blocks to creamy spreads, vegan cheese has come a long way.
Driven by a desire for more sustainable and ethical food choices, consumers now have an abundance of vegan cheese alternatives to choose from, allowing them to enjoy the cheesy goodness they crave without compromising their plant-based values.
Recipe
Vegan cheese can be a delightful and nutritious alternative to traditional dairy-based cheese. Not only is it typically lower in saturated fat and cholesterol, but it also caters to those with dietary restrictions or ethical concerns regarding animal products.
Additionally, incorporating ingredients like chia seeds can enhance the nutritional profile of your vegan cheese, adding beneficial omega-3 fatty acids and fiber. In this recipe, we'll explore a simple and flavorful homemade vegan cheese alternative that can be used in a variety of dishes.
Crafting your own vegan cheese at home allows you to control the ingredients and create a personalized taste profile. The process is straightforward and can be customized to suit your preferences.
Whether you're looking to top your favorite pizza, add a creamy touch to a pasta dish, or simply enjoy a tasty snack, this recipe is a great starting point.
- 1 cup raw cashews, soaked for at least 4 hours or overnight
- 1/2 cup unsweetened almond milk
- 2 tablespoons lemon juice
- 1 teaspoon apple cider vinegar
- 1/2 teaspoon sea salt
- 1/4 teaspoon garlic powder
- 1/4 teaspoon onion powder
Drain and rinse the soaked cashews. In a high-speed blender, combine the cashews, almond milk, lemon juice, apple cider vinegar, sea salt, garlic powder, and onion powder. Blend until smooth and creamy, scraping down the sides as needed.
Transfer the mixture to a cheesecloth-lined colander or nut milk bag and allow it to strain for 30 minutes to 1 hour, depending on the desired texture. For a firmer cheese, strain for longer.
Once the desired consistency is reached, transfer the vegan cheese to an airtight container and refrigerate for at least 2 hours before serving.
This homemade vegan cheese can be enjoyed on its own, used as a spread, or incorporated into various recipes. For a more robust flavor, you can experiment with different herbs, spices, or even additions like nutritional yeast.
Remember to store the cheese in the refrigerator and consume within 5-7 days for optimal freshness.
Cooking Steps
First, you'll want to soak your nuts overnight. This helps them get extra creamy when you blend them into a smooth paste.
Next, add your favorite spices and flavorings to the nut mixture.
Step 1. Soak Nuts Overnight for Creaminess

To achieve the desired creaminess in your vegan cheese alternatives, you'll want to start by soaking your nuts overnight. This simple step helps to soften the nuts, making them easier to blend into a smooth, creamy texture.
Simply place your preferred nuts, such as cashews or almonds, in a bowl and cover them with water. Let them soak for at least 8 hours, or even overnight, to allow the nuts to become fully hydrated.
Once the soaking is complete, drain and rinse the nuts thoroughly. This will remove any excess water and prepare them for the next step in your vegan cheese-making process.
By taking the time to soak your nuts, you'll be able to achieve a rich, velvety consistency that will make your homemade vegan cheese alternatives irresistible.
The creaminess you create will be the perfect base for a variety of flavors and textures.
Step 2. Blend Soaked Nuts Into Smooth Paste

Once your nuts have finished soaking, it's time to turn them into a smooth, creamy paste. Grab your blender or food processor and add the soaked nuts.
Blend on high speed, scraping down the sides as needed, until the mixture becomes a silky-smooth consistency. This may take a minute or two, so be patient and let the machine do its job.
The key is to blend the nuts thoroughly, ensuring there are no visible chunks or pieces remaining. You want a creamy, lump-free texture that will be perfect for all your vegan cheese recipes.
Feel free to add a tablespoon or two of the soaking liquid if the mixture seems too thick. This will help create an even creamier base.
Once you've achieved the desired texture, your nut paste is ready to use. Scoop it out and get ready to transform it into all sorts of delicious, dairy-free cheese alternatives.
The possibilities are endless!
Step 3. Add Spices and Flavorings

Your creamy nut paste is the perfect blank canvas to build upon. Now it's time to add some excitement with spices and flavorings!
Start by exploring your spice cabinet. Garlic powder, onion powder, and smoked paprika can instantly boost the savory notes. Don't be afraid to get creative – a dash of cumin or turmeric can lend an earthy complexity.
For a touch of tanginess, stir in some lemon juice or apple cider vinegar. These acidic ingredients will help mimic the sharp bite of traditional cheese.
If you're aiming for a more aged flavor, try a sprinkle of nutritional yeast. Its nutty, cheese-like taste is a game-changer.
Once you've added your favorite spices and flavorings, give the mixture a good stir. Taste as you go, adjusting the seasonings until it's perfect.
The key is finding the right balance to satisfy your cravings for that classic cheese experience, all without a single dairy product.
Step 4. Shape Mixture Into Desired Form

With your creamy nut paste prepared, you can now shape it into your desired form. Whether you're craving a wheel of Brie, slices of cheddar, or even a block of feta, the possibilities are endless.
Gently scoop the mixture into your hands and start molding it. Don't be afraid to get a little messy – the texture will become smooth and pliable as you work it. If the mixture seems too soft, simply refrigerate it for a bit to firm it up.
Once you've achieved the perfect shape, you can get creative with the presentation. Try pressing the mixture into molds or gently shaping it by hand. You can even roll it into logs and slice it for a beautiful, uniform look.
Regardless of the shape, your homemade vegan cheese is sure to impress. With a few simple steps, you've transformed a basic nut paste into a delightful dairy-free alternative that's ready to be enjoyed.
Step 5. Refrigerate for Flavor Development

After you've shaped your vegan cheese into the desired form, it's time to refrigerate it for flavor development. This is an important step in creating the perfect texture and taste.
By chilling your homemade cheese, you'll allow the flavors to meld and intensify over time. The cool temperature helps the cheese firm up and develop a delightful tanginess.
Don't be tempted to skip this step! Refrigerating your creation is crucial for achieving that authentic cheese-like flavor. Plan to let it chill for at least 4 hours, though overnight is even better. This gives the ingredients time to work their magic.
When you're ready to enjoy your vegan cheese, you'll be amazed at how much the flavor has improved.
Patience is key here. The wait will be worth it when you take that first bite of your delicious, dairy-free masterpiece. Get ready to savor the rich, creamy goodness you've crafted right in your own kitchen!
Final Thoughts
As we reach the end of our exploration of vegan cheese alternatives, what final thoughts come to mind? In conclusion, the variety and quality of vegan cheese alternatives continue to impress. From classic nut-based options to innovative plant-based creations, there is truly something for everyone. As we wrap up our discussion, it’s worth noting that the world of vegan cuisine is constantly evolving, and new products and recipes are always emerging. If you’re looking for more inspiration in the kitchen, consider exploring raw vegan dessert recipes for a sweet and healthy treat.
Creating your own dairy-free cheeses at home can be such a rewarding and exciting journey.
Think about all the delicious possibilities – from creamy cashew-based bries to tangy almond feta.
The best part is, you can customize the flavors to your liking.
Want a sharper cheddar-style cheese? Simply let it age a bit longer.
Craving a smoky gouda? Add some smoked paprika.
The options are endless!
Frequently Asked Questions
What Are the Common Ingredients Used in Vegan Cheese?
Common vegan cheese ingredients include nuts like cashews, almonds, or macadamia, coconut oil, nutritional yeast, tapioca or agar-agar for texture, and various seasonings to mimic the flavor of traditional dairy-based cheeses.
How Do Vegan Cheeses Compare to Traditional Dairy-Based Cheeses?
Vegan cheeses offer a dairy-free alternative that can mimic the texture and flavor of traditional cheese, though they may differ in terms of nutritional profile, melting properties, and overall taste experience. However, they provide options for those seeking a plant-based cheese option.
Are Vegan Cheeses Nutritionally Equivalent to Dairy-Based Cheeses?
No, vegan cheeses aren't nutritionally equivalent to dairy-based cheeses. They typically have less protein, calcium, and other nutrients found in dairy products. But they can be a good alternative for those avoiding animal-based foods.
How Long Can Homemade Vegan Cheese Be Stored?
Homemade vegan cheese can typically be stored for up to 1 week in the refrigerator. Make sure to store it in an airtight container and consume it before it spoils. With proper storage, you can enjoy your homemade vegan cheese for several days.
Can Vegan Cheese Be Used in the Same Way as Dairy Cheese?
You can use vegan cheese in many of the same ways as dairy cheese. It melts, grates, and slices well, making it a versatile substitute for recipes calling for traditional cheese. However, it may have slightly different melting and texture properties.