
Gai Tod, the beloved Thai fried chicken, offers an irresistible balance of crunch, juiciness, and bold flavors. This iconic dish traces its roots to the Sukhothai Kingdom era, and it remains a cherished staple in Thai households and restaurants worldwide. The key lies in thorough marination, which infuses the chicken with a perfect blend of fish sauce, garlic, and spices. Proper frying technique is crucial, ensuring a crispy outer layer while preserving the juicy interior. Pair Gai Tod with sticky rice, tangy dipping sauce, and fresh herbs for an authentic Thai dining experience. If you're eager to explore the secrets behind this culinary delight, keep reading for a deeper dive into the world of Gai Tod.
Key Takeaways
- Gai Tod, or Thai Fried Chicken, is a beloved staple dish in Thai cuisine, originating from the Sukhothai Kingdom era with regional variations.
- The dish is characterized by a perfect balance of crunch, juiciness, and bold Thai flavors, achieved through thorough marination and proper frying techniques.
- Marination in seasoned buttermilk is essential for flavor infusion and tenderness, with longer marination yielding better results.
- Maintaining the correct oil temperature during frying is crucial for achieving the desired crispy texture, while a seasoned flour coating further enhances the crispiness.
- Gai Tod is often served with sticky rice, zesty dipping sauces, and garnished with fresh herbs like cilantro or Thai basil, reflecting the traditional Thai street food culture.
History
Originating in Thailand, Gai Tod, or fried chicken, has a rich history that dates back centuries. The dish's origins can be traced to the era of the Sukhothai Kingdom, when it was a popular street food.
As Thai cuisine evolved, Gai Tod became a beloved staple, with each region developing its unique recipes and preparation methods.
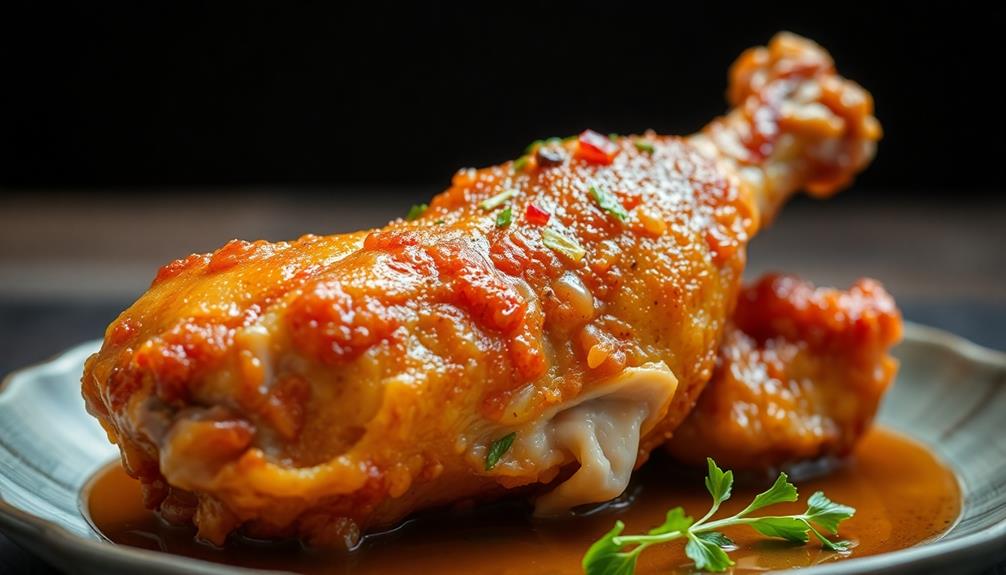
The core of Gai Tod is, of course, the chicken. Traditionally, Thai cooks used free-range birds, which lent a heartier flavor to the dish. The chicken is marinated in a blend of spices, garlic, and fish sauce, then coated in a light, crispy batter before being fried to golden perfection.
This time-honored process results in a mouthwatering combination of juicy meat and crunchy skin that has captivated Thai food enthusiasts for generations.
Gai Tod's popularity has endured, and today, it remains a beloved staple in Thai households and restaurants around the world.
Whether enjoyed as a snack, a main course, or a shared plate, this iconic fried chicken dish continues to delight and inspire culinary adventurers.
Recipe
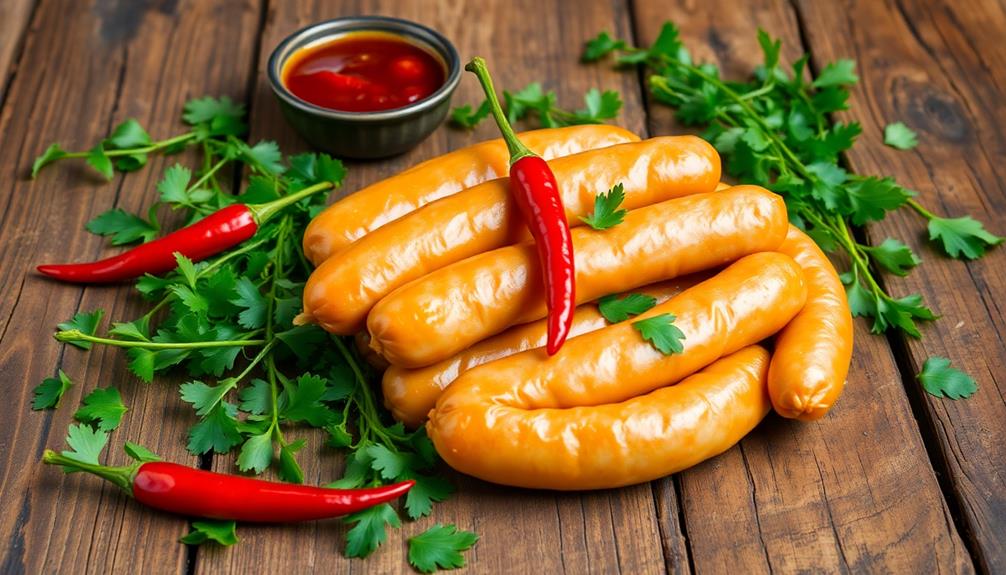
Gai Tod, or Thai Fried Chicken, is a beloved street food in Thailand. This crispy, juicy dish is a perfect balance of savory, sweet, and salty flavors. Originating from the Isaan region, Gai Tod has become a staple in Thai cuisine, often served as a snack or accompaniment to sticky rice. In Thailand, Gai Tod is typically marinated in a mixture of garlic, coriander root, and black pepper before being deep fried to perfection. Many street vendors also offer a variation of Gai Tod served with a side of spicy dipping sauce or pickled vegetables. Another popular way to enjoy Gai Tod is to pair it with a traditional Thai chicken sausage recipe, creating a flavorful and satisfying meal.
The key to authentic Gai Tod lies in the marinade, which infuses the chicken with a blend of aromatic spices and herbs. The fried chicken is then served with a tangy dipping sauce, making it a truly irresistible treat.
- 1 lb (450g) chicken thighs or drumsticks, cut into bite-sized pieces
- 2 cloves garlic, minced
- 1 tablespoon fish sauce
- 1 tablespoon lime juice
- 1 teaspoon sugar
- 1 teaspoon ground coriander
- 1/2 teaspoon ground cumin
- 1/2 teaspoon white pepper
- 1/4 cup all-purpose flour
- Vegetable oil for frying
In a large bowl, combine the chicken pieces, garlic, fish sauce, lime juice, sugar, coriander, cumin, and white pepper. Mix well and let marinate for at least 30 minutes.
Heat the vegetable oil in a deep fryer or heavy-bottomed pan to 350°F (175°C). Dredge the marinated chicken in the all-purpose flour, shaking off any excess. Fry the chicken in batches until golden brown and cooked through, about 5-7 minutes per batch. Drain the fried chicken on a paper towel-lined plate.
For the best Gai Tod, serve the fried chicken immediately while it's hot and crispy. The dish is often accompanied by a tangy dipping sauce made with fish sauce, lime juice, and chopped chilies. Enjoy this authentic Thai street food as a delicious snack or side dish.
Cooking Steps
First, let's marinate the chicken in a seasoned buttermilk mixture.
Then, dredge the chicken in a flavorful flour coating.
Next, fry the chicken in hot oil until golden brown.
Remember to let the chicken rest for a bit before serving, and don't forget to garnish with fresh herbs for a lovely finishing touch.
Step 1. Marinate Chicken in Seasoned Buttermilk

Marinating the chicken in a seasoned buttermilk mixture is a crucial step in ensuring the meat remains tender and flavorful throughout the cooking process.
Start by combining buttermilk, garlic, paprika, salt, and pepper in a large bowl or resealable bag. Add the chicken pieces and make sure they're fully coated in the marinade.
Cover the bowl or seal the bag and refrigerate for at least 30 minutes, or up to 24 hours. The longer the chicken marinates, the more tender and flavorful it will be.
When you're ready to fry, remove the chicken from the marinade, allowing any excess to drip off. This seasoned buttermilk mixture helps the chicken develop a delicious crust while keeping the interior juicy and moist.
Don't skip this step – it's the key to achieving the perfect Gai Tod!
Step 2. Dredge Chicken in Seasoned Flour

After marinading the chicken, it's time to prepare it for frying. Grab a shallow dish and pour in your seasoned flour mixture.
You'll want to use a combination of all-purpose flour, garlic powder, paprika, salt, and pepper. Dip each piece of chicken into the flour, making sure to fully coat all sides.
Gently shake off any excess before placing the chicken on a clean plate or baking sheet. This coating will give the fried chicken its delicious crispy texture. Be gentle when handling the chicken to prevent the breading from falling off.
Once all the pieces are coated, you're ready to start frying. Heat up your oil to the perfect temperature and get ready to transform that marinated chicken into golden-brown perfection.
The seasoned flour will create an irresistible crust that seals in all the juicy, flavorful goodness from the buttermilk marinade. Get ready for the most incredible Thai fried chicken you've ever tasted!
Step 3. Fry Chicken in Hot Oil

Once the chicken is coated in the seasoned flour, it's time to transform it into golden-brown perfection.
You'll need a heavy-duty pan or pot and about 2-3 inches of high-heat oil, like vegetable or peanut oil. Bring the oil to 350°F, keeping a close eye on the temperature.
Gently lower the coated chicken pieces into the hot oil, being careful not to overcrowd the pan. Fry for 3-5 minutes per side, flipping carefully with tongs, until the chicken is crispy and golden brown. The internal temperature should reach 165°F.
Drain the fried chicken on a wire rack or paper towel-lined plate to allow excess oil to drip off. This ensures an extra crispy texture.
Adjust the heat as needed to maintain the oil temperature and prevent the chicken from burning. Fry the chicken in batches if needed to keep the oil at the right temperature.
With these simple steps, you'll have mouthwatering Thai fried chicken ready to enjoy.
Step 4. Let Chicken Rest Before Serving

Letting the fried chicken rest for a few minutes before serving is a crucial final step. This resting period allows the juices to redistribute evenly throughout the meat, ensuring each bite is bursting with flavor and texture.
Don't be tempted to dig in right away – patience is key! Transfer the crispy, golden-brown chicken pieces to a wire rack or paper-towel-lined plate, leaving a bit of space between them. This allows any excess oil to drain off, preventing a greasy, heavy mouthfeel.
As the chicken rests, the crust will set, locking in all that delicious crispiness. After 5-7 minutes, your fried chicken is ready to serve. The wait will be worth it – each morsel will be perfectly cooked, with a satisfying crunch on the outside and juicy, tender meat within.
Serve immediately for maximum enjoyment, garnished with fresh herbs or a zesty dipping sauce if desired. The resting period is the final touch that elevates your homemade Gai Tod to restaurant-quality perfection.
Step 5. Garnish With Fresh Herbs

A few fresh herbs can lend a vibrant, aromatic finish to your crispy fried Gai Tod. Chopped cilantro and Thai basil make a classic garnish, adding a lovely pop of color and a burst of herbal flavor.
Simply scatter a generous handful over the top of your piping hot chicken. You can also try mint, chives, or even sliced green onions for a varied, fragrant presentation.
For maximum freshness, wait until the very last minute to garnish your dish. The herbs' bright green hues and delicate flavors will contrast beautifully with the golden, crunchy chicken.
Gently toss the garnishes just before serving to evenly distribute them. Encourage your guests to inhale the aromatic scents and layer the fresh herbs atop each bite for an authentic Thai eating experience.
With this simple finishing touch, your Gai Tod will be truly restaurant-worthy.
Final Thoughts
As you consider your final thoughts on Gai Tod, it's important to reflect on the key takeaways from this culinary exploration.
The hallmark of exceptional Gai Tod is the perfect balance of crunch, juiciness, and bold Thai flavors. To achieve this, you've learned the importance of marinating the chicken thoroughly and frying at the right temperature.
Don't forget to season generously with fish sauce, garlic, and spices for that authentic Thai taste.
Garnishing with fresh herbs like cilantro, basil, and scallions adds a vibrant finishing touch that brightens the dish.
Serving Gai Tod with sticky rice, papaya salad, or a tangy dipping sauce completes the experience.
With these insights, you're well on your way to mastering this beloved Thai street food classic in your own kitchen.
Savor each bite, and enjoy the satisfying crunch and flavor explosion that make Gai Tod so irresistible.
Frequently Asked Questions
Is Gai Tod Gluten-Free?
Typically, gai tod is not gluten-free as it's often coated in a flour-based batter before frying. However, you can find gluten-free versions that use alternative flours or skip the batter entirely. Just be sure to check the ingredients carefully.
What Type of Oil Is Best for Frying Gai Tod?
For frying, you'll want to use an oil with a high smoke point, like peanut, vegetable, or canola oil. These oils can withstand the high heat required for crispy, golden-brown fried chicken without burning or imparting unwanted flavors.
Can I Bake Gai Tod Instead of Frying?
You can certainly bake gai tod instead of frying it. While the texture won't be exactly the same, baking is a healthier option that can still result in crispy, flavorful chicken. Give it a try and see how you like the outcome.
How Long Does Gai Tod Keep in the Fridge?
Freshly cooked fried chicken can typically last 3-4 days in the refrigerator when stored properly in an airtight container. However, the exact shelf life may vary depending on factors like the cooking method and storage conditions.
Can I Use Chicken Thighs Instead of Breasts for Gai Tod?
Absolutely! You can use chicken thighs instead of breasts for your dish. Thighs are often more flavorful and tender, making them a great alternative. Just adjust the cooking time as needed to ensure they're cooked through.