Connect with us

Street Food Around the World

Jerk Chicken: Jamaica’s Fiery Street Food Delight

You’ll be transported to the vibrant markets of Jamaica with the bold, fiery flavors of jerk chicken, a cultural ambassador showcasing the island’s resilience and creativity.

Published

on

jamaican spicy chicken dish

Jerk chicken, Jamaica's iconic street food delight, will transport you to the vibrant markets of the island with its bold, fiery flavors. This beloved dish's origins trace back to the indigenous Taíno people, who used pimento wood and leaves for smoking meats. Later, African slaves contributed their spice blends, evolving the signature jerk seasoning that now features an irresistible balance of sweet, savory, and sizzling heat. Jerk chicken is a true cultural ambassador, showcasing Jamaica's resilience and creativity through its unique cooking methods and flavor profile. Take a culinary journey to the heart of Jamaican cuisine and discover why this dish is so revered.

Key Takeaways

  1. Jerk chicken is a beloved Jamaican dish with roots tracing back to the indigenous Taíno people and African slaves, showcasing the island's rich culinary heritage.
  2. The unique flavor profile of jerk chicken, featuring a blend of spices like allspice, thyme, and Scotch bonnet peppers, creates a zesty and bold taste experience.
  3. Traditional jerk cooking methods, such as using pimento wood and leaves for smoking, contribute to the dish's signature smoky char and enhance the overall flavor complexity.
  4. Jerk chicken is often enjoyed as a street food, with vendors serving it alongside sides like rice and peas or festival, creating a vibrant and communal dining experience.
  5. The enduring legacy of jerk chicken has led to its global popularity, as the dish continues to influence culinary trends and serve as a cultural ambassador for Jamaican cuisine.

History

Originating in the hills of Jamaica, jerk chicken's history can be traced back to the island's indigenous Taíno people. These early inhabitants used pimento wood and leaves to slowly smoke and season meats, creating a bold, spicy flavor.

Over time, the technique evolved as African slaves brought their own spices and cooking methods to the island. The name "jerk" likely comes from the Quechua word "charqui," meaning dried, salted meat.

As Jamaican cuisine grew, jerk chicken became a beloved staple, often sold by street vendors. The spicy, aromatic dish quickly gained popularity, and today it's considered a national treasure.

From humble beginnings to global fame, jerk chicken's history is a flavorful tale of Jamaica's rich culinary traditions. Whether savored on the streets or in your own kitchen, this fiery delight captures the spirit of the island.

Recipe

Jerk chicken is a beloved dish that originates from the vibrant streets of Jamaica. The term "jerk" refers to the unique spice blend that imbues the meat with a captivating blend of sweet, savory, and fiery flavors. This recipe captures the essence of authentic Jamaican jerk chicken, perfect for bringing a taste of the islands to your own kitchen.

Advertisement

The key to exceptional jerk chicken lies in the marinade. A combination of aromatic spices, herbs, and a touch of sweetness creates a flavor profile that's truly addictive. The chicken is then slow-cooked, allowing the spices to permeate the meat, resulting in a tender, juicy, and intensely flavored dish.

Ingredients:

  • 2 lbs chicken thighs or drumsticks
  • 2 tablespoons jerk seasoning
  • 1 onion, diced
  • 3 cloves garlic, minced
  • 1 scotch bonnet or habanero pepper, seeded and diced
  • 1 tablespoon brown sugar
  • 2 tablespoons soy sauce
  • 1 tablespoon lime juice
  • 1 teaspoon thyme
  • Salt and black pepper to taste

Instructions:

In a large bowl, combine the jerk seasoning, onion, garlic, scotch bonnet pepper, brown sugar, soy sauce, lime juice, and thyme. Add the chicken and toss to coat evenly. Cover and marinate in the refrigerator for at least 30 minutes, or up to 24 hours for maximum flavor.

Preheat your grill or oven to 375°F (190°C). If grilling, arrange the chicken on the grates and cook for 20-25 minutes per side, or until the internal temperature reaches 165°F (75°C). If baking, place the chicken in a baking dish and roast for 35-40 minutes, turning halfway, until fully cooked.

When cooking jerk chicken, it's crucial to keep a close eye on the heat level. The scotch bonnet or habanero pepper adds a fiery kick, so adjust the amount to suit your spice tolerance.

Advertisement

Serve the jerk chicken with your choice of sides, such as rice and peas, plantains, or a refreshing Caribbean slaw, to balance the heat and complete the authentic Jamaican experience.

Cooking Steps

First, you'll want to marinate the chicken in a blend of spices overnight.

Then, grill the chicken over pimento wood to get that authentic Jamaican flavor.

Don't forget to baste the chicken with pimento oil as it cooks.

Serve the jerk chicken with a side of fragrant rice and peas, and garnish with freshly chopped scallions for a vibrant finishing touch.

Advertisement

Step 1. Marinate Chicken in Spices Overnight

overnight chicken spice marinade

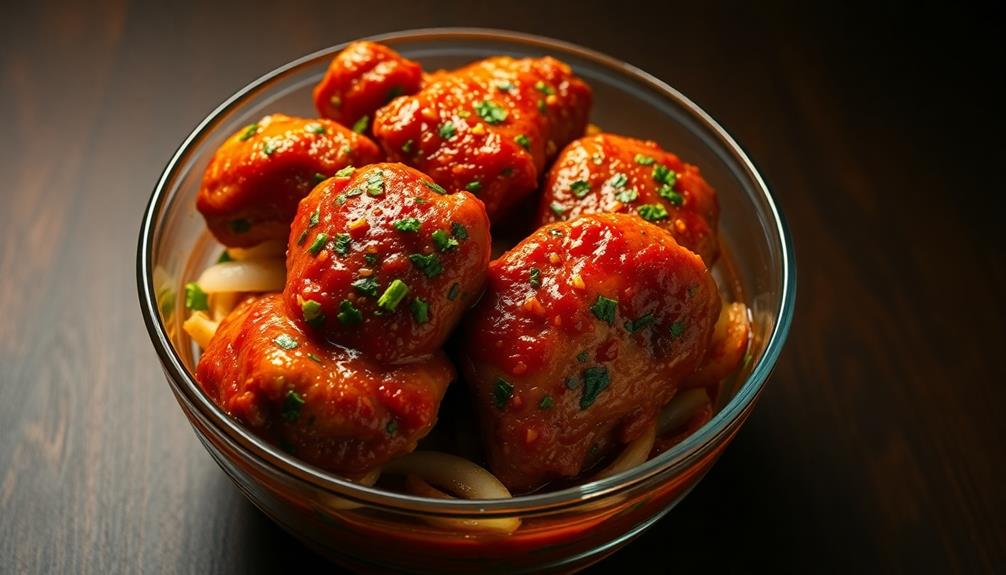
After you've gathered all the necessary ingredients, it's time to prepare the jerk marinade. In a large bowl, combine the allspice, thyme, garlic, brown sugar, and a generous pinch of salt. Give it a good stir to blend the flavors.

Next, add the soy sauce, lime juice, and a few tablespoons of water. Whisk everything together until the marinade is smooth and well-incorporated.

Now it's time for the star of the show – the chicken! Place the chicken pieces in the bowl and use your hands to massage the marinade all over the meat. Make sure every nook and cranny is coated.

Once the chicken is fully covered, cover the bowl with plastic wrap and pop it in the fridge. Let the chicken marinate for at least 8 hours, or even better, overnight. This allows the flavors to really sink in and infuse the chicken with that signature Jamaican jerk taste.

Step 2. Grill Chicken Over Pimento Wood

grill chicken pimento wood

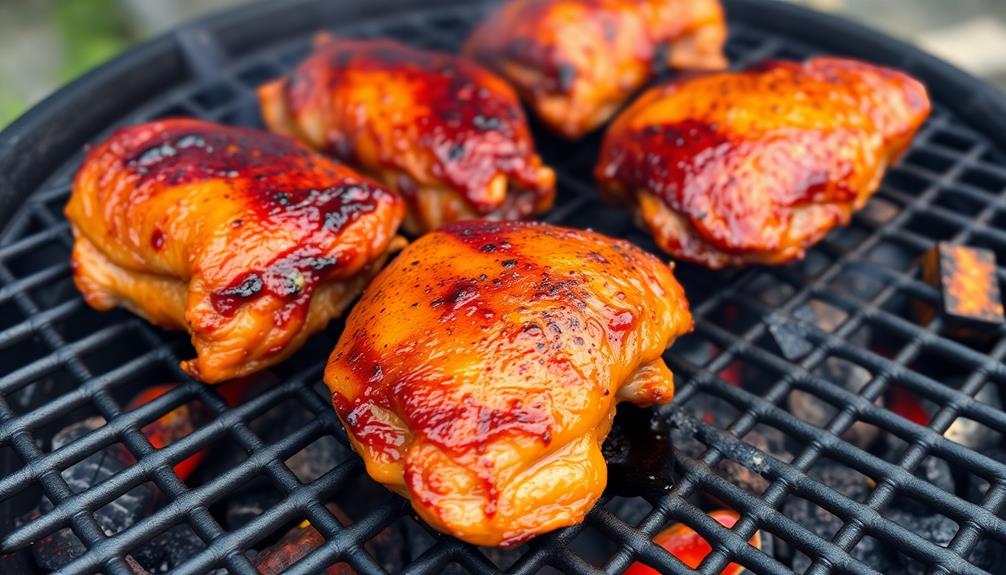
Once the chicken has marinated to perfection, it's time to bring that authentic Jamaican flavor to life on the grill. You'll need some pimento wood, which is also known as allspice wood. This wood is the secret ingredient that gives jerk chicken its signature smoky aroma and taste.

Carefully place the marinated chicken pieces directly over the pimento wood coals, allowing the smoke to infuse the meat.

Keep a close eye on the chicken, turning it occasionally to ensure even cooking. The high heat will create a beautiful char on the outside, locking in all those delicious juices. As the chicken sizzles, the pimento wood smoke will waft through the air, filling your senses with the tantalizing scents of the islands.

Advertisement

Once the chicken is cooked through, with an internal temperature of 165°F, remove it from the grill. Get ready to savor the bold, spicy, and smoky flavors that define authentic Jamaican jerk chicken.

Step 3. Baste Chicken With Pimento Oil

baste chicken pimento oil

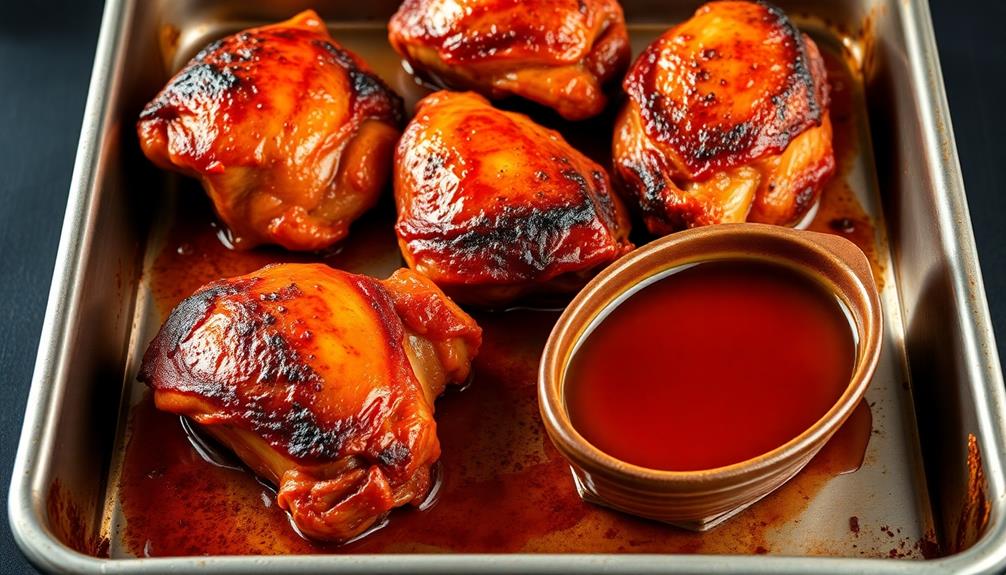
As the chicken sizzles over the pimento wood coals, baste it generously with pimento oil. The warm, aromatic oil will soak into the meat, infusing it with the unique flavor of Jamaica's famous allspice.

Dip a brush into the oil and sweep it across the chicken's skin, ensuring every inch is coated. Watch as the oil glistens on the surface, creating a shiny, golden-brown crust.

Don't be shy with the basting – keep reapplying the oil throughout the cooking process. The more you baste, the more intense the pimento flavor will be. The oil's heat will also help caramelize the chicken, adding a delightful crunch to the outside while keeping the interior juicy and tender.

Be mindful not to over-baste, as too much oil can lead to flare-ups. A light, even coating is all you need to achieve the perfect jerk chicken.

With each brushstroke, you're bringing the vibrant tastes of Jamaica right to your plate.

Advertisement

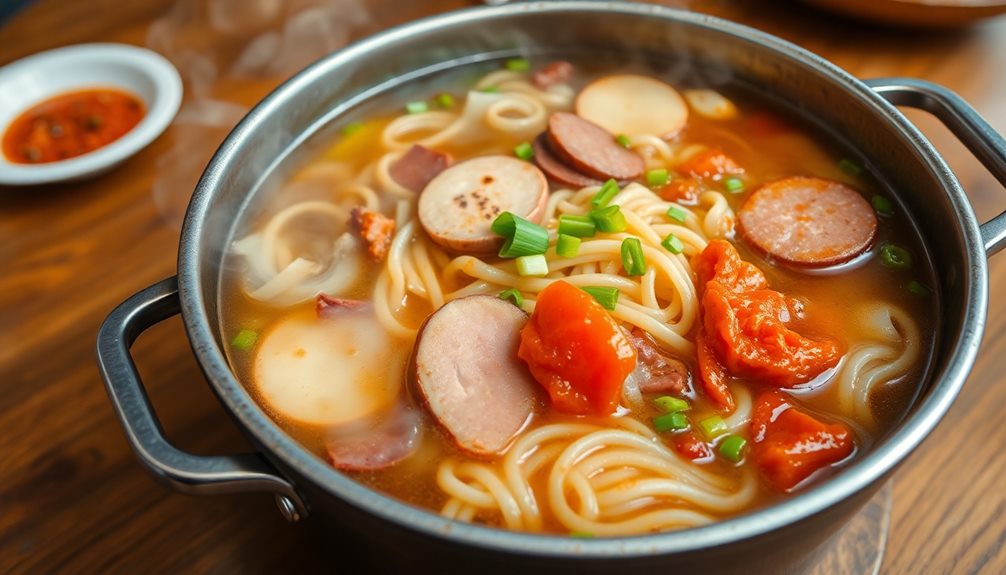
Step 4. Serve Chicken With Rice and Peas

serve chicken with rice

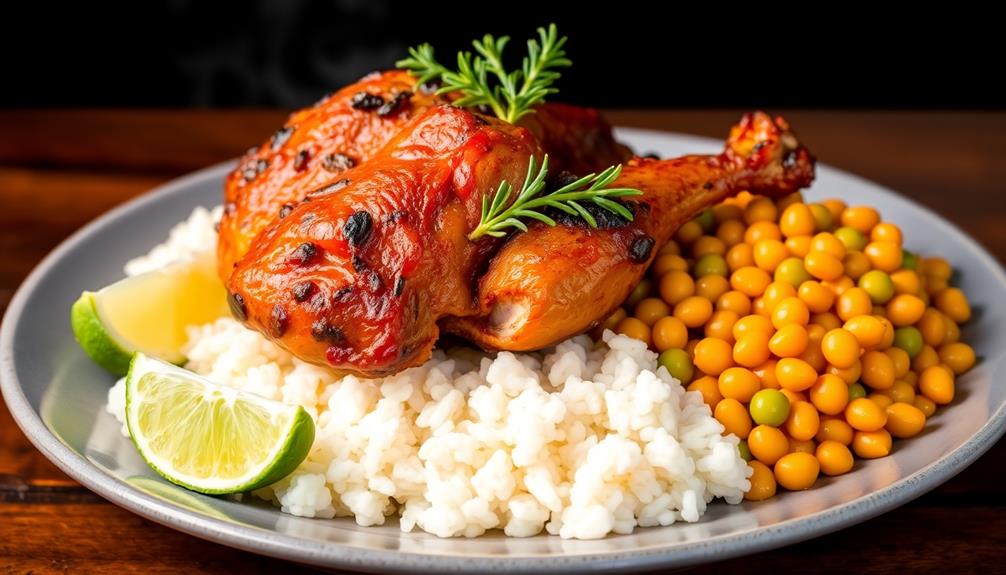
With the jerk chicken perfectly grilled and basted, it's time to round out the meal with a classic Jamaican accompanimentrice and peas. This simple yet satisfying side dish is the perfect complement to the bold, spicy flavors of the chicken.

First, you'll need to cook the rice. Follow the package instructions, adding in the peas towards the end of the cooking time. The peas will become tender and infuse the rice with their earthy sweetness.

Be sure to fluff the rice with a fork when it's done, allowing the grains to separate and create a light, fluffy texture.

Now, it's time to serve. Scoop the fragrant rice and peas onto a plate, then top it with a generous portion of the juicy, seasoned jerk chicken.

The contrast of the tender meat, the fluffy rice, and the pop of the peas creates a harmonious blend of flavors and textures that will have your taste buds dancing. Savor every bite and let the bold Jamaican flavors transport you to the vibrant streets of the island.

Step 5. Garnish With Chopped Scallions

garnish with chopped scallions

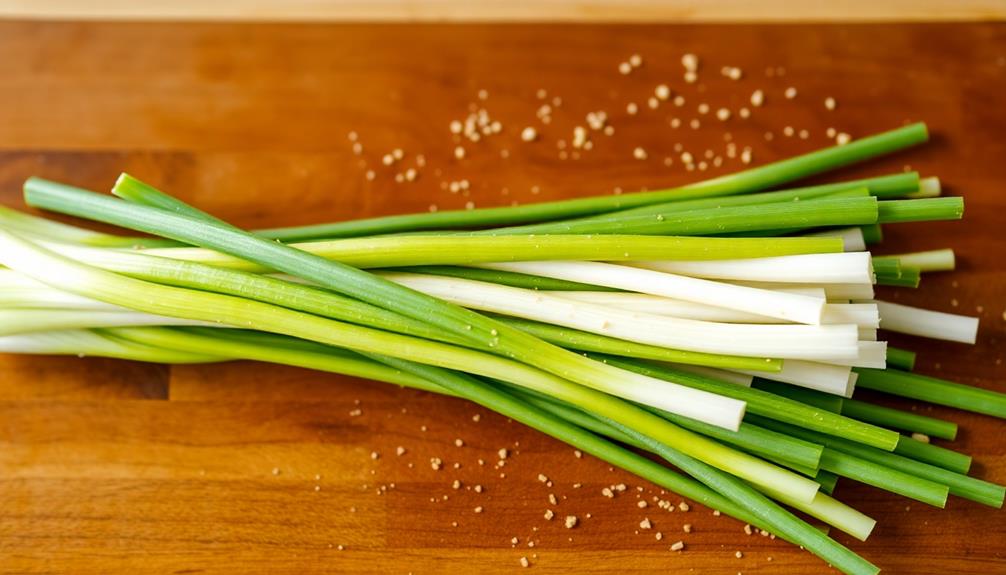
Finally, give the dish an extra pop of color and freshness by sprinkling chopped scallions over the top.

These green onions add a delightful crunch and a hint of onion flavor that perfectly complements the bold, spicy jerk seasoning. Be generous with the scallions, allowing them to cover the chicken in a vibrant green garnish.

Advertisement

The contrast of the soft, tender chicken and the crisp, fresh scallions creates a delightful texture and flavor combination. Plus, the scallions add a beautiful visual appeal, making the dish look even more appetizing.

Don't be shy – pile on those scallions! Their bright, zesty taste will liven up every bite, adding a refreshing touch to balance the heat of the jerk seasoning.

With the scallions in place, your authentic Jamaican jerk chicken is ready to be savored and enjoyed to the fullest.

Final Thoughts

Jerk chicken's enduring popularity is a testament to its irresistible flavor profile and the cultural significance it holds in Jamaica's vibrant food landscape.

As you've discovered, the unique blend of spices, the slow-cooking method, and the smoky char create a truly unforgettable dining experience. Whether you've savored it straight from a roadside stall or recreated it in your own kitchen, jerk chicken's ability to transport you to the heart of Jamaican culture is undeniable.

Advertisement

As you bid farewell to this delectable journey, remember that the essence of jerk chicken extends far beyond the plate. It's a reflection of the island's resilience, creativity, and deep-rooted culinary traditions.

The next time you indulge in a flavorful bite, let it be a reminder of the vibrant spirit and rich history that make Jamaica such a captivating destination. Embrace the fiery flavors, the lively atmosphere, and the endless possibilities that jerk chicken holds for culinary exploration.

Frequently Asked Questions

What Are the Health Benefits of Eating Jerk Chicken?

Eating jerk chicken can provide you with a healthy dose of protein, which is essential for building and repairing tissues in your body. The spices used in the marinade may also offer anti-inflammatory benefits and boost your metabolism.

How Long Can Jerk Chicken Be Stored After Cooking?

After cooking, jerk chicken can be stored for up to 4 days in the refrigerator or 3 months in the freezer. Make sure to let it cool completely before storing and reheat thoroughly before serving.

Can Jerk Chicken Be Made in a Slow Cooker?

You can absolutely make jerk chicken in a slow cooker. The slow cooking method helps the flavors meld and tenderizes the meat, resulting in a delicious and authentic Jamaican-style dish you can enjoy at home.

Advertisement

What Are the Best Side Dishes to Serve With Jerk Chicken?

When serving jerk chicken, you'll want to pair it with tasty side dishes that complement the bold, spicy flavors. Consider sides like rice and peas, roasted sweet potatoes, coleslaw, and plantains to balance out the heat of the jerk seasoning.

How Spicy Is Authentic Jerk Chicken Compared to Other Cuisines?

Authentic jerk chicken is quite spicy, even more so than many other cuisines. You'll likely find it to be hotter than typical Mexican or Indian dishes, with a bold, complex blend of spices that pack a punch.

Advertisement

Street Food Around the World

Gelato vs. Ice Cream: Italy’s Frozen Treat Revolution

Forgo the typical ice cream and dive into the creamy, dense world of gelato – Italy’s frozen treat revolution that’s about to transport you to a realm of cool bliss.

Published

on

italian frozen dessert showdown

Gelato and ice cream may seem similar, but they're a frozen treat revolution in Italy! Gelato has a creamy, dense texture and bold flavors, while ice cream is light and fluffy. Gelato's got less fat and sugar, but both are made with milk, cream, and sugar. The key difference is in how they're churned – gelato's churned slower to keep it dense. Sounds delicious, right? Whether you prefer the rich and indulgent taste of gelato or the classic creamy goodness of ice cream, there's a frozen delight waiting to transport you to a realm of cool bliss. To learn more about the fascinating history and cultural significance of these frozen treats, keep reading!

Key Takeaways

  • Gelato originated in 16th century Italy, while ice cream's history dates back to ancient Asian civilizations and was later introduced to Europe in the 17th century.
  • Gelato has a higher milk-to-cream ratio, resulting in a denser texture and more intense flavor, while ice cream has a higher sugar content and lighter, fluffier texture.
  • The preparation methods differ, with gelato being churned slower to incorporate less air, and ice cream being churned faster to achieve a lighter texture.
  • Gelato typically contains less fat than ice cream, influencing consumer choices based on nutritional awareness and preferences.
  • The competition between gelato and ice cream continues to grow in the dessert market, reflecting evolving consumer preferences and the rise in popularity of artisan gelato shops worldwide.

History

Although gelato and ice cream have long been enjoyed around the world, their histories diverge significantly.

Gelato's origins can be traced back to 16th century Italy, where Florentine architect Bernardo Buontalenti is credited with creating the first true gelato recipe. He served his frozen dessert to the powerful Medici family, who were instantly captivated by its rich, creamy texture.

Meanwhile, ice cream's history can be traced to ancient civilizations in Asia, where they used snow and ice to create frozen treats. It wasn't until the 17th century that ice cream made its way to Europe, where it quickly became a beloved delicacy among the aristocracy.

As time passed, both gelato and ice cream evolved, with each region developing its own unique styles and flavors.

Today, these frozen treats continue to delight taste buds around the globe, each with its own distinct heritage and cultural significance.

Advertisement

Recipe

Gelato and ice cream are both frozen dairy desserts, but they differ in their ingredients, preparation, and texture. Gelato typically has a higher proportion of milk to cream compared to ice cream, resulting in a denser and silkier texture. Additionally, gelato often contains less fat and air than ice cream, making it richer and more intense in flavor.

The process of making gelato also differs from that of ice cream. Gelato is typically churned at a slower speed, which incorporates less air and results in a dense, creamy texture. Ice cream, on the other hand, is churned at a higher speed, incorporating more air and resulting in a lighter, fluffier texture.

Ingredients:

  • 2 cups whole milk
  • 1 cup heavy cream
  • 3/4 cup granulated sugar
  • 1 teaspoon vanilla extract

Instructions:

In a medium saucepan, combine the milk, cream, and sugar. Heat the mixture over medium heat, stirring frequently, until the sugar has dissolved and the mixture is hot but not boiling.

Remove the pan from the heat and stir in the vanilla extract. Allow the mixture to cool to room temperature, then cover and refrigerate for at least 2 hours, or until completely chilled.

Advertisement

Once chilled, pour the mixture into an ice cream maker and churn according to the manufacturer's instructions, usually for 20-30 minutes. Transfer the gelato to a freezer-safe container and freeze for at least 2 hours before serving.

Tips:

For a richer, creamier gelato, you can use an additional 1/2 cup of heavy cream and reduce the milk by 1/2 cup. You can also experiment with adding different flavors, such as chocolate, coffee, or fruit purees, to the base recipe.

When serving, let the gelato sit at room temperature for a few minutes to soften slightly before scooping for the best texture.

Cooking Steps

Now it's time to start churning that frozen dairy mixture!

Advertisement

Slowly add in the cream and fold in the flavorful ingredients.

Step 1. Churn the Frozen Dairy Mixture

churn frozen dairy mixture

Once the ice cream or gelato base has been prepared, it's time to churn the frozen dairy mixture. This is a crucial step in the process, as churning introduces air into the mixture, creating that luscious, creamy texture we all love.

You'll want to use an ice cream maker for this part. As the machine spins, it will gradually freeze the base while simultaneously whipping air into it. This whipping action incorporates tiny air pockets, which give ice cream and gelato their soft, smooth consistency.

The churning usually takes around 20-30 minutes, depending on your machine. You'll know it's done when the mixture has increased in volume and reached a soft, creamy texture.

Once it's reached the desired consistency, you can stop the machine and transfer the frozen dairy treat to a container for further freezing.

Step 2. Add Cream Slowly

gradually incorporate cream carefully

After churning the frozen dairy mixture, you'll want to add the cream slowly. This is a crucial step that helps create the signature silky-smooth texture of gelato. Unlike ice cream, gelato has a higher ratio of milk to cream, which gives it a denser, richer flavor.

As you gently pour in the cream, be sure to incorporate it thoroughly into the mixture. Stir with a wooden spoon or spatula, taking care not to overwork the ingredients. The slow addition of cream helps the gelato develop its luxurious mouthfeel.

Advertisement

Once the cream is fully incorporated, you can continue the freezing process. This gradual approach ensures the gelato maintains its creamy consistency, without becoming overly dense or icy.

The result is a luscious, intensely flavorful frozen treat that melts deliciously on your tongue. With patience and care, you're well on your way to creating an authentic Italian-style gelato.

Step 3. Fold in the Flavoring Ingredients

incorporate flavoring ingredients carefully

Next, you'll want to fold in any flavoring ingredients. This is the fun part where you get to add delicious extras to your gelato or ice cream.

Carefully mix in your chosen ingredients, like chocolate chips, nuts, fruit purees, or extracts. You'll need to gently fold them in to avoid over-mixing and deflating the airy texture you've worked so hard to achieve.

Take your time and be gentle, folding the mixture with a spatula in a figure-eight motion. This helps incorporate the flavors without causing the air bubbles to collapse.

Once the mix-ins are evenly distributed, your gelato or ice cream is ready for the freezer. The flavors will continue to develop as it firms up.

Advertisement

Just be sure not to overfill your container, as the mixture will expand during freezing. Now you can dive in and enjoy your homemade frozen treat!

Step 4. Flavor With Desired Ingredients

add preferred flavor ingredients

Fold in your desired ingredients with a gentle touch to avoid deflating the airy texture you've worked so hard to create.

Whether you're craving a classic vanilla or a daring chocolate-raspberry swirl, the flavors are entirely up to you. Gently fold in your extracts, purees, or crushed nuts until they're evenly dispersed. Be careful not to overmix, as that can lead to an icy, dense texture.

Once your base is perfectly flavored, it's time to freeze. Pour the gelato mixture into your prepared container and place it in the freezer. Stir the mixture every 30 minutes as it freezes to incorporate air and prevent ice crystals from forming. This step is crucial for achieving that signature smooth, creamy texture.

Keep a close eye on the gelato as it freezes, tasting it periodically to ensure the flavor is just right.

When it reaches your desired consistency, transfer the gelato to an airtight container and enjoy your homemade frozen delight!

Advertisement

Step 5. Freeze Until Desired Consistency

freeze to desired consistency

Once your base is perfectly flavored, it's time to freeze. Gelato and ice cream start the same way – with a creamy, custard-like mixture.

But the freezing process is where they really differ. Gelato is churned at a slower speed, incorporating less air, resulting in a denser, silkier texture. On the other hand, ice cream is churned faster, whipping in more air, making it fluffier and lighter.

During freezing, the mixture is constantly stirred to prevent large ice crystals from forming. This gentle churning keeps the texture smooth and creamy.

As the temperature drops, the mixture thickens and transforms into the luscious, frozen treat you know and love. The slower churning of gelato results in a dense, intense flavor, while the quicker churning of ice cream produces a light, airy texture.

Just a few minutes of patience, and your frozen delight is ready to enjoy!

Final Thoughts

In the end, the choice between gelato and ice cream ultimately comes down to personal preference.

Advertisement

Both are delightful frozen treats, but with distinct characteristics that may appeal to different tastes. Gelato is typically richer, denser, and more intensely flavored, while ice cream is lighter and creamier. The key difference lies in the preparation process, as gelato uses less fat and air, resulting in a more concentrated flavor.

Whether you prefer the luxurious mouthfeel of gelato or the classic, indulgent taste of ice cream, there's no wrong answer.

The beauty of these frozen delights is that they can both bring joy and satisfaction, transporting you to a world of cool, creamy bliss.

Frequently Asked Questions

What Is the Difference Between Gelato and Ice Cream in Texture?

You'll notice that gelato has a smoother, silkier texture than ice cream. It's denser and less airy, with less fat and air incorporated into the mixture, creating a richer, more intense flavor.

How Do the Flavors of Gelato and Ice Cream Differ?

You'll find that gelato typically has a more intense and concentrated flavor compared to ice cream. While ice cream can have a richer, creamier taste, gelato often showcases bold, vibrant flavors that truly pop.

Advertisement

Is Gelato a Healthier Option Compared to Ice Cream?

Yes, gelato can be a healthier option compared to ice cream. It typically contains less fat, fewer calories, and often uses natural ingredients. However, both treats should be enjoyed in moderation as part of a balanced diet.

How Does the Serving Size of Gelato Differ From Ice Cream?

You'll typically find that a serving of gelato is smaller than a serving of ice cream. Gelato tends to be denser and richer, so a little goes a long way compared to the lighter, airier consistency of ice cream.

What Are the Popular Gelato Flavors in Italy?

You'll find classic Italian gelato flavors like creamy vanilla, rich chocolate, and fruity favorites like stracciatella, pistachio, and lemon throughout Italy. Artisanal shops often offer unique and seasonal options to tempt your taste buds.

Continue Reading

Street Food Around the World

Exploring the Vibrant World of Mexican Tacos Al Pastor

Wandering the vibrant streets of Mexico, uncover the captivating story and mouthwatering flavors of the beloved taco al pastor, a fusion of Middle Eastern and Mexican culinary traditions.

Published

on

vibrant mexican tacos al pastor

Get ready to embark on a mouthwatering adventure through the vibrant world of Mexican tacos al pastor! These divine creations are a delightful fusion of Middle Eastern and Mexican culinary traditions, with tender, marinated pork, sweet pineapple, and zesty toppings coming together in every bite. You'll be captivated by the story behind this beloved street food and how it's prepared with care, using a unique vertical spit cooking method that infuses the meat with irresistible flavors. Discover the rich cultural significance and the steps to recreate this taste sensation in your own kitchen. Prepare to be swept away by the incredible depth of flavor in these tacos al pastor!

Key Takeaways

Key Points:

  • Tacos al pastor originated from Lebanese immigrants in Mexico, blending Middle Eastern and Mexican culinary traditions to create a unique flavor profile.
  • The dish features marinated pork, grilled on a vertical spit, combined with sweet pineapple, fresh cilantro, and onions for a savory and refreshing experience.
  • The slow-roasting cooking technique on the vertical spit ensures even heat distribution and moisture retention, resulting in tender and flavorful pork.
  • The marinade, made with achiote paste, guajillo chiles, garlic, and spices, infuses the pork with a complex blend of earthy, spicy, and savory notes.
  • Tacos al pastor are deeply rooted in Mexican culture, often enjoyed during celebrations and social gatherings, representing the diverse heritage of Mexican gastronomy.

History

The origins of tacos al pastor can be traced back to Lebanese immigrants who settled in Mexico in the late 19th century. These immigrants brought with them a technique for cooking meat on a vertical spit, known as shawarma.

Mexican cooks adapted this method, using pork instead of lamb, and adding a blend of spices and pineapple to create the unique flavor profile of tacos al pastor.

As the dish gained popularity, street vendors and taqueria owners began perfecting their own versions, experimenting with different marinades and toppings.

Today, tacos al pastor are a beloved staple across Mexico, with each region and even individual establishments putting their own spin on the classic recipe.

Advertisement

The combination of tender, flavorful pork, tangy pineapple, and fresh toppings like onions, cilantro, and lime makes tacos al pastor a true culinary delight that has captured the hearts and taste buds of both locals and visitors alike.

Recipe

Tacos al pastor, a beloved Mexican street food, are a fusion of Middle Eastern and Mexican flavors. The dish originated in central Mexico, where Lebanese immigrants introduced the concept of spit-roasted meat. Over time, the recipe was adapted to use pork and incorporate traditional Mexican spices and ingredients.

At the heart of tacos al pastor are thin slices of marinated pork that are stacked on a vertical spit and slowly cooked, allowing the fat to render and the meat to caramelize. The pork is then shaved off the spit, chopped, and served in warm tortillas, often topped with diced pineapple, onion, and cilantro.

  • 2 lbs boneless pork shoulder, cut into thin strips
  • 1 pineapple, peeled, cored, and cut into rings
  • 1 white onion, diced
  • 1 bunch of cilantro, chopped
  • 12-16 small corn tortillas
  • Marinade:
  • 4 guajillo chiles, seeded and stems removed
  • 4 achiote (annatto) seeds
  • 4 garlic cloves
  • 1 tbsp ground cumin
  • 1 tsp dried oregano
  • 1 tsp black pepper
  • 1/4 cup pineapple juice
  • 2 tbsp apple cider vinegar
  • 1 tbsp olive oil
  • 1 tsp salt

Begin by making the marinade. In a blender, puree the guajillo chiles, achiote seeds, garlic, cumin, oregano, black pepper, pineapple juice, vinegar, and olive oil until smooth. Add salt and mix well.

Place the pork strips in a large resealable bag or bowl, pour the marinade over the pork, and marinate for at least 2 hours, or up to 24 hours in the refrigerator.

When ready to cook, preheat a grill or grill pan to medium-high heat. Grill the pineapple rings until lightly charred on both sides, about 3-4 minutes per side. Remove from heat and dice the pineapple.

Advertisement

Grill the marinated pork in batches until cooked through and slightly charred, about 5-7 minutes per batch. Chop the grilled pork into small pieces.

To serve, warm the tortillas and top with the chopped pork, diced pineapple, onion, and cilantro. Enjoy these authentic and flavorful tacos al pastor.

Cooking Steps

First, you'll marinate the pork in a blend of spices overnight to infuse it with bold flavor.

Next, stack the pork slices vertically on a spit, then carefully slice the meat into thin strips.

Lastly, slowly cook the meat on the vertical spit, topping it off with fresh pineapple and fragrant cilantro.

Advertisement

Step 1. Marinate Pork With Spices Overnight

marinate pork with spices

To begin, marinate the pork in the spice mixture overnight.

You'll need a large resealable bag or a shallow dish. In the bag or dish, combine the pork, achiote paste, garlic, oregano, cumin, cloves, cinnamon, and a pinch of salt and pepper.

Seal the bag or cover the dish, then pop it in the fridge for at least 6 hours, or up to 24 hours.

The longer the pork marinates, the more flavorful it'll be. The spices will infuse the meat, giving it that classic al pastor taste.

Just make sure to give the bag or dish a gentle shake or stir occasionally, so the pork absorbs all the tasty seasonings.

When you're ready to cook, remove the marinated pork from the fridge.

Advertisement

It's now bursting with Mexican flavors, ready to be grilled or roasted to perfection.

Get excited – the tacos are just a few steps away!

Step 2. Stack Pork Slices Vertically

vertical pork slice stacking

With the pork marinated and ready to go, it's time to stack the slices vertically. You'll need a vertical spit or rotisserie to create the authentic al pastor look and flavor.

Carefully arrange the pork slices, stacking them one on top of the other, making sure to pack them tightly together. This vertical stack will allow the meat to cook evenly and develop that signature cone-like shape.

As the pork cooks, the fat will render and drip down, basting the layers below. This self-basting process infuses the meat with irresistible flavors.

Don't forget to add the pineapple wedges to the top of the stack – they'll caramelize and add a delightful sweetness that complements the savory pork.

Advertisement

With the pork sizzling away, you'll soon have an impressive, towering creation that's ready to be sliced into those perfect little al pastor tacos.

Get ready for the mouthwatering aroma to fill your kitchen!

Step 3. Slice Pork Into Thin Strips

slice pork into strips

After the pork has roasted to perfection on the vertical spit, it's time to start slicing it into the thin strips that are characteristic of al pastor tacos.

Use a sharp knife to carefully slice the pork into long, thin strips. You'll want to slice it against the grain, which means cutting perpendicular to the muscle fibers. This will create tender, juicy strips that are perfect for your tacos.

As you slice, pay close attention to the thickness – you're aiming for pieces that are just a few millimeters wide. This will ensure that the pork cooks quickly and absorbs all the wonderful flavors from the marinade.

Once you've sliced the entire slab of pork, you can transfer the strips to a clean bowl or platter, ready to be added to your tacos.

Advertisement

Get excited, because these flavorful pork strips are going to take your al pastor tacos to the next level!

Step 4. Slowly Cook Meat on Vertical Spit

cook meat on spit

Carefully lower the prepared pork slab onto the vertical spit. This unique cooking method is what makes tacos al pastor so special. As the spit slowly rotates, the meat cooks evenly, developing a crispy outer layer and juicy interior. The process takes time, but the results are worth it.

Keep a close eye as the pork sizzles and caramelizes. Occasionally, use a long fork to gently baste the meat with the flavorful drippings. This bastes the pork, ensuring it stays moist and infuses the meat with the blend of seasonings.

As the hours pass, the exterior takes on a deep reddish-brown hue, signaling the pork is ready.

Using a sharp carving knife, carefully shave thin slices directly off the rotating spit. The tender pork is now perfectly cooked and bursting with the signature flavors of tacos al pastor.

Step 5. Garnish With Pineapple and Cilantro

garnish with pineapple cilantro

Top the warm taco filling with fresh pineapple chunks. Their sweet, juicy flavor pairs perfectly with the savory meat and spices. Gently press the pineapple pieces into the filling, allowing them to soak up all the delicious flavors.

Next, sprinkle on a generous amount of chopped cilantro. Its bright, herbal notes cut through the richness of the dish, creating a wonderful balance of tastes.

Advertisement

The pineapple and cilantro garnish doesn't just look amazing – it also adds a fantastic textural element. The soft, tender pineapple contrasts with the crisp taco shell, while the fresh cilantro leaves provide a satisfying crunch in every bite.

Be sure to top each taco with a good amount of the garnishes. The pineapple and cilantro should be an integral part of the dish, not just an afterthought.

Take a moment to admire the vibrant colors and mouthwatering aromas before taking your first delicious bite.

Final Thoughts

Ultimately, tacos al pastor are a beloved Mexican dish that encapsulate the vibrant flavors and rich cultural heritage of the region. The combination of tender, marinated pork, fragrant spices, and the sweet touch of pineapple creates a harmonious blend that tantalizes the taste buds.

What truly sets these tacos apart is the unique cooking method, where the meat is slow-roasted on a vertical spit, known as a trompo, allowing the flavors to meld together in a mesmerizing dance.

Advertisement

As you savor each bite, you're transported to the lively streets of Mexico, where the sizzle of the trompo and the laughter of the locals create a sense of community and culinary tradition.

Tacos al pastor aren't just a meal; they're a cultural experience, a testament to the ingenuity and passion of Mexican cuisine. Whether you're enjoying them on a bustling city street or in the comfort of your own home, these tacos will undoubtedly leave a lasting impression, inviting you to explore the vibrant world of Mexican gastronomy time and time again.

Frequently Asked Questions

What Is the Significance of the Pineapple in Tacos Al Pastor?

The pineapple in tacos al pastor adds a sweet and tangy contrast to the savory marinated pork. It's an essential element, providing a delightful balance of flavors that makes this Mexican dish so mouthwatering and unique.

Can Vegetarians Enjoy Tacos Al Pastor?

As a vegetarian, you can't traditionally enjoy tacos al pastor since they're made with marinated pork. However, you can find veggie-friendly versions that substitute the pork with soy, mushrooms, or other plant-based proteins to satisfy your taco cravings.

How Do I Find the Best Tacos Al Pastor in Mexico City?

To find the best tacos al pastor in Mexico City, ask locals for recommendations, look for places with a spit of marinated pork, and be open to trying different spots until you discover your favorite.

Advertisement

Can I Make Tacos Al Pastor at Home Without a Rotisserie?

You can definitely make tasty tacos al pastor at home without a rotisserie. Use thin pork slices, marinate them in a flavorful achiote-based sauce, and pan-fry or broil the meat. Get creative with toppings for an authentic homemade taco experience.

What Drinks Pair Well With Tacos Al Pastor?

You can't go wrong with a cold beer or a refreshing margarita when enjoying tacos al pastor. The sweetness and spiciness of the dish pairs perfectly with the acidity and bite of these classic Mexican drinks.

Continue Reading

Street Food Around the World

Currywurst: Germany’s Spicy Street Food Staple

Bite into the bold, savory flavors of currywurst, Germany’s iconic street food that’s captivated taste buds for generations – and discover why this spicy culinary delight is a must-try experience.

Published

on

germany s iconic spicy sausage

Dive into the vibrant world of currywurst, Germany's beloved spicy street food that's captivated taste buds for generations! This iconic dish was born from the resourcefulness of post-war Berliners, blending savory grilled sausage with tangy, curry-infused ketchup. It's a national treasure that balances spicy, sweet, and savory flavors in every bite. Whether you enjoy it straight from a bustling market stall or in a cozy cafe, currywurst is a must-try experience that celebrates Germany's rich culinary heritage. And if you want to learn more about this beloved dish, there's a lot more to explore.

Key Takeaways

  • Currywurst is a beloved German street food that originated in post-World War II Berlin, combining grilled sausage with a savory, curry-flavored ketchup.
  • The dish represents a fusion of flavors and culinary creativity, reflecting the resourcefulness and resilience of the German people during the post-war period.
  • Currywurst has become a cultural icon, celebrated in festivals and food events, and frequently depicted in German media, symbolizing the country's rich culinary traditions.
  • The recipe features a simple yet flavorful combination of ingredients, including bratwurst, ketchup, Worcestershire sauce, and curry powder, which can be customized to individual tastes.
  • Currywurst is enjoyed across Germany in various settings, from lively street markets to cozy cafes, and has gained national pride as a must-try culinary experience for locals and visitors alike.

History

According to culinary historians, the origins of currywurst can be traced back to the post-World War II era in Germany. During this time, resourceful Berliners were looking for ways to stretch their food supplies and satisfy their hunger.

One enterprising sausage vendor, Herta Heuwer, began experimenting with ketchup, Worcestershire sauce, and curry powder – creating a unique and flavorful topping for grilled sausages.

The dish quickly gained popularity among the city's residents, who appreciated its bold taste and affordable price. As word of the tasty currywurst spread, it became a beloved street food staple across Germany.

Today, it remains a cultural icon, with countless currywurst stands and restaurants serving up this spicy, saucy delight. Whether enjoying it as a quick snack or sharing it with friends, the history and tradition of currywurst continue to captivate and satisfy Germans and visitors alike.

Recipe

Currywurst is a beloved street food that originated in Germany and has become a cultural icon. It consists of a grilled or fried pork sausage that's sliced and served with a curry-flavored ketchup-based sauce, often garnished with curry powder.

Advertisement

The key to a delicious currywurst is the balance of flavors between the savory sausage, the tangy sauce, and the warm spices. Traditionally, the sausage is cooked until it's crispy on the outside and juicy on the inside, providing a satisfying texture.

Ingredients:

  • 4 bratwurst or other pork sausages
  • 1 cup ketchup
  • 2 tablespoons Worcestershire sauce
  • 1 tablespoon curry powder
  • 1 teaspoon paprika
  • 1/2 teaspoon ground cumin
  • 1/4 teaspoon cayenne pepper
  • Salt and black pepper to taste

Cooking Instructions:

Grill or pan-fry the sausages until they're cooked through and lightly charred on the outside. Slice the sausages into 1-inch pieces.

In a small saucepan, combine the ketchup, Worcestershire sauce, curry powder, paprika, cumin, and cayenne pepper. Warm the sauce over medium heat, stirring occasionally, until heated through. Season with salt and black pepper to taste.

Serve the sausage slices with the curry sauce, and garnish with additional curry powder if desired.

Advertisement

Tips:

To achieve the signature crispy exterior on the sausages, make sure to cook them over high heat or on a hot grill.

For a smokier flavor, you can also grill the sausages over charcoal. Adjust the spice level of the sauce to your preference by adding more or less cayenne pepper.

Serve the currywurst with traditional accompaniments like fries or a fresh salad for a complete and satisfying meal.

Cooking Steps

Slice the sausage into bite-sized pieces.

Advertisement

Add the curry ketchup mixture and let it simmer until heated through.

Garnish the dish with chopped onions and serve it warm with some delicious bread.

Step 1. Slice Sausage Into Bite-Sized Pieces

slice sausage into pieces

Once the sausages have been grilled to perfection, it's time to slice them into bite-sized pieces. Using a sharp knife, carefully cut the currywurst into smaller chunks, about 1-inch in size. This'll make the sausage easier to eat and enjoy while you're out on the street or at a festival.

Take your time and be gentle – you don't want to squish the sausage or make a mess. Run the knife through the casing and through the spiced, juicy meat inside. The key is to create uniform pieces that'll soak up all that delicious curry sauce when you pour it on top.

Once you've sliced the entire sausage, you're ready for the next step: dressing it up with the signature currywurst toppings! A sprinkle of curry powder, a drizzle of ketchup, and a squirt of mustard will transform these simple sausage bites into an authentic German street food classic.

Step 2. Add Curry Ketchup Mixture

incorporate curry ketchup blend

The curry-ketchup mixture is the star of the show. It's what gives currywurst its signature flavor and spice. First, you'll need to grab a mixing bowl and combine the ketchup, curry powder, and a splash of vinegar. Stir everything together until it's well-blended. The curry powder adds a warm, earthy kick, while the vinegar gives it a tangy note.

Once your sauce is ready, it's time to drizzle it over the bite-sized sausage pieces. Don't be shy – you want to coat them generously! The savory sausage and the lively curry-ketchup create a mouthwatering combination.

Advertisement

As you take your first bite, you'll be hit with the bold, aromatic flavors. It's a symphony of sweet, spicy, and savory that'll have your taste buds doing a happy dance.

The key is to strike the right balance between the sausage and the sauce. You want each component to shine. With a little practice, you'll be whipping up restaurant-quality currywurst in no time!

Step 3. Simmer Mixture Until Heated Through

simmer mixture until heated

After blending the curry-ketchup mixture, let's simmer it over medium heat until it's heated through, about 2-3 minutes.

You'll want to keep a close eye on it, stirring occasionally to prevent it from burning. As the mixture heats up, you'll start to smell the aromatic blend of spices and tangy tomato. This is where the magic happens! The simmering process allows the flavors to meld together, creating a rich and flavorful base for your currywurst.

Once the mixture is heated through, it's ready to serve. You can ladle it over your grilled sausages, making sure to cover them evenly.

The warm, spicy sauce will soak into the sausages, infusing them with a delightful depth of flavor. Get ready to experience the true essence of currywurst – a harmonious balance of savory, tangy, and just the right amount of heat.

Advertisement

This simple step brings the dish together, making it a genuine taste of Germany's beloved street food.

Step 4. Garnish With Chopped Onions

garnish with chopped onions

As the sausages and curry-ketchup mixture are ready, you'll want to add a final touch of flavor and texture. Grab a sharp knife and carefully dice up a small onion.

Don't worry about making the pieces perfectly uniform – a little variation in size will add visual interest. Sprinkle the chopped onions generously over the top of your piping hot currywurst.

The raw onion slices will provide a cool, crunchy contrast to the warm, savory sausage and rich, spicy sauce. The onion's sharp flavor will also help to cut through the richness, keeping the dish balanced and refreshing.

Feel free to use as much or as little onion as you prefer, depending on your personal taste. Just be sure to distribute the onion pieces evenly so that each bite gets a little crunch and zing.

With the onions in place, your currywurst is now complete and ready to enjoy as an authentic German street food experience.

Advertisement

Step 5. Serve Warm With Bread

serve warm with bread

Serve the warm currywurst immediately, as it's best enjoyed piping hot. Place the sausage on a plate and drizzle the tangy, spicy curry sauce over the top. Don't be shy – smother that sausage in the delicious sauce!

Pair the currywurst with a fresh, crusty roll or slice of bread. The bread is perfect for soaking up every last drop of that savory sauce.

For the full currywurst experience, sprinkle some chopped onions over the top. The crunchy onions add a lovely contrast to the soft sausage. Currywurst is commonly served with a side of fries or potato salad, but the bread is the true star – it's an essential part of this iconic German street food.

Take your first bite and let the flavors explode in your mouth. The tender sausage, bold curry sauce, and hearty bread create a symphony of taste that will have you craving more. Enjoy every last bite of this beloved German specialty.

Final Thoughts

Currywurst has undoubtedly cemented its place as a beloved German street food icon. From its humble beginnings as a quick and tasty snack, it has grown to become a source of national pride, representing the country's vibrant culinary scene.

Whether you're a local or a visitor, indulging in a steaming plate of currywurst is a must-do experience. As you savor each bite, the perfect balance of spicy, tangy, and savory flavors will ignite your taste buds, leaving you craving more.

Advertisement

The versatility of currywurst allows it to be enjoyed in a variety of settings, from lively street markets to cozy cafes. It's a dish that brings people together, creating a sense of community and shared enjoyment.

Beyond its delicious taste, currywurst also holds a special place in German culture, serving as a symbol of the country's rich history and traditions. As you explore the winding streets and bustling neighborhoods, the aroma of freshly grilled currywurst will beckon you, inviting you to join in the celebration of this beloved culinary treasure.

Frequently Asked Questions

Is Currywurst a Healthy Option for a Meal?

Currywurst isn't the healthiest meal option. It's high in fat, sodium, and calories from the sausage and sauce. While tasty, it's better enjoyed in moderation as an occasional treat rather than a regular part of your diet.

Can I Find Currywurst at Restaurants Outside of Germany?

You can find currywurst at restaurants outside of Germany, though it may not be as widely available. Many European cities and some international locations have adopted this popular German street food dish.

How Long Does It Take to Prepare Currywurst at Home?

It shouldn't take you more than 20-30 minutes to prepare currywurst at home. The key steps are slicing the sausage, making the curry-tomato sauce, and assembling the dish with your desired toppings. With a little practice, you can whip up this tasty snack quickly.

Advertisement

What Are Some Popular Toppings or Accompaniments for Currywurst?

For currywurst, you can top it with popular toppings like sauerkraut, onions, and cheese. Common accompaniments include french fries, bread rolls, or a side salad to complement the savory and spicy flavors of this German street food classic.

Are There Any Vegetarian or Vegan Versions of Currywurst?

You can find vegetarian and vegan versions of currywurst. These meatless options often use soy-based "sausages" or mushrooms to recreate the signature flavor. They're a great way to enjoy this German street food favorite without the meat.

Continue Reading

Affiliate Disclaimer
As an affiliate, we may earn a commission from qualifying purchases. We get commissions for purchases made through links on this website from Amazon and other third parties.

Advertisement

Vetted

top local car washes top local car washes
Vetted2 months ago

14 Best Car Washes Near You for a Sparkling Clean Ride

I discovered the 14 best car washes near you that promise a sparkling clean ride, and you won't want to...

top mops for 2024 top mops for 2024
Vetted2 months ago

The 15 Best Mops of 2025 – Your Ultimate Guide to a Spotless Home

Find the perfect mop for your cleaning needs in 2025, and discover how these top choices can revolutionize your home...

top women s fragrances 2024 top women s fragrances 2024
Vetted2 months ago

15 Best Perfumes for Women in 2025 – A Fragrance Guide You Can’t Miss

Keen to discover the top 15 perfumes for women in 2025? Uncover unique scents that will elevate your fragrance game!

top local bars guide top local bars guide
Vetted2 months ago

14 Best Bars Near You for an Unforgettable Night Out

Looking for the perfect bar to elevate your night out? Discover the 14 best spots that promise unforgettable experiences!

luxurious beard oil selection luxurious beard oil selection
Vetted2 months ago

15 Best Beard Oils for a Luxurious Grooming Experience in 2025

Shop the 15 best beard oils for a luxurious grooming experience in 2025 and discover which ones will elevate your...

top college laptops 2024 top college laptops 2024
Vetted2 months ago

15 Best College Laptops of 2025: The Ultimate Guide for Students

With our guide to the 15 best college laptops of 2025, discover which powerful models will elevate your academic experience...

waterproof mascaras for tears waterproof mascaras for tears
Vetted2 months ago

15 Best Waterproof Mascaras That Will Survive Any Tear-Jerker

Outstanding waterproof mascaras await to keep your lashes flawless through any emotional moment; discover which ones made the top 15...

top flavorful disposable vapes top flavorful disposable vapes
Vetted2 months ago

15 Best Disposable Vapes of 2025: Top Picks for Flavor and Convenience

Prepare to discover the 15 best disposable vapes of 2025 that blend exceptional flavor and convenience, but which ones truly...

refreshing lunch salad ideas refreshing lunch salad ideas
Vetted2 months ago

15 Best Salads Near You That Will Freshen Up Your Lunch Routine

Transform your lunch with the 15 best salads nearby that will tantalize your taste buds and leave you craving more...

top convertible car seats top convertible car seats
Vetted2 months ago

15 Best Convertible Car Seats of 2025 – Safety and Comfort for Your Little One

Get ready to discover the top 15 convertible car seats of 2025 that blend safety and comfort—find out which models...

delicious fast food breakfast delicious fast food breakfast
Vetted2 months ago

15 Best Fast Food Breakfast Options That Will Make Your Mornings Delicious

Uncover the 15 best fast food breakfast options that will transform your mornings into a delicious experience you won't want...

stylish contacts for vision stylish contacts for vision
Vetted2 months ago

14 Best America’s Contacts for Clear Vision and Style

Browse through the 14 best contact lenses in America for clear vision and style, and discover which one perfectly complements...

Trending