Mac and cheese boasts a rich history stretching back to the 13th century, with early pasta and cheese dishes laying the foundation. This iconic comfort food gained widespread popularity in the 1930s, particularly after Kraft introduced their boxed version in 1937. The classic recipe features tender elbow macaroni, a creamy cheese sauce, and a golden brown, bubbly baked top. While cheddar remains the signature cheese, you can explore a variety of mix-ins and gourmet twists to suit your tastes. Whether you're seeking a quick weeknight dinner or an indulgent side, mac and cheese continues to enchant palates around the world. Intrigued to learn more about its enduring appeal?
Key Takeaways
- Mac and cheese has a long history dating back to the 13th century, with early pasta and cheese dishes being its precursor.
- The dish gained widespread popularity in the United States in the 1930s, particularly after Kraft introduced its boxed mac and cheese in 1937.
- The classic homemade mac and cheese recipe consists of elbow macaroni, butter, flour, milk, cheddar, and Parmesan cheese, with various cooking techniques to achieve the desired texture and flavor.
- Cheese variations, such as Gruyère, mozzarella, and blue cheese, as well as creative add-ins like vegetables, proteins, and seasonings, have led to the evolution of mac and cheese into a diverse and beloved comfort food.
- Mac and cheese holds significant cultural significance, serving as a symbol of home cooking, nostalgia, and culinary creativity, with traditional recipes and gourmet adaptations continuing to be celebrated worldwide.
Top picks for "cheese"
Open Amazon search results for this keyword.
As an affiliate, we earn on qualifying purchases.
History
The origins of mac and cheese can be traced back to the 13th century. Pasta and cheese dishes have been enjoyed for centuries, with early recipes dating back to the Byzantine Empire.
In the 1300s, a cookbook called "The Forme of Cury" featured a proto-mac and cheese recipe, using lasagna-like pasta and hard cheese.
By the 1700s, the dish had evolved, with baked macaroni and Parmesan recipes appearing in Europe. This eventually made its way to America, where Thomas Jefferson is credited with popularizing mac and cheese in the United States after his time in France. He served the dish at a state dinner in 1802, and his recipe for "macaroni and cheese" was later published.
Over the centuries, mac and cheese has continued to evolve, with countless variations and interpretations. From the classic baked casserole to gourmet takes with fancy cheeses, this comfort food remains a beloved dish enjoyed by people around the world.
Recipe
Mac and cheese is a classic and comforting dish that has been enjoyed for generations. The perfect combination of creamy, cheesy goodness and tender pasta is a surefire way to satisfy any craving.
Whether you're looking for a quick weeknight dinner or an indulgent side dish, this recipe is sure to hit the spot.
Preparing homemade mac and cheese is surprisingly simple and allows you to customize the flavors to your liking. With just a few basic ingredients and a little time, you can create a mac and cheese that will have your family coming back for seconds.
- 8 ounces elbow macaroni
- 3 tablespoons unsalted butter
- 3 tablespoons all-purpose flour
- 2 cups milk
- 2 cups shredded cheddar cheese
- 1/2 cup grated Parmesan cheese
- 1/2 teaspoon salt
- 1/4 teaspoon black pepper
Preheat the oven to 375°F. Cook the macaroni according to package instructions until al dente. Drain and set aside.
In a saucepan, melt the butter over medium heat. Whisk in the flour and cook for 1-2 minutes, stirring constantly. Gradually whisk in the milk and cook until the mixture thickens, about 5 minutes.
Remove from heat and stir in the cheddar and Parmesan cheeses, salt, and pepper until the cheese is melted and the sauce is smooth. Add the cooked macaroni and stir to combine.
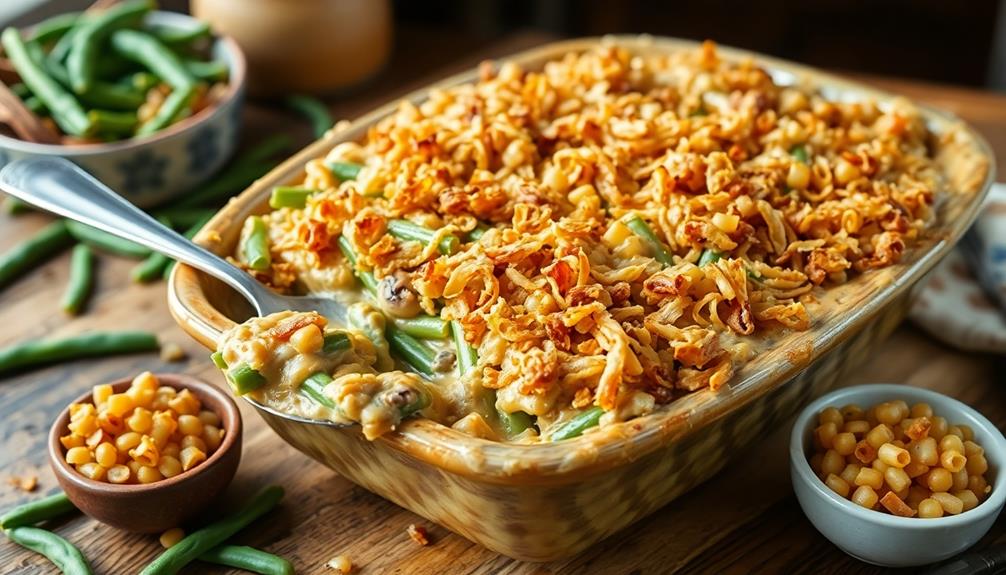
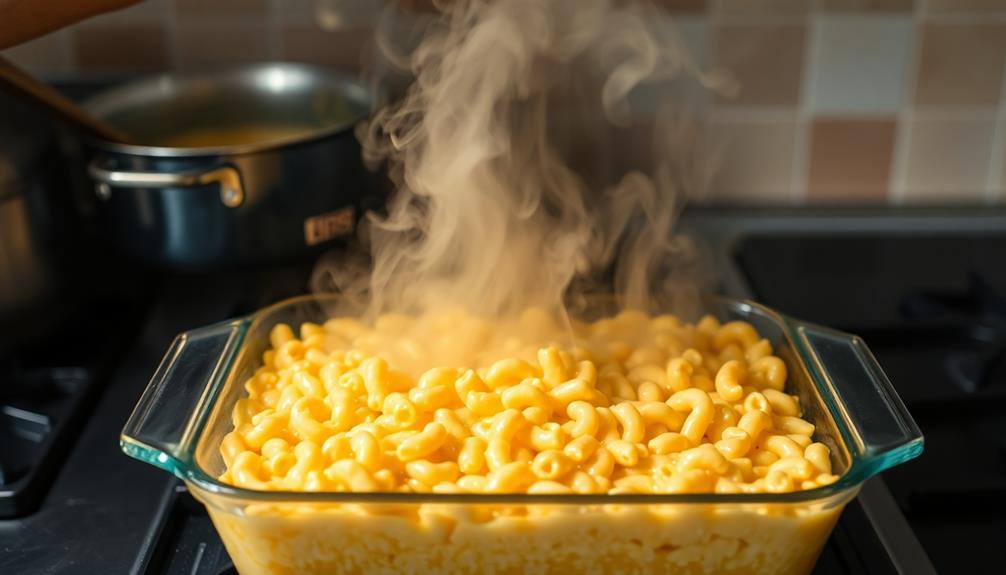
Transfer the mixture to a 9×13 inch baking dish. Bake for 20-25 minutes, or until the top is golden brown and bubbly. Allow to cool for 5 minutes before serving.
For an extra creamy texture, consider using a combination of different cheeses, such as sharp cheddar, Gruyère, and Parmesan.
You can also add in cooked bacon, diced ham, or sautéed vegetables for added flavor and texture. Serve hot and enjoy! The addition of cooked bacon or diced ham can provide a savory and meaty element to the dish, while sautéed vegetables can add a pop of color and a boost of nutrients. Adding these ingredients can also make the hash even heartier and more satisfying. Additionally, consider incorporating the benefits of apple cider, such as its potential to promote digestion and boost the immune system, into your dish for added health benefits.
Cooking Steps
Preheat your oven to 350°F.
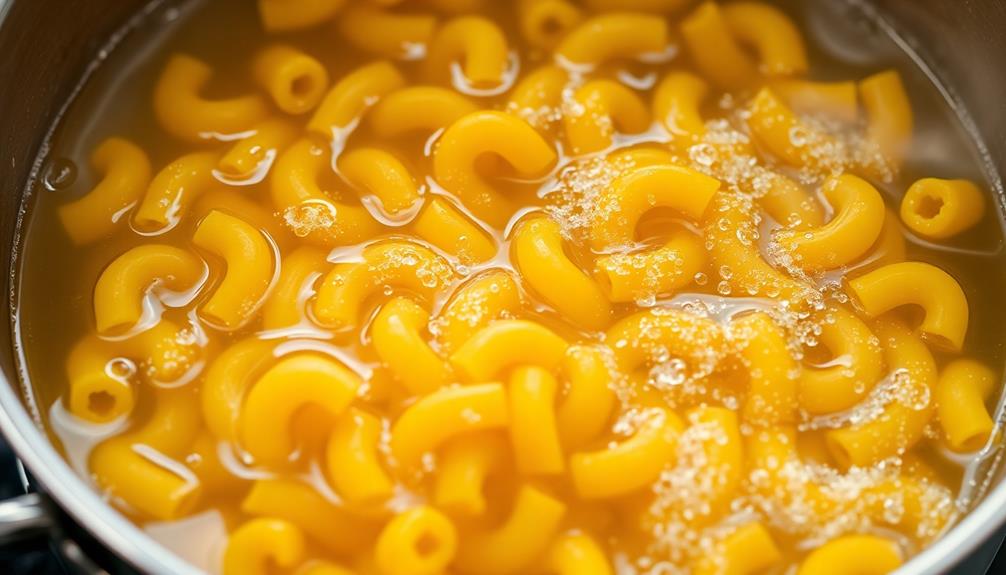
Next, boil the pasta according to the package instructions.
Once cooked, drain the pasta and return it to the pot.
Now, stir in the cheese and desired seasonings until the mixture is well combined.
Step 1. Preheat Oven to 350°F

Preheating the oven to 350°F is a crucial first step in the mac and cheese cooking process. This temperature ensures the cheese melts evenly and the pasta bakes to perfection. Here's why it's important:
- Proper oven temperature allows the cheese to melt smoothly, creating that gooey, creamy texture you crave in a delicious mac and cheese.
- Baking at 350°F ensures the pasta cooks through without drying out or becoming rubbery.
- This temperature strikes the right balance, preventing the edges from burning while the center remains undercooked.
To preheat your oven, simply turn the dial or press the buttons to set it to 350°F.
It's best to allow 10-15 minutes for the oven to fully heat up before placing your mac and cheese inside.
This step may seem minor, but it makes a big difference in the final outcome of your dish.
With the oven preheated, you're ready to move on to the next phase of assembling and baking your homemade mac and cheese.
Step 2. Boil Pasta According to Package
With the oven ready, you can now focus on boiling the pasta according to the package instructions.
Begin by filling a large pot with water and placing it over high heat on the stovetop. Once the water comes to a rapid boil, carefully add the dry pasta, stirring gently to prevent it from sticking together.
Follow the cooking time recommended on the pasta package, which is typically 7-12 minutes for most standard elbow macaroni. During this time, set a timer to ensure you don't overcook the pasta. Periodically stir the pot to maintain an even boil and prevent the pasta from clumping.
When the timer goes off, quickly drain the pasta in a colander, being cautious of the hot steam. Rinse the pasta with cool water to stop the cooking process, then return it to the pot.
At this point, the pasta is ready to be combined with the cheese sauce, which you'll prepare in the next step.
Step 3. Drain and Return Pasta to Pot

Once the pasta has finished cooking, carefully drain it in a colander to remove the excess water. Be cautious when handling the hot pasta and colander. Shake the colander gently to help the water drain off completely.
Next, return the drained pasta to the original cooking pot. This will allow you to easily add the cheese sauce and other ingredients. Having the pasta back in the pot makes it simpler to combine everything thoroughly.
Depending on the specific mac and cheese recipe, you may need to add milk, butter, and the cheese packet or homemade cheese sauce at this stage. Stir the mixture gently but thoroughly to ensure the pasta is evenly coated.
The pot of drained pasta is now ready for the next step – adding the cheese! This is where the magic of mac and cheese really comes together, transforming the plain pasta into a creamy, cheesy delight.
Step 4. Stir in Cheese and Seasonings
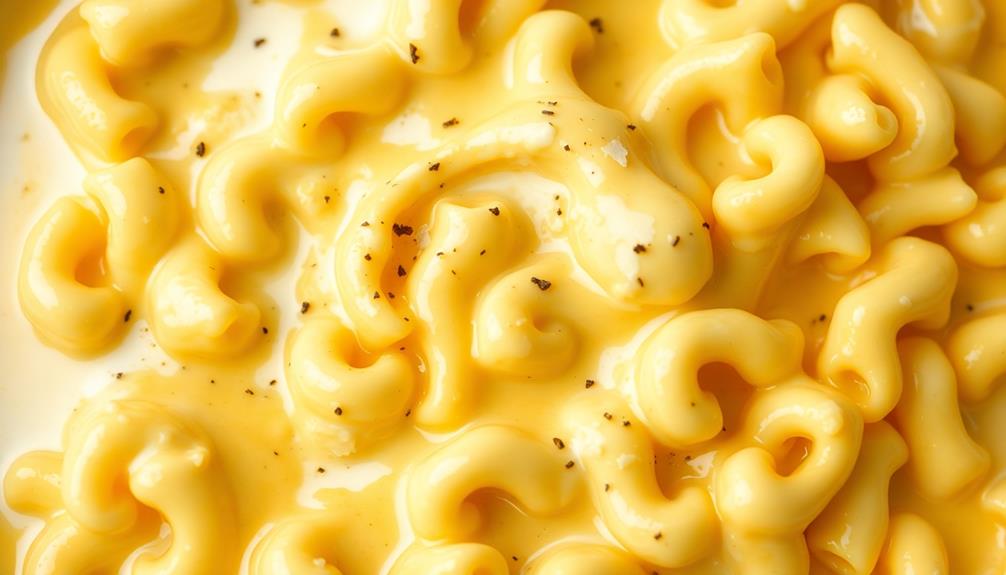
To begin the process of stirring in the cheese and seasonings, add the desired amount of shredded cheese or cheese sauce to the pot of drained pasta. Gently stir the ingredients together until the cheese is fully melted and the pasta is evenly coated. This helps the flavors meld together seamlessly.
Next, consider adding any additional seasonings to complement the cheese. Some popular options include:
- Salt and pepper to taste
- Garlic powder or minced garlic
- Onion powder
- Paprika
- Dried herbs like thyme or oregano
Stir the seasonings in thoroughly, tasting and adjusting as needed until the flavor profile is just right. The key is to strike a balance, allowing the cheese to shine while enhancing it with carefully selected spices and aromatics.
Once the cheese and seasonings are fully incorporated, your creamy, indulgent mac and cheese is ready to serve and enjoy!
Step 5. Transfer to Baking Dish
Now that the cheese and seasonings are perfectly blended into the pasta, you can transfer the mac and cheese to a baking dish.
Choose a 9×13-inch baking dish or a similar-sized ovenproof vessel. Ensure the dish is well-greased with butter or nonstick cooking spray to prevent sticking.
Carefully spoon the cheesy pasta mixture into the prepared dish, spreading it out evenly with a spatula. If you have any leftover breadcrumbs or crunchy topping, sprinkle them over the top of the macaroni for an extra layer of texture and crunch.
Once the mac and cheese is in the baking dish, it's ready to be baked to bubbly, golden-brown perfection. Preheat your oven to 375°F (190°C) and get ready to enjoy a delicious, homemade mac and cheese dish that's sure to satisfy your comfort food cravings.
Final Thoughts
As you've reached the end of this journey through the world of mac and cheese, it's time to take a step back and reflect on the key insights you've gained. This classic dish, with its creamy, cheesy goodness, has a rich history and endless variations to explore.
From the perfect pasta texture to the ideal cheese blend, you've learned the nuances that transform a simple mac and cheese into a culinary masterpiece. The importance of technique, such as properly cooking the pasta and creating a smooth béchamel sauce, can't be overstated.
And the versatility of this dish, allowing for creative add-ins and toppings, means the possibilities are truly endless.
Ultimately, the joy of mac and cheese lies in its ability to comfort, satisfy, and bring people together. Whether you're feeding a crowd or enjoying a cozy night in, this dish is a timeless classic that will continue to delight for generations to come.
As you go forth, remember the lessons learned and embrace the endless potential of this beloved comfort food.
Frequently Asked Questions
What Is the Nutritional Value of Mac and Cheese?
The nutritional value of a dish depends on its ingredients. You'll need to check the specific recipe or nutrition label to determine the calorie, fat, protein, and carbohydrate content of the mac and cheese you're considering.
Is Mac and Cheese Gluten-Free?
No, regular mac and cheese is not gluten-free. The pasta in traditional mac and cheese contains gluten from wheat. However, you can find gluten-free versions made with gluten-free pasta for those with dietary restrictions.
Can I Make Mac and Cheese in a Slow Cooker?
Yes, you can make mac and cheese in a slow cooker. The slow cooking process allows the flavors to meld together, and it's a convenient way to prepare a comforting meal with minimal effort.
How Long Does Homemade Mac and Cheese Last in the Fridge?
Homemade mac and cheese can typically last 3-4 days in the refrigerator when stored properly in an airtight container. However, its shelf life may vary depending on the ingredients used and how it was prepared.
Can I Freeze Leftover Mac and Cheese?
Yes, you can freeze leftover mac and cheese. It'll keep for 2-3 months in the freezer. Just make sure to store it in an airtight container or freezer-safe bag to prevent freezer burn.