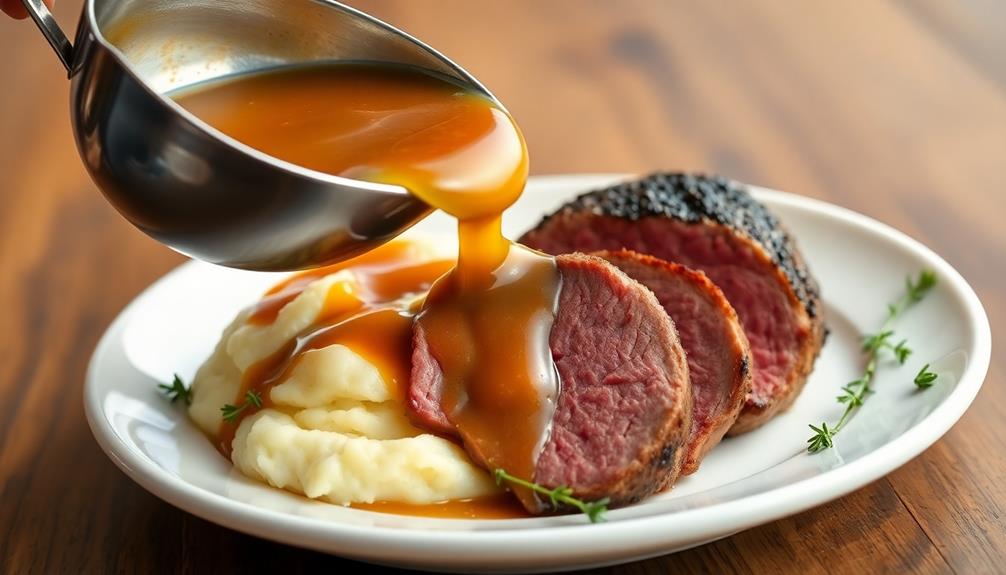

Gravy is a savory sauce that enhances the flavors of many dishes. You'll typically make it using meat drippings, flour, and broth. To create gravy, start by making a roux with equal parts fat and flour, then gradually whisk in liquid while cooking. Season with complementary herbs and spices to elevate the taste. For a smooth texture, strain the gravy through a fine-mesh sieve. Remember, practice makes perfect when it comes to achieving the ideal consistency and flavor. Whether you're topping mashed potatoes or smothering a roast, mastering gravy-making will take your culinary skills to the next level. Explore different variations to find your signature style.
Key Takeaways
- Gravy is a sauce made from meat drippings, thickened with flour or cornstarch, and often flavored with herbs and spices.
- The basic ingredients for gravy typically include meat drippings, flour, broth, salt, and pepper.
- A roux, made from equal parts fat and flour, is often used as the foundation for thickening gravy.
- Seasoning is crucial for enhancing gravy flavor, with herbs and spices chosen to complement the main dish.
- Straining gravy through a fine-mesh strainer helps achieve a smooth, lump-free texture.
History
Although the exact origins of gravy are unclear, its history stretches back centuries. You'll find references to gravy-like sauces in medieval cookbooks, where they were often used to enhance the flavors of roasted meats.
As cooking techniques evolved, so did the art of making gravy. In 17th-century England, you'd have seen gravy becoming a staple in many households. It was during this time that the term "gravy" began to be widely used.
The Industrial Revolution brought about changes in food production and preservation, which influenced gravy-making techniques. You might be surprised to learn that gravy's popularity soared during World War II.
With meat rationing in effect, people turned to gravy to add flavor and substance to their meals. This period saw the rise of packaged gravy mixes, making it easier for you to prepare gravy at home.
Today, you'll find countless variations of gravy across different cuisines. From the rich, brown gravies of British Sunday roasts to the creamy sausage gravies of Southern American breakfasts, this versatile sauce continues to evolve and delight taste buds worldwide.
Recipe
Gravy is a versatile and delicious sauce that can elevate any meal, particularly roasted meats and mashed potatoes. This classic accompaniment is made by combining meat drippings with flour and broth, resulting in a rich and flavorful sauce that adds depth to your dishes. For a traditional touch, many home cooks also add chopped giblets to their gravy for added flavor and texture. If you’re looking for a delicious giblet gravy recipe, simply sauté the giblets with onions and herbs, then simmer in broth before straining and combining with the meat drippings and flour. This savory and rich gravy is the perfect finishing touch to any holiday meal or Sunday dinner.
While there are many variations of gravy, this recipe focuses on a basic beef gravy that can be easily customized to suit your taste preferences. With just a few simple ingredients and some patience, you can create a smooth, savory gravy that will impress your family and dinner guests alike.
- 1/4 cup beef drippings (from roasted meat)
- 1/4 cup all-purpose flour
- 2 cups beef broth
- 1/2 teaspoon salt
- 1/4 teaspoon black pepper
- 1/4 teaspoon dried thyme (optional)
To make the gravy, start by heating the beef drippings in a saucepan over medium heat. Gradually whisk in the flour, stirring constantly to create a smooth paste (roux).
Cook the roux for 1-2 minutes, then slowly pour in the beef broth, whisking continuously to prevent lumps from forming. Add the salt, pepper, and thyme (if using).
Bring the mixture to a simmer and cook for 5-10 minutes, stirring occasionally, until the gravy has thickened to your desired consistency.
For the best results, use a whisk to ensure a smooth texture and prevent lumps from forming. If your gravy becomes too thick, simply add more broth to thin it out. Conversely, if it's too thin, continue simmering until it reaches the desired thickness.
Taste and adjust the seasoning as needed before serving. Remember that gravy will continue to thicken as it cools, so it's best to serve it immediately for optimal consistency.
Cooking Steps
To make delicious gravy, you'll want to follow a few key steps.
Start by combining flour and fat to create a roux, then gradually add broth or drippings while whisking to avoid lumps.
As you simmer the mixture, season it with your favorite herbs and spices, and continue cooking until it reaches your desired thickness, straining if necessary to ensure a smooth consistency.
Step 1. Combine Flour and Fat

After preparing your pan drippings, the next crucial step in making gravy is combining flour and fat. This mixture, known as a roux, is the foundation of your gravy and will determine its thickness and texture.
You'll want to use equal parts flour and fat, typically about 2 tablespoons each for every cup of liquid you plan to add later.
To create your roux, start by melting the fat in a saucepan over medium heat. Once it's hot, sprinkle in the flour gradually, whisking constantly to prevent lumps from forming. Keep stirring until the mixture is smooth and bubbling, which usually takes about 1-2 minutes.
The color of your roux will depend on how long you cook it:
- Blonde roux: Cook for 2-3 minutes for a light, subtle flavor
- Brown roux: Cook for 3-5 minutes for a nuttier taste
- Dark roux: Cook for 5-7 minutes for a rich, intense flavor
Step 2. Add Broth or Drippings

Once your roux is ready, it's time to introduce the liquid component of your gravy. This is where you'll add either broth or drippings, depending on what you have available and the flavor profile you're aiming for. If you're using pan drippings from roasted meat, they'll infuse your gravy with rich, savory notes.
Pour them slowly into your roux, whisking constantly to prevent lumps from forming. If you're opting for broth, choose one that complements your main dish. Chicken broth works well for poultry-based gravies, while beef broth is ideal for red meat. For a vegetarian option, vegetable broth is an excellent choice.
Regardless of your liquid, you'll want to add it gradually, about a quarter cup at a time, whisking vigorously as you go. As you incorporate the liquid, you'll notice the mixture start to thicken. Keep whisking and adding liquid until you reach your desired consistency.
Step 3. Season With Herbs and Spices

With your gravy base now prepared, it's time to elevate its flavor profile with herbs and spices. The key is to choose complementary flavors that enhance your main dish without overpowering it.
For a classic roast chicken gravy, try adding:
- Dried thyme
- Dried rosemary
- Garlic powder
- Black pepper
Start with small amounts, about 1/4 teaspoon of each, and taste as you go. You can always add more, but you can't take it out once it's in.
For beef gravy, consider:
- Dried oregano
- Worcestershire sauce
- Onion powder
- Paprika
If you're feeling adventurous, experiment with less traditional additions like:
- Sage for a Thanksgiving-inspired flavor
- Tarragon for a French twist
- Cayenne for a spicy kick
- Mustard powder for depth
Step 4. Simmer Until Desired Thickness

The final step in achieving perfect gravy lies in simmering it down to your desired thickness. As you continue to stir, you'll notice the gravy gradually reducing and becoming more concentrated. This process not only thickens the gravy but also intensifies its flavors.
Keep an eye on the consistency as it simmers. You're looking for a smooth, velvety texture that coats the back of a spoon. Remember, the gravy will continue to thicken slightly as it cools, so it's best to aim for a consistency that's just a tad thinner than your ideal.
Here are some tips to help you achieve the perfect thickness:
- Use low heat to prevent scorching
- Stir frequently to ensure even cooking
- Test thickness by dipping a spoon and seeing how it coats
- If it's too thick, add small amounts of broth or water
- If it's too thin, continue simmering or add a cornstarch slurry
Once you've reached your desired thickness, remove the gravy from heat. Give it a final taste, adjust seasonings if needed, and serve immediately. Your homemade gravy is now ready to elevate any meal!
Step 5. Strain to Remove Lumps

While achieving the perfect thickness is important, you'll want to ensure your gravy is smooth and lump-free before serving. To do this, you'll need to strain your gravy. This step is crucial for creating a silky-smooth texture that'll elevate your dish.
Here's how to strain your gravy effectively:
- Place a fine-mesh strainer over a clean saucepan or bowl.
- Carefully pour the gravy through the strainer, allowing it to catch any lumps or solids.
- Use the back of a spoon to gently press any remaining gravy through the strainer.
- Discard the solids left in the strainer.
If you don't have a fine-mesh strainer, you can use a regular colander lined with cheesecloth. This method will catch even the tiniest lumps, ensuring your gravy is perfectly smooth.
After straining, return the gravy to the stove and warm it up if needed. You may need to adjust the seasoning, as straining can sometimes affect the flavor intensity.
Final Thoughts
Gravy enthusiasts know that mastering this versatile sauce can elevate any meal. As you've learned throughout this guide, creating the perfect gravy isn't just about following a recipe; it's about understanding the techniques and principles behind each step.
From selecting the right base to carefully thickening the sauce, you've gained valuable insights into the art of gravy-making.
Remember, practice makes perfect. Don't be discouraged if your first attempts aren't flawless. Each time you make gravy, you'll develop a better sense of timing, consistency, and flavor.
Experiment with different ingredients and methods to find your signature style.
Keep these key points in mind:
- Always start with a flavorful base
- Gradually add liquid to avoid lumps
- Season thoughtfully and taste as you go
- Strain for a smooth finish
Whether you're preparing a holiday feast or a simple weeknight dinner, your newfound gravy skills will impress family and friends.
With patience and attention to detail, you'll soon be crafting restaurant-quality gravies that'll have everyone asking for seconds.
Frequently Asked Questions
Can Gravy Be Made Ahead of Time and Reheated?
Yes, you can definitely make gravy ahead of time and reheat it! This is a great time-saver for busy cooks.
Here's what you need to know:
- Prepare your gravy as usual
- Let it cool completely
- Store in an airtight container in the fridge (up to 3 days)
- When ready to use, reheat slowly on the stove
- Stir frequently to prevent lumps
- Add a splash of broth or milk if it's too thick
How Long Does Homemade Gravy Last in the Refrigerator?
You can typically keep homemade gravy in your refrigerator for 3-4 days.
It's crucial to store it properly in an airtight container to maintain its quality and prevent bacterial growth.
If you've made a large batch, consider freezing portions for longer storage.
When you're ready to use it, make sure to reheat it thoroughly to at least 165°F (74°C).
Always check for any signs of spoilage, such as an off smell or mold, before consuming.
What Are Some Alternatives to Flour for Thickening Gravy?
You've got several tasty alternatives to flour for thickening your gravy.
Try cornstarch for a silky texture, or arrowroot for a glossy finish.
Potato starch works well and won't cloud your gravy.
For a nutty flavor, consider ground nuts or nut flours.
Pureed vegetables like cauliflower or roasted onions can add thickness and flavor.
Don't forget about reduction; simmering your gravy longer will naturally thicken it.
Each option brings its own unique properties, so experiment to find your favorite!
Is It Possible to Make Gravy Without Meat Drippings?
Yes, you can definitely make gravy without meat drippings! Here are some alternatives:
- Use vegetable broth or stock as your base
- Sauté onions and garlic for flavor
- Add mushrooms for a savory, meaty taste
- Use herbs and spices like thyme, rosemary, and black pepper
- Thicken with cornstarch, arrowroot, or a roux made with oil instead of butter
You'll still get a delicious, flavorful gravy without relying on meat drippings.
It's perfect for vegetarian dishes or when you don't have drippings available.
Can Gravy Be Frozen for Later Use?
Yes, you can freeze gravy for later use! It's a great way to save time and reduce food waste. Here's what you need to know:
- Allow the gravy to cool completely before freezing.
- Store it in airtight containers or freezer bags.
- Label with the date and contents.
- Freeze for up to 3 months.
When you're ready to use it, thaw in the refrigerator overnight.
Reheat gently on the stove, stirring frequently. If it's too thick, add a little broth or water to reach your desired consistency.