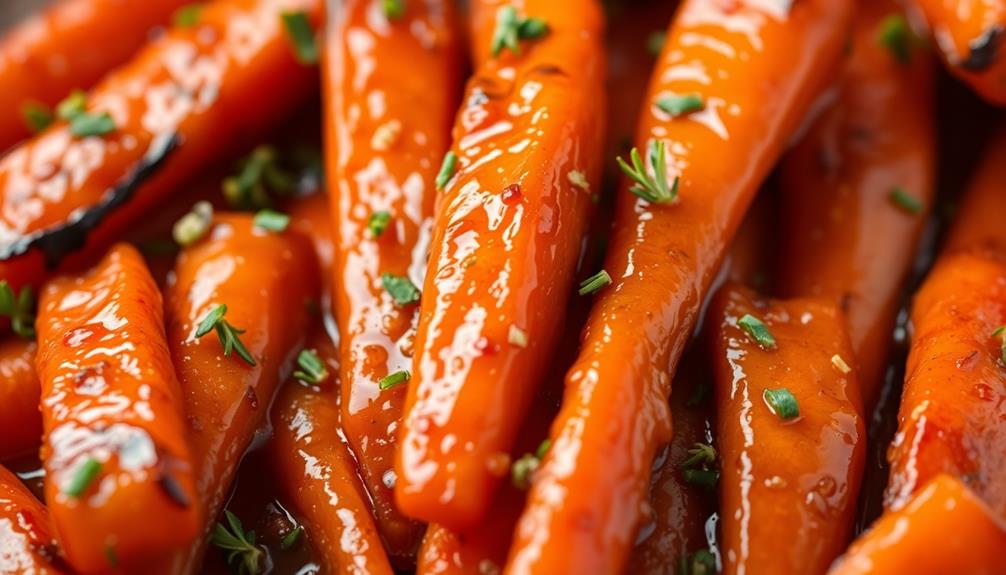

Glazed carrots are a timeless side dish that can elevate any meal. Originating in the Middle East, the orange carrot was developed in the Netherlands in the 16th century. The glazing technique enhances the natural sweetness through butter, sugar, and spices, resulting in a caramelized, shiny appearance. To make them, you'll slice the carrots, boil them until tender, then glaze them in a butter-honey mixture until it thickens into a delectable coating. Glazed carrots pair perfectly with roasted meats and grilled fish, and you can even find creative ways to incorporate them into vegetarian dishes. Let's explore more about this beloved side dish…
Key Takeaways
- Glazed carrots have origins in the Middle East, where purple and yellow root vegetables were first cultivated, with the orange carrot developing in the Netherlands during the 16th century.
- The glazing technique enhances the natural sweetness of carrots through the use of butter, sugar, and spices, resulting in a caramelized, shiny appearance.
- Glazed carrots are a classic side dish that can be served on their own or paired with various meals, celebrated for their simplicity and flavor.
- The cooking process for glazed carrots involves boiling the sliced carrots, followed by a glazing step where the carrots are coated in a butter and brown sugar mixture.
- Glazed carrots are a versatile dish that can complement a variety of main courses, and they offer nutritional benefits as a low-calorie and fiber-rich vegetable.
History
Glazed carrots have been a staple in many cuisines for centuries. Their origins can be traced back to the Middle East, where they were first cultivated as a purple or yellow root vegetable.
It wasn't until the 16th century that the familiar orange carrot we know today was developed in the Netherlands.
The process of glazing carrots, or coating them in a sweet glaze, emerged as a way to enhance the natural sweetness of the vegetable. This technique became popular in European kitchens, where chefs would simmer carrots in a mixture of butter, sugar, and sometimes spices.
The result was a beautifully caramelized, shiny glaze that complemented the tender, flavorful carrots.
Today, glazed carrots remain a beloved side dish, appearing on menus from casual diners to upscale restaurants. Their timeless appeal lies in their simplicity, allowing the natural goodness of the carrot to shine through the sweet, sticky glaze.
Recipe
Glazed carrots are a classic side dish that can elevate any meal. The combination of tender, sweetly caramelized carrots and a simple glaze creates a delightful flavour profile that complements a variety of main dishes. Whether you're serving it for a family dinner or a holiday gathering, this recipe is sure to please.
The key to achieving the perfect glazed carrots lies in the cooking method. By roasting the carrots, you'll bring out their natural sweetness and develop a lovely caramelized exterior. The glaze, made with a few simple ingredients, coats the carrots and adds a sheen that's both visually appealing and delightful to the palate.
Ingredients:
- 1 lb (450g) carrots, peeled and cut into 1-inch (2.5cm) pieces
- 2 tablespoons olive oil
- 2 tablespoons unsalted butter
- 2 tablespoons honey
- 1 tablespoon Dijon mustard
- 1 tablespoon chopped fresh thyme (or 1 teaspoon dried thyme)
- Salt and black pepper to taste
Instructions:
Preheat your oven to 400°F (200°C). Toss the carrot pieces with the olive oil in a large baking dish or on a rimmed baking sheet. Roast for 20-25 minutes, or until the carrots are tender and starting to caramelize.
In a small saucepan, melt the butter over medium heat. Whisk in the honey and Dijon mustard until well combined. Pour the glaze over the roasted carrots and toss to coat evenly.
Sprinkle the chopped thyme (or dried thyme) over the top and season with salt and black pepper to taste. Return the glazed carrots to the oven and roast for an additional 5-10 minutes, or until the glaze has thickened and the carrots are nicely glazed.
Serve the glazed carrots warm, and enjoy the sweet, tangy, and perfectly caramelized flavours.
Cooking Steps
Peel and slice the carrots into even pieces.
Boil the carrots in salted water until tender.
Drain the carrots and return them to the pan, then add butter and brown sugar, simmering until a delicious glaze forms.
Step 1. Peel and Slice Carrots
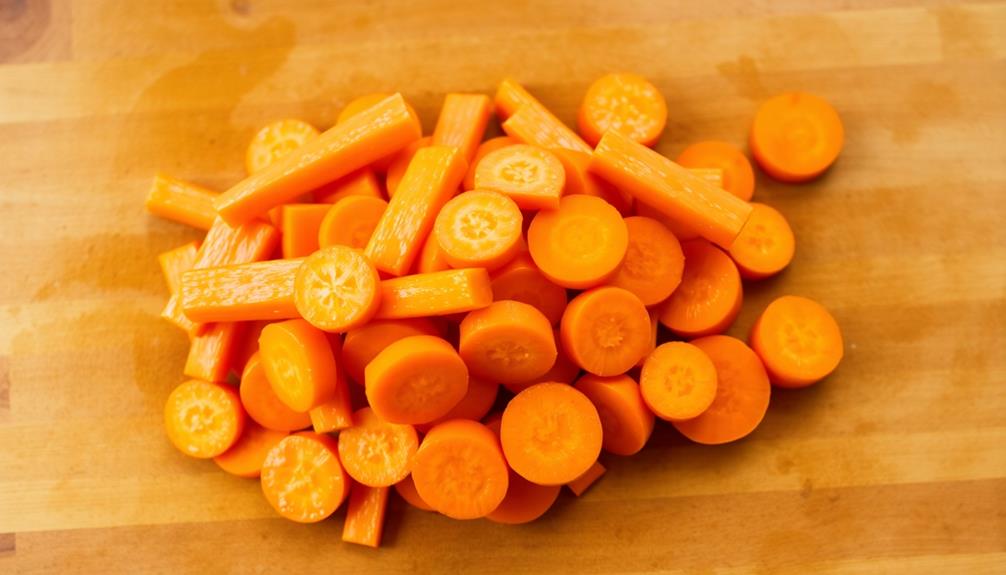
Begin by trimming off the carrot tops and peeling the outer layer of the carrots to reveal the tender, vibrant flesh beneath. This step is crucial as the peel can often taste bitter and tough. Use a sharp peeler or knife to remove the skin, taking care to avoid wasting too much of the carrot itself.
Next, slice the carrots into uniform, bite-sized pieces. You can cut them into:
- Rounds – slice the carrots crosswise into discs
- Sticks – slice the carrots lengthwise into long, thin strips
- Diagonal slices – slice the carrots at a 45-degree angle for a more rustic presentation
Aim for slices that are about 1/4 to 1/2 inch thick. This will ensure even cooking and a pleasing texture.
If the carrots are particularly thick, you may want to halve or quarter them lengthwise before slicing. Having carrot pieces of similar size will help them cook evenly.
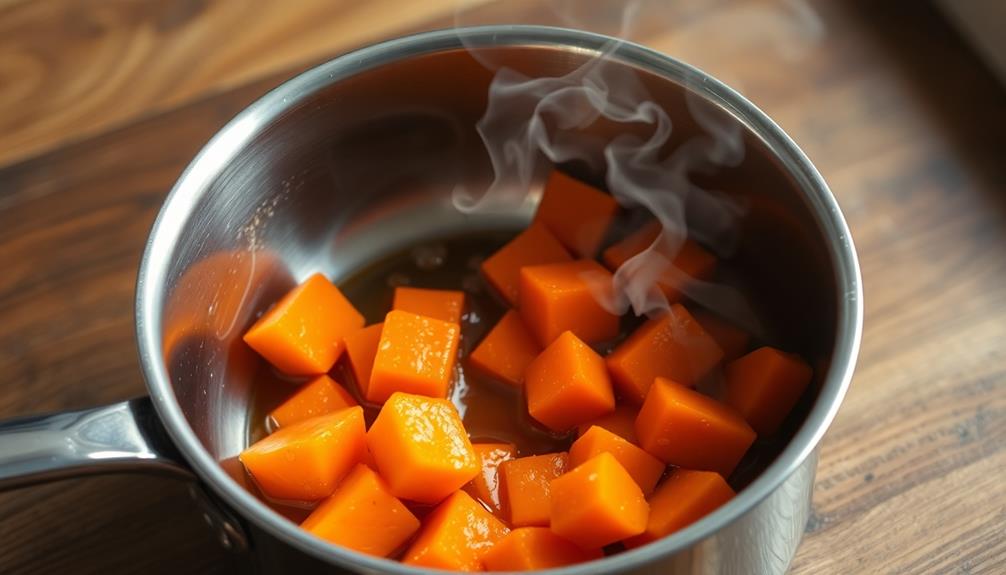
Step 2. Boil Carrots in Salted Water

Once you've prepared the carrots by peeling and slicing them, bring a pot of salted water to a boil. The saltiness will enhance the natural sweetness of the carrots, so be generous with the seasoning.
As the water comes to a boil, gently add the sliced carrots to the pot. Adjust the heat to maintain a gentle simmer, and let the carrots cook for 10-15 minutes, or until they're tender when pierced with a fork.
Cooking the carrots in salted water serves several purposes. First, it helps to soften the carrots, making them more pliable and easier to work with.
Second, the salt helps to season the carrots from the inside out, ensuring a well-balanced flavor. Finally, the boiling process helps to lock in the vibrant orange color, preserving the carrots' bright and appealing appearance.
Once they're cooked to your desired tenderness, drain the carrots and set them aside, ready to be glazed and finished.
Step 3. Drain and Return to Pan
After boiling the carrots, drain them in a colander and return them to the pan. This is an important step, as it allows the excess water to be removed from the carrots, preventing them from becoming soggy or watery in the final dish.
Once the carrots are back in the pan, you can begin the glazing process.
First, turn the heat to medium-high. This will help the glaze come together quickly and evenly coat the carrots. Next, add the remaining ingredients to the pan – typically butter, honey, and a pinch of salt and pepper.
Stir the mixture continuously to ensure the carrots are fully coated and the glaze has a chance to thicken.
Continue cooking the carrots for 5-7 minutes, or until the glaze has reached your desired consistency. It should coat the carrots in a shiny, sweet layer.
Once finished, remove the pan from the heat and serve the glazed carrots immediately, while they're hot and at their most delicious.
Step 4. Add Butter and Brown Sugar
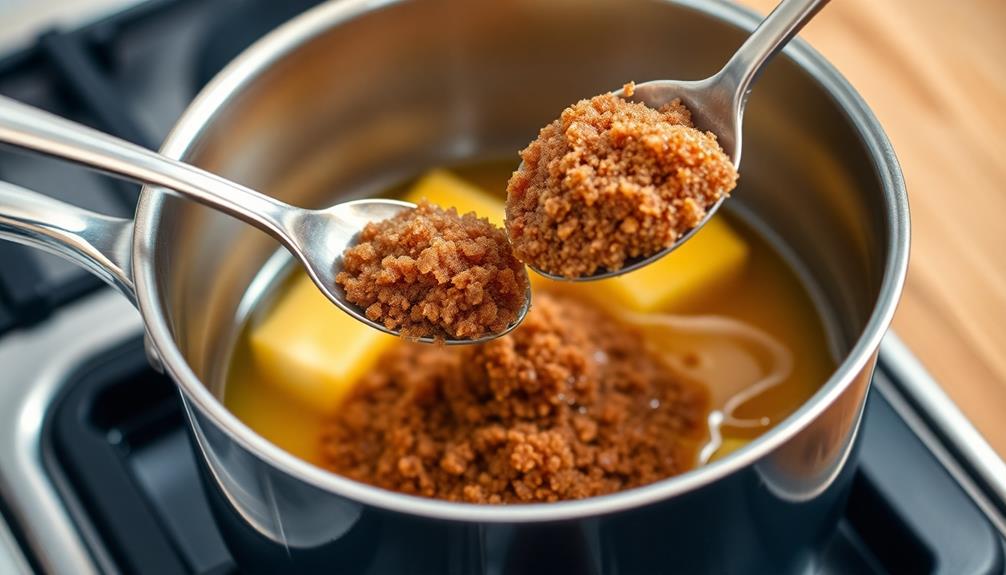
Next, melt the butter in the pan over medium-high heat.
Once the butter has melted, sprinkle in the brown sugar and stir to combine. The brown sugar will start to dissolve and caramelize, creating a rich, sticky glaze.
Continue cooking, stirring frequently, until the glaze thickens slightly, about 2-3 minutes. Be careful not to let the sugar burn – adjust the heat if needed to prevent scorching.
The final glaze should have a syrupy consistency that coats the carrots evenly.
Now, add the cooked carrots back to the pan and toss to fully coat them in the buttery brown sugar glaze.
Cook for an additional minute or two, until the carrots are heated through and the glaze has a nice shine.
The key is to work quickly at this stage, ensuring the carrots are well-coated before serving.
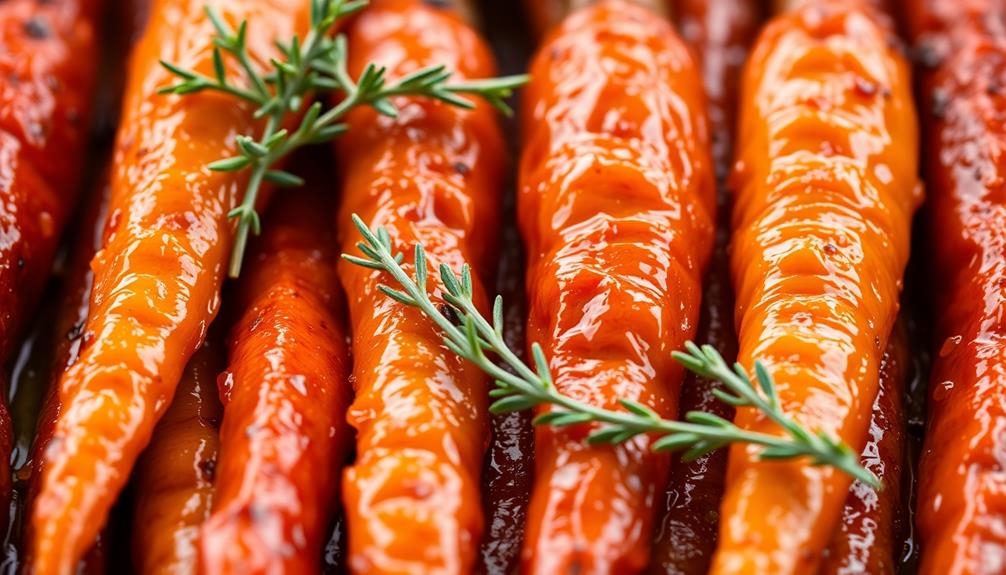
The sweet, caramelized glaze is the perfect finishing touch to your delicious glazed carrots.
Step 5. Simmer Until Glazed
With the butter and brown sugar melted together, let the mixture simmer, stirring frequently, until it thickens into a rich, glossy glaze, about 2-3 minutes. This process is key to achieving the signature sheen and concentrated sweetness of glazed carrots.
As the mixture simmers, keep a close eye on it, adjusting the heat as needed to prevent burning. Gently swirl the pan to ensure even cooking and distribution of the glaze. The carrots should become tender and the sauce should coat them beautifully.
Once the glaze has reached the desired consistency – thick enough to cling to the carrots but still pourable – remove the pan from heat. Be cautious, as the sugary mixture can be quite hot.
Taste and adjust seasoning as needed, adding a pinch of salt to balance the sweetness if desired.
Serve the glazed carrots immediately, spooning any extra glaze over the top. The vibrant, caramelized appearance and melt-in-your-mouth texture will delight your taste buds.
Final Thoughts
Glazed carrots are a simple yet delectable side dish that can elevate any meal. With their vibrant color, tender texture, and sweet-savory flavor, they're a crowd-pleasing favorite that's surprisingly easy to make at home.
As you've discovered, the key to perfectly glazed carrots lies in the simmering process. By cooking the carrots in a mixture of broth, butter, and a touch of sweetener, you'll create a glossy, caramelized coating that's utterly irresistible.
Remember to keep a close eye on the pot, stirring frequently, to ensure the carrots don't overcook or burn.
Once your carrots are beautifully glazed, you can serve them as is or get creative. Try sprinkling them with fresh herbs, toasted nuts, or a sprinkle of citrus zest for added flavor and texture.
Glazed carrots pair wonderfully with roasted meats, grilled fish, or as part of a hearty vegetarian meal. Enjoy them as a simple yet elegant side dish that's sure to impress. For a complete meal, try serving the glazed carrots alongside a perfectly seared steak or a roasted chicken. Their natural sweetness and tender texture complement the heartiness of the main course, making for a truly satisfying dining experience. And for a refreshing contrast, consider including a classic waldorf salad recipe with crisp apples, crunchy celery, and walnuts, drizzled with a creamy dressing. The combination of flavors and textures creates a well-balanced and memorable meal.
Frequently Asked Questions
Can Glazed Carrots Be Made in Advance?
Yes, you can make glazed carrots in advance. They can be prepared a day or two ahead of time and reheated just before serving. The glaze will keep the carrots moist and flavorful.
Do Glazed Carrots Have a Long Shelf Life?
While dishes can have varying shelf lives, glazed carrots generally won't last too long. They'll likely stay fresh for 3-4 days in the fridge, but you'll want to enjoy them soon after preparing.
Can Glazed Carrots Be Frozen for Later Use?
Can you freeze glazed carrots? Yes, you can! Glazed carrots freeze well and can be stored in the freezer for up to 8-12 months. Just be sure to let them cool completely before freezing for best results.
Are There Any Health Benefits to Eating Glazed Carrots?
Eating glazed carrots can provide you with a range of health benefits. They're a good source of vitamins, minerals, and antioxidants, which may support immune function, eye health, and skin health. Plus, the natural sweetness can satisfy your cravings.
Can Glazed Carrots Be Served as a Side Dish?
Absolutely, glazed carrots can be served as a delightful side dish. They're easy to prepare, pair well with a variety of main courses, and offer a tasty way to incorporate more vegetables into your meal.