Thanksgiving
Brussels Sprouts
You might think Brussels sprouts are boring, but wait until you discover the secret to transforming these tiny cabbages into…
Brussels sprouts, once dreaded by many, have become a culinary favorite. These miniature cabbages originated in ancient Rome and gained popularity in Belgium during the 16th century. They're packed with nutrients, including vitamin C and fiber. To prepare them, start by trimming and washing the sprouts, then cut them in half for even cooking. Season with salt and pepper before roasting in a hot oven until golden brown. For an extra flavor boost, drizzle with balsamic glaze before serving. With the right techniques, you'll transform these tiny veggies into a delicious side dish that even skeptics will enjoy. Discover how to elevate your Brussels sprouts game and impress your dinner guests.
Key Takeaways
- Brussels sprouts are nutrient-dense vegetables rich in vitamin C, fiber, and antioxidants.
- They originated in ancient Rome and gained popularity in Belgium during the 16th century.
- Roasting Brussels sprouts at high temperatures enhances their flavor and creates a crispy exterior.
- Seasoning with salt, pepper, and balsamic glaze can transform Brussels sprouts into a delicious side dish.
- Brussels sprouts have evolved from a disliked vegetable to a culinary favorite with proper preparation techniques.
History
Brussels sprouts trace their origins back to ancient Rome, where they were first cultivated from wild cabbage. You might be surprised to learn that these tiny, leafy vegetables have been around for centuries!
As time passed, they made their way through Europe, with Belgium becoming a significant player in their cultivation. In the 16th century, Brussels sprouts gained popularity in Belgium, particularly in the area around Brussels. That's where they got their name!
You'll find that they were grown extensively in the cool climate of the Low Countries, which was perfect for these hardy little veggies. By the 18th century, Brussels sprouts had spread to other parts of Europe and eventually made their way to North America. They've been a staple in many cuisines ever since.
You'll often see them featured in holiday meals, especially in the United States and the United Kingdom. Today, you can find Brussels sprouts grown all over the world, from California to the Netherlands. They've come a long way from their humble beginnings in ancient Rome! In recent years, Brussels sprouts have experienced a resurgence in popularity due to their versatility and health benefits. They can be roasted, sautéed, or even shredded and used in salads. Some people even incorporate them into unique recipes, such as a creamy scalloped potato recipe for added texture and flavor. No matter how you choose to enjoy them, Brussels sprouts are a delicious and nutritious addition to any meal.
Recipe
Brussels sprouts, those miniature cabbage-like vegetables, have undergone a culinary renaissance in recent years. Once maligned as a bitter and unpalatable side dish, they've now become a trendy and beloved ingredient in many kitchens. This recipe will showcase Brussels sprouts in a simple yet delicious preparation that brings out their natural flavors and textures.
Roasting Brussels sprouts is an excellent way to enhance their taste and create a crispy exterior while maintaining a tender interior. The addition of balsamic vinegar and honey in this recipe provides a perfect balance of tangy sweetness that complements the slightly nutty flavor of the sprouts. This dish isn't only flavorful but also nutritious, making it an ideal side for various main courses or even as a standalone vegetarian meal.
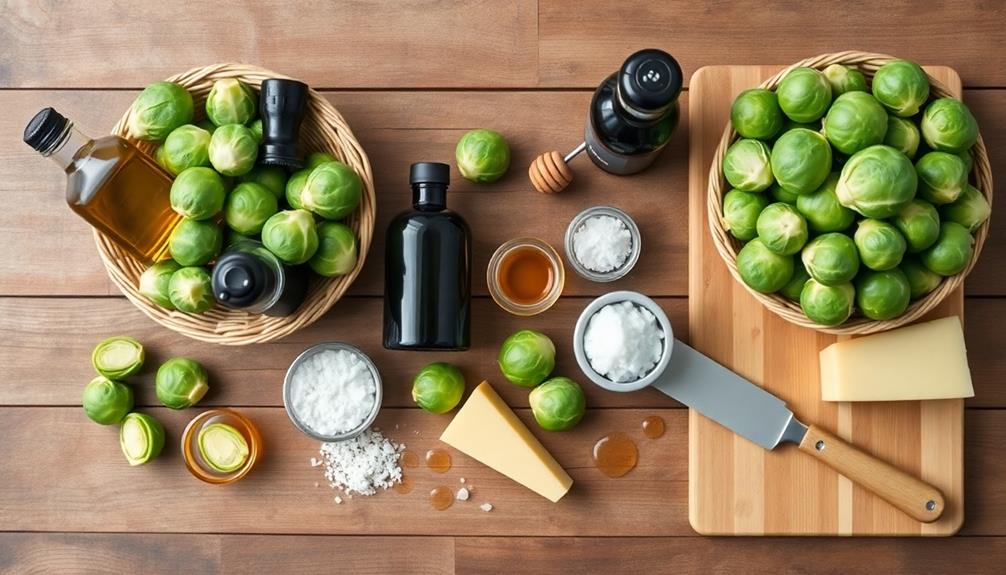
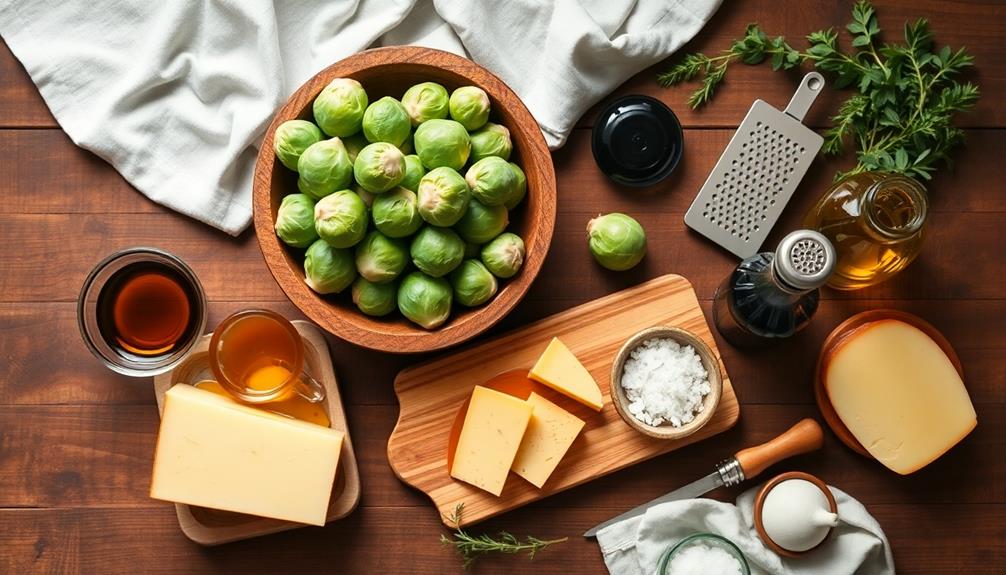
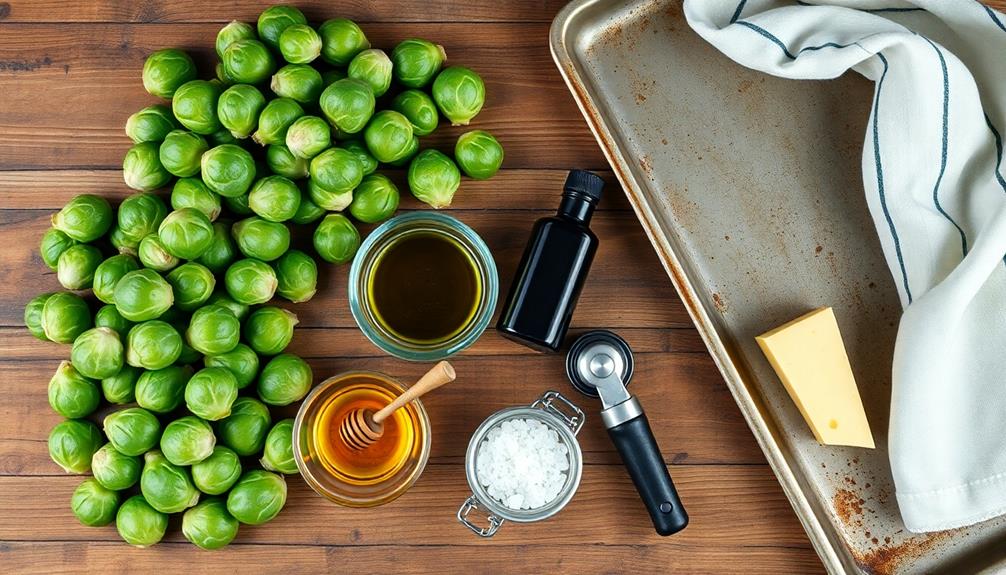
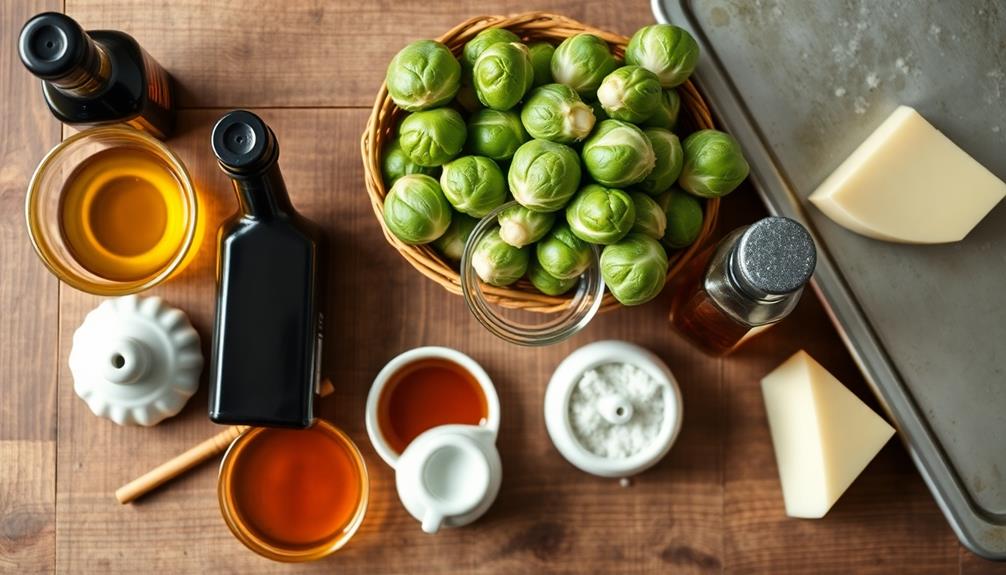
- 1 pound Brussels sprouts
- 2 tablespoons olive oil
- 2 tablespoons balsamic vinegar
- 1 tablespoon honey
- Salt and pepper to taste
- 1/4 cup grated Parmesan cheese (optional)
Preheat your oven to 400°F (200°C). Trim the ends of the Brussels sprouts and remove any yellow or damaged outer leaves. Cut them in half lengthwise.
In a large bowl, whisk together olive oil, balsamic vinegar, and honey. Add the Brussels sprouts to the bowl and toss to coat evenly. Spread the sprouts on a baking sheet in a single layer, cut side down. Sprinkle with salt and pepper.
Roast in the preheated oven for 20-25 minutes, or until the sprouts are tender and caramelized, flipping them halfway through cooking. Remove from the oven and sprinkle with grated Parmesan cheese if desired. Serve immediately.
For the best results, choose Brussels sprouts that are similar in size to ensure even cooking. If you prefer a stronger flavor, try adding minced garlic or red pepper flakes to the oil mixture before roasting.
To make this dish vegan-friendly, simply omit the Parmesan cheese or replace it with nutritional yeast. Leftover roasted Brussels sprouts can be stored in an airtight container in the refrigerator for up to 3 days and reheated in the oven or microwave.
Cooking Steps
To cook Brussels sprouts perfectly, you'll want to follow a few key steps.
Start by trimming and washing your sprouts, then cut them in half to ensure even cooking.
Once prepared, season them with salt and pepper before roasting in a hot oven, and finish by drizzling them with a tangy balsamic glaze for an extra burst of flavor.
Step 1. Trim and Wash Sprouts
Preparing Brussels sprouts for cooking begins with proper cleaning and trimming. You'll want to start by examining your sprouts and removing any discolored or damaged outer leaves.
Next, rinse them thoroughly under cool running water to remove any dirt or debris that might be clinging to the surface.
Once your sprouts are clean, it's time to trim them. Using a sharp knife, cut off the tough stem end of each sprout, taking care not to remove too much and cause the leaves to fall apart.
If you're working with larger sprouts, you may want to cut an "X" into the base of the stem to help them cook more evenly.
For recipes that call for halved or quartered sprouts, simply cut them lengthwise through the stem. This not only makes them easier to cook but also allows seasonings to penetrate more deeply.
Remember, uniform sizing is key to ensuring all your sprouts cook at the same rate.
Step 2. Cut Sprouts in Half
With your Brussels sprouts trimmed and washed, it's time to cut them in half. This step is crucial for achieving the perfect texture and flavor in your dish. Here's why cutting your sprouts matters:
- Even cooking: Halved sprouts cook more evenly, ensuring that both the exterior and interior reach the desired doneness.
- Caramelization: The flat surface created by cutting allows for better contact with the pan, resulting in delicious caramelization.
- Flavor absorption: The exposed interior of the sprout can better absorb seasonings and marinades.
To cut your sprouts in half:
- Place a sprout on your cutting board, stem side down.
- Hold it steady with your non-dominant hand.
- Using a sharp knife, carefully slice through the center of the sprout from top to bottom.
- Repeat with the remaining sprouts.
For larger sprouts, you may want to quarter them to ensure they cook at the same rate as smaller ones.
Step 3. Season With Salt and Pepper
Seasoning your Brussels sprouts with salt and pepper is a crucial step that can't be overlooked. This simple yet essential process enhances the natural flavors of the sprouts, elevating them from bland to delicious.
After you've cut your sprouts in half, it's time to add some seasoning. Start by sprinkling a generous pinch of salt over your halved Brussels sprouts. Don't be shy – salt helps to draw out moisture and intensify the sprouts' inherent sweetness.
Next, add freshly ground black pepper to taste. The peppercorns' sharp, spicy notes complement the sprouts' earthy flavor profile perfectly.
For best results, follow these tips:
- Use kosher or sea salt instead of table salt for better flavor distribution
- Opt for freshly ground black pepper rather than pre-ground for maximum aroma and taste
- Season from about 10 inches above the sprouts to ensure even coverage
- Toss the sprouts gently after seasoning to coat them thoroughly
Step 4. Roast in Hot Oven
Now that your Brussels sprouts are perfectly seasoned, it's time to roast them to crispy perfection. Preheat your oven to 425°F (220°C) to ensure a hot environment for optimal caramelization.
Spread the seasoned sprouts in a single layer on a baking sheet, making sure they're not overcrowded. This allows hot air to circulate freely, promoting even cooking and browning.
Place the baking sheet in the preheated oven and roast for 20-25 minutes. You'll want to give the sprouts a good shake or stir about halfway through the cooking time to ensure they brown evenly on all sides.
Keep an eye on them as they near the end of cooking, as oven temperatures can vary. You'll know your Brussels sprouts are done when they're tender on the inside and crispy and golden brown on the outside.
The outer leaves should be slightly charred, adding a delicious smoky flavor to the dish. Once they're roasted to your liking, remove them from the oven and let them cool for a few minutes before serving.
This brief rest allows the flavors to settle and makes them easier to handle.
Step 5. Drizzle With Balsamic Glaze
To elevate your roasted Brussels sprouts even further, a drizzle of balsamic glaze adds a perfect finishing touch. This sweet and tangy reduction complements the nutty flavor of the sprouts, creating a delicious balance that'll have you coming back for more.
Here's how to make and apply the glaze:
- In a small saucepan, combine 1 cup of balsamic vinegar with 2 tablespoons of honey.
- Bring the mixture to a boil, then reduce heat and simmer for about 15 minutes.
- Stir occasionally until the liquid has reduced by half and coats the back of a spoon.
- Let it cool slightly – it'll thicken as it cools.
Once your Brussels sprouts are roasted to perfection, transfer them to a serving dish. Drizzle the warm balsamic glaze over the sprouts, making sure to coat them evenly.
The dark, syrupy glaze will create a beautiful contrast against the golden-brown sprouts.
For an extra touch, you can sprinkle some toasted pine nuts or crumbled goat cheese on top. The combination of flavors and textures will make your Brussels sprouts irresistible, even to those who typically shy away from this vegetable.
Final Thoughts
Brussels sprouts have come a long way from their reputation as a dreaded vegetable. With the right preparation techniques and recipes, you'll find that these little green gems can be a delightful addition to your meals.
Remember, the key to enjoying Brussels sprouts lies in how you cook them. Roasting brings out their natural sweetness, while pan-searing creates a crispy exterior.
Don't be afraid to experiment with different seasonings and flavor combinations. From garlic and parmesan to bacon and maple syrup, there's a Brussels sprout recipe out there for everyone.
If you're still hesitant, try incorporating them into dishes you already enjoy, like stir-fries or pasta.
As you've learned, Brussels sprouts aren't only tasty but also packed with nutrients. They're an excellent source of vitamin C, fiber, and antioxidants.
Frequently Asked Questions
Are Brussels Sprouts Actually From Brussels?
You might be surprised to learn that Brussels sprouts aren't actually from Brussels!
They're named after the Belgian capital, but their true origin lies in ancient Rome.
These mini cabbages were likely cultivated in Belgium in the 16th century, which led to their popular name.
Today, they're grown in many countries worldwide.
Can You Eat Brussels Sprouts Raw?
Yes, you can eat Brussels sprouts raw! They're surprisingly versatile and make a crunchy addition to salads or slaws.
To enjoy them uncooked, slice them thinly or shred them for the best texture. Raw Brussels sprouts have a slightly bitter, nutty flavor that's milder than when cooked.
They're packed with nutrients, including vitamins C and K. However, if you have digestive sensitivities, you might find them easier to digest when lightly cooked.
Give raw Brussels sprouts a try and see how you like them!
How Long Do Brussels Sprouts Last in the Refrigerator?
When you're storing fresh brussels sprouts in your fridge, you can expect them to last about 3 to 5 days.
To maximize their shelf life, keep them unwashed in a plastic bag in your crisper drawer. If you've bought them on the stalk, they'll stay fresh for up to a week.
Are Brussels Sprouts and Cabbage the Same Vegetable?
No, Brussels sprouts and cabbage aren't the same vegetable, but they're close relatives.
They're both members of the Brassica family, which includes other veggies like broccoli and kale.
While cabbage forms a large head, Brussels sprouts grow as small, individual buds along a thick stalk.
You'll notice they've similar flavors, but Brussels sprouts are typically more compact and have a slightly nuttier taste.
Both are nutritious choices for your diet, packed with vitamins and fiber.
Do Brussels Sprouts Help With Weight Loss?
Do brussels sprouts help with weight loss? Yes, they can be a great addition to your weight loss journey!
They're low in calories but high in fiber, which helps you feel full longer. You'll also get a nutrient boost, as they're packed with vitamins and minerals.
Try roasting them with a bit of olive oil for a delicious, weight-friendly side dish.
Rachel is all about nostalgic comfort food with a modern twist. She brings the flavors of classic American diners to Cook if Ya, with her takes on burgers, fries, and milkshakes. Rachel’s love for simple, hearty meals brings a bit of retro flair to the table, reminding us all of the joys of classic diner dishes.
Thanksgiving
Thanksgiving Turkey: Brining Secrets
With a simple brining technique, transform your Thanksgiving turkey into a mouthwatering centerpiece that will leave your guests craving for more.
Brining is the secret to transforming your Thanksgiving turkey into a mouthwatering centerpiece! It all started way back in the colonial days when folks used it to keep their turkeys juicy and flavorful. Today, brining is a recognized technique that infuses the meat with moisture and savory seasonings. You'll need to soak the turkey in a saltwater brine, then rinse and pat it dry before roasting. This tenderizes the meat and creates a crispy, golden-brown skin that'll have your guests asking for seconds. Brining is the key to a truly memorable Thanksgiving feast – and there's more where that came from!
Key Takeaways
- Brining turkey origins trace back to early American colonial period and helps keep turkey moist and flavorful for Thanksgiving.
- Essential brining ingredients include kosher salt, brown sugar, water, herbs, peppercorns, and bay leaves, with a 12-24 hour brining duration.
- Brining breaks down proteins and infuses turkey with savory seasonings, resulting in a juicy, tender, and delicious Thanksgiving centerpiece.
- Rinsing and patting dry the turkey after brining, then rubbing with herb butter, enables crispy skin during roasting for maximum flavor.
- Brining transforms a plain turkey into a mouthwatering delight, ensuring juices flow when sliced and creating a memorable Thanksgiving dining experience.
History
Tracing the origins of brining, the practice of soaking a turkey in a saltwater solution before cooking, can be found in the early American colonial period.
Back then, resourceful cooks used this technique to help keep their hard-earned birds moist and flavorful. As the years passed, the tradition of brining turkeys for Thanksgiving gained popularity, becoming a beloved part of many families' holiday celebrations.
Today, brining is a widely recognized method for preparing the perfect Thanksgiving turkey. By submerging the bird in a salty brine, the meat absorbs moisture and seasoning, resulting in a juicy, tender, and delicious centerpiece for your feast.
Whether you prefer a simple salt-and-water mixture or a more complex blend of herbs and spices, brining is a foolproof way to ensure your turkey is the star of the show.
Recipe
Brining is a crucial step in achieving a juicy and flavorful Thanksgiving turkey. The process of submerging the turkey in a salt-water solution helps to break down the proteins, resulting in a more tender and moist final product. Additionally, the brine can be infused with aromatic herbs and spices, providing a delightful depth of flavor to the bird.
Before diving into the recipe, it's important to allocate sufficient time for the brining process. Depending on the size of your turkey, the recommended brining duration can range from 12 to 24 hours. This allows the brine to fully penetrate the meat and work its magic.
- 1 (12-16 lb) whole turkey, thawed if frozen
- 1 cup kosher salt
- 1/2 cup brown sugar
- 2 gallons water
- 4 sprigs fresh thyme
- 2 sprigs fresh rosemary
- 1 tablespoon whole black peppercorns
- 3 bay leaves
In a large stockpot or clean bucket, combine the salt, brown sugar, and water, stirring until the salt and sugar have dissolved. Add the thyme, rosemary, peppercorns, and bay leaves.
Submerge the turkey, making sure it's fully covered by the brine. Cover and refrigerate for 12-24 hours, depending on the size of the turkey.
After the brining process, remove the turkey from the brine, rinse it under cold water, and pat it dry with paper towels. Proceed with your desired roasting method, ensuring the turkey is cooked to an internal temperature of 165°F.
The brined turkey will result in a juicy, flavorful, and perfectly seasoned centerpiece for your Thanksgiving feast.
Cooking Steps
Soak that turkey in a saltwater brine to lock in moisture and flavor.
After brining, rinse the bird and pat it dry.
Now, rub that turkey all over with a delicious herb butter – this'll give it a beautiful golden-brown skin when you roast it at 325°F.
Get ready for the juiciest, most flavorful Thanksgiving turkey ever!
Step 1. Soak Turkey in Saltwater Brine
With a saltwater brine, you'll infuse your turkey with exceptional moisture and flavor.
First, in a large pot or bucket, combine one gallon of water with a cup of salt. Stir until the salt fully dissolves, creating a brine.
Then, gently lower your turkey into the solution, making sure it's fully submerged. Cover and refrigerate for 12 to 24 hours, allowing the brine to work its magic.
The salt will help the turkey retain its natural juices, while also adding a delightful savory undertone.
When it's time to roast, simply remove the turkey, pat it dry, and get cooking!
Your brined bird will turn out tender, juicy, and overflowing with mouthwatering flavor in every bite.
Brining is the secret to the best Thanksgiving turkey ever – your friends and family will be amazed. First, you’ll need to create a brine by combining water, salt, sugar, herbs, and spices. Then, place your turkey in the brine and let it soak for at least 24 hours. The result? A juicy, flavorful bird that will have everyone coming back for seconds. And don’t forget to save the turkey giblets, as they can be used to make a delicious gravy or stock for soup. Understanding turkey giblets and their uses can take your Thanksgiving meal to the next level.
Step 2. Rinse Turkey After Brining
After the turkey has finished its brine, you'll want to thoroughly rinse it under cool running water. This will help remove any excess salt and brine that's still clinging to the skin.
You can even use your hands to gently rub the surface, making sure you get into all the nooks and crannies. It's important to rinse the turkey well, as any leftover brine could make the meat overly salty.
Once it's rinsed, you can pat the turkey dry with some paper towels. This will help the skin get nice and crispy when you roast it later.
Don't forget to rinse the cavity too – you want to make sure all that briny goodness is washed away.
With a clean, dry turkey, you're one step closer to the perfect Thanksgiving feast. Get ready for the juiciest, most flavorful turkey your family has ever tasted!
Step 3. Pat Turkey Dry
After thoroughly rinsing the turkey, you'll want to pat it completely dry using some clean paper towels. This is a crucial step that helps ensure the skin gets nice and crispy when you roast the bird.
Gently blot and press the paper towels against the turkey, soaking up any excess moisture. You might need to go through a few batches of towels to get the job done, but don't worry – it'll be worth it!
With the turkey nice and dry, the oven heat can work its magic, crisping up that delicious skin to golden perfection. Plus, a dry bird means the seasonings and herbs you add will stick better, infusing every bite with mouthwatering flavor.
Step 4. Rub Turkey With Herb Butter
Your next step is to create a delectable herb butter to coat the turkey. This easy-to-make mixture will infuse your bird with mouthwatering flavors!
Start by gathering a few simple ingredients – butter, fresh herbs, garlic, and a pinch of salt and pepper. In a bowl, let the butter soften at room temperature.
Then, finely chop the herbs, such as rosemary, thyme, and sage. Mince the garlic and add it to the butter, along with the chopped herbs and a sprinkle of salt and pepper.
Use a fork to mash and mix everything together until it's nice and smooth. Gently lift the skin of the turkey and spread the herb butter all over the meat, making sure to get it into every nook and cranny.
This will create a deliciously crispy and flavorful skin as your turkey roasts. With the herb butter in place, your turkey is ready for the oven!
Get ready for the amazing aroma to fill your kitchen as it bakes to perfection.
Step 5. Roast Turkey at 325°F
Preheat your oven to 325°F. This is the perfect temperature to roast your Thanksgiving turkey to perfection!
Gently place the brined turkey onto a sturdy roasting rack inside a large roasting pan. Make sure the turkey's legs are facing the front of the oven. This will help the thighs cook evenly.
Slide the pan into the preheated oven and set a timer for 2 to 2 1/2 hours. As the turkey roasts, the delicious aroma will fill your kitchen.
Baste the turkey every 30 minutes with the flavorful juices in the bottom of the pan. This will help create a beautiful, golden-brown skin.
Use a meat thermometer to check that the thickest part of the turkey breast reaches 165°F.
Once it's done, take the turkey out of the oven and let it rest for 20 minutes before carving. This allows the juices to redistribute, making your turkey extra moist and flavorful.
Now you're ready to serve up a delicious Thanksgiving feast!
Final Thoughts
Ultimately, brining your turkey is one of the best ways to ensure a juicy, flavorful Thanksgiving centerpiece. The salty brine infuses the meat with moisture and savory seasonings, transforming a plain bird into a mouthwatering delight.
Imagine slicing into that golden-brown skin and watching the juices flow – it's a moment that'll have your guests reaching for seconds (and maybe thirds!).
But the benefits of brining don't stop there. The process also helps tenderize the meat, making each bite a pleasure to chew. Additionally, brining adds flavor to the meat, ensuring that each bite is not only tender but also packed with delicious taste. Another benefit of brining is that it helps to lock in moisture, preventing the meat from drying out during the cooking process. This is where the benefits of beef broth come into play, as it can be used as a key ingredient in the brining solution to further enhance the flavor and juiciness of the meat.
And let's not forget the aromatic herbs and spices you can add to the brine, which will fill your kitchen with the tantalizing scents of the holiday season.
Frequently Asked Questions
How Long Should I Brine the Turkey for Best Results?
You should brine the turkey for 12 to 24 hours for the best results. The longer you brine, the more flavorful and moist the turkey will be. Just be sure not to brine it for too long, as it can become overly salty.
Can I Use a Dry Brine Instead of a Wet Brine?
Absolutely, you can use a dry brine instead of a wet brine. Dry brining is a simple and effective way to season and tenderize your turkey. It's a great alternative if you don't want to deal with the hassle of a wet brine.
What Type of Herbs and Spices Work Best in the Brine?
You can experiment with various herbs and spices in your brine to add flavor. Popular choices include rosemary, thyme, sage, garlic, peppercorns, and bay leaves. Use them fresh or dried, adjusting the amounts to suit your taste preferences.
How Do I Ensure the Turkey Stays Moist During Roasting?
To ensure your turkey stays moist during roasting, baste it frequently with the pan juices and consider using a meat thermometer to monitor the internal temperature. Avoid overcooking, and let the turkey rest before carving to lock in the moisture.
Can I Brine a Frozen Turkey, or Does It Need to Be Thawed?
You can brine a frozen turkey, but it'll take longer. The turkey needs to be completely thawed before brining to ensure the brine penetrates evenly. Don't try to brine a partially frozen bird – it won't work well.
Alejandro is a vibrant advocate of traditional Mexican cuisine. From spicy tacos and enchiladas to rich moles and tamales, Alejandro’s dishes celebrate the colorful, bold flavors of Mexico. His recipes bring authentic Mexican street food and home-cooked meals to your table, with a focus on using fresh, flavorful ingredients.
Thanksgiving
Leftover Turkey Casserole
Indulge in a cozy and comforting way to repurpose your leftover Thanksgiving turkey with this easy-to-make casserole that’s sure to impress your family and friends.
Turn that leftover Thanksgiving turkey into a hearty and comforting casserole! This crowd-pleasing dish combines tender turkey with a creamy sauce, veggies, cheese, and a crunchy topping. It's easy to prepare, using simple ingredients you likely already have on hand. Just mix everything together, bake until bubbly and golden, and enjoy a delicious second-day meal. The casserole's versatility allows you to customize the flavors, making it a creative way to repurpose leftovers. Plus, it's cost-effective and minimizes food waste – a win-win. Keep reading to discover the full recipe and cooking steps for this beloved post-holiday classic. Simply shred or chop the leftover turkey and mix it with the creamy sauce, vegetables, and cheese. Feel free to add in any extra seasonings or spices to elevate the flavors and make it your own. If you’re looking for a juicy roast turkey recipe, be sure to check out our website for step-by-step instructions. With just a few simple steps, you can transform your Thanksgiving leftovers into a delicious and satisfying meal that the whole family will love.
Key Takeaways
- The leftover turkey casserole is a popular dish that transforms tender turkey into a hearty and comforting meal, often combining it with a creamy sauce and a crunchy topping.
- The recipe typically includes cooked turkey, cream of mushroom soup, vegetables, shredded cheddar cheese, and breadcrumbs, making it a convenient and versatile dish.
- The casserole offers quick preparation, minimizing food waste by utilizing leftover turkey, and serves as an economical alternative to dining out or ordering in.
- The dish can be customized with various ingredients and flavors, allowing for personal preferences and dietary restrictions, while promoting sustainable cooking practices.
- The leftover turkey casserole not only provides a balanced meal but also encourages culinary creativity, inspiring experimentation with different flavor combinations and serving as a foundation for future meal ideas.
History
Turkey has been a staple of the American Thanksgiving feast for centuries. The origins of this beloved tradition can be traced back to the early days of the Plymouth Colony, where the Pilgrims and the Wampanoag people celebrated their first successful harvest in 1621. This shared feast, often referred to as the "First Thanksgiving," featured turkey as a centerpiece, alongside other wild game and locally grown produce.
Over time, the tradition of serving turkey on Thanksgiving evolved, becoming an integral part of the holiday's culinary landscape. As families gathered to give thanks, the leftover turkey became a practical and delicious way to continue the celebration.
Casseroles emerged as a popular method of utilizing these leftovers, allowing families to create new and satisfying dishes that could feed a crowd. Today, the leftover turkey casserole remains a beloved post-Thanksgiving staple, a testament to the enduring legacy of this cherished American tradition.
Recipe
Leftover turkey is a delightful ingredient that can be transformed into a hearty and comforting casserole. This dish isn't only a great way to use up any remaining turkey from your holiday feast but also a satisfying meal that the whole family can enjoy.
Similar to how bread pudding transforms stale bread, this casserole uses leftover turkey to create something truly special. The combination of tender turkey, creamy sauce, and a crunchy topping makes this casserole a true crowd-pleaser. It's perfect for a cozy weeknight dinner or as a simple yet impressive dish to share with guests.
- 3 cups cooked turkey, shredded or diced
- 1 can (10.5 oz) cream of mushroom soup
- 1 cup milk
- 1 cup frozen peas
- 1 cup cooked, diced carrots
- 1 cup cooked, diced potatoes
- 1 cup shredded cheddar cheese
- 1 cup breadcrumbs or crushed crackers
- 2 tablespoons butter, melted
Preheat your oven to 375°F (190°C). In a large bowl, combine the shredded or diced turkey, cream of mushroom soup, milk, peas, carrots, and potatoes. Mix well until all the ingredients are evenly distributed.
Transfer the mixture to a greased 9×13-inch baking dish. Sprinkle the shredded cheddar cheese on top, followed by the breadcrumbs or crushed crackers. Drizzle the melted butter over the top.
Bake the casserole for 30-35 minutes, or until the top is golden brown and the filling is bubbly. Allow the casserole to cool for a few minutes before serving.
This dish can be paired with a fresh salad or your favorite sides for a complete and satisfying meal. Enjoy your delicious leftover turkey casserole!
Cooking Steps
Preheat your oven to 350°F.
In a large bowl, mix together the leftover turkey, vegetables, and seasonings.
Pour the mixture into a baking dish and bake for 30-40 minutes.
Once cooked, let the casserole stand for 5 minutes before serving.
Step 1. Preheat Oven to 350°F
To get the oven ready for the casserole, you'll want to preheat it to 350°F. This temperature is perfect for baking the dish, ensuring it cooks through evenly without burning the top or leaving the center underdone.
It's important to give the oven time to fully heat up before adding the casserole. This typically takes around 15-20 minutes, depending on your oven. You can use this time to gather the remaining ingredients and prepare the baking dish.
Once the oven has reached 350°F, you're ready to assemble and bake the casserole. This step-by-step process will help the dish turn out perfectly every time.
Be sure to keep a close eye on the oven to prevent overcooking, and enjoy the delicious aroma as the casserole bakes to golden brown perfection.
Step 2. In a Large Bowl, Mix Ingredients
In a large bowl, combine the cooked turkey, cooked stuffing, cream of mushroom soup, milk, frozen vegetables, and seasonings. Stir everything together until it's well-mixed.
This casserole is a great way to use up your leftover Thanksgiving turkey and stuffing. The cream of mushroom soup and milk create a rich, creamy base, while the frozen veggies add color and nutrition.
Feel free to adjust the ingredient amounts to your taste. For example, if you have a lot of extra turkey, you can add a bit more. Or if you prefer more veggies, toss in an extra handful or two. Just be sure to mix everything thoroughly so the flavors meld together.
Once the ingredients are combined, transfer the mixture to a greased baking dish. Smooth the top with a spatula to create an even layer.
Now you're ready to bake the casserole and enjoy a delicious, comforting meal made with your leftover turkey.
Step 3. Pour Into Baking Dish
Once the ingredients are combined in the large bowl, transfer the mixture to a greased baking dish. This 9×13-inch dish should be lightly coated with cooking spray or butter to prevent sticking.
Gently pour the turkey and vegetable blend into the prepared dish, smoothing the top with a spatula to create an even layer.
Next, top the casserole with the cubed bread, ensuring the entire surface is covered. This layer of bread will soak up the delicious flavors as the dish bakes.
If desired, you can lightly press the bread cubes into the filling to help them adhere.
Step 4. Bake for 30-40 Minutes
Slide the baking dish into the preheated oven and let the turkey casserole bake for 30 to 40 minutes. This step allows the flavors to meld together and the dish to develop a golden-brown crust on top.
Keep an eye on it, as oven temperatures can vary. You'll know it's done when the edges are bubbling, and the center is hot and bubbly.
Once the timer goes off, carefully remove the casserole from the oven. Let it rest for about 5 minutes before serving. This resting period allows the casserole to set up and makes it easier to portion out.
When ready to serve, scoop portions onto plates or bowls. The turkey casserole pairs well with a fresh salad or steamed vegetables for a complete and satisfying meal.
Enjoy your delicious use of leftover turkey!
Step 5. Let Stand 5 Minutes Before Serving
After removing the casserole from the oven, let it stand for about 5 minutes before serving. This resting period allows the flavors to meld together and the casserole to set up slightly. During this time, the hot, bubbly filling will thicken, making it easier to scoop out neat servings.
While you wait, this is a great opportunity to prepare any additional sides or garnishes. Perhaps you'd like to toss together a simple salad or warm up some dinner rolls to accompany the casserole. You could also take this time to set the table and gather any necessary serving utensils.
Once the 5 minutes are up, the casserole should be ready to serve. Scoop out portions using a large spoon or spatula, being careful not to disturb the layers too much.
Serve the casserole hot, garnished with a sprinkle of fresh parsley or a dollop of cranberry sauce, if desired. Enjoy this delicious way to use up your leftover turkey!
Final Thoughts
The Leftover Turkey Casserole is a delightful way to repurpose your holiday leftovers. This hearty dish not only saves you time and money but also reduces food waste, making it an eco-friendly option.
By incorporating the remaining turkey, vegetables, and stuffing into a creamy casserole, you've created a well-balanced meal that's sure to satisfy.
The best part? This recipe is incredibly versatile, allowing you to customize it based on your personal preferences or the ingredients you have on hand.
Feel free to experiment with different types of cheese, add extra veggies, or even switch up the protein. The key is to have fun and get creative with your leftovers.
As you savor the final bites of this comforting casserole, take a moment to appreciate the convenience and cost-effectiveness of this dish.
The Leftover Turkey Casserole not only provides a delicious second act for your holiday meal but also serves as a reminder that with a little creativity, you can transform your leftovers into something truly special.
Frequently Asked Questions
Can I Use Rotisserie Chicken Instead of Turkey?
Absolutely, you can use rotisserie chicken instead of turkey. The flavors and textures will be similar, and it'll make for a quick and easy meal. Just be sure to adjust the cooking time accordingly.
How Long Does the Casserole Last in the Fridge?
The casserole will usually last 3-4 days in the fridge. Be sure to store it in an airtight container and reheat it thoroughly before serving. Enjoy your delicious leftovers!
Can I Freeze the Leftover Casserole?
Yes, you can freeze the leftover casserole. Freezing is a great way to extend the shelf life of your meal. Simply portion it into airtight containers and store in the freezer for up to 3 months.
Is the Casserole Suitable for Vegetarians or Vegans?
The casserole may not be suitable for vegetarians or vegans, as it likely contains meat-based ingredients. It's best to check the recipe and adjust it accordingly if you want a plant-based version that meets your dietary needs.
Can I Add Additional Vegetables to the Recipe?
You can absolutely add additional vegetables to the recipe! Vegetables are a great way to boost the nutrition and flavor of any dish. Feel free to experiment with your favorite veggies to enhance the overall dish.
Rachel is all about nostalgic comfort food with a modern twist. She brings the flavors of classic American diners to Cook if Ya, with her takes on burgers, fries, and milkshakes. Rachel’s love for simple, hearty meals brings a bit of retro flair to the table, reminding us all of the joys of classic diner dishes.
Thanksgiving
Turkey Sandwich (For Leftovers)
Hanker for a tasty and portable lunch? Transform your Thanksgiving or holiday leftovers into a classic turkey sandwich. Read on to learn the secret to perfecting this versatile meal.
Transform your Thanksgiving or holiday leftovers into a tasty and portable lunch with a classic turkey sandwich. This versatile meal originated in the early 20th century and gained popularity as industrialization made turkey more widely available. The secret to a delicious turkey sandwich lies in using fresh, high-quality ingredients – think freshly sliced turkey, your choice of bread, creamy condiments, and crunchy vegetables. Customize it to your liking, then enjoy the satisfying blend of savory, creamy, and fresh flavors in each bite. For more details on perfecting your turkey sandwich, keep reading.
Key Takeaways
- Utilize leftover turkey to create a versatile and flavorful sandwich, featuring fresh bread, condiments, and customizable toppings.
- Ensure quality ingredients like sliced turkey and preferred bread to enhance the overall taste and texture of the sandwich.
- Experiment with various condiments and toppings, such as mayonnaise, mustard, lettuce, and tomato, to personalize the sandwich to your liking.
- Assemble the sandwich with a balanced distribution of ingredients, considering the flavor profile, texture, and visual appeal.
- Enjoy the nutritional benefits of the turkey sandwich, which provides lean protein, fiber, and essential vitamins and minerals.
History
The origins of the turkey sandwich can be traced back to the early 20th century, when the rise of industrialized food production and growing affluence in urban centers paved the way for its popularity.
As more Americans began to work in offices and factories, the need for a portable, filling meal arose. The turkey sandwich, with its combination of savory meat, bread, and often complementary condiments, emerged as a convenient and satisfying lunch option.
Driven by the expansion of commercial poultry farming, the availability of pre-sliced bread, and the increasing popularity of sandwich shops, the turkey sandwich quickly gained traction.
By the mid-20th century, it had become a staple in lunchboxes and diner menus nationwide.
The versatility of the turkey sandwich, allowing for creative ingredient combinations and adaptations, has contributed to its enduring appeal over the decades.
Today, the turkey sandwich remains a beloved classic, a testament to its enduring place in American culinary history.
Recipe
A classic turkey sandwich is a delightful and versatile meal that can be enjoyed any time of the day. Whether you're looking for a quick lunch or a satisfying snack, this simple recipe will guide you through the steps to create a delicious and satisfying sandwich.
The key to a great turkey sandwich lies in the quality of the ingredients. Start with freshly sliced turkey, preferably roasted or smoked for maximum flavor. Pair it with your choice of bread, from hearty whole-grain to soft and pillowy white, and don't forget the condiments and toppings that will bring the flavors together.
Ingredients:
- 4 slices of bread
- 6 ounces of sliced turkey
- 2 slices of cheese (such as cheddar or swiss)
- 2 tablespoons of mayonnaise
- 1 tablespoon of Dijon mustard
- 2 slices of tomato
- 2 leaves of lettuce
Instructions:
Spread the mayonnaise and Dijon mustard on the four slices of bread. Layer the turkey, cheese, tomato, and lettuce on two of the slices. Top with the remaining two slices of bread to create the sandwiches.
When preparing this dish, consider toasting the bread for added crunch and warmth. You can also experiment with different types of cheese, vegetables, or condiments to personalize the flavor profile.
Remember to slice the tomatoes thinly to ensure a balanced texture in the sandwich.
Cooking Steps
Slice the bread to your desired thickness.
Spread your favorite condiments onto the bread slices.
Layer the turkey slices, add cheese slices, and top with any additional toppings you'd like.
Step 1. Slice Bread to Desired Thickness
Slicing the bread to your preferred thickness is a crucial step in crafting the perfect turkey sandwich. The thickness of the bread can significantly impact the overall texture and balance of the sandwich, so it's essential to get it just right.
Using a sharp serrated knife, gently saw back and forth to slice the bread into even, uniform pieces. Aim for a thickness that's substantial enough to support the filling, yet not so thick that it overwhelms the other ingredients.
A good rule of thumb is to slice the bread between 1/4 to 1/2 inch thick. This range provides the optimal ratio of bread to turkey, cheese, and any other toppings you choose to include.
Take your time and pay attention to the thickness, adjusting as needed, to ensure each slice is cut precisely. Properly sliced bread lays the foundation for a well-balanced and delightful turkey sandwich.
Step 2. Spread Condiments on Bread Slices
With your bread slices ready, you can now move on to spreading the condiments. The choice of condiments is entirely up to you, but classic options include mayonnaise, mustard, and/or a flavorful spread like pesto or hummus.
It's important to note that while some human foods are safe for dogs, others, like grapes, can be harmful; always consider your furry friends when preparing meals and feeding safe treats.
If using mayonnaise, start by applying a thin, even layer across the surface of each bread slice. This will help create a smooth, creamy base for the other ingredients.
For mustard, you can either spread it directly on the bread or mix it with a bit of mayonnaise to create a tangy, zesty blend.
Alternatively, if you prefer a more robust flavor, consider using a pesto or hummus. Spoon a small amount onto the bread and use the back of a knife to gently spread it, taking care not to tear the delicate surface.
The key is to ensure an even distribution of the condiment, providing maximum flavor in every bite.
Once the condiments are applied, you're ready to assemble the turkey sandwich!
Step 3. Layer Turkey Slices
Now that you've prepared the bread with your choice of condiments, it's time to layer the turkey slices. This is a crucial step in crafting the perfect turkey sandwich, as the arrangement and placement of the turkey can make or break the overall experience.
Begin by selecting high-quality, thinly sliced turkey. Deli-style turkey works best, as it's delicate enough to layer neatly without overwhelming the other ingredients.
Arrange the turkey slices in a slightly overlapping pattern, ensuring that each slice covers the majority of the bread's surface area. This creates a uniform and visually appealing layer of turkey.
When layering, be mindful of the placement and distribution. You want to achieve a balance, with the turkey covering the bread evenly from edge to edge.
Avoid clustering the slices in the center, as this can create an uneven texture and make it challenging to take a satisfying bite.
Step 4. Add Cheese Slices
After you've carefully layered the turkey slices, it's time to add the cheese. Selecting the right cheese can truly elevate your turkey sandwich. Consider classic options like cheddar or Swiss, or get creative with pepper jack or provolone.
Slice the cheese into thin, even pieces, ensuring it covers the turkey completely. You want the cheese to melt seamlessly, creating a cohesive and flavorful layer.
When arranging the cheese, be mindful of overlapping the slices slightly to prevent gaps. Gently press the cheese down to help it adhere to the turkey. This will create a sturdy foundation for the rest of your sandwich.
Feel free to use as much or as little cheese as you prefer, depending on your personal taste preferences.
Step 5. Add Any Desired Toppings
Next, you can add any desired toppings to your turkey sandwich. The possibilities are endless when it comes to customizing your sandwich with tasty toppings.
Some popular options include:
- Crisp lettuce leaves or fresh spinach to add a crunchy, nutritious element.
- Juicy tomato slices or roasted red peppers for a burst of tangy flavor.
- Thinly sliced onions, whether red, white, or shallots, for a subtle bite.
- Crunchy pickle chips or relish to provide a tangy, briny contrast.
- Creamy avocado slices or a smear of guacamole for a rich, creamy texture.
- Crispy bacon strips to add a salty, smoky note.
Feel free to experiment with various combinations to find your perfect flavor profile.
Final Thoughts
The preparation of a satisfying turkey sandwich shouldn't be taken lightly. As the final step in your culinary journey, the choices you make regarding the finishing touches can truly elevate the entire experience.
Consider adding a sprinkle of salt and pepper to enhance the flavors, or a drizzle of your favorite condiment to provide a delightful contrast. Remember, the beauty of the turkey sandwich lies in its simplicity – don't overpower the natural goodness of the ingredients.
Once you've assembled your masterpiece, take a moment to admire your handiwork. Savor the aroma, the textures, and the harmonious blend of flavors.
Then, with a sense of pride and anticipation, take that first bite, allowing the flavors to dance across your palate. Enjoy every morsel, savoring the satisfaction of a job well done.
The turkey sandwich, a testament to your culinary skills, is now ready to be relished and shared with loved ones. Once the sandwich is made, you place it on a decorative platter and garnish it with a sprinkle of parsley for that final touch. As you bring it to the table, your friends and family gather around, eager to taste your masterpiece. As you all enjoy the delicious meal together, you start thinking about what to do with the remaining turkey. Perhaps it’s time to try out that leftover turkey casserole recipe you’ve been eyeing for a while.
Frequently Asked Questions
How Long Can the Turkey Sandwich Be Stored in the Fridge?
You can store the sandwich in the fridge for 3-4 days. Keep it in an airtight container or wrap it tightly to prevent it from drying out. Consume it within that timeframe for the best quality and food safety.
Can I Use Different Types of Bread for the Sandwich?
You can definitely use different types of bread for your sandwich. The flavor and texture of the bread can change the overall taste and experience, so feel free to experiment with options like whole wheat, sourdough, or even croissants.
Is It Possible to Make the Sandwich Ahead of Time?
Yes, you can certainly make the sandwich ahead of time. Prepare it and store it in an airtight container in the fridge. Just be sure to eat it within a few days for best quality and freshness.
How Can I Make the Sandwich More Flavorful?
To make your sandwich more flavorful, you can try adding herbs, spices, or a flavor-packed condiment like pesto or roasted garlic aioli. Experiment with different combinations to find your perfect flavor profile.
Can I Add Any Extra Toppings or Condiments to the Sandwich?
You can definitely add more toppings and condiments to make your sandwich more flavorful. Consider adding crisp lettuce, juicy tomatoes, creamy avocado, or even a tangy pickle or two. Don't be afraid to experiment with different flavors!
Rachel is all about nostalgic comfort food with a modern twist. She brings the flavors of classic American diners to Cook if Ya, with her takes on burgers, fries, and milkshakes. Rachel’s love for simple, hearty meals brings a bit of retro flair to the table, reminding us all of the joys of classic diner dishes.
-
Brazilian Cuisine3 months ago
Tacacá
-
Polish Comfort Food3 months ago
Krupnik (Barley Soup)
-
Brazilian Cuisine3 months ago
Caldeirada
-
Brazilian Cuisine3 months ago
Chicken in Brown Sauce
-
Southern Comfort Food3 months ago
Cheese Straws
-
African Cuisine3 months ago
Kedjenou (Ivory Coast)
-
Polish Comfort Food3 months ago
Vegetable Salad
-
American Diner Classics3 months ago
The Maillard Reaction: Understanding the Chemistry of Browning {Food Science and Cooking}