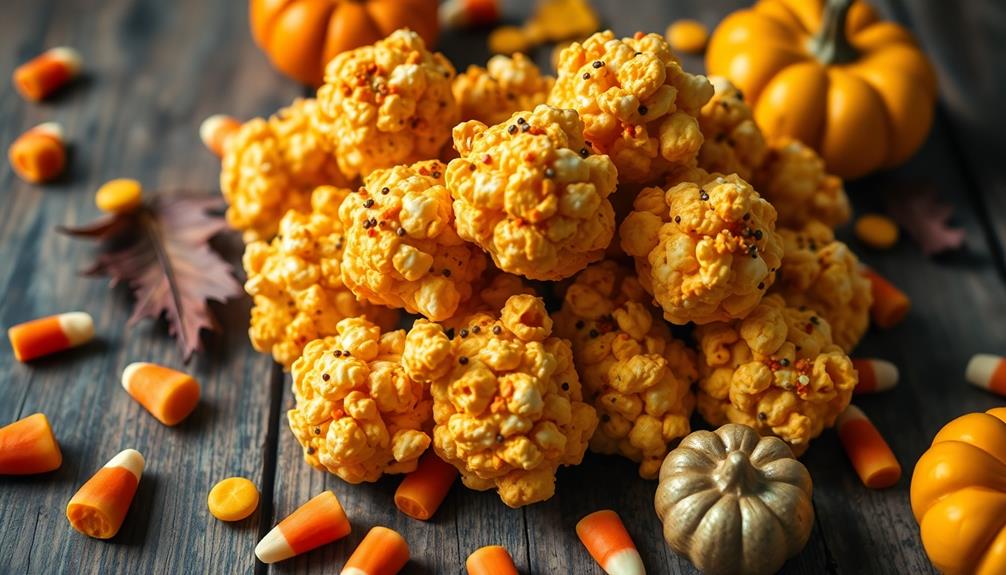

You'll love these vibrant pumpkin Rice Krispie treats – they bring the flavors of fall to a classic snack! Originating in the early 20th century, these treats evolved into a beloved tradition marking the arrival of autumn. The recipe is easy, combining pumpkin puree and warm spices with the classic Rice Krispies cereal base, marshmallows, and butter for a chewy and crunchy texture. Serve them at parties, gatherings, or as a seasonal delight. Don't forget the creative toppings like melted chocolate and chopped nuts! Read on to discover the full history and recipe for these festive treats. Looking for more ways to incorporate the flavors of fall into your meals? Try out a jackolantern stuffed peppers recipe for a fun and festive twist on a classic dish. The combination of savory vegetables and hearty filling makes this a perfect autumn meal. Stay tuned for the full recipe and step-by-step instructions!
Key Takeaways
- Pumpkin Rice Krispie Treats are a seasonal dessert that combines the classic Rice Krispie Treat with pumpkin puree and warm spices for a festive twist.
- The recipe is easy to make and includes ingredients like Rice Krispies cereal, pumpkin puree, marshmallows, and butter, resulting in a chewy and crunchy texture.
- Pumpkin Rice Krispie Treats are popular for various occasions, including school parties and family gatherings, and can be stored for up to 5 days.
- Variations of the recipe include adding spices like cinnamon or nutmeg, making it gluten-free, and decorating the treats with melted chocolate or chopped nuts.
- Pumpkin Rice Krispie Treats are a beloved tradition that marks the arrival of fall, providing a vibrant color and cozy flavor to the classic Rice Krispie Treat.
Top picks for "pumpkin rice krispie"
Open Amazon search results for this keyword.
As an affiliate, we earn on qualifying purchases.
History
The origins of Pumpkin Rice Krispie Treats can be traced back to the early 20th century, when resourceful cooks began experimenting with incorporating seasonal ingredients into classic dessert recipes.
As the popularity of Rice Krispie Treats grew, bakers looked for ways to add a touch of autumn flavor. They discovered that pumpkin puree blended beautifully with the cereal, marshmallows, and butter, creating a delightful seasonal twist.
Over the years, this recipe has become a beloved tradition, marking the arrival of fall and the cozy feeling of the harvest season.
Today, Pumpkin Rice Krispie Treats continue to delight bakers and treat-lovers alike, offering a simple yet scrumptious way to celebrate the flavors of the pumpkin patch.
Whether you're making them for a school party, a family gathering, or just a cozy afternoon snack, these festive treats are sure to bring a smile to everyone's face.
Recipe
Fall is the perfect time to enjoy the flavors of pumpkin. These Pumpkin Rice Krispie Treats are a delightful twist on the classic treat, incorporating the warm spices of pumpkin pie. They make a great snack, dessert, or even a fun addition to a holiday spread.
The creamy pumpkin puree and autumn-inspired spices perfectly complement the crunchy Rice Krispies cereal, creating a texture that's both chewy and satisfying. This easy-to-make recipe is sure to become a new family favorite.
- 3 tablespoons unsalted butter
- 4 cups miniature marshmallows
- 1/2 cup pumpkin puree
- 1 teaspoon ground cinnamon
- 1/2 teaspoon ground ginger
- 1/4 teaspoon ground nutmeg
- 1/8 teaspoon ground cloves
- 6 cups Rice Krispies cereal
In a large saucepan, melt the butter over medium heat. Add the marshmallows and stir constantly until completely melted and smooth. Remove from heat and stir in the pumpkin puree, cinnamon, ginger, nutmeg, and cloves until well combined.
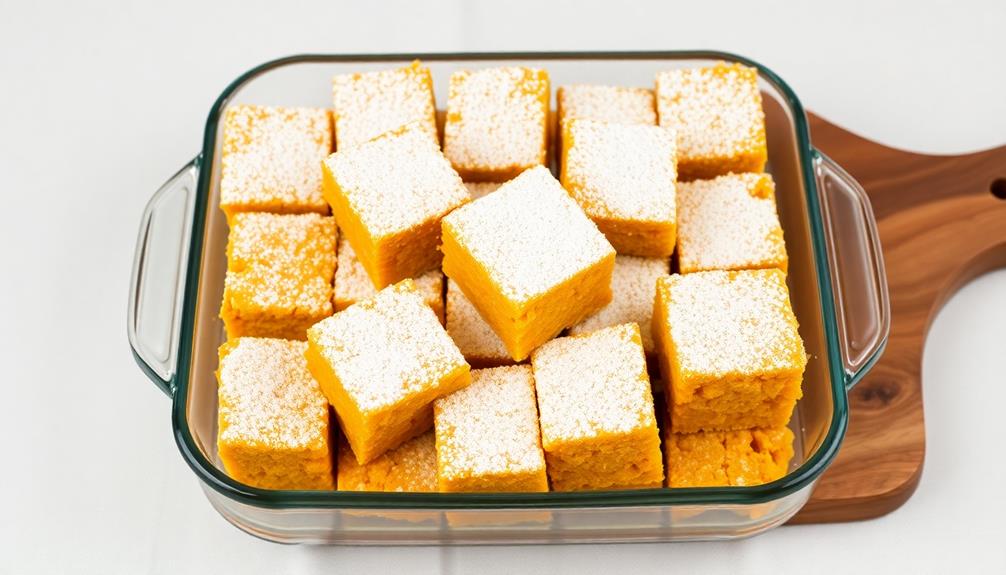
Fold in the Rice Krispies cereal until evenly coated. Press the mixture into a greased 9×13-inch baking pan. Allow to cool completely before cutting into squares.
For a festive touch, consider sprinkling the top of the treats with a dusting of ground cinnamon or crushed graham crackers. Store the Pumpkin Rice Krispie Treats in an airtight container at room temperature for up to 5 days.
Cooking Steps
Melt the butter and marshmallows in a large pot over low heat, stirring frequently until smooth.
Stir in the pumpkin puree until well combined.
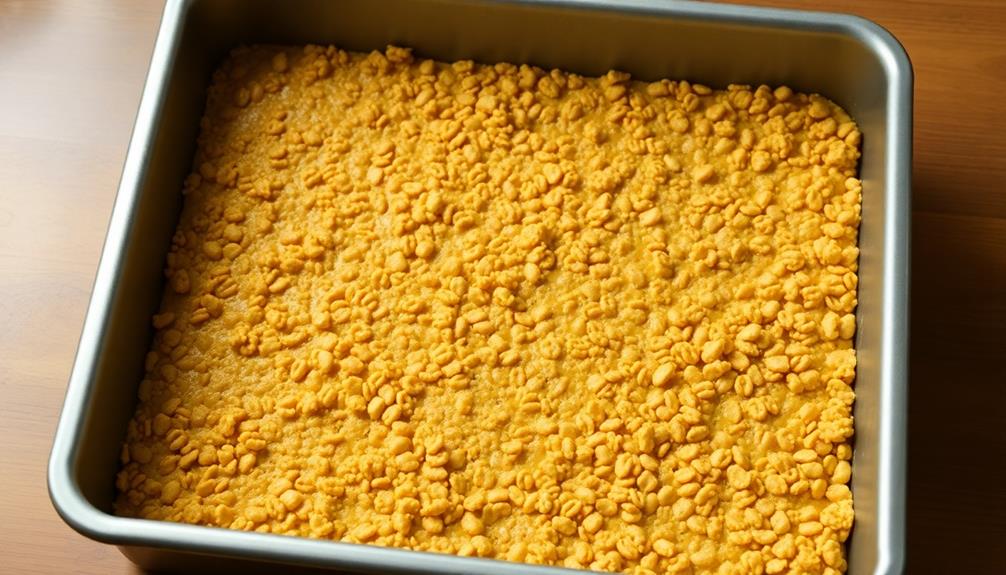
Remove the pot from the heat and quickly mix in the Rice Krispies cereal, coating them evenly.
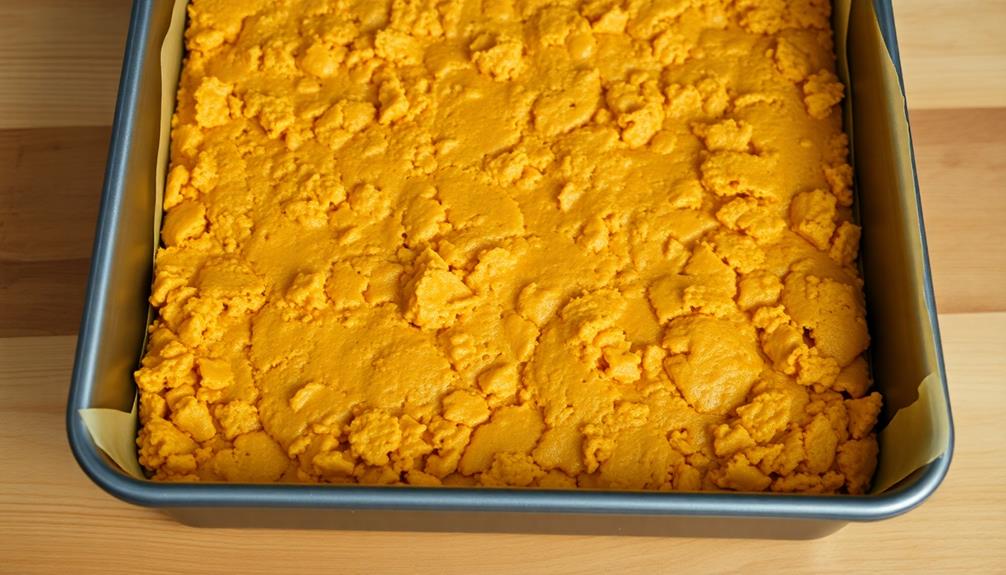
Press the mixture firmly into a prepared pan and let it cool completely before cutting into squares.
Step 1. Melt Butter and Marshmallows

First, melt the butter in a large saucepan over medium heat.
Once the butter has fully melted, add the marshmallows.
Stir the mixture constantly with a wooden spoon or silicone spatula, making sure the marshmallows are completely incorporated and the mixture is smooth. This should take about 5-7 minutes.
Be patient and don't let the mixture burn.
The key is to keep a close eye on the pan, stirring frequently, until the marshmallows have fully melted and combined with the butter.
You'll know it's ready when the mixture is glossy and has a creamy, gooey texture.
Once it reaches this stage, remove the pan from the heat.
The melted marshmallow mixture will continue to be warm and pliable, perfect for mixing in the Rice Krispies cereal.
Step 2. Add Pumpkin Puree

With the melted marshmallow mixture still warm and pliable, you'll want to stir in the pumpkin puree. This will give your Rice Krispie treats a delightful autumn flavor and vibrant orange color.
Be sure to use pure pumpkin puree, not pumpkin pie filling, as the latter contains added spices and sweeteners that could alter the taste. Gently fold the pumpkin into the marshmallow mixture until it's fully incorporated.
You'll notice the consistency become thicker and creamier as the pumpkin adds body to the treats. This pumpkin addition will make your Rice Krispie treats extra soft and moist, with a subtle pumpkin taste that complements the classic cereal flavor.
Once the pumpkin is blended in, you're ready to quickly transfer the mixture to your prepared baking pan and smooth the top. The pumpkin puree will help hold the treats together for easy cutting into squares later on.
Step 3. Stir in Rice Krispies Cereal

After blending in the pumpkin puree, you'll want to quickly stir in the Rice Krispies cereal. This is the moment when the magic happens!
As you gently fold the crunchy cereal into the sweet, orange mixture, you'll start to see the signature Rice Krispie Treat texture coming together. Be sure to work carefully, as you don't want to crush the delicate cereal pieces.
The goal is to evenly distribute the Rice Krispies throughout the pumpkin mixture, creating a uniform consistency. Once the cereal is fully incorporated, you'll have a beautifully vibrant, pumpkin-y base that's ready to be pressed into the pan.
This step happens fast, so have your prepared pan nearby and be ready to transfer the mixture as soon as it's combined. The Rice Krispies will provide the perfect amount of crunch to balance the soft, pumpkin-y goodness.
Get excited – your pumpkin-flavored treats are just moments away from being complete!
Step 4. Press Into Prepared Pan
Now that the pumpkin-infused Rice Krispies mixture is ready, you'll want to transfer it to your prepared pan.
Grease an 8×8 inch baking dish with nonstick cooking spray or butter. This will help the treats release easily once they've set.
Carefully scoop the gooey, orange-hued cereal mixture into the pan. Using a rubber spatula or the back of a spoon, firmly press the mixture into an even layer, filling all the corners.
Make sure to compact it well so the treats hold their shape. Once the mixture is evenly spread, use the spatula to create a smooth, flat surface on top.
This will ensure your finished pumpkin Rice Krispies treats have a neat, uniform appearance.
With the pan prepped and the mixture pressed in, you're ready for the next step – letting the treats cool and set before cutting into squares.
Just a few more easy tasks to go until you can dig into these festive fall-inspired treats!
Step 5. Let Cool Before Cutting
Once the pumpkin Rice Krispies mixture is pressed into the prepared pan, allow it to cool completely before attempting to cut into squares. This step is crucial, as the treats need time to set and firm up. Rushing the process can lead to a messy, crumbly result. Be patient and let the pan sit on the counter for at least 30 minutes, or until the mixture has fully hardened.
Once cooled, use a sharp knife to slice the pumpkin Rice Krispies treats into neat, even squares. Cutting them while they're still warm can cause them to fall apart. Take your time and make clean, straight cuts for the best presentation.
Don't worry if the edges look a bit uneven – that's all part of the homemade charm! Once cut, the squares can be carefully removed from the pan and enjoyed. Remember to store any leftovers in an airtight container to keep them fresh and delicious.
Final Thoughts
Though these pumpkin Rice Krispie treats may take a bit more effort than the classic version, the end result is well worth it. The vibrant orange color and the cozy pumpkin flavor make these treats perfect for fall.
You'll love how the pumpkin puree adds a soft and gooey texture, while the Rice Krispies provide a satisfying crunch. Plus, the festive pumpkin shape is sure to delight your family and friends.
Once you've mastered this recipe, you can have fun experimenting with different toppings or shapes. Try drizzling them with melted chocolate or sprinkling on some chopped nuts for extra crunch.
You could even make mini pumpkin bites by using a mini muffin tin. No matter how you serve them, these pumpkin Rice Krispie treats are guaranteed to be a hit.
Frequently Asked Questions
Can I Use a Different Type of Cereal?
Absolutely! You can substitute any crunchy cereal in place of the original. Just be mindful that the texture and flavor may differ. Feel free to experiment and find your favorite variation.
How Long Do the Treats Stay Fresh?
The treats will stay fresh for about a week if you store them in an airtight container at room temperature. They may last a bit longer in the fridge, but the texture could become dry and crumbly over time.
Can I Add Extra Pumpkin Spice Flavoring?
Sure, you can definitely add extra pumpkin spice flavoring to your treats. Just be mindful of not overpowering the other flavors. Start with a small amount and adjust to your preference. Have fun experimenting!
Do I Need to Refrigerate the Treats?
You don't necessarily need to refrigerate the treats, but it's best to store them at room temperature. Refrigeration can make them hard and dry out faster. Keep them in an airtight container for optimal freshness.
Can I Substitute Honey for the Marshmallows?
You can substitute honey for the marshmallows, but the texture and binding properties won't be the same. The treats may be more crumbly and less cohesive. Consider reducing the amount of honey used to prevent over-sweetness.
Conclusion
You'll love these pumpkin rice krispie treats! They're so easy to make and the perfect fall treat. The pumpkin and spices give them a cozy, festive flavor that'll have you reaching for more. Why not give them a try this season? You won't be disappointed – these treats are sure to become a new favorite in your household. Enjoy!