Popcorn balls have a long and festive history as a Halloween treat, tracing their origins back to the late 19th century. Families would gather to pop kernels over a fire, then shape the crunchy popcorn into bright orange and black spheres. Today, these tasty treats combine popcorn with a sticky caramel coating, making them a perfect snack for trick-or-treaters and Halloween parties. The simple recipe comes together quickly, though you'll need to work fast to prevent the caramel from hardening. Once shaped, you can wrap the popcorn balls in cellophane and add Halloween-themed decorations. With easy-to-follow steps and plenty of room for creativity, these popcorn balls are a fun and delicious way to celebrate the spooky season.
Key Takeaways
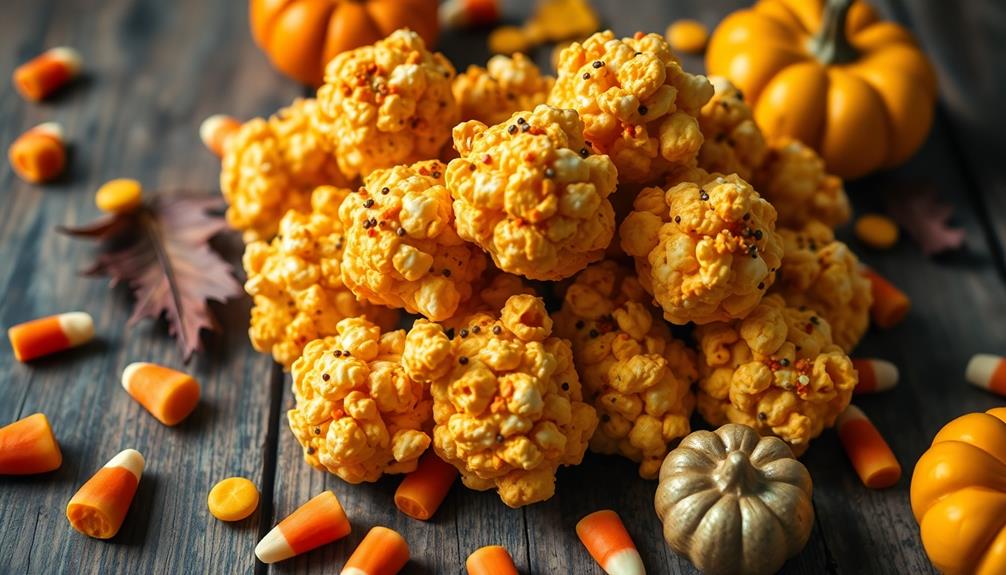
- Popcorn balls are a classic Halloween treat dating back to the late 19th century, reflecting the holiday's signature orange and black colors.
- The simple recipe combines crunchy popcorn with a sticky caramel coating, creating a festive and satisfying snack.
- Making popcorn balls is an engaging hands-on activity for children, encouraging creativity and promoting healthier Halloween snacking.
- Popcorn balls can be decorated with colorful sprinkles, edible glitter, and spooky stickers to enhance their festive appearance.
- Homemade popcorn balls can be packaged in cellophane or other creative ways to serve as unique Halloween gifts and party favors.
Top picks for "halloween popcorn ball"
Open Amazon search results for this keyword.
As an affiliate, we earn on qualifying purchases.
History
The origins of Halloween popcorn balls can be traced back to the late 19th century, when the treat emerged as a popular way to celebrate the spooky holiday.
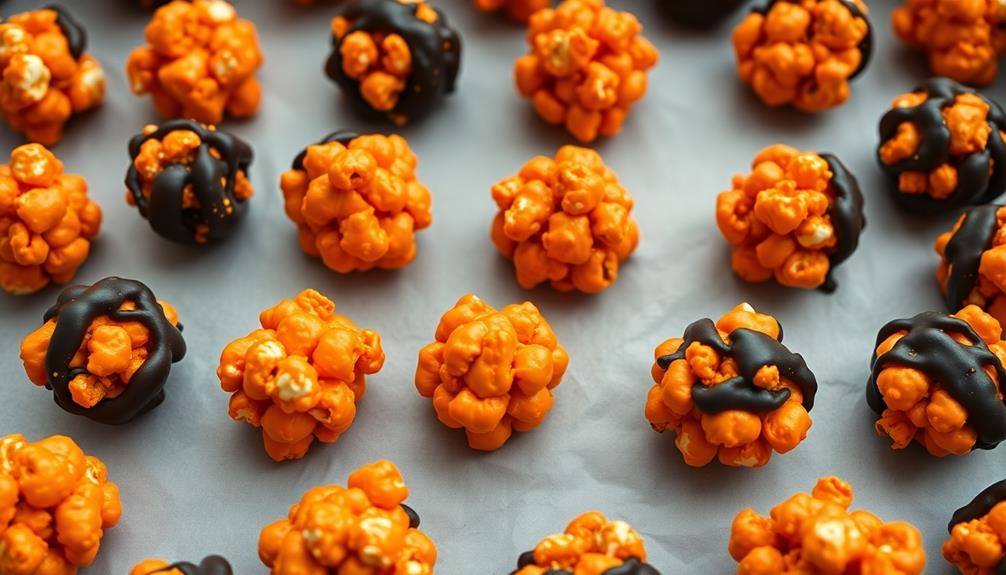
Back then, families would gather together, popping kernels over a fire and shaping them into festive spheres. These homemade popcorn balls were often decorated with bright orange and black colors, reflecting the iconic Halloween palette.
As the tradition grew, popcorn balls became a staple at Halloween parties and trick-or-treating events. Children would eagerly await the arrival of neighbors handing out these crunchy, sweet confections.
Over time, recipes evolved, incorporating additional ingredients like molasses, honey, or even chocolate to create unique flavors.
Today, popcorn balls remain a beloved Halloween classic, linking modern celebrations to the holiday's early roots. Whether homemade or store-bought, these whimsical treats continue to delight and inspire the young and young-at-heart alike. One popular way to enjoy popcorn balls during Halloween is by hosting a spooky-themed party and including them on the dessert table. It’s also fun to get creative with the presentation by shaping the popcorn balls into cute pumpkin or ghost shapes. And for those looking for a savory option, try out this delicious mummy meatballs recipe for a frighteningly tasty addition to your Halloween spread.
Recipe
Popcorn balls are a classic Halloween treat that are fun to make and enjoy. They're a delightful combination of crunchy popcorn, sticky caramel, and festive colors. These Halloween popcorn balls are sure to delight both kids and adults alike.
For an added twist, consider incorporating spices or flavors inspired by traditional desserts like bread pudding to enhance the overall taste experience.
The process of making popcorn balls is simple, but it requires a bit of attention and care. The key is to work quickly and efficiently to ensure that the caramel doesn't harden too much before you can shape the popcorn into balls.
Ingredients:
- 10 cups popped popcorn
- 1 cup light corn syrup
- 1 cup brown sugar
- 1/2 cup unsalted butter
- 1/4 teaspoon salt
- 1 teaspoon vanilla extract
- Food coloring (optional)
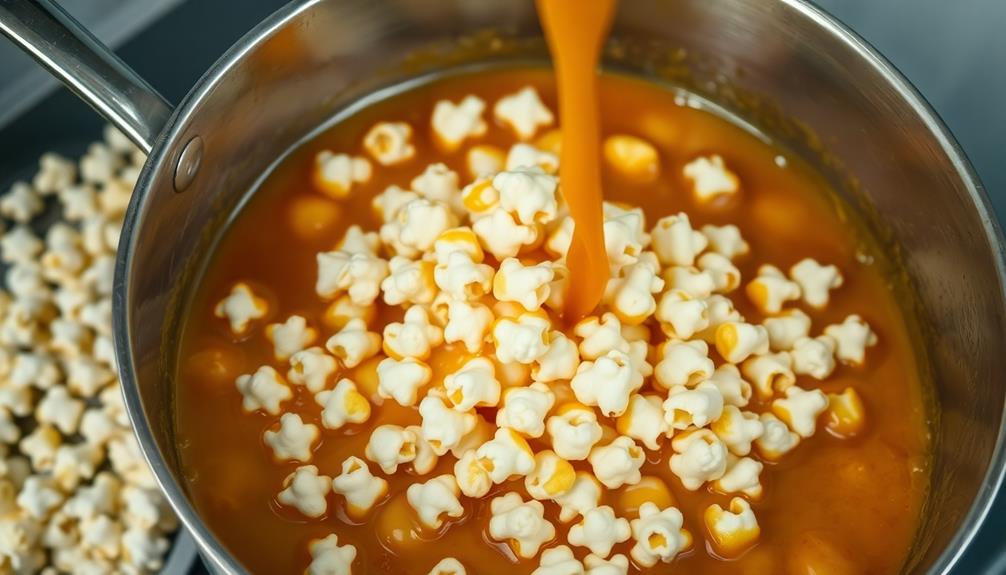
In a large saucepan, combine the corn syrup, brown sugar, butter, and salt. Cook over medium heat, stirring constantly, until the mixture reaches 250°F on a candy thermometer.
Remove from heat and stir in the vanilla extract. If using food coloring, add it now and mix well.
Quickly pour the hot caramel mixture over the popped popcorn and stir to coat evenly. Working quickly, use greased hands to shape the popcorn into balls and place them on a parchment-lined baking sheet.
Allow the popcorn balls to cool and harden completely before serving.
It's important to work quickly when forming the popcorn balls, as the caramel will start to set and harden quickly. If the mixture becomes too difficult to work with, you can reheat it briefly to soften it up again.
Additionally, feel free to experiment with different food coloring combinations to create a Halloween-themed look for your popcorn balls.
Cooking Steps
First, you'll heat up the sugar mixture on the stovetop.
Then, you'll gently fold in the freshly popped popcorn until it's fully coated.
Next, use your hands to shape the mixture into fun, spooky popcorn balls.
Step 1. Heat Sugar Mixture
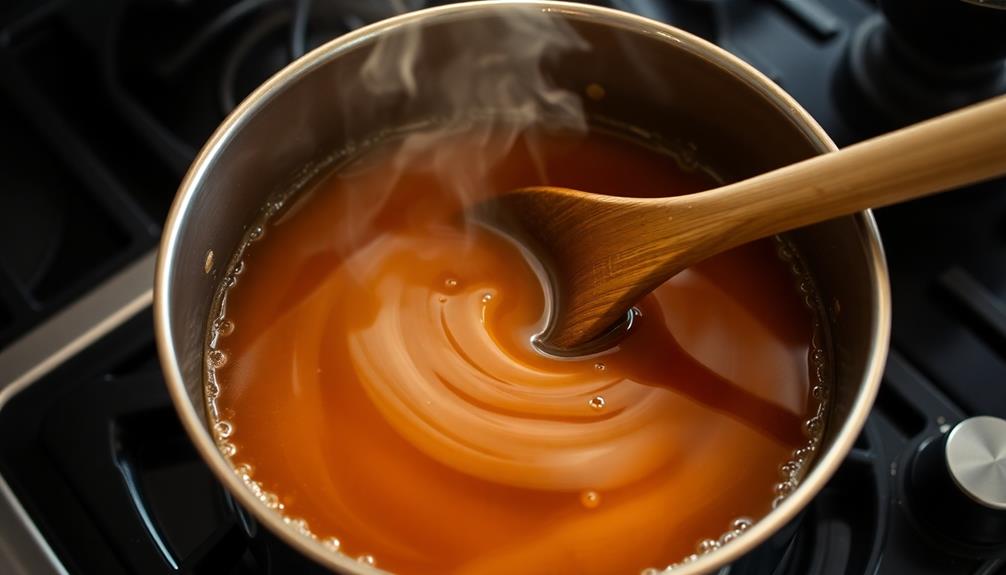
Next, bring the sugar mixture to a boil over medium heat, stirring constantly.
You'll want to keep a close eye on it, making sure it doesn't burn. As the mixture heats up, it'll start to bubble and thicken. Keep stirring to prevent any scorching.
Once it reaches a full boil, let it bubble for about a minute, continuing to stir. This will help the sugar fully dissolve and create a nice, smooth texture.
After that minute is up, remove the pan from the heat. The sugar mixture will be nice and hot, so be careful!
Pour it over the popped popcorn, making sure to evenly coat all the kernels. Work quickly, as the sugar will start to harden as it cools.
Use a spatula or wooden spoon to gently fold and mix the popcorn, ensuring every piece is covered in the sweet, sticky coating.
Get ready for the fun part – shaping your popcorn balls!
Step 2. Add Popcorn to Mixture
Once the sugar mixture has reached the desired consistency, quickly pour it over the prepared popcorn.
You'll need to work fast, as the sugar will start to harden quickly. Use a large spoon or spatula to gently fold the popcorn into the hot, sticky mixture, making sure to coat every kernel.
Be careful not to crush the popcorn – you want to keep it light and airy. As you stir, you'll see the popcorn becoming coated in the shimmering, golden syrup.
Keep folding and turning the mixture until all the popcorn is evenly covered. It's important to act quickly, as the sugar will start to set, making it harder to mix.
Once the popcorn is fully coated, immediately transfer it to a baking sheet or large bowl to cool.
Gently press the popcorn balls together with your hands, shaping them into round, bite-sized treats.
Work quickly before the mixture hardens. Your homemade Halloween popcorn balls are now ready to be enjoyed!
Step 3. Form Balls
As the popcorn becomes fully coated in the sticky, golden syrup, it's time to shape them into festive popcorn balls.
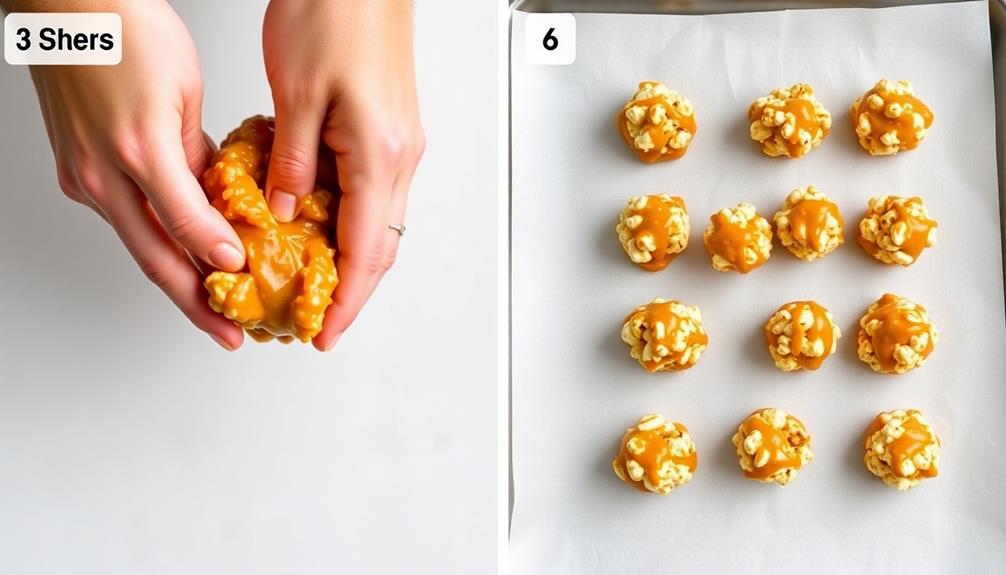
Lightly grease your hands with a bit of cooking oil or butter. This will prevent the mixture from sticking to your fingers as you work.
Gently scoop up a handful of the coated popcorn and begin shaping it into a round ball. Apply gentle pressure, molding the popcorn together until it holds its shape.
Don't pack it too tightly, or your popcorn balls will be dense. Aim for a light, airy texture.
Once you've formed a ball, place it on a baking sheet or plate. Repeat this process, creating as many popcorn balls as you'd like.
If the mixture starts to feel too sticky, simply re-grease your hands. The key is to work quickly, before the syrup cools and becomes too firm.
With a little practice, you'll have a tray of festive, homemade Halloween popcorn balls ready to enjoy.
Step 4. Let Popcorn Balls Cool Slightly
After forming the popcorn balls, let them cool slightly on the baking sheet or plate. This step is important, as the popcorn mixture will be very hot right after molding.
Allowing the balls to cool for a few minutes will make them easier to handle and prevent your hands from getting burned.
Once the popcorn balls have cooled for about 3-5 minutes, you can start to transfer them to a serving platter or container. Use a spatula to gently lift each ball and place it on the new surface.
Be careful not to squeeze or deform the balls as you move them.
The slightly cooled popcorn balls will hold their shape better than if they were still piping hot. This cooling period gives the caramel or marshmallow coating time to set up a bit, ensuring the popcorn stays nicely compacted together.
With the balls safely transferred, you're ready for the next step – adding any final decorations before serving your spooktacular Halloween treats!
Step 5. Wrap Popcorn Balls in Cellophane
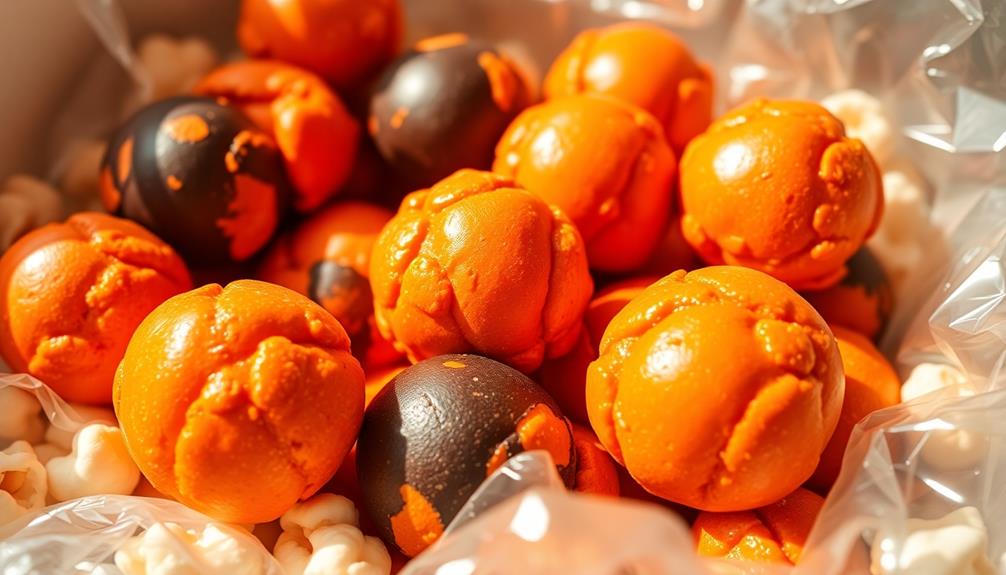
With the popcorn balls now cooled, it's time to wrap them in cellophane to preserve their shape and appearance. This step is crucial for presenting your homemade Halloween treats in a festive and appealing way.
To begin, gather some clear cellophane or plastic wrap. Tear off a piece that's large enough to fully cover each popcorn ball. Gently place a popcorn ball in the center of the cellophane. Bring the edges up around the ball, then twist and tie the cellophane at the top to secure it. This creates a neat, individual wrapper that showcases the popcorn ball.
Repeat this process for each popcorn ball, taking care not to handle them too much and risk deforming their round shape.
Once all the balls are wrapped, you can use ribbon, string, or even Halloween-themed stickers to decorate the cellophane. This adds a personalized touch that makes your popcorn balls look extra special.
Now they're ready to be displayed or packaged for sharing with family and friends.
Final Thoughts
Ultimately, popcorn balls make for a delightful Halloween treat that's both festive and fun. You can get creative with the decorations, using colorful sprinkles, edible glitter, or even spooky stickers to make each one unique.
Plus, they're a great activity to do with kids, letting them get hands-on in the kitchen.
The best part? Popcorn balls are a healthier alternative to traditional candies and chocolates. They provide a satisfying crunch and a touch of sweetness, without the sugar overload.
Your little ghouls and goblins will love munching on these homemade treats as they go trick-or-treating or attend Halloween parties.
Frequently Asked Questions
How Long Do Homemade Popcorn Balls Last?
Homemade popcorn balls can typically last for 3-5 days when stored properly in an airtight container at room temperature. They'll stay fresh and maintain their texture, but you'll want to consume them within a week for the best quality.
Can I Substitute Other Types of Popcorn?
You can substitute other types of popcorn, but the texture and flavor may vary. Experiment with different popcorn varieties to find the one that best suits your preferences and recipe.
How Do I Store Leftover Popcorn Balls?
To store leftover popcorn balls, place them in an airtight container or plastic bag. Keep them at room temperature and consume within a few days for optimal freshness and texture.
Can I Make Popcorn Balls Ahead of Time?
You can make popcorn balls ahead of time, but you'll need to store them properly. Keep them in an airtight container at room temperature for up to a week, or freeze them for longer storage.
Are Popcorn Balls Gluten-Free?
Popcorn balls are naturally gluten-free, as they're made from popcorn, sugar, and other ingredients that don't contain gluten. You can enjoy them without worry if you have a gluten intolerance or celiac disease.
Conclusion
Making these Halloween popcorn balls is a spooktacular way to celebrate the holiday! You'll love how easy they are to create, and your friends and family will be impressed by your baking skills. Serve them up at your next Halloween party, or package them as delightful treats to share. Get ready for some ghoulishly good fun as you bring this classic recipe to life!