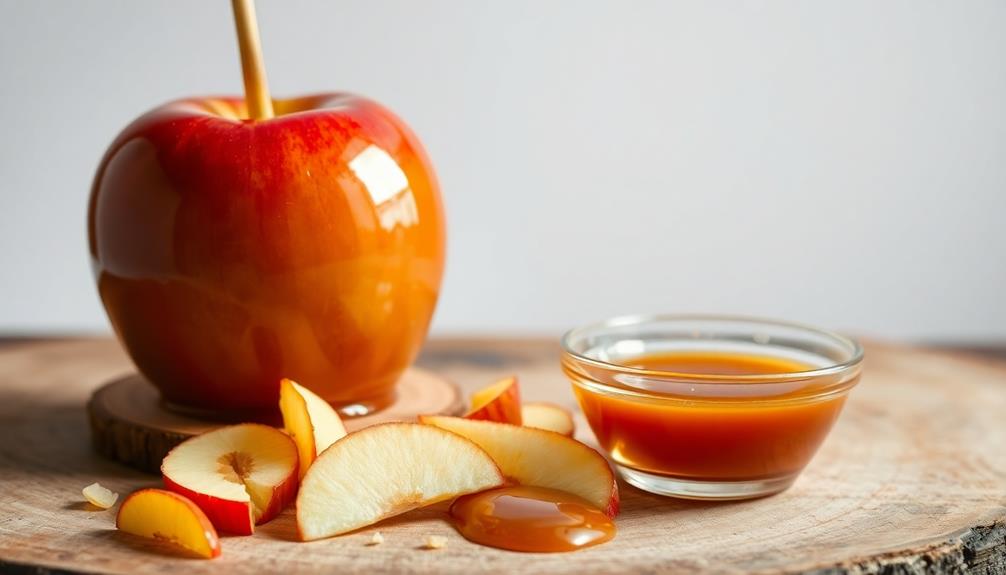

Caramel apples are a beloved autumn treat that'll transport you right to the heart of the season. You'll love the crisp, tart flavor of freshly-picked apples combined with a rich, gooey caramel coating. It's a delightful contrast of textures and tastes that'll have your taste buds dancing with joy. Craft your own creations by melting sugar, corn syrup, and cream into a decadent caramel, then dip juicy, firm apples for a classic fall indulgence. Top them off with nuts, sprinkles, or chocolate for a truly personalized experience. Once you've mastered the art of making caramel apples, you'll discover there's so much more to explore.
Key Takeaways
- Caramel apples are a popular fall treat, often associated with autumn festivities like Halloween and Thanksgiving, featuring a rich, gooey caramel coating on crisp apples.
- The origin of caramel apples can be traced back to the late 19th century, with their accidental creation at a fair in the U.S., quickly gaining popularity as a carnival and fair food.
- Caramel apples are made by melting a caramel mixture to 250°F, dipping the apples into the caramel, and allowing the coating to harden for a crisp shell.
- Customization is a key aspect of caramel apples, with various toppings like nuts, crushed cookies, or sprinkles adding visual appeal and unique flavor combinations.
- Creating caramel apples can be a fun group activity, fostering a sense of community and enjoyment, both in the making and consuming of the autumnal treat.
Top picks for "caramel appl"
Open Amazon search results for this keyword.
As an affiliate, we earn on qualifying purchases.
History
The origin of caramel apples can be traced back to the late 19th century. At a fair in the United States, a candy maker accidentally dropped an apple into a vat of hot caramel. To his surprise, the caramel coated the apple perfectly, creating a delightful new treat.
Word quickly spread about this tasty invention, and caramel apples became a popular carnival and fair food.
Over time, caramel apples evolved, with different flavors and toppings added. Today, you can find caramel apples dipped in chocolate, rolled in nuts, or even decorated with sprinkles.
They're a beloved fall treat, often associated with Halloween and Thanksgiving. Whether you enjoy the classic caramel coating or prefer a more adventurous flavor, caramel apples have a rich history that's sure to delight your taste buds.
Recipe
Caramel apples are a classic fall treat that bring back nostalgic memories of crisp autumn days and county fairs. The combination of tart, juicy apples and rich, sweet caramel is a flavor pairing that's hard to beat.
Whether enjoyed as a standalone snack or used as a garnish for desserts, caramel apples are a delightful way to celebrate the season.
This recipe offers a simple and delicious way to make homemade caramel apples. With just a few ingredients and a little bit of time, you can create a batch of these irresistible confections to share with family and friends.
Ingredients:
- 6 medium-sized apples, washed and stems removed
- 1 cup granulated sugar
- 1/2 cup light corn syrup
- 1/2 cup unsalted butter
- 1/2 cup heavy cream
- 1/4 teaspoon salt
Instructions:
Insert wooden skewers or popsicle sticks into the center of each apple.
In a medium saucepan, combine the sugar, corn syrup, butter, heavy cream, and salt. Bring the mixture to a boil over medium heat, stirring constantly.
Continue to cook, without stirring, until the caramel reaches 245°F on a candy thermometer.
Carefully dip each apple into the hot caramel, turning to coat completely. Place the coated apples on a baking sheet lined with parchment paper and refrigerate until the caramel has set, about 30 minutes.
For best results, use firm, tart apples such as Granny Smith or Honeycrisp. The caramel will adhere better to these varieties.
Additionally, you can customize your caramel apples by rolling them in chopped nuts, crushed cookies, or sprinkles after dipping.
Enjoy your homemade caramel apples as a sweet fall treat!
Cooking Steps
Wash and dry those apples until they shine!
Next, melt the caramel in a saucepan, stirring often, until it's smooth and silky.
Carefully dip each apple into the warm caramel, coating it evenly, then set them aside to let the caramel harden.
If you'd like, you can get creative with optional decorations too!
Step 1. Wash and Dry the Apples

Before moving on to the caramel coating, it's crucial to properly wash and dry the apples.
Begin by rinsing each apple under cool, running water. Use a soft-bristled brush to gently scrub the surface, removing any dirt, wax, or impurities. Be sure to pay extra attention to the stem area, as this is where dirt and debris can accumulate.
Once the apples are clean, use a clean, lint-free towel to thoroughly pat them dry. Make sure there are no remaining water droplets on the surface, as this could interfere with the caramel's adhesion.
If the apples are even slightly damp, the caramel won't bind properly, resulting in a messy and uneven coating. Take the time to ensure each apple is completely dry before moving on to the next step.
With the apples washed and dried, you're now ready to begin the process of creating a delicious caramel coating.
Step 2. Melt Caramel in Saucepan
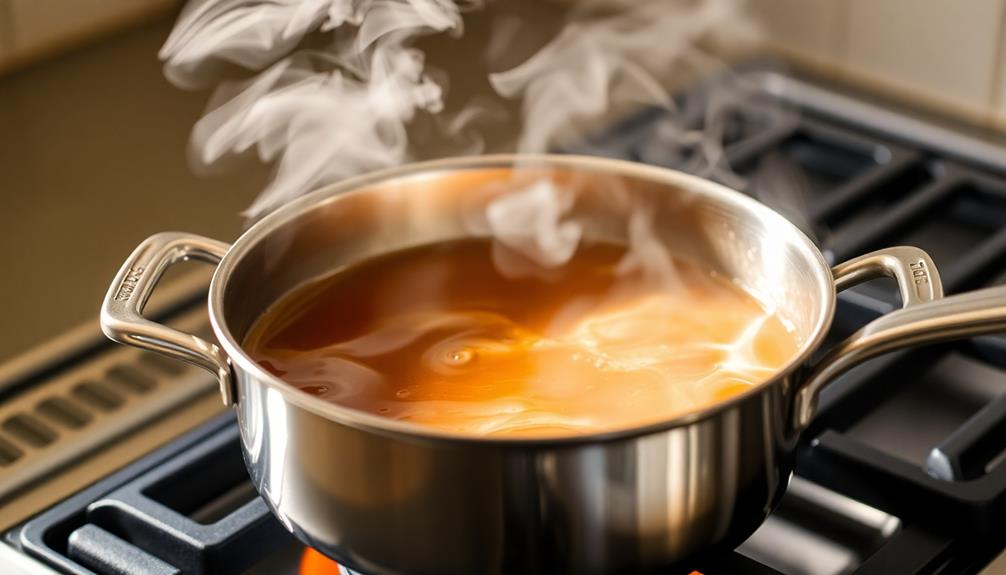
With the apples prepped, it's time to turn your attention to the caramel. In a medium saucepan, combine the sugar, corn syrup, and water. Gently heat the mixture over medium, stirring occasionally, until the sugar dissolves completely.
Once dissolved, stop stirring and allow the caramel to come to a boil. Carefully let the caramel boil, without stirring, until it reaches 250°F on a candy thermometer. This will take about 10-15 minutes. Keep a close eye on it, as the caramel can quickly go from perfect to burnt.
Once it reaches the right temperature, immediately remove the saucepan from the heat. Be very careful, as the caramel will be extremely hot.
Slowly and carefully pour the caramel into a deep, heatproof bowl. This will make it easier to dip the apples. Allow the caramel to cool for 5-10 minutes, until it thickens slightly but is still easy to dip the apples into.
Step 3. Dip Apples in Caramel Mixture
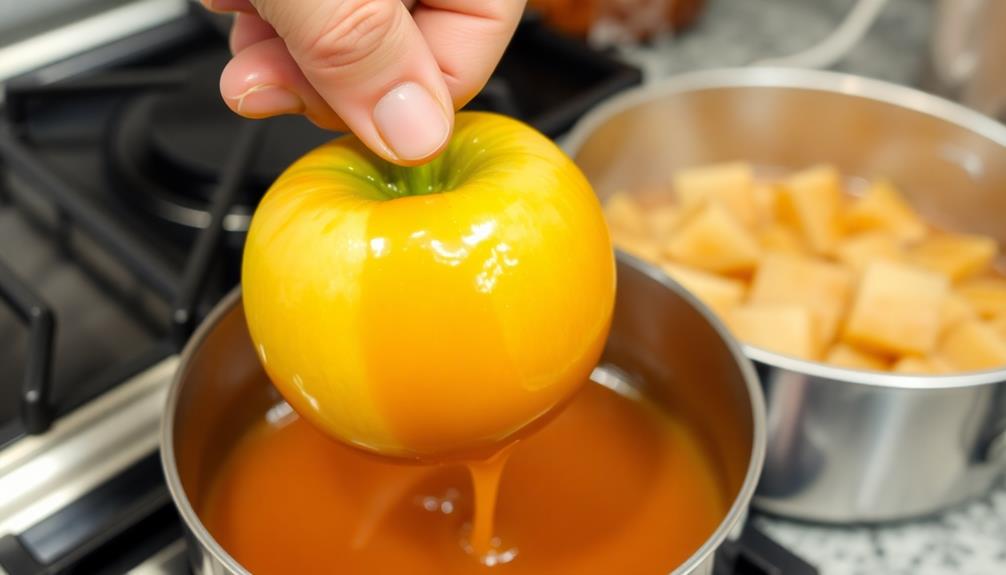
Once the caramel has reached the ideal consistency, grasp one of the prepared apple sticks and gently dip the apple into the hot caramel mixture.
Slowly rotate the apple, ensuring the entire surface is coated evenly. Be careful not to let the caramel drip off too much, as you want a nice, thick coating. If the caramel begins to thicken too quickly, you can reheat it slightly to keep it at the perfect dipping consistency.
After coating the apple, hold it above the saucepan for a moment to allow any excess caramel to drip back in. Then, place the caramel-coated apple on a sheet of parchment paper or a lightly greased surface to cool and set.
Repeat this process with the remaining apples, working quickly before the caramel hardens. Once all the apples are coated, you can get creative by rolling them in chopped nuts, sprinkles, or other toppings if desired.
Allow the caramel apples to cool completely before serving and enjoying this delightful autumn treat.
Step 4. Allow Caramel to Harden

After coating the apples, allow the caramel to harden completely before serving. This crucial step ensures the caramel forms a delightful, crisp shell around the apple.
Be patient – it may take up to 30 minutes for the caramel to fully set.
Place the caramel-coated apples on a parchment-lined baking sheet or a clean surface. Avoid touching the caramel until it's hardened, as this could cause it to stick or tear.
As the caramel cools, you'll see it transform from a glossy, smooth coating to a matte, firm shell.
Once the caramel is completely hardened, your caramel apples are ready to enjoy! The crunchy caramel shell contrasts beautifully with the juicy, crisp apple beneath.
These treats are perfect for fall gatherings, Halloween parties, or anytime you crave a sweet and satisfying dessert. Savor the delicious combination of tart apple and rich caramel in every bite.
Step 5. Optional Decorations

Elevate your caramel apples by adding optional decorations. Once the caramel has hardened, you can get creative and personalize your treats.
Consider rolling the apples in chopped nuts, like almonds or peanuts, for a delightful crunch. Crushed graham crackers or cookie crumbs also make a tasty topping.
For a pop of color, sprinkle on mini chocolate chips, sprinkles, or crushed candy canes. You can even drizzle on melted chocolate or white chocolate for an extra indulgent touch.
If you're feeling festive, decorate the apples with holiday-themed sprinkles or edible glitter. Experiment with different flavor combinations, like rolling them in cinnamon-sugar or dipping them in melted caramel a second time.
Get the whole family involved and let the kids customize their own caramel apples. The options are endless!
Have fun making your caramel apples uniquely your own.
Final Thoughts
The caramel-apple experience, when crafted with care, can be a delightful autumnal treat. As you've learned, creating these sweet, sticky delights takes some effort, but the end result is well worth it. The simple pleasure of biting into a crisp apple coated in rich, gooey caramel is hard to beat.
Whether you choose to decorate your caramel apples or enjoy them in their natural state, the most important thing is to have fun with the process. Gather your friends and family, put on some festive music, and embrace the cozy, fall atmosphere.
Frequently Asked Questions
Are Caramel Apples Gluten-Free?
You'll be happy to know that caramel apples are generally gluten-free, as they're made with just a few simple ingredients – apples, sugar, and sometimes additional flavorings. Just double-check the packaging to ensure there are no gluten-containing additives.
How Long Do Caramel Apples Last?
Caramel apples generally last 1-2 weeks when stored properly. They'll stay fresh longer if you keep them refrigerated and avoid excessive handling. The caramel coating protects the apple, but they won't last indefinitely.
Can I Make Caramel Apples in Advance?
Sure, you can make caramel apples in advance. They'll keep for up to a week if stored properly in an airtight container in the refrigerator. Just be sure to let them come to room temperature before serving.
What Is the Best Type of Apple to Use?
The best type of apple to use depends on your preferences. Tart, firm apples like Granny Smith or Honeycrisp work well, as they hold their shape and provide a nice contrast to the sweet caramel. Another great option is the classic Fuji apple, which has a subtly sweet flavor that complements the caramel perfectly. If you prefer a more subtle apple flavor, Gala apples are a good choice. Whichever type of apple you choose, they will all work well in our refreshing poison apple martini recipe.
Do I Need to Refrigerate Caramel Apples?
Do you need to refrigerate your caramel apples? The answer depends on how long you plan to store them. If you'll eat them within a few days, you don't need to refrigerate them. But for longer storage, refrigeration is recommended to prevent spoilage.
Conclusion
Caramel apples are a classic treat that'll delight your taste buds! They're surprisingly simple to make, and you'll love the combination of crisp apple and smooth caramel. Whether you enjoy them as a snack or dessert, these sweet delights are sure to put a smile on your face. So, what are you waiting for? Grab some apples and get cooking – your new favorite fall treat awaits!