You'll love Rice Krispie Treats! These classic no-bake treats have been a beloved part of American culture since the 1930s. It all started when Kellogg's introduced their iconic Rice Krispies cereal. The combination of crispy cereal, gooey marshmallows, and buttery goodness creates an irresistible texture that's hard to beat. Simple to make with just a few ingredients, these treats are perfect for any occasion – from birthday parties to school events. You can even put your own spin on them by adding fun mix-ins like chocolate chips or peanut butter. There's a reason why Rice Krispie Treats have remained a timeless classic for generations. Let's explore the delicious details behind this beloved dessert.
Key Takeaways
- Rice Krispie Treats are a classic no-bake dessert known for their sweet, gooey, and crunchy texture made with Rice Krispies cereal, marshmallows, and butter.
- The recipe for Rice Krispie Treats was first published in 1939 and gained immense popularity in the 1940s as a beloved treat for children and adults.
- The key ingredients in Rice Krispie Treats are carbohydrates from the cereal, high sugar content from the marshmallows, and moderate calories of approximately 90 calories per square.
- Rice Krispie Treats are versatile and can be modified with additional ingredients like chocolate chips, peanut butter, or unique flavors to create various versions of the classic treat.
- Rice Krispie Treats hold significant cultural significance, often associated with childhood memories and commonly made for special occasions, parties, and school events.
History
The origins of Rice Krispie Treats can be traced back to the 1930s when Kellogg's introduced its iconic Rice Krispies cereal. This lightweight, crispy rice-based breakfast food quickly became a family favorite.
In 1939, Kellogg's employee Malitta Jensen and her friend Mildred Day discovered a clever way to transform the cereal into a delightful snack. They combined melted marshmallows with the crunchy Rice Krispies, pressed the mixture into a pan, and voila – the original Rice Krispie Treats were born!
This simple yet tasty recipe soon spread through word of mouth, and by the 1940s, Rice Krispie Treats had become a beloved treat across America.
The combination of the cereal's satisfying snap, crackle, and pop with the gooey, sweet marshmallows made these treats an instant classic.
Over the decades, the recipe has remained largely unchanged, with Rice Krispie Treats continuing to delight generations of fans with their irresistible flavor and nostalgic charm.
Recipe
Rice Krispie Treats are a classic, no-bake dessert that are beloved for their sweet, gooey, and crunchy texture. These treats are incredibly easy to make and require only a few simple ingredients. They're perfect for everything from birthday parties to potlucks.
The key to making the perfect Rice Krispie Treats is to strike the right balance between the marshmallows and the cereal. Too much marshmallow and the treats will be overly sticky and dense, while too little will result in a dry and crumbly texture.
- 3 tablespoons unsalted butter
- 4 cups miniature marshmallows
- 6 cups Rice Krispies cereal
In a large saucepan, melt the butter over medium heat. Add the marshmallows and stir constantly until they're completely melted and the mixture is smooth.
Remove the pan from the heat and quickly stir in the Rice Krispies cereal, making sure to coat all the pieces evenly.
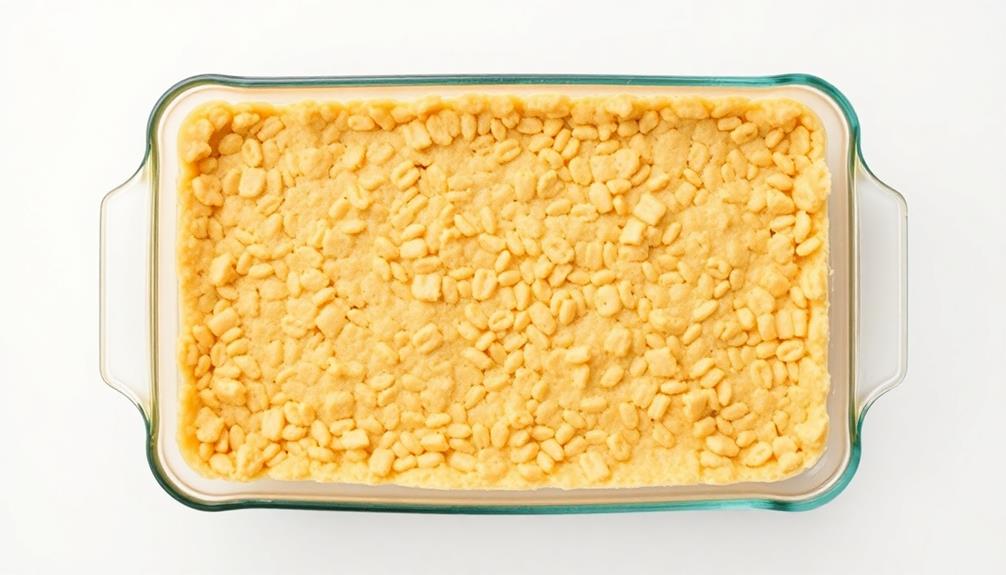
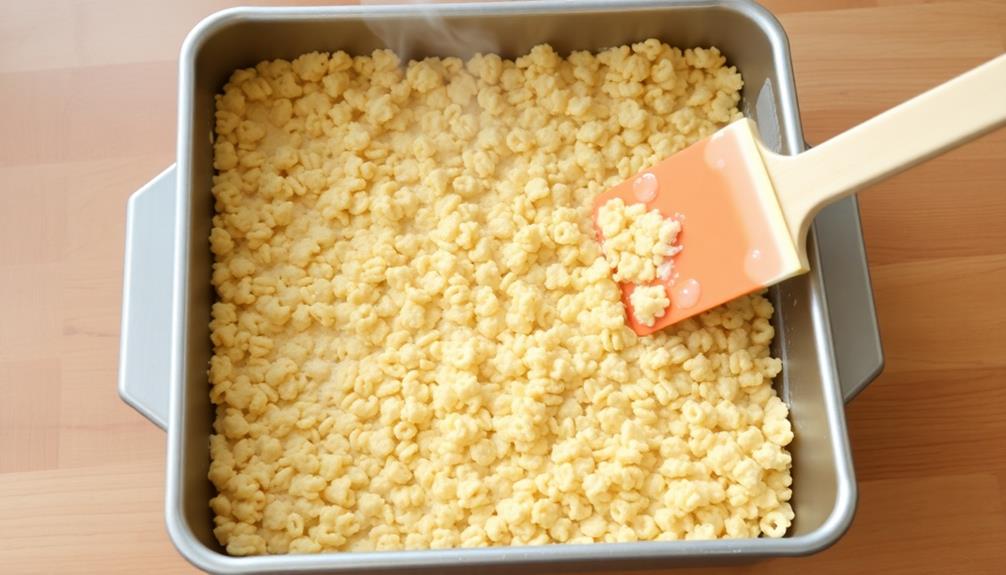
Press the mixture into a greased 9×13 inch baking pan, using a greased spatula or your hands to flatten it into an even layer.
Allow the treats to cool completely before cutting into squares. For best results, store the treats in an airtight container at room temperature for up to 5 days.
Cooking Steps
First, you'll melt the butter and marshmallows together in a pot on the stove.
Once they're nice and gooey, stir in the crunchy Rice Krispies cereal.
Next, press the sweet mixture into a pan and let it cool slightly.
Step 1. Melt Butter and Marshmallows Together
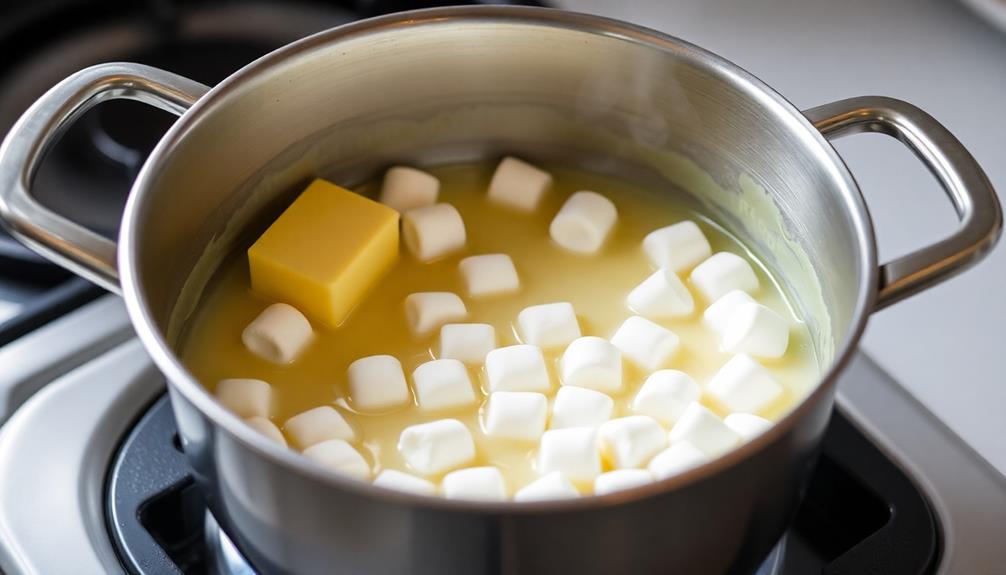
Heat up the butter and marshmallows in a saucepan over low heat, stirring occasionally until they've fully melted together into a smooth, gooey mixture.
You'll want to keep a close eye on it, making sure not to let it burn. Once the butter and marshmallows are nicely melted, the mixture should be thick and creamy.
Stir it continuously to prevent any lumps from forming. This step is crucial, as the melted butter and marshmallows will be the glue that holds your Rice Krispie Treats together.
Take your time and don't rush it – you want the consistency to be just right. When the mixture is fully melted and combined, remove the saucepan from the heat.
Now you're ready to stir in the crunchy Rice Krispies cereal, forming your delicious treats. Get ready for the sweet, buttery aroma to fill your kitchen!
Step 2. Add Rice Krispies Cereal
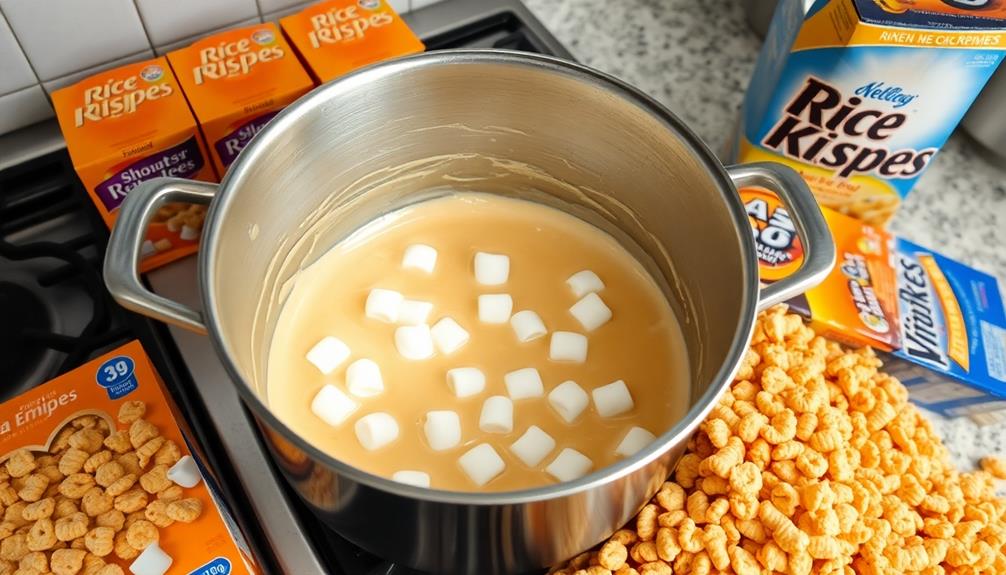
With the butter and marshmallows melted, you can now add the Rice Krispies cereal. Take the gooey, sweet mixture and pour in the crispy cereal. Stir everything together quickly, ensuring the cereal is fully coated.
You'll want to work fast, as the marshmallow mixture starts to firm up rapidly. As you mix, you'll see the rice cereal disappear into the melted marshmallows. Keep stirring until the cereal is evenly distributed and the entire mixture has a smooth, cohesive texture.
It's important not to overmix, as that can make the treats too dense. Once the cereal is well incorporated, it's time to transfer the mixture to your prepared pan.
Use a buttered spatula or your hands to press the Rice Krispie treats into an even layer, filling the pan from edge to edge. Smooth the top to create a neat, uniform surface. Now your base is ready for the next step!
Step 3. Press Mixture Into Pan
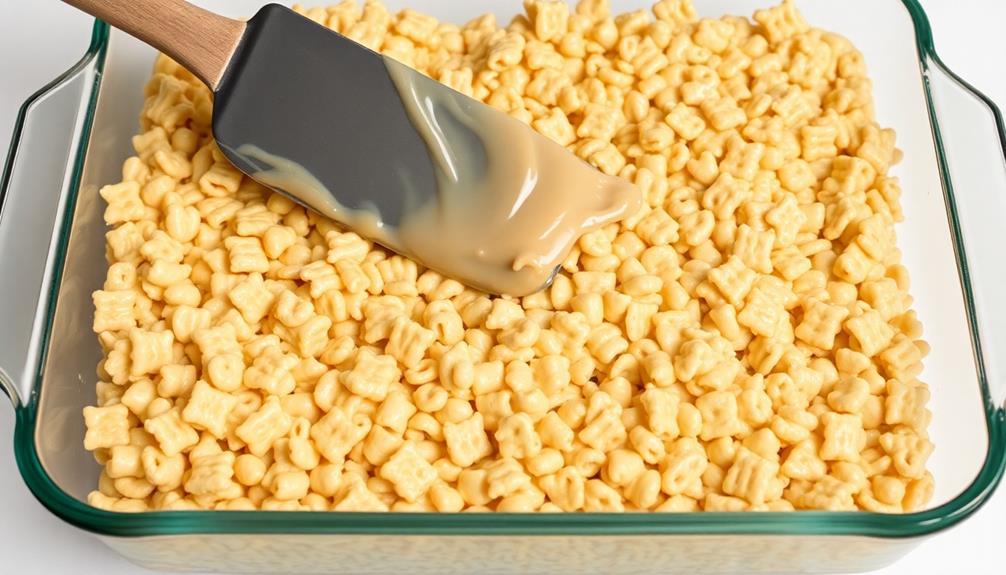
Once the cereal is well incorporated, transfer the mixture to your prepared pan.
Use a greased 9×13-inch baking dish or line it with parchment paper for easy removal later.
Gently press the gooey, golden mixture into the pan, making sure to spread it out evenly.
Smooth the top with a lightly greased spatula or your hands.
Be careful not to compact the mixture too much, as you want the treats to stay light and airy.
Evenly distributing the mixture will ensure your Rice Krispie Treats bake up perfectly.
Once the pan is filled, you're ready to let the treats set.
Pop the pan in the fridge for about 30 minutes, or until the marshmallow mixture has firmed up.
This chilling step is crucial for getting clean, neat squares when you cut the treats later.
With the base now formed, you're one step closer to enjoying those classic, crunchy-yet-chewy Rice Krispie Treats.
Step 4. Let Mixture Cool Slightly
After pressing the mixture into the pan, allow it to sit and cool slightly. This is an important step that you don't want to skip. As the treats cool, the marshmallow mixture will start to firm up, making it easier to cut into perfect squares later on.
Give it about 5-10 minutes to cool – you don't want to wait too long, or the mixture will become too hard to work with.
While the treats are cooling, you can start preparing your workspace for the next step. Grab a sharp knife and a cutting board. This will make it a breeze to slice the cooled Rice Krispie Treats into neat, even squares.
Be careful when cutting, as the mixture may still be a bit sticky. Take your time and make clean, decisive cuts. Soon, you'll have a platter full of delicious, homemade Rice Krispie Treats ready to share with family and friends.
Mmm, can you already smell that buttery, marshmallow aroma?
Step 5. Cut Into Squares
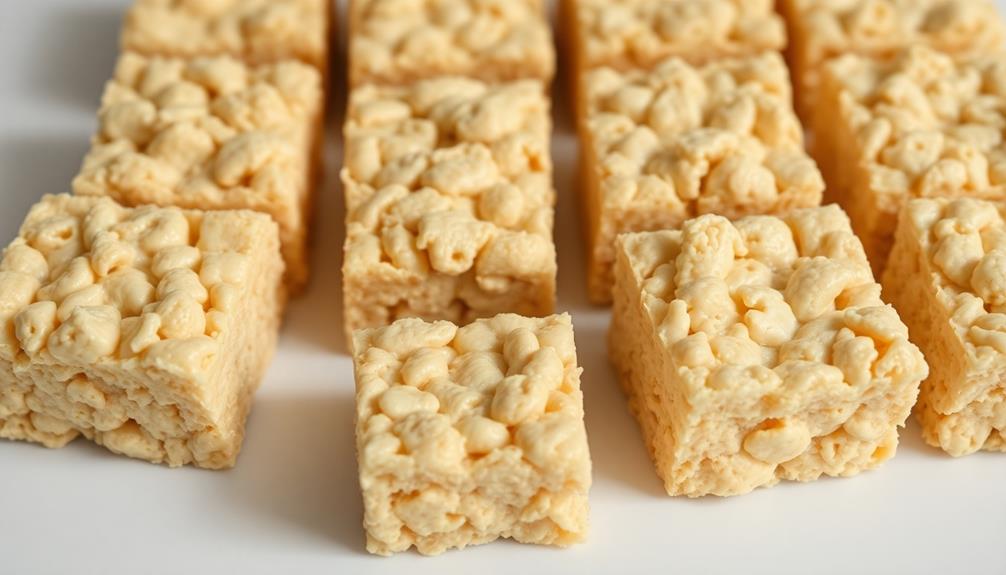
Carefully slide a sharp knife along the edges of the pan to loosen the hardened Rice Krispie Treats.
Once they're free, use the knife to gently lift the slab of treats onto a cutting board.
With a quick, even motion, cut the treats into squares. Aim for pieces that are roughly the same size so they'll cook evenly.
Be careful as the treats may still be slightly warm. As you cut, you'll see the familiar crunchy texture and feel the marshmallow-y softness.
The squares should hold their shape nicely.
Once you've cut the entire slab, you'll have a tray full of perfectly portioned Rice Krispie Treats. Now it’s time to move on to the next step in your baking adventure. While the treats cool and set, why not try your hand at a classic recipe, such as a traditional cucumber sandwich recipe? This light and refreshing dish is the perfect complement to the sweetness of the Rice Krispie Treats. Gather your ingredients and prepare to transport yourself to a refined afternoon tea with this timeless favorite.
Now you can easily grab a square or two to enjoy.
The cutting process is quick and straightforward, allowing you to move on to the best part – eating these delicious, gooey treats!
Final Thoughts
With a perfect balance of gooey sweetness and crispy texture, Rice Krispie Treats have long been a beloved snack for people of all ages. As you savor the last bite, you can't help but feel a sense of nostalgia.
These classic treats are a timeless comfort, evoking memories of childhood and simple pleasures. Whether enjoyed at a family gathering, a school bake sale, or as an afternoon pick-me-up, Rice Krispie Treats always hit the spot.
Their versatility allows for endless customization, from adding colorful sprinkles to drizzling with chocolate. Yet, at their core, they remain true to the original recipe – a testament to the enduring appeal of this timeless confection.
As you lick the last remnants of melted marshmallow from your fingers, you're reminded of the joy and happiness these treats bring. With each bite, you're transported to a carefree time, where the simple pleasures in life were the most rewarding.
Rice Krispie Treats will forever hold a special place in your heart, a sweet reminder of the power of simple delights.
Frequently Asked Questions
How Long Do Rice Krispie Treats Last?
How long homemade treats last depends on several factors. Typically, they'll stay fresh for 3-5 days when stored properly in an airtight container at room temperature. But their shelf life can vary, so it's best to enjoy them soon after making.
Can I Use a Different Type of Cereal?
You can definitely use a different type of cereal to make your treats. Just substitute the same amount of any crunchy, puffed cereal and follow the same basic recipe. Get creative and try different flavors!
Why Do My Rice Krispie Treats Get Hard?
Your treats might get hard if you're overcooked the marshmallow mixture or let it sit too long before forming the bars. Try reducing the cooking time and pressing the mixture into the pan immediately.
Can I Freeze Rice Krispie Treats?
Yes, you can freeze your rice krispie treats. Simply wrap them tightly in plastic wrap or aluminum foil, then place them in an airtight container or freezer bag. When ready to enjoy, thaw them at room temperature.
How Do I Store Leftover Rice Krispie Treats?
You can store your leftover treats in an airtight container at room temperature for up to a week. Avoid refrigerating them as this can make them dry and crumbly. Enjoy your delicious treats whenever you're craving something sweet!
Conclusion
Whip up a batch of these classic treats and you'll be in for a real treat! The gooey, crunchy texture is simply irresistible. Whether you're a fan of the original or love to get creative with mix-ins, rice krispie treats are a timeless, crowd-pleasing dessert that's sure to satisfy your sweet tooth. So, what are you waiting for? Give this easy recipe a try and enjoy the sweet, nostalgic goodness.