
Whether you're hosting a graduation party or want to add a unique touch to your next potluck, the Graduation Cap Cheese Ball is a delightful and whimsical appetizer that'll delight your guests and celebrate academic achievements in a delicious way. This cheesy treat originated in the 1970s as a creative way to mark special occasions, and it's become a beloved tradition over the years. You'll need some cream cheese, cheddar, parmesan, and crushed crackers to craft this impressive-looking dish. With its savory flavors and festive presentation, it's sure to be the talk of the party. And if you keep reading, you'll discover even more about this essential graduation celebration treat.
Key Takeaways
- The Graduation Cap Cheese Ball is a savory appetizer designed to resemble a graduation mortarboard, adding a playful element to graduation celebrations.
- The cheese ball is made by combining cream cheese, cheddar cheese, parmesan cheese, and green onions, then shaping it into a dome and coating it with crushed crackers or cookies.
- This dish became a beloved tradition at high school and college graduation parties in the 1970s and has since evolved into an essential part of graduation celebrations.
- The unique shape and delicious flavor of the Graduation Cap Cheese Ball make it an impressive and memorable contribution to any graduation party or potluck.
- Serving the Graduation Cap Cheese Ball with crackers, bread, or vegetable dippers provides a versatile and crowd-pleasing appetizer option for graduation festivities.
Top picks for "graduation cheese ball"
Open Amazon search results for this keyword.
As an affiliate, we earn on qualifying purchases.
History
The origins of the graduation cap cheese ball can be traced back to the 1970s, when creative party hosts sought novel ways to celebrate academic achievements.
Back then, the idea of shaping a cheesy appetizer into the iconic mortarboard cap was a brilliant stroke of inspiration. Partygoers were delighted by this unique interpretation of the graduation theme, which added a playful and edible element to the festivities.
Over the years, the graduation cap cheese ball has become a beloved tradition, gracing tables at high school and college graduation parties across the country.
Its enduring popularity speaks to the universal joy of celebrating educational milestones. Whether you're a proud graduate or the supportive loved one of one, this tasty treat captures the spirit of accomplishment and the promise of new beginnings.
The graduation cap cheese ball has truly stood the test of time, evolving into an essential part of graduation celebrations everywhere.
Recipe
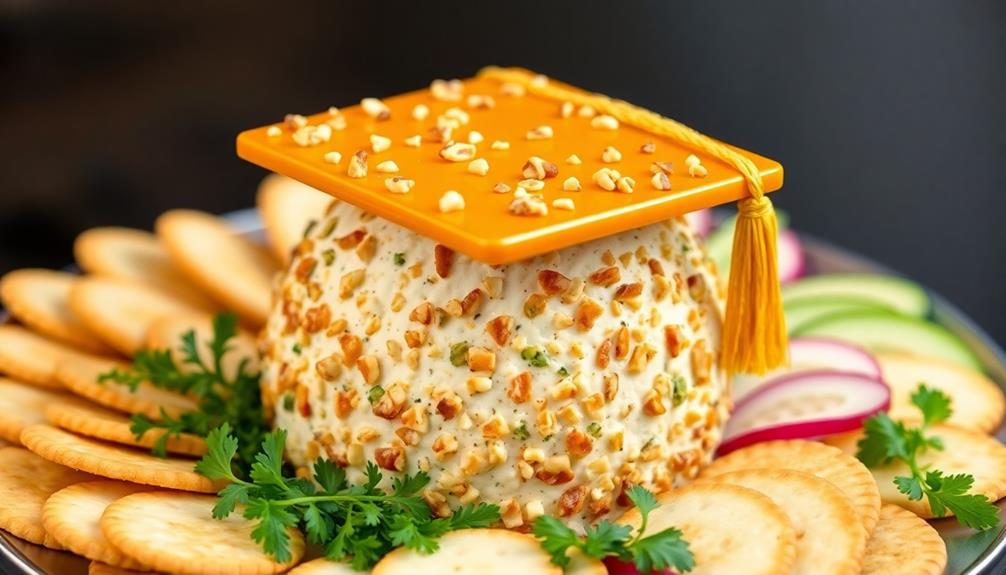
Graduation Cap Cheese Ball is a fun and creative way to celebrate a special milestone. This savory and cheesy appetizer is the perfect addition to any graduation party or potluck. With its whimsical presentation and delicious flavor, it's sure to impress your guests and make your graduation celebration even more memorable.
To create this edible graduation cap, you'll need to mold a cheese ball into the shape of a cap and top it with crushed crackers or cookies to mimic the textured surface of a real graduation cap. The result is a unique and eye-catching dish that will have everyone talking.
Ingredients:
- 2 (8 oz) packages cream cheese, softened
- 2 cups shredded cheddar cheese
- 1/2 cup grated parmesan cheese
- 2 tablespoons finely chopped green onions
- 1 teaspoon garlic powder
- 1/2 teaspoon onion powder
- 1/4 teaspoon black pepper
- 2 cups crushed crackers or cookies (such as Ritz, Triscuits, or graham crackers)
Cooking Instructions:
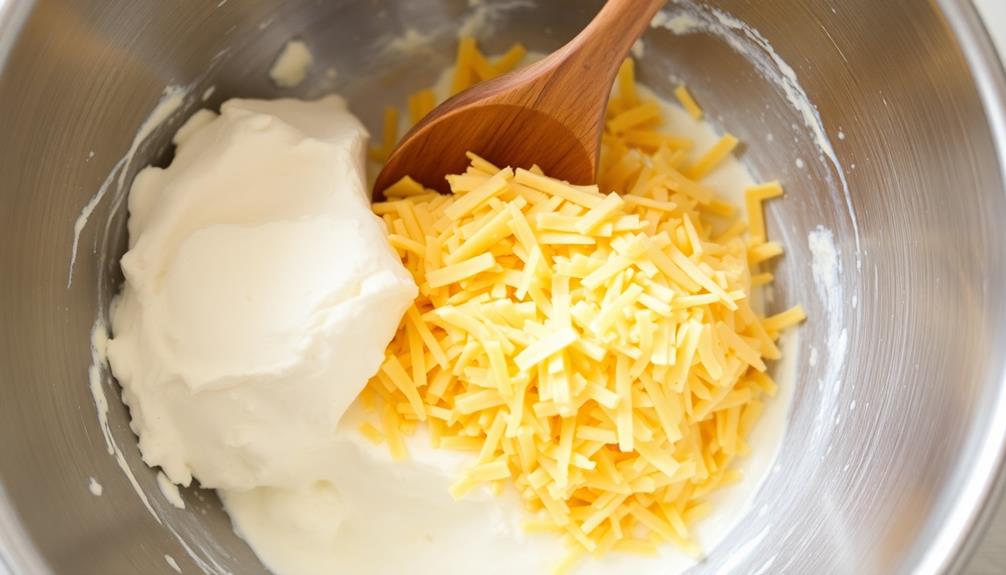
In a large bowl, combine the softened cream cheese, cheddar cheese, parmesan cheese, green onions, garlic powder, onion powder, and black pepper. Mix until well blended.
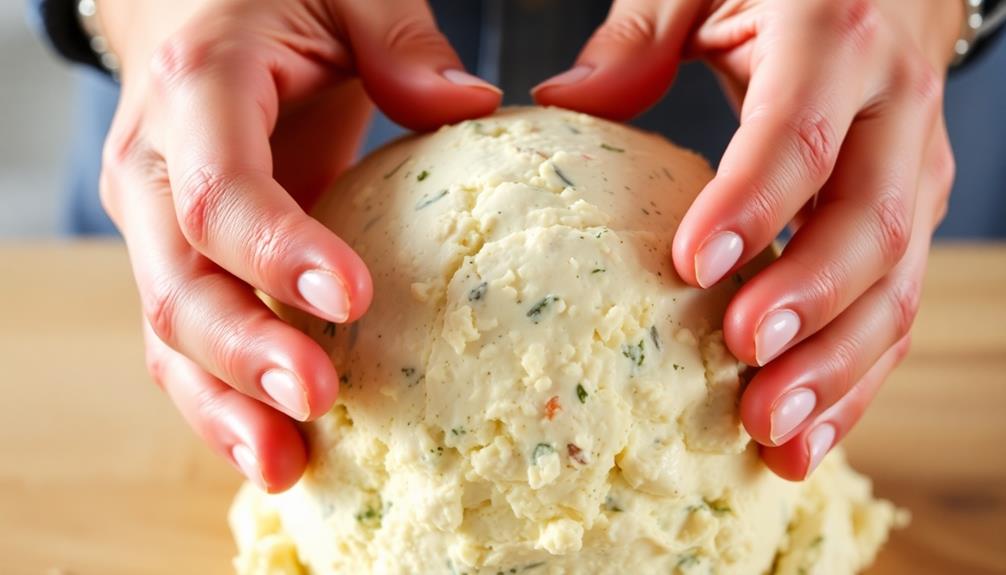
Shape the mixture into a dome, resembling a graduation cap. Refrigerate the cheese ball for at least 2 hours to allow it to firm up.
Once the cheese ball is firm, remove it from the refrigerator and roll it in the crushed crackers or cookies, pressing gently to coat the entire surface. Serve the graduation cap cheese ball with your favorite crackers, bread, or vegetable dippers. Enjoy!
Tips:
For a more uniform shape, you can place the cheese ball mixture in a bowl and refrigerate it for 30 minutes before shaping. This will help the cheese firm up slightly, making it easier to mold into a cap-like shape.
Additionally, you can use a small bowl or ramekin to help hold the cheese ball in the desired shape as it firms up in the refrigerator.
Cooking Steps
Mix the cream cheese and cheddar until they're well combined.
Next, roll the mixture into a ball.
Now, coat the ball with crushed crackers to give it a fun, textured look.
Top it off with pretzel stick accents for the perfect graduation cap-inspired design.
Refrigerate the cheese ball for 2 hours before serving to let the flavors meld together.
Step 1. Mix Cream Cheese and Cheddar
Combining the creamy texture of cream cheese with the sharp, tangy notes of cheddar, you'll create a delightful foundation for your graduation cap cheese ball.
In a large mixing bowl, add the softened cream cheese and shredded cheddar cheese. Using a hand mixer or a sturdy spoon, blend the two ingredients together until they're fully incorporated and the mixture is smooth and creamy. Be sure to scrape down the sides of the bowl to ensure even mixing.
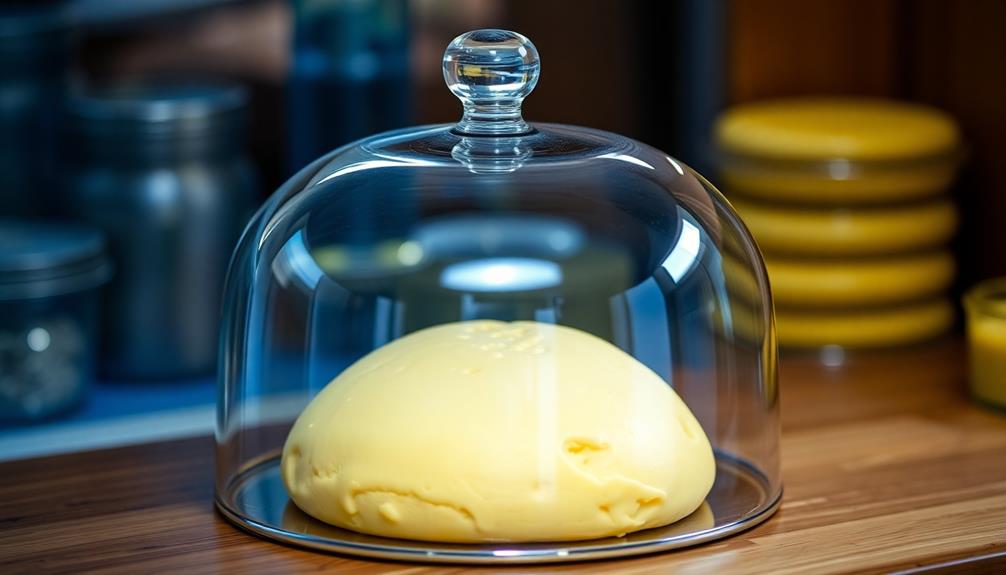
Once the cream cheese and cheddar are well combined, you can begin to shape the mixture into a ball. Gently roll and shape the cheese mixture with your hands, forming it into a round, compact ball.
If the mixture seems too soft, you can chill it in the refrigerator for 30 minutes to firm it up before shaping. With the cheese ball formed, you're ready to move on to the next step in creating your festive graduation cap treat.
Step 2. Roll Into Ball
With the cream cheese and cheddar blended to creamy perfection, it's time to shape your graduation cap cheese ball.
Grab a clean work surface and lightly dust it with some flour. This'll prevent the cheese mixture from sticking as you roll it into a ball.
Scoop the cheesy goodness onto the floured surface and use your hands to gently shape it into a smooth, round ball.
Don't be too rough – you want to keep the texture nice and soft. Once you've got the perfect sphere, it's time to chill it.
Pop the ball into the fridge for at least 30 minutes so it can firm up a bit.
After the chilling time, you'll have a nicely shaped cheese ball, ready to be decorated and served.
Isn't that easy? With just a few simple steps, you're on your way to creating an impressive graduation-themed appetizer that's sure to impress your guests.
Step 3. Coat Ball With Crushed Crackers
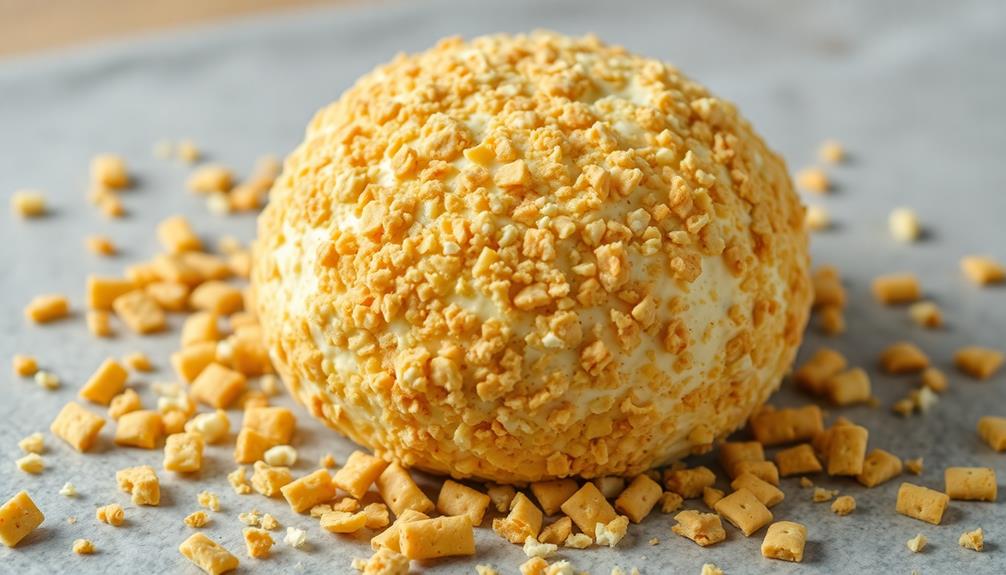
After chilling, it's time to coat the cheese ball in a crunchy, cracker-y exterior. Grab a handful of crushed crackers and gently press them onto the surface of the cheese ball.
Work your way around, covering the entire ball in a delightful cracker crust. Don't be afraid to add more crushed crackers as needed – you want a nice, even coating that will add a satisfying crunch to every bite.
Once the ball is fully coated, give it a gentle shake to help the crackers adhere. If any spots look bare, simply add a few more crumbs and press them into place.
The key is to create a uniform, textured shell that will complement the creamy cheese center.
Now that your graduation cap cheese ball is ready, it's time to serve it up with pride. Place it on your favorite platter and surround it with crackers, veggies, or other dippers.
Get ready for oohs and aahs as your guests marvel at your impressive culinary creation!
Step 4. Decorate With Pretzel Stick Accents

To transform your graduation cap cheese ball into a true showstopper, you'll want to add some playful pretzel stick accents.
Begin by gathering a handful of long, thin pretzel sticks. Carefully press the tips of the pretzels into the sides of the cheese ball, creating a graduation cap-like design. Arrange the pretzels evenly around the ball, angling them slightly outward to mimic the tassel on a traditional graduation cap.
Next, take a few additional pretzel sticks and break them into shorter 2-inch pieces. Randomly insert these smaller pretzel accents throughout the design, filling in any gaps or empty spaces.
The varying lengths and placement of the pretzels will give your cheese ball a fun, whimsical look that's perfect for celebrating graduation.
Step 5. Refrigerate for 2 Hours Before Serving
Once your graduation cap cheese ball is assembled, refrigerate it for at least 2 hours before serving. This step is crucial to allow the flavors to meld and the cheese to firm up. During this time, the cream cheese and other ingredients will blend together seamlessly, creating a delightful texture and taste.
While you wait, you can start preparing the rest of your graduation party spread. Set out some crackers, sliced baguettes, or vegetable sticks for dipping. You could even make a simple salad or batch of deviled eggs to round out the menu.
When the 2 hours are up, remove the cheese ball from the fridge. It should now have a nice, firm exterior, perfect for slicing and serving.
Arrange it on a platter and surround it with your choice of dippers. Your guests will love digging into this playful, edible graduation cap! For a fun twist, consider making a crisp and refreshing salsa to accompany the graduation cap. This school spirit dip recipe is perfect for adding a pop of color and flavor to the spread. Your guests will enjoy the combination of the playful presentation and the tasty and unique dip options.
Final Thoughts
Undoubtedly, the Graduation Cap Cheese Ball is a delightful and creative treat that can elevate any celebratory gathering. This festive appetizer not only looks impressive but also delivers a delicious flavor that'll have your guests raving.
The combination of creamy cheese, savory seasonings, and the unique graduation cap shape makes for a truly memorable addition to your party spread. Additionally, consider serving it alongside a cheesy dip like Queso Fundido to complement the flavors and provide more variety for your guests.
Preparing this cheese ball in advance ensures you can enjoy the festivities stress-free. After shaping and chilling the cheese ball, you can let your creativity shine by decorating it with the finishing touches.
Whether you opt for the classic graduation cap design or get more adventurous with additional toppings, the Graduation Cap Cheese Ball is sure to be the talk of the party. So, don't hesitate to give this recipe a try – your guests will be delighted, and you'll bask in the glory of your culinary prowess.
Frequently Asked Questions
What Kind of Cheese Is Used in the Cheese Ball?
The cheese ball typically uses a blend of creamy cheeses, such as cream cheese and cheddar cheese. You can experiment with different cheese varieties to create your desired flavor profile for the cheese ball.
How Long Does It Take to Assemble the Graduation Cap?
It'll take you around 30 minutes to assemble the graduation cap. You'll need to carefully shape the cheese ball, create the tassel, and attach the elements to form the iconic graduation cap design.
Can the Cheese Ball Be Made in Advance?
You can absolutely make the cheese ball in advance. Simply prepare the mixture, shape it, and refrigerate it until you're ready to serve. This allows the flavors to meld and makes assembly a breeze when it's time to enjoy.
Is the Graduation Cap Decorative or Edible?
The decorative element on the cheese ball can be either edible or non-edible, depending on your preference. You can use various materials like crushed crackers, chopped nuts, or even a fondant or gum paste cap to create the graduation cap look.
What Kind of Crackers or Bread Are Recommended for Serving?
For serving, you can choose from a variety of crackers or bread. Classic options like water crackers, whole grain crackers, or sliced baguette would complement the cheese ball nicely and allow the flavors to shine.
Conclusion
You'll love this graduation cap cheese ball! It's a fun and festive treat that'll make your party a hit. Dress up your spread with this creative appetizer that's easy to make. Just follow the simple steps, and you'll have a cheesy masterpiece that's sure to impress your guests. Serve it up with your favorite crackers or veggies, and get ready to bask in the compliments. It's the perfect way to celebrate your special occasion!