Build-your-own pizza stations let you create your perfect pie! You'll find a wide array of fresh toppings and flavourful sauces to choose from, empowering you to craft a one-of-a-kind masterpiece. It's an engaging and creative dining experience, where you can let your culinary creativity shine. Whether you're craving classic pepperoni or an adventurous veggie medley, these interactive stations make it easy to build your dream pizza. The joy comes from personaling your meal and exploring new flavour combinations. Keep reading to discover the history, recipes, and cooking steps for this exciting dining trend. And if you can’t get enough of the build-your-own concept, you’ll love the build your own taco bar! Similar to the pizza station, the taco bar gives you the freedom to choose your own toppings, proteins, and sauces to create the perfect taco. It’s a fun and interactive dining experience that’s perfect for families, groups, or anyone who loves to customize their meal. The build your own taco bar is a great way to explore new flavors and get creative with your food.
Key Takeaways
- A build-your-own pizza station allows customers to customize their pizzas by offering a variety of toppings, sauces, and crust options.
- The interactive dining experience enhances customer engagement and appeals to diverse dietary preferences and restrictions.
- The self-service model reduces food waste, streamlines inventory management, and lowers labor costs, providing operational benefits.
- The growing demand for customizable food options and the popularity of experiential dining among younger demographics drive market trends.
- Homemade pizza recipes emphasize the use of high-quality ingredients and proper dough rising for a delightful and personalized dining experience.
History
When did the build-your-own pizza concept first emerge? This fun and creative idea has been around for quite some time!
Back in the 1950s, a few clever pizza parlors started letting customers choose their own toppings. Can you imagine how exciting that must have been? No more settling for a pre-made pizza – now you could craft your perfect slice.
Over the years, the build-your-own pizza trend continued to grow in popularity. Pizza shops realized customers loved having the freedom to customize their order.
Imagine all the delicious possibilities – pepperoni, mushrooms, olives, the works! By the 1980s, this interactive pizza experience became a staple at many family-friendly restaurants.
Today, it's more popular than ever, with endless topping choices to satisfy every taste. Get ready to design your dream pizza and enjoy every bite!
Recipe
Building your own pizza at home can be a fun and rewarding experience. With a few simple ingredients and some basic cooking techniques, you can create a delicious and customized pizza that will satisfy your cravings.
The key to a great homemade pizza is using high-quality ingredients and allowing the dough to rise properly. This not only enhances the flavor but also creates a perfect texture that's both crispy and chewy.
Ingredients:
- 1 batch of your favorite pizza dough, either store-bought or homemade
- 1 cup of your favorite pizza sauce
- 2 cups of shredded mozzarella cheese
- Assorted toppings of your choice (e.g., pepperoni, mushrooms, bell peppers, onions, etc.)
Cooking Instructions:
Preheat your oven to 450°F (230°C). Roll or stretch the pizza dough into a round shape and transfer it to a lightly greased baking sheet or pizza pan.
Spread the pizza sauce evenly over the dough, leaving a small border around the edges. Sprinkle the shredded mozzarella cheese over the sauce, and then add your desired toppings.
Bake the pizza for 12-15 minutes, or until the crust is golden brown and the cheese is melted and bubbly.
Cooking Steps
First, preheat your oven to a toasty 450°F.
Then, roll out the dough until it's nice and thin.
Next, spread the sauce evenly across the crust – you don't want any bare spots!
Finally, sprinkle the cheese all over, and add your favorite toppings.
Get ready for a delicious homemade pizza!
Step 1. Preheat Oven to 450°F
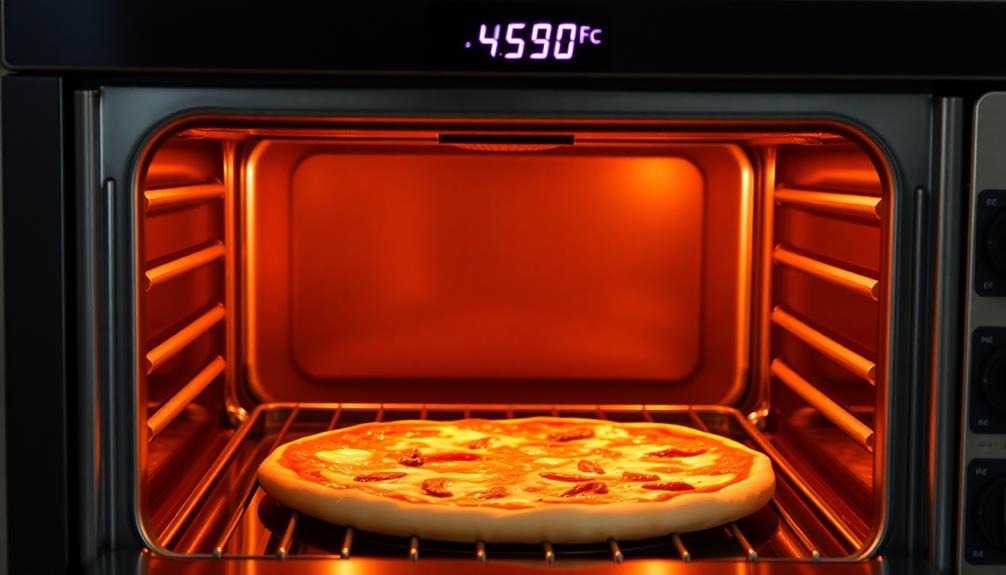
Preheat your oven to a toasty 450°F. This high heat is perfect for baking pizza crust to crispy, golden-brown perfection.
It's important to let your oven fully preheat before adding your pizza, so don't skip this step! While you're waiting, take a moment to gather your other pizza-making supplies. You'll need a baking sheet or pizza pan, your favorite sauce, an assortment of tasty toppings, and, of course, the dough or crust.
Once your oven is nice and hot, carefully slide your pizza onto the center rack. Bake for 12-15 minutes, keeping an eye on it to ensure the crust doesn't burn. The cheese should be melted and bubbly, and the edges nicely browned.
When the timer goes off, use oven mitts to remove your freshly baked pizza. Let it cool for a minute or two, then slice and serve! Get ready to enjoy a delicious, customized pizza masterpiece.
Step 2. Roll Out the Dough
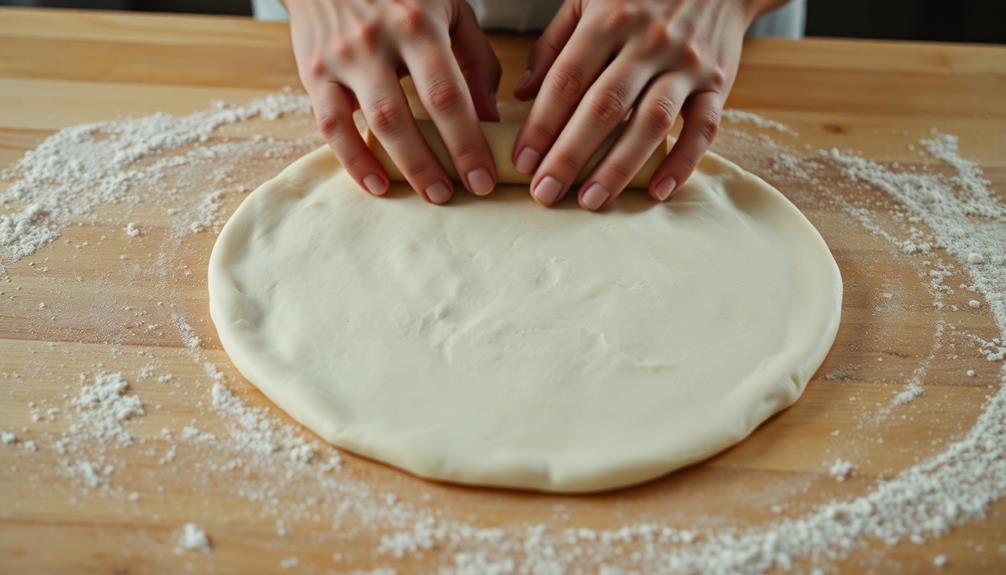
Once you've gathered your dough, it's time to get rolling. Grab a clean, lightly floured work surface and place your dough ball in the center. Using your hands, gently press the dough outward, starting from the middle and working your way to the edges. This helps to evenly distribute the dough and create a nice, round shape.
Next, use a rolling pin to slowly roll the dough out, turning it a quarter turn after each roll. Apply just a light dusting of flour to the surface and pin as needed to prevent sticking. Roll the dough until it's about 12 inches wide and 1/4 inch thick, creating the perfect base for your homemade pizza.
If the dough starts to spring back, let it rest for a few minutes before continuing to roll. This allows the gluten to relax, making it easier to stretch.
Once it's the desired size and thickness, your dough is ready to top and bake!
Step 3. Spread the Sauce Evenly

With your dough ready, it's time to add the sauce. Grab that ladle and get ready to spread it evenly across the surface. Start at the center and work your way outward, making sure to cover every nook and cranny.
Don't be shy – you want that sauce to reach the edges for maximum flavor in every bite.
As you spread, be gentle and take your time. You don't want to tear the dough or create any bare spots. Use smooth, circular motions to ensure the sauce is distributed evenly.
If you notice any thin or uneven areas, simply add a bit more sauce to even it out.
Once you've covered the entire surface, take a step back and admire your handiwork. The dough should be completely coated, with no dry spots in sight.
Now it's time to move on to the next step – adding your favorite toppings! Get ready to build the pizza of your dreams.
Step 4. Sprinkle the Cheese Evenly
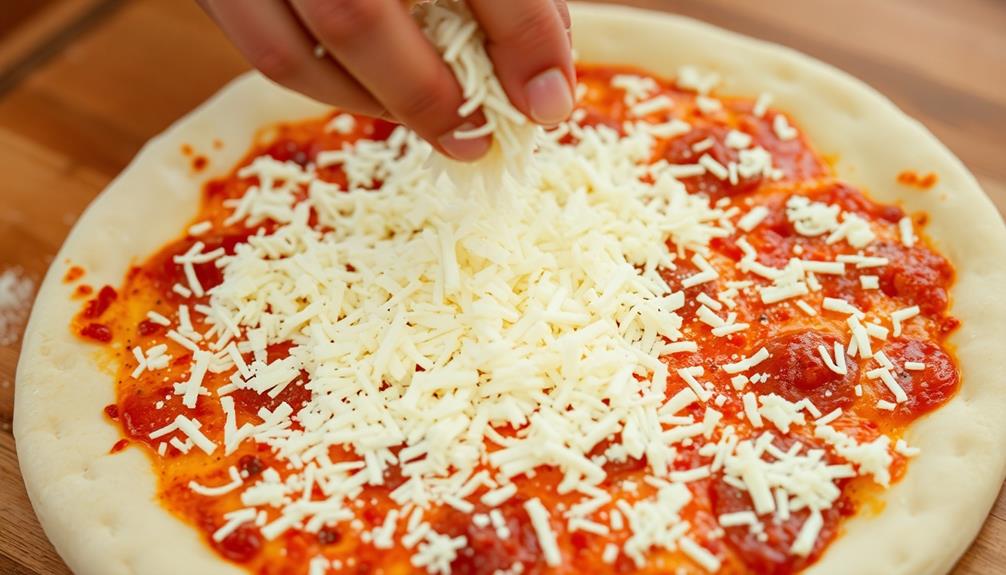
With the sauce evenly distributed, it's time to add the cheese. Grab that bag of shredded mozzarella and hold it over the pizza. Sprinkle the cheese in a circular motion, starting from the center and working your way out.
Make sure to cover the entire surface, leaving no bare spots. You want a nice, even layer of melty goodness.
Don't be shy with the cheese – this is your pizza, so load it up! But be careful not to overdo it, or you might end up with a greasy mess. Just sprinkle and spread the cheese until it looks perfect to you.
Once you're satisfied with the cheese coverage, give the pizza a little shake to help the cheese settle into all the nooks and crannies.
Now take a step back and admire your handiwork. The cheese is evenly distributed, and your pizza is one step closer to being ready for the oven. Get ready for the next step – adding your favorite toppings!
Step 5. Add Desired Toppings
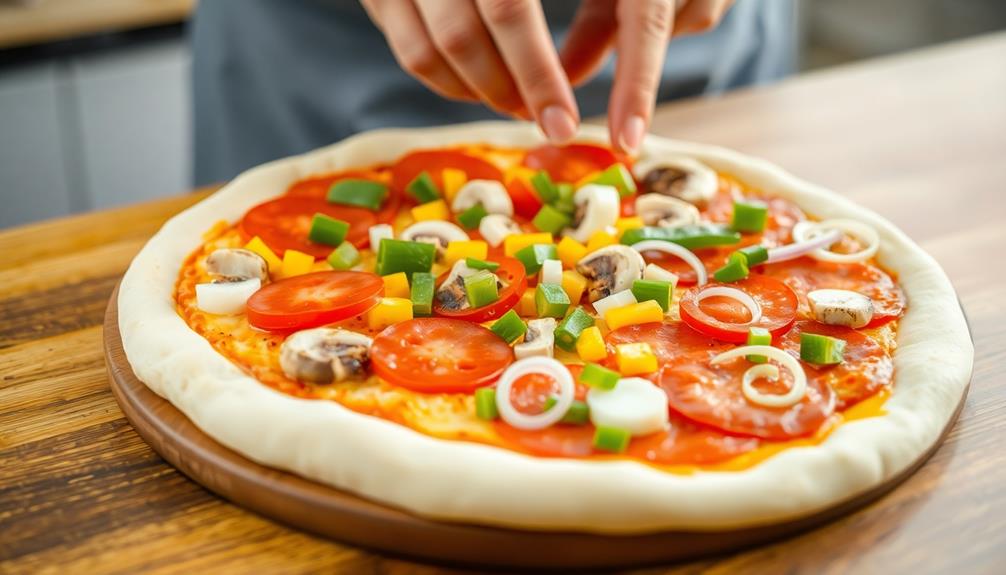
Next, add your desired toppings! This is where you get to be creative and make your pizza just the way you like it.
Grab a handful of your favorite veggies, like juicy tomatoes, crisp peppers, or tangy olives, and spread them evenly over the cheese. If you're a meat-lover, go ahead and add some savory pepperoni or spicy sausage.
Don't be afraid to mix it up and try new combinations! The key is to not overload your pizza – you want the toppings to be distributed nicely so every bite is delicious.
Take a step back and admire your creation. Doesn't it look amazing?
Now you're ready for the final step: popping your pizza in the oven. Get ready for the mouthwatering aroma to fill your kitchen as it bakes to perfection.
Soon, you'll be enjoying a hot, fresh slice of your very own custom-made pizza. Yum!
Final Thoughts
Ultimately, the build-your-own pizza station offers a fun and engaging dining experience that allows customers to customize their meals to their exact preferences. The ability to choose from a variety of fresh toppings and ingredients empowers individuals to craft a truly personalized pizza that caters to their unique tastes.
This interactive process not only enhances the overall enjoyment of the meal but also fosters a sense of creativity and ownership. As customers assemble their custom pizzas, they can unleash their culinary imagination, experimenting with various flavor combinations and textures.
The build-your-own approach encourages exploration and encourages customers to step outside their comfort zones, potentially discovering new favorite toppings or ingredient pairings. This customizable experience ensures that every pizza is a unique masterpiece, tailored to the individual's preferences.
Ultimately, the build-your-own pizza station provides a delightful and personalized dining experience that's sure to leave customers feeling satisfied and inspired.
Frequently Asked Questions
Can I Use Any Type of Cheese for My Pizza?
You can use any type of cheese you'd like for your pizza. From classic mozzarella to unique options like goat or feta, the choice is yours to create your perfect pie.
How Do I Know When the Pizza Is Done Baking?
You'll know the pizza's done baking when the crust is golden brown and crispy, and the cheese is melted and bubbly. Keep an eye on it, and use a toothpick or poke test to ensure it's cooked through.
Can I Add Extra Toppings Beyond the Provided Options?
Sure, you can add extra toppings beyond the provided options. Just keep in mind that adding too many toppings may affect the cooking time and the overall quality of your pizza. Have fun customizing your pizza to your liking!
Is There a Gluten-Free or Dairy-Free Crust Option Available?
Yes, there are gluten-free and dairy-free crust options available. Many restaurants now offer these alternatives to accommodate various dietary needs and preferences. Be sure to inquire about the available options when placing your order.
How Long Will the Leftover Pizza Stay Fresh in the Fridge?
Leftover pizza can stay fresh in the fridge for 3-4 days. Be sure to store it in an airtight container or wrap it tightly in plastic wrap to prevent it from drying out. Enjoy your leftovers!
Conclusion
You'll love creating your own personalized pizza from scratch! It's so much fun to pick your favorite toppings and watch them bake to perfection. Imagine the delicious aroma and the first bite of your custom-made masterpiece. Unleash your inner chef and get ready for a tasty adventure. Trust us, you won't be able to resist coming back for more!