
Brownies have a delightful history dating back to the early 20th century, when a chef's mistake in a Chicago hotel kitchen led to the creation of a dense, fudgy square that quickly gained widespread popularity. Today, this chocolate-based dessert comes in countless variations, from walnut to cream cheese, found in bakeries and cafes worldwide. The key to making the perfect brownie lies in balancing the right ingredients and following precise preparation methods. With rich chocolate flavor and a melt-in-your-mouth texture, homemade brownies offer a rewarding baking experience and a delectable treat to share with family and friends. There's much more to discover about these beloved squares.
Key Takeaways
- Brownies originated in the early 20th century due to a chef's mistake in a Chicago hotel kitchen, leading to their widespread popularity.
- The classic chocolate-based dessert features a balance of ingredients like unsalted butter, sugar, eggs, flour, cocoa powder, and optional additions like chocolate chips.
- The key to success in making brownies lies in proper preparation methods, such as melting the chocolate and butter, mixing the batter thoroughly, and baking at the right temperature.
- Brownies can be sliced into uniform squares and presented with optional toppings like powdered sugar or caramel sauce for added elegance.
- Baking and sharing brownies can be a rewarding communal experience, allowing for personal variations and the enjoyment of a beloved treat.
Top picks for "browny"
Open Amazon search results for this keyword.
As an affiliate, we earn on qualifying purchases.
History
Tracing the origins of brownies takes us back to the early 20th century, when a chef's mistake in a Chicago hotel kitchen led to the creation of this beloved chocolate treat.
You see, the chef was trying to make a chocolate cake, but they forgot to add the flour. Instead of throwing it out, they decided to bake it anyway. The result was a dense, fudgy square that quickly became a hit with hotel guests.
From that humble beginning, brownies have evolved into a worldwide phenomenon.
Bakers have experimented with different ingredients, creating endless variations like walnut brownies, cream cheese brownies, and even brownies with chunks of chocolate bar mixed in.
Today, you can find brownies in bakeries, cafes, and even the aisles of your local grocery store.
Whether you prefer them cakey or fudgy, plain or loaded with extras, one thing's for sure – brownies have a special place in the hearts and stomachs of chocolate lovers everywhere.
Recipe
Brownies are a classic and beloved chocolate-based dessert that have been enjoyed for generations. These rich, fudgy treats are the perfect indulgence for any occasion, from casual gatherings to special events.
The key to making the perfect brownie lies in the balance of ingredients and the method of preparation. With the right recipe and a little bit of care, anyone can create a batch of brownies that will satisfy even the most discerning sweet tooth.
Ingredients:
- 1 cup (2 sticks) unsalted butter, melted
- 2 cups granulated sugar
- 4 large eggs
- 1 cup all-purpose flour
- 3/4 cup unsweetened cocoa powder
- 1 teaspoon salt
- 1 teaspoon baking powder
- 1 cup semi-sweet chocolate chips (optional)
Instructions: Preheat the oven to 350°F (180°C). Grease a 9×13-inch baking pan. In a large bowl, whisk together the melted butter and sugar until combined. Add the eggs, one at a time, mixing well after each addition.
In a separate bowl, sift together the flour, cocoa powder, salt, and baking powder. Gradually add the dry ingredients to the wet ingredients, mixing just until combined. Fold in the chocolate chips, if using. Pour the batter into the prepared baking pan and spread it evenly.
Bake for 25-30 minutes, or until a toothpick inserted into the center comes out clean. Allow the brownies to cool completely before cutting and serving.
To ensure the best results, be sure to use high-quality ingredients and follow the recipe closely. For an extra rich and fudgy texture, consider adding a touch of espresso powder or a splash of vanilla extract to the batter.
Additionally, experiment with different mix-ins, such as nuts, caramel, or even a swirl of peanut butter, to create your own unique twist on this classic dessert.
Cooking Steps
Preheat your oven to 350°F – this gets it ready for baking.
Next, melt the chocolate and butter together, creating a smooth, rich base.
Now, add the eggs and mix well, blending everything nicely.
Time to stir in the sugar and vanilla, bringing in that classic brownie flavor.
Step 1. Preheat Oven to 350°F

First, preheat your oven to 350°F. This crucial step ensures your brownies bake evenly and reach the perfect texture. Simply turn the dial on your oven to 350 degrees Fahrenheit and allow it a few minutes to reach the desired temperature.
Once your oven is hot and ready, grab your baking pan. Greasing or lining it with parchment paper will make removing the brownies a breeze later on.
Next, gather all your ingredients so they're within easy reach. This will help the baking process flow smoothly.
Now that your oven is preheated and your pan is prepared, you're one step closer to delicious homemade brownies! The next phase involves mixing the batter, which is where the real magic happens.
Pay close attention to the mixing instructions, as proper technique is key for that perfect fudgy texture. Soon, the aroma of freshly baked brownies will fill your kitchen, leaving you hungry for that first irresistible bite.
Step 2. Melt Chocolate and Butter Together

To make the perfect brownies, begin by melting the chocolate and butter together. In a medium-sized saucepan, gently heat the chocolate and butter over low heat, stirring constantly.
Be careful not to let the mixture boil, as that can cause the ingredients to separate. Instead, you want to melt them together slowly and smoothly, creating a rich, velvety base for your brownies.
Once the chocolate and butter have fully melted and combined, remove the saucepan from the heat. This step is crucial, as you don't want the mixture to overcook or burn.
Carefully pour the melted chocolate and butter into a large mixing bowl. This will make the next steps easier and help the brownies bake evenly.
Take your time with this process, as properly melting the chocolate and butter is the foundation for creating delicious, fudgy brownies. With the chocolate and butter ready, you can now move on to the next step in the recipe.
Step 3. Add Eggs and Mix Well

Having melted the chocolate and butter together, you can now crack the eggs into the bowl and mix everything well.
Gently crack 2 to 3 eggs directly into the melted mixture. Be careful not to let any eggshells fall in.
Once the eggs are in, use a spoon or whisk to stir the batter together. Mix thoroughly until the eggs are fully incorporated and the batter is smooth and uniform.
Don't overmix, or the brownies could turn out tough. Just mix until everything is well blended. The eggs will help hold the brownies together and give them a fudgy, moist texture.
Keep stirring until the batter looks rich and glossy.
Now that the chocolate, butter, and eggs are mixed, you're ready for the next step: adding the dry ingredients.
Step 4. Stir in Sugar and Vanilla
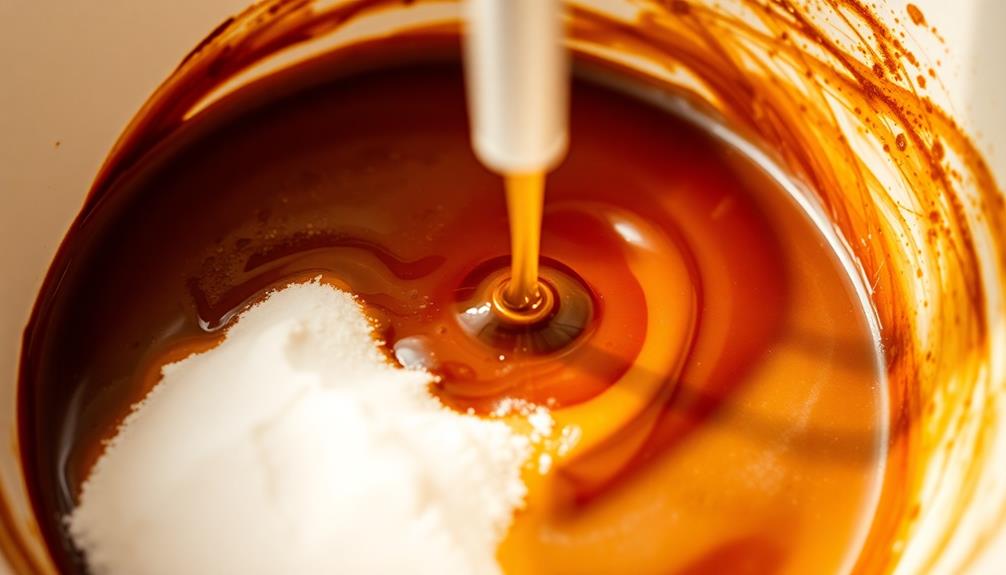
Now, stir in the sugar and vanilla. This is where the brownies start to come together!
First, add the granulated sugar. Stir it in gently until it's fully incorporated. The sugar will dissolve into the batter, adding sweetness and a lovely shine.
Next, pour in the vanilla extract. Vanilla is a classic flavor that pairs so well with chocolate. Give the batter another good stir to mix the vanilla throughout. You'll start to smell that delicious aroma filling the kitchen.
The sugar and vanilla work together to create a rich, fudgy texture in the final brownies. Keep stirring until the batter is smooth and homogeneous. Be careful not to overmix, though – you don't want to develop too much gluten, which can make the brownies tough.
Once the sugar and vanilla are evenly distributed, you're ready for the next step!
Step 5. Add Flour and Bake

Next, add the flour to the batter. Gently fold it in until no dry pockets remain. Be careful not to overmix, or your brownies will turn out tough and dry.
Once the flour is fully incorporated, your batter is ready for the oven.
Preheat your oven to 350°F (175°C). Grease an 8×8 inch baking pan or line it with parchment paper. Carefully pour the batter into the prepared pan, smoothing the top with a spatula.
Now, it's time to bake! Place the pan in the preheated oven and set a timer for 25-30 minutes. Keep an eye on the brownies, as oven temperatures can vary.
They're done when a toothpick inserted in the center comes out clean or with just a few moist crumbs.
Remove the brownies from the oven and let them cool completely before cutting into squares. Enjoy your delicious homemade treats!
Final Thoughts
As you put the finishing touches on your homemade brownies, take a moment to savor the accomplishment.
You've created a delectable treat that's sure to delight your family and friends. The rich, chocolatey aroma filling the air is a testament to your baking prowess. As you carefully drizzle the melted chocolate over the top, you can’t help but smile at the thought of everyone’s faces when they take their first bite. It’s moments like these that make all the time and effort in the kitchen worthwhile. And when the dessert is finished, you know your loved ones will enjoy it even more with a cup of hot chocolate. There are so many different ways to make hot chocolate, but your secret recipe always seems to be a hit.
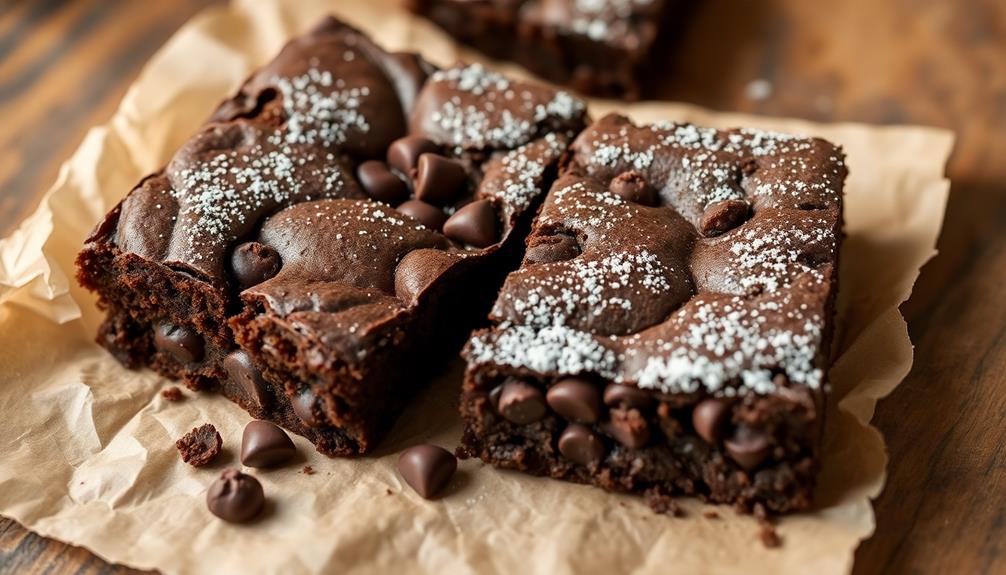
Now, let's talk about the final steps. Once your brownies have cooled, it's time to slice them into perfect squares.
Be gentle and use a sharp knife to ensure clean, even cuts. You can even get creative with the presentation, adding a dusting of powdered sugar or a drizzle of caramel sauce for an extra touch of elegance.
As you stack the brownies on a serving plate, take pride in your work.
These brownies aren't just a dessert – they're a reflection of your culinary skills. Enjoy the fruits of your labor, and don't be afraid to share your recipe with others.
After all, the joy of baking is in the sharing.
Frequently Asked Questions
Are Brownies Gluten-Free?
No, brownies are typically not gluten-free. Most recipes for brownies contain wheat flour, which is a source of gluten. If you require a gluten-free dessert, you'll need to find a recipe that specifically uses gluten-free flour or ingredients.
Can Brownies Be Made Vegan?
Yes, you can absolutely make brownies vegan. Simply substitute the eggs and butter with plant-based alternatives like flax or chia eggs and vegan butter or oil. The result will be a delicious, dairy-free and egg-free treat.
How Long Do Homemade Brownies Last?
Homemade brownies typically last 3-5 days when stored properly at room temperature in an airtight container. Their shelf life can be extended to 5-7 days in the refrigerator. Proper storage is key to maintaining their freshness and texture.
Can I Freeze Baked Brownies?
You can freeze baked brownies. Once cooled, wrap them tightly in plastic wrap or aluminum foil, then place in a freezer-safe bag or container. Frozen brownies can last up to 3 months, making them a convenient treat to have on hand.
What Are the Best Toppings for Brownies?
When considering toppings for your sweet treats, you have a wealth of options to make them even more irresistible. From classic chocolate chips to decadent caramel drizzle, the possibilities are endless to personalize and elevate your homemade or store-bought brownies.
Conclusion
You've made it to the end of our brownie adventure! Now it's time to savor the delicious, chocolatey treats you've created. Grab a glass of milk, and dive in. These brownies are sure to bring a smile to your face and satisfy your sweet tooth. Enjoy every bite – you've earned it! Brownies are the perfect indulgence, and you know how to make them just right.