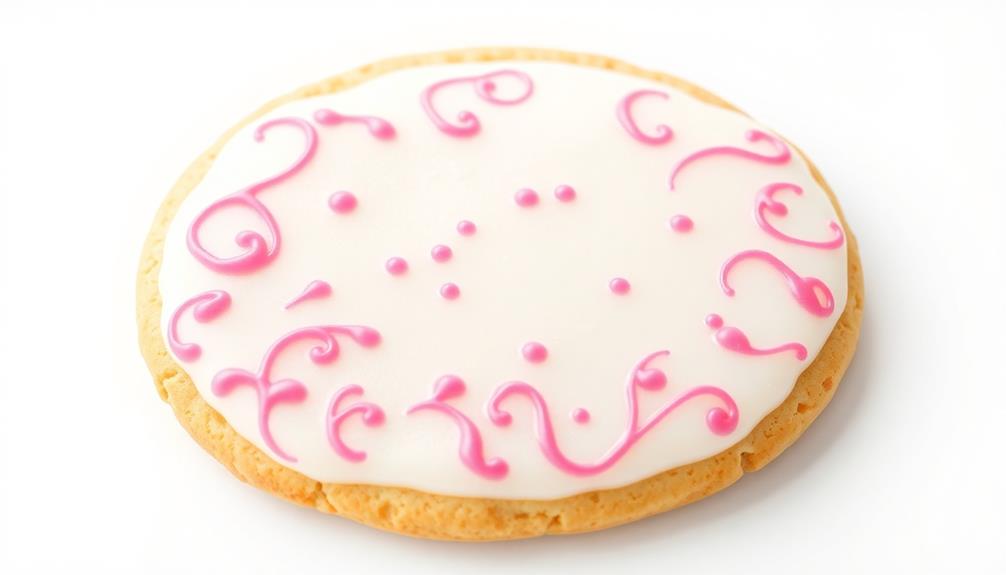
Sugar cookies with royal icing are a timeless delight that have brought joy to generations! This classic treat dates back to 17th century Europe, where bakers crafted intricate shapes and decorated them with vibrant icing. As sugar became more affordable, families began baking and decorating these delicious cookies together, a tradition that's endured worldwide. You'll love the buttery crispness of the cookies paired with the smooth, sweet icing – it's a flavor and texture combination that's simply irresistible. Plus, the creative possibilities for decorating are endless, making each cookie a unique work of art. If you're ready to dive into this delightful baking adventure…
Key Takeaways
- Sugar cookies with royal icing date back to the 17th century in Europe and remain a beloved holiday tradition worldwide.
- The simple method of creating the cookies allows for creative decoration using the smooth, sweet royal icing.
- The combination of a buttery, crisp cookie and the glossy, visually appealing royal icing creates an irresistible taste and texture experience.
- Decorating the cookies showcases baking skills and personal style, adding sentimental value and a sense of accomplishment.
- Sharing the homemade sugar cookies strengthens bonds with friends and family, as the treats are intended to bring joy to those who indulge.
Top picks for "sugar cooky royal"
Open Amazon search results for this keyword.
As an affiliate, we earn on qualifying purchases.
History
Sugar cookies with royal icing have a rich history that dates back to the 17th century. You can imagine bakers in elegant European kitchens, carefully rolling out dough and cutting out intricate shapes. They'd then carefully decorate the cookies with colorful royal icing, creating delightful masterpieces.
Over the centuries, this classic treat has captured the hearts of people around the world. As sugar became more affordable, the popularity of sugar cookies exploded. Families would gather together to bake and decorate these festive treats, filling the air with the sweet aroma of vanilla and the sight of vibrant icing.
Today, sugar cookies with royal icing remain a beloved tradition, gracing holiday tables and bringing smiles to people of all ages. Whether you're enjoying a classic snowflake cookie or an elaborately decorated design, each bite transports you to a world of warmth, nostalgia, and pure delight.
Recipe
Sugar cookies are a classic treat that can be enjoyed year-round. The combination of a buttery, crisp cookie and a smooth, sweet icing makes for a delightful dessert. This recipe provides a simple and straightforward method for creating these beloved cookies.
You can enhance your baking experience with products like the premium quality pillow inserts to ensure your kitchen is comfortable while you bake. The use of royal icing allows for a professional-looking finish and the opportunity to get creative with decorations. Whether you prefer simple designs or intricate patterns, the icing can be tailored to your desired aesthetic.
Ingredients:
- 2 cups all-purpose flour
- 1 teaspoon baking powder
- 1/2 teaspoon salt
- 1 cup unsalted butter, softened
- 1 cup granulated sugar
- 1 egg
- 2 teaspoons vanilla extract
For the Royal Icing:
- 3 egg whites
- 4 cups confectioners' sugar
- 1 teaspoon lemon juice
Cooking Instructions:
Preheat the oven to 375°F (190°C). In a medium bowl, whisk together the flour, baking powder, and salt.
In a large bowl, cream the butter and sugar until light and fluffy. Beat in the egg and vanilla extract. Gradually add the dry ingredients to the wet ingredients, mixing until a dough forms. Chill the dough for 30 minutes.
Roll the dough out on a lightly floured surface to 1/4-inch thickness. Cut out shapes using cookie cutters and place them on a parchment-lined baking sheet. Bake for 8-10 minutes, or until the edges are lightly golden. Allow the cookies to cool completely on the baking sheet before decorating.
To make the royal icing, beat the egg whites in a large bowl until they form soft peaks. Gradually add the confectioners' sugar and lemon juice, beating until the icing is smooth and glossy.
Transfer the icing to a piping bag and decorate the cooled cookies as desired. Allow the icing to set before serving.
Cooking Steps
Preheat your oven to a toasty 375°F, then let's cream the butter and sugar together until they're light and fluffy.
Now, simply add in the dry ingredients and mix until a smooth dough forms.
Roll that dough into little balls, pop them in the oven, and bake for 8-10 minutes until they're perfectly golden brown.
Step 1. Preheat Oven to 375°F
Before you begin assembling the dough, it's crucial to preheat your oven to 375°F. This step helps ensure your cookies bake evenly and reach that perfect golden-brown color. Go ahead and turn your oven dial to 375 and let it warm up while you get everything else ready.
Once the oven is preheated, you'll hear a little chime or beep to let you know it's reached the right temperature. That's your cue to start rolling out and cutting the dough.
The hot oven will work its magic, baking the cookies to a delightful, crisp-yet-chewy texture. Just be sure to keep an eye on them, as they can go from perfectly baked to over-baked in the blink of an eye!
When they're lightly golden around the edges, they're ready to come out and cool. Then you can decorate them with the tasty royal icing. Yum!
Step 2. Cream Butter and Sugar Together

With the oven preheated, you can now focus on the dough. In a large mixing bowl, add the softened butter and granulated sugar.
Using a hand mixer or a spoon, cream the butter and sugar together until the mixture is light and fluffy, about 2-3 minutes. You'll know it's ready when the texture becomes smooth and the color lightens.
As you cream the ingredients, you'll start to smell the sweet aroma of the butter and sugar blending together. This step is crucial for achieving the perfect tender and crumbly texture in your sugar cookies.
Be sure to scrape down the sides of the bowl occasionally to ensure everything is evenly mixed.
Once the butter and sugar are perfectly creamed, you can move on to the next step of adding the other wet ingredients.
Step 3. Add Dry Ingredients

Next, add the dry ingredients to the creamed butter and sugar. In a separate bowl, whisk together the all-purpose flour, baking powder, and salt.
This mixture of dry ingredients will give your cookies the perfect light and airy texture. Slowly add the dry ingredients to the creamed butter and sugar, mixing just until combined.
Be careful not to overmix, or your cookies could end up tough. The dry ingredients will absorb the wet ingredients, creating a smooth dough that's ready to be scooped and baked.
This step is crucial for achieving the classic sugar cookie shape and flavor. Once the dough is ready, you can start shaping the cookies and getting them ready for the oven.
The combination of the creamed butter and sugar with the dry ingredients is what gives these sugar cookies their irresistible taste and melt-in-your-mouth texture.
Step 4. Roll Dough Into Balls

After you've combined the dry ingredients with the creamed butter and sugar, it's time to shape the dough.
You'll want to scoop out small portions of the dough and roll them into nice, round balls. As you roll each one, imagine you're a sculptor, gently molding the dough with your palms until it forms a perfect sphere.
These adorable little dough balls will bake up into delightfully soft and tender cookies.
Once you've rolled the entire batch into balls, you can place them spaced apart on your baking sheets.
Be sure to leave room for them to spread a bit as they bake.
Now, you're ready to pop those trays in the oven and let the magic happen!
The heat will transform your doughy spheres into irresistible sugar cookies, ready to be decorated with the creamy royal icing.
Get excited, because these cookies are going to turn out beautifully!
Step 5. Bake for 8-10 Minutes

Preheat your oven to 375°F (190°C).
Once your dough is rolled into perfect little balls, it's time to bake them to golden perfection! Carefully place the dough balls onto a baking sheet, making sure to leave a little space between each one. This will allow the cookies to spread out just a bit as they bake.
Now, pop that tray into the oven and let the magic happen. In around 8-10 minutes, your kitchen will start filling with the most tantalizing aroma of freshly baked cookies.
Keep an eye on them, as you want the edges to be lightly golden brown, while the centers stay soft and chewy.
Once the timer goes off, use oven mitts to safely remove the tray. Allow the cookies to cool on the baking sheet for a minute or two before transferring them to a wire rack.
This will help them keep their shape as they finish baking. Now, get ready to decorate these sweet treats with your favorite royal icing! To make the royal icing, simply mix powdered sugar with a little bit of water and your favorite food coloring. Once the cookies are cooled, use a piping bag to decorate with the icing. Sprinkle with edible glitter or colored sugar for an extra special touch. And there you have it, a delicious chocolate pretzel recipe that is sure to impress your friends and family!
Final Thoughts
With a few simple steps and a little time, you can create delightful sugar cookies adorned with a smooth, glossy royal icing. These treats are a true delight, perfect for sharing with friends, family, or even enjoying all by yourself.
The rich, buttery flavor of the cookies pairs beautifully with the sweet, creamy icing, making each bite a delectable experience.
As you admire your handiwork, you can't help but feel a sense of pride and accomplishment. These cookies aren't only visually stunning, but they also showcase your baking skills.
Whether you choose to decorate them with vibrant sprinkles, delicate piping, or keep them elegantly simple, each cookie is a unique work of art.
Beyond their aesthetic appeal, these sugar cookies are sure to bring a smile to the faces of those who indulge.
The combination of the soft, tender cookie and the silky icing creates a texture that's simply irresistible. With every nibble, you'll be reminded of the joy that can be found in homemade baking.
Frequently Asked Questions
Can I Freeze the Cookies for Later Use?
Yes, you can freeze the cookies for later use. Freezing is an excellent way to extend the shelf life of your baked goods and enjoy them at a later time. Just be sure to store them properly to maintain freshness.
How Long Do the Cookies Stay Fresh?
Your cookies will stay fresh for up to a week when stored at room temperature in an airtight container. For longer storage, you can freeze the cookies for several months, maintaining their texture and flavor.
What Are the Best Storage Tips for the Iced Cookies?
To store iced cookies, keep them in an airtight container at room temperature. Avoid refrigerating them, as this can make the icing become soft and sticky. Enjoy your cookies within a week for optimal freshness.
Can I Substitute Any Ingredients in the Recipe?
You can substitute some ingredients, but be cautious. Swap out butter for a different fat, or try adjusting the sugar amount. However, avoid major changes that could affect the recipe's structure and flavor profile.
How Do I Achieve the Perfect Consistency for the Royal Icing?
To achieve the perfect consistency for royal icing, you'll need to find the right balance. Start with a thick icing, then gradually add water until it reaches the desired smooth, spreadable texture for decorating.