Connect with us

Seafood Specialties

New England Clam Chowder

Just when you thought you knew everything about this classic New England staple, discover the full history and recipe that will transport you to the cozy coastal towns of the Northeast.

Published

on

creamy seafood soup dish

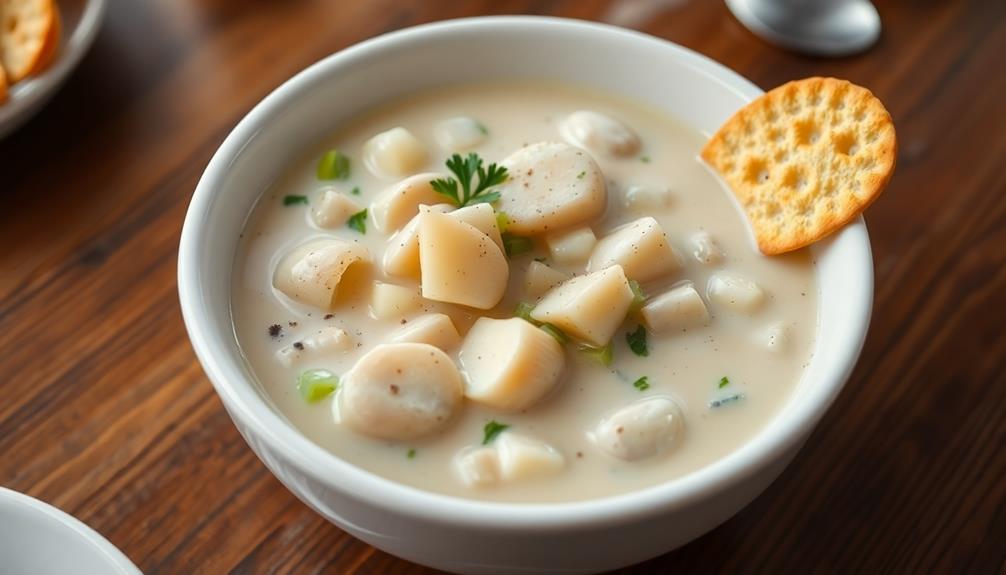
New England clam chowder is a beloved classic dish that'll warm your soul and transport you right to the cozy coastal towns of the Northeast, where this hearty and creamy soup has been a staple for centuries. You'll start with fresh, high-quality clams, then add in diced potatoes, onions, and bacon for a savory, flavorful broth. The creamy texture comes from a blend of milk and cream, creating a comforting and satisfying meal. Whether you enjoy it on a chilly day or during a summer seaside picnic, this New England staple is sure to delight your taste buds. And if you keep reading, you'll discover the full history and recipe for this timeless dish.

Key Takeaways

  • New England Clam Chowder is a classic dish that originated in the 17th century with early settlers in the region.
  • The traditional recipe includes ingredients like salted pork, onions, potatoes, and fresh clams, which have evolved over time.
  • Variations of the chowder can include a creamy broth or the addition of tomatoes, depending on local preferences.
  • The dish is often served with crusty bread or oyster crackers, and is best enjoyed on chilly days for its comforting flavors.
  • Quality ingredients, especially fresh clams, and the proper blending of flavors are key to creating a satisfying New England Clam Chowder.

History

The origins of New England clam chowder can be traced back to the 17th century, when early settlers in the region began crafting this hearty soup.

Back then, the dish was a simple combination of salted pork, onions, potatoes, and of course, the local clams. As the years passed, the recipe evolved, with fishermen and coastal communities putting their own spin on the classic. Some added tomatoes, while others preferred a creamy base.

No matter the variation, one thing remained constant: the love for this comforting, flavorful soup.

Today, New England clam chowder is a beloved staple, enjoyed by folks far and wide.

Whether you're slurping it down on a blustery day or savoring it by the seaside, this dish connects us to the rich history and traditions of the region.

Advertisement

Recipe

New England Clam Chowder

Recipe

Clam chowder is a beloved classic in the Northeast United States, with a rich, creamy broth and chunks of tender clams. This recipe for New England-style clam chowder captures the essence of this comforting dish. The key is to use fresh, high-quality clams and to let the flavors meld together for a truly satisfying result.

This chowder is the perfect way to warm up on a chilly day. Serve it with crusty bread or oyster crackers for a complete meal.

Ingredients:

Advertisement
  • 2 pounds littleneck or cherrystone clams, scrubbed clean
  • 4 slices bacon, diced
  • 1 onion, diced
  • 2 celery stalks, diced
  • 2 potatoes, peeled and diced
  • 2 cups whole milk
  • 1 cup heavy cream
  • 2 bay leaves
  • 1 teaspoon dried thyme
  • Salt and black pepper to taste

Instructions:

In a large pot or Dutch oven, cook the diced bacon over medium heat until crisp. Remove the bacon and set aside, reserving the bacon fat in the pot.

Add the onion and celery to the pot and sauté for 5-7 minutes, until softened. Add the potatoes, milk, cream, bay leaves, and thyme. Simmer the chowder for 15-20 minutes, until the potatoes are tender.

Add the clams to the pot, cover, and cook for 5-7 minutes, until the clams have opened up. Discard any clams that don't open. Season the chowder with salt and pepper to taste. Serve the chowder hot, garnished with the reserved crispy bacon.

Tips:

For a thicker chowder, you can mash some of the potatoes against the side of the pot. You can also add a tablespoon or two of all-purpose flour to the sautéed onions and celery to create a roux, which will thicken the chowder.

Advertisement

Adjust the seasoning as needed, and consider adding a splash of clam juice or white wine to enhance the flavor.

Cooking Steps

Peel and dice those potatoes, then sauté the onions until they're nice and soft.

Next, toss in the clams and broth, and let the chowder simmer until the potatoes are tender.

Step 1. Peel and Dice Potatoes
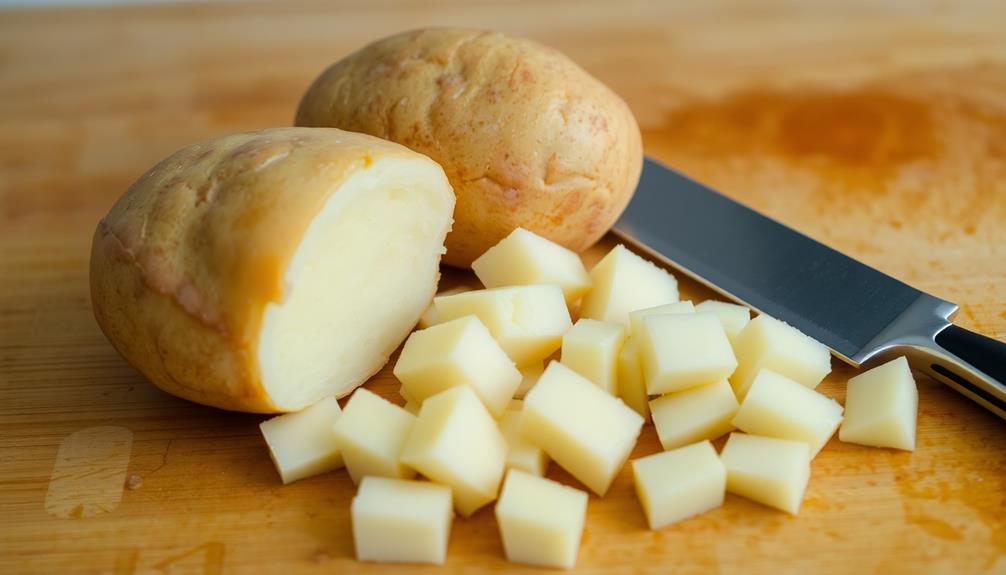
peel dice prepare potatoes

Gather about 2 pounds of potatoes and peel them using a sharp knife or vegetable peeler. Carefully remove the thin skin, being mindful not to waste too much of the potato.

Once peeled, rinse the potatoes under cool running water to wash away any dirt or debris. Grab a sturdy cutting board and a sharp chef's knife.

Slice the potatoes into bite-sized cubes, about 1/2-inch thick. This uniform size will help them cook evenly in the chowder. As you dice, be sure to keep the potato pieces together in small piles to make the next steps easier.

Advertisement

Keep going until all the potatoes are nicely cubed. Now you're ready to add them to the pot along with the other delicious ingredients.

Just wait until you taste how the tender potatoes soak up all the wonderful flavors of this classic New England clam chowder!

Step 2. Dice and Sauté Onions
dice onions saut them

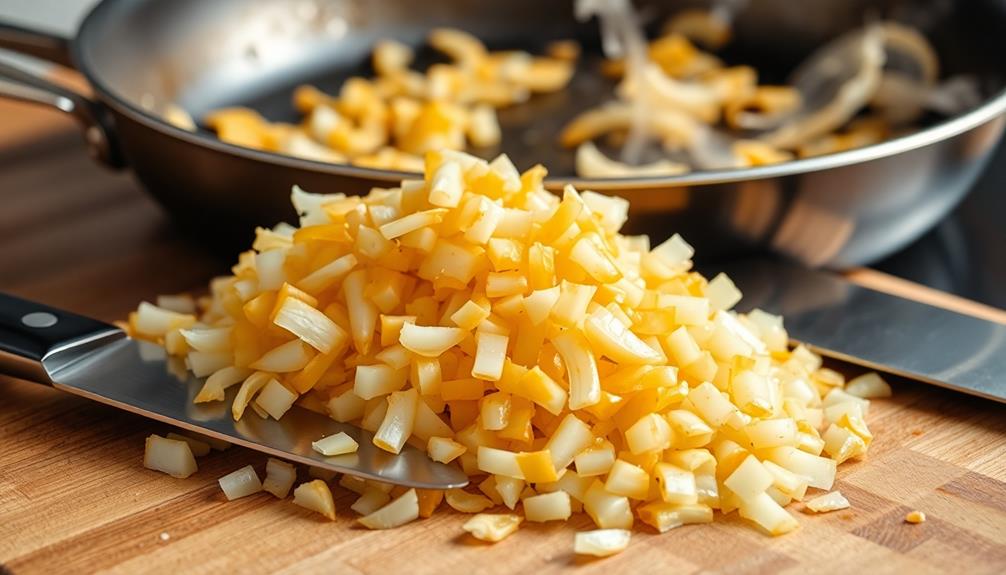
Onion-dicing and sautéing come next in this chowder-making adventure. First, grab a sharp knife and a sturdy cutting board. Carefully slice the onion in half from top to bottom, then set one half aside for now.

Lay the other half flat-side down and slice it into thin strips. Next, stack the strips and slice them crosswise to create diced onion pieces. Easy, right?

Now, it's time to sauté the onions. Heat a large pot or Dutch oven over medium heat and add a pat of butter. Once it's melted, toss in the diced onions.

Stir them around and let them cook until they're soft and translucent, about 5 minutes. The kitchen will start to smell amazing as the onions caramelize and release their natural sweetness.

Advertisement

Keep an eye on them, stirring occasionally, to prevent any burning. Soon, you'll have perfectly sautéed onions, ready to contribute their flavor to the chowder.

Step 3. Add Clams and Broth
incorporate clams and broth

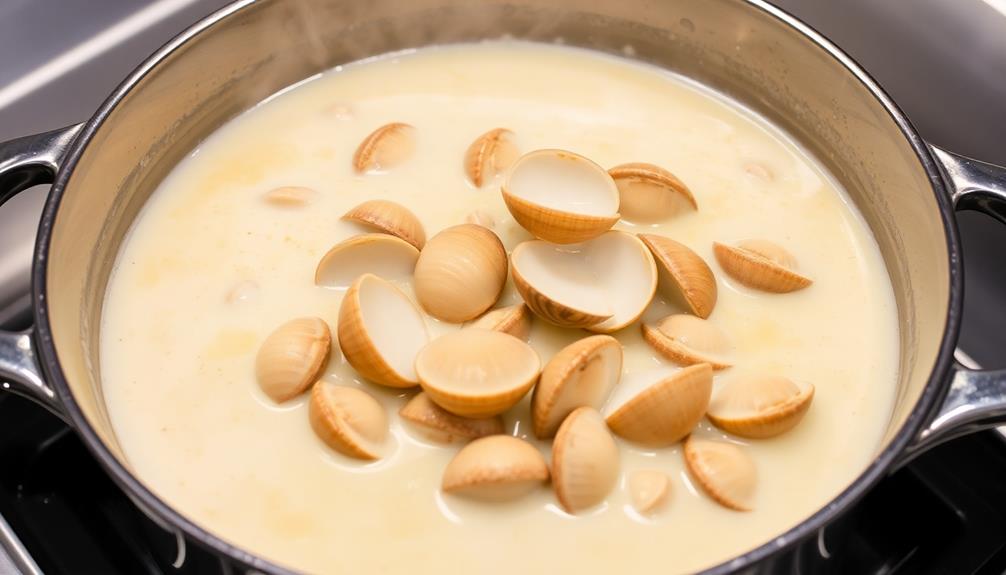
With the onions nicely sautéed, it's time to add the clams and broth. Grab a can or two of fresh, juicy clams and pour them right into the pot. Don't be shy – the more clams, the better!

Now, it's time to give your chowder a nice, hearty broth. Pour in some chicken or veggie broth, and make sure to add just enough to get that perfect, creamy consistency. Give it a good stir, and let the flavors meld together.

As the chowder bubbles away on the stove, you'll start to smell the irresistible aroma of the clams and broth. Your mouth will be watering, just waiting to take that first spoonful.

When it's all ready, ladle up a big, steaming bowl and get ready for a taste of true New England comfort. The tender clams and rich broth will warm you right up on a chilly day. Mmm, this is going to be delicious! Don’t forget to pair your clam chowder with some crusty bread for dipping. It’s the perfect way to soak up all that savory goodness. And if you’re a fan of hearty dutch oven recipes, this clam chowder is sure to become a favorite in your rotation. The slow simmering in a dutch oven allows all the flavors to meld together, creating a truly satisfying dish.

Step 4. Simmer Chowder Until Potatoes Tender
simmer chowder until tender

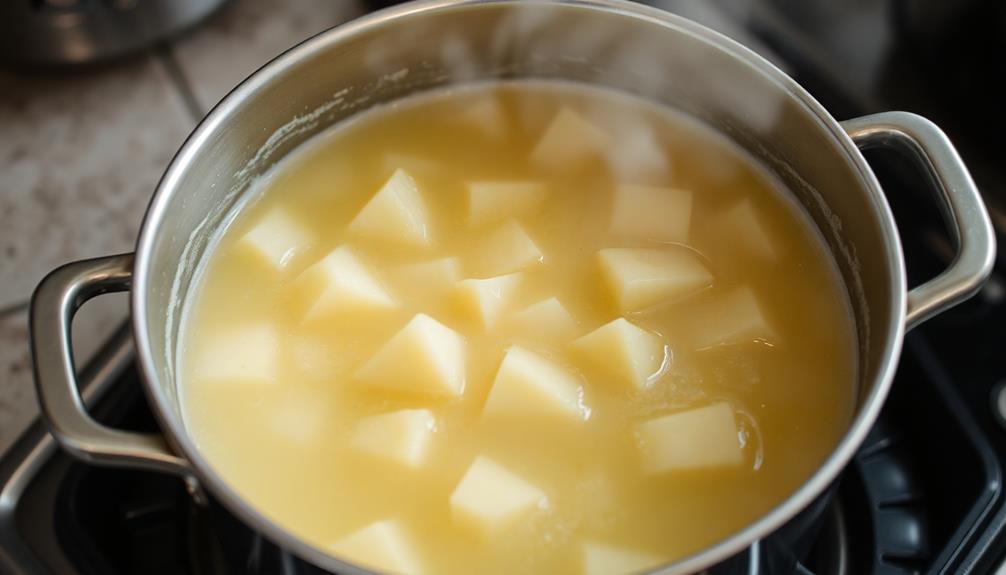
Simmering the chowder, you'll want to ensure the potatoes become tender, which should take around 15-20 minutes.

As the mixture bubbles away, you'll start to smell the savory scents of the clams, bacon, and creamy broth. Keep an eye on it, giving the pot a gentle stir every now and then to prevent anything from sticking to the bottom.

Advertisement

You'll know the potatoes are ready when you can easily pierce them with a fork. Once they're tender, the chowder will have a delightfully thick and hearty texture.

Reduce the heat to low and let it simmer for a few more minutes, allowing the flavors to meld together. This simmering process is crucial for developing the rich, comforting taste that makes New England clam chowder so beloved.

Soon, you'll have a steaming bowl of this classic, creamy delight ready to enjoy.

Step 5. Add Cream and Seasonings
incorporate cream and seasonings

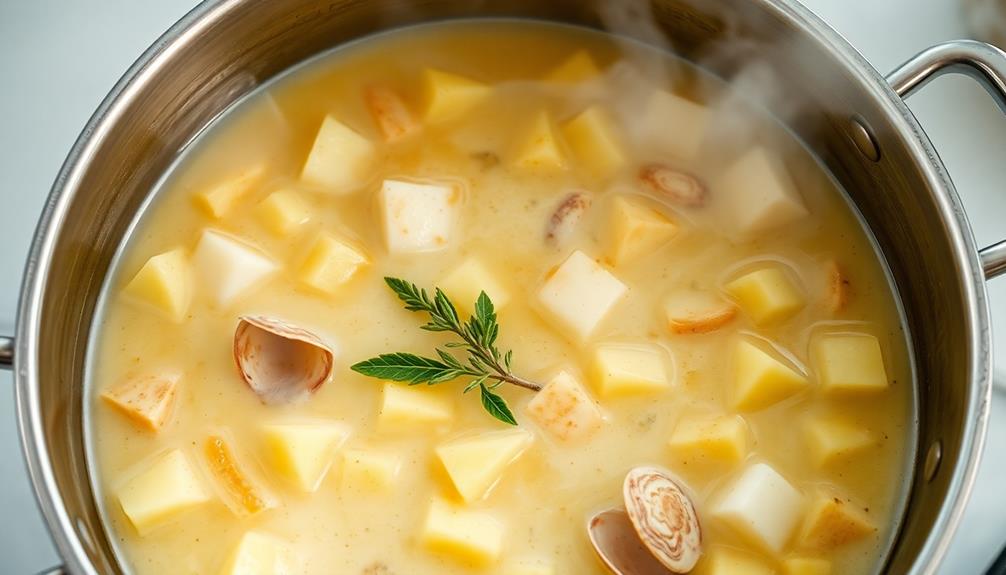
Next, stir in the cream. You'll see the chowder start to thicken up as the cream mixes in. Yum!

Now, it's time to add the seasonings. Grab some salt and pepper and give it a few good shakes. A little bit of salt and pepper really brings out the flavors in the chowder.

Next, sprinkle in some dried thyme. The earthy, herbal notes of the thyme pair perfectly with the creamy texture.

Advertisement

Stir everything together until the seasonings are nicely incorporated. Can you smell that? It's making your mouth water, isn't it?

Final Thoughts

New England Clam Chowder is a hearty and delicious dish that has been a staple in the region for centuries. Now that you've added the cream and seasoned it to perfection, it's time to sit back and enjoy your masterpiece.

The rich, creamy broth and tender clams are sure to warm your soul on a chilly day. As you take that first spoonful, you'll be transported to the cozy coastal towns of New England, where the salty air and the sounds of crashing waves set the perfect backdrop for this comforting meal.

Don't be afraid to get creative with your toppings, too. A sprinkle of fresh parsley or a few crispy croutons can add a delightful crunch.

And if you're feeling extra indulgent, a dollop of sour cream or a slice of crusty bread on the side can take your chowder to new heights of deliciousness.

Advertisement

Frequently Asked Questions

What Type of Clams Are Best for Chowder?

For the best chowder, you'll want to use cherrystones or littleneck clams. These briny, flavorful clams hold up well in the chowder and provide the perfect texture and taste. Their firm flesh is ideal for this hearty dish.

Can I Use Canned Clams Instead of Fresh?

You can certainly use canned clams instead of fresh for your recipe. While fresh clams may provide more flavor, canned clams are a convenient and affordable option that can still make a tasty chowder.

How Can I Make My Chowder Thicker?

To make your chowder thicker, try adding a roux. Melt butter in a saucepan, whisk in flour, and cook for a few minutes. Slowly stir this mixture into your chowder until it reaches your desired consistency.

Is It Possible to Make a Low-Fat Version?

Yes, you can make a low-fat version of your chowder. Try using low-fat milk or evaporated milk instead of heavy cream, and add pureed potatoes or cornstarch to thicken it without the extra fat.

How Long Does Leftover Chowder Last in the Fridge?

Leftover chowder can last 3-4 days in the fridge when stored properly. Keep it in an airtight container and ensure it cools completely before refrigerating. Consume it within that timeframe for best quality and food safety.
Advertisement
Advertisement

Seafood Specialties

Cioppino: San Francisco’s Seafood Stew

Overflowing with the flavors of the sea, Cioppino, San Francisco’s iconic seafood stew, transports diners to the vibrant coastal culinary heritage of California.

Published

on

san francisco s seafood delicacy

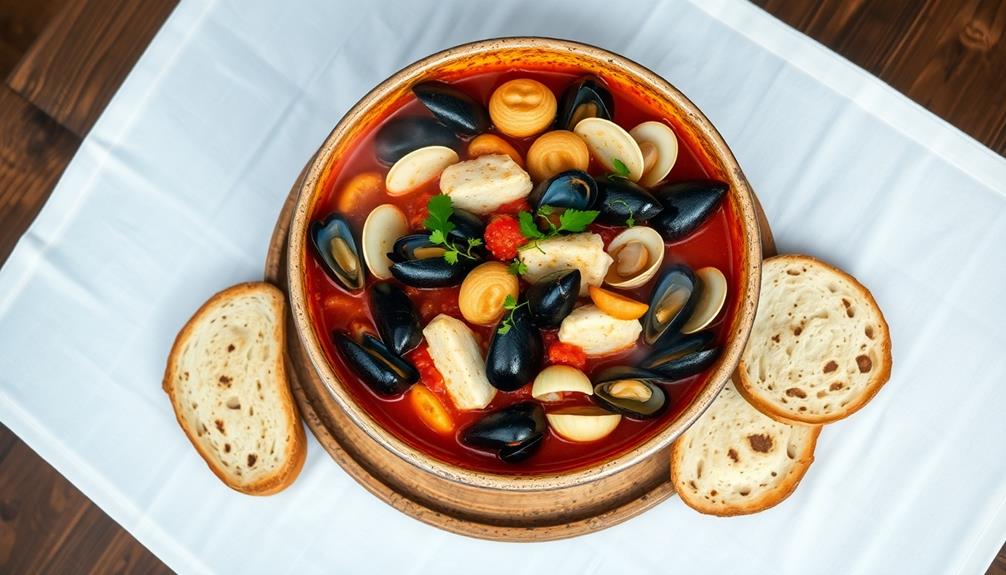
Cioppino, San Francisco's iconic seafood stew, is a flavorful blend of Italian coastal traditions and the abundant ocean bounty found along California's shores. This comforting dish features a tomato-based broth that's simmered with a symphony of fresh seafood like Dungeness crab, clams, and mussels. You'll be transported to the bustling docks and lively markets that inspired its creation, with each hearty spoonful offering a taste of San Francisco's vibrant culinary heritage. Serve it up with crusty bread for an unforgettable dining experience that'll leave you craving more. There's so much to discover about this beloved local specialty.

Key Takeaways

  • Cioppino originated from Italian immigrant communities in late 19th century San Francisco and evolved to include local seafood like Dungeness crab, clams, and mussels.
  • The dish features a flavorful tomato-based broth that balances the sweetness of the seafood and is typically served with crusty bread for dipping.
  • The quality and variety of fresh seafood are crucial for a successful Cioppino, representing the rich coastal bounty of the Pacific Ocean.
  • Cioppino has become a beloved part of San Francisco's culinary identity, reflecting the city's diverse cultural influences and commitment to quality ingredients.
  • Enjoyed year-round, Cioppino provides a comforting, soul-warming experience in every bowl, showcasing the versatility of this iconic San Francisco seafood stew.

History

The origins of Cioppino, San Francisco's iconic seafood stew, can be traced back to the city's Italian immigrant communities in the late 19th century.

These hardworking fishermen from Italy's coastal regions brought their traditional fish stew recipes with them when they settled in the bustling port of San Francisco.

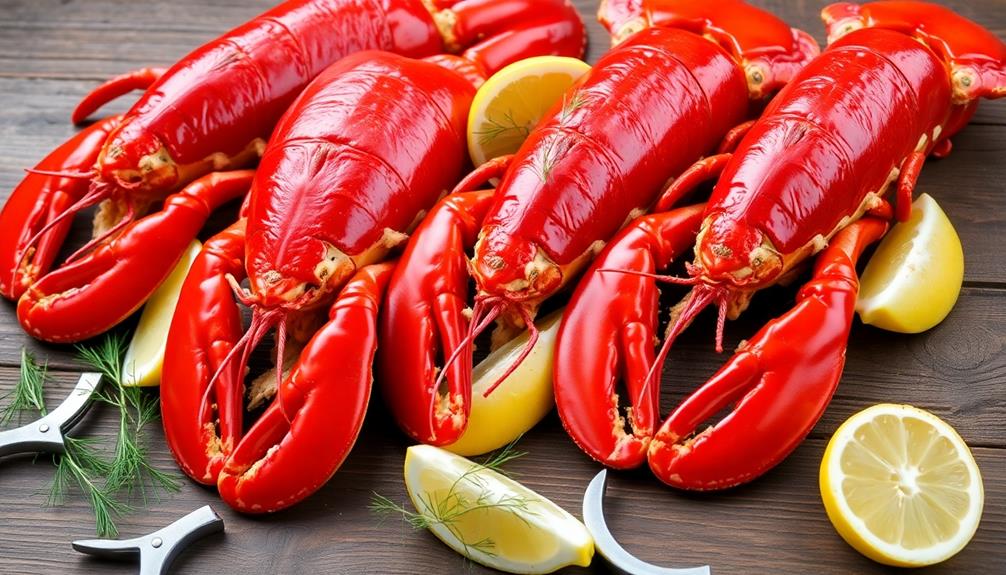
As they shared their culinary traditions, the dish evolved, incorporating local seafood like Dungeness crab, clams, and mussels. The fusion of flavors and ingredients created a unique and unforgettable dining experience, drawing in locals and tourists alike. In order to keep the dish authentic, the chefs made a point of buying fresh lobster directly from the local fishermen, ensuring the highest quality and supporting the community. This dedication to sourcing the best ingredients added to the dish’s reputation as a must-try seafood specialty.

The name "Cioppino" likely comes from the Italian word "ciuppin," meaning a type of small fish.

Over time, this hearty, flavorful stew became a beloved part of San Francisco's culinary identity, a reflection of the city's diverse cultural influences.

Advertisement

Today, Cioppino remains a cherished specialty, showcasing the fresh, bountiful seafood of the Pacific Ocean.

Whether savored at a cozy waterfront restaurant or prepared at home, this signature dish transports you to the vibrant spirit of San Francisco's historic Italian fishing community.

Recipe

Cioppino, a quintessential San Francisco dish, is a flavorful seafood stew that showcases the bountiful local catch. Originating from the Italian-American fishing communities of the city, this hearty dish combines a variety of fresh seafood in a tomato-based broth, creating a symphony of tastes and textures.

The key to a successful Cioppino lies in the quality and variety of the seafood used. By selecting the freshest and most seasonal ingredients, you can elevate this dish to new culinary heights, transporting your taste buds to the vibrant waterfront of San Francisco.

Ingredients:

Advertisement
  • 1 lb. assorted seafood (such as shrimp, mussels, clams, and white fish)
  • 1 onion, diced
  • 3 cloves garlic, minced
  • 1 cup dry white wine
  • 1 (28 oz) can diced tomatoes
  • 2 cups fish or seafood stock
  • 1 bay leaf
  • 1 tsp dried oregano
  • 1/4 tsp red pepper flakes (optional)
  • Salt and black pepper to taste
  • 2 tbsp olive oil
  • Crusty bread, for serving

Cooking Instructions:

In a large pot or Dutch oven, heat the olive oil over medium heat. Add the diced onion and sauté until translucent, about 5 minutes. Stir in the minced garlic and cook for an additional minute until fragrant.

Pour in the white wine and let it simmer for 2-3 minutes to reduce slightly. Add the diced tomatoes, fish or seafood stock, bay leaf, oregano, and red pepper flakes (if using). Season with salt and black pepper to taste. Bring the mixture to a boil, then reduce the heat and let it simmer for 15-20 minutes, allowing the flavors to meld.

Extra Tips:

For the best results, use a variety of fresh, high-quality seafood. Experiment with different combinations, such as mussels, clams, shrimp, and white fish like halibut or cod.
When selecting your seafood, look for firm, shiny flesh and a fresh, briny smell. You can also add in some scallops or squid for extra variety and flavor. For a delicious and impressive dish, try this saltcrusted fish recipe. The crispy, seasoned crust locks in the moisture and flavor of the fish, creating a truly memorable meal for any seafood lover. To complement the natural flavors of the seafood, consider incorporating lowsodium cooking techniques, such as steaming or grilling, to avoid overpowering the delicate taste. Herbs, citrus, and garlic can also enhance the dish without adding unnecessary salt. By using these methods, you can create a healthier meal that still packs a punch with vibrant, fresh flavors.

Adjust the cooking time based on the size and thickness of the seafood. Serve the Cioppino hot, with crusty bread for dipping in the flavorful broth. Enjoy this taste of San Francisco's coastal cuisine in the comfort of your own home.

Advertisement

Cooking Steps

Chop up those aromatic veggies to kick things off.

Next, you'll add some tangy tomatoes to the mix.

Then, pour in that rich wine and savory broth – now we're cooking!

Don't forget to toss in your fresh seafood and garnish with fragrant herbs for the perfect finishing touch.

Step 1. Chop Aromatics to Start

chop aromatics to begin

First, chop up the aromatic vegetables that will form the flavor base of your cioppino.

You'll need to mince some onions, garlic, and celery – don't be shy, chop them up nice and small! The onions will add sweetness, the garlic will bring a zesty kick, and the celery will lend a fresh, crunchy texture.

Advertisement

Once those are ready, grab a handful of fresh parsley and give it a good chop too. The parsley will brighten up the whole dish with its vibrant, herby flavor.

Work quickly and efficiently – you want everything prepped and ready to go before you start cooking.

With the aromatics chopped, you're one step closer to enjoying a steaming bowl of that famous San Francisco seafood stew.

Get excited, because the best is yet to come!

Step 2. Add Tomatoes

add tomatoes next step

Adding the tomatoes is a crucial next step in crafting your cioppino. Grab a few fresh, juicy tomatoes and give them a good chop. You'll want to dice them into bite-sized pieces so they'll blend seamlessly into the stew. The tomatoes will add a burst of bright, tangy flavor that balances out the rich seafood.

Once your tomatoes are ready, toss them right into the pot with the simmering broth and aromatics. Give everything a good stir to incorporate the tomatoes evenly. As the tomatoes cook, they'll release their juices, creating a rich, tomatoey base for your cioppino.

Advertisement

Don't be afraid to add a generous amount of tomatoes – the more the merrier! The tomatoes will soften and melt into the stew, creating a deliciously tomato-forward flavor that's simply irresistible.

Get ready for your kitchen to fill with the mouthwatering aroma of this San Francisco classic.

Step 3. Add Wine and Broth

incorporate wine and broth

Next, pour in the wine and broth to create the flavorful base for your cioppino. The wine brings a delightful acidity that balances the sweetness of the tomatoes, while the broth adds a savory depth of flavor.

Gently pour in a cup of dry white wine, such as chardonnay or pinot grigio, and then follow it up with 4 cups of seafood or chicken broth.

Stir the liquids together, making sure to scrape up any bits of tomato or garlic that have stuck to the bottom of the pot. Let the mixture simmer for about 10 minutes, allowing the flavors to meld and the sauce to thicken slightly.

The wonderful aroma of the wine and broth will fill your kitchen, getting your taste buds all tingly in anticipation. Now, it's time to add your assortment of fresh, juicy seafood to create the authentic taste of San Francisco's beloved cioppino!

Advertisement

Step 4. Add Seafood

incorporate seafood ingredients

The arrival of the fresh, vibrant seafood marks the centerpiece of this iconic San Francisco dish. Gather your favorite selection of ocean treasures – juicy mussels, plump shrimp, tender clams, and meaty chunks of white fish.

Gently lower them into the aromatic broth, letting them simmer until they've opened up and turned opaque. Feel the excitement build as the flavors meld together, creating a symphony of the sea.

Breathe in the tantalizing aroma – briny, garlicky, and oh-so-irresistible. Can't you just imagine dipping a crusty piece of sourdough bread into the flavorful stew, soaking up every last drop?

The seafood infuses the broth with its natural sweetness, making each spoonful a delightful escape to the California coast. Get ready to savor the fruits of the Pacific, all wrapped up in one comforting, soul-warming bowl of Cioppino.

Step 5. Garnish With Fresh Herbs

garnish with fresh herbs

A sprinkle of freshly chopped herbs adds the final, vibrant touch to your Cioppino. Pluck a few sprigs of fragrant basil, parsley, or oregano from your garden or the local market. Gently tear the leaves into bite-sized pieces and scatter them over the top of the stew.

The herbaceous aroma will instantly waft up, enticing your senses. As you take a spoonful, the fresh flavors mingle with the briny seafood, creating a symphony of tastes on your tongue. The bright green flecks also add a lovely pop of color, making your Cioppino look as appetizing as it tastes.

Feel free to experiment with different herb combinations – perhaps try a sprinkle of fennel fronds or a handful of chopped chives. No matter which herbs you choose, they'll elevate your Cioppino to the next level, turning a delicious dish into an absolute culinary delight.

Advertisement

Final Thoughts

Ultimately, Cioppino exemplifies the culinary prowess of San Francisco. This iconic seafood stew is a true celebration of the city's coastal bounty.

As you savor each fragrant, flavorful bite, you'll be transported to the bustling docks and lively markets that inspire its creation. The blend of succulent seafood – plump mussels, tender clams, and juicy shrimp – harmonize beautifully with the rich, tomato-based broth.

Aromatic herbs and spices add depth and complexity, while the crusty bread serves as the perfect accompaniment for sopping up every last drop.

Whether enjoyed on a chilly evening or as a summer seaside treat, Cioppino captures the spirit of San Francisco in each spoonful.

It's a dish that truly embodies the city's vibrant culture, passion for quality ingredients, and unwavering commitment to culinary excellence.

Advertisement

Dive into this gastronomic delight and experience the flavors that have made Cioppino a beloved San Francisco tradition.

Frequently Asked Questions

What Is the Origin of the Name "Cioppino"?

You're curious about the origin of the name "cioppino," aren't you? Well, it's believed to have derived from the Italian word "ciuppin," which refers to a fisherman's stew made with the catch of the day.

Can Cioppino Be Made With Frozen Seafood?

Absolutely, you can make cioppino with frozen seafood. Frozen seafood is a convenient and affordable option that can produce a delicious dish. Just be sure to thaw the seafood properly before adding it to the stew.

How Long Does Cioppino Keep in the Refrigerator?

You can store cioppino in the refrigerator for up to 3-4 days. Keep it in an airtight container, and it'll stay fresh. Just be sure to reheat it thoroughly before serving.

Is Cioppino Gluten-Free?

Yes, cioppino is typically gluten-free as it doesn't contain any wheat-based ingredients. The seafood and tomato-based broth used in this stew make it a great option for those following a gluten-free diet.

Advertisement

Can Cioppino Be Served With Bread Other Than Sourdough?

Yes, you can definitely serve cioppino with bread other than sourdough. Crusty baguettes, garlic bread, or even gluten-free options like cornbread or rice crackers would all pair nicely with the flavorful seafood stew.

Continue Reading

Seafood Specialties

Ceviche: South American Raw Fish Dish

Captivating ceviche, the vibrant South American raw fish dish, will whisk you away on a delightful culinary journey, revealing the rich flavors of Peru.

Published

on

south american raw fish

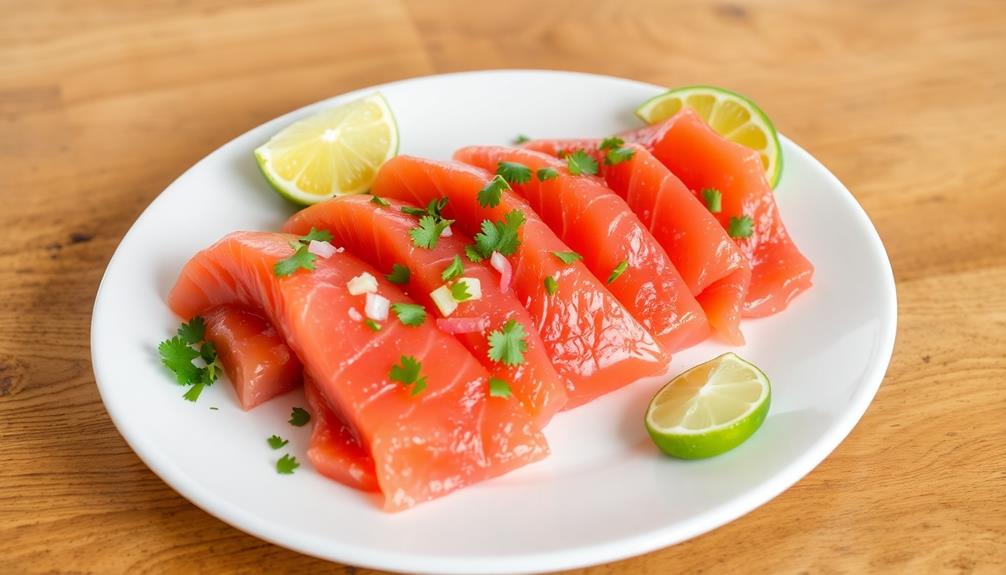
Ceviche, the vibrant South American raw fish dish, will transport you on a delightful culinary journey! Originated centuries ago by Peruvian fishermen, ceviche combines sushi-grade seafood, tangy citrus juices, and aromatic herbs for a refreshing taste sensation. You'll love how the acid "cooks" the fish, giving it a tender texture. Customize your ceviche with colorful veggies, spicy chili peppers, or tropical fruits. Whether you enjoy it chilled on a hot day or as the star of a celebratory feast, ceviche offers a delightful window into South America's rich culinary heritage. Let's explore more about this captivating dish!

Key Takeaways

  • Ceviche is a traditional South American dish that originated in Peru, where fishermen cured fresh catch in citrus juices, transforming the fish into a tender delicacy.
  • The dish represents a fusion of indigenous and colonial culinary practices, with variations incorporating local ingredients and seasonings.
  • Ceviche is prepared by marinating sushi-grade fish in a blend of citrus juices, which "cook" the fish by changing its texture and flavor.
  • Ceviche is low in calories, high in protein, and rich in omega-3 fatty acids and vitamin C, making it a healthy seafood option.
  • Ceviche has gained global popularity, with ceviche bars and restaurants showcasing the cultural significance and culinary techniques of this vibrant South American dish.

History

Ceviche, a beloved South American dish, has a rich history that can be traced back centuries. This tantalizing treat originated in Peru, where fishermen would cure their fresh catch of the day in citrus juices.

As the fish "cooked" in the acidic marinade, it transformed into a delightfully tender and flavorful delicacy. Over time, recipes for ceviche evolved, with each coastal region adding its own unique twist.

Some versions incorporate vibrant vegetables like sweet potatoes or corn, while others feature zesty seasonings or aromatic herbs.

Today, ceviche remains a cherished part of South American cuisine, showcasing the bountiful seafood and diverse culinary traditions of this captivating continent.

Whether you're savoring the classic Peruvian style or exploring a regional variation, the refreshing taste of ceviche is sure to transport you on a delicious journey through South America's rich culinary heritage.

Advertisement

Recipe

Ceviche is a quintessential South American dish that showcases the bright, refreshing flavors of raw seafood "cooked" in an acidic marinade. The process of "cooking" the fish in the citrus juices breaks down the proteins, resulting in a tender, flavorful dish. Ceviche is typically enjoyed as an appetizer or a light main course, often accompanied by crisp, tangy side dishes.

The key to a successful ceviche lies in the quality and freshness of the seafood. Choose the freshest, sushi-grade fish available, and handle it with care to preserve its delicate texture and flavor.

  • 1 lb sushi-grade white fish (such as halibut, sea bass, or tilapia), diced into 1/2-inch cubes
  • 1 cup fresh lime juice (about 8-10 limes)
  • 1/2 cup fresh orange juice
  • 1 red onion, thinly sliced
  • 2 tomatoes, diced
  • 1 jalapeño, seeded and finely chopped
  • 1/2 cup chopped cilantro
  • Salt and pepper to taste

In a large non-reactive bowl, combine the diced fish, lime juice, and orange juice. Cover and refrigerate for 30 minutes to 1 hour, stirring occasionally, until the fish is opaque and "cooked" throughout.

Gently fold in the sliced onion, diced tomatoes, chopped jalapeño, and cilantro. Season with salt and pepper to taste.

Serve the ceviche immediately, accompanied by crisp tortilla chips, sliced avocado, or a refreshing side salad. The acidity of the citrus juices will continue to "cook" the fish, so it's best to consume the ceviche shortly after preparing it.

Enjoy this bright, vibrant dish that captures the essence of South American cuisine.

Advertisement

Cooking Steps

First, you'll need to dice the fresh fish into bite-sized pieces.

Next, you'll marinate the fish in a zesty citrus juice blend.

Then, you'll add in some tasty seasonings to really make the flavors pop.

Let the fish soak up all that deliciousness for about 30 minutes, then serve it up chilled and garnished with fragrant cilantro.

Step 1. Dice Fish Into Bite-Sized Pieces

dice fish into pieces

Next, you'll want to dice the fish into bite-sized pieces. This is an important step, as you want the fish to be easy to eat and evenly cooked in the citrus marinade.

Use a sharp knife and cutting board to carefully cut the fish into small, uniform cubes, about 1/2 to 1 inch in size. This will help the fish soak up all the delicious flavors of the ceviche.

Advertisement

Take your time and be precise – you don't want any huge chunks or uneven pieces. Once the fish is all nicely diced, you can transfer it to a bowl and get ready for the next step.

The small, even pieces will create the perfect texture and ensure every bite is bursting with that tangy, zesty ceviche taste. Are you ready to see the fish transform into a masterpiece? Let's keep going!

Step 2. Marinate Fish in Citrus Juice

citrus juice fish marinade

After diligently dicing the fish, you'll want to start marinating it in the citrus juice. This is where the magic really happens! You'll need some freshly squeezed lemon and lime juice – the more the merrier. Go ahead and pour that tangy, bright juice all over the fish.

Make sure every single piece is coated and submerged. The citrus is going to work its tenderizing and flavor-boosting powers, transforming the raw fish into something truly extraordinary.

As the fish marinates, you'll notice it start to "cook" and turn opaque. This is the chemical reaction happening – the acidity in the citrus juice is effectively cooking the fish without any heat. Isn't that wild?

Keep the fish marinating for at least 30 minutes, or up to a few hours, stirring occasionally. The longer it sits, the more flavor it will soak up. Get ready for a burst of fresh, zesty goodness in every bite!

Advertisement

Step 3. Add Seasonings

add seasoning to taste

Once the fish has marinated, it's time to add some seasonings to really make the flavors pop!

First, grab some fresh cilantro and give it a good chopping. The bright, herby notes will add a wonderful freshness to your ceviche.

Next, finely mince some red onion. The sharp, tangy flavor will nicely balance out the citrusy marinade.

Don't forget the jalapeño – just a small one, diced up nice and small. It'll give your ceviche a delightful kick of heat.

Finally, sprinkle in a bit of salt and pepper to taste. The seasonings will really make all the flavors come alive on your tongue.

Now, give everything a good stir to combine all those mouth-watering ingredients. Your ceviche is really starting to shape up!

Advertisement

Get ready, because your taste buds are about to be treated to an incredible South American delight.

Step 4. Let Fish Marinate for 30 Minutes

marinate fish for thirty minutes

With the seasonings added, it's time to let the fish marinate for about 30 minutes. This is an important step, as it allows the citrus juices and spices to really soak into the fish, making the flavors pop.

You can almost smell the tantalizing aroma already, can't you?

As the fish sits, the acidic citrus juice will actually "cook" the fish, transforming its texture and bringing out its natural sweetness. It's like magic!

You'll start to see the fish change color, going from translucent to opaque – a sure sign that it's ready to devour.

Don't be tempted to sneak a taste just yet, though. Be patient and let those flavors meld together for the full 30 minutes.

Advertisement

When the time is up, you'll have wonderfully zesty, tender ceviche that's bursting with freshness.

Now, the fun part – time to dig in!

Step 5. Serve Chilled, Garnish With Cilantro

serve chilled garnish cilantro

Once the fish has marinated for 30 minutes, you'll want to serve the ceviche chilled. This will help enhance the bright, fresh flavors of the lime juice, onions, and cilantro.

Grab some small bowls or plates and get ready to wow your guests!

Gently scoop the marinated fish and vegetables out of the bowl and into the serving dishes. Make sure to drizzle a bit of the flavorful citrus marinade over the top. The ceviche should be nice and cold, with a refreshing zing from the lime.

Finish it off by sprinkling some chopped cilantro over the top. The bright green herbs will add a beautiful pop of color and a burst of fresh flavor.

Advertisement

Invite your friends and family to dig in and enjoy this vibrant, zesty South American treat. The chilled ceviche is sure to cool everyone down on a hot day.

Final Thoughts

Ceviche, the captivating South American raw fish dish, has undoubtedly captured the hearts and palates of food enthusiasts worldwide. From the vibrant colors to the tantalizing flavors, this refreshing creation is a true delight for the senses.

As you savor each bite, the interplay of the tender fish, tangy citrus, and aromatic herbs creates a symphony of taste that will leave you craving more.

Whether you're enjoying it on a sun-drenched beach or in the comfort of your own home, ceviche is the perfect companion for any occasion. Its versatility allows you to experiment with a variety of ingredients, making it a dish that can be tailored to your personal preferences.

Frequently Asked Questions

What Is the Difference Between Ceviche and Sushi?

The key difference between ceviche and sushi is that ceviche doesn't use cooked rice, and it's "cooked" using citrus juice, whereas sushi features raw fish served with vinegared rice. Both showcase fresh seafood, but the preparation methods set them apart.

Advertisement

Can Ceviche Be Made With Cooked Fish?

Yes, ceviche can be made with cooked fish. While traditional ceviche uses raw fish, you can also prepare it with poached, grilled, or baked fish if you prefer a cooked version of this flavorful South American dish.

How Long Does Ceviche Need to Marinate?

How long ceviche needs to marinate depends on the fish you're using, but it's generally around 30 minutes to 2 hours. The citrus juice 'cooks' the fish, so you'll want to keep an eye on it.

Can Ceviche Be Frozen for Later Consumption?

Yes, you can freeze ceviche for later consumption. However, the texture and flavor may change slightly after being frozen. It's best to consume ceviche within a few hours of preparation for the optimal taste and texture.

What Are the Health Benefits of Eating Ceviche?

Eating ceviche can provide you with a range of health benefits. It's a good source of lean protein, vitamins, and minerals, and it may even aid in digestion and boost your immune system. Plus, it's a tasty and refreshing dish.

Advertisement
Continue Reading

Seafood Specialties

The Art of Sushi: Mastering Rice and Fish Preparation

Tempting sushi, a culinary masterpiece, awaits those who delve into the secrets of preparing the perfect sticky rice and selecting the freshest fish.

Published

on

sushi preparation techniques mastery

Sushi is an artful culinary journey that delights the senses! Originating in ancient Japan, this beloved dish has evolved into a global phenomenon. To create mouthwatering sushi, you'll need to master the secrets of preparing the perfect sticky, slightly sweet sushi rice. Start by carefully selecting the freshest fish – tuna, salmon, and mackerel are popular choices. Then, learn the techniques for molding the rice, arranging the fish, and rolling it all into visually stunning sushi. With the right tools and plenty of practice, you'll soon be crafting sushi that looks and tastes like it came straight from a renowned Tokyo restaurant. There's so much more to uncover about the art of sushi!

Key Takeaways

  1. Proper preparation and seasoning of sushi rice are essential for achieving the desired sticky, sweet, and balanced texture.
  2. Sourcing high-quality, fresh fish from reputable suppliers and understanding seasonal availability are crucial for creating exceptional sushi.
  3. Mastering sushi-making techniques, including efficient rolling and precise knife skills, is paramount for producing visually appealing and delicious sushi.
  4. Thoughtful combination of flavors and textures, such as using garnishes and sauces, enhances the overall sushi experience.
  5. Continuous practice and attention to detail are necessary to develop the skills and artistry required for crafting exceptional sushi.

History

Sushi's origins can be traced back to ancient Japan, where people first preserved fish by fermenting it with rice. This early form of sushi, known as narezushi, was a practical way to store food in the days before refrigeration.

Over time, the process evolved, and sushi became a delicacy enjoyed by the Japanese elite.

In the 1800s, a chef named Hanaya Yohei revolutionized sushi preparation by introducing nigiri-zushi, where freshly prepared rice is formed into bite-sized ovals and topped with a slice of raw fish. This innovative style of sushi quickly gained popularity and spread throughout Japan.

Today, sushi is enjoyed worldwide, with chefs constantly experimenting with new ingredients and techniques to create unique and flavorful dishes.

The history of sushi is a testament to the ingenuity and creativity of the Japanese people, who've elevated this simple dish into a true art form.

Advertisement

Recipe

Sushi is a beloved Japanese dish that has captivated taste buds worldwide. The art of sushi-making is a delicate balance of flavors, textures, and precision. At the heart of this culinary experience lies the careful preparation of the rice, which serves as the foundation for the dish.

To create sushi rice, the key is to use short-grain Japanese rice. This type of rice is known for its sticky and slightly sweet nature, which helps bind the ingredients together and provide the perfect canvas for the various toppings and fillings.

Ingredients:

  • 2 cups short-grain Japanese rice
  • 2 cups water
  • 1/4 cup rice vinegar
  • 2 tablespoons sugar
  • 1 teaspoon salt

Instructions:

Rinse the rice thoroughly until the water runs clear, then add it to a saucepan with the water. Bring to a boil, then reduce the heat to low, cover, and simmer for 15-20 minutes, or until the rice is tender and the water has been absorbed.

Transfer the cooked rice to a large, shallow bowl and let it cool slightly. In a small bowl, combine the rice vinegar, sugar, and salt, stirring until the sugar has dissolved. Gently fold the vinegar mixture into the warm rice, using a wooden spoon or paddle to ensure even distribution.

Advertisement

When preparing sushi, it's important to have all your ingredients prepped and ready to go. This includes slicing vegetables, preparing any protein, and having a sharp knife on hand.

Additionally, be sure to use a bamboo sushi mat to roll the sushi, as it will help you achieve the perfect shape and tightness. With a little practice and patience, you'll be crafting restaurant-quality sushi in no time.

Cooking Steps

Carefully wash and drain the sushi rice to prepare it perfectly.

Then, gently mix in the vinegar to give the rice that classic sushi flavor.

Now, it's time to mold the rice into your desired shape, whether that's a classic roll or a hand-pressed nigiri.

Advertisement

Don't forget to neatly arrange the fresh sashimi slices and lightly wrap the sushi roll tightly to ensure it holds its shape.

Step 1. Carefully Wash and Drain Sushi Rice

wash and drain rice

When preparing sushi, you'll want to thoroughly wash and drain the sushi rice before cooking. This step is crucial to ensure the perfect texture and flavor of your sushi.

Start by placing the rice in a fine-mesh strainer and rinse it under cold running water, gently stirring the rice with your hands to remove any excess starch. You'll notice the water becoming cloudy, which is completely normal.

Continue rinsing until the water runs clear, usually about 2-3 minutes. This process helps to remove the excess surface starch, which can make the rice sticky and gloppy.

Once the rice is washed, let it drain for a few minutes, shaking the strainer gently to remove as much water as possible. This step ensures the rice will cook evenly and have a light, fluffy texture when it's time to assemble your sushi.

With the rice properly washed and drained, you're now ready to move on to the next step in your sushi-making journey.

Advertisement

Step 2. Gently Vinegar Sushi Rice

gently prepare vinegar sushi

With the rice properly washed and drained, you'll next want to gently flavor it with a vinegar mixture.

In a small bowl, combine rice vinegar, sugar, and a pinch of salt. Stir until the sugar has fully dissolved.

Gently fold this flavorful liquid into the freshly cooked rice using a wooden spoon or rice paddle. Be careful not to overmix, as you don't want to crush the delicate grains.

The goal is to evenly distribute the seasoning throughout the rice without breaking it down. As you fold, you'll notice the rice taking on a beautiful sheen and a subtly sweet, tangy aroma.

This vinegar seasoning is the secret to achieving that authentic sushi rice flavor. Take your time and work slowly, allowing the rice to fully absorb the vinegar mixture.

With this simple yet essential step, you're well on your way to creating sushi perfection at home.

Advertisement

Step 3. Mold Sushi Rice Into Desired Shape

mold sushi rice shape

Next, you'll want to mold the seasoned sushi rice into your desired shape. Gently scoop up a portion of the sticky rice and shape it into a small oval or rectangle using your hands. Be careful not to compress the rice too tightly, as you'll want to maintain its fluffy texture.

If you're making nigiri sushi, shape the rice into an oblong mound and use your thumb to create a small indent at the top. This is where you'll place the slice of fresh fish later.

For rolled sushi, like California rolls, spread the rice evenly onto a sheet of nori (dried seaweed). Use a bamboo sushi mat to help you roll the nori tightly around the fillings.

As you mold the rice, keep a small bowl of water nearby to lightly moisten your hands. This will prevent the rice from sticking to your fingers. With a little practice, you'll be shaping sushi rice like a pro in no time!

Step 4. Neatly Arrange Sashimi Slices

arrange sashimi slices neatly

After you've carefully molded the sushi rice, it's time to turn your attention to neatly arranging the sashimi slices. This is a crucial step in creating a visually stunning sushi presentation.

First, select the freshest, highest-quality sashimi you can find. Gently place the thin, delicate slices on the molded rice, overlapping them slightly for a beautiful, cascading effect. Ensure each slice is evenly spaced and aligned, creating a harmonious, symmetrical pattern.

Pay close attention to the color and texture of the sashimi, arranging the slices to highlight their natural beauty. As you work, step back periodically to check the overall composition, making any necessary adjustments to achieve the perfect balance.

Advertisement

Step 5. Lightly Wrap Sushi Roll Tightly

lightly wrap sushi roll

Once you've neatly arranged the sashimi slices, it's time to lightly wrap the sushi roll tightly.

Start by placing a sheet of nori (dried seaweed) on a bamboo sushi mat. Spread a thin layer of sushi rice evenly over the nori, leaving a small strip at the top uncovered.

Arrange your desired fillings, such as thinly sliced vegetables or cooked seafood, in a line across the center of the rice.

Gently lift the edge of the bamboo mat closest to you, and begin to roll the sushi forward, using the mat to help you tighten the roll as you go. Apply just enough pressure to keep the roll together, being careful not to squeeze too hard and risk breaking the nori.

Once you've rolled it all the way, use the mat to shape the roll into a tight, even cylinder.

Then, with a sharp, slightly wet knife, slice the roll into bite-sized pieces.

Advertisement

Enjoy your perfectly wrapped sushi rolls!

Final Thoughts

Ultimately, preparing sushi is an art form that requires dedication, patience, and a keen eye for detail.

As you've learned, every step is crucial, from selecting the freshest fish to expertly rolling the perfect bite. While it may seem daunting at first, with practice, you'll develop the skills to create sushi that's not only visually stunning but also bursting with flavor.

Remember, the joy of sushi lies in the process. Embrace the rhythm of slicing, seasoning, and assembling each piece.

Take pride in your handiwork, and don't be afraid to experiment with new ingredients and techniques. The more you immerse yourself in the art of sushi, the more you'll discover the depth of flavors and textures it has to offer.

Advertisement

Frequently Asked Questions

What Is the Proper Way to Hold Chopsticks When Eating Sushi?

When eating sushi, you should hold the chopsticks between your thumb and index finger, with the middle finger supporting the bottom of the chopsticks. Keep your grip relaxed and your movements gentle to showcase your sushi etiquette.

How Long Can Sushi Be Stored Before It Becomes Unsafe to Eat?

Sushi doesn't keep for long – it's best to eat it the same day it's made. Typically, you shouldn't store sushi for more than a day in the fridge. After that, it can become unsafe to consume due to bacterial growth.

Can Vegetarians Enjoy Sushi, and if So, What Options Are Available?

Yes, vegetarians can absolutely enjoy sushi! You'll find an array of vegetarian options like avocado rolls, cucumber rolls, and inari – seasoned fried tofu pouches. Get creative and explore the tasty plant-based possibilities at your local sushi spot.

What Are the Health Benefits of Incorporating Sushi Into One's Diet?

Incorporating sushi into your diet can provide numerous health benefits. It's rich in omega-3 fatty acids, which support heart health, and the seafood contains essential vitamins and minerals. Plus, the rice and veggies offer complex carbs and fiber to fuel your body. For those who are concerned about sustainability, there are also sustainable seafood options available, such as salmon and mackerel. By choosing these options, you can feel good about supporting environmentally friendly practices while still enjoying the delicious and nutritious benefits of sushi. In addition, incorporating sushi into your diet can also add variety and expand your palate, providing a tasty and refreshing alternative to traditional meal options.

How Can I Find a Reputable Sushi Restaurant in My Local Area?

To find a reputable sushi restaurant in your local area, ask for recommendations from friends and check online reviews. Look for restaurants that prioritize fresh, high-quality ingredients and have a knowledgeable staff. Don't be afraid to try a few places to find your favorite.

Advertisement
Continue Reading

Affiliate Disclaimer
As an affiliate, we may earn a commission from qualifying purchases. We get commissions for purchases made through links on this website from Amazon and other third parties.

Advertisement

Latest

spicy korean pork stir fry spicy korean pork stir fry
Korean Cuisine3 hours ago

Duruchigi: Korean Spicy Pork Stir-Fry

On a quest for a flavorful dish that brings joy to the table? Discover the secrets behind the vibrant and...

dairy free soft vegan bread dairy free soft vegan bread
Baking and Pastry6 hours ago

Vegan Milk Bread: Soft and Fluffy Without the Dairy

Savor the softness of vegan milk bread that's delightfully fluffy and dairy-free; discover the secrets to perfecting this irresistible treat!

vietnamese ginger braised chicken vietnamese ginger braised chicken
Vietnamese Cuisine6 hours ago

Ga Kho Gung: Vietnamese Braised Chicken With Ginger

Unlock the mouthwatering secrets of Ga Kho Gung, a beloved Vietnamese braised chicken dish that's been delighting families for centuries.

sweet savory braised pork sweet savory braised pork
Vietnamese Cuisine6 hours ago

Vietnamese Thịt Kho Tàu: Sweet and Savory Braised Pork

Jump into the savory-sweet world of Vietnamese Thịt Kho Tàu, where tender pork simmers in a caramelized sauce for a...

bold spicy vietnamese ginger chicken bold spicy vietnamese ginger chicken
Vietnamese Cuisine6 hours ago

Vietnamese Ginger Chicken: Ginger Chicken for Bold and Spicy Flavors

Kickstart your taste buds with Vietnamese Ginger Chicken, a bold and spicy dish that'll transport you to the vibrant flavors...

flavorful chicken shawarma rice flavorful chicken shawarma rice
Middle Eastern Cuisine6 hours ago

Chicken Shawarma Rice: a Fusion Dish Packed With Flavor

Kick your taste buds into high gear with Chicken Shawarma Rice, a fusion dish that blends tender spice-rubbed chicken and...

crispy korean seaweed rolls crispy korean seaweed rolls
Korean Cuisine6 hours ago

Gimmari Korean: The Crispy Seaweed Rolls You’ll Love

Crispy, golden-brown gimmari are the irresistible Korean seaweed rolls with an ancient heritage that'll have you hooked - dive deeper...

instagrammable smoothie bowl creations instagrammable smoothie bowl creations
Beverage Deep Dives12 hours ago

Smoothie Bowl Art: Instagram-Worthy Breakfasts

Joyful, colorful, and nutrient-rich, smoothie bowls have become a social media sensation, tempting you to discover the secrets behind these...

effortless meals with slow cooker effortless meals with slow cooker
One-Pot Wonders12 hours ago

Slow Cooker Secrets: Set-It-and-Forget-It Meals for Busy Days

Discover the convenience and flavor of slow cooker meals that unlock hassle-free, mouthwatering dishes for your busy days.

effortless cooking with prep effortless cooking with prep
Kitchen Hacks and Tips15 hours ago

Mise En Place: the Key to Effortless Cooking

Never underestimate the power of mise en place - the ultimate secret to unlocking a world of effortless cooking and...

gut friendly low fodmap recipes gut friendly low fodmap recipes
Cooking for Special Diets20 hours ago

Low-FODMAP Diet: Gut-Friendly Recipes

Unlock the secrets to soothing your tummy troubles with delectable low-FODMAP recipes that'll leave you feeling nourished and satisfied. Discover...

flavorful african cassava leaf flavorful african cassava leaf
African Cuisine22 hours ago

Cassava Leaf: A Staple of African Cuisine Full of Flavor

Cassava leaves create a flavorful connection to African cuisine, inviting you to discover their unique taste and versatility in your...

Trending