

You'll love how the Instant Pot simplifies making creamy, comforting risotto without the constant stirring required by traditional methods. This hands-off approach allows you to enjoy all the rich, satisfying flavors of homemade risotto with minimal effort, making it a perfect choice for busy weeknights or relaxed weekend meals. Just toast the rice, add broth, and let the Instant Pot do the work – no more aching arms from endless stirring! Once it's done, simply stir in some Parmesan and butter for an extra creamy finish. And if you keep reading, you'll discover even more tips for perfect Instant Pot risotto every time.
Key Takeaways
- The Instant Pot eliminates the need for constant stirring, simplifying the risotto cooking process.
- Proper pressure cooking and natural release ensure the rice cooks perfectly without the traditional hands-on method.
- Toasting the rice and sautéing aromatics before pressure cooking enhances the flavor and texture of the risotto.
- Stirring in Parmesan cheese and butter at the end creates a rich, creamy consistency.
- Fluffing the risotto with a fork before serving improves the overall texture and presentation.

Instant Pot Duo 7-in-1 Electric Pressure Cooker, Slow Cooker, Rice, Steamer, Sauté, Yogurt Maker, Warmer & Sterilizer, Includes App With Over 800 Recipes, Stainless Steel, 6 Quart
- 7-in-1 Cooking Functions: Pressure, slow, sauté, steam, rice, yogurt, warm
- Smart One-Touch Programs: 13 customizable cooking options
- Safe Steam Release: Easy-Release switch for safety and convenience
As an affiliate, we earn on qualifying purchases.
History
The origins of risotto can be traced back to northern Italy, where this creamy, rice-based dish has been a culinary staple for centuries.
Back in the 1400s, risotto was a humble meal enjoyed by the working class, made with simple ingredients like rice, broth, and butter, which was a highly valued ingredient at the time due to its historical significance in cooking.
Over time, clever Italian cooks started experimenting, adding all sorts of tasty toppings like mushrooms, saffron, or even shrimp. By the 1800s, risotto had become a beloved dish for folks from all walks of life.
These days, you'll find risotto on the menus of fancy restaurants and family kitchens alike.
It's a versatile dish that can be whipped up in so many delicious ways. Whether you like it rich and creamy or with a little bite, risotto is a comforting classic that's stood the test of time.
Recipe
Risotto is a classic Italian dish that's known for its creamy, comforting texture. While traditional risotto requires constant stirring on the stovetop, the Instant Pot makes the process much easier and hands-off. This recipe delivers the same delicious results with minimal effort.
The key to successful Instant Pot risotto is using the right technique. By toasting the rice and sautéing the aromatics before pressure cooking, you can achieve the perfect al dente texture and rich, flavor-packed dish.
- 2 tablespoons unsalted butter
- 1 onion, finely chopped
- 2 cloves garlic, minced
- 1 1/2 cups Arborio or Carnaroli rice
- 1/2 cup dry white wine
- 4 cups warm chicken or vegetable broth
- 1/2 cup grated Parmesan cheese
- 2 tablespoons chopped fresh parsley
- Salt and freshly ground black pepper to taste
In the Instant Pot, melt the butter over the "Sauté" function. Add the onion and garlic, and cook for 2-3 minutes until fragrant. Add the rice and toast for 1-2 minutes, stirring constantly. Pour in the white wine and cook until the liquid is absorbed, about 1 minute.
Pour in the warm broth, secure the lid, and set the Instant Pot to cook on high pressure for 6 minutes. When the time is up, allow the pressure to release naturally for 10 minutes, then quick-release the remaining pressure. Stir in the Parmesan cheese and parsley, and season with salt and pepper to taste.
For the creamiest risotto, be sure to use Arborio or Carnaroli rice, which have a higher starch content. Additionally, allowing the risotto to rest for a few minutes after cooking helps the rice to release more starch and achieve that signature creamy texture.
Cooking Steps
Add the Arborio rice and broth, then seal the lid and pressure cook until tender.
Once the pressure's released, stir in the Parmesan and butter to create a creamy, delicious risotto.
Fluff the risotto with a fork before serving, and enjoy this classic Italian dish!
Step 1. Add Arborio Rice and Broth
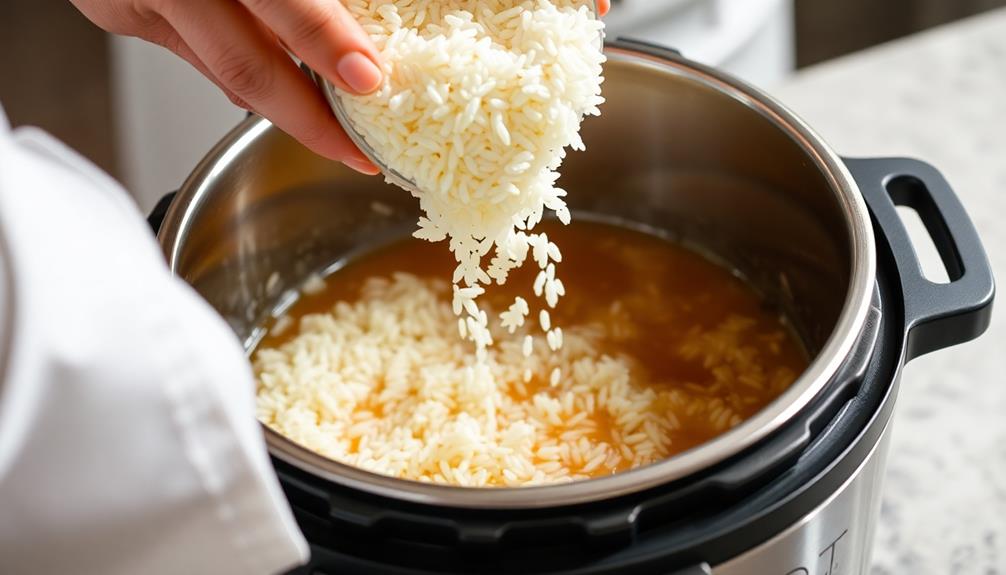
Once you've toasted the rice, it's time to add the broth. Grab your trusty Instant Pot and pour in the warm chicken or vegetable broth. The broth will sizzle and steam as it hits the hot pan, filling your kitchen with a delicious aroma.
Slowly pour in the arborio rice, one cup at a time, stirring gently to coat each grain in the broth. This special type of rice is perfect for risotto – it has a plump, creamy texture that will become the star of your dish.
As the rice simmers, the starches will release, creating a rich, velvety sauce. Give the pot a few good stirs to ensure the rice cooks evenly.
In just a few minutes, the rice will start to soften and expand, transforming into a perfectly cooked, restaurant-quality risotto. Get ready for a taste that will transport you straight to Italy!
Step 2. Seal Lid and Pressure Cook
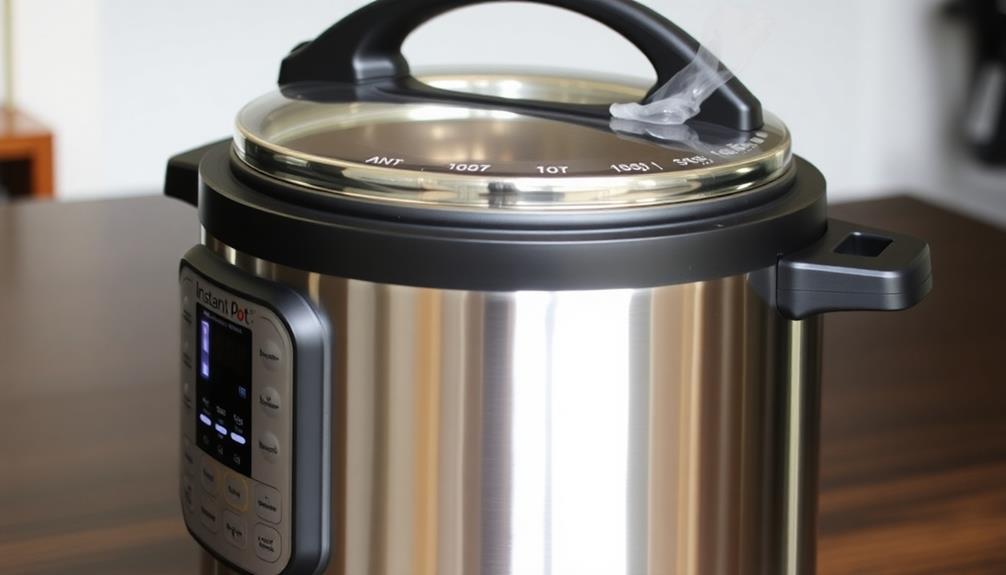
Secure the Instant Pot's lid, ensuring it's properly sealed. You'll hear a satisfying click as it locks into place.
Now, turn the steam release valve to the "Sealing" position. This traps all the heat and steam inside, building up the pressure that's crucial for creating that creamy, melt-in-your-mouth risotto texture.
With the lid sealed, press the "Manual" or "Pressure Cook" button and set the timer for 6 minutes. The Instant Pot will quickly come to pressure, and you'll see the timer start counting down.
Be patient and let the magic happen! When the time is up, the Instant Pot will beep to let you know.
Don't rush to open the lid – instead, let the pressure naturally release for 10 minutes. This extra time allows the rice to finish cooking perfectly.
After 10 minutes, carefully turn the steam release valve to the "Venting" position to release any remaining pressure.
Once the float valve drops, you can open the lid and get ready to enjoy your delicious Instant Pot risotto!
Step 3. Release Pressure Valve

After the 10 minutes of natural pressure release, you'll want to carefully turn the steam release valve to the "Venting" position.
As you do this, you'll hear a loud hissing noise as the remaining pressure is released from the Instant Pot. Take your time and don't rush this step – the steam is very hot, so be sure to keep your face and hands clear of the valve.
Once the floating valve drops down, indicating the pot is fully depressurized, you can open the lid.
Be careful, as hot steam will come billowing out. Lift the lid away from you to avoid getting burned.
Now your perfectly cooked risotto is ready to serve! The grains should be tender and creamy, without any crunchiness.
Grab your spoon and dig in – this hands-off Instant Pot risotto is sure to be a hit with the whole family.
Step 4. Stir in Parmesan and Butter

With the pressure released, go ahead and stir in the Parmesan cheese and butter. This is the best part!
You'll see the cheese melt right into the creamy risotto, making it even more delicious. The butter adds a lovely richness that balances out the rice.
Give it a good stir to make sure everything is combined. Yum, just imagine the savory, cheesy aroma wafting through your kitchen. Your family is going to love this!
Now, take a deep breath and get ready to enjoy your perfectly cooked Instant Pot risotto. The Parmesan and butter really tie all the flavors together, making each bite absolutely heavenly.
Mmm, you can already taste how creamy and comforting it's going to be. Go ahead, take that first bite – you deserve this tasty reward for all your hard work.
Savor every single cheesy, buttery morsel. Isn't homemade risotto the best?
Step 5. Fluff With Fork Before Serving

Now that the Parmesan and butter have melted into the risotto, it's time to fluff it up before serving. Grab a fork and gently fluff the creamy rice, lifting and turning it with care.
You'll see the grains separate and become light and fluffy. This final step is important because it adds air to the risotto, making it extra soft and inviting.
Imagine the satisfying sound as your fork glides through the risotto, creating a cloud-like texture. The aroma of the melted cheese and butter will waft through the air, making your mouth water. As you take your first bite, the rich and creamy flavors of the risotto will dance on your taste buds, delighting your senses. The indulgent combination of melted cheese and butter creates a luxurious and comforting dish, perfect for a cozy night in. And if you’re feeling adventurous, try elevating your sandwiches with mayonnaise by incorporating some of the delicious risotto as a unique and tasty spread.
Once the risotto is perfectly fluffed, it's ready to be scooped into bowls and enjoyed. The presentation will be stunning, with each bite promising a delightful combination of creaminess and airiness.
Get ready to impress your family and friends with this simple yet impressive technique that takes your Instant Pot risotto to the next level!
Final Thoughts
Risotto prepared in the Instant Pot can wrap up your cooking experience on a high note. You'll be amazed at how quickly and effortlessly this creamy, comforting dish comes together.
With the added benefit of a nutritious touch, you can consider incorporating ingredients like celery juice and pregnancy health benefits to enhance your meal. No more standing at the stove, constantly stirring – the Instant Pot does all the work for you! Just sit back and let the magic happen.
Once your risotto is cooked to perfection, don't forget to fluff it with a fork before serving. This helps to create a light and fluffy texture, perfect for enjoying every delicious bite.
The Instant Pot makes the process so easy, you'll wonder why you ever cooked risotto any other way.
Now, all that's left is to grab a bowl, top your risotto with your favorite garnishes, and savor the flavors. Whether you're cooking for the whole family or treating yourself to a cozy meal, this Instant Pot risotto is sure to satisfy.
Dig in and enjoy!
Frequently Asked Questions
How Long Does the Instant Pot Need to Come to Pressure?
Typically, it takes about 10-15 minutes for an Instant Pot to come to pressure, depending on the recipe and the amount of liquid involved. This pressurization time allows the pot to build up the necessary steam to cook the food effectively.
Can I Use a Different Type of Rice?
You can definitely use a different type of rice in your Instant Pot recipe. Just be sure to adjust the cooking time and liquid ratio accordingly, as different rices may have varying absorption rates and cooking needs.
What if I Want to Add Vegetables or Protein?
Sure, you can easily add vegetables or protein to your risotto. Simply sauté them separately before adding to the Instant Pot, or mix them in towards the end of the cooking time. This allows you to customize your dish to your liking.
How Can I Adjust the Consistency of the Risotto?
To adjust the consistency of your risotto, you can add more liquid (broth or water) for a looser texture, or let it cook a bit longer for a thicker, creamier result. Don't be afraid to experiment until you achieve your desired consistency.
Is the Instant Pot Method as Creamy as Traditional Risotto?
The Instant Pot method won't produce the same creamy texture as traditional stovetop risotto. While it's convenient, the lack of constant stirring means you won't get the same rich, velvety consistency. For a creamier result, you'll need to put in the elbow grease.