Baklava's origins trace back to ancient Greece, where it was first created. This delightful pastry features layers of flaky phyllo dough brushed with butter, sandwiched between a fragrant nut filling, and drenched in a sweet syrup. Over time, the recipe spread across the Mediterranean, evolving with cultural influences – the Ottomans added cinnamon and lemon, while Greeks favored honey and walnuts. Today, modern interpretations incorporate flavors like rose water and cardamom. To make this irresistible treat, you'll layer the phyllo, nuts, and syrup, then bake until golden brown. And if you keep reading, you'll discover the step-by-step process for crafting this timeless Mediterranean delight.
Key Takeaways
- Baklava is a rich, sweet pastry made with layers of phyllo dough, chopped nuts, and sweetened with honey or syrup.
- The origins of baklava can be traced back to ancient Greece, and the recipe has since spread throughout the Mediterranean region.
- Baklava recipes have cultural variations, with the Ottomans adding cinnamon and lemon, and the Greeks favoring honey and walnuts.
- Proper preparation of baklava involves carefully brushing each layer of phyllo dough with melted butter to achieve a flaky, crisp texture.
- Baking the baklava until it is golden brown and then pouring a warm syrup over the top helps to enhance the moisture and flavor of the dessert.
History
Baklava's origins can be traced back to the ancient Greeks, who are believed to have created the first iteration of this delectable pastry.
These skilled bakers layered thin sheets of phyllo dough with chopped nuts, often walnuts or pistachios, and sweetened the dish with honey or syrup. Over time, the recipe spread throughout the Mediterranean region, with each culture putting its unique spin on the classic.
The Ottomans, for example, added cinnamon and lemon to the filling, while the Greeks preferred to use honey and walnuts.
As baklava traveled to other parts of the world, new flavors emerged, like the rose water and cardamom used in the Middle Eastern version.
Today, baklava remains a beloved treat, enjoyed for its flaky texture, nutty flavor, and sweet indulgence.
Whether you savor a traditional slice or experiment with modern interpretations, this pastry's rich history is sure to delight your taste buds.
Cooking Steps
Begin by preheating your oven to 350°F (175°C). This is the ideal temperature to bake your delicious baklava.
Next, prepare your workspace by lightly greasing a baking dish with butter or non-stick cooking spray. Carefully unroll the phyllo dough and place it on a clean, dry surface. Working with one sheet at a time, brush it lightly with melted butter or oil. Layer the buttered sheets in the prepared baking dish, making sure to cover the entire bottom.
Now, it's time to create the filling. In a bowl, mix together chopped walnuts, cinnamon, and a pinch of sugar. Sprinkle this mixture evenly over the phyllo layers.
Repeat the process of layering the buttered phyllo sheets and the nut filling until you've used up all the ingredients. Be sure to tuck in the edges of the top layer to prevent the baklava from drying out during baking.
Step 1. Brush Phyllo Dough With Butter
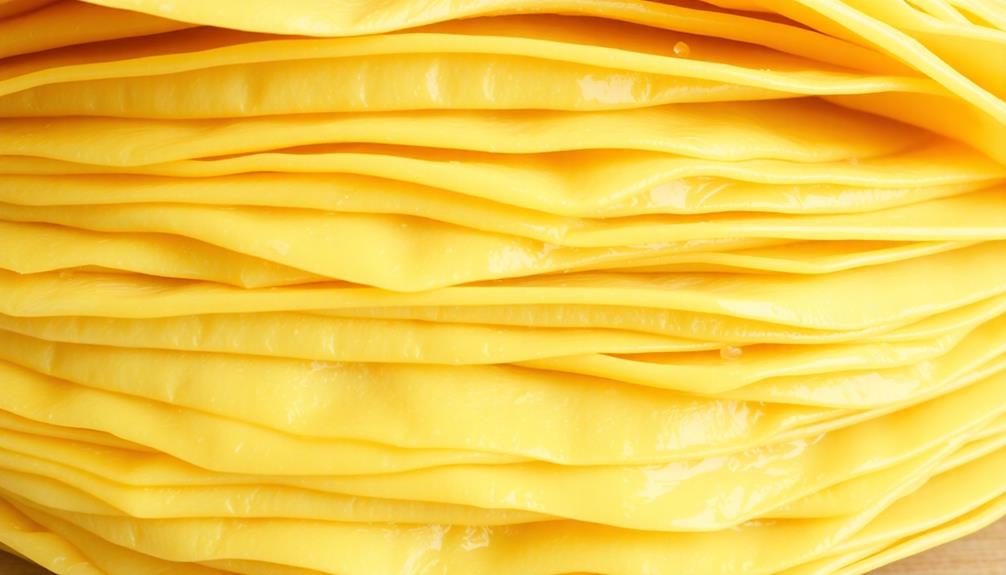
Once you have your phyllo dough ready, it's time to brush each layer with melted butter. This is a crucial step in making authentic baklava.
Grab your pastry brush and get ready to work. Dip the brush into the melted butter, making sure to coat it evenly. Then, gently brush the top of the first sheet of phyllo dough, covering it completely. Be careful not to tear the delicate layers.
Continue this process with each sheet of phyllo, brushing the top of every layer with the rich, golden butter. Make sure to get into the edges and corners, ensuring every inch is coated. The butter will help the phyllo dough crisp up beautifully in the oven.
Take your time and be patient. It may seem tedious, but this step is essential for achieving the perfect flaky texture of baklava.
Once you've brushed all the layers, you're ready to move on to the next step in creating your tasty homemade treat.
Step 2. Layer Phyllo Dough Sheets

With your phyllo dough sheets brushed with butter, it's time to start layering them in the baking pan.
Gently place the first sheet of phyllo dough into the pan, making sure it covers the bottom completely. Brush the top of this sheet with more melted butter using a pastry brush.
Now, add another sheet of phyllo dough on top, brush it with butter, and continue this process until you've used up half of your phyllo dough.
Once you've got a nice stack of buttered phyllo layers, it's time to add your nut mixture. Sprinkle it evenly over the phyllo, making sure to cover the entire surface.
Then, repeat the layering process with the remaining phyllo sheets, brushing each one with butter as you go. Be careful not to tear the delicate dough as you work.
Keep building those layers until you've used up all the phyllo. Your baklava is starting to take shape!
Step 3. Sprinkle Chopped Nuts Between Layers
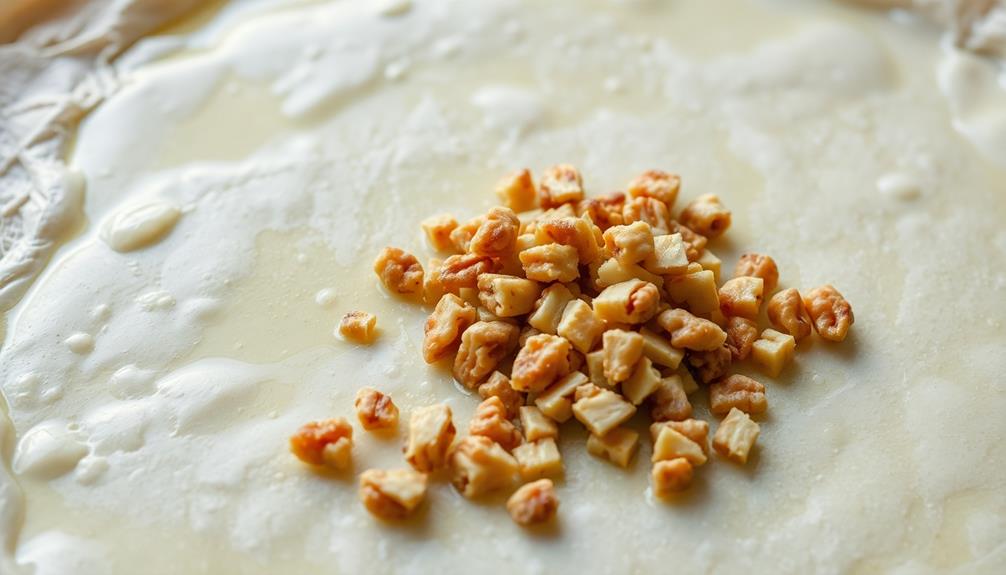
Now that you've built a nice foundation of buttered phyllo layers, it's time to add the nut mixture. Grab a bowl and toss together your chopped nuts – whether it's walnuts, pistachios, or a blend of your favorites.
For an extra flavor boost, consider incorporating some compound butter recipes that can elevate your baklava experience. Spread this nutty goodness evenly over the top of your phyllo layers. Don't be shy – you want a good amount of nuts in each bite!
As you layer on more phyllo and more nuts, be sure to keep that buttery brush handy. Brushing each layer lightly with melted butter will help everything stick together and give you that delicious, flaky texture.
Keep going until you've used up all your phyllo dough and nuts – you should have around 8-10 layers total.
Now your baklava is ready for the oven! Pop it in and let the magic happen. Soon, your kitchen will be filled with the heavenly aroma of baking baklava.
Can't you just smell those toasted nuts and that sweet, buttery pastry? Get ready for a true taste of the Mediterranean!
Step 4. Bake Until Golden Brown

Preheat your oven to 350°F (175°C) and, with your baklava now ready, slide it into the preheated oven. The delicious aroma will soon fill your kitchen as the pastry bakes to a golden brown.
Keep a close eye on it, since the perfect baklava should have a crisp, flaky crust on top. Bake for 35 to 45 minutes, checking occasionally to ensure it doesn't burn. You'll know it's ready when the top is a beautiful golden hue and the edges have turned a lovely shade of amber.
Once it's out of the oven, let the baklava cool for about 30 minutes before cutting into it. This allows the layers to set and the flavors to meld together.
Savor the sweetness of the honey and the crunch of the nuts in every bite. Enjoy your homemade baklava – it's a true delight!
Step 5. Pour Syrup Over Baked Baklava
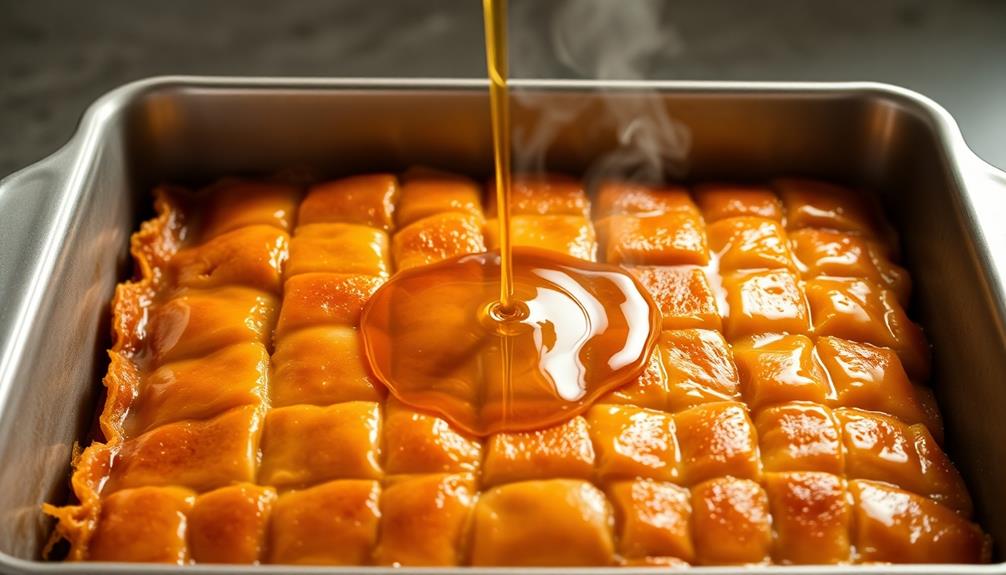
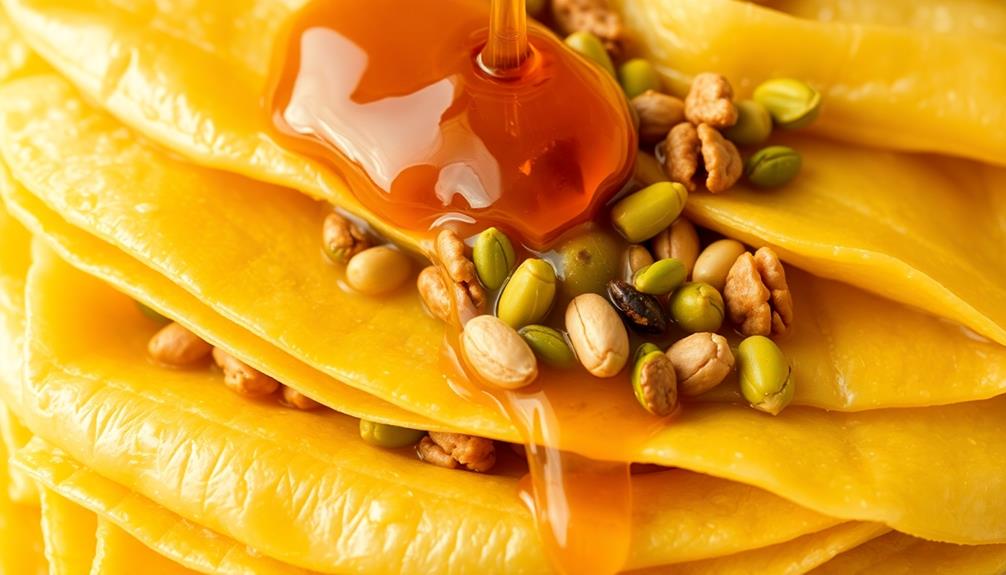
Once the baklava has finished baking to a beautiful golden hue, it's time to drizzle the delightful syrup over the top. This sweet, sticky syrup will soak into the crisp layers of phyllo dough, transforming your freshly baked baklava into an irresistible treat.
Carefully pour the warm syrup over the entire surface of the baklava, making sure to get it into all the nooks and crannies. You'll see the syrup quickly disappear into the layers, leaving behind a glistening, moist texture.
The aroma of the spices and nuts will fill the air, making your mouth water in anticipation.
Once the baklava is thoroughly coated, let it sit for at least 30 minutes. This will allow the flavors to meld and the syrup to fully absorb.
Then, cut the baklava into neat, triangular pieces and serve it up to your eager guests. They'll be amazed by the perfect balance of flaky pastry and sweet, syrupy goodness in every bite.
Final Thoughts
Ultimately, baklava is a captivating and time-honored dessert that transcends cultural boundaries.
Whether you're enjoying it in a quaint café in Greece or baking it in your own kitchen, this flaky, syrupy treat never fails to delight. The layers of crisp, golden phyllo dough, the fragrant blend of spices, and the sweet, sticky syrup all come together to create a truly unique flavor experience.
As you savor each bite, you'll be transported to distant lands and ancient traditions.
Baklava is a testament to the rich culinary heritage of the Mediterranean and the Middle East, a delicious bridge between cultures. It's a dessert that can be shared with family and friends, sparking conversations and creating lasting memories.
Frequently Asked Questions
What Is the Origin of the Name "Baklava"?
The origin of the name "baklava" is quite fascinating!
It's believed to have roots in the Turkish language, where "baklava" likely comes from the words "baklama" or "bükülmüş", meaning "to fold" or "to wrap".
This refers to the way the delicious layers of flaky pastry are folded and wrapped around the rich, nutty filling.
Isn't that an interesting bit of culinary history?
How Long Can Baklava Be Stored For?
How Long Can It Be Stored?
You can keep your delicious baklava around for quite a while! When stored properly, it'll stay fresh and tasty for up to two weeks.
Just make sure to keep it in an airtight container at room temperature. That way, you can enjoy those crispy layers and sweet, nutty filling anytime you crave them.
With proper storage, you can savor the flavors of baklava for days to come!
Can Baklava Be Made With Different Types of Nuts?
Absolutely! You can make baklava with all sorts of delightful nuts.
Instead of the classic walnuts, you could try pecans, almonds, or even pistachio. Each nut will give your baklava a unique flavor and texture.
The key is to finely chop the nuts so they layer beautifully between the flaky phyllo dough.
Get creative and experiment – your taste buds will thank you for trying new nut combinations in this classic treat!
Is Baklava Gluten-Free?
Is baklava gluten-free? Well, that's a great question! The answer is a bit tricky.
Traditionally, baklava is made with phyllo dough, which does contain wheat and gluten.
But the good news is that you can make a gluten-free version using alternative flour blends.
Just swap out the regular phyllo for a gluten-free variety. Isn't that exciting?
With a few simple adjustments, you can enjoy all the flaky, nutty deliciousness of baklava without the gluten. You can easily swap in gluten-free phyllo dough or even make your own with alternate flours like almond or coconut. Another option is to use a combination of chopped nuts and honey to create a similar texture and flavor. And if you’re looking for more gluten-free Middle Eastern dishes, be sure to try out this delicious Baba Ghanoush recipe.
Isn't that wonderful?
What Is the Traditional Way to Serve Baklava?
The traditional way to serve baklava is simple yet elegant.
You'll start by cutting the baklava into small, bite-sized pieces, usually square or diamond-shaped.
Then, you'll carefully arrange the pieces on a platter or plate, making sure they're evenly spaced.
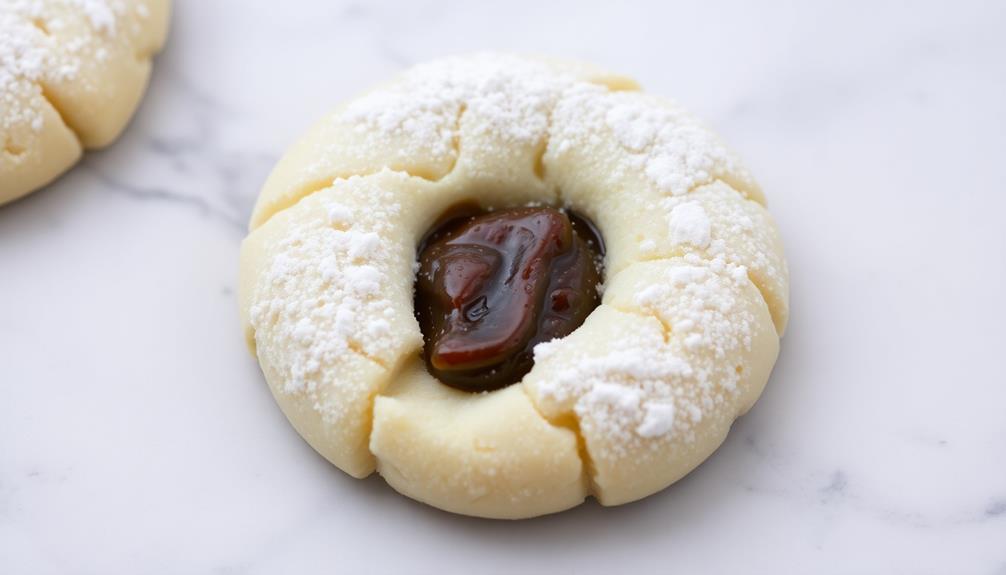
To add a touch of sweetness, you might sprinkle some powdered sugar or chopped nuts over the top.
Serve it alongside a hot cup of tea or coffee, and get ready for a truly delightful treat!