Korean Cuisine
Kimchi Quesadillas: Korean-Mexican Fusion
Adventurous foodies will delight in this fusion of Korean kimchi and Mexican cheese, creating a delectable and easy-to-make Kimchi Quesadillas dish.
If you're a fan of both Korean and Mexican cuisines, you're in for a real treat with these delectable Kimchi Quesadillas! Picture the tangy, spicy kick of authentic Korean kimchi perfectly complemented by the melty goodness of Mexican cheese, all wrapped up in a crispy tortilla. This quick and satisfying meal will have your taste buds dancing with joy. You'll love how the fusion of these two bold flavors creates a unique culinary experience. The best part? It's super easy to make at home. Want to learn more about this exciting crossover of cuisines and how to whip up your own batch?
Key Takeaways
- Kimchi quesadillas combine the tangy, spicy flavors of Korean kimchi with the melted cheese and crisp tortilla of classic Mexican quesadillas.
- The recipe is a quick and satisfying fusion dish that appeals to diverse palates, blending traditional Korean and Mexican culinary elements.
- High-quality, fresh kimchi is essential to enhance the overall flavor and texture of the quesadillas.
- Kimchi quesadillas can be served warm with additional dips or sauces, and are suitable for casual meals or festive gatherings.
- The versatility of quesadillas allows for experimentation with various fillings, catering to different dietary preferences and culinary tastes.
History
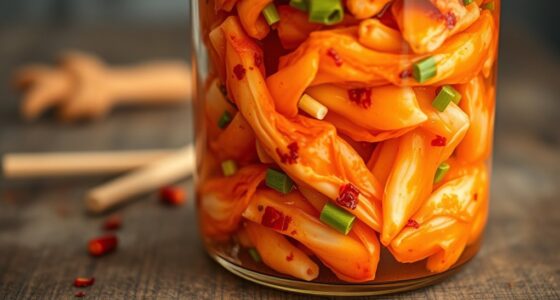
Originating in Korea, kimchi has long been a staple ingredient in the country's cuisine. This spicy, fermented cabbage dish is a beloved part of Korean culture, often served as a side or used in various recipes.
Kimchi's history dates back centuries, with evidence of fermented vegetables being consumed in Korea as early as the 3rd century AD. Over time, the recipe evolved, incorporating different vegetables and seasonings to create the wide variety of kimchi we know today.
While kimchi may seem like an unlikely pairing with the classic Mexican quesadilla, the two flavors actually complement each other beautifully. The tangy, crunchy kimchi adds a unique twist to the gooey, cheesy quesadilla, creating a delightful fusion of two beloved dishes.
Whether you're a fan of Korean or Mexican cuisine, the kimchi quesadilla is a delicious way to explore the exciting world of culinary blending.
Recipe
Kimchi, a traditional Korean fermented vegetable dish, meets the quintessential Mexican quesadilla in this delightful fusion recipe. The tangy, spicy flavor of the kimchi perfectly complements the melty, cheesy goodness of the quesadilla. This dish is a unique and satisfying way to enjoy two beloved global cuisines in a single bite.
Preparing this dish is a breeze, making it an excellent choice for a quick and satisfying meal. The combination of the crisp tortilla, gooey cheese, and bold kimchi flavors will leave your taste buds craving more.
- 4 large flour tortillas
- 2 cups grated Monterey Jack or Cheddar cheese
- 1 cup diced kimchi
- 2 tablespoons unsalted butter, divided
Preheat a large skillet or griddle over medium heat. Place one tortilla in the skillet and sprinkle half of the cheese over the surface. Top with half of the diced kimchi, then fold the tortilla in half. Cook for 2-3 minutes per side, or until the cheese is melted and the tortilla is golden brown.
Repeat with the remaining ingredients to make a total of 4 quesadillas.
For best results, use fresh, high-quality kimchi for maximum flavor. The kimchi can be adjusted to taste, depending on your preference for spiciness. Additionally, experiment with different cheese varieties to find your perfect flavor combination.
Cooking Steps
Spread that kimchi all over the tortilla, then sprinkle on the shredded cheese.
Fold the tortilla in half and pop it in the pan until it's golden brown and crispy.
Slice up those quesadillas and get ready to dig in – they're ready to serve!
Step 1. Spread Kimchi on Tortilla
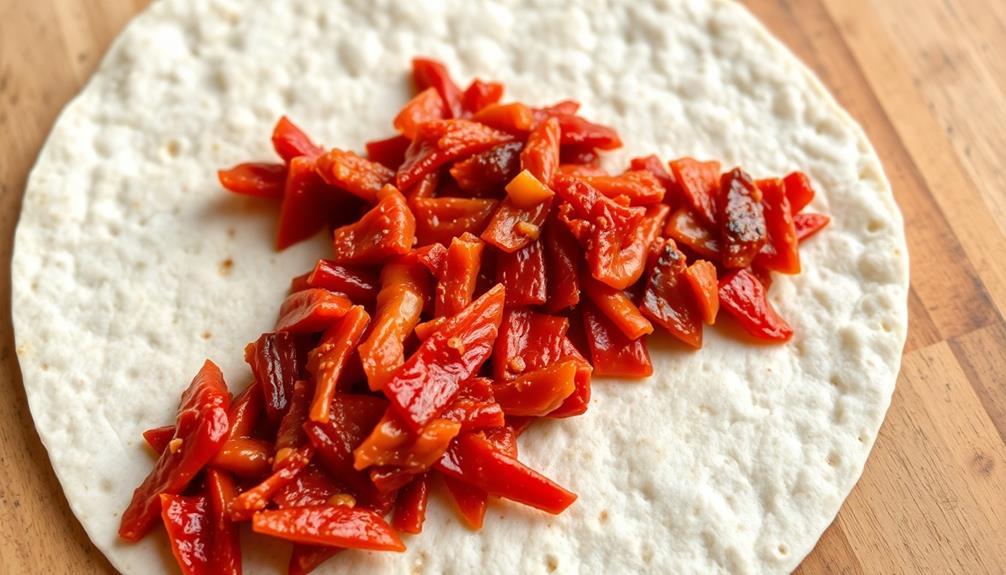
Next, you'll want to generously spread the kimchi over the surface of the tortilla. Don't be shy – pile on that spicy, tangy goodness! The bright, vibrant colors of the kimchi will create a delightful contrast against the pale tortilla.
As you scoop out the kimchi, you'll catch a whiff of its pungent, garlicky aroma, making your mouth water in anticipation. This fusion dish not only tantalizes your taste buds but also offers inspiring keto transformations for those looking to enhance their culinary experience.
Carefully, spread the kimchi all the way to the edges, ensuring each bite will be packed with flavor. The kimchi's crunchy texture will add a satisfying crunch to your quesadilla. Feel free to layer on as much or as little as you'd like, depending on your personal taste preferences.
Once the kimchi is evenly distributed, you're ready to top it with cheese and fold the tortilla in half. Get ready for an explosion of Korean and Mexican flavors in every melty, gooey bite!
Step 2. Add Shredded Cheese
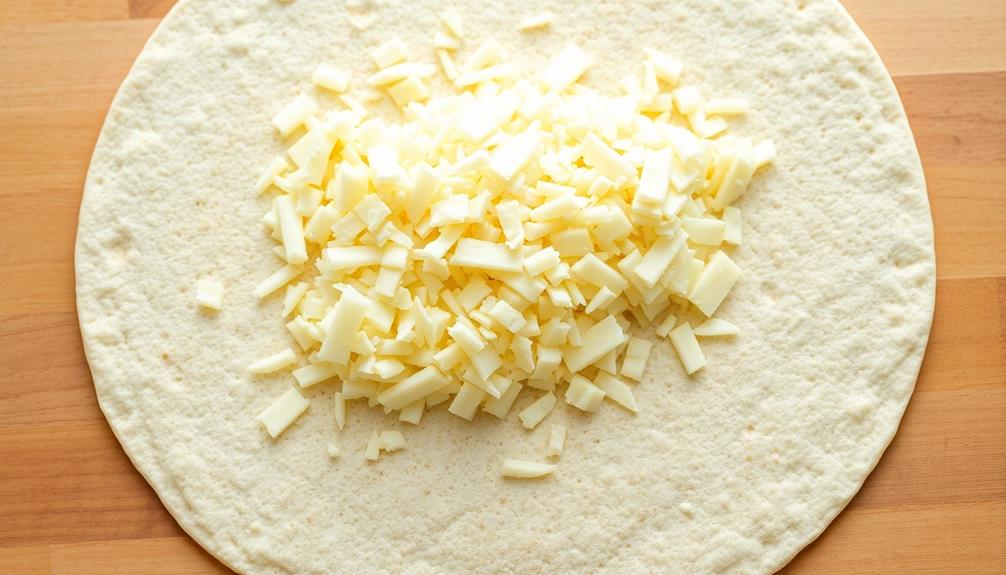
After spreading the kimchi, it's time to add the shredded cheese. You'll want to use a nice, melty cheese like cheddar or Monterey Jack. Grab a handful of the cheese and sprinkle it evenly over the kimchi-covered tortilla.
Make sure to cover the whole surface so every bite has that gooey, cheesy goodness. Don't be stingy – you want a nice thick layer of cheese!
Once the cheese is on, it's time to fold the tortilla in half to create the classic quesadilla shape. Gently press down to help the cheese start to melt.
Now you're ready to pop it in the pan or on the griddle to toast it up. The cheese will get all melty and the tortilla will turn golden brown and crispy.
Mmm, can you just imagine that first bite? The kimchi's tangy, spicy flavor mixed with the creamy, comforting cheese – it's a match made in heaven!
Step 3. Fold Tortilla in Half
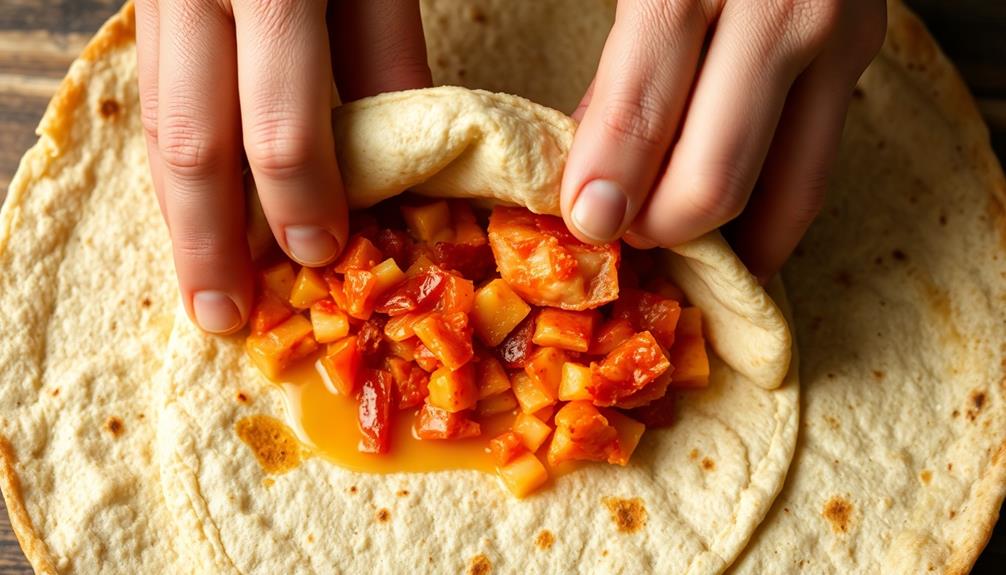
With the cheese evenly distributed, it's time to fold the tortilla in half.
Gently take the top half of the tortilla and bring it over to the bottom half. Press down lightly to seal the two sides together, creating a perfectly symmetrical half-moon shape.
You'll feel the warmth of the melted cheese as the tortilla folds, and see the vibrant colors of the kimchi peeking out from the middle.
Fold with care, making sure not to tear the tortilla. Once folded, you can almost smell the delicious fusion of flavors waiting to be devoured.
The quesadilla is now ready to be cooked to golden, crispy perfection. Flip it over and let the other side sizzle until it's just as irresistible.
Get ready for an explosion of taste in every bite of this unique, mouthwatering creation!
Step 4. Cook Until Golden Brown
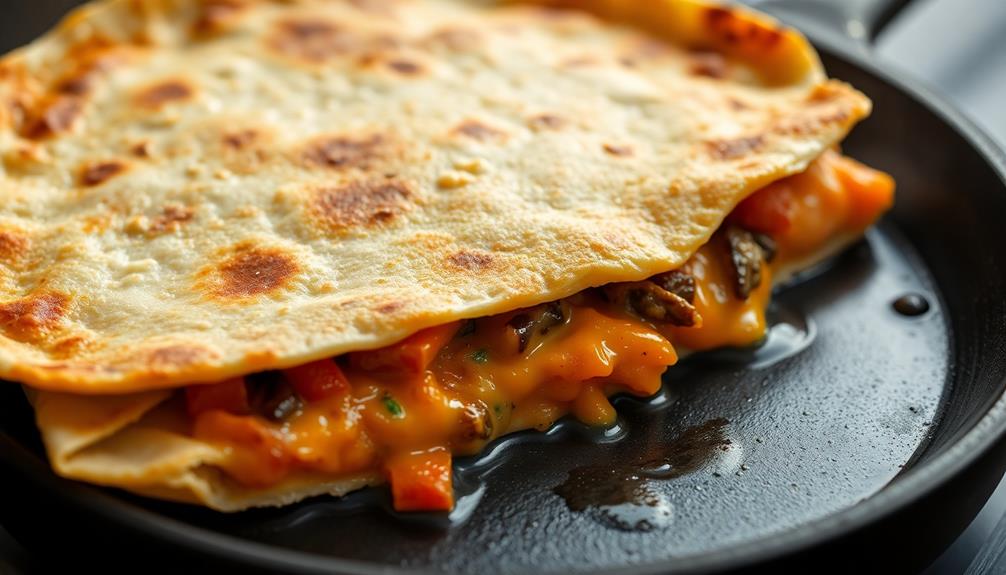
Place the folded quesadilla in a preheated skillet or griddle over medium heat. Listen as it sizzles, filling the air with a tantalizing aroma!
Let it cook for a minute or two, keeping a close eye on it. You'll know it's ready to flip when the bottom turns a lovely golden-brown. Carefully use a spatula to gently flip the quesadilla over. Cook the other side until it's also golden and crispy. The cheese should be melted and oozing out the sides – mmm, delicious!
Once both sides are perfectly cooked, transfer the quesadilla to a cutting board. Slice it into triangles so it's easy to share and enjoy.
The contrast of the crispy tortilla and the warm, gooey filling is simply irresistible. Serve the kimchi quesadillas hot, garnished with extra kimchi, green onions, or a spicy dipping sauce, if desired. Get ready for an explosion of flavors in every bite!
Step 5. Slice Quesadillas Before Serving
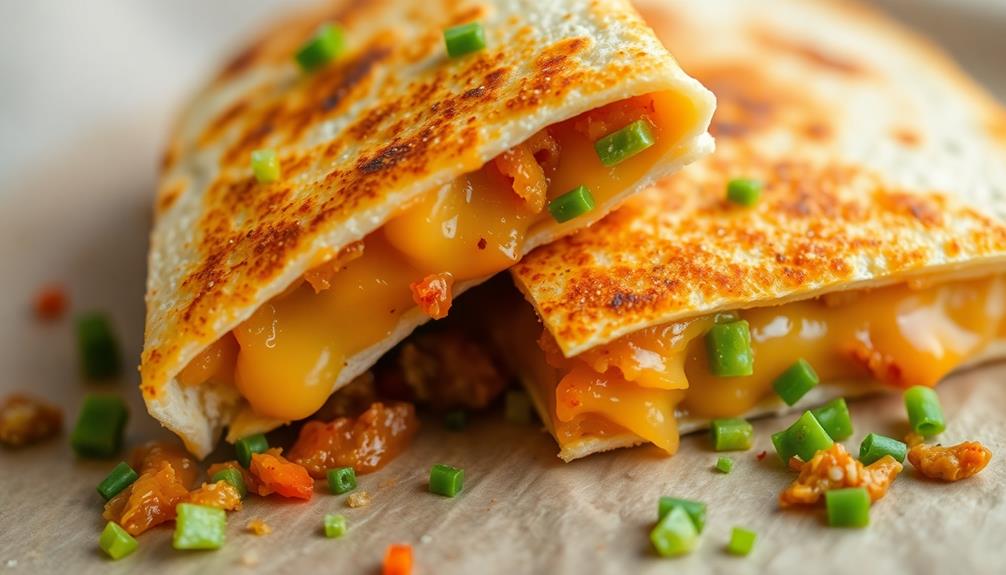
Once you have the perfectly golden-brown quesadilla on the cutting board, it's time to slice it up for easy serving. Using a sharp knife, carefully cut the quesadilla into four or six even triangles. This will make it a breeze for your family and friends to grab a piece and enjoy the delicious combination of crispy tortilla, melted cheese, and savory kimchi.
With the rising popularity of unique flavors and blends in the food industry, this fusion dish is sure to impress your guests, especially those who appreciate health benefits of tea.
Don't be shy about slicing those quarters or sixths – you want everyone to get a nice, hefty portion. The aroma of the toasted tortilla and the vibrant colors of the kimchi peeking through will have your guests' mouths watering and grabbing for a slice as soon as you set the plate down.
Serve the quesadilla triangles warm, and watch them disappear in no time! The perfect balance of spicy, tangy, and cheesy flavors in every bite will have everyone coming back for seconds.
Final Thoughts
As you whip up your kimchi quesadillas, step back and savor the fusion of flavors. The crunch of the tortilla, the zing of the kimchi, and the melty goodness of the cheese – it's a party in your mouth!
You've created a delightful culinary adventure that combines the best of Korean and Mexican cuisines. Consider serving these tasty treats during your next Halloween gathering to impress your guests and add a unique twist to your festivities with Halloween traditions and activities. In addition to your creative fusion, why not offer a spooky twist by incorporating popular Korean kimchi or bulgogi into tacos, adding vibrant color and rich flavors? For an extra surprise, serve Japanese octopus ball snacks (takoyaki) as eerie yet delicious appetizers, perfect for guests intrigued by both Korean-Mexican fusion and popular Japanese street food. These playful dishes will elevate your Halloween celebration and leave everyone raving about the night’s unforgettable feast.
Your friends and family are sure to be impressed by your culinary creativity. Serve the quesadillas with a fresh, crisp salad or some tangy guacamole for a complete meal.
Don't be afraid to experiment with different fillings, like spicy pork or sautéed veggies, to find your perfect flavor combination.
The beauty of this dish is its versatility. Whip up a batch for a casual weeknight dinner or impress guests at your next gathering.
No matter when you enjoy them, these kimchi quesadillas are sure to bring a smile to your face and a happy dance to your taste buds.
Frequently Asked Questions
Is Kimchi Quesadilla a Traditional Korean or Mexican Dish?
Kimchi quesadilla isn't a traditional dish from either Korea or Mexico. It's a creative fusion that combines the tangy, spicy flavor of Korean kimchi with the classic Mexican quesadilla. This unique dish blends elements from both cuisines into a tasty, innovative creation.
Can I Substitute Other Fermented Vegetables for Kimchi?
Certainly, you can substitute other fermented vegetables for kimchi in your quesadillas. Try sauerkraut, pickled carrots, or even fermented beets to add a unique twist to your fusion dish. The possibilities are endless when it comes to experimenting with different flavors.
How Long Does It Take to Make Kimchi Quesadillas?
Making kimchi quesadillas doesn't take long – you can whip them up in around 30 minutes. Start by sautéing the kimchi, then assemble the quesadillas and cook them on the stovetop until the cheese is melted and the tortillas are crispy.
Can I Use Store-Bought Kimchi for This Recipe?
Absolutely! You can use store-bought kimchi for this recipe. It'll save you time, and the bold, tangy flavors of the store-bought kimchi will still work perfectly in your quesadillas. Feel free to use your favorite brand.
What Type of Cheese Works Best in Kimchi Quesadillas?
Sure, you can use store-bought kimchi for your quesadillas. As for the cheese, go for a melty variety like cheddar, Monterey Jack, or Mexican blend. These cheeses will complement the tangy, spicy flavors of the kimchi perfectly.
Alejandro is a vibrant advocate of traditional Mexican cuisine. From spicy tacos and enchiladas to rich moles and tamales, Alejandro’s dishes celebrate the colorful, bold flavors of Mexico. His recipes bring authentic Mexican street food and home-cooked meals to your table, with a focus on using fresh, flavorful ingredients.
Korean Cuisine
Tonkatsu Korean Style: a Crispy Pork Cutlet With a Twist
You won’t believe how a simple twist on tonkatsu brings bold Korean flavors to your table—discover the secrets behind this irresistible dish!
Tonkatsu Korean style is a delicious twist on the classic crispy pork cutlet. You start with fresh pork loin that you pound to make it tender. After marinating the meat in a tasty mix of soy sauce, garlic, and ginger, you coat it in crunchy panko breadcrumbs. Fry those cutlets until they're golden brown and super crispy! To really make it special, serve it with a zesty dipping sauce made from gochujang, soy sauce, and honey. This dish is perfect for family meals and brings everyone together. Stick around to discover more secrets and fun tips!
Key Takeaways
- Tonkatsu originated in Japan but was adapted in Korea with a sweet and spicy sauce, enhancing its comfort food appeal.
- Essential ingredients include pork loin, flour, egg, and panko breadcrumbs for a crispy texture.
- Marinate pork loin fillets in a mixture of soy sauce, sugar, garlic, and ginger for at least 30 minutes for flavor.
- Serve tonkatsu with a spicy dipping sauce made from gochujang, soy sauce, rice vinegar, and honey, along with pickled vegetables.
- Cooking tonkatsu can be a fun social activity, encouraging family and friends to participate in meal preparation.
History
Have you ever wondered how the crispy pork cutlet became a beloved dish in many cultures? The story actually begins in Japan, where it's known as tonkatsu. In the late 19th century, Japanese chefs began frying pork cutlets in breadcrumbs, creating a crunchy exterior with tender meat inside. People loved it, and soon, tonkatsu restaurants sprang up across the country!
As time went by, this tasty dish made its way to Korea, where it was embraced with open arms. Koreans added their own twist by serving it with a delicious sweet and spicy sauce, making it even more special. This fusion of flavors turned it into a popular comfort food, enjoyed by families everywhere.
The crispy pork cutlet didn't stop at Japan and Korea! You'll find variations in many other cultures too. In Western countries, it often appears as a schnitzel, where the cutlet is fried with a golden crust.
Each culture adds its unique touch, but they all share that crunchy goodness we love.
Isn't it fascinating how one simple dish can travel the world and become a favorite for so many?
Cooking Steps
To achieve a perfectly crispy pork cutlet, you'll need to follow a series of straightforward steps that ensure flavor and texture.
First, gather your ingredients: pork loin, flour, egg, and panko breadcrumbs. Start by slicing the pork into even pieces, about half an inch thick. This helps them cook evenly and stay juicy.
Next, you're going to create a breading station. Put flour in one bowl, beaten egg in another, and panko breadcrumbs in a third. Coat each piece of pork first in flour, shaking off the excess. Then dip it into the egg, allowing any extra to drip off. Finally, cover the pork in panko, pressing gently so it sticks well.
Now, heat some oil in a large skillet over medium heat. Once the oil's hot, carefully add your breaded cutlets. Cook them for about 3-4 minutes on each side, or until they turn golden brown and crispy.
When they're done, place them on a paper towel to drain any excess oil.
Slice your crispy pork cutlets and serve them with your favorite dipping sauce or rice. Enjoy your delicious creation!
Step 1. Prepare Pork Loin Fillets
Preparing pork loin fillets is a straightforward process that sets the stage for a delicious crispy pork cutlet. First, you'll want to pick out some nice, fresh pork loin fillets from your local market. Aim for pieces that are about an inch thick; this helps them cook evenly.
Next, place the fillets on a clean cutting board. You can use a meat mallet or a rolling pin to gently pound them to your desired thickness. This step not only helps tenderize the meat but also ensures they cook faster and stay juicy.
Once they're the right thickness, rinse the fillets under cold water, then pat them dry with paper towels. Drying is important because it helps the coating stick better later.
If you see any excess fat, you can trim it off to make your cutlets leaner. After that, you're all set! Your pork loin fillets are prepped and ready to go.
You'll be one step closer to creating the most amazing crispy pork cutlet, and your kitchen will be filled with delightful aromas soon. Exciting, right?
Step 2. Marinate in Soy Sauce
After you've prepared the pork loin fillets, it's time to enhance their flavor with a simple soy sauce marinade. First, grab a bowl and pour in about half a cup of soy sauce. This rich, salty goodness is the star of your marinade.
Add a tablespoon of sugar to balance the saltiness and give it a little sweetness. You can also mix in a teaspoon of minced garlic and some grated ginger for a tasty kick!
Now, take your pork loin fillets and place them in the bowl, making sure they're fully submerged in the marinade. If you have a zip-top bag, that works even better! Just pour the marinade over the fillets, seal the bag, and give it a gentle shake.
Let it sit for at least 30 minutes in the fridge. This step is super important because it allows the flavors to soak in, making your pork extra delicious!
When the time is up, take the pork out of the marinade and let it rest for a minute. You're now ready to move on to the next exciting step in creating your crispy pork cutlet! Enjoy the delicious aroma while you wait!
Step 3. Coat With Panko Breadcrumbs
Now that your pork loin fillets have soaked up all that flavorful marinade, it's time to give them a crispy coating.
First, take out a plate and pour some panko breadcrumbs onto it. Panko breadcrumbs are special because they're light and airy, making your cutlets super crispy.
Next, grab your marinated pork and let any excess marinade drip off. You don't want it too wet, or the breadcrumbs won't stick.
Now, one by one, lay the pork fillets onto the plate of panko. Make sure to press them gently into the breadcrumbs, coating both sides well. You can even sprinkle some on top to get every inch covered!
Once each fillet is covered, shake off any extra breadcrumbs. This helps keep the coating light and crunchy.
If you want to have a little fun, you can even add some spices to the panko for extra flavor! Just mix in a pinch of garlic powder or paprika.
Now your pork is ready for the next step, where it'll become golden and delicious. You're doing great, and your crispy pork cutlet is going to be amazing!
Step 4. Fry Until Golden Brown
It's time to bring your coated pork cutlets to life by frying them until they're golden brown and crispy. First, heat a good amount of oil in a large, deep skillet over medium heat. You want enough oil so the cutlets can float a little while cooking.
Once the oil is hot, carefully place your panko-coated cutlets in the skillet. Don't crowd the pan; you want each cutlet to have space to fry evenly.
Fry the cutlets for about 4 to 5 minutes on each side. Keep an eye on them, and flip them gently with tongs when they turn a beautiful golden brown. The sound of sizzling oil is music to your ears! If the cutlets are browning too quickly, lower the heat a bit. You want them crispy, not burnt!
When they're perfectly golden, use tongs to lift them out of the oil and place them on a plate lined with paper towels. This helps soak up any extra oil, making them lighter and crunchier.
Now, take a moment to admire your work! You've just created delicious, crispy pork cutlets that are ready for the next step.
Step 5. Serve With Spicy Dipping Sauce
With your crispy pork cutlets ready, it's the perfect moment to whip up a spicy dipping sauce that'll take your dish to the next level. This sauce is super simple to make and adds a delicious kick to your meal.
Start by gathering your ingredients: a few tablespoons of gochujang (Korean chili paste), soy sauce, rice vinegar, and a touch of honey for sweetness.
In a small bowl, mix together about two tablespoons of gochujang, two tablespoons of soy sauce, one tablespoon of rice vinegar, and one tablespoon of honey. Stir everything together until it's nice and smooth. If you like it spicier, feel free to add more gochujang!
Once your sauce is ready, grab a small dish and pour it in. Now, it's time to serve! Place your crispy pork cutlets on a plate and set the spicy dipping sauce beside them.
You can even add some fresh veggies or pickled radish for a pop of color. When you take a bite, dip your cutlet in the sauce to enjoy that fantastic flavor.
Get ready for a tasty experience that'll make your meal unforgettable! Enjoy!
Final Thoughts
When you take a moment to savor that crispy pork cutlet, it's clear that this dish is more than just a meal; it's an experience.
Imagine the crunch of the golden coating, followed by the juicy, tender pork inside. Each bite transports you to a cozy Korean kitchen, filled with delightful aromas and flavors.
You've learned how to make this delicious dish, and now it's time to share it with your family and friends. The joy of cooking together can turn a simple dinner into a fun gathering.
Plus, serving it with that spicy dipping sauce adds a kick that everyone will love!
Remember, cooking is all about creativity. Feel free to experiment with different flavors or sides.
Maybe add some pickled vegetables or a fresh salad to brighten the plate. The possibilities are endless!
Frequently Asked Questions
What Is the Main Difference Between Tonkatsu and Korean-Style Pork Cutlet?
The main difference lies in the seasoning and preparation. You'll find tonkatsu typically uses a Japanese panko crust, while Korean-style pork cutlet often features a sweeter marinade and might include a thicker, crunchier batter.
Can I Use Chicken Instead of Pork for This Recipe?
You can definitely use chicken instead of pork in this recipe! Just adjust the cooking time, as chicken cooks faster. Enjoy the crispy texture and flavors while making it your own with this substitution.
What Dipping Sauces Pair Well With Korean-Style Tonkatsu?
You'll love pairing Korean-style tonkatsu with dipping sauces like spicy gochujang, tangy soy sauce mixed with vinegar, or a creamy sesame sauce. Each adds a delicious flavor contrast that enhances the crispy cutlet's taste.
How Do I Store Leftover Tonkatsu?
To store leftover tonkatsu, wrap it tightly in plastic wrap or foil, and place it in an airtight container. Refrigerate for up to three days. Reheat in the oven for best results and crispiness.
Is There a Gluten-Free Option for the Breading?
Yes, you can use gluten-free breadcrumbs or crushed gluten-free crackers for the breading. Just ensure your other ingredients are also gluten-free, and you'll create a delicious dish that everyone can enjoy without gluten.
Ji-hoon is a skilled chef specializing in traditional and modern Korean cuisine. From savory bulgogi and kimchi to hearty stews and sizzling bibimbap, Ji-hoon’s recipes bring Korea’s bold, spicy, and umami-rich flavors to your kitchen. He focuses on authentic techniques and fresh ingredients that make Korean food so vibrant and flavorful.
Korean Cuisine
Chapssaltteok: The Sweet and Chewy Korean Rice Cake
With a rich history dating back to the Goryeo dynasty, Chapssaltteok, the beloved Korean rice cake, has become a cherished staple in Korean homes and celebrations, boasting a perfect balance of sweetness and texture.
Chapssaltteok, the beloved Korean rice cake, boasts a rich history dating back to the Goryeo dynasty. These chewy delights were once reserved for royalty but have since become a cherished staple in Korean homes and celebrations. Made with glutinous rice flour, they're perfectly balanced in sweetness and texture, with a crunchy coating of toasted sesame seeds. Whether you're enjoying them during Lunar New Year or as a special treat, these rice cakes represent an integral part of Korean culinary tradition. With their captivating presentation and irresistible flavors, it's no wonder Chapssaltteok's popularity continues to soar worldwide. Curious to learn more?
Key Takeaways
- Chapssaltteok is a traditional Korean rice cake with a unique chewy texture, made from glutinous rice flour and often filled with sweet red bean paste.
- The origins of Chapssaltteok can be traced back to the Goryeo dynasty, where it was once a delicacy enjoyed by the royal court.
- Chapssaltteok holds significant cultural significance in Korea, being an essential part of festive celebrations like Lunar New Year and Chuseok.
- The preparation of Chapssaltteok involves simple steps, including kneading the dough, boiling the dough balls, and coating them in toasted sesame seeds.
- Chapssaltteok's popularity has been growing globally, with fusion adaptations appearing on contemporary dessert menus and increased availability in international markets.
History
When did chapssaltteok, the beloved Korean rice cake, first come into existence? This chewy and sweet delicacy has a rich history dating back centuries!
Originating from the Korean peninsula, chapssaltteok was once a treat enjoyed only by the royal court. Over time, it became a beloved snack for people of all classes.
The earliest records of chapssaltteok can be traced to the Goryeo dynasty (918-1392 CE). During this period, the rice cakes were crafted with intricate designs and served at important events.
As the centuries passed, the recipes and techniques evolved, allowing the beloved chapssaltteok to become a staple in Korean homes and celebrations.
Today, chapssaltteok remains a beloved part of Korean culture. From Lunar New Year to Chuseok, these chewy rice cakes are a must-have for any festive occasion.
Their history is as rich and varied as the flavors they offer, making them a true taste of Korean heritage.
Recipe
Chapssaltteok is a classic Korean rice cake that's both delicious and visually appealing. These soft, chewy cakes are made with glutinous rice flour, giving them a unique texture that sets them apart from other rice-based desserts. Traditionally, they're often enjoyed during special occasions or as a snack throughout the year.
The process of making chapssaltteok involves a few simple steps, but the results are well worth the effort. The combination of the sticky rice flour, sweetened red bean paste, and the subtlety of the flavors create a harmonious and satisfying treat.
Ingredients:
- 1 cup glutinous rice flour
- 1/2 cup water
- 1/4 cup sugar
- 1/2 cup red bean paste
- Cornstarch for dusting
Cooking Instructions:
In a large bowl, combine the glutinous rice flour and water. Knead the mixture until it forms a smooth, pliable dough. Cover the dough and let it rest for 30 minutes.
Divide the dough into 8 equal pieces. On a lightly cornstarch-dusted surface, roll each piece into a small ball. Use your thumb to make an indent in the center of each ball, then fill the indent with a teaspoon of red bean paste. Gently pinch the dough around the filling to seal it.
Arrange the filled chapssaltteok on a lightly cornstarch-dusted surface.
Tips:
When working with the dough, be sure to keep your hands and the work surface lightly dusted with cornstarch to prevent the dough from sticking.
Additionally, be gentle when filling and sealing the chapssaltteok to avoid tearing the delicate dough. Serve the chapssaltteok at room temperature or slightly chilled for the best texture and flavor.
Cooking Steps
Let's get started on the fun part – kneading the dough, rolling it into balls, and flattening them.
You'll then boil the flattened dough balls and coat them in tasty sesame seeds.
This hands-on process is sure to get the whole family involved in creating these delightful Korean rice cakes.
Step 1. Knead the Glutinous Rice Flour Dough
To begin, you'll want to knead the glutinous rice flour dough thoroughly. Grab a large mixing bowl and pour in the flour.
Slowly add in the water, a little at a time, as you mix the dough with your hands. Knead and squeeze the dough, working it until it becomes smooth and pliable, about 5 minutes.
Don't be afraid to get your hands dirty! The dough should feel soft and slightly sticky, but not so sticky that it sticks to your fingers. If it's too dry, add a bit more water; if it's too wet, sprinkle in a touch more flour.
Keep kneading until the consistency is just right.
Once the dough is perfectly mixed, cover the bowl and let it rest for 30 minutes. This allows the flour to fully hydrate, making the dough even more supple and easy to work with.
Now you're ready to start shaping those delightful chapssaltteok!
Step 2. Roll the Dough Into Balls
After the dough has rested, it's time to begin rolling it into balls. Grab a small handful of the soft, pliable dough and roll it between your palms to create a smooth, round shape. Be sure to use gentle motions to avoid overworking the dough. As you roll, the outside will become silky smooth, while the inside stays delightfully chewy.
Once you've formed a perfect ball, place it on a lightly floured surface. Repeat this process, rolling the remaining dough into consistent, bite-sized morsels. Aim for about 1-inch in diameter – this size will ensure each piece cooks evenly and has the perfect texture.
With all the dough transformed into tidy little balls, you're ready for the next step: steaming the chapssaltteok to achieve that classic glossy finish. Place the dough balls onto a parchment-lined steaming tray, ensuring enough space between them to expand as they cook. As with some choux pastry techniques, the steady application of steam will help the chapssaltteok develop a smooth, delicate surface. After steaming, allow them to cool slightly before serving, enjoying their soft, glossy exteriors.
Get ready for the aroma of sweet, toasted rice to fill your kitchen as these adorable rice cakes come to life!
Step 3. Flatten the Dough Balls
With the dough balls neatly arranged, it's time to flatten each one. Using your palms, gently press down on a ball, spreading it out into a flat, round shape.
Don't worry if it's not perfectly circular – the imperfections add to the charm!
As you flatten the dough, you'll notice it becomes smoother and more pliable. Keep going until each ball is about 1/4 inch thick. This will help the rice cakes cook evenly and achieve that signature chewy texture.
Once flattened, arrange the discs in a single layer on a lightly floured surface. This prevents them from sticking together.
With your work surface prepped, you're all set to move on to the next step – steaming the rice cakes! Get ready for the sweet, pillowy goodness that's about to unfold.
Step 4. Boil the Flattened Dough Balls
Next, bring a large pot of water to a boil over high heat.
Once the water is bubbling away, carefully drop the flattened dough balls into the pot. Gently stir and let them simmer for 5-7 minutes, until they're nice and puffy. You'll know they're ready when they float to the top!
Now, use a slotted spoon to scoop out the boiled rice cakes. Drain them well, making sure to remove any excess water. Aren't they just the cutest little puffballs?
From here, you can serve the chapssaltteok as-is, or get creative!
Try drizzling them with honey or sprinkling them with toasted sesame seeds for extra flavor. You can even stuff them with sweet red bean paste for a delightful surprise inside. The possibilities are endless!
Step 5. Coat Flattened Dough in Sesame Seeds
To coat the flattened dough balls in sesame seeds, first prepare a shallow dish or plate with a layer of toasted sesame seeds.
Gently roll each flattened dough ball in the sesame seeds, making sure to cover the entire surface. As you roll, apply a light touch to avoid crushing the delicate dough.
Once the dough balls are fully coated, transfer them to a clean surface. You can use your hands or a spatula to carefully move them, being mindful not to disturb the sesame seed coating.
Arrange the coated dough balls in a single layer, allowing them to rest for a few minutes.
The sesame seed coating won't only add a delightful crunch but also impart a nutty, aromatic flavor to the chapssaltteok.
This final step seals in the sweetness and transforms the humble rice cakes into a visually appealing and irresistible treat.
Final Thoughts
Chapssaltteok, the beloved Korean rice cake, is a delightful treat that encapsulates the essence of Korean cuisine. With its fluffy, chewy texture and delicate sweetness, it's no wonder this traditional delicacy has captured the hearts of both Koreans and food enthusiasts worldwide.
What makes chapssaltteok truly special is its ability to bring people together, whether it's enjoyed during a family gathering or a festive celebration.
As you savor each bite, you'll be transported to the vibrant streets of Seoul, where the aroma of freshly made rice cakes fills the air. The satisfying crunch of the sesame seeds, combined with the pillowy softness of the dough, creates a harmonious blend of flavors and textures that will leave you craving more.
Chapssaltteok isn't just a dessert; it's a beloved part of Korean culture, a tangible representation of the country's rich culinary heritage.
Frequently Asked Questions
What Is the Traditional Way to Shape Chapssaltteok?
You traditionally shape chapssaltteok by hand, gently molding the sticky rice dough into small, bite-sized rounds or oval shapes. This requires skill and practice to achieve the desired texture and appearance.
How Long Does It Take to Properly Age the Rice Paste?
To properly age the rice paste, you'll need about 8-12 hours. The longer you let the paste ferment, the more complex the flavors will become, so don't rush the process.
Can Chapssaltteok Be Frozen for Later Use?
Yes, you can freeze chapssaltteok for later use. It's best to wrap the cakes individually and store them in an airtight container. This'll preserve their texture and flavor when you're ready to enjoy them.
Are There Any Dietary Restrictions for Eating Chapssaltteok?
You'll want to consider any dietary restrictions you may have when eating chapssaltteok. It's made with rice flour, so it's not suitable for those following a gluten-free diet. Additionally, it may contain dairy or other allergens.
Where Can I Find the Necessary Ingredients for Making Chapssaltteok?
You can find the necessary ingredients for making chapssaltteok at your local Asian grocery store or online. They usually carry the rice flour, sugar, and other traditional components needed to make this delicious Korean treat.
Ji-hoon is a skilled chef specializing in traditional and modern Korean cuisine. From savory bulgogi and kimchi to hearty stews and sizzling bibimbap, Ji-hoon’s recipes bring Korea’s bold, spicy, and umami-rich flavors to your kitchen. He focuses on authentic techniques and fresh ingredients that make Korean food so vibrant and flavorful.
Korean Cuisine
Myulchi Bokkeum: Korean Stir-Fried Anchovies With Sesame
The delightful Myulchi Bokkeum offers a savory twist on anchovies that will leave you craving more—discover the secrets to this irresistible dish!
Myulchi Bokkeum is a tasty Korean dish featuring stir-fried anchovies with sesame seeds. You'll love how easy it is to make! First, rinse and dry the anchovies, then fry them until they're crispy. Next, mix soy sauce and sugar to create a flavorful coating. Don't forget to sprinkle sesame seeds on top for an extra crunch! You can even add colorful veggies like carrots and bell peppers for fun. This dish is not only delicious but also packed with omega-3s and can be enjoyed at gatherings with family and friends. Want to know more about this delightful dish?
Key Takeaways
- Myulchi Bokkeum is a traditional Korean dish made by stir-frying anchovies with a savory seasoning mix, enhancing their flavor profile.
- The dish includes sesame seeds, which add a delightful crunch and nutty flavor when toasted with the anchovies.
- It is rich in omega-3 fatty acids, protein, and essential vitamins, making it a nutritious snack option.
- Myulchi Bokkeum fosters social connections, making it ideal for sharing with family and friends during communal meals.
- The cooking process is simple and quick, allowing for creativity and experimentation with ingredients for varied flavor outcomes.
History
When you dive into the history of Myulchi Bokkeum, you'll find that it's more than just a dish; it's a reflection of Korea's culinary evolution. This tasty stir-fried anchovy dish has roots that stretch back centuries. Anchovies, or "myulchi," have been an important part of Korean diets because they're packed with nutrients and flavor.
You'll discover that people started using these tiny fish in various ways long before Myulchi Bokkeum became popular. In the past, Koreans often relied on preserved and fermented foods due to the country's changing seasons. Myulchi Bokkeum emerged as a practical way to cook with anchovies and enhance their taste.
Families would gather in the kitchen, sharing stories and laughter while preparing this dish. The combination of anchovies with sweet and spicy seasonings made it a favorite for many!
As Korea modernized, Myulchi Bokkeum remained a beloved staple. It symbolizes not just tradition but also adaptation. Today, you might find it served as a side dish in homes and restaurants, bringing people together over a shared love of flavor and culture.
Isn't it exciting to think about how a simple dish can tell such a rich story?
Cooking Steps
To prepare Myulchi Bokkeum, start by gathering all your ingredients, ensuring you have dried anchovies, cooking oil, garlic, and your choice of seasonings ready.
Once you've got everything, heat a pan over medium heat and add a splash of cooking oil. When the oil's hot, toss in the dried anchovies. You'll want to stir them around for about 2-3 minutes until they start to get crispy and golden.
Next, chop up some garlic and add it to the pan. The smell will be amazing! Keep stirring for another minute or so, making sure the garlic doesn't burn.
Now it's time for the fun part: adding your seasonings! You can use soy sauce, sugar, or even a sprinkle of sesame seeds for some extra flavor. Mix everything together well, letting the anchovies absorb all those delicious flavors.
After about 1-2 more minutes, your Myulchi Bokkeum should be ready! Turn off the heat and let it cool for a bit.
Serve it warm, and enjoy your tasty Korean dish that's perfect as a side or snack! Happy cooking!
Step 1. Prepare Anchovies for Frying
How do you ensure your anchovies are ready for frying? First, you'll want to gather your anchovies. If they're fresh, rinse them gently under cold water. This helps to remove any sand or dirt. If you're using dried anchovies, you don't need to rinse them, but check for any excess moisture.
Next, lay the anchovies out on a clean kitchen towel to dry. This step is super important because any moisture left on them can cause splattering during frying.
While they're drying, take a moment to inspect each anchovy. Remove any heads or guts if they're still attached. You can use kitchen scissors or your fingers for this task. It might seem a bit tricky, but with practice, you'll get the hang of it!
Once you've prepped your anchovies, you can arrange them in a single layer on a plate. This makes it easier to fry them evenly later on.
When you're done, you'll have a beautiful pile of ready-to-fry anchovies that'll soon become a delicious Myulchi Bokkeum dish. You're almost there, and it's going to be tasty!
Step 2. Add Seasoning Mix
With your anchovies prepped and ready, it's time to create a flavorful seasoning mix. Start by grabbing a small bowl. You'll need some soy sauce, sugar, and a pinch of garlic powder to make it extra tasty.
Pour about two tablespoons of soy sauce into the bowl. Then, add one tablespoon of sugar. This will help balance the saltiness of the soy sauce and add a lovely sweetness to your dish. Next, sprinkle in half a teaspoon of garlic powder. If you love garlic, you can add a bit more!
Now, stir everything together until the sugar dissolves and all the ingredients blend nicely. You should have a shiny, sweet-salty mixture. Once that's done, set the seasoning mix aside for a moment.
When your anchovies are sizzling in the pan, it's time to add this mix. Pour it over the anchovies and watch them soak up all that delicious flavor.
Keep stirring gently to ensure every little anchovy gets coated. This step is super important because it'll make your dish really special. Get ready for the yummy smell that'll fill your kitchen!
Step 3. Add Sesame Seeds
After the anchovies have absorbed the flavorful seasoning mix, it's time to enhance their taste and texture with sesame seeds. These tiny seeds pack a big punch of flavor and add a delightful crunch to your dish!
Start by measuring out about two tablespoons of sesame seeds. You can use either white or black seeds, depending on what you like best.
Next, sprinkle the sesame seeds over the anchovies in the pan. Give them a gentle stir to make sure every little fish gets coated with those nutty seeds. This step not only boosts the flavor, but it also makes your dish look even more appetizing.
Now, let the anchovies and sesame seeds cook together for an additional minute or two. This will help the seeds toast slightly, bringing out their rich, roasted flavor.
Keep an eye on them to avoid burning. Once you smell that wonderful aroma, you know they're ready!
Step 4. Add Vegetables for Flavor
To elevate the flavor of your Myulchi Bokkeum, adding vegetables is a fantastic step. Veggies bring a pop of color and a delicious taste that complements the anchovies perfectly!
Start by choosing some vegetables you love. Carrots, bell peppers, and green onions work great. Chop them into small pieces so they cook quickly and mix well with the anchovies.
Once you've got your vegetables prepped, heat a bit of oil in your pan over medium heat. Add the chopped veggies first and stir-fry them for a few minutes. You want them to become tender but still crunchy. This brings out their natural sweetness and makes your dish even tastier!
After your veggies are ready, toss in the fried anchovies. Mix everything together gently, so the flavors blend beautifully. At this point, you can also add a splash of soy sauce or a sprinkle of sugar if you want a touch more sweetness.
Keep stirring for another minute or so, making sure everything is well-coated and heated through.
Now, your Myulchi Bokkeum is bursting with flavors from both the anchovies and the colorful veggies. Enjoy this delightful dish with rice or as a side! The savory, umami notes of the crispy anchovies pair wonderfully with the vibrant sautéed vegetables, creating a perfect balance of textures and tastes. For an even heartier meal, consider serving it alongside an eggplant rice recipe, which adds a rich, earthy depth to the dish. Together, these flavors transform a simple meal into a satisfying and harmonious dining experience.
Step 5. Adjust Heat for Crispiness
Once your vegetables are tender and mixed with the anchovies, adjusting the heat is key to achieving the perfect crispiness. Start by turning up the heat to medium-high. This helps the anchovies get that nice, crunchy texture you want.
Keep an eye on them, though! You don't want them to burn. Stir the mixture gently but often, making sure everything cooks evenly.
As the heat rises, you'll hear that delightful sizzle. This means your dish is coming to life! If you notice that things are starting to cook too quickly, don't worry—just lower the heat a bit. You want to find that sweet spot where everything's crisping up but not turning black.
After about five to seven minutes, check in on your anchovies. They should be golden and crispy. Once you're happy with the texture, remove the pan from the heat.
Let it cool for a minute, and then it's time to savor the deliciousness you've created. The aroma will fill your kitchen, and you'll know you've nailed it! Enjoy your Myulchi Bokkeum, and get ready to impress your friends and family!
Final Thoughts
When you savor Myulchi Bokkeum, you're not just enjoying a dish; you're experiencing a delicious blend of savory flavors and cultural tradition.
This Korean stir-fried anchovy dish is more than just a meal; it's a connection to a rich culinary heritage that's been passed down through generations. Each bite brings a delightful crunch and a burst of umami that dances on your taste buds.
Making Myulchi Bokkeum can be a fun adventure in the kitchen! You can experiment with different spices and adjust the sweetness to match your personal taste.
Plus, it's a fantastic way to introduce your friends and family to Korean cuisine. They'll be amazed at how simple ingredients can come together to create something so special.
Frequently Asked Questions
What Are the Nutritional Benefits of Myulchi Bokkeum?
When you explore the nutritional benefits, you'll find it's rich in protein, omega-3 fatty acids, and essential vitamins. These elements support heart health, boost brain function, and provide energy, making it a nutritious addition to your diet.
Can I Substitute Anchovies With Other Fish?
You can definitely substitute anchovies with other fish, like sardines or mackerel. Just keep in mind that different fish have unique flavors and textures, so adjust your seasoning and cooking time accordingly for the best results.
How Should I Store Leftover Myulchi Bokkeum?
To store leftovers, let them cool completely, then transfer to an airtight container. Refrigerate for up to a week. Reheat gently on the stovetop or microwave before serving for the best taste.
Is Myulchi Bokkeum Gluten-Free?
You'll find that many traditional Korean dishes can be gluten-free, but it depends on the ingredients used. Always check for any sauces or seasonings that might contain gluten to ensure your dish remains safe.
What Dishes Pair Well With Myulchi Bokkeum?
When pairing dishes, you'll enjoy myulchi bokkeum alongside steamed rice, kimchi, or a light soup. These combinations enhance the flavors, making your meal balanced and satisfying, creating a delightful dining experience you won't forget.
Ji-hoon is a skilled chef specializing in traditional and modern Korean cuisine. From savory bulgogi and kimchi to hearty stews and sizzling bibimbap, Ji-hoon’s recipes bring Korea’s bold, spicy, and umami-rich flavors to your kitchen. He focuses on authentic techniques and fresh ingredients that make Korean food so vibrant and flavorful.
-
Southern Comfort Food1 month ago
Cheese Straws
-
Brazilian Cuisine1 month ago
Caldeirada
-
Southern Comfort Food1 month ago
Creamed Corn
-
Brazilian Cuisine1 month ago
Chicken in Brown Sauce
-
Brazilian Cuisine1 month ago
Tacacá
-
Southern Comfort Food1 month ago
Chocolate Gravy
-
Southern Comfort Food1 month ago
Squash Casserole
-
Polish Comfort Food1 month ago
Krupnik (Barley Soup)