Korean Cuisine
Daikon in Korean Cuisine: The Versatile Radish You’ll Love
Savor the versatile delights of daikon, a staple in Korean cuisine, as it effortlessly enhances every dish with its crisp texture and mild sweetness.
You'll fall in love with daikon, the versatile white radish that's been a staple in Korean cuisine for centuries! This nutrient-rich veggie has a crisp texture and mild sweetness that complements Korea's bold flavors. From savory kimchi to hearty stews, daikon absorbs seasonings like a sponge, enhancing every dish. It's even considered a symbol of good fortune in Korean culture, featured in festive celebrations. Whether you enjoy it raw, pickled, or cooked, daikon's versatility means there's endless ways to incorporate this beloved ingredient into your meals. Just wait until you see how else this radish can elevate your cooking adventures!
Key Takeaways
- Daikon has been a staple in Korean cuisine for centuries, valued for its crisp texture and mild sweetness, and featured in dishes like kimchi and stews.
- Daikon is nutrient-rich, low in calories, high in vitamin C and fiber, and supports digestive health, lowers blood pressure, and aids weight management.
- Daikon adds a refreshing crunch and enhances flavor profiles in traditional Korean dishes, and can be eaten raw, pickled, or cooked in various ways.
- A simple daikon side dish features grated daikon mixed with soy sauce, sesame oil, brown sugar, garlic, ginger, and green onions, served chilled.
- Daikon's versatility in Korean cuisine allows for creativity, as it can be used in salads, pickled, or roasted, complementing the bold flavors of Korean cuisine.
History
For centuries, daikon has been a staple ingredient in Korean cuisine. This versatile radish is deeply rooted in Korean culinary traditions, tracing back to the Goryeo dynasty in the 10th century. During this time, daikon was highly prized for its crisp texture and mild, slightly sweet flavor.
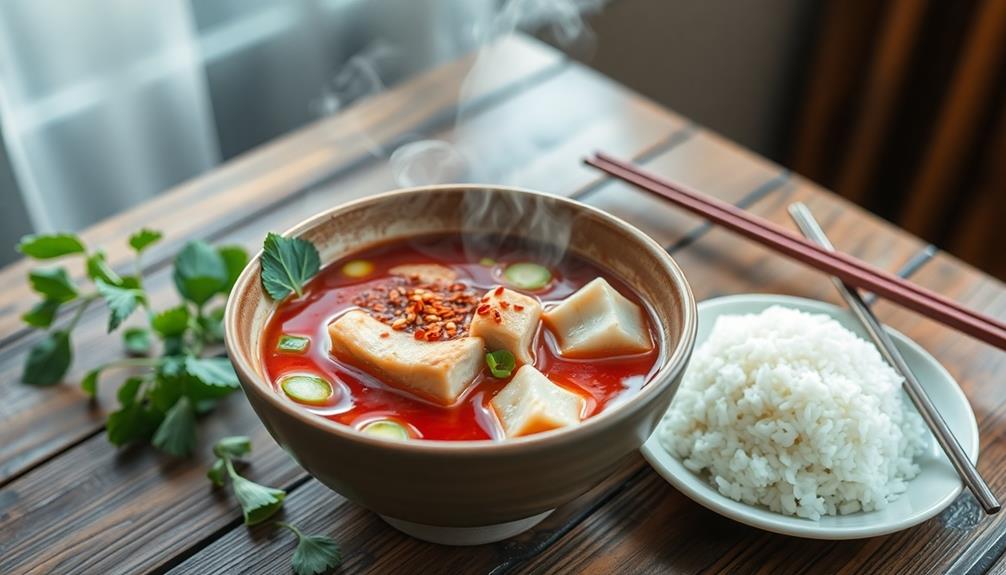
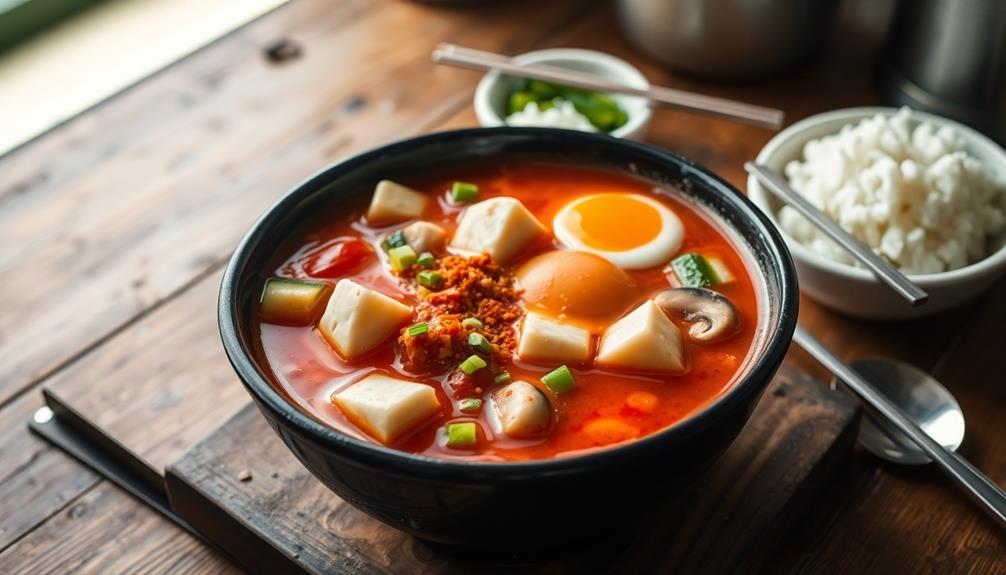
As Korean culture and cuisine evolved, daikon became a beloved part of the national diet. It found its way into a wide range of dishes, from savory kimchi to hearty soups and stews. Daikon's ability to absorb and complement various seasonings made it a natural fit for Korea's vibrant, flavor-packed cuisine.
Today, daikon remains a beloved ingredient, celebrated for its versatility and health benefits. Whether grated, pickled, or cooked, this humble radish continues to be a cornerstone of Korean culinary traditions, delighting both home cooks and renowned chefs alike.
Recipe
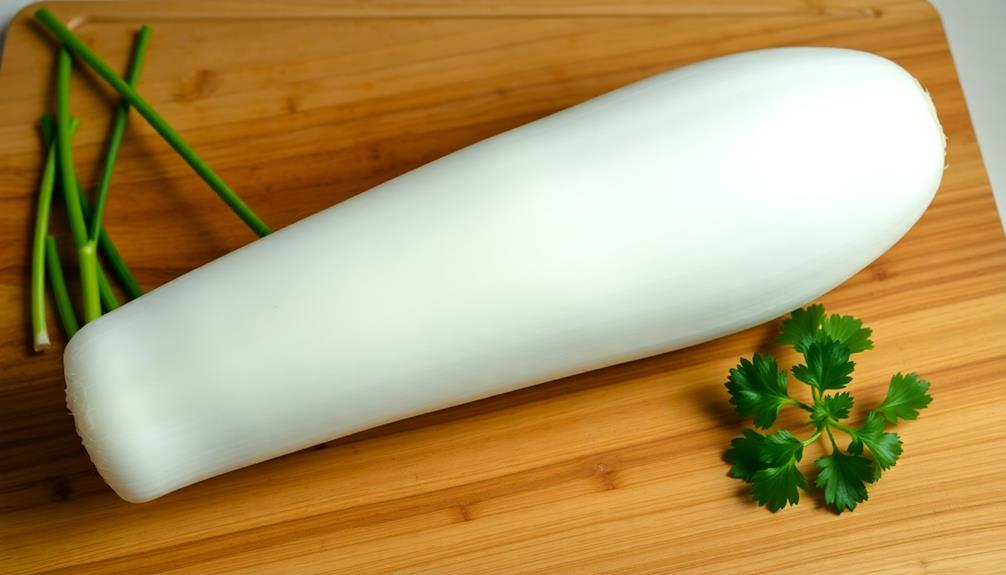
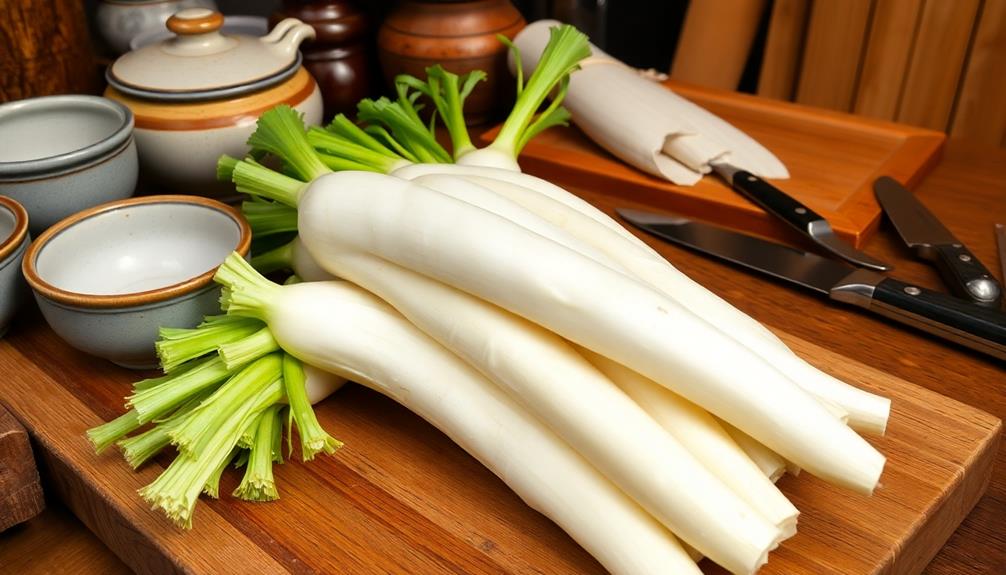
Daikons, also known as white radishes, are a staple ingredient in Korean cuisine. These large, cylindrical root vegetables add a unique crunch and subtle sweetness to a variety of dishes. One popular way to enjoy daikon is by preparing it in a simple, yet flavorful recipe.
The versatility of daikon allows it to be used in both savory and sweet dishes. In this recipe, we'll showcase how to incorporate daikon into a traditional Korean side dish that pairs well with rice, grilled meats, or stews.
- 1 pound daikon, peeled and sliced into thin strips
- 2 tablespoons soy sauce
- 1 tablespoon brown sugar
- 1 teaspoon sesame oil
- 1 clove garlic, minced
- 1 teaspoon grated ginger
- 1/2 teaspoon crushed red pepper flakes (optional)
- 2 tablespoons sesame seeds
- 1 green onion, thinly sliced
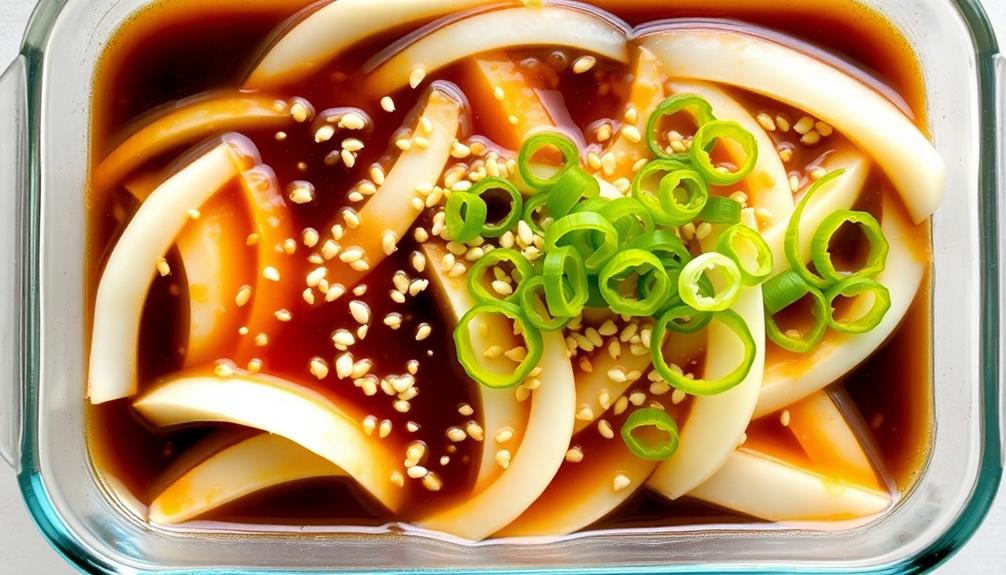
In a large bowl, combine the sliced daikon, soy sauce, brown sugar, sesame oil, garlic, ginger, and red pepper flakes (if using). Toss the ingredients together until the daikon is evenly coated. Allow the mixture to marinate for 30 minutes, stirring occasionally.
When ready to serve, transfer the marinated daikon to a serving dish and sprinkle with sesame seeds and sliced green onions. This dish can be enjoyed at room temperature or chilled, making it a versatile side that can be prepared ahead of time.
The key to this recipe is allowing the daikon to fully absorb the flavorful marinade, resulting in a delightful balance of sweet, savory, and slightly spicy notes.
Cooking Steps
Rinse the daikon under cool running water to wash off any dirt.
Peel the daikon and grate it using a large-holed grater.
In a bowl, mix the grated daikon with soy sauce and sesame oil until well combined.
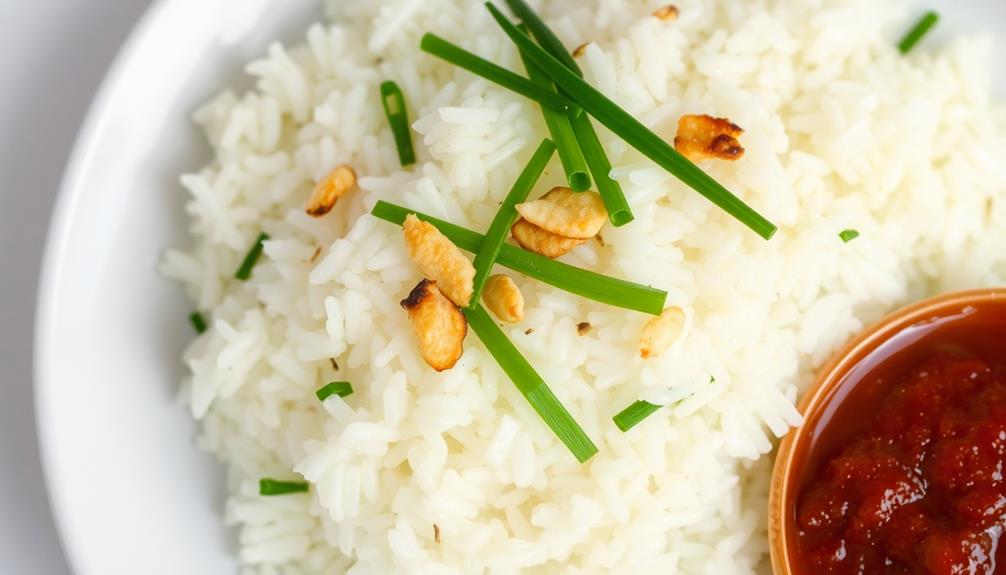
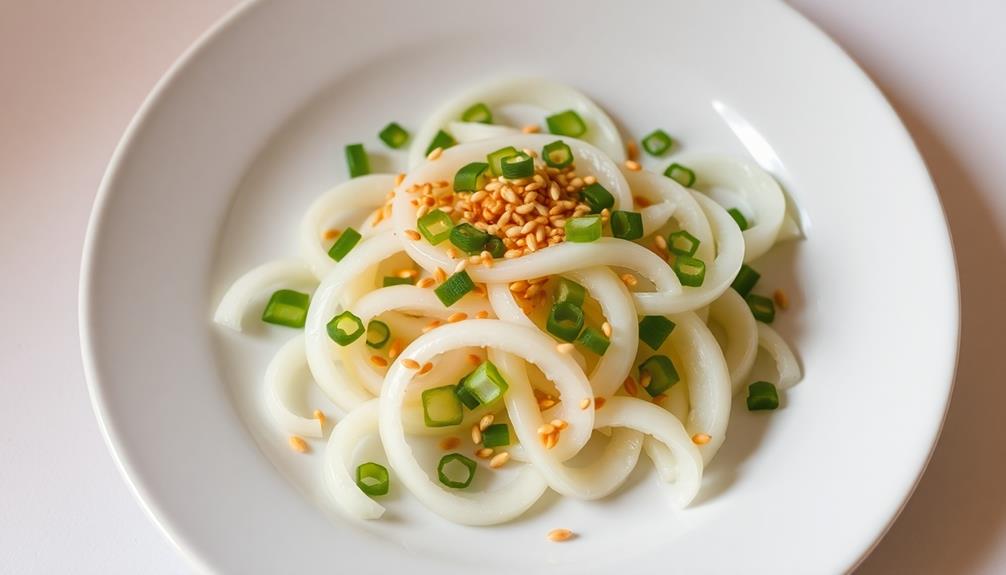
Top it off with sliced green onions for a refreshing side dish that's best served chilled.
Step 1. Rinse Daikon Under Cold Water
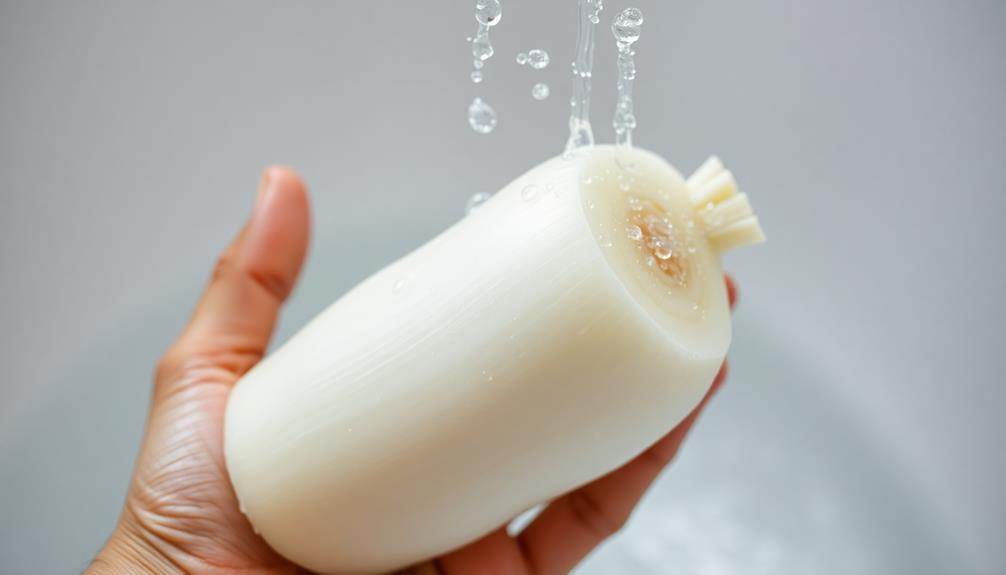
After trimming the ends, you'll want to give the daikon a thorough rinse under cold running water. This helps remove any dirt or impurities that may have accumulated on the surface.
Gently scrub the daikon with your hands as you rinse, ensuring it's squeaky clean and ready for the next step.
Once it's rinsed, you can pat the daikon dry with a clean kitchen towel or paper towels. This will help prepare the vegetable for whatever tasty Korean dish you plan to create.
Whether you're making a hearty stew, a crisp salad, or a flavorful side, starting with a clean daikon is the key to unlocking its full potential.
Step 2. Peel and Grate the Daikon
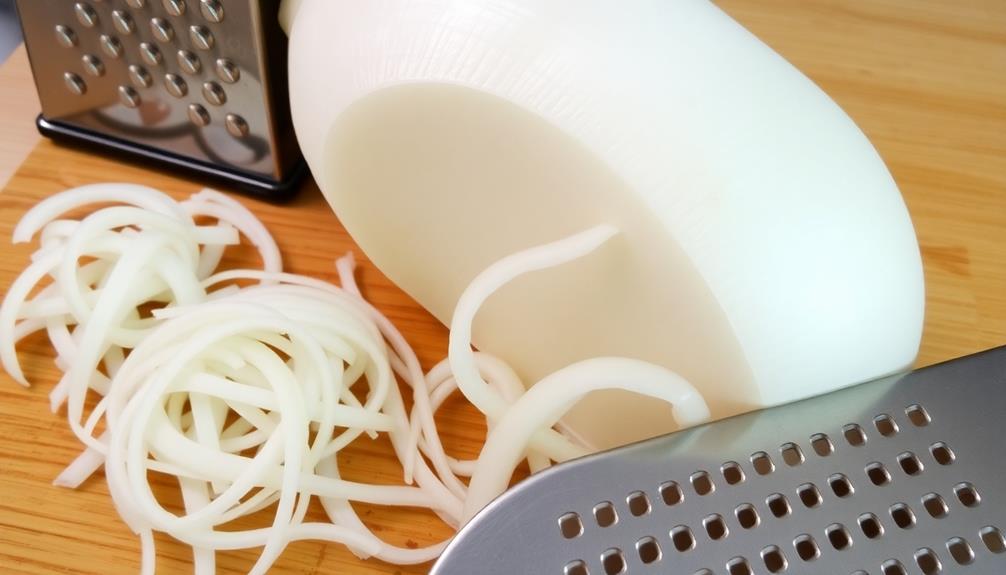
With the daikon now clean, it's time to peel and grate it. First, grab a sharp vegetable peeler and gently remove the thin skin, taking care not to waste too much of the flesh. You'll want the daikon to be smooth and blemish-free.
Next, grab a sturdy box grater and position the large holes facing up. Carefully run the daikon across the grater, applying gentle pressure to create long, thin shreds. Keep grating until you've transformed the entire daikon into a fluffy, snow-white pile.
The key is to grate the daikon in a way that creates long, delicate strands. This texture is perfect for enhancing the crunch and flavor in all sorts of Korean dishes, from spicy salads to savory pancakes.
Step 3. Mix With Soy Sauce and Sesame Oil
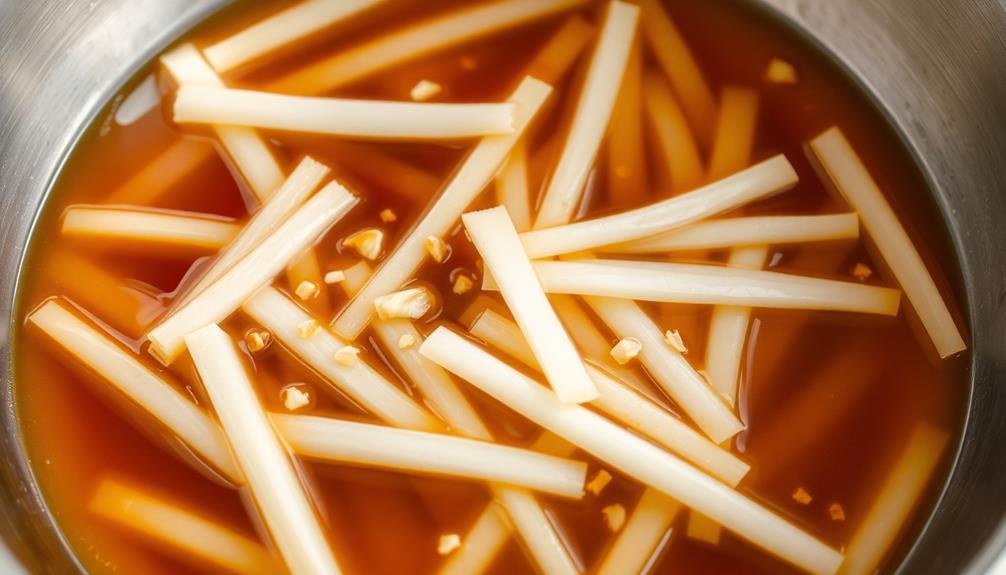
Take the grated daikon and place it in a mixing bowl.
Now, you'll want to add a few tablespoons of soy sauce and a drizzle of nutty sesame oil. Stir it all together until the daikon is nicely coated. The soy sauce will bring a savory depth, while the sesame oil adds a wonderful fragrance.
This simple mix makes a fantastic side dish or topping for all kinds of Korean meals. Try it with grilled meat, stir-fries, or even as a crunchy garnish for soup. Its tangy, savory flavors and crisp texture pair beautifully with the bold and spicy notes of traditional Korean cuisine. For a complete and balanced meal, enjoy it alongside a chilled glass of refreshing Korean rice punch, which adds a subtly sweet contrast. This combination is perfect for sharing with friends and family during a cozy dinner or festive gathering.
The flavors are bold yet balanced, with the daikon providing a satisfying crunch.
For an extra pop of flavor, you can sprinkle on a pinch of toasted sesame seeds or dried chili flakes.
Get creative and have fun experimenting! This versatile daikon dish is sure to become a new family favorite.
Step 4. Add Sliced Green Onions
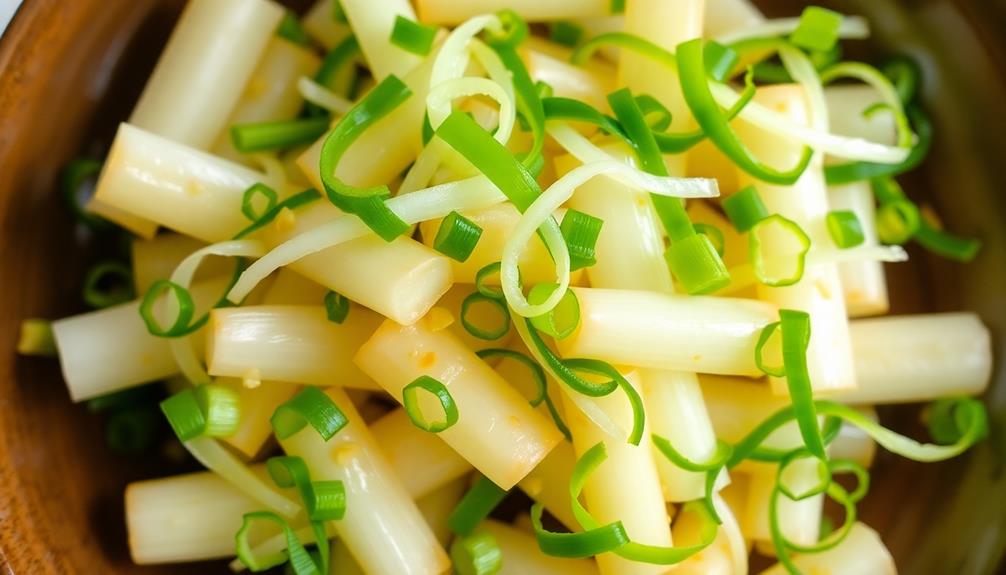
Next, slice some green onions into thin rounds. These vibrant green slices will add a lovely pop of color and a fresh, zesty flavor to your dish.
Green onions aren't only delicious but also provide health benefits, as they're low in calories and rich in antioxidants, making them a great addition to your meals for anti-inflammatory benefits. Simply take a bunch of green onions and cut them crosswise, creating little green rings that will beautifully decorate your daikon radish creation.
The cool, crunchy daikon pairs so nicely with the crisp, pungent green onions. Their flavors mingle together, creating a harmonious balance that will delight your taste buds.
Sprinkle the sliced green onions over the top of your soy sauce and sesame oil-dressed daikon, making sure to distribute them evenly.
The green onions not only add wonderful flavor but also a visually appealing touch. Their bright green hues will make your dish look fresh, vibrant, and appetizing.
Get ready for your taste buds to dance with joy at the delightful combination of tastes and textures!
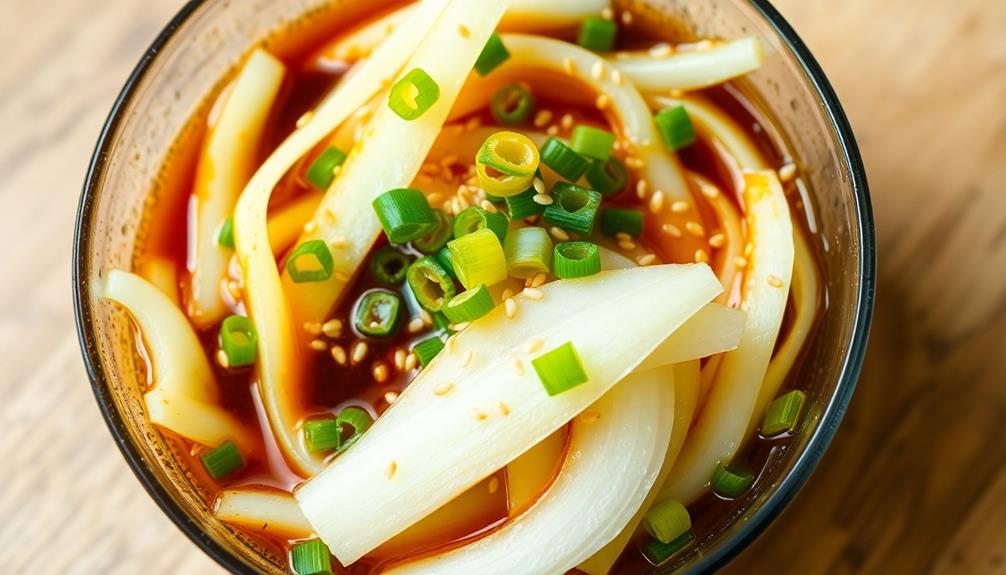
Step 5. Serve Chilled for Refreshing Side Dish
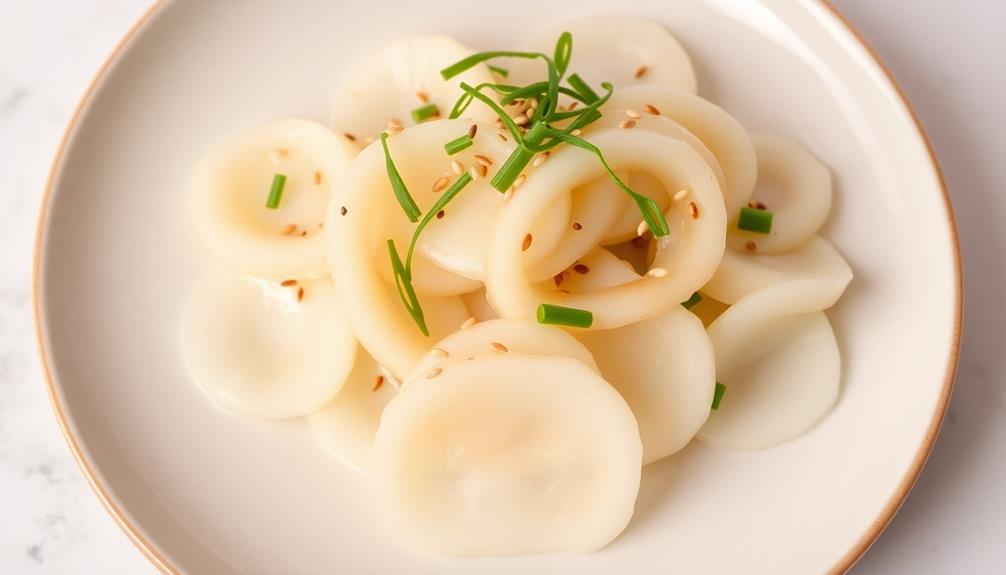
To serve the daikon radish dish chilled for a refreshing side, simply place the prepared ingredients in the refrigerator for about 30 minutes. This will allow the flavors to meld and the crisp texture of the daikon to become even more refreshing.
Once chilled, arrange the sliced daikon on a serving plate and top it with the bright green onion slices. The contrast of the white daikon and the vibrant green onions creates a visually appealing dish that's perfect for a hot summer day or a lively Korean-inspired meal.
Serve this chilled daikon side alongside your main course, or enjoy it on its own as a light and healthy snack. The cool, crunchy daikon and the subtle onion flavor will leave you feeling refreshed and satisfied.
It's a simple yet delightful way to incorporate this versatile vegetable into your Korean culinary adventures.
Final Thoughts
Daikon's versatility in Korean cuisine is truly worthy of further exploration. Whether you're enjoying it as a refreshing chilled side dish or incorporating it into a hearty stew, this versatile radish adds a delightful crunch and subtle sweetness to a variety of dishes.
Don't be afraid to get creative! Try shredding daikon into salads, pickling it for a tangy twist, or even roasting it for a caramelized flavor. The possibilities are endless.
Daikon's mild taste makes it a fantastic canvas for bold Korean spices and seasonings. Explore the vibrant world of kimchi, where daikon shines as a star ingredient.
Or, if you're feeling adventurous, experiment with blending daikon into your favorite soups and stews for a unique texture and flavor profile.
Embrace the wonder of daikon and let it transport you to the heart of authentic Korean cuisine. Your taste buds will thank you!
Frequently Asked Questions
How Do I Select the Best Daikon Radish for Cooking?
When selecting a daikon radish for cooking, look for one that's firm, heavy, and free of blemishes. Avoid daikon that's wilted or discolored, as they may be past their prime. Choose a size that suits your recipe's needs.
Can I Substitute Daikon for Other Types of Radish?
You can substitute daikon for other types of radish, but the flavor and texture may differ. Daikon has a milder, sweeter taste compared to other radishes. Consider the dish and adjust cooking times if using a different radish variety.
How Long Does Daikon Last in the Refrigerator?
Typically, daikon radish will last 2-4 weeks in the refrigerator when stored properly. Keep it wrapped in a damp paper towel or stored in a sealed bag to maintain its freshness for longer.
What Are the Health Benefits of Consuming Daikon?
Consuming daikon provides you with numerous health benefits. It's rich in vitamins, minerals, and antioxidants that can boost your immune system, aid digestion, and even reduce inflammation. Plus, it's low in calories, making it a great addition to your diet.
Can I Use Daikon in Stir-Fries or Is It Only for Soups?
You can definitely use daikon in stir-fries! It's a versatile vegetable that adds a crunchy texture and mild flavor to various dishes. Don't limit it to just soups – experiment with it in stir-fries for a delicious addition.
Ji-hoon is a skilled chef specializing in traditional and modern Korean cuisine. From savory bulgogi and kimchi to hearty stews and sizzling bibimbap, Ji-hoon’s recipes bring Korea’s bold, spicy, and umami-rich flavors to your kitchen. He focuses on authentic techniques and fresh ingredients that make Korean food so vibrant and flavorful.
Korean Cuisine
Korean Fusion Delight: Why Menbosha Is a Must-Try Snack
Curious about the captivating cultural fusion that is Menbosha? Discover why this Korean delicacy is a must-try snack that’ll delight your taste buds.
You've gotta try Menbosha – it's a Korean fusion delight that'll delight your tastebuds! This crispy fried treat blends the best of Korean and Western flavors, with a savory pork and veggie filling wrapped in a fluffy rice flour dough. It's like a cultural celebration in every bite! The contrast of the crisp exterior and the umami-rich filling is simply divine. Menbosha's versatility means you can enjoy it as a snack, appetizer, or even part of a larger meal. Impress your friends and family with this tasty fusion – it's sure to be the talk of your next gathering! Want to dive deeper into the story behind this Korean delicacy?
Key Takeaways
- Menbosha's unique fusion of Korean and Western flavors creates a delightful culinary experience that celebrates the richness of Korean culinary traditions.
- The crispy fried exterior and savory pork and vegetable filling of Menbosha offer an irresistible contrast of textures and flavors.
- Menbosha's adaptability to low-carb diets and versatility in serving as a snack or part of a meal make it a versatile and appealing option.
- The harmonious balance of flavors and textures in Menbosha, combined with the option to personalize it with dipping sauces, provide a satisfying and engaging dining experience.
- Menbosha's portable and shareable nature make it an ideal choice for various social gatherings, from casual snacks to festive celebrations.
History
It's believed that the Korean fusion snack known as Menbosha originated in the early 20th century, when Korean entrepreneurs sought to blend traditional Korean flavors with Western-style baked goods.
These visionary chefs combined the savory, umami-rich tastes of Korean cuisine with the buttery, flaky textures of pastries, creating a truly unique and delightful treat.
The name "Menbosha" is a playful fusion of the Korean word "meon" meaning "soft" and the Japanese word "bosha" meaning "bread."
This clever name perfectly captures the snack's irresistible character – soft, pillowy dough encasing a flavorful filling.
Over the decades, Menbosha has evolved, with fillings ranging from sweet red bean paste to savory ham and cheese.
No matter the flavor, each bite delivers a harmonious dance of textures and tastes that celebrate the richness of Korean culinary traditions.
Recipe
Menbosha is a beloved Korean fusion snack, blending the savory delights of Japan's tempura with the vibrant flavors of Korean cuisine. This unique treat features a crispy fried exterior encasing a tantalizing filling of seasoned pork and vegetables. Preparing Menbosha at home allows you to savor this gastronomic delight in the comfort of your own kitchen.
For those looking to enjoy a low carb diet while indulging in tasty snacks, Menbosha can be adapted by using alternative flours or minimizing the filling's carb content.
The key to achieving the perfect Menbosha lies in the balance of the dough and the careful selection of ingredients. The dough, made with a blend of wheat flour, water, and a touch of salt, must be kneaded to the right consistency, allowing for a light and airy texture once fried.
- 2 cups all-purpose flour
- 1 cup water
- 1 teaspoon salt
- 1 pound ground pork
- 1 carrot, grated
- 2 green onions, finely chopped
- 2 tablespoons soy sauce
- 1 teaspoon sesame oil
- 1/2 teaspoon ground black pepper
- Vegetable oil for frying
To prepare the Menbosha, begin by mixing the ground pork, grated carrot, chopped green onions, soy sauce, sesame oil, and black pepper in a bowl until well combined.
Next, roll the dough into small balls and flatten them into discs. Place a spoonful of the pork mixture in the center of each disc, then carefully fold the dough over the filling and pinch the edges to seal.
When ready to fry, heat the vegetable oil in a deep-fryer or heavy-bottomed pot to 350°F (175°C). Gently lower the Menbosha into the hot oil and fry until golden brown, about 2-3 minutes per batch.
Drain the fried Menbosha on a paper towel-lined plate, and serve hot, accompanied by your favorite dipping sauce. Enjoy the delightful contrast of the crispy exterior and the savory, flavorful filling in every bite of this Korean fusion delight.
Cooking Steps
Slice the cabbage and carrots thinly, then combine them with the savory sauce.
Next, fold the veggie mixture into the dough and fry the dumplings until they're golden brown.
Serve these tasty treats while they're still piping hot for maximum enjoyment!
Step 1. Slice Cabbage and Carrots Thinly
Begin by slicing the cabbage and carrots thinly. Use a sharp knife to create thin, even strips. This will ensure the vegetables cook quickly and evenly in the pan. Additionally, using fresh, high-quality ingredients can significantly enhance the overall flavor of your dish, making it a truly delightful experience.
Energy-saving features reduce overall energy consumption significantly, similar to how using the right techniques can optimize your cooking.
Go slowly and be careful, as you don't want any accidents. Next, try to make the slices as thin as possible, around 1/4 inch thick. The thinner the better, as this will help the veggies absorb all the delicious flavors. Gather the sliced cabbage and carrots in a bowl, ready to add to the pan.
Now, you're ready to move on to the next step – sautéing the vegetables! This will bring out their natural sweetness and make them tender and crisp. Get excited, because the aromas are about to fill your kitchen.
Just wait until you take that first bite of the finished Menbosha snack. Mmm, it's going to be absolutely scrumptious!
Step 2. Combine Vegetables and Sauce
Once you've sliced the cabbage and carrots, it's time to combine them with the savory sauce. In a large bowl, gently toss the vegetables with the delicious sauce until they're evenly coated. The tangy, sweet, and umami flavors of the sauce will really make the veggies pop!
The addition of chia seeds can also enhance the dish, as they're a rich source of dietary fiber, aiding digestion and promoting satiety aiding digestion.
Now, here's the fun part – you get to add the crispy fried batter to the mix. Carefully fold in the golden-brown menbosha pieces, making sure they're distributed throughout the salad. This adds an amazing crunch that contrasts perfectly with the tender vegetables.
Don't be afraid to get in there with your hands and give everything a good mix. You want to ensure the sauce and menbosha are thoroughly incorporated. The result should be a vibrant, flavorful blend that's sure to tantalize your taste buds.
With the vegetables and sauce combined, you're well on your way to creating a truly mouthwatering Korean fusion delight. Get ready for an explosion of flavors in every bite!
Step 3. Fold Vegetable Mixture Into Dough
After combining the vegetables and sauce, gently fold the vibrant mixture into the prepared menbosha dough. This step is crucial for creating the perfect pockets of flavor in your tasty snack.
First, take a spoonful of the veggie goodness and place it in the center of a dough round. Fold the dough over to form a half-moon shape, then use your fingers to gently pinch and seal the edges.
Repeat this process with the remaining dough and veggie filling. Be careful not to overstuff the dough – you want just the right amount of filling to create a delicious balance.
Once all the pockets are formed, you're ready to cook your menbosha to golden-brown perfection. The dough will puff up, encasing the flavorful veggies inside. Get ready for an explosion of Korean fusion delight in every bite!
Step 4. Fry the Dumplings Until Golden
Heat a generous amount of oil in a large skillet or wok over medium-high heat.
Once the oil is hot and shimmering, carefully add the prepared dumplings to the pan. Fry them until they're a beautiful golden brown, about 2-3 minutes per side. Be sure to flip them gently with a slotted spoon to avoid breaking them.
As the dumplings sizzle and crisp up, the aroma will fill your kitchen, making your mouth water in anticipation.
When they're perfectly fried, transfer them to a paper towel-lined plate to drain any excess oil. Serve the crispy, golden-brown menbosha dumplings hot, garnished with a sprinkle of toasted sesame seeds and a drizzle of your favorite dipping sauce.
The contrast of the crunchy exterior and the tender, flavorful filling is simply irresistible.
Get ready to savor the delightful fusion of Korean and Japanese influences in every bite!
Step 5. Serve Immediately, While Hot
As soon as the menbosha dumplings have reached that gorgeous golden-brown hue, transfer them from the pan to a paper towel-lined plate.
Don't forget – you'll want to serve these piping hot for the full flavor experience! The crispy exteriors and warm, gooey centers are an absolute delight.
Now, gather your friends and family around the table. Quickly place the steaming menbosha onto a serving platter, and watch their faces light up with joy.
Encourage everyone to grab a dumpling (or two!) and dive in. The combination of savory and slightly sweet flavors is sure to have them coming back for more.
Don't be shy about dipping the menbosha in the accompanying dipping sauce. The tangy, slightly spicy notes perfectly complement the rich, satisfying filling.
Savor every bite, savoring the perfect fusion of Korean and international influences.
Enjoy this moment of deliciousness, and don't forget to share your thoughts on this incredible snack with your loved ones. Menbosha is a true taste of Korean fusion delight!
Final Thoughts
Overall, the Menbosha snack is a delightful fusion of Korean and Japanese influences. This unique treat offers a sensational explosion of flavors and textures that'll leave you craving more.
From the crisp, golden exterior to the fluffy, savory interior, every bite is a culinary adventure. The subtle sweetness of the rice flour dough perfectly complements the umami-rich fillings, creating a harmonious balance that'll captivate your taste buds.
Whether you're enjoying Menbosha as an afternoon snack or a festive party treat, it's sure to be a hit. The portability and easy-to-share nature of this delicacy make it a fantastic option for gatherings, picnics, or simply indulging in some "me-time."
Frequently Asked Questions
Where Can I Purchase Menbosha Snacks in My Local Area?
To find menbosha snacks in your local area, you'll need to check at Asian grocery stores or specialty food markets. Many international supermarkets and online retailers may also carry this unique Korean fusion snack.
What Are the Nutritional Benefits of Menbosha?
Menbosha is a nutritious snack that packs a punch. It's high in protein, fiber, and healthy fats, keeping you fuller for longer. Plus, it's a great source of essential vitamins and minerals. Give it a try for a guilt-free treat.
How Long Can Menbosha Snacks Be Stored After Opening?
After you open a pack of menbosha snacks, they'll stay fresh for up to 2 weeks when stored properly in an airtight container at room temperature. Be sure to consume them within that timeframe to enjoy their full flavor and crispiness.
Are There Any Vegan or Gluten-Free Options for Menbosha?
Yes, there are vegan and gluten-free options for menbosha snacks. You'll find plant-based versions made without any animal products, as well as gluten-free recipes that cater to dietary restrictions. Just be sure to check the packaging carefully.
Can Menbosha Be Incorporated Into Other Dishes or Recipes?
Absolutely! Menbosha can be incorporated into other dishes and recipes. You can use it as a topping for salads, add it to stir-fries, or even bake it into breads and pastries for a unique flavor and texture.
Ji-hoon is a skilled chef specializing in traditional and modern Korean cuisine. From savory bulgogi and kimchi to hearty stews and sizzling bibimbap, Ji-hoon’s recipes bring Korea’s bold, spicy, and umami-rich flavors to your kitchen. He focuses on authentic techniques and fresh ingredients that make Korean food so vibrant and flavorful.
Korean Cuisine
Budae Jeongol: The Korean Army Stew That Packs a Punch
Weaving together a rich tapestry of flavors, Budae Jeongol, the iconic Korean army stew, captivates the senses and reflects the resilience of the Korean people.
Budae jeongol, the iconic Korean army stew, blends savory, spicy, and hearty flavors that have captivated taste buds for generations. During the Korean War, locals used leftover military rations to create this resourceful dish. Today, it features a rich, umami-packed base with Spam, hot dogs, and kimchi. You'll sauté the meats, then add broth, seasonings, and an array of veggies for layers of texture and flavor. The longer you simmer, the more the ingredients meld into a comforting, deeply satisfying meal. Budae jeongol embodies the resilience and ingenuity of the Korean people – and if you continue reading, you'll uncover the full history and cooking process.
Key Takeaways
- Budae Jeongol, or "army base stew," originated during the Korean War when locals used leftover military rations to create flavorful stews.
- The dish has evolved over time, incorporating ingredients like Spam and hot dogs, becoming a beloved Korean comfort food with regional variations.
- Budae Jeongol features a robust broth, a variety of meats, and an array of vegetables, creating a hearty and flavor-packed culinary experience.
- The dish's unique blend of Eastern and Western flavors reflects the resourcefulness and resilience of Korean culture in the face of wartime scarcity.
- Budae Jeongol offers a delicious and historical connection to Korean cuisine, making it a must-try for both enthusiasts and newcomers to the cuisine.
History
Budae Jeongol's origins trace back to the Korean War, when food scarcity compelled locals to make the most of limited resources.
With shortages of fresh meat and vegetables, resourceful cooks began incorporating leftover military rations into their stews, creating a savory blend of flavors. The name "Budae Jeongol" literally means "army base stew," reflecting its humble beginnings on the fringes of military camps.
Over time, this ingenious dish evolved, as home cooks experimented with new ingredients.
Spam, hot dogs, and other canned meats became staples, along with gochujang (Korean chili paste) and assorted vegetables. The result was a robust, spicy concoction that nourished families and became a beloved comfort food.
Today, budae jeongol remains a popular menu item, with each region and restaurant putting its own unique spin on the recipe.
From its wartime origins to its enduring legacy, this dish embodies the resilience and culinary creativity of the Korean people.
Cooking Steps
To prepare the delectable Budae Jeongol, you'll want to start by gathering all the necessary ingredients. This includes staples like spam, hot dogs, bacon, and kimchi, as well as gochujang (Korean chili paste), soy sauce, and garlic.
Once you've rounded up everything, it's time to get cooking!
Begin by sautéing the spam, hot dogs, and bacon in a large pot or Dutch oven. This will create a flavorful base for the stew.
Next, add the kimchi, gochujang, soy sauce, and garlic. Stir everything together and let it simmer for a bit, allowing the flavors to meld.
Now, it's time to add the broth. You can use a pre-made beef or vegetable broth, or even some water. Bring the mixture to a boil, then reduce the heat and let it simmer until the flavors are fully developed, about 20-30 minutes.
Step 1. Gather Ingredients and Equipment
Assembling the necessary components is the initial step in crafting the flavorful Korean army stew.
You'll need a large pot or Dutch oven to accommodate all the delicious ingredients. A sturdy ladle will come in handy for serving up generous portions. Don't forget to grab a sharp knife for chopping the vegetables.
For the stew itself, you'll need ground pork, spicy sausage, Spam, hot dogs, and a variety of veggies like onions, carrots, cabbage, and mushrooms.
Gochujang, a Korean chili paste, provides the signature heat, while soy sauce, garlic, and ginger add depth of flavor. Tofu, ramen noodles, and instant tteokbokki rice cakes are optional additions that can take this dish to the next level.
With all your tools and ingredients assembled, you're ready to start cooking up a storm in the kitchen.
Get ready to experience the bold, comforting flavors of this iconic Korean dish!
Step 2. Add Vegetables
With your prep work complete, it's time to start cooking! Grab those sliced and diced veggies and let's get them into the pot.
First, toss in the mushrooms. They'll add an earthy, savory depth to the stew. Next, go for the onions – their sweetness will balance out the other flavors.
Don't forget the cabbage! It'll bring a lovely crunch and fresh element to the dish.
Now, let's get those carrots in there. They'll add a pop of color and natural sweetness.
And the green onions? They'll lend a delightful aromatic touch.
Finally, add the bean sprouts. Their crunchy texture will be the perfect contrast to the tender meats.
As the vegetables simmer, you'll start to smell the aromas wafting through your kitchen. Get ready for a flavor explosion!
The stew is really coming together now. Keep an eye on it and adjust the seasoning as needed. Soon, you'll have a hearty, comforting bowl of Budae Jeongol ready to enjoy.
Step 3. Add Broth and Seasonings
Now, pour in the broth to get the party started. You'll want to add enough to cover all the ingredients, about 4 cups of beef or chicken broth. Stir it up and let the flavors mingle.
Next, it's time to season this stew to perfection. A couple tablespoons of soy sauce will give it a savory umami boost. Don't forget a teaspoon of sesame oil – it adds a lovely nutty aroma. For a little heat, sprinkle in some crushed red pepper flakes. Lastly, a pinch of sugar will balance out the bold flavors.
Give it all a good stir and let the stew simmer until the vegetables are tender and the flavors have melded, about 10-15 minutes. Taste and adjust the seasoning as needed.
The broth and seasonings are the glue that hold this hearty stew together, making each bite a delicious adventure.
Step 4. Add Meat
Once the broth and seasonings have melded, it's time to add the protein that gives this stew its hearty, satisfying core.
You'll want to include a variety of meats – the more, the merrier! Start with some sliced spam or hot dogs, which are classic additions.
Then, toss in a few pieces of juicy, tender beef or pork. Don't forget the chicken, either! Shredded or cubed, it'll add a delightful texture.
Finally, for a real flavor explosion, sprinkle in some crumbled bacon. The smoky, savory notes will tie everything together perfectly.
As the meats simmer in the flavorful broth, they'll become infused with all those wonderful Korean seasonings.
Get ready for a mouthwatering mélange of textures and tastes! With the protein added, this budae jjigae is truly becoming a complete, satisfying meal.
Keep a close eye as it all cooks together, and get ready to dive in once it's ready.
Step 5. Simmer Until Flavors Meld
After you've added all the delightful meats, let the stew simmer gently on the stovetop. This allows the flavors to meld together, creating a harmonious blend that'll tantalize your taste buds.
As the pot bubbles away, the aromas will fill your kitchen, making your mouth water in anticipation. Stir the stew occasionally, ensuring the ingredients cook evenly and nothing sticks to the bottom.
The longer you let it simmer, the more intense the flavors will become. Give it at least 20 minutes, but up to an hour for the ultimate flavor experience. Don't be tempted to rush this step – patience is key!
Once the time is up, take a deep breath and savor the enticing aroma. Your Budae Jeongol is now ready to be served, bursting with a symphony of flavors that'll transport you straight to the heart of Korea.
Get ready for a culinary adventure like no other!
Final Thoughts
Budae jeongol, the unique Korean army stew, offers a captivating culinary experience that blends the flavors of the East and West. As you delve into this hearty dish, you'll be amazed by the depth of flavor and the way it brings together an array of unexpected ingredients. From the savory sausages to the tangy kimchi, each element plays a crucial role in creating the perfect balance of sweet, salty, and spicy.
What makes budae jeongol so special is its ability to transport you to a different time and place. It's a dish that was born out of necessity, a testament to the resourcefulness and resilience of the Korean people.
As you savor each bite, you can't help but feel a sense of connection to the history and culture that shaped this incredible recipe.
Whether you're a seasoned Korean food enthusiast or a newcomer to the cuisine, budae jeongol is a must-try dish that will leave a lasting impression on your taste buds and your heart.
Frequently Asked Questions
What Is the Origin of the Name "Budae Jeongol"?
The name "budae jeongol" comes from the Korean words for "army base" (budae) and "stew" (jeongol). It reflects the dish's origins, which were created by Koreans near US military bases after the Korean War using leftover American ingredients.
Are There Any Vegetarian or Vegan Versions of Budae Jeongol?
While traditional budae jeongol features meats, you can find vegetarian or vegan versions that swap in plant-based protein sources like tofu, mushrooms, or soy-based meat alternatives to create a meatless take on this popular Korean dish.
Can Budae Jeongol Be Made With Different Types of Meat?
Absolutely! You can make budae jeongol with different types of meat. Whether it's beef, pork, or even chicken, the stew's flavors will adapt to the protein you choose. Get creative and experiment to find your perfect version.
How Long Can Leftover Budae Jeongol Be Stored?
You can store leftover budae jeongol in the fridge for up to 4 days or in the freezer for 2-3 months. Make sure to let it cool completely before refrigerating or freezing.
Are There Any Unique Serving Traditions for Budae Jeongol?
When serving budae jeongol, you'll often find it's customized to individual tastes. Some may top it with a fried egg or kimchi, while others enjoy it straight from the communal pot. It's a shared experience, perfect for gathering with friends and family.
Ji-hoon is a skilled chef specializing in traditional and modern Korean cuisine. From savory bulgogi and kimchi to hearty stews and sizzling bibimbap, Ji-hoon’s recipes bring Korea’s bold, spicy, and umami-rich flavors to your kitchen. He focuses on authentic techniques and fresh ingredients that make Korean food so vibrant and flavorful.
Korean Cuisine
Menbosha Recipe: Korean Shrimp Toast You’ll Love
Create delicious Menbosha, a Korean shrimp toast that’s crispy and flavorful—discover the secret to this mouthwatering snack that everyone will enjoy!
You're going to love making Menbosha, a tasty Korean shrimp toast! Start by mixing fresh shrimp with chopped green onions, garlic, and some zesty seasonings. Spread this shrimp mixture on slices of bread, and fry them in hot oil until they turn golden brown and crispy. Once they're ready, let them drain on paper towels to get rid of any extra oil. Menbosha makes for a fun snack or appetizer, perfect for sharing with family and friends. Each bite is a delightful mix of flavors! Keep exploring, and you'll discover even more tasty tips and tricks!
Key Takeaways
- Menbosha is a delightful Korean shrimp toast combining crispy bread and seasoned shrimp, perfect as an appetizer or snack.
- The dish features fresh shrimp mixed with garlic, green onion, and sesame oil for a unique flavor profile.
- Fry the prepared shrimp toast in oil until golden brown for optimal crispiness, about 2-3 minutes per side.
- Serve Menbosha with dipping sauces like soy sauce or spicy mayo to enhance the taste experience.
- Enjoy making Menbosha with family and friends, fostering creativity and creating memorable culinary moments.
History
Menbosha, a delightful dish originating from Chinese cuisine, has a rich history that reflects its cultural significance. This tasty treat is often made with shrimp, bread, and spices, creating a crispy snack that's loved by many.
You might be surprised to learn that Menbosha has roots in Chinese culinary traditions, where it was enjoyed by families for generations. It's believed that this dish spread to other parts of Asia, adapting along the way to include different flavors and ingredients.
When you bite into Menbosha, you're tasting a blend of cultures and histories, as it combines elements from various regions. The dish gained popularity in places like Korea, where it became a beloved street food.
People of all ages enjoy Menbosha, making it not just a meal, but a fun social experience. Whether you're at a bustling market or enjoying it at home, each crispy piece tells a story of connection and community.
Ingredients:
- 500g ground meat (beef, lamb, or chicken)
- 1 medium onion, finely chopped
- 2 cloves garlic, minced
- 1 teaspoon ground cumin
- 1 teaspoon ground coriander
- 1 teaspoon paprika
- 1/2 teaspoon salt
- 1/2 teaspoon black pepper
- 1/4 teaspoon cayenne pepper (optional for heat)
- 1 cup breadcrumbs
- 2 large eggs
- 4 slices of bread
- Vegetable oil for frying
Cooking Instructions:
In a large bowl, combine the ground meat with the chopped onion, minced garlic, cumin, coriander, paprika, salt, black pepper, and cayenne pepper (if using). Mix well until all ingredients are evenly incorporated.
Take a slice of bread, dip it in water briefly, and then remove excess moisture. Place a spoonful of the meat mixture in the center of the bread and fold it over, pressing the edges to seal. Repeat this process with the remaining slices of bread and meat mixture.
In a shallow dish, whisk the eggs and then dip each bread-wrapped meat patty into the egg mixture, ensuring thorough coverage. Heat vegetable oil in a frying pan over medium heat and fry the Menbosha until golden brown on both sides, about 3-4 minutes per side. Remove and drain on paper towels.
Extra Tips:
When preparing Menbosha, ensure that the meat mixture is well-seasoned to enhance the flavors. You can also experiment with different spices or add chopped herbs like parsley or mint for a fresh touch.
If you prefer a healthier version, consider baking the Menbosha in the oven at 180°C (350°F) for about 20-25 minutes until golden brown, turning halfway through. Serve the dish warm for the best flavor, and don't forget to pair it with a delicious dipping sauce, such as tahini or a spicy yogurt dip, to elevate your Menbosha experience.
Cooking Steps
To make delicious Menbosha, you'll follow a straightforward series of cooking steps that ensure perfect results.
First, start by peeling and deveining your shrimp. Rinse them under cold water, then chop them finely. Next, mix the shrimp with a little salt, pepper, and your choice of garlic or ginger for extra flavor.
Now, grab your bread! You can use white or whole wheat slices. Cut off the crusts and flatten each slice with a rolling pin. Spread the shrimp mixture evenly on one side of each slice, then press another slice on top to make a sandwich.
Heat some oil in a frying pan over medium heat. While it's heating, beat an egg in a bowl. Dip each sandwich into the egg, coating it well.
Once the oil is hot, carefully place the sandwiches in the pan. Cook them for about 3-4 minutes on each side until they're golden brown and crispy.
Step 1. Prepare Shrimp Mixture
Creating a flavorful shrimp mixture is essential for achieving the perfect Menbosha. First, you'll want to gather fresh shrimp—make sure they're peeled and deveined. If you can, use medium-sized shrimp, as they'll give you a nice bite.
Next, chop the shrimp into small pieces. You can use a knife or a food processor, but be careful not to over-process them; you want some texture!
Once your shrimp is ready, transfer them to a mixing bowl. It's time to bring in some friends to the party! You can add a bit of finely chopped green onion for a pop of color and flavor. Some people like to include a splash of sesame oil to enhance the richness. If you want a touch of sweetness, try adding a pinch of sugar too!
Now, mix everything together gently with a spatula or your hands. It's important to combine all the ingredients well, but you don't want to mash the shrimp.
You're aiming for a nice, chunky mixture that will spread beautifully on your bread later. With this shrimp mixture prepped, you're one step closer to making delicious Menbosha!
Step 2. Add Seasoning to Shrimp
Now that you've prepared your shrimp mixture, it's time to add some seasoning to elevate the flavors. This step is super important because it makes your Menbosha taste amazing!
Start by grabbing some salt. Just a pinch will do, but don't be shy—taste as you go! Next, add some pepper for a little kick. It's like giving your shrimp a friendly nudge!
For a zesty twist, squeeze in some fresh lemon juice. It brightens the whole flavor and makes your shrimp sing! If you like a hint of sweetness, a dash of sugar can balance everything out.
Now, let's talk about garlic! Minced garlic adds a yummy aroma that everyone will love. You can also sprinkle in some sesame oil for that authentic Korean flavor. It's rich and nutty, making your dish extra special.
Once you've added your seasonings, gently mix everything together. You want all those flavors to hug each other!
Take a moment to taste the mixture. If it needs a little more seasoning, don't hesitate to add it. Trust your taste buds! You're almost ready for the next exciting step!
Step 3. Spread on Bread Slices
With your seasoned shrimp mixture ready, it's time to spread it onto your bread slices. Grab your favorite bread; white or whole grain works great! Lay out the slices on a clean cutting board or a plate.
Using a butter knife or a small spatula, scoop up some of that delicious shrimp mixture. You want to spread it evenly across each slice, covering the entire surface. Make sure you get a nice, thick layer. This will help create a tasty toast!
As you spread, think about how yummy each bite will be. You might even want to hum a little tune as you work! It's all about having fun in the kitchen. If you have extra shrimp mixture, don't worry; you can always save it for later or use it to make more toast!
Once you've spread the shrimp mixture on all your slices, take a moment to admire your creation. Each slice is now a little masterpiece, ready for its next big adventure!
Don't forget to clean up your workspace; we want to keep everything neat and tidy. You're doing an amazing job, and soon you'll have a delicious treat to share with family and friends!
Step 4. Fry Until Golden Brown
How do you know when your shrimp toast is ready to fry? First, you'll want to heat your oil in a pan over medium heat. A good rule of thumb is to test the oil by dropping a tiny bit of bread in. If it sizzles and bubbles, you're all set!
Now, carefully place your shrimp toast into the hot oil, making sure not to overcrowd the pan. This way, each piece gets enough space to cook evenly.
As your toast fries, keep an eye on it. You want that beautiful golden brown color! It usually takes about 2 to 3 minutes on each side. Use a spatula to gently flip the toast, but be careful not to splash the hot oil. You'll know it's time to flip when the bottom is crispy and a lovely shade of gold.
When both sides are perfectly browned, it's a sign that your shrimp toast is ready to come out. The aroma will fill your kitchen, making everyone eager to taste!
Step 5. Drain on Paper Towels
Once your shrimp toast has reached that perfect golden brown, it's time to remove it from the oil. Carefully lift each piece using a slotted spoon or tongs, letting the excess oil drip off. This step is super important because it helps keep your menbosha crunchy, and nobody likes soggy toast!
Now, grab a plate and lay down some paper towels. Place each piece of shrimp toast on the towels, giving them a little space. The towels will soak up any leftover oil, leaving your delicious menbosha light and crispy. You might want to pat the tops gently with another paper towel to get rid of even more oil.
While your shrimp toast is cooling, you can start thinking about dipping sauces. You could whip up some soy sauce or even a spicy mayo! Just imagine dipping that golden piece of toast into your favorite sauce—yum!
After a few minutes, once they're cool enough to handle, it's time to dig in. Your menbosha is ready to be enjoyed by family and friends. So gather around, share some smiles, and savor every bite!
Final Thoughts
As you wrap up your culinary adventure with menbosha, remember that this delightful dish isn't just about the taste but also the experience of making it. Cooking can be so much fun, especially when you get to try new flavors and techniques.
You've turned simple ingredients into something special, and that's something to be proud of!
Now that you've mastered menbosha, think about how you can share it with family and friends. Imagine their smiles when they bite into that crispy, shrimp-filled toast.
You've created a little piece of Korean delight that's perfect for snacking or serving at gatherings. Plus, it's a great way to introduce others to new foods.
Don't forget to experiment! You can add your favorite spices or try different types of bread.
Each time you make menbosha, you can discover something new. So, roll up your sleeves and get ready to whip up another batch.
With every toast you make, you're not just cooking—you're creating memories. Enjoy every bite, and happy cooking!
Frequently Asked Questions
Can I Use Frozen Shrimp for Menbosha?
Yes, you can use frozen shrimp for menbosha. Just make sure to thaw them thoroughly before cooking. This'll ensure they're tender and flavorful, giving you the delicious results you're aiming for in your dish.
What Bread Types Are Best for Making Menbosha?
For making menbosha, you'll want to choose soft white bread or brioche. These types absorb flavors well, creating a delicious contrast to the shrimp filling, enhancing the overall taste and texture of the dish.
How Do I Store Leftover Menbosha?
To store leftover menbosha, let them cool completely, then place them in an airtight container. Refrigerate for up to three days or freeze for longer storage. Reheat in the oven for best texture. Enjoy!
Can I Make Menbosha Gluten-Free?
Yes, you can definitely make menbosha gluten-free! Just swap regular bread with gluten-free options, like rice bread or gluten-free flour. Ensure all other ingredients are also gluten-free to enjoy this delicious treat without any worries.
What Dipping Sauces Pair Well With Menbosha?
When enjoying menbosha, you'll love dipping them in spicy mayo, sweet chili sauce, or soy sauce. Each adds a unique flavor that complements the shrimp toast perfectly, enhancing your overall tasting experience. Enjoy experimenting!
Ji-hoon is a skilled chef specializing in traditional and modern Korean cuisine. From savory bulgogi and kimchi to hearty stews and sizzling bibimbap, Ji-hoon’s recipes bring Korea’s bold, spicy, and umami-rich flavors to your kitchen. He focuses on authentic techniques and fresh ingredients that make Korean food so vibrant and flavorful.
-
Brazilian Cuisine3 months ago
Tacacá
-
Brazilian Cuisine3 months ago
Caldeirada
-
Polish Comfort Food3 months ago
Krupnik (Barley Soup)
-
Brazilian Cuisine3 months ago
Chicken in Brown Sauce
-
Southern Comfort Food3 months ago
Cheese Straws
-
African Cuisine3 months ago
Kedjenou (Ivory Coast)
-
Polish Comfort Food3 months ago
Vegetable Salad
-
American Diner Classics3 months ago
The Maillard Reaction: Understanding the Chemistry of Browning {Food Science and Cooking}