Kitchen Hacks and Tips
Japanese Tamagoyaki: The Art of the Rolled Omelette
Hone your culinary skills with the centuries-old Japanese art of tamagoyaki, a delicate and delicious rolled omelette that’s a breakfast and bento box favorite.
Tamagoyaki, the Japanese rolled omelette, is a centuries-old culinary treasure that showcases Japanese artistry. It's a beloved breakfast and bento box favorite, known for its delicate sweetness and fluffy, layered texture. To make it, you'll whisk eggs until frothy, add savory-sweet seasonings, and carefully cook thin layers before expertly rolling them up – it takes practice, but the result is a visually stunning and delicious treat. Explore the fascinating history and techniques behind this iconic Japanese dish, and you'll discover why mastering the art of tamagoyaki is a rewarding culinary journey.
Key Takeaways
- Tamagoyaki is a traditional Japanese rolled omelette characterized by its delicate, sweetened layers and fluffy yet firm texture.
- The dish's preparation requires carefully controlled temperature and a specialized rolling technique to achieve its signature layered appearance.
- Tamagoyaki has a long history in Japanese cuisine and is traditionally served at formal tea ceremonies, showcasing the chef's culinary artistry.
- Unique flavor profiles and presentation make tamagoyaki a versatile dish suitable for any meal, with the potential for various customizations and ingredient combinations.
- Mastering the art of tamagoyaki requires patience and continuous practice, as each attempt provides an opportunity for improvement and the satisfaction of a homemade creation.
History
Tracing the origins of Japanese tamagoyaki, this delicate and savory rolled omelet dates back centuries, with its roots firmly planted in the culinary traditions of Japan.
Emerging from the country's vibrant food culture, tamagoyaki has evolved over time, reflecting the ingenuity and artistry of Japanese cooks.
In the past, this dish was often served at formal tea ceremonies, showcasing the chef's mastery of technique. Each carefully rolled layer adds depth and complexity, creating a harmonious blend of flavors and textures.
Over the centuries, the preparation of tamagoyaki has been refined, with home cooks and professional chefs alike perfecting the art of gently rolling the eggs to achieve the signature layered appearance.
Today, tamagoyaki remains a beloved staple in Japanese cuisine, enjoyed for its delicate sweetness and unique presentation.
Whether savored on its own or incorporated into various dishes, this iconic rolled omelet continues to captivate and delight those who appreciate the art of traditional Japanese cooking.
Recipe
Tamagoyaki, or Japanese rolled omelette, is a beloved breakfast and bento box staple in Japan. The delicate layers of sweetened egg create a unique and satisfying texture that's both fluffy and slightly firm. Mastering the art of Tamagoyaki takes practice, but with the right technique, you can recreate this traditional dish in your own kitchen.
The key to achieving the signature layered appearance is to cook the egg in multiple thin layers, gently rolling the omelette as you go. This process may seem daunting at first, but the result is well worth the effort, as the layered effect not only looks beautiful but also enhances the flavour and mouthfeel of the dish.
- 4 large eggs
- 1 tablespoon dashi stock or water
- 1 tablespoon mirin
- 1 tablespoon soy sauce
- 1 teaspoon sugar
- Pinch of salt
In a small bowl, whisk together the eggs, dashi stock (or water), mirin, soy sauce, sugar, and salt until well combined.
Heat a small, rectangular omelette pan or tamagoyaki pan over medium heat and lightly grease the surface. Pour in a thin layer of the egg mixture and cook until just set, then gently roll the omelette towards you.
Pour another thin layer of egg onto the pan and continue rolling the omelette, repeating this process until all the egg mixture has been used. Slice the Tamagoyaki into desired portions and serve warm.
To ensure your Tamagoyaki turns out perfectly, be sure to use a pan with straight, slightly sloped sides to facilitate the rolling process.
Additionally, adjust the heat as needed to prevent the egg from overcooking or burning. With a little practice, you'll be able to create beautifully layered and delicious Tamagoyaki right in your own kitchen.
Cooking Steps
Crack and beat those eggs until they're nice and frothy.
Stir in some dashi stock, soy sauce, and a touch of sugar to get that perfect savory-sweet flavor.
Now, it's time to carefully roll up that omelette, cooking it on both sides for a beautifully layered tamagoyaki.
Step 1. Crack and Beat the Eggs
To begin, crack the eggs into a mixing bowl. You'll want to use fresh, high-quality eggs for the best results. Gently tap the eggs against the side of the bowl, then use your fingers to separate the shells and let the egg whites and yolks fall into the bowl. Be careful not to let any bits of shell drop in.
Now, it's time to beat the eggs. Using a pair of chopsticks or a small whisk, vigorously whisk the eggs until they're fully combined and the mixture is smooth and uniform. You don't want to see any streaks of yolk or white – the goal is a homogeneous, golden-yellow liquid.
As you whisk, try to incorporate a bit of air into the eggs. This will help create the light, fluffy texture you're going for in the final tamagoyaki.
Keep whisking until the eggs have a slightly frothy appearance on top.
Step 2. Add Dashi Stock
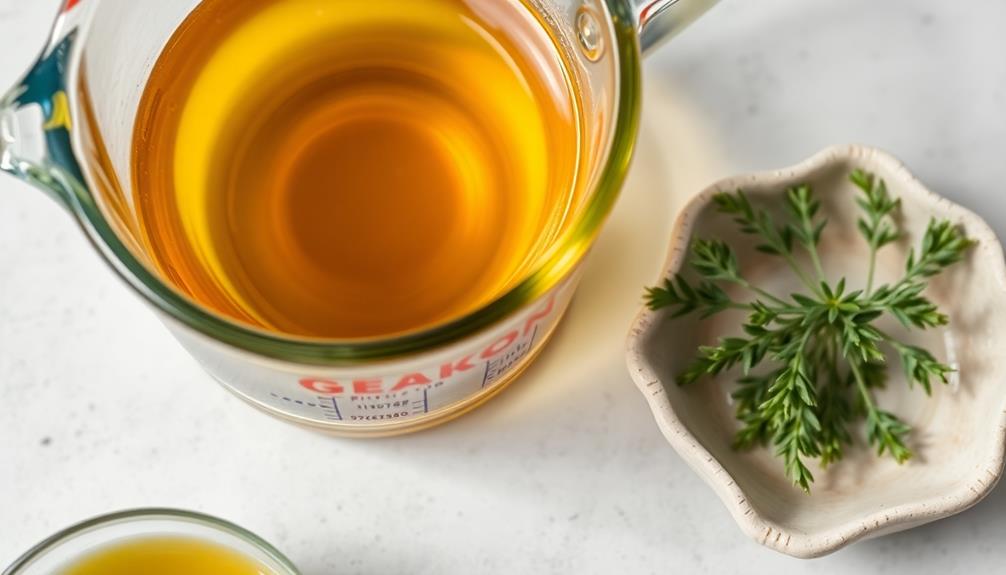
Next, add a bit of dashi stock to the beaten eggs. Dashi is a savory Japanese broth made from dried kelp and dried bonito flakes. It adds a wonderful umami flavor to the tamagoyaki.
Simply pour in a small amount of dashi, just enough to thin out the egg mixture slightly. This will help the eggs cook evenly and give them a delicate, silky texture.
Stir the dashi into the eggs until it's fully incorporated. You want the mixture to be smooth and pourable, but not too thin. This delicate balance is key to achieving the perfect tamagoyaki.
The dashi enhances the eggy flavor without overpowering it. It also helps the eggs roll up neatly into that signature layered rectangle shape.
Be sure to taste the egg mixture at this stage and adjust the seasoning as needed. Add a pinch of salt if necessary to balance the savory dashi.
Now you're ready to start cooking your tamagoyaki!
Step 3. Add Soy Sauce and Sugar
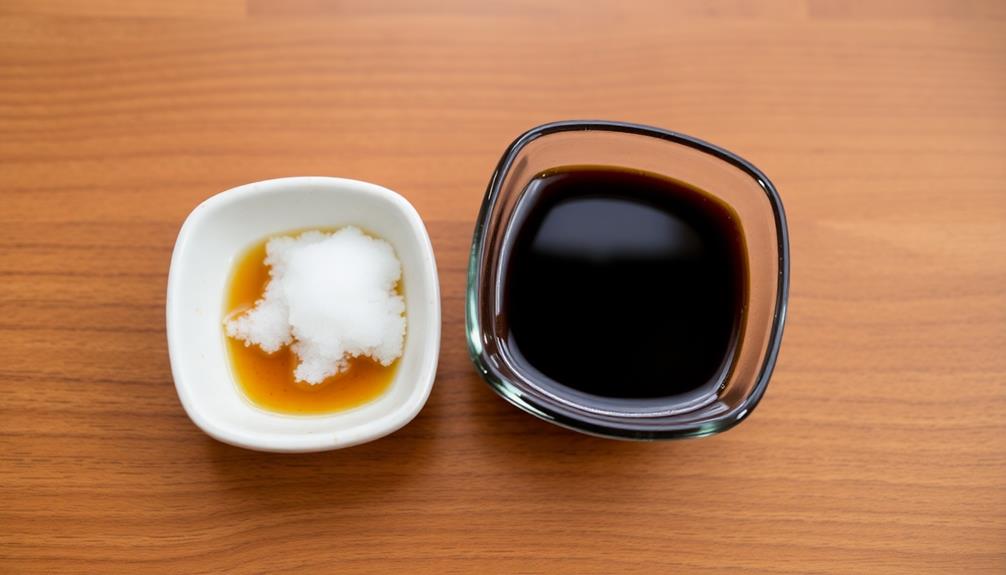
Adding a touch of soy sauce and sugar to the egg mixture is crucial for achieving the signature flavor and sheen of authentic tamagoyaki. The soy sauce adds a savory umami note, while the sugar balances the richness of the eggs with a subtle sweetness.
Be sure to use just the right amount – too much and the flavors will be overpowering, but too little won't give you that perfect tamagoyaki taste.
Gently whisk the soy sauce and sugar into the beaten eggs until they're fully incorporated. You want the mixture to be smooth and uniform, with no clumps of undissolved sugar. The soy sauce will also help to deepen the color of the cooked omelette, giving it that beautiful golden-brown hue.
As you roll the tamagoyaki, the soy sauce and sugar will continue to caramelize, creating a glistening, almost lacquered appearance on the surface of the omelette.
Each slice will be a delightful burst of sweet and savory flavors, making this traditional Japanese dish truly irresistible.
Step 4. Roll the Omelette Carefully
With the egg mixture seasoned to perfection, it's time to carefully roll the tamagoyaki.
Grab your wooden or silicone rolling mat and place it in front of you. Gently pour a thin layer of the egg mixture onto the mat, spreading it evenly from one end to the other.
As the egg starts to set, use your chopsticks or a small spatula to carefully roll the omelette into a tight cylinder. Don't worry if it's not perfect – the key is to roll it up slowly and steadily.
Once you've reached the end, use the mat to help you roll the tamagoyaki into a neat package.
Repeat this process, pouring more egg mixture and rolling it up, until you've used all the egg. The result should be a beautifully layered, compact roll.
Take your time and be gentle – the secret to a delicious tamagoyaki is in the careful rolling.
Step 5. Cook on Both Sides
Once the tamagoyaki is rolled up, you'll want to cook it on both sides to achieve that signature golden-brown color and custard-like texture.
Heat a clean, non-stick pan over medium heat. Gently place the rolled omelette seam-side down in the pan. Cook for 1-2 minutes until the bottom is lightly browned.
Carefully flip the roll using chopsticks or a spatula. Cook the other side for another 1-2 minutes until golden-brown.
Don't worry if the edges look a bit ragged – that's all part of the charm! The key is to cook it evenly on both sides to get that lovely caramelized crust.
Once both sides are cooked, you can remove the tamagoyaki from the pan and slice it into bite-sized pieces.
The slices will reveal the beautiful layers of egg inside. Serve the tamagoyaki warm, perhaps alongside some soy sauce or other dipping sauces for extra flavor. Enjoy this delightful Japanese delicacy!
Final Thoughts
Ultimately, tamagoyaki is a delightful Japanese omelette that rewards patient practice. Once you've mastered the rolling technique, you'll be able to create these fluffy, layered delights with ease. The sweet, savory flavour is truly unique and will impress your friends and family.
Don't be discouraged if your first few attempts don't turn out perfectly. Tamagoyaki takes time to perfect, but the satisfaction of slicing into your own homemade creation is worth the effort. Remember, practice makes perfect! With each batch, you'll get better at controlling the temperature, rolling the omelette, and achieving those distinctive layers.
The beauty of tamagoyaki lies in its simplicity. All you need are a few basic ingredients and the right tools.
Once you have the technique down, you can experiment with different flavour combinations to make it your own. Enjoy the process of mastering this classic Japanese dish – your taste buds will thank you!
Frequently Asked Questions
What Is the Origin of the Word "Tamagoyaki"?
You're curious about the origin of the word "tamagoyaki," aren't you? Well, it's a Japanese term that combines "tamago," meaning "egg," and "yaki," meaning "grilled" or "pan-fried." So, the word literally refers to a rolled omelette.
Can I Make Tamagoyaki Without a Special Pan?
You can make tamagoyaki without a special pan, but it'll be more challenging. Try using a square or rectangular nonstick skillet and rolling the cooked layers tightly as you go. It may take some practice, but you can still achieve that classic tamagoyaki look.
How Long Can Tamagoyaki Be Stored?
You can store tamagoyaki for up to 3 days in the refrigerator. Make sure to wrap it tightly in plastic wrap or place it in an airtight container to maintain its freshness.
Is Tamagoyaki Gluten-Free?
Yes, tamagoyaki is gluten-free. It's made with just eggs, dashi, and a bit of sugar and soy sauce, so there's no wheat or gluten-containing ingredients in the traditional recipe.
Can I Add Additional Ingredients to Tamagoyaki?
You certainly can add additional ingredients to tamagoyaki. Feel free to experiment with ingredients like vegetables, meats, or cheese to customize the flavor and texture of your rolled omelette.
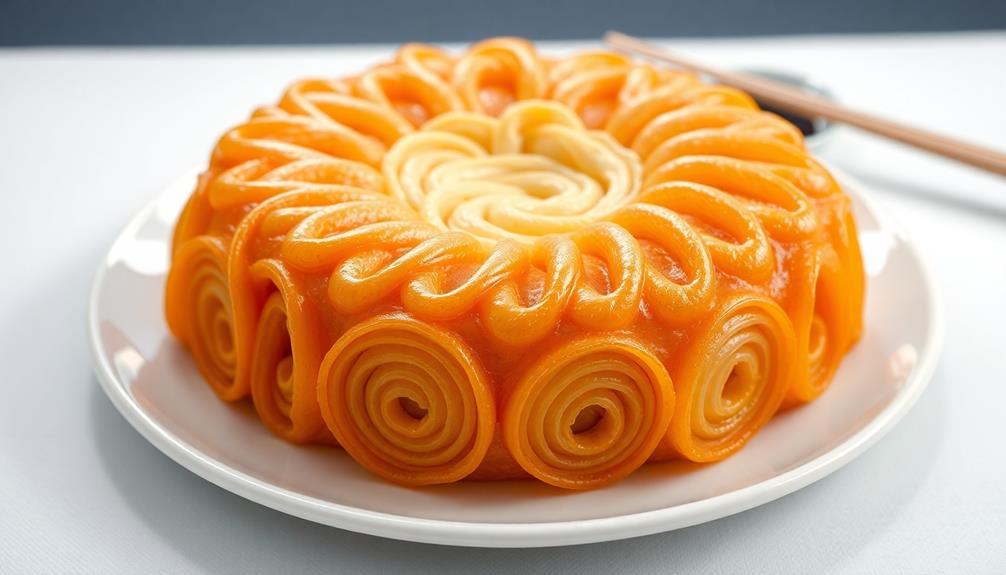
Kitchen Hacks and Tips
Knife Sharpening: Maintaining Your Most Important Tool
Blades that are razor-sharp unlock a world of culinary possibilities, transforming even the simplest tasks into a delightful experience. Discover the secrets of effortless knife sharpening.
Knife sharpening's been around forever – even ancient Egyptians knew how important it was! Your knives are your most crucial kitchen tools, so you'll want to keep them in tip-top shape. Whetstones, gentle pressure, and a consistent angle are the keys to sharpening like a pro. After, clean off any metal bits, wipe it down with oil, and you're all set. Regular honing and maintenance mean your knives will last for years. Taking good care of your blades makes cooking a breeze and way more fun. Ready to take your skills to the next level?
Key Takeaways
- Proper knife sharpening techniques, including the use of whetstones, ensure professional-level blade edges and reliable cutting performance.
- Regular honing and cleaning after each use prolong the lifespan of kitchen knives and maintain their sharpness.
- Consistent sharpening angle and the absence of burrs on the blade are crucial for maintaining optimal edge sharpness.
- Quality knives, when properly maintained, serve as essential and trustworthy kitchen tools that enhance cooking efficiency and enjoyment.
- Committing to basic knife care practices, such as proper storage and periodic professional sharpening, results in reliable and long-lasting kitchen companions.
History
Knife sharpening has, for centuries, been an essential skill in both culinary and industrial domains. From the ancient Egyptians who used sharpening stones to keep their blades keen, to the skilled blacksmiths of medieval Europe who forged and honed the weapons of knights, the art of sharpening has a rich and fascinating history.
In the kitchen, chefs have long relied on sharp knives to efficiently slice, dice, and chop their ingredients. A well-sharpened blade not only makes food preparation faster and easier, but it also helps to preserve the delicate flavors and textures of the ingredients.
Outside the kitchen, sharpening has been crucial for tradespeople, from carpenters and woodworkers to landscapers and mechanics, who rely on sharp tools to get the job done right.
Today, the tradition of knife sharpening lives on, with a variety of techniques and tools available to help keep your blades in top condition. Whether you prefer the classic whetstone or the convenience of an electric sharpener, the art of sharpening remains an essential skill for anyone who values a sharp, reliable edge.
Recipe
Knife sharpening is an essential skill for any home cook or professional chef. A sharp knife not only makes food preparation easier and more efficient, but it also improves safety by reducing the risk of slips and cuts. In this recipe, we'll guide you through the process of sharpening a knife using a whetstone, a time-honored method that ensures a razor-sharp edge.
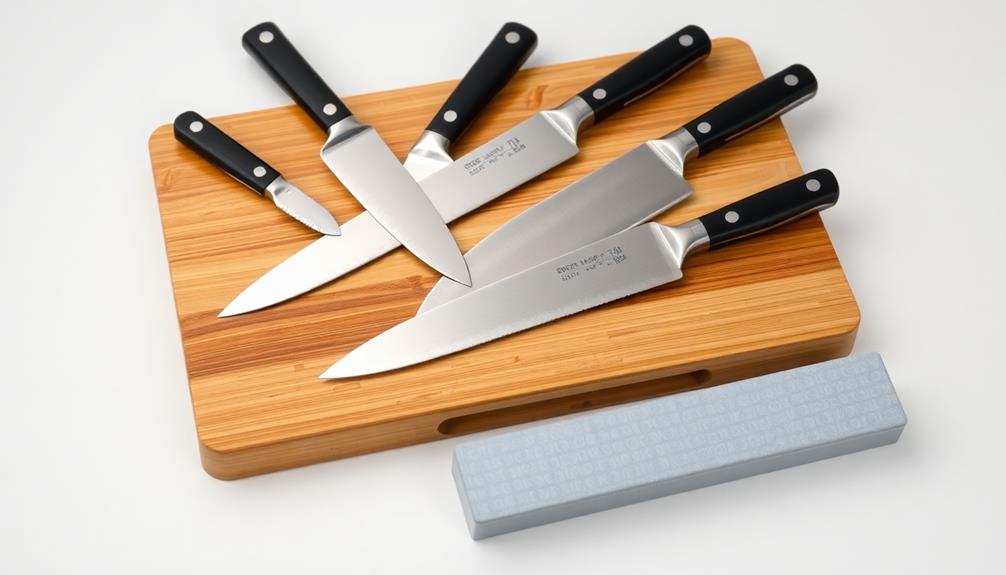
Whetstones, also known as sharpening stones, are the preferred tool for serious knife enthusiasts. These natural or synthetic stones come in a variety of grits, from coarse to fine, allowing you to both sharpen and hone your blade. The process may take some practice, but with the right technique, you can achieve a professional-level edge on your knives.
Ingredients:
- Whetstone (preferably a combination stone with coarse and fine grits)
- Knife to be sharpened
- Water for lubricating the stone
Instructions:
Soak the whetstone in water for about 10-15 minutes before use. This helps to create a slurry that aids the sharpening process.
Place the stone on a stable surface, such as a damp towel or non-slip mat, to prevent it from moving during sharpening. Hold the knife at a consistent 20-30-degree angle to the stone and apply gentle pressure as you move the blade across the surface, alternating between the left and right sides.
Repeat this process, moving from the coarse to the fine grit, until you achieve the desired sharpness.
When sharpening, it's important to maintain a consistent angle and apply even pressure throughout the stroke. Take your time and avoid rushing the process, as this can lead to an uneven edge.
After sharpening, be sure to clean and dry your knife thoroughly to prevent rust. With regular maintenance using a whetstone, your knives will stay sharp and reliable for years to come.
Cooking Steps
Before you start cooking, you'll want to make sure your knife is razor-sharp.
First, carefully clean the blade to get rid of any food or debris.
Then, use a sharpening stone to hone the edge, keeping the angle consistent as you work.
Remember to hone the blade gently – you don't want to damage the metal.
With a little care, your knife will be slicing and dicing like a pro in no time!
Step 1. Carefully Clean the Knife Blade
Once you've finished sharpening your knife, it's important to carefully clean the blade. Start by rinsing the knife under warm, soapy water. This will remove any metal filings or debris left over from the sharpening process.
Gently scrub the blade with a soft-bristled brush, making sure to get into all the nooks and crannies. Rinse the blade thoroughly until the water runs clear, then dry it completely with a clean, lint-free cloth.
Next, use a small amount of food-safe mineral oil or knife polish to wipe down the entire blade. This will help protect the metal and keep it from rusting. Be sure to get the oil or polish into the joints and along the spine of the blade.
Once you're done, give the knife a final wipe-down with a clean cloth to remove any excess.
Cleaning your knife properly after sharpening is crucial for maintaining its razor-sharp edge and ensuring it's ready for your next culinary adventure. With a little care, your knife will stay in tip-top shape for years to come.
Step 2. Use a Sharpening Stone
To sharpen your knife, you'll need a sharpening stone. This special stone will help you get that blade razor-sharp again!
First, soak the stone in water for 5-10 minutes. This will help the stone glide smoothly across the knife.
Place the stone on a stable surface, then run the blade along the stone at a 20-30 degree angle. Apply gentle pressure and move the knife in short, forward strokes.
Flip the knife and repeat on the other side. Keep alternating until you feel that the edge is nice and sharp. Remember to sharpen both sides evenly for the best results.
Rinse the knife when you're done to remove any metal filings. Be careful – the blade will be extremely sharp!
Now your knife is ready to slice, chop, and dice with ease. Sharpening takes some practice, but it's a great skill to have. Your trusty kitchen knife will thank you!
Step 3. Inspect the Sharpening Angle
After sharpening your knife, it's important to inspect the angle. You'll want to make sure the blade is nice and sharp, so hold it up to the light. See how the edge reflects the light? That's a good sign it's been sharpened properly.
Next, run your finger gently along the edge. It should feel smooth and burr-free. If you feel any little bumps or rough spots, you may need to go back and sharpen it some more.
The sharpening angle is key – you're aiming for around 20 to 25 degrees. Any steeper and the blade might be too fragile. Any less and it won't cut as well. Use your eyes and fingers to check that the angle looks right.
If it's a bit off, you can carefully adjust your sharpening technique next time. With a little practice, you'll get the hang of it and have super sharp knives that'll make cooking a breeze!
Step 4. Maintain Consistent Sharpening Angle
By maintaining a consistent sharpening angle, you'll ensure your knife's edge remains keen and effective. When you sharpen your knife, it's crucial to keep the blade at the same angle every time. This helps the edge stay nice and sharp, making your knife a joy to use in the kitchen.
Picture yourself gliding the blade along the sharpening stone at a perfect 20-degree angle. Feel the smooth, rhythmic motion as you carefully work the edge. It's important to keep the angle consistent, moving the knife in long, even strokes. This way, you'll gradually refine the edge, sharpening it to perfection.
Staying focused on that consistent angle takes some practice, but it's well worth the effort. Your knife will slice and chop with ease, making food prep a breeze.
Plus, a consistently sharp blade is safer to use – it'll glide through ingredients without slipping or skipping. So, keep that angle true, and enjoy the convenience of a super-sharp knife!
Step 5. Hone the Blade Gently
Gently hone the blade of your knife after each use to maintain its sharp edge. Use a honing steel – that's the long, skinny metal rod you might've seen chefs using.
Carefully draw the blade along the honing steel at a 20-degree angle, making 10-15 strokes on each side. You'll feel the blade gliding smoothly across the steel, almost like it's dancing! This realigns the edge of your knife, keeping it razor-sharp and ready for your next cooking adventure.
Be gentle, move slowly, and keep the angle consistent. You don't want to damage the blade.
After honing, give the knife a quick wipe down to remove any metal filings. Then it's ready to slice, chop, and dice with ease! Honing only takes a minute, but it makes a big difference. Your knife will feel brand new every time you use it.
Get in the habit of honing after each use, and your trusty blade will last for years to come.
Final Thoughts
Knife sharpening is an essential skill that can elevate your culinary experience.
With a sharp knife, you'll find chopping, slicing, and dicing a breeze. Imagine the satisfaction of gliding through thick-skinned vegetables or tender meats with ease, rather than struggling with a dull blade.
Remember, a well-cared-for knife is a joy to use.
It's like having a trusty sidekick in the kitchen, ready to assist you in creating delicious meals. Maintain your knives, and they'll reward you with years of faithful service.
Frequently Asked Questions
How Often Should I Sharpen My Kitchen Knives?
You should sharpen your kitchen knives every 6-12 months, depending on how frequently you use them. Regular sharpening will keep your blades sharp and help them last longer, ensuring they're always ready for your cooking tasks.
What Are the Best Tools to Sharpen Knives?
The best tools to sharpen your knives include manual knife sharpeners, electric knife sharpeners, whet stones, and professional sharpening services. Consider your budget, skill level, and the frequency of sharpening when choosing the right tool for your needs.
Can I Sharpen My Knives With a Grinder or Power Tool?
You can sharpen your knives with a grinder or power tool, but it requires skill and care to avoid damaging the blade. It's generally better to use a manual sharpener or have your knives professionally sharpened.
How Do I Sharpen Serrated Knives?
To sharpen serrated knives, you'll need a specialty sharpener or a small file. Carefully run the tool along the serrated edges, following the existing angle. Take your time and don't apply too much pressure to avoid damaging the blade.
What Should I Do if My Knife Is Damaged?
If your knife is damaged, don't try to sharpen it. Instead, you should take it to a professional knife sharpener who can properly assess the damage and repair or replace the blade as needed.
Kitchen Hacks and Tips
Meal Prep Sundays: A Week of Meals in One Day
Overcome your weekly meal planning woes with Meal Prep Sundays – a simple way to enjoy a week’s worth of healthy, homemade meals in just one day. Learn more.
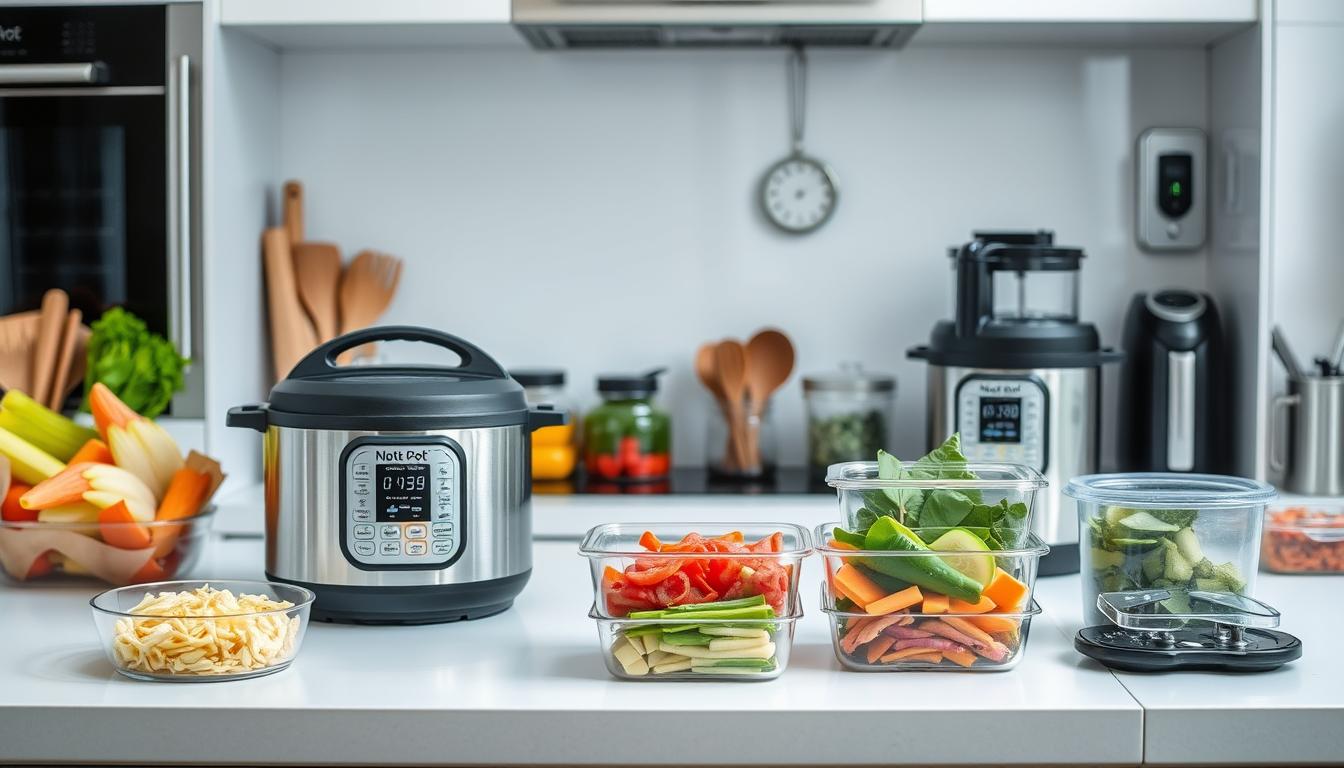
"Meal Prep Sundays" is the popular trend of making a whole week's worth of healthy meals in just one day! It started in the mid-1900s to help busy folks save time and money. Now, folks share their favorite meal prep tips online. You can make tasty recipes like baked chicken, quinoa, and roasted veggies. Chop, roast, and portion the ingredients ahead of time so you can easily reheat meals all week. Meal prepping is fun for families too – kids love helping in the kitchen! Preparing nutritious meals in advance makes healthy eating a breeze. Intrigued? Keep reading to learn more about the benefits of Meal Prep Sundays.
Key Takeaways
- Meal prepping on Sundays involves preparing multiple meals for the week, saving time and money by cooking in advance.
- Recipes can be customized to various dietary preferences and needs, ensuring balanced nutrition with proteins, vegetables, and complex carbohydrates.
- Meal prep containers allow for easy storage and reheating of the prepared meals, making weeknight dinners a breeze.
- The meal prep process involves steps like chopping vegetables, roasting them, and portioning the meals into individual containers.
- Engaging children and family members in the meal prep process can make it a fun and shared responsibility, promoting healthy eating habits.
History
The concept of meal prepping has been around for decades, with its roots tracing back to the mid-20th century. Back then, busy families and working individuals realized the benefits of planning and preparing their meals in advance. By setting aside time on Sundays, they could cook up a week's worth of healthy, delicious food – saving time and money in the long run.
Many parents today also find that meal prepping allows them to focus on family time and activities, like creating themed activities that reflect mom's interests for their children.
Over the years, the practice of "Meal Prep Sundays" has only grown in popularity. With the rise of social media, people have shared their meal prep tips, tricks, and mouthwatering recipes, inspiring others to join in. Nowadays, you can find countless online resources, from blogs to YouTube channels, all dedicated to the art of meal planning and preparation.
Whether you're a busy parent, a student on the go, or simply someone who wants to eat better, the concept of Meal Prep Sundays has stood the test of time. It's a simple, effective way to take control of your meals and your health – all while making the most of your Sundays.
Recipe
Meal Prep Sundays: Recipe
Preparing meals in advance can be a game-changer for busy weeknights. By dedicating a few hours on a Sunday, you can set yourself up for success throughout the week. This recipe for a hearty and flavorful dish is perfect for meal prepping, as it holds up well in the fridge and can be easily reheated.
Additionally, incorporating safe fruits like apples and blueberries can enhance the meal's nutrition while providing healthy snacks for both you and your furry friends throughout the week.
The combination of tender chicken, wholesome grains, and roasted vegetables creates a nutritious and satisfying meal that will keep you energized and satisfied. Plus, the customizable nature of this recipe allows you to tailor it to your preferences or dietary needs.
- Boneless, skinless chicken breasts
- Quinoa
- Broccoli florets
- Roasted sweet potatoes
- Olive oil
- Salt and pepper
- Garlic powder
- Onion powder
In a large skillet, sauté the chicken in a bit of olive oil over medium-high heat until cooked through, about 8-10 minutes per side. Season with salt, pepper, garlic powder, and onion powder.
While the chicken is cooking, prepare the quinoa according to package instructions. Roast the broccoli and sweet potatoes in the oven at 400°F for 20-25 minutes, tossing halfway, until tender and lightly browned.
To ensure your meal prep is a success, consider portioning out the components into individual containers for easy grab-and-go meals. The chicken, quinoa, and roasted vegetables will keep well in the refrigerator for up to 4 days.
When ready to enjoy, simply reheat and you'll have a delicious and nutritious meal ready in minutes.
Cooking Steps
Alright, let's get cookin'! First, you'll want to preheat your oven to 400°F.
While the oven is heating, consider incorporating some of the essential low carb foods into your meal prep, such as non-starchy vegetables and healthy fats like olive oil low carb foods.
Next, chop up those veggies into nice, bite-sized pieces.
Then, pop them in the oven and roast them at 400°F until they're nice and tender.
Step 1. Preheat Oven to 400°F
Preheating your oven to 400°F is a crucial first step in the cooking process. This toasty temperature ensures your food cooks evenly and thoroughly. Simply turn the knob on your oven to the 400°F mark, and you're well on your way to meal prep success!
As the oven heats up, you'll hear the fan whirring and feel the warmth radiating from the appliance. In no time, the oven will beep, letting you know it's reached the perfect temperature.
Now that your oven is preheated, you can start preparing your ingredients. Whether you're roasting vegetables, baking chicken, or making a quiche, this hot oven will work its magic.
The high heat will caramelize the outside of your food, locking in all the delicious flavors. Get ready for your kitchen to be filled with mouthwatering aromas!
Preheating the oven is an easy but important step that sets the stage for a delicious meal prep Sunday.
Step 2. Chop Vegetables Into Bite-Sized Pieces
After preheating the oven, start chopping your vegetables into bite-sized pieces. This is where the fun really begins! Grab your cutting board and a sharp knife, and get ready to slice and dice.
First, tackle those carrots – chop them up into little coins or sticks, whichever you prefer. Then, move on to the zucchini, dicing it into small cubes. Don't forget the bell peppers – slice them into strips or chop them up into colorful squares.
And lastly, mince that garlic – the more the merrier!
As you chop, you'll start to notice the wonderful aromas filling your kitchen. The sizzle of the veggies roasting in the oven is like music to your ears.
Before you know it, you'll have a whole array of perfectly prepped produce, ready to be tossed into your favorite recipes. Isn't meal prep Sunday the best?
Get ready for a week of delicious and healthy homemade meals!
Step 3. Roast Vegetables at 400°F
Once the oven has reached the desired temperature, you'll want to start roasting those chopped vegetables. Preheat your oven to 400°F and grab a large baking sheet.
Arrange the prepared veggies in a single layer, making sure they've plenty of space to breathe. You don't want them crowded, or they'll end up steaming instead of roasting. Drizzle the veggies with a touch of olive oil and give them a good sprinkle of salt and pepper. Feel free to add any other seasonings you love – garlic powder, Italian herbs, or even a dash of paprika would be delicious.
Once everything is nicely coated, pop the baking sheet into the hot oven. Set a timer for 20-25 minutes, and get ready for your kitchen to be filled with the most amazing roasted veggie aroma.
Give the veggies a gentle toss halfway through to ensure even cooking. When the timer goes off, you'll have perfectly tender, caramelized vegetables ready to be enjoyed all week long!
Step 4. Combine Roasted Vegetables in Containers
With your roasted veggies now hot and fragrant from the oven, it's time to start portioning them out for the week ahead.
Grab some airtight containers and start dividing up the delicious roasted carrots, brussels sprouts, and sweet potatoes you prepared earlier. Be sure to scoop up all those caramelized bits – they're the best part!
Carefully spoon the veggies into the containers, leaving a little room at the top for mixing and tossing later.
Pop the lids on tight, and you're all set. Now you've got healthy, flavorful veggie bases ready to go for quick meals and snacks throughout the week.
Just wait until you smell that savory, roasted aroma every time you open the fridge. It's going to make your mouth water!
With your veggie prep done, you can breathe a sigh of relief. Sunday meal prep is well underway, and you're one step closer to a week of delicious, homemade eats.
Step 5. Portion Meals Into Meal Prep Containers
To continue your Sunday meal prep, grab your portioned roasted vegetables and start dividing them into individual meal prep containers.
These handy containers will make your weekdays a breeze! Scoop those delicious veggies into each section, making sure to fill them up nice and full. Don't be afraid to pack them in there – you want your meals to be satisfying.
Next, it's time to add your protein. Whether it's grilled chicken, roasted tofu, or juicy meatballs, carefully place a portion in each container. Yum! The savory flavors will pair perfectly with the veggies.
Finally, finish off your meals by adding a complex carb, like brown rice or quinoa. Fluff it up and evenly distribute it across your containers.
Now you've got a complete, balanced meal ready to go!
Close up the lids and pop your meal prep containers in the fridge. All your hard work today means you can just grab and go all week long. Isn't that exciting? You're on your way to eating healthy with ease!
Final Thoughts
As you wrap up your Meal Prep Sundays, remember that consistency is key. By dedicating a little time each week to plan and prepare your meals, you'll be on your way to a healthier lifestyle.
Think of meal prepping as a fun, easy way to take care of yourself and your family.
Now that you've learned how to portion your meals into containers, you can experiment with new recipes and flavors.
Get the whole family involved – kids love helping in the kitchen! Try out different spices, herbs, and ingredients to keep things interesting.
And don't forget to have a few go-to, no-fuss meals that you can whip up in a pinch.
The best part? All your hard work on Meal Prep Sundays will pay off throughout the week.
Enjoy the satisfaction of grabbing a nutritious, delicious meal without the stress of cooking every night.
With a little planning, you've got this!
Frequently Asked Questions
What Are the Benefits of Meal Prepping?
You'll save time, money, and reduce stress by meal prepping. It helps you eat healthier, avoid impulse purchases, and ensures you always have a nutritious meal on hand. Meal prepping sets you up for success throughout the week.
How Long Does It Take to Meal Prep for a Week?
The time it takes to meal prep for a week can vary, but you can typically complete it in 1-2 hours. The key is to plan ahead, use efficient techniques, and prepare multiple meals at once.
Can I Customize Meal Prep Recipes to My Dietary Needs?
Absolutely! You can customize meal prep recipes to accommodate your dietary needs. Modify ingredients, adjust portion sizes, and experiment with alternative cooking methods to create meals that cater to your preferences and health goals.
How Do I Store Prepped Meals to Maintain Freshness?
You can store prepped meals by using airtight containers, dividing portions, and refrigerating or freezing them. This helps maintain freshness and ensures your meals stay tasty throughout the week.
What Essential Kitchen Tools Are Needed for Meal Prepping?
You'll need essential tools like air-tight containers, a quality blender, food processor, and slow cooker to streamline your meal prep. These versatile appliances make it easy to prep and preserve a week's worth of nutritious meals.
Kitchen Hacks and Tips
Australian Avocado Toast: The Global Breakfast Sensation
Discover the captivating story behind the global phenomenon that is Australian avocado toast, a breakfast sensation that has captured the hearts and palates of brunch enthusiasts worldwide.
Australian avocado toast has taken the world by storm, captivating brunch enthusiasts globally with its delightful fusion of flavors and textures rooted in the country's culinary heritage. This beloved breakfast dish emerged in early 20th century Australia, influenced by Mediterranean cuisine and health trends. It's evolved into a versatile staple featuring ripe avocado, crusty sourdough, and tasty toppings like feta and microgreens. The success lies in using fresh, high-quality ingredients that recreate that coveted cafe experience at home. Discover more about the cultural and economic impact of this global breakfast sensation.
Key Takeaways
- Avocado toast originated in early 20th century Australia, influenced by Mediterranean cuisine and health trends, and gained global popularity as a brunch staple.
- The dish features essential ingredients like sourdough bread, ripe avocado, feta, and microgreens, emphasizing the use of fresh, high-quality components.
- The cooking process involves toasting the bread, mashing the avocado, and garnishing with cracked black pepper, olive oil, and microgreens.
- Avocado toast is nutritionally beneficial, being rich in healthy fats, fiber, and essential vitamins, making it suitable for various diets.
- The cultural and economic impact of Australian avocado toast includes shifting food trends, boosting local economies, and promoting sustainability and tourism.
History
In the early 20th century, avocado toast emerged as a beloved breakfast dish in Australia. It all started when Aussies discovered the creamy, nutty flavor of avocados and how delicious they tasted when mashed and spread on crispy, golden toast. This simple, yet satisfying combo quickly became a breakfast staple across the country.
As time passed, Australians started experimenting with different toppings, like tomatoes, feta, and even a sprinkle of chili flakes. The dish evolved, becoming more than just avocado and toast – it was a canvas for creative culinary expression.
Cafes and eateries began offering their own unique takes on avocado toast, each with its own signature twist.
Today, avocado toast is a global phenomenon, but it all traces back to its humble beginnings in Australia. Whether you prefer it classic or with a modern flourish, this beloved breakfast dish continues to delight and inspire food enthusiasts around the world.
Recipe
Avocado toast has become a beloved breakfast or brunch staple, and the Australian take on this dish is a delightful twist. The creamy, nutrient-rich avocado is the star, complemented by the crunch of toasted bread and the zesty flavors that are a hallmark of Australian cuisine.
To elevate your avocado toast experience, consider incorporating a bit of flavored butter for an extra layer of richness and taste.
The key to a perfect Australian avocado toast lies in the balance of fresh, high-quality ingredients and the careful preparation. This recipe will guide you through the steps to create a cafe-worthy dish in the comfort of your own kitchen.
- 2 slices of sourdough bread
- 1 ripe avocado, mashed
- 2 tablespoons crumbled feta
- 1 tablespoon chopped fresh cilantro
- 1 tablespoon lemon juice
- 1 teaspoon olive oil
- Salt and pepper to taste
- Red pepper flakes (optional)
Toast the sourdough bread until golden brown. In a small bowl, mash the avocado and mix in the feta, cilantro, lemon juice, and olive oil. Season with salt and pepper to taste.
Spread the avocado mixture evenly over the toasted bread slices. Garnish with a sprinkle of red pepper flakes, if desired.
For the best experience, use a ripe but firm avocado, and adjust the lemon juice and seasoning to your personal taste preferences. Enjoy your Australian-inspired avocado toast as a delicious and nutritious start to your day.
Cooking Steps
Toast the bread until it's perfectly golden.
Mash the avocado until it's nice and creamy.
Sprinkle some cracked black pepper on top, then drizzle with a touch of olive oil.
Step 1. Toast the Bread
Preheat your oven to 400°F (200°C). Grab your favorite slices of bread – sourdough, whole wheat, or whatever you prefer.
Arrange them on a baking sheet and pop them in the oven. Toast the bread for 5-7 minutes, keeping an eye on it to ensure it doesn't burn. You want the slices to be golden-brown and crispy on the edges.
Once the bread is toasted to perfection, remove the baking sheet from the oven. Carefully transfer the slices to a plate or cutting board.
Grab a knife and gently spread a generous amount of butter or olive oil over the warm, toasted surfaces. This will create a delightful, melty base for your avocado.
Now you're ready to mash, slice, or arrange the creamy avocado on top of your perfectly crisp toast. The stage is set for the final, flavorful touch – your favorite avocado toast toppings!
Step 2. Mash the Avocado
With the toast ready, it's time to turn your attention to the avocado. Grab a ripe, creamy avocado and place it on a clean cutting board.
Using a sturdy fork, start mashing the avocado, pressing down and turning the fork to create a smooth, spreadable consistency. Don't be afraid to get a little vigorous – you want the avocado to become nice and creamy.
As you mash, you can add a squeeze of fresh lemon juice, a pinch of salt, and a dash of pepper to bring out the natural flavors of the avocado.
Keep mashing and mixing until the avocado is an irresistible, velvety spread. Feel free to taste as you go, adjusting the seasoning to your liking.
Once it's perfectly mashed, you're ready to spoon the avocado goodness onto your crisp, golden toast. Get ready for a flavor explosion that will transport your taste buds straight to the sun-drenched cafes of Australia.
Step 3. Sprinkle With Cracked Black Pepper
A light dusting of cracked black pepper is the final touch to elevate your avocado toast. It adds a subtle kick of flavor that perfectly complements the creamy avocado.
Simply grab your favorite peppercorn grinder and give it a few twists over the top of your toast. You'll hear the satisfying crackle as the peppercorns release their aromatic oils, filling the air with a warm, peppery scent.
The black pepper's zesty notes create a wonderful contrast to the rich avocado, making every bite more interesting. As you take that first delightful bite, the black pepper tingling on your tongue, you'll wonder how you ever enjoyed avocado toast without this final flourish.
It's a simple step that takes just seconds but elevates your breakfast to something truly special. So don't skip the pepper – it's the perfect finishing touch to make your Australian avocado toast shine.
Step 4. Drizzle With Olive Oil
After adding the perfect touch of cracked black pepper, it's time to drizzle your avocado toast with a delicate layer of high-quality olive oil. This finishing touch brings the flavors together beautifully. The rich, fruity notes of the olive oil complement the creaminess of the avocado, creating a harmonious balance on your plate.
Gently drizzle the olive oil over the top of the toast, using just enough to lightly coat the surface. You don't want to overpower the other ingredients, but rather enhance them with a subtle richness. The olive oil will soak into the bread, adding a delightful moisture and depth of flavor.
As you take your first bite, you'll taste the interplay of the peppery, buttery avocado and the smooth, grassy olive oil. It's a simple yet sublime combination that epitomizes the essence of Australian avocado toast.
Get ready to savor every bite of this global breakfast sensation!
Step 5. Garnish With Fresh Microgreens
Topping off your avocado toast with a vibrant garnish of fresh microgreens elevates the dish to new heights. These tiny, nutrient-packed leaves add a burst of color, texture, and flavor that perfectly complements the creamy avocado.
Microgreens are the young seedlings of various herbs, greens, and vegetables, and they pack a powerful punch of vitamins, minerals, and antioxidants.
Simply scatter a handful of the delicate microgreens over the top of your toast, letting their vibrant hues and delicate stems cascade across the surface. The peppery, earthy, or sweet notes of the microgreens will dance on your tongue, creating a symphony of flavors.
Their crunchy texture also provides a delightful contrast to the soft, smooth avocado. This simple garnish transforms your avocado toast into a truly Instagram-worthy creation, making it a feast for both the eyes and the palate.
Final Thoughts
Ultimately, the Australian avocado toast experience offers a delightful fusion of flavors, textures, and cultural influences that tantalize the palate.
Whether you're enjoying it for breakfast, brunch, or a light lunch, this dish is a true delight. The creamy avocado, combined with the crunchy toast and fresh microgreens, creates a harmonious balance that's simply irresistible.
But the beauty of this dish goes beyond just the taste – it's also a testament to the global reach of Australian cuisine and the way it has captured the hearts and stomachs of food enthusiasts around the world.
As you savor each bite, you'll be taken on a culinary journey that celebrates the diversity and innovation that makes Australian food so special.
Frequently Asked Questions
Where Can I Find the Best Avocado Toast in Australia?
You'll find the best avocado toast in Australia's cafes and brunch spots, where chefs showcase their unique takes on this beloved breakfast staple. From classic to creative, there's an avocado toast to suit every taste throughout the country.
How Can I Make My Avocado Toast More Visually Appealing?
To make your avocado toast more visually appealing, try topping it with thinly sliced radishes, crumbled feta, and a sprinkle of paprika. You can also get creative with the bread, using different types or shapes for a unique presentation.
Is Avocado Toast a Healthy Breakfast Option?
Avocado toast can be a healthy breakfast option if you choose whole-grain bread, top it with nutrient-rich avocado, and add extras like tomatoes, eggs, or a sprinkle of feta. The healthy fats and fiber will keep you feeling full.
How Long Does It Take to Prepare Avocado Toast?
Preparing avocado toast is a quick and easy task. It'll take you just 5-10 minutes to mash the avocado, toast the bread, and assemble your delicious breakfast. With minimal effort, you can enjoy a nutritious and filling start to your day.
Are There Any Vegan or Gluten-Free Variations of Avocado Toast?
Yes, there are vegan and gluten-free avocado toast variations. You can use mashed avocado on gluten-free bread or toast, and top it with plant-based ingredients like sliced tomatoes, radishes, or a sprinkle of nutritional yeast for a tasty vegan version.
-
Southern Comfort Food1 month ago
Cheese Straws
-
Brazilian Cuisine1 month ago
Caldeirada
-
Southern Comfort Food1 month ago
Creamed Corn
-
Brazilian Cuisine1 month ago
Chicken in Brown Sauce
-
Brazilian Cuisine1 month ago
Tacacá
-
Southern Comfort Food1 month ago
Squash Casserole
-
Southern Comfort Food1 month ago
Chocolate Gravy
-
African Cuisine1 month ago
Poulet DG (Cameroon)