Connect with us

International Breakfast Dishes

Australian Vegemite on Toast

Lively and savory, the iconic Australian treat of Vegemite on toast is a national treasure that connects generations with its umami-rich flavor – learn more about this beloved spread.

Published

on

vegemite toast delightfully australian

You'll love the classic Australian treat of Vegemite on toast! This iconic savory spread was first created in the 1920s and has become a national treasure, connecting generations with its delightfully umami flavor. Simply toast your bread to a golden brown, then spread a thin layer of Vegemite across the surface. For a creamy contrast, add a touch of butter. The salty, rich taste is sure to delight your taste buds. Vegemite is packed with essential B vitamins, making it a nutritious snack. Once you've tried it, you'll understand why Vegemite holds such a special place in the hearts of Australians. There's more to discover about this beloved spread…

Key Takeaways

  • Vegemite is a beloved Australian savory spread made from brewer's yeast extract, known for its umami-rich flavor profile.
  • The traditional way to enjoy Vegemite is to spread it on toast, often with a thin layer of butter or margarine for creamy contrast.
  • Vegemite is rich in essential B vitamins and provides dietary fiber, making it a nutritious and low-calorie option.
  • The optimal way to prepare Vegemite on toast is to lightly apply the spread, as it has a strong, concentrated flavor.
  • Vegemite has gained global recognition as a unique Australian culinary icon, with variants and fusion recipes emerging worldwide.

History

Dating back to the early 1920s, Vegemite's history is intertwined with the cultural identity of Australia. This beloved spread was created by a young food technologist named Dr. Cyril Callister, who was tasked with finding a use for the leftover brewer's yeast.

After much experimentation, he developed a savory, salty paste that quickly became a breakfast staple across the country. Vegemite's unique flavor, made from concentrated yeast extract, vitamins, and minerals, quickly won over Aussies who couldn't get enough of the dark, almost black spread.

Over the decades, Vegemite has become more than just a food – it's a symbol of national pride. Whether you layer it thickly or spread it thinly, the taste of Vegemite on crispy toast is a true taste of Australia.

From the bustling cities to the remote outback, Vegemite has earned its place as an Aussie icon, connecting generations and creating delicious memories one bite at a time.

Recipe

Vegemite is a savory and umami-rich spread that has become an iconic part of Australian cuisine. When paired with the simplicity of toast, it creates a satisfying and comforting snack that can be enjoyed any time of the day. The key to a perfect Vegemite on toast is to strike the right balance between the robust flavor of the spread and the crisp, golden toast.

Advertisement

The beauty of this dish lies in its simplicity. It's a quick and easy meal that can be prepared in mere minutes, making it the perfect choice for a busy morning, a mid-afternoon pick-me-up, or a late-night indulgence.

Ingredients:

  • 2 slices of bread (your preferred type)
  • Butter or margarine
  • Vegemite

Instructions:

Toast the bread to your desired level of crispness. Spread a thin layer of butter or margarine on each slice of toast. Then, using a small spoon, apply a thin and even layer of Vegemite across the surface of the toast, taking care not to overwhelm the flavors.

When it comes to enjoying Vegemite on toast, it's important to remember that a little goes a long way. The strong, savory taste of Vegemite can be quite intense, so it's best to start with a light hand and gradually increase the amount to suit your personal preferences.

Additionally, some people enjoy a slightly thicker layer of Vegemite, while others prefer a more subtle application. Experiment and find the perfect balance that suits your taste buds.

Advertisement

Cooking Steps

Toast the bread until it's golden brown.

Spread a layer of that iconic Vegemite over the toast, then add a thin smear of cool, creamy butter on top.

Sprinkle on some black pepper if you're feeling fancy – this savory treat is ready to enjoy!

Step 1. Toast the Bread

toast the bread first

To begin, grab a slice of bread and place it in the toaster.

Listen closely as the toaster springs to life, heating up the bread and making it crisp and golden. You'll start to smell the delightful aroma of the toasting bread, filling the air with its irresistible scent.

Watch as the bread slowly turns a lovely shade of brown, the perfect canvas for your Vegemite spread.

Advertisement

Once the toast pops up, carefully remove it, being mindful of any lingering heat.

The surface should feel pleasantly firm, with a satisfying crunch when you press on it. If you'd like, you can give the toast a gentle swirl to evenly distribute the heat.

Now it's time to slather on that savory Vegemite, spreading it right to the edges for maximum flavor in every bite.

With the toast perfectly toasted, you're one step closer to enjoying the bold, umami-rich taste of this classic Australian delight.

Step 2. Spread Vegemite Evenly on Toast

evenly spread vegemite toast

With your freshly toasted bread in hand, take a generous dollop of Vegemite and begin spreading it evenly across the surface.

Use the back of a spoon to gently coax the dark, savory spread from the jar, coating the toast in a delightful layer. Smooth it out, making sure to reach the edges so every bite can enjoy the bold, umami flavor.

Advertisement

Don't be shy – Vegemite is meant to be applied liberally! The key is to get an even distribution, creating a consistent texture and taste in each mouthful.

As you work, notice the aroma wafting up, hinting at the deliciousness to come. Keep going until the toast is completely covered, then step back and admire your handiwork.

The Vegemite should glisten invitingly, ready to tantalize your tastebuds. Now, all that's left is to take a big bite and savor the authentic Australian experience!

Step 3. Add a Thin Layer of Butter

apply butter thinly evenly

After evenly coating the toast with Vegemite, add a thin layer of butter. The cool, creamy butter will complement the bold, salty Vegemite perfectly.

Gently spread the butter from edge to edge using a butter knife. You want just enough to create a light, even coating – not so much that it overwhelms the Vegemite. The contrast of the buttery richness and the savory, umami-packed Vegemite is absolutely divine.

As you press the knife against the toast, you'll hear a satisfying scratch, letting you know the butter is evenly distributed. The golden-brown surface of the toast will glisten with the added butter, making your mouth water in anticipation.

Advertisement

This simple step enhances the Vegemite's flavor and creates a smooth, creamy texture that's truly irresistible. Get ready for a burst of Australian flavor in every bite!

Step 4. Enjoy the Savory Treat

savor your delicious creation

Take a deep breath and savor the intoxicating aroma wafting from the perfectly toasted bread. The dark, glossy spread has been evenly applied, creating a savory canvas for your taste buds.

Gently pick up the slice, feeling the slight warmth radiating through the crust. Bring it close to your face and inhale the bold, umami-rich scent that's uniquely Vegemite.

With eager anticipation, take a small bite, letting the flavors dance on your tongue. The salty, yeasty goodness mingles with the creamy butter, creating a symphony of taste.

Chew slowly, savoring each morsel as it melts in your mouth. The texture is perfectly balanced – not too soft, not too crispy.

As you swallow, feel the satisfying sensation travel down your throat. A smile spreads across your face, and you can't help but take another bite, eager to experience the delightful flavors once more.

Advertisement

Vegemite on toast has never tasted so good.

Step 5. Sprinkle With Black Pepper (Optional)
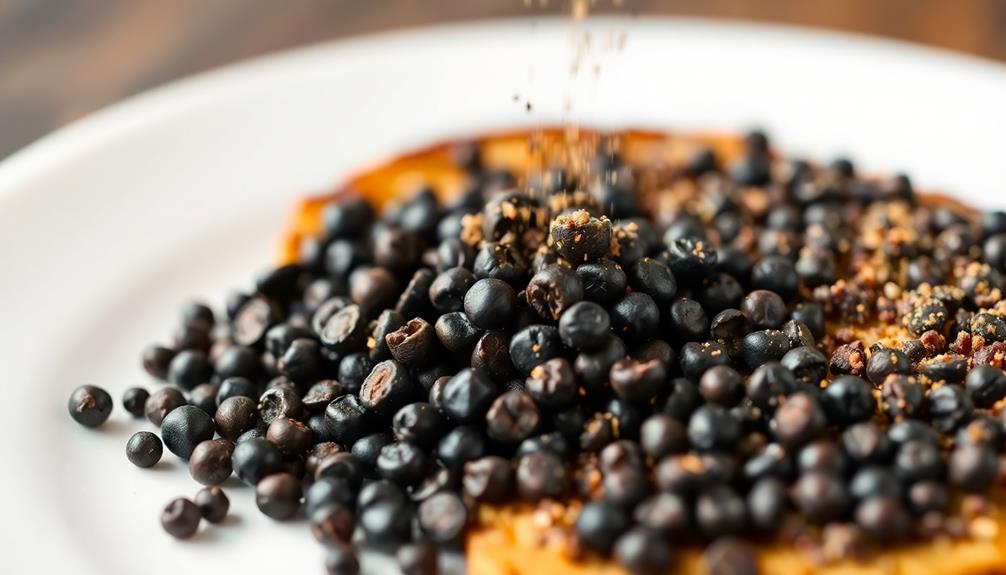
add black pepper optional

Your Vegemite-topped toast is the perfect canvas for a light sprinkle of freshly ground black pepper. For an added layer of flavor, you can also drizzle a bit of high-quality olive oil over the toast. This will help enhance the richness of the Vegemite and give a subtle hint of fruitiness to the dish. If you’re feeling adventurous, you could even pair this with a traditional Peking duck recipe for a fusion of Australian and Chinese flavors. The salty umami of the Vegemite would complement the sweet and savory flavors of the duck perfectly.

Just a touch of this fragrant spice can really take your savory treat to the next level! Grab your pepper mill and give it a few twists over the golden toast, letting the tiny black specks dot the surface.

The peppery aroma will instantly awaken your senses, complementing the rich, salty Vegemite flavor. Feel free to sprinkle on as much or as little as you like – a light dusting is often all you need to add a delightful zing.

The contrast of the bold Vegemite and the earthy, warm pepper is simply irresistible. Go ahead, give it a try! You won’t be disappointed by the explosion of flavors in your mouth. If you’re feeling adventurous, you can even try spreading the Vegemite and pepper mixture on a warm piece of toast for breakfast. For a fresh twist, consider making a pesto with alternative herbs to complement the bold flavors.

You'll be surprised by how a simple seasoning can elevate your humble slice of Vegemite toast into something truly extraordinary.

Advertisement

Dig in and enjoy every savory, peppery bite.

Final Thoughts

Ultimately, Vegemite on toast remains an integral part of Australian cuisine and culture.

Whether you're a lifelong Aussie or trying it for the first time, this beloved snack is sure to delight your taste buds. The salty, umami-rich spread pairs perfectly with the crispy, golden bread, creating a delightful contrast in flavors and textures.

As you take that first bite, the aroma of freshly toasted bread and the distinct, savory essence of Vegemite will tantalize your senses.

The creamy, smooth texture of the spread melts in your mouth, leaving a satisfying and comforting sensation.

Advertisement

With each subsequent slice, you'll find yourself falling deeper in love with this quintessential Australian treat.

Frequently Asked Questions

What Is the Origin of Vegemite's Distinctive Flavor?

The unique, umami-rich flavor of Vegemite comes from its high concentration of yeast extract, which is packed with savory compounds like glutamates and nucleotides that stimulate your taste buds, creating that distinctive, love-it-or-hate-it experience.

How Long Can an Opened Jar of Vegemite Be Stored?

Once you've opened a jar of Vegemite, it can be stored in the fridge for up to 6 months. Just be sure to keep it tightly sealed to prevent it from drying out and losing its signature bold flavor.

Can Vegemite Be Used in Recipes Other Than Toast?

Absolutely! Vegemite isn't just for toast. You can use it in all sorts of recipes, from savory baked goods to marinades and dips. Its umami-rich flavor can add depth to many dishes beyond the classic breakfast staple.

Is Vegemite Suitable for Vegetarians and Vegans?

Yes, Vegemite is suitable for vegetarians and vegans. It's a yeast-based spread that doesn't contain any animal products, making it a great option for those following plant-based diets. You can enjoy Vegemite on its own or incorporate it into various dishes.

Advertisement

What Are the Health Benefits of Regularly Consuming Vegemite?

Vegemite is a great source of vitamin B12, which is essential for energy production and red blood cell formation. It also contains folate, iron, and antioxidants that can boost your immune system and overall health when consumed regularly.

Advertisement

International Breakfast Dishes

Japanese Tamagoyaki: Rolled Omelette

Behold the delicate layers of this iconic Japanese rolled omelette, known as tamagoyaki, a culinary delight that blends sweet, savory, and umami flavors.

Published

on

japanese rolled omelette delight

Tamagoyaki, the iconic Japanese rolled omelette, has a rich history dating back to the Edo period. This delightful dish features layers of thin, sweetened egg crepes that are expertly rolled into a striped log, creating a visually stunning and flavorful culinary delight. The recipe calls for simple ingredients like eggs, dashi, mirin, and sugar, which are whisked together and carefully cooked to achieve the signature soft, custard-like texture. Rolling the omelette into layers takes some practice, but the end result is well worth it – a harmonious blend of sweet, savory, and umami flavors. Discover more about this cherished Japanese culinary tradition.

Key Takeaways

  • Tamagoyaki is a traditional Japanese rolled omelette dish that originated during the Edo period, initially enjoyed by samurai and nobles.
  • The recipe has evolved to include dashi stock, mirin, and sugar, creating a sweet-savory flavor profile.
  • Tamagoyaki is made by layering thin omelets, resulting in a striped log appearance that represents a significant aspect of Japanese culinary tradition.
  • The cooking process involves whisking eggs, pouring thin layers into a pan, and rolling the cooked layers to create the final shape.
  • Tamagoyaki can be served as a side dish or snack, and it allows for experimentation with different fillings and seasonings.

History

The origins of tamagoyaki, Japan's beloved rolled egg dish, can be traced back centuries. This tasty treat has been a staple in Japanese cuisine for generations, with its roots dating back to the Edo period.

Back then, samurai and nobles would enjoy a simple version of tamagoyaki, using just eggs and a touch of soy sauce. Over time, the recipe evolved, with the addition of dashi stock, mirin, and a hint of sugar, creating the delightfully sweet-savory flavor we know and love today.

Tamagoyaki is made by carefully layering thin omelets and rolling them up into a beautiful, striped log. The process takes skill and practice, but the end result is worth it – a soft, fluffy, and irresistibly flavored roll that melts in your mouth.

Whether enjoyed as a side dish, part of a bento box, or as a tasty snack, tamagoyaki is a true taste of Japanese culinary tradition.

Recipe

Tamagoyaki is a quintessential Japanese omelette that's both savory and slightly sweet. It's a popular breakfast or bento box item, with its distinct layered appearance and delicate flavor. Preparing this dish requires some technique, but the process is quite straightforward.

Advertisement

The key to a successful tamagoyaki is in the rolling and layering of the thin omelette layers. This creates the signature square shape and tender texture. With a little practice, anyone can master this traditional Japanese culinary art.

  • 3 large eggs
  • 1 tablespoon dashi stock (or water)
  • 1 tablespoon mirin
  • 1 teaspoon soy sauce
  • 1 teaspoon sugar
  • Pinch of salt
  • Vegetable oil for cooking

In a small bowl, whisk together the eggs, dashi stock, mirin, soy sauce, sugar, and salt until well combined.

Heat a small, rectangular tamagoyaki pan or nonstick skillet over medium heat and lightly coat with vegetable oil. Pour in a thin layer of the egg mixture and cook until just set.

Carefully roll the omelette to one side of the pan, then pour in another thin layer of egg and roll the omelette again. Repeat this process, rolling the omelette after each new layer, until all the egg mixture is used up.

Slice the tamagoyaki into pieces and serve warm.

For best results, be sure to use a pan with straight sides to achieve the uniform square shape. Adjust the heat as needed to prevent the omelette from overcooking or burning.

Advertisement

With a little patience and attention to detail, you'll be rewarded with a beautifully layered, subtly flavored tamagoyaki.

Cooking Steps

Whisk those eggs in a bowl until they're nice and smooth.

Then, add a dab of butter to the pan and let it sizzle.

Carefully pour in the egg mixture and get ready to roll up that tasty omelette, creating layer after delicious layer!

Step 1. Whisk Eggs in a Bowl

whisk eggs in bowl

Crack the eggs into a bowl, then whisk them together until the mixture is smooth and uniform. Be sure to use a sturdy whisk and beat the eggs vigorously, creating lots of air bubbles that will make your tamagoyaki light and fluffy.

As you whisk, you'll see the once-runny eggs transform into a pale, creamy liquid. Don't be afraid to really go for it – the more you whisk, the better the texture will be!

Advertisement

Next, add a splash of dashi or water to the bowl. This extra liquid will help the eggs cook evenly and prevent them from becoming rubbery.

Give the mixture another good whisk until it's fully combined. You'll know it's ready when the eggs have a smooth, silky appearance.

Now you're all set to start cooking your delicious tamagoyaki!

Step 2. Add Butter to the Pan

butter added to pan

With the eggs whisked to perfection, it's time to turn your attention to the pan.

Grab a small, nonstick skillet and place it over medium heat. Once the pan is warm, it's time to add a small pat of butter. The butter will melt and coat the surface, creating a slick, shiny surface that's perfect for cooking the delicate eggs.

As the butter sizzles, tilt the pan to ensure it's evenly distributed. You'll know the pan is ready when the butter starts to foam and turn a nutty, golden brown.

Advertisement

Be careful not to let it burn – that would leave a bitter taste. Now, it's time to pour in a thin layer of the egg mixture. Watch as it quickly sets around the edges, forming a perfectly even base for your tamagoyaki.

Step 3. Pour Egg Mixture Into Pan

pour mixture into pan

Once the butter has melted and the pan is hot, gently pour a thin layer of the whisked egg mixture into the center of the pan.

You'll see the eggs sizzle and puff up as they cook. Tilt the pan gently to let the uncooked egg flow to the edges, creating a thin, even layer.

When the eggs start to set at the edges, use a pair of chopsticks or a spatula to carefully roll the cooked egg into a cylinder, starting from one side and working your way across.

Gently push the rolled egg towards the far side of the pan to make room for the next layer.

Repeat this process, pouring in a thin layer of egg and rolling it up, until you've used up all the egg mixture.

Advertisement

The key is to work quickly and gently to maintain the soft, fluffy texture of the tamagoyaki.

With a little practice, you'll be rolling up perfect Japanese-style omelets in no time!

Step 4. Roll up the Omelette

omelette rolling technique explained

To roll up the tamagoyaki, gently use a pair of chopsticks or a spatula to carefully transfer the cooked egg from one side of the pan to the other, creating a neat cylinder.

Slowly, start to roll up the egg, keeping it tight and compact as you go. It's like rolling a sushi roll, but with soft, delicate egg instead of rice!

As you roll, the egg will take on a beautiful, layered appearance. Once you've reached the end, give the roll a gentle squeeze to help it hold its shape.

Slice the tamagoyaki into bite-sized pieces and arrange them on a plate. Aren't they just the cutest little egg rolls you ever did see?

Advertisement

Serve them up hot, with a sprinkle of soy sauce or a drizzle of sweet sauce if you like.

Get ready to impress your friends and family with your tamagoyaki rolling skills!

Step 5. Repeat Rolling, Creating Layers

repeat rolling create layers

After you've rolled up the first layer of the tamagoyaki, it's time to repeat the process, creating those beautiful, distinct layers.

Grab your pan and add a fresh layer of the egg mixture. As it starts to set, use your chopsticks or a spatula to gently roll it up from the edge, just like before.

Carefully transfer the rolled omelette to the side of the pan, then add another layer of the egg mixture.

Repeat this rolling and layering process, working quickly to keep the egg from overcooking. With each new layer, you'll see the tamagoyaki growing taller and more magnificent.

Advertisement

The sweet, custard-like texture and vibrant yellow color are simply mouthwatering. Don't be afraid to adjust the heat as needed to prevent burning. Each delicate roll should have an even, golden-brown exterior.

Keep going until you've built up 5 or 6 incredible layers. Now your authentic Japanese tamagoyaki is ready to slice and enjoy!

Final Thoughts

Regardless of whether you opt for the intricate layered tamagoyaki or the simpler rolled version, the Japanese egg dish offers a delightful culinary experience.

The vibrant yellow color and soft, pillowy texture are sure to delight your senses. Imagine the satisfying sensation as you take your first bite, the sweet-savory flavors dancing on your tongue.

Whether you serve it as a side dish or enjoy it as a snack, tamagoyaki is a true taste of Japanese cuisine. The versatility of this dish means you can experiment with different fillings and seasonings to suit your personal preferences.

Advertisement

Frequently Asked Questions

How Long Can Cooked Tamagoyaki Be Stored?

Cooked tamagoyaki can be stored in the refrigerator for up to 3-4 days. Make sure to wrap it tightly in plastic wrap or store it in an airtight container to prevent it from drying out or absorbing other flavors.

Can Tamagoyaki Be Frozen and Reheated?

You can definitely freeze and reheat tamagoyaki. Once cooked, let it cool completely, then wrap it tightly and store it in the freezer for up to 3 months. When ready to eat, thaw and reheat gently in the microwave or oven.

What Equipment Is Required to Make Tamagoyaki?

To make tamagoyaki, you'll need a rectangular pan, chopsticks or a small spatula, and a rolling mat or bamboo sushi mat. With the right tools, you can easily create this delicate Japanese egg dish at home. Tamagoyaki is traditionally made using a rectangular pan called a makiyakinabe, which is specifically designed for making this type of rolled omelette. The chopsticks or small spatula are essential for gently rolling the layers of egg as they cook. Additionally, using a rolling mat or bamboo sushi mat helps to firmly shape the tamagoyaki and is a common tool in Asian cooking methods in bamboo. With these tools in hand and a little practice, you’ll be able to master the art of making tamagoyaki in no time.

Can Tamagoyaki Be Made Without a Special Pan?

Yes, you can make tamagoyaki without a special pan. You can use a regular nonstick skillet or a square metal baking pan. Just be sure to grease the surface and roll the eggs carefully to get the distinctive layered effect.

Are There Any Dietary Restrictions for Tamagoyaki?

Yes, there are some dietary restrictions to consider when making tamagoyaki. If you have dietary restrictions, you'll want to adjust the ingredients to accommodate any allergies or intolerances, such as using dairy-free milk or omitting certain seasonings.

Advertisement
Continue Reading

International Breakfast Dishes

English Full Breakfast: The Ultimate Fry-up

Famously hearty and comforting, the English full breakfast, known as the “fry-up,” is a time-honored tradition that brings people together and fuels the day.

Published

on

ultimate english breakfast experience

You're in for a real treat! The classic English full breakfast, known as the "fry-up," is a time-honored tradition that brings people together. Its origins trace back to the 19th century upper classes, but the industrial revolution made it a national treasure, enjoyed by all. This hearty meal typically includes crispy bacon, plump sausages, fried eggs, grilled tomatoes, and savory mushrooms, often with black pudding and baked beans on the side. It's a delicious way to start your day, fueling you up with protein, carbs, and plenty of flavor. If you're curious to learn more about this beloved British breakfast, keep reading!

Key Takeaways

  1. The English full breakfast is a traditional meal with origins in the 19th century among the upper classes, later adopted by the working class.
  2. The fry-up typically includes bacon, sausages, eggs, tomatoes, mushrooms, and often black pudding and baked beans, served with toast or fried bread.
  3. The meal is high in protein, but can also be high in fats and calories depending on preparation, with variations for healthier and dietary-specific options.
  4. Frying is the most common cooking method, with grilling as a healthier alternative, and precise timing is crucial for serving all components hot.
  5. The breakfast represents a social gathering point and a source of culinary heritage, with modern adaptations reflecting global influences and artisanal interpretations.

History

The origins of the English full breakfast can be traced back to the 19th century, when the upper classes would indulge in a hearty morning meal to fuel their day.

As the industrial revolution took hold, the working class followed suit, enjoying a filling breakfast before a long day's work. This traditional fry-up featured a mouthwatering array of ingredients, from sizzling rashers of crispy bacon to savory pork sausages, golden-yolked eggs, and grilled tomatoes.

The aroma of freshly brewed tea or coffee wafted through the air, completing the satisfying spread.

Over time, the English full breakfast became a beloved national treasure, uniting people from all walks of life around the table.

Today, it remains a cherished tradition, a comforting taste of the past that brings families and friends together to start the day right, one delicious bite at a time.

Advertisement

Recipe

The English Full Breakfast is a hearty and iconic dish that has been a staple of British cuisine for centuries. This comprehensive meal typically includes a variety of ingredients that come together to create a satisfying and comforting start to the day.

At its core, the English Full Breakfast is a celebration of the diverse flavors and textures that can be found in a traditional English breakfast. From the savory sizzle of bacon to the comforting warmth of baked beans, each component of this dish plays a vital role in creating a truly exceptional dining experience.

  • 2 rashers of back bacon
  • 2 pork sausages
  • 2 eggs (fried or scrambled)
  • 1 tomato, halved
  • 1 portobello mushroom, sliced
  • 2 slices of black pudding
  • 2 slices of toast
  • Baked beans
  • Butter

In a large skillet or griddle, cook the bacon, sausages, and black pudding over medium-high heat until they're golden brown and cooked through. In a separate pan, fry the eggs and sauté the mushroom slices.

Arrange the cooked components on a plate, alongside the halved tomato and a generous serving of baked beans. Toast the bread and serve it with a pat of butter.

When preparing the English Full Breakfast, it's important to ensure that all the ingredients are cooked to perfection. The bacon should be crisp, the sausages juicy, and the eggs cooked to your desired doneness.

Additionally, consider serving the dish with a steaming cup of tea or coffee to complete the quintessential English breakfast experience.

Advertisement

Cooking Steps

Get ready to cook up a delicious English full breakfast!

First, fry the bacon until it's nice and crispy.

Next, fry the eggs just the way you like them – runny, scrambled, or even sunny-side up.

Then, sauté the mushrooms and tomatoes to perfection.

Don't forget to grill the black pudding slices too, and toast the bread to your desired crispness.

Advertisement

Let's get cooking!

Step 1. Fry Bacon Until Crisp

crispy bacon frying instructions

Next, you'll want to fry the bacon until it's crisp. Grab a large skillet and set it over medium-high heat. Once the pan is nice and hot, add your bacon slices in a single layer.

Let them sizzle and pop, flipping occasionally, until the bacon turns a deep golden brown and gets all nice and crispy, about 5-7 minutes.

The key is to make sure the bacon has plenty of space in the pan, so it crisps up evenly instead of steaming. As the bacon cooks, you'll see the fat rendering out, making the slices get extra crunchy.

Keep an eye on it and adjust the heat as needed to prevent burning.

Once the bacon is perfectly crisp, use tongs or a slotted spoon to transfer it to a paper towel-lined plate. Let it drain for a minute before adding it to the rest of your full English breakfast feast.

Advertisement

The bacon's salty, savory crunch is going to take this classic meal to the next level!

Step 2. Fry Eggs Until Desired Doneness

fry eggs to preference

Once the bacon is crispy and set aside, you'll want to fry the eggs to your desired doneness. Crack a few fresh eggs into a hot, well-oiled pan, and let them sizzle!

If you like your eggs runny, let them cook for just a minute or two, until the whites are set but the yolks are still gloriously golden and gooey. For a firmer yolk, flip the eggs and cook for a bit longer.

You can even try basting the eggs with the hot oil to get that perfect, even cook. The sound of the sizzling eggs and the tempting aroma filling the kitchen will have your mouth watering in no time!

Once they're cooked just the way you like them, use a spatula to carefully transfer the eggs to your plate, nestled alongside the crispy bacon. Get ready for a delightful explosion of flavors in every bite of this classic English breakfast.

Step 3. Sauté Mushrooms and Tomatoes

saut mushrooms and tomatoes

With the crispy bacon and perfectly cooked eggs ready, it's time to turn your attention to the mushrooms and tomatoes. Sauté the mushrooms in the same pan until they are browned and tender, then set them aside. In a separate pan, cook the tomatoes until they are softened and slightly caramelized. Once the mushrooms and tomatoes are ready, you can assemble your delicious Turkish menemen recipe by combining all the elements together in a large skillet and heating them through. Enjoy this savory and satisfying dish as a hearty breakfast or a satisfying brunch option.

Grab a large skillet and heat it over medium-high heat. Add a drizzle of olive oil and let it shimmer. Carefully add the sliced mushrooms, and hear them sizzle as they hit the hot pan. Give them a stir, letting them cook until they start to turn golden brown around the edges, about 5 minutes.

Advertisement

Next, toss in the cherry tomatoes. They'll burst with juicy goodness, adding a lovely pop of color to the pan. Sprinkle in a pinch of salt and pepper to enhance the natural flavors.

Sauté everything together for another 2-3 minutes, until the tomatoes are softened but still hold their shape. The mushrooms should be tender and the tomatoes bursting with flavor.

Serve the sautéed mushrooms and tomatoes alongside the other breakfast items for a mouthwatering English full breakfast.

Step 4. Grill Black Pudding Slices

grill black pudding slices

For the black pudding, preheat your grill to medium-high heat.

You'll love the way the sizzling black pudding slices start to brown and crisp up on the outside while staying moist and savory on the inside.

Carefully place the slices on the hot grill grates, making sure they've a little room to breathe.

Advertisement

As they cook, you'll smell that irresistible aroma wafting through the kitchen – it's enough to get your stomach rumbling!

Flip the slices after 2-3 minutes, letting the other side get that nice charred flavor.

Cook for another 2-3 minutes until both sides are nicely grilled.

Slide the perfectly cooked black pudding onto your plate, and get ready for a real treat.

The warm, tender texture pairs beautifully with the robust, earthy flavor.

Advertisement

This classic component of the English breakfast is sure to satisfy your taste buds and keep you fueled up for the day ahead.

Step 5. Toast Bread to Desired Crispness

toast bread until crispy

Toasting the bread to your desired crispness is a simple yet essential step in crafting the perfect English breakfast.

You'll want to use a toaster or toaster oven for this task, as it ensures an even, golden-brown finish across the surface of the bread. Start by placing your slices in the toaster and setting the dial to your preferred level of doneness.

Keep a close eye on the bread as it toasts, listening for that satisfying "pop" to signal it's ready. Once it's reached your desired crispness, remove the toast and set it aside.

You can even give it a quick rub of butter or a light sprinkle of salt if you'd like to add a little extra flavor. Perfectly toasted bread is the foundation for a delightful full English breakfast, so take your time and get it just right.

With a little practice, you'll be toasting like a pro in no time!

Advertisement

Final Thoughts

Ultimately, the English full breakfast represents a time-honored tradition that continues to captivate both locals and visitors alike.

As you've seen, this iconic meal is a true celebration of flavors, textures, and the art of coming together around the table. From the crisp, golden toast to the savory sizzle of the sausages, every element is carefully prepared to delight the senses.

Whether you're starting your day with a hearty fry-up or indulging in it as a leisurely brunch, the English full breakfast is more than just a meal – it's a cultural experience that connects people and creates cherished memories.

Frequently Asked Questions

What Are the Origins of the Full English Breakfast?

The origins of the full English breakfast can be traced back to the 17th century, when the gentry and aristocracy adopted the hearty meal as a way to sustain themselves throughout the day. It's become a beloved national dish over time.

How Long Does It Take to Prepare a Full English Breakfast?

Preparing a full English breakfast can take anywhere from 30 to 60 minutes, depending on your cooking skills and the number of components you're including. It's a time-consuming but rewarding task that requires careful coordination and multitasking in the kitchen.

Advertisement

Can I Make a Vegetarian or Vegan Version of the Full English?

Absolutely! You can easily create a delectable vegetarian or vegan version of the full English breakfast. Swap out the traditional meats with plant-based alternatives, and incorporate hearty vegetables, beans, and grilled halloumi or tofu for a satisfying meatless feast.

Is the Full English Breakfast Suitable for People With Dietary Restrictions?

Yes, the full English breakfast can be adapted to suit various dietary restrictions. By substituting vegan meat alternatives and plant-based sides, you can enjoy this classic meal while accommodating your dietary needs.

How Can I Make a Full English Breakfast Healthier?

You can make a full English breakfast healthier by using leaner cuts of meat, baking or grilling ingredients instead of frying, incorporating more vegetables, and using whole-grain bread. Opt for low-fat dairy products and limit the use of oils and butter.

Continue Reading

International Breakfast Dishes

Turkish Menemen: Scrambled Eggs With Tomatoes

Hearty and comforting, Turkish Menemen blends scrambled eggs with juicy tomatoes, offering a true taste of traditional Turkish cuisine that will leave you craving more.

Published

on

turkish tomato scrambled eggs

Oh, you're in for a treat! Menemen is the classic Turkish dish of scrambled eggs and tender, juicy tomatoes. It's a beloved breakfast staple that's been enjoyed for generations, reflecting the rich culinary heritage of Turkey. The warm, comforting flavors of the eggs and the sweet, tangy tomatoes make for a truly satisfying meal. And it's so easy to make – just a few simple ingredients and you're good to go! Menemen is the perfect way to start your day, or enjoy as a cozy snack. Dive in and you'll see why this dish holds a special place in Turkish culture. There's more to discover about this tasty tradition…

Key Takeaways

  • Menemen is a traditional Turkish dish that features a delightful combination of scrambled eggs and diced tomatoes, reflecting the country's rich culinary heritage.
  • The dish is known for its vibrant flavors, achieved by using fresh, locally-sourced ingredients and aromatic spices like paprika and cumin.
  • Menemen is a versatile meal that can be enjoyed for breakfast, brunch, or as a light, satisfying snack, making it an accessible and popular choice.
  • The simplicity of the recipe, with minimal ingredients and a quick preparation time, allows for easy customization and personal variations to suit individual preferences.
  • Menemen is often served warm, accompanied by crusty bread or pide, and can be garnished with fresh herbs, adding to the overall dining experience and bringing people together around the table.

History

The origins of Menemen can be traced back to the Ottoman era, when Turkish cuisine was heavily influenced by the culinary traditions of the region. This beloved scrambled egg dish has its roots in the bustling markets and kitchens of ancient Anatolia.

Back then, resourceful cooks would gather fresh tomatoes, peppers, and onions to create a simple, yet flavorful meal. As the Ottoman Empire grew, the recipe for Menemen spread throughout the land, becoming a beloved breakfast staple in homes and cafes alike. The dish reflects the broader cultural exchanges characteristic of that time, much like the ongoing rising tensions among major powers today, which shape global culinary influences.

Today, Menemen remains a cherished part of Turkish culture, a delicious reminder of the country's rich history and vibrant flavors.

Whether you're enjoying it at a seaside cafe or cooking it in your own kitchen, the comforting aromas of sizzling vegetables and perfectly scrambled eggs transport you to the heart of Turkey.

With each bite, you'll savor the country's vibrant culinary heritage and the timeless appeal of this beloved dish.

Advertisement

Recipe

Menemen is a classic Turkish egg dish that originated in the Aegean region. It's a delicious and versatile recipe that can be enjoyed for breakfast, brunch, or even as a light meal. The combination of eggs, tomatoes, peppers, and onions creates a flavorful and satisfying dish.

The key to a great Menemen is to use high-quality, fresh ingredients and to cook them with care. The dish is simple to prepare, but the flavors really come together when the ingredients are allowed to meld and the eggs are cooked to perfection.

Ingredients:

  • 4 eggs
  • 2 tomatoes, diced
  • 1 bell pepper, diced
  • 1 onion, diced
  • 2 tablespoons olive oil
  • 1 teaspoon paprika
  • 1 teaspoon cumin
  • Salt and pepper to taste

Instructions:

In a large skillet, heat the olive oil over medium heat. Add the diced onion and bell pepper, and sauté for 5-7 minutes until softened.

Add the diced tomatoes, paprika, cumin, salt, and pepper. Stir to combine and let the mixture simmer for 2-3 minutes.

Advertisement

Crack the eggs directly into the skillet, being careful not to break the yolks. Gently stir the eggs to scramble them, and cook until the eggs are soft and creamy, about 3-5 minutes. Adjust seasoning to taste.

Tips:

For a slightly different flavor, try using a combination of bell peppers and spicy peppers, such as Anaheim or Fresno chili peppers.

Serve the Menemen warm, accompanied by crusty bread or pide for dipping in the delicious egg mixture. Garnish with fresh herbs, such as parsley or dill, for a pop of color and freshness.

Cooking Steps

Crack and whisk those eggs, then sauté the onions and peppers until they're nice and soft.

Advertisement

Next, add the diced tomatoes and let everything simmer together.

Step 1. Crack and Whisk the Eggs

crack and whisk eggs

With a quick motion, crack the eggs into a mixing bowl. Four fresh, farm-fresh eggs should do the trick! Crack them one by one, letting the golden yolks and clear whites tumble into the bowl.

Don't be shy – give those eggs a good whisk with a fork or whisk. Whisk them up until they're nice and frothy, with no runny bits left. You want them to be well-blended and ready to cook.

As you whisk, you can almost smell the savory aroma of the sizzling menemen already. The eggs will transform from plain to utterly delightful once they hit the hot pan.

Keep whisking until the mixture is light and airy – that's the secret to fluffy, melt-in-your-mouth menemen. With the eggs prepped, you're one step closer to enjoying this classic Turkish breakfast.

Next, it's time to sauté the veggies that will give your menemen its signature flavor. Get ready to fire up the stove!

Advertisement

Step 2. Sauté the Onions and Peppers

saut onions and peppers

Heat a large skillet or frying pan over medium heat.

Once it's nice and hot, add a drizzle of olive oil.

Now, toss in those crisp, colorful bell peppers and the aromatic onions.

Sauté them together, stirring occasionally, until they become nice and tender – about 5 to 7 minutes.

You'll know they're ready when the onions turn golden brown and the peppers start to get a little bit of char on the edges.

Mmm, can you already smell those savory, sizzling veggies?

Advertisement

They're going to be the perfect base for our delicious Turkish menemen.

For an extra nutrition boost, consider adding some health benefits of celery juice to your breakfast routine.

Keep an eye on them, making sure they don't burn, and get ready for the next step.

Soon, we'll be adding in the juicy tomatoes and cracking those fresh eggs right on top.

This is where the magic really starts to happen!

Advertisement

Step 3. Add Diced Tomatoes

incorporate diced tomatoes

Once the onions and peppers have softened, add the diced tomatoes to the skillet.

You'll love the way the juicy tomatoes sizzle and release their delicious aroma as they hit the hot pan. Stir them in with the softened veggies, making sure they're well combined.

The tomatoes will start to break down, creating a flavorful sauce that'll be the perfect base for your scrambled eggs. Don't be shy – pile those vibrant red cubes right in!

As they cook, you'll see the mixture transform into a vibrant, colorful blend. The tomatoes will release their juices, adding a lovely sweetness and acidity that'll balance out the other flavors.

Get ready for your kitchen to be filled with the mouthwatering scents of this classic Turkish dish.

With the tomatoes incorporated, you're one step closer to enjoying the comforting, homemade goodness of Menemen.

Advertisement

Step 4. Add the Eggs

incorporate eggs into mixture

Next, crack the eggs directly into the sizzling pan with the softened veggies and tomatoes.

Listen as they sizzle and pop, filling the air with a mouthwatering aroma!

Using a spatula, gently push and fold the eggs, creating those delicious fluffy curds.

Watch as the eggs transform from liquid to solid, becoming a vibrant golden-yellow color.

Keep a close eye, stirring occasionally, until the eggs are cooked through but still nice and soft.

Mmm, can you just imagine how heavenly they'll taste?

Advertisement

The juicy tomatoes, the tender onions, and the rich, creamy eggs all mingling together – it's a flavor explosion in the making!

Add a sprinkle of salt and pepper to bring out all those delightful flavors, then dive right in.

This scrambled egg masterpiece is sure to make your taste buds dance with joy.

Get ready for a truly satisfying breakfast or anytime snack!

Step 5. Garnish With Fresh Parsley

garnish with fresh parsley

Finally, grab a handful of fresh, vibrant parsley and roughly chop it. The bright green leaves will add a lovely, herbal aroma and a pop of color to your delicious Turkish Menemen.

Sprinkle the chopped parsley over the top of the fluffy, golden scrambled eggs and juicy, sautéed tomatoes. The parsley's flavor will perfectly complement the dish, cutting through the richness of the eggs and balancing the acidity of the tomatoes.

Advertisement

Plus, the fresh, crunchy texture of the parsley will provide a nice contrast to the soft, creamy eggs. Don't be shy with the parsley – go ahead and be generous! The more you add, the more flavor and freshness you'll get in every bite.

Garnish your Menemen with the parsley, then serve it hot, straight from the skillet. Your family and friends will love the vibrant, herbal touch it adds to this classic Turkish breakfast delight.

Final Thoughts

Turkish Menemen is a delightful and versatile dish that can be enjoyed for breakfast, brunch, or even a light lunch.

It's the perfect way to start your day or satisfy your cravings any time. The combination of fluffy eggs, juicy tomatoes, and aromatic spices creates a flavor explosion in your mouth.

What's great about this recipe is its simplicity – it's quick and easy to make, but the results are truly impressive.

Advertisement

Once you've mastered the basics, you can experiment with different toppings and variations to make it your own.

Try adding some crumbled feta cheese, sliced olives, or even a sprinkle of crushed red pepper flakes. The possibilities are endless!

No matter how you choose to enjoy it, Turkish Menemen is sure to become a new favorite in your household.

Frequently Asked Questions

Are There Any Regional Variations of Turkish Menemen?

Yes, there are regional variations of Turkish menemen. Different regions may use different vegetables, spices, or cooking techniques to create their own unique version of this popular scrambled egg dish.

Can Menemen Be Made With Different Types of Eggs?

You can definitely make menemen with different types of eggs. While the traditional version uses scrambled eggs, you could also try it with poached, fried, or even egg whites to create unique variations.

Advertisement

How Can Menemen Be Served or Paired With Other Dishes?

You can serve menemen alongside crusty bread, fresh herbs, and feta cheese for a hearty breakfast. It also pairs well with grilled meats or a simple salad for a light lunch or dinner.

Does Menemen Have Any Cultural Significance in Turkish Cuisine?

Menemen holds significant cultural importance in Turkish cuisine. It's a beloved breakfast dish that reflects the country's rich culinary heritage and is often enjoyed with fresh bread, olives, and other traditional Turkish breakfast items.

Can Menemen Be Made in Advance and Reheated?

Yes, you can make menemen in advance and reheat it. The eggs may become a bit firmer upon reheating, but the flavors will still meld together nicely. Just be sure to store it properly to maintain its texture and taste.

Continue Reading

Affiliate Disclaimer
As an affiliate, we may earn a commission from qualifying purchases. We get commissions for purchases made through links on this website from Amazon and other third parties.

Advertisement

Latest

alternative flours for baking alternative flours for baking
Cooking for Special Diets3 minutes ago

Gluten-Free Baking: Flour Alternatives

Delve into the world of gluten-free baking with an array of unique flour alternatives that offer distinct flavors and textures,...

delicious african yam dishes delicious african yam dishes
African Cuisine3 hours ago

African Yam Recipes: Creative Ways to Enjoy Yams

Awaken your taste buds with exciting African yam recipes that transform this versatile ingredient into unforgettable dishes; discover mouthwatering ideas...

spicy korean pork stir fry spicy korean pork stir fry
Korean Cuisine8 hours ago

Duruchigi: Korean Spicy Pork Stir-Fry

On a quest for a flavorful dish that brings joy to the table? Discover the secrets behind the vibrant and...

dairy free soft vegan bread dairy free soft vegan bread
Baking and Pastry10 hours ago

Vegan Milk Bread: Soft and Fluffy Without the Dairy

Savor the softness of vegan milk bread that's delightfully fluffy and dairy-free; discover the secrets to perfecting this irresistible treat!

vietnamese ginger braised chicken vietnamese ginger braised chicken
Vietnamese Cuisine11 hours ago

Ga Kho Gung: Vietnamese Braised Chicken With Ginger

Unlock the mouthwatering secrets of Ga Kho Gung, a beloved Vietnamese braised chicken dish that's been delighting families for centuries.

sweet savory braised pork sweet savory braised pork
Vietnamese Cuisine11 hours ago

Vietnamese Thịt Kho Tàu: Sweet and Savory Braised Pork

Jump into the savory-sweet world of Vietnamese Thịt Kho Tàu, where tender pork simmers in a caramelized sauce for a...

bold spicy vietnamese ginger chicken bold spicy vietnamese ginger chicken
Vietnamese Cuisine11 hours ago

Vietnamese Ginger Chicken: Ginger Chicken for Bold and Spicy Flavors

Kickstart your taste buds with Vietnamese Ginger Chicken, a bold and spicy dish that'll transport you to the vibrant flavors...

flavorful chicken shawarma rice flavorful chicken shawarma rice
Middle Eastern Cuisine11 hours ago

Chicken Shawarma Rice: a Fusion Dish Packed With Flavor

Kick your taste buds into high gear with Chicken Shawarma Rice, a fusion dish that blends tender spice-rubbed chicken and...

crispy korean seaweed rolls crispy korean seaweed rolls
Korean Cuisine11 hours ago

Gimmari Korean: The Crispy Seaweed Rolls You’ll Love

Crispy, golden-brown gimmari are the irresistible Korean seaweed rolls with an ancient heritage that'll have you hooked - dive deeper...

instagrammable smoothie bowl creations instagrammable smoothie bowl creations
Beverage Deep Dives16 hours ago

Smoothie Bowl Art: Instagram-Worthy Breakfasts

Joyful, colorful, and nutrient-rich, smoothie bowls have become a social media sensation, tempting you to discover the secrets behind these...

effortless meals with slow cooker effortless meals with slow cooker
One-Pot Wonders16 hours ago

Slow Cooker Secrets: Set-It-and-Forget-It Meals for Busy Days

Discover the convenience and flavor of slow cooker meals that unlock hassle-free, mouthwatering dishes for your busy days.

effortless cooking with prep effortless cooking with prep
Kitchen Hacks and Tips19 hours ago

Mise En Place: the Key to Effortless Cooking

Never underestimate the power of mise en place - the ultimate secret to unlocking a world of effortless cooking and...

Trending