Indonesian Cuisine
Sate Padang (Padang-style Satay)
Mouthwatering Padang-style satay, a captivating blend of tender grilled meat, spicy peanut sauce, and crispy fried shallots, invites you to discover the rich culinary heritage of Indonesia.
Sate Padang, the captivating Padang-style satay, takes you on a delightful culinary journey through Indonesia's rich heritage. This iconic dish, born in early 20th century Padang, West Sumatra, blends tender grilled meat, a tantalizing spicy-savory peanut sauce, and the satisfying crunch of crispy fried shallots. The harmonious flavors transport you to the bustling streets of Padang, where this beloved specialty first gained fame. Whether enjoyed as an appetizer or main course, Sate Padang leaves a lasting impression, and you'll be eager to explore more of Indonesia's vibrant food culture. If you’re looking to recreate the magic of Sate Padang at home, look no further than the traditional Indonesian chicken satay recipe. This time-honored dish calls for marinating succulent chicken pieces in a rich blend of aromatic spices before grilling them to perfection. The resulting tender, juicy skewers paired with the signature peanut sauce and crispy shallots, offer an authentic taste of Indonesia that will undoubtedly leave you craving for more.
Key Takeaways
- Sate Padang is a traditional Indonesian dish originating from Padang, West Sumatra, featuring tender meat skewers with a distinctive spicy and savory peanut sauce.
- The dish has evolved over decades, with various vendors developing their own signature recipes and cooking techniques, contributing to its complex and captivating flavor profile.
- The preparation involves marinating the meat in a blend of aromatic spices, followed by grilling and serving with a rich peanut sauce made from roasted peanuts, coconut milk, and a variety of spices.
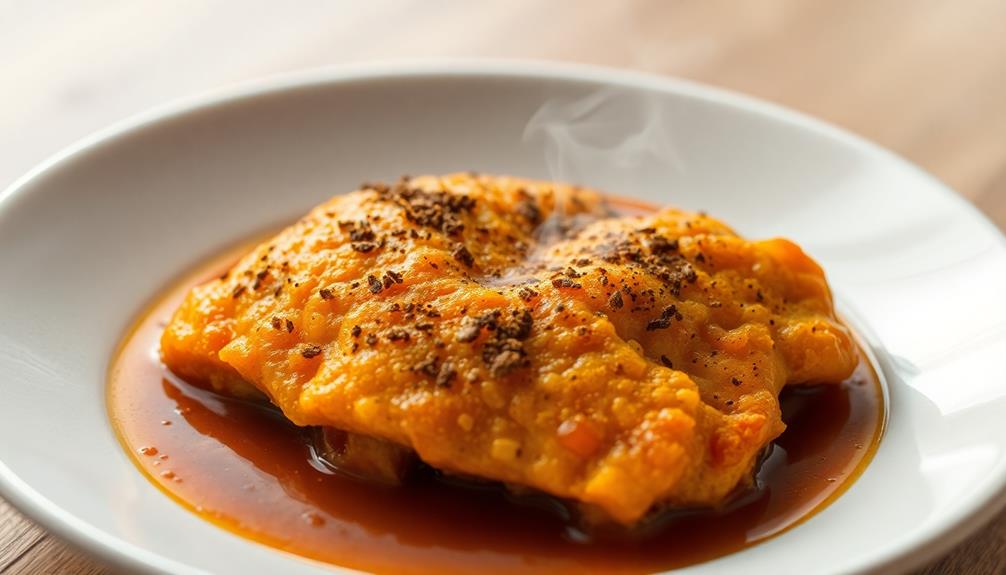
- Sate Padang is often served with ketupat, a traditional Indonesian rice cake, which provides a chewy texture to complement the savory and spicy flavors of the dish.
- The addition of crispy fried shallots as a garnish adds a delicate, aromatic flavor and satisfying crunch, enhancing the overall experience of the dish.
History
Sate Padang, a beloved culinary icon of Indonesia, has a rich history dating back to the early 20th century. This iconic dish originated in the bustling city of Padang, West Sumatra, where skilled street vendors first began serving their unique take on the classic Indonesian satay.
What sets Sate Padang apart is its distinctive spicy and savory sauce, made from a blend of chili peppers, shallots, garlic, and a variety of aromatic spices. The meat, typically beef or buffalo, is carefully seasoned and grilled to perfection, then served alongside the tantalizing sauce and an array of accompaniments, such as ketupat (rice cakes) and lontong (compressed rice).
Over the decades, Sate Padang has evolved, with each vendor developing their own signature recipes and techniques.
Today, this beloved dish is enjoyed across Indonesia and has even gained international fame, captivating taste buds with its bold, complex flavors and tender, juicy meat.
Recipe
Sate Padang is a popular Indonesian dish that originated from the city of Padang, West Sumatra. It consists of tender beef or buffalo meat skewered and served with a rich, spicy peanut sauce. The distinct flavors of this dish come from a blend of aromatic spices and a touch of acidity from the use of lime juice.
Preparing Sate Padang at home can be a rewarding experience, allowing you to recreate the authentic flavors of this beloved street food. With the right ingredients and a bit of patience, you can enjoy this delectable dish in the comfort of your own kitchen.
Ingredients:
- 1 lb beef or buffalo, cut into thin strips
- 12 bamboo skewers, soaked in water for 30 minutes
- Cooking oil for grilling
For the Spice Paste:
- 6 cloves garlic
- 4 shallots
- 3 candlenuts or macadamia nuts
- 2 lemongrass stalks, tender white part only
- 2 red chilies
- 1 tsp ground coriander
- 1 tsp ground cumin
- 1 tsp salt
For the Peanut Sauce:
- 1/2 cup roasted peanuts, ground
- 1 cup coconut milk
- 2 tbsp tamarind paste
- 2 tbsp brown sugar
- 1 tsp salt
- 1/2 tsp ground coriander
- 1/2 tsp ground cumin
Cooking Instructions:
In a food processor or blender, combine all the ingredients for the spice paste and blend until a smooth paste forms.
Coat the beef strips with the spice paste, cover, and refrigerate for at least 30 minutes to allow the flavors to infuse.
Thread the marinated beef onto the soaked bamboo skewers. Preheat a grill or grill pan and cook the sate, turning occasionally, until the beef is cooked through and lightly charred, about 8-10 minutes.
In a saucepan, combine all the ingredients for the peanut sauce and simmer, stirring occasionally, until the sauce thickens, about 10 minutes.
Serve the grilled sate skewers with the peanut sauce on the side.
Tips:
- Soak the bamboo skewers in water for at least 30 minutes to prevent them from burning during grilling.
- Adjust the amount of chilies in the spice paste based on your desired level of spiciness.
- Serve the sate Padang with steamed white rice, cucumber slices, and a sprinkle of fried shallots for a complete and authentic dining experience.
Cooking Steps
Marinate the meat in a zesty spice mixture, then grill the skewers over hot charcoal for that smoky, grilled flavor.
Serve the sate Padang with a creamy peanut sauce and fluffy ketupat (rice cakes), and don't forget to top it all off with crispy fried shallots.
Step 1. Marinate Meat With Spice Mixture
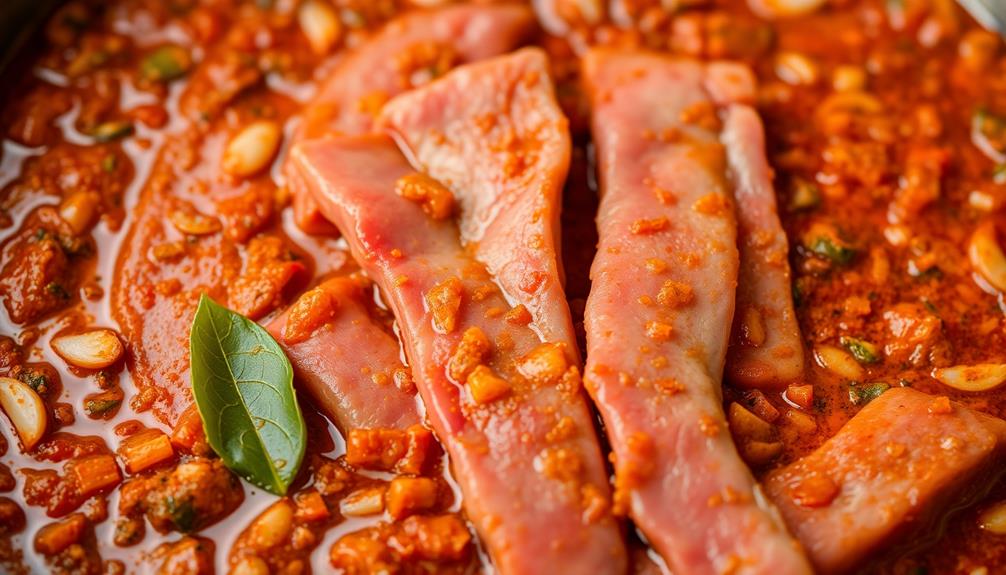
To get the perfect Sate Padang, you'll need to marinate the meat with a spice mixture. Start by combining ground coriander, cumin, turmeric, garlic, shallots, and chilies in a large bowl.
Add a pinch of salt and pepper, then stir everything together until the spices are well-blended.
Next, add your choice of meat – beef or chicken work great. Gently massage the spice mixture into the meat, making sure each piece is coated evenly.
Cover the bowl and let the meat marinate for at least an hour, or up to 24 hours if you have the time. The longer you let it sit, the more flavorful the final dish will be.
When you're ready to start cooking, thread the marinated meat onto skewers. This will make it easier to grill or broil the sate to perfection.
Just be sure to keep a close eye on it, turning the skewers frequently, until the meat is cooked through and slightly charred around the edges.
Step 2. Grill Meat Skewers Over Charcoal
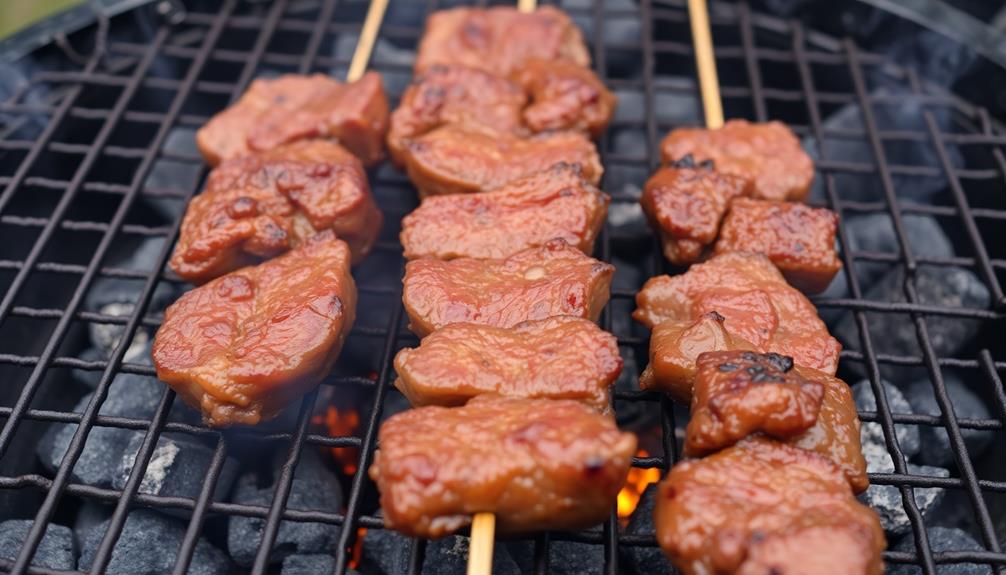
Fire up your charcoal grill or preheat your broiler to high heat. Once it's scorching hot, thread the marinated meat onto skewers. Make sure to leave a little space between each piece so they cook evenly.
Carefully place the skewers directly over the intense flames or under the broiler.
Grill or broil the meat, turning occasionally, until it's lightly charred and cooked through, about 8-10 minutes. Keep a close eye to prevent burning. The high heat will seal in the flavors and create a delightful smoky char.
Once the meat is perfectly grilled, transfer the skewers to a serving platter. Serve the sizzling hot sate padang with the tangy peanut sauce and garnishes like cucumber, onion, and lime wedges.
Mmm, the aroma of those charred, spice-infused meat skewers is simply mouthwatering! Dig in and enjoy every last bite of this beloved Indonesian specialty.
Step 3. Serve With Padang-Style Peanut Sauce
The peanut sauce is the perfect accompaniment to the grilled sate padang. It's a rich, creamy sauce that perfectly balances the savory meat skewers. To make it, you'll need roasted peanuts, coconut milk, palm sugar, garlic, shallots, chili peppers, lemon juice, and spices like coriander and cumin.
First, blend the peanuts, garlic, shallots, and chili peppers into a smooth paste. In a saucepan, combine the peanut paste, coconut milk, palm sugar, lemon juice, and spices.
Simmer the sauce, stirring frequently, until it thickens to your desired consistency. The sweet, nutty, and slightly spicy flavors will meld together, creating a sauce that's bursting with complexity.
Drizzle the warm peanut sauce over the sate padang, allowing the flavors to intermingle. You can also serve the sauce on the side for dipping.
The cool, creamy sauce provides a delightful contrast to the hot, charred meat skewers, making every bite a delicious experience.
Step 4. Serve Sate Padang With Ketupat
Alongside the flavorful sate padang, you'll want to serve up a side of ketupat, the classic Indonesian rice cakes. These bite-sized parcels are made by boiling rice in coconut leaves, which gives them a unique shape and texture.
The ketupat's slightly chewy and dense interior pairs perfectly with the savory and slightly spicy sate padang.
To serve, simply place the warm ketupat alongside the sate padang on a plate. The ketupat can be cut open to reveal the compressed rice inside, ready to be dipped into the rich peanut sauce that accompanies the sate.
The contrast of the soft, starchy ketupat and the tender, marinated meat is a delightful combination that will have your taste buds dancing.
Don't forget to offer extra peanut sauce for those who want to drizzle it over the top. The perfect pairing of sate padang and ketupat is a beloved Indonesian classic that's sure to delight your guests.
Step 5. Garnish With Crispy Fried Shallots
To elevate your sate padang, crispy fried shallots make for a delightful garnish. These crunchy, golden-brown slices add a fabulous flavor and texture contrast to the rich, savory skewers.
Start by thinly slicing some fresh shallots. Then, heat up a generous amount of oil in a skillet over medium heat. Carefully add the shallot slices and fry them until they turn a gorgeous golden-brown. Be sure to stir occasionally to ensure even cooking.
Once they've reached the perfect crispy texture, remove the shallots from the oil and place them on a paper towel-lined plate to drain. Sprinkle the crispy fried shallots over your sate padang just before serving. Their delicate, aromatic flavor and satisfying crunch will elevate the dish to new heights.
The shallots' vibrant color also makes for a lovely visual presentation. Give this simple yet impactful garnish a try – your taste buds will thank you!
Final Thoughts
Sate Padang is a captivating culinary experience that leaves a lasting impression. Even after savoring the final morsel, you'll find yourself craving more of this incredible dish. The harmonious blend of spices, tender meat, and crisp shallots creates a symphony of flavors that dance on your palate.
As you savor the final bites, you can't help but feel a sense of satisfaction and delight. The complexity of the flavors is truly remarkable, with each component playing a crucial role in the overall experience. The charred, flavorful meat, the tangy and slightly sweet peanut sauce, and the crunchy shallots come together in a delightful harmony that's both comforting and exciting.
Whether enjoying Sate Padang as an appetizer or a main course, the journey from the first bite to the last is a truly memorable one. It's a dish that showcases the rich culinary heritage of Indonesia and leaves you eager to explore more of the country's vibrant food culture.
Frequently Asked Questions
What Is the Origin of the Name "Sate Padang"?
The name "sate padang" comes from the city of Padang in West Sumatra, Indonesia, where this distinct style of skewered meat dish originated. It's known for its rich, spicy peanut sauce and unique flavors that set it apart from other Indonesian satay varieties.
How Does Sate Padang Differ From Other Indonesian Satay Dishes?
Sate Padang differs from other Indonesian satay dishes in its distinct spicy and savory flavor profile, often featuring a thick peanut sauce and tender beef or offal. It's a unique regional speciality that sets it apart from more familiar satay varieties.
What Are the Typical Accompaniments Served With Sate Padang?
When enjoying sate padang, you'll typically find it served with an array of tasty accompaniments, such as ketupat (compressed rice cakes), sayur labu (butternut squash in coconut milk), and a fiery sambal chili sauce to complement the flavorful skewered meat.
Can Sate Padang Be Made Vegetarian or Vegan?
You can certainly make a vegetarian or vegan version of sate padang. Instead of meat, you can use tofu, tempeh, or even mushrooms as the protein source. The key is to replicate the flavors with spices and marinades.
How Long Does It Typically Take to Prepare Sate Padang?
Preparing sate padang can take some time, usually around 2-3 hours. You'll need to marinate the meat, skewer it, and then grill or broil it. The sauce also needs to be prepared, which adds to the overall prep time.
Indonesian Cuisine
Cooking With Durian: the King of Fruits
Aromatic and divisive, the “king of fruits” durian captivates with its creamy texture and bold flavors, inviting culinary adventurers to explore its gastronomic potential.
Durian, the "king of fruits," has captivated culinary enthusiasts worldwide with its distinctive flavor and versatility. Rooted in Southeast Asian cuisine, this pungent tropical fruit offers a delightful journey for the open-minded. Carefully crack open the spiky shell to reveal the creamy flesh, then blend it into silky smoothies or sauté it with spices. Pair the rich durian with complementary ingredients like coconut milk and sticky rice for a harmonious experience. While the pungent aroma may challenge some, patience and experimentation are essential to unlock the depth of durian's gastronomic potential.
Key Takeaways
- Durian has a long history and cultural significance as a revered culinary ingredient in Southeast Asian cuisine.
- Durian is known for its unique flavor profile, ranging from sweet to savory, and its creamy, nutrient-dense flesh.
- Cooking with durian offers health benefits, such as providing energy, supporting heart health, and boosting immune function.
- Durian can be incorporated into a variety of sweet and savory dishes, including desserts, curries, and rice-based preparations.
- Proper preparation techniques, such as opening the fruit, removing the flesh, and blending or cooking it, are crucial for successfully utilizing durian in recipes.
History
Durian's history as a culinary ingredient dates back centuries, with evidence of its use in Southeast Asian cuisines as early as the 13th century. The pungent, spiky fruit has long been revered in the region, with its unique flavor and texture playing a central role in traditional dishes.
Over time, the popularity of durian has spread globally, capturing the imagination of adventurous eaters and sparking a culinary renaissance.
Today, durian's versatility is celebrated by chefs and home cooks alike, who incorporate it into a wide range of sweet and savory preparations. From creamy durian ice cream to savory durian curries, the fruit's rich, custard-like flesh lends itself beautifully to both sweet and savory applications.
As durian's global appeal continues to grow, its history as a beloved ingredient in Southeast Asian cuisine remains a testament to its enduring culinary significance.
Recipe
Durian, the divisive tropical fruit with a pungent aroma and a unique, creamy texture, can be a delightful ingredient when incorporated into the right dishes. While its distinctive flavor may not appeal to everyone, those who embrace it can discover a world of culinary possibilities.
When used judiciously, durian can lend a luxurious creaminess and a subtle sweetness to both savory and sweet preparations. Its versatility allows it to shine in various Southeast Asian cuisines, as well as in fusion dishes that highlight its distinctive qualities.
- 2 ripe durians, peeled and flesh removed
- 1 cup coconut milk
- 1/2 cup granulated sugar
- 1/2 teaspoon salt
- 2 cups glutinous rice, soaked for at least 4 hours or overnight
- Pandan leaves (optional)
In a large pot, combine the durian flesh, coconut milk, sugar, and salt. Bring the mixture to a gentle simmer, stirring occasionally, until the sugar has dissolved and the flavors have melded, about 15-20 minutes.
Meanwhile, steam the soaked glutinous rice until tender, about 25-30 minutes.
When ready to serve, scoop the steamed glutinous rice into bowls and top with the warm durian custard. Garnish with pandan leaves, if desired. This dish is best enjoyed warm, as the contrast between the warm, creamy durian and the chewy, sticky rice creates a delightful textural experience. To complete the sensory experience, pair this delightful dessert with a refreshing beverage like iced pandan tea or coconut water. For a full Southeast Asian culinary experience, consider serving this durian and glutinous rice dessert after a meal of traditional Indonesian dishes, such as rendang or sate. And if you’re looking to add more Indonesian flavors to your repertoire, try your hand at an authentic asinan recipe for a tasty and tangy salad.
Cooking Steps
Crack open the durian shell with a sturdy knife.
Scoop out the creamy flesh and blend it into a smooth puree.
Then, cook the durian puree and serve it warm alongside sticky rice for a truly indulgent experience.
Step 1. Crack Open the Durian Shell
Carefully, you'll want to commence the process of cracking open the durian's tough, spiky exterior. Using a sharp knife, slowly work your way around the fruit, cutting through the thick, thorny rind. Be mindful of the strong, pungent odor that will likely fill the air.
Once you've made a full circumference, firmly grasp the two halves and gently pull them apart. Inside, you'll find the bright yellow, creamy flesh nestled between the large, inedible seeds. Using a spoon, scoop out the precious durian pulp, being careful to avoid the bitter rind.
Durian's complex, savory-sweet flavor makes it a polarizing fruit, but its unique taste is undoubtedly worth the effort. Crack open the durian with care, and you'll be rewarded with a culinary experience like no other.
Prepare to be captivated by the intense aroma and indulgent texture of this remarkable tropical delight.
Step 2. Remove the Flesh
With the durian's tough exterior now breached, you can move on to extracting the creamy flesh within.
Gently pry open the fruit, being mindful of the sharp edges. Scoop out the pale yellow segments, taking care not to lose any precious flesh. The texture is soft and luxurious, like custard or crème brûlée. Discard any stringy bits or hard seeds as you go.
Work quickly, as the flesh can oxidize and darken if left exposed. Once you've collected all the usable flesh, give it a gentle rinse to remove any debris or lingering odor.
The durian's pungent aroma may linger, but the flavor is worth it. Now you're ready to incorporate this unique tropical treasure into your culinary creations.
Step 3. Blend the Durian Flesh
Once you've collected the durian flesh, it's time to blend it into a smooth, creamy texture. Start by transferring the durian flesh into a high-powered blender or food processor.
Add a splash of water or coconut milk to help the blending process. Pulse the mixture, gradually increasing the speed, until the durian is completely broken down and the texture is silky-smooth.
Be careful not to overmix, as this can cause the durian to become too liquid. Aim for a thick, velvety consistency that's perfect for incorporating into your cooking.
Taste the blended durian and adjust the consistency as needed, adding more liquid for a thinner texture or letting it blend a bit longer for a thicker, creamier result.
With the durian flesh now blended to perfection, you're ready to explore the diverse culinary applications of this unique and flavorful ingredient.
Incorporate the durian puree into sweet or savory dishes, or use it as a base for sauces, dips, and more.
Step 4. Cook the Durian Flesh
The durian flesh, now smoothly blended, offers a versatile canvas for your culinary creations.
You can sauté the durian flesh with fragrant spices like garlic, shallots, and chili to create a savory side dish.
Alternatively, you can fold the durian purée into a rich custard base and bake it into a decadent crème brûlée.
For a unique twist on a classic, try incorporating the durian flesh into pancake or waffle batter for a tropical breakfast treat.
If you're feeling adventurous, experiment by blending the durian into a smoothie or milkshake, adding a touch of sweetness from honey or coconut milk.
No matter how you choose to cook the durian, the creamy, intense flavor will shine through, delighting your taste buds.
With a little culinary creativity, the durian flesh can be transformed into a wide array of delectable dishes, each one a celebration of this extraordinary fruit.
Step 5. Serve Warm With Sticky Rice
Serving the warm, fragrant durian flesh alongside fluffy, sticky rice creates a harmonious pairing that tantalizes the senses. Scoop the soft, custard-like durian into a serving bowl, being careful to avoid any bitter or stringy parts.
Prepare the sticky rice according to package instructions, ensuring it's cooked to a moist, glutinous texture. Spoon the steaming rice around the durian, creating a visually appealing presentation.
The durian's rich, creamy flavor pairs beautifully with the sticky rice's slightly sweet and chewy nature. Encourage guests to scoop up bites of the two components together, allowing the flavors to mingle on the palate.
You can serve this dish as a dessert or an indulgent snack, perhaps with a sprinkle of toasted coconut or a drizzle of palm sugar syrup for added texture and sweetness. Enjoy the contrast of temperatures and textures as you savor each bite of this quintessential Southeast Asian delicacy.
Final Thoughts
Ultimately, cooking with durian can be a rewarding yet challenging endeavor. The pungent aroma and unique texture of this fruit require a certain level of culinary expertise and an open mind. While it may not be for everyone, those who embrace the durian's flavor profile can discover a world of delicious possibilities.
When working with durian, patience and a willingness to experiment are key. Adjusting recipes, balancing flavors, and finding the right pairings can take time and practice. But the satisfaction of creating a harmonious dish that showcases the durian's complex notes is well worth the effort.
Whether you're incorporating durian into sweet or savory recipes, the key is to let the fruit's natural excellence shine. Don't be afraid to let the durian take center stage, and allow its unique characteristics to guide your culinary journey.
With an adventurous spirit and a touch of creativity, you can unlock the true potential of this remarkable fruit.
Frequently Asked Questions
How Can I Avoid the Strong Smell of Durian When Cooking?
To avoid the strong smell of durian when cooking, you can try using airtight containers, cooking outdoors, or using a fan to disperse the odor. Additionally, you might want to consider using frozen or canned durian instead of fresh.
Is It Possible to Make Durian-Based Dishes That Are Not Sweet?
Yes, you can absolutely make savory durian-based dishes. The fruit's creamy texture and subtle nutty flavor lend themselves well to savory preparations like curries, stir-fries, and even durian-stuffed dumplings or pastries.
What Are the Best Ways to Store Leftover Cooked Durian Dishes?
For leftover cooked durian dishes, store them in airtight containers in the refrigerator. This will help preserve the flavor and texture. Consume within 3-5 days for best quality.
Can Durian Be Used in Savory Dishes Like Curries or Stir-Fries?
Yes, you can absolutely use durian in savory dishes like curries and stir-fries. The unique flavor of durian can add a creamy, rich taste to these savory preparations, complementing the other ingredients.
Does the Texture of Cooked Durian Vary Depending on the Ripeness?
Yes, the texture of cooked durian does vary depending on its ripeness. Riper durian will be softer and creamier, while less ripe durian will be firmer and chunkier when cooked.
Indonesian Cuisine
Shrimp Fritters
Kinetic and crispy, shrimp fritters are a must-try seafood delight that blends juicy shrimp with a golden-brown batter, leaving you craving more.
Shrimp fritters are a must-try seafood delight! These crispy bites originated in ancient Asia and have become a global sensation, blending juicy shrimp with a golden-brown, crunchy batter. To make them, you'll combine shrimp, flour, and seasonings before frying to perfection. Serve these fritters piping hot with delectable dipping sauces like spicy aioli or tangy cocktail sauce. The key is selecting the freshest shrimp and achieving the ideal texture through careful frying. Once you get a taste, you'll understand why shrimp fritters have become a beloved staple, from lively street food to refined dining experiences. There's so much more to discover about these delightful fritters!
Key Takeaways
- Shrimp fritters are a beloved global dish with origins tracing back to ancient Asian cuisines, featuring a crispy batter and juicy shrimp.
- The recipe involves combining shrimp, flour, cornstarch, and seasonings, followed by frying to achieve the perfect texture.
- Fresh shrimp selection and proper frying techniques are crucial for creating the desired crispy exterior and flavorful interior.
- Shrimp fritters can be served as appetizers or main courses, often accompanied by various dipping sauces to complement the dish.
- This versatile dish can be adapted to suit different occasions, from casual street food to fine dining, making it a popular choice for diverse settings.
History
Shrimp fritters have a rich history that dates back centuries. These delectable treats have been enjoyed by people all over the world, from coastal communities to bustling cities.
The origins of shrimp fritters can be traced back to ancient Asian cuisines, where cooks would skillfully fry up these crispy bites. Over time, the recipe has evolved, with different regions putting their own unique spin on the classic dish.
Whether you're enjoying them as a snack or a side dish, shrimp fritters have a way of bringing people together. The combination of juicy shrimp and crispy batter is simply irresistible.
As you take a bite, you can almost feel the history and culture infused in every morsel. From street food to fine dining, shrimp fritters have become a beloved staple that continues to delight and captivate food enthusiasts everywhere.
Recipe
Shrimp fritters are a delightful and crispy seafood dish that can be enjoyed as an appetizer or a main course. These savory bites are a popular street food in many coastal regions, often served hot and fresh from the fryer.
The key to making exceptional shrimp fritters lies in the balance of flavors and the perfect texture. The tender shrimp are coated in a light and flavorful batter, then fried to golden perfection, resulting in a crispy exterior and a juicy, flavorful interior.
- Shrimp, peeled and deveined
- All-purpose flour
- Cornstarch
- Baking powder
- Salt
- Pepper
- Eggs
- Milk
- Vegetable oil for frying
To prepare the shrimp fritters, begin by mixing the dry ingredients – flour, cornstarch, baking powder, salt, and pepper – in a bowl. In a separate bowl, whisk the eggs and milk together. Gradually add the wet ingredients to the dry ingredients, stirring until a smooth batter forms. Gently fold in the shrimp.
Heat the vegetable oil in a large skillet or Dutch oven to 350°F (175°C). Working in batches, carefully drop spoonfuls of the shrimp batter into the hot oil and fry until golden brown, about 2-3 minutes per side. Drain the cooked fritters on a paper towel-lined plate.
For best results, serve the shrimp fritters hot, while they're crispy and fresh from the fryer. You can accompany them with a variety of dipping sauces, such as a spicy aioli, sweet chili sauce, or a classic remoulade. Enjoy these delectable shrimp fritters as a tasty and satisfying treat.
Cooking Steps
First, you'll need to combine the flour, shrimp, and your favorite seasonings in a bowl.
Next, heat some oil in a pan over medium heat.
Then, carefully drop spoonfuls of the shrimp mixture into the hot oil and fry until they're a lovely golden brown. Don’t overcrowd the pan, as this can cause the temperature of the oil to drop and result in soggy shrimp fritters. Once they’re done, remove them from the oil and place them on a paper towel to drain any excess oil. Now, for a sweet treat, try out our crispy fried banana recipe, which makes for a delicious dessert or snack option for any occasion. Simply coat banana slices in a light batter and fry them until they’re golden and crispy. Serve them with a sprinkle of powdered sugar or a drizzle of honey for a delectable treat.
Don't forget to drain the excess oil from the fritters before serving them hot with a delicious chili sauce on the side.
Step 1. Combine Flour, Shrimp, and Seasoning
Next, you'll want to combine the flour, shrimp, and seasonings in a large mixing bowl. First, measure out the all-purpose flour and add it to the bowl.
Then, gently fold in the peeled and deveined shrimp. Be careful not to overmix, as you don't want to break up the shrimp.
Now, sprinkle in the salt, ground black pepper, and any other spices you'd like, such as paprika or garlic powder. Use a wooden spoon to stir everything together until the shrimp is evenly coated with the seasoned flour.
This mixture is the base for your delicious shrimp fritters. The flour helps the fritters hold their shape when frying, while the shrimp and spices provide the mouthwatering flavor.
Once the ingredients are combined, you're ready to scoop the mixture and fry up those crispy, golden-brown shrimp fritters!
Step 2. Heat Oil in Pan
Once the shrimp mixture is ready, you'll need to prepare the pan for frying. Grab a large skillet and pour in enough oil to come about 1/4 inch up the sides. You want to use a neutral-flavored oil with a high smoke point, like vegetable or canola oil.
Turn the heat to medium-high and let the oil heat up. You'll know it's ready when the oil starts to shimmer and tiny bubbles form around the edge of the pan.
While the oil heats, it's a good idea to do a quick test. Gently drop a small spoonful of the shrimp mixture into the hot oil. If it sizzles immediately and turns golden brown, you're all set. If it takes a while to cook or the color isn't right, adjust the heat as needed.
Once the oil is at the perfect temperature, you can start frying the shrimp fritters in batches, being careful not to overcrowd the pan. Get ready for crispy, golden-brown deliciousness!
Step 3. Fry Until Golden Brown
With the oil heated and ready, gently lower spoonfuls of the shrimp mixture into the pan. Watch as the fritters sizzle and turn a beautiful golden brown!
Be careful not to overcrowd the pan – you'll want to fry them in batches to ensure even cooking.
As the fritters cook, use a slotted spoon to gently flip them over, ensuring they brown evenly on both sides. The delicate shrimp pieces should become crispy and delightful, with a subtle crunch that's simply irresistible.
Keep a close eye on the fritters, adjusting the heat as needed to prevent burning.
Once they've reached that perfect golden hue, carefully remove the fritters from the oil and place them on a paper towel-lined plate. This will help absorb any excess oil, leaving you with shrimp fritters that are light, crispy, and ready to enjoy.
Repeat the process until all the batter has been transformed into these delectable morsels.
Step 4. Drain Excess Oil From Fritters
After gently removing the golden brown shrimp fritters from the oil, place them on a paper towel-lined plate. The paper towels will absorb the excess oil, leaving your fritters crispy and delicious.
To enhance the overall cooking experience, it's beneficial to ensure proper airflow around the frying area, similar to how air purifier maintenance dos and don'ts can affect performance. Gently pat the tops of the fritters with another paper towel to soak up any remaining oil. This step is crucial to prevent the fritters from becoming greasy or soggy.
Next, transfer the drained fritters to a serving platter or plate. The paper towels will have done their job, so you can discard them now.
Arrange the fritters in a single layer, making sure they don't touch each other. This will allow any final traces of oil to evaporate, keeping the texture just right. Remember, the key is to remove the excess oil without drying out the delicate shrimp inside.
With a little care, you'll have perfectly crisp and flavorful shrimp fritters ready to enjoy.
Step 5. Serve Hot With Chili Sauce
Serve the hot shrimp fritters immediately, as their crispy texture is best enjoyed straight from the oil.
Carefully transfer the golden-brown fritters to a serving plate using a slotted spoon. The piping hot shrimp morsels are the perfect canvas for a vibrant chili sauce.
Whisk together a simple dipping sauce by combining tangy rice vinegar, fiery chili garlic sauce, and a touch of soy sauce. The sweet-spicy-savory flavors will perfectly complement the savory shrimp.
Invite your guests to dunk the fritters into the zesty sauce, savoring the contrast of hot and cool, crispy and creamy.
Don't be afraid to get a little messy – the sheer joy of these shrimp fritters is in the hands-on experience. Encourage your loved ones to dig in with their fingers, relishing each bite.
The combination of crunchy exterior and tender interior is truly irresistible. Serve these shrimp fritters hot, with plenty of napkins nearby, and watch them disappear in no time.
Final Thoughts
All in all, you've now learned the essential steps to crafting delectable shrimp fritters. From selecting the freshest shrimp to perfecting the crispy exterior, you've mastered the art of creating this beloved snack.
The key is to strike the right balance – not too greasy, not too dry, but just the right amount of crunch and flavor in every bite.
As you continue to experiment with this recipe, don't be afraid to put your own spin on it. Try adding different seasonings or serving it with a variety of dipping sauces. The possibilities are endless, so have fun and get creative in the kitchen.
Remember, the joy of cooking is in the process, so savor each step and enjoy the delicious results.
Shrimp fritters are a versatile dish that can be enjoyed as an appetizer, a side, or even a main course.
Whether you're hosting a gathering or simply indulging in a tasty treat, these fritters are sure to impress and delight.
Frequently Asked Questions
What Is the Best Way to Clean the Shrimp Before Frying?
To clean the shrimp, you'll want to devein and peel them. Rinse the shrimp under cold running water, then use a small knife to remove the dark vein running along the back. Pat the shrimp dry before frying.
Can I Use Frozen Shrimp Instead of Fresh?
You can definitely use frozen shrimp instead of fresh. Just make sure to thaw them completely and pat them dry before using. Frozen shrimp can work just as well as fresh in many recipes.
How Do I Achieve the Perfect Crispiness in the Fritters?
To achieve the perfect crispiness, you'll want to ensure the oil's at the right temperature and that you're frying the fritters in small batches. Gently squeeze out excess moisture from the ingredients before frying for maximum crispiness.
Can I Make the Batter Ahead of Time?
Yes, you can make the batter ahead of time. Just be sure to cover and refrigerate it until you're ready to fry the fritters. This will help the batter stay fresh and crisp when you cook it.
What Is the Recommended Dipping Sauce for Bakwan Udang?
For a tasty dipping sauce, you can't go wrong with a simple yet flavorful blend of soy sauce, rice vinegar, and a touch of chili oil. This classic combination complements the crispy fritters beautifully.
Indonesian Cuisine
Kue Putu (Bamboo Rice Cake)
Graced with a unique bamboo-steamed shape, Kue Putu is an enchanting Indonesian rice cake that captivates with its sweet, caramelized filling and rich cultural heritage. Discover more about this timeless delicacy.
Step into the vibrant world of Kue Putu, Indonesia's beloved bamboo-steamed rice cake! This centuries-old delicacy enchants with its unique shape, crafted by steaming rice batter in bamboo tubes – a nod to the country's rich culinary heritage. Made with a simple yet delectable blend of rice flour, coconut milk, and palm sugar, Kue Putu boasts a soft, sticky texture and a sweet, caramelized filling that tantalizes the taste buds. Enjoyed as a snack or dessert, it's a cherished symbol of hospitality and cultural connection, often found at family gatherings and street markets. Intrigued to learn more about this captivating Indonesian treat? Look no further than Kue Putu’s charming presence at local festivities and traditional ceremonies, where its comforting aroma and delightful flavor are celebrated. Pair a plate of Kue Putu with a cup of fragrant Indonesian coffee or a refreshing glass of iced tea for a truly indulgent experience. And don’t forget to savor this delightful snack alongside a popular Indonesian noodle dish, such as Mie Goreng or Mie Ayam, for a complete culinary adventure through Indonesia’s diverse and delicious cuisine.
Key Takeaways
- Kue Putu is a traditional Indonesian rice cake with a unique shape and flavor, originating in the 17th century and deeply rooted in local culinary traditions.
- The key ingredients for Kue Putu include rice flour, coconut milk, and palm sugar, which are steamed in bamboo tubes to achieve its distinctive texture and aroma.
- Preparation of Kue Putu involves soaking bamboo leaves, grinding the rice flour mixture, and steaming the filled bamboo leaves to create the final product.
- Kue Putu is commonly consumed as a snack or dessert, often served warm and accompanied by fresh grated coconut or additional palm sugar, evoking nostalgia and cultural pride.
- Nutritionally, Kue Putu offers a balance of carbohydrates, healthy fats, and fiber, making it a wholesome option when consumed in moderation as part of a balanced diet.
History
When did the iconic Indonesian steamed rice cake, Kue Putu, first emerge? Historians believe this delightful treat has origins dating back to the 17th century. It was likely inspired by similar rice-based snacks enjoyed across Southeast Asia.
In the early days, Kue Putu was often served during special occasions and celebrations. The unique shape, made by steaming the rice batter in hollowed-out bamboo tubes, gave the cake a distinctive look and texture.
As the popularity of Kue Putu grew, it became a beloved part of Indonesian culinary traditions.
Over time, the recipe evolved, with creative cooks experimenting with different fillings and flavors. Today, you can find Kue Putu made with a variety of ingredients, from the classic brown sugar and coconut to more modern variations.
No matter the recipe, this timeless treat remains a cherished icon of Indonesian cuisine, connecting generations through its delicious and unique taste.
Recipe
Kue Putu is a traditional Indonesian steamed rice cake with a sweet palm sugar filling. It's a popular snack that's often enjoyed as a breakfast or afternoon treat.
The unique flavor and texture of Kue Putu comes from the combination of the chewy rice flour dough and the gooey, caramelized palm sugar filling. The steaming process also imparts a delightful aroma that makes this treat irresistible.
Ingredients:
- 200 grams rice flour
- 100 grams tapioca flour
- 1/2 teaspoon salt
- 150 milliliters coconut milk
- 50 grams grated fresh coconut
- 100 grams palm sugar, chopped
Cooking Instructions:
In a large bowl, mix the rice flour, tapioca flour, and salt. Gradually add the coconut milk, stirring constantly until a smooth, pliable dough forms.
Divide the dough into small, equal-sized balls. Press a small amount of palm sugar into the center of each ball, then shape the dough around the filling to completely enclose it.
Place the filled dough balls in a greased steamer and steam for 15-20 minutes, or until cooked through.
To ensure the best texture and flavor, it's important to use fresh, high-quality ingredients. The palm sugar should be grated or chopped into small pieces to allow it to melt evenly during the steaming process.
Serve the Kue Putu warm, garnished with the grated fresh coconut, for a truly authentic and delightful experience.
Cooking Steps
First, you'll need to soak the bamboo leaves overnight to get them ready.
Next, grab your rice flour and mix it all up.
Once that's done, it's time to steam the rice mixture until it's just right.
Now, carefully fill those bamboo leaves and serve your warm, fresh kue putu!
Step 1. Soak Bamboo Leaves Overnight
Soaking the bamboo leaves overnight is a crucial step in preparing the perfect Kue Putu. These leaves will serve as the outer layer, or wrapper, for the delicious rice cakes.
Start by gathering fresh bamboo leaves. They should be green, pliable, and free of any blemishes or tears. Gently rinse the leaves under cool running water to remove any dirt or debris.
Next, place the leaves in a large bowl or container and cover them with water. Let them soak for at least 8 hours, or overnight. This softens the leaves, making them more pliable and easier to work with when it's time to assemble the Kue Putu.
Once the soaking is complete, drain the leaves and pat them dry with a clean towel. They're now ready to be used in the next step of the recipe.
Soaking the bamboo leaves is an essential preparation that ensures your Kue Putu will have a beautifully wrapped, tender exterior.
Step 2. Grind Rice Flour Mixture
To prepare the rice flour mixture, you'll need to grind the core ingredients. Start by gathering your rice flour, palm sugar, and salt.
You'll want to use a mortar and pestle to grind these together into a fine, even consistency. Gently spoon the rice flour into the mortar, followed by the palm sugar and a pinch of salt.
Begin grinding the mixture in a circular motion, applying steady pressure. Keep going until the grains of rice flour have been completely broken down, and the palm sugar has been fully incorporated.
The goal is to create a smooth, powdery texture that will come together beautifully when you add the water later on.
Take your time with this step – the more thoroughly you grind the ingredients, the better the final kue putu will turn out. Once you're satisfied with the consistency, you're ready to move on to the next part of the process.
Step 3. Steam the Rice Mixture
The next step is to steam the rice mixture.
You'll need a steamer pot or a bamboo steamer lined with banana leaves. Gently place the rice mixture into the steamer, being careful not to pack it down too tightly. This allows the steam to circulate evenly and cook the putu perfectly.
Set the steamer over a pot of boiling water, making sure the water doesn't touch the bottom of the steamer. Cover the steamer with a lid and let the rice mixture steam for about 15-20 minutes.
The putu should turn a lovely, vibrant green color as it cooks.
Keep an eye on the water level and add more boiling water if needed to maintain the steam. When the putu is done, the grains will be soft and tender.
Carefully remove the steamer and let the putu cool slightly before serving. The fragrant, steamed rice cakes are now ready to enjoy!
Step 4. Fill Bamboo Leaves
After the rice mixture has been steamed, it's time to fill the bamboo leaves.
Grab a piece of bamboo leaf and place a spoonful of the warm, fragrant rice mixture in the center. Carefully fold the leaf over, creating a little packet. Secure the packet with a small bamboo skewer or toothpick to keep it closed.
Repeat this process, filling each bamboo leaf until you've used up all the rice mixture.
Be gentle as you handle the delicate leaves – you don't want to tear them. Arrange the filled bamboo packets on a serving platter or steamer basket, preparing them for the final steaming step.
The aroma of the steamed rice and fragrant leaves will have your mouth watering!
Soon, you'll be able to unwrap these little bundles of joy and savor the warm, sticky-sweet goodness inside. Get ready for a truly authentic Indonesian treat.
Step 5. Serve Warm and Fresh
Once the bamboo packets are arranged, it's time to steam them. Carefully place the filled bamboo leaves into a steamer, making sure they're not crowded. Cover the steamer and let the cakes steam for about 15 minutes.
As the timer ticks down, the scent of the warm, fragrant putu will start to fill the air, making your mouth water in anticipation.
When the timer goes off, it's time to serve these delightful treats. Using tongs, gently remove the steaming hot bamboo packets from the steamer. Be careful, as the leaves will be very hot.
Unwrap the packets to reveal the soft, fluffy putu cakes inside. Serve them immediately while they're still warm and fresh, as this is when they'll be at their absolute best.
The soft, sticky texture and sweet, coconutty flavor are simply irresistible. Enjoy these traditional Indonesian delights with family and friends, savoring every bite.
Final Thoughts
As we reach the conclusion of our exploration of Kue Putu, it's clear that this traditional Indonesian delicacy holds a special place in the hearts and culinary traditions of the region.
The combination of the warm, fluffy rice cake, the sweet palm sugar filling, and the fresh pandan leaf aroma creates a truly unique and satisfying experience.
While Kue Putu may seem simple, its preparation requires skill and attention to detail. The steaming process, the careful shaping of the dough, and the perfect timing of the final cooking all contribute to the perfection of this beloved treat.
As you savor each bite, you can't help but appreciate the rich history and cultural significance that Kue Putu carries.
Whether you're enjoying it as a morning snack or an afternoon pick-me-up, Kue Putu is a delightful reminder of the joys of traditional Indonesian cuisine.
As you venture forth, we hope you'll keep this special cake in mind and seek out opportunities to indulge in its comforting and delicious flavors.
Frequently Asked Questions
How Long Can Kue Putu Be Stored?
Freshly made, you can store the cakes for up to 3 days in the fridge. However, they won't last much longer as the texture and flavor will start to deteriorate. For best quality, enjoy them within a day or two.
Can Kue Putu Be Made Without Bamboo?
Yes, you can make this traditional rice cake without using bamboo. Instead, you can use other steaming vessels like a metal or silicone mold to achieve the same texture and flavor.
Is Kue Putu Gluten-Free or Vegan-Friendly?
Yes, kue putu can be made gluten-free and vegan-friendly. You can use rice flour, coconut milk, and palm sugar to create a delicious and allergy-friendly version of this traditional Indonesian snack.
What Is the Traditional Way to Serve Kue Putu?
Traditionally, you'd serve kue putu steaming hot, often with a sprinkle of grated coconut and a drizzle of palm sugar syrup. It's a delightful combination of textures and flavors that makes for a tasty and authentic Indonesian treat.
Can Kue Putu Be Frozen for Later Use?
Can you freeze kue putu for later use? Absolutely! Cooked kue putu can be frozen for up to 2 months. Just reheat them in a steamer when ready to serve, and you'll enjoy that signature taste and texture.
-
Brazilian Cuisine3 months ago
Tacacá
-
Polish Comfort Food3 months ago
Krupnik (Barley Soup)
-
Brazilian Cuisine3 months ago
Caldeirada
-
Brazilian Cuisine3 months ago
Chicken in Brown Sauce
-
Southern Comfort Food3 months ago
Cheese Straws
-
African Cuisine3 months ago
Kedjenou (Ivory Coast)
-
Polish Comfort Food3 months ago
Vegetable Salad
-
American Diner Classics3 months ago
The Maillard Reaction: Understanding the Chemistry of Browning {Food Science and Cooking}