
Get ready to embark on a delightful culinary journey with kerak telor, the iconic Indonesian street food! Centuries ago, this savory dish emerged from the creativity of Jakarta's street vendors, crafting a crispy crust from leftover rice and eggs. Today, kerak telor remains a beloved symbol of Indonesian identity, often enjoyed during special occasions and celebrations. The harmonious blend of glutinous rice, eggs, grated coconut, and aromatic spices creates a unique texture and flavor profile that will captivate your senses. Intrigued? Keep reading to uncover the rich history and mouthwatering details behind this beloved Indonesian delicacy. If you’re feeling adventurous, why not try your hand at making kerak telor at home? With its simple yet flavorful ingredients, this iconic street food can easily be recreated in your own kitchen. And if you’re a fan of Indonesian cuisine, you might also want to explore the tantalizing flavors of pempek recipe, another popular dish that will surely satisfy your craving for exotic and delicious flavors. So why not bring a taste of Indonesia to your own table and experience the delight of these beloved dishes?
Key Takeaways
- Kerak Telor is a traditional Indonesian street food that originated in Jakarta, featuring a savory pancake-like texture with a crispy exterior.
- The key ingredients include glutinous rice, eggs, grated coconut, and aromatic spices, which contribute to its unique flavor profile.
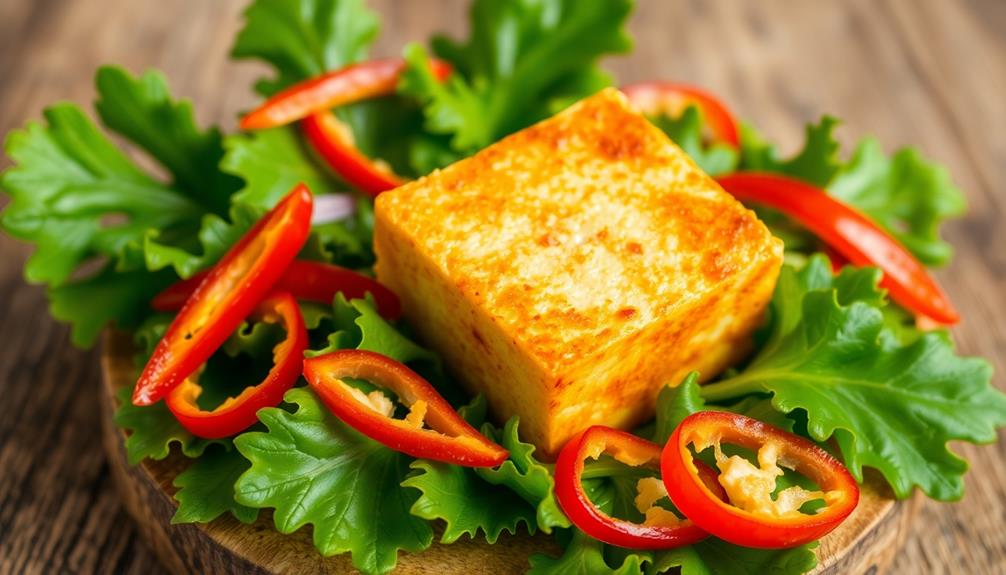
- The dish is known for its contrasting textures, with a crunchy exterior and a soft, pillowy interior, creating a harmonious taste experience.
- Kerak Telor is often served warm, garnished with additional grated coconut, and can be paired with various dipping sauces.
- The dish represents the creativity and ingenuity of Indonesian street food culture, showcasing the country's rich culinary traditions and heritage.
Top picks for "kerak telor glutinou"
Open Amazon search results for this keyword.
As an affiliate, we earn on qualifying purchases.
History
Kerak telor, a beloved street food in Indonesia, has a rich history that dates back centuries. This delectable treat, made from a combination of glutinous rice, eggs, and a variety of aromatic spices, has its origins in the bustling streets of Jakarta.
It's believed that kerak telor was first created as a way to use up leftover rice and eggs, transforming them into a savory and satisfying snack. Over time, the recipe has evolved, with vendors adding their own unique touches to make their kerak telor stand out.
Today, this iconic dish can be found throughout Indonesia, from bustling city centers to quiet neighborhoods, delighting locals and visitors alike with its irresistible flavors.
The crunchy, golden crust and the soft, fluffy interior make kerak telor a true culinary delight, a testament to the ingenuity and creativity of Indonesian street food culture.
Recipe
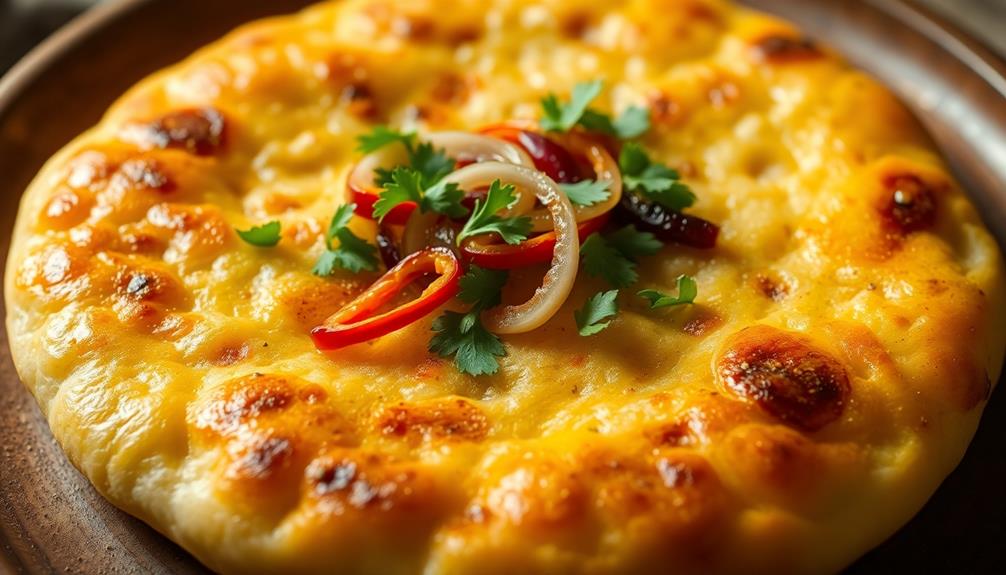
Kerak Telor is a traditional Indonesian street food originating from Jakarta. It's a savory pancake made from a mixture of glutinous rice, egg, and a variety of flavorful spices and toppings. This dish is considered a delicacy and is often enjoyed as a snack or a light meal.
The unique texture of Kerak Telor comes from the combination of the sticky glutinous rice and the crispy, caramelized egg exterior. The dish is typically cooked on a special concave skillet, which gives it its distinctive shape and ensures even cooking.
Ingredients:
- 1 cup glutinous rice, soaked in water for at least 4 hours
- 2 eggs
- 1/2 cup grated coconut
- 1 teaspoon salt
- 1 teaspoon ground shrimp paste
- 1/2 teaspoon ground coriander
- 1/2 teaspoon ground cumin
- 2 tablespoons shallots, finely chopped
- 2 tablespoons dried shrimp, finely chopped
- Vegetable oil for cooking
Cooking Instructions:
Drain the soaked glutinous rice and blend it in a food processor or blender until it forms a smooth batter. In a separate bowl, beat the eggs. Add the grated coconut, salt, ground shrimp paste, ground coriander, ground cumin, shallots, and dried shrimp to the egg mixture and mix well.
Heat a small, non-stick concave skillet over medium heat and grease it lightly with vegetable oil. Scoop a few tablespoons of the rice batter into the center of the skillet and spread it out slightly. Pour a small amount of the egg mixture over the rice batter. Cover the skillet and cook for 2-3 minutes, or until the bottom is crispy and golden.
Carefully flip the Kerak Telor and cook for another 2-3 minutes on the other side until fully cooked.
Tips:
For the best texture, it's important to use the right type of glutinous rice. Look for "ketan" or "sticky rice" in Asian grocery stores. Additionally, be cautious when flipping the Kerak Telor, as the thin, crispy exterior can easily break. Serve the Kerak Telor warm, garnished with additional grated coconut if desired.
Cooking Steps
First, you'll need to soak the glutinous rice overnight.
Once it's drained and rinsed, mix it with coconut milk.
Next, it's time to cook the kerak telor mixture.
Step 1. Soak Glutinous Rice Overnight

Before you begin cooking the Kerak Telor, you'll need to soak the glutinous rice overnight. This important step helps the rice become soft and sticky, which is crucial for the dish's unique texture.
Simply place the rice in a large bowl, then add enough water to cover it completely. Let it sit on the counter for at least 8 hours, or overnight.
The soaking process allows the rice grains to absorb moisture and become pliable. This will make them easier to work with later on.
When you're ready to cook, drain the rice and discard the soaking water. The rice should have a plump, translucent appearance.
This prepared rice will be the foundation for the crispy Kerak Telor crust. With the rice ready, you can move on to the next steps in bringing this traditional Indonesian street food to life.
Step 2. Drain and Rinse Glutinous Rice

After the rice has soaked, drain it thoroughly in a fine-mesh strainer.
Rinse the rice under cool running water, gently stirring with your hands to remove any excess starch. This step is crucial, as it helps prevent the rice from becoming gummy or sticky during cooking.
Once the water runs clear, shake the strainer to allow the excess moisture to drain off. You want the rice to be damp, but not dripping wet. This balance ensures the rice cooks evenly and develops that signature crispy crust.
Now that your glutinous rice is prepped, you're one step closer to enjoying the delicious Kerak Telor.
The next phase involves mixing the rice with beaten eggs and other key ingredients. Get ready to create a mouthwatering dish packed with texture and flavor!
Step 3. Mix Glutinous Rice and Coconut Milk

With the glutinous rice prepped, you'll now combine it with rich coconut milk to create the base for the Kerak Telor.
In a large bowl, pour in the rinsed glutinous rice. Slowly pour in the coconut milk, stirring gently to ensure the grains are evenly coated. The coconut milk will help soften the rice and add a delightful creaminess to the dish.
Continue mixing until the rice and coconut milk are fully incorporated. You'll want the mixture to have a thick, porridge-like consistency. If it seems too dry, simply add a bit more coconut milk.
Once the base is ready, you can move on to the next step of cooking the Kerak Telor. Get excited, because the best is yet to come!
This flavorful combination of glutinous rice and coconut milk will serve as the foundation for the crispy, eggy crust that makes this dish so unique and delicious.
Step 4. Cook Kerak Telor Mixture

Now that you've combined the glutinous rice and coconut milk, it's time to cook the Kerak Telor mixture.
First, grab a large, flat pan and place it over medium heat. Once the pan is hot, gently pour the rice mixture into the center, creating a circular shape. Using a spatula, spread the mixture evenly, forming a thin, even layer.
As the mixture cooks, you'll notice the edges starting to turn golden brown and crispy. This is exactly what you want! Resist the urge to overcrowd the pan – work in batches if needed to maintain that perfect texture.
Occasionally, gently lift the edges with your spatula to ensure even cooking.
After 5-7 minutes, the bottom should be nicely browned and crispy. Carefully flip the Kerak Telor over and cook for another 3-5 minutes on the other side.
When both sides are crispy and golden, it's ready to be served hot and enjoy!
Step 5. Flip and Brown the Kerak Telor

Once the kerak telor has cooked for 5-7 minutes on one side, it's time to flip it over. Gently slide a spatula under the crust and carefully turn it over. Be gentle, as the crust is delicate.
You'll want to make sure the other side gets a chance to brown and crisp up. Cook for another 5-7 minutes, keeping a close eye on it. The crust should develop a lovely golden-brown color.
Once both sides are nicely browned, it's time to remove the kerak telor from the pan. Slide the spatula under the entire crust and lift it out. Place it on a plate or cutting board.
Now, let's take a look at that beautiful crust! It should be crisp and slightly chewy, with a wonderfully nutty aroma. The egg and rice mixture inside will be hot and steaming.
Resist the urge to dig in just yet – you'll want to let it cool for a minute or two before serving. This allows the flavors to meld together perfectly.
Final Thoughts
Kerak telor, a captivating culinary delight, has left an indelible mark on your taste buds. This unique dish, with its crispy egg and glutinous rice crust, has truly captured your heart.
As you savor the final bites, you can't help but feel a sense of satisfaction and wonder. The flavors and textures of kerak telor have danced across your palate, leaving you craving more.
The way the crunchy exterior gives way to the soft, pillowy interior is simply mesmerizing. Each bite is a symphony of sweet, savory, and slightly smoky notes that harmonize perfectly.
Looking back on your culinary journey with kerak telor, you can't help but feel a deep appreciation for the rich heritage and traditions that have shaped this remarkable dish.
It's a testament to the ingenuity and passion of Indonesian cuisine. As you say goodbye, you know that the memory of this delectable treat will linger, inspiring you to seek out new and exciting culinary adventures.
Frequently Asked Questions
How Long Does It Take to Make Kerak Telor?
Making this dish takes quite some time, doesn't it? You'll need around an hour to prepare and cook it, so be sure to set aside enough time to make this delicious and intricate meal.
Can Kerak Telor Be Frozen for Later Use?
Yes, you can freeze the dish for later use. Simply portion it out, wrap it tightly, and store it in the freezer. When ready to enjoy, thaw it in the fridge and reheat it before serving.
What Is the Best Way to Reheat Kerak Telor?
The best way to reheat it is to place it in a preheated oven at 350°F (175°C) for 5-10 minutes, or until it's heated through and the crust is crispy again. Don't forget to use oven mitts when handling the hot dish.
Can Kerak Telor Be Made With Different Types of Eggs?
Yes, you can use different types of eggs to make this dish. While chicken eggs are the traditional choice, duck or quail eggs can also work well, adding their own unique flavors and textures. There are also various ways to handle broken eggs, such as using them as a binding agent in meatloaf or meatballs, or incorporating them into a breading mixture for fried foods. Additionally, if you accidentally break an egg while preparing this dish, you can always try salvaging it by carefully removing any shell fragments and adding the remaining egg to the mixture. No matter what type of egg you use or how you handle them, this dish is sure to be delicious.
Is Kerak Telor Suitable for Vegetarians or Those With Dietary Restrictions?
Traditional versions of this dish aren't suitable for vegetarians or those with dietary restrictions, as they typically contain eggs. However, you could experiment with plant-based alternatives to make a vegetarian-friendly version that accommodates your dietary needs.