Connect with us

Indonesian Cuisine

Corn Fritters

Hailing from indigenous roots, corn fritters have evolved into a cherished treat across the Americas – learn how to make these crispy, sweet delights.

Published

on

crispy corn snack bites

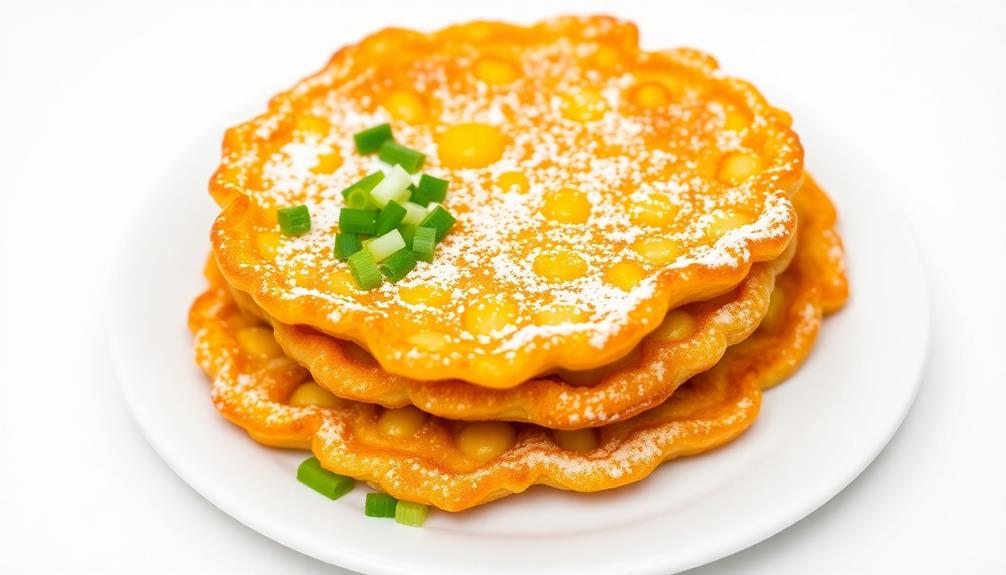
Corn fritters have a rich history, originating with indigenous peoples and later adopted by European settlers. These crispy, sweet treats are now cherished across the Americas and the Caribbean as breakfast, sides, or desserts. To make the best corn fritters, you'll need fresh or frozen corn, flour, baking powder, and a few other simple ingredients. Start by combining the corn and flour, then add the egg and milk mixture. Fry the batter in hot oil until golden brown, and serve piping hot. The harmonious balance of crispy exterior and soft interior is sure to satisfy your cravings. If you're intrigued, keep reading to learn more delicious ways to enjoy corn fritters.

Key Takeaways

  • Corn fritters have a long and varied history, originating with indigenous peoples in the Americas and evolving over centuries into a cherished regional dish.
  • The essential ingredients for corn fritters include fresh or frozen corn, all-purpose flour, baking powder, eggs, and milk, with specific cooking tips for optimal texture and flavor.
  • The cooking process involves combining the corn and flour, adding the egg and milk mixture, and frying the batter in hot oil until golden brown.
  • Corn fritters offer a versatile flavor profile, with a balance of sweet corn and savory batter, and can be enjoyed as a side dish, snack, or main course.
  • Serving corn fritters immediately after frying and presenting them with various dipping sauces or toppings can enhance the overall dining experience.

History

Corn fritters have a long and storied history, dating back to the indigenous peoples of the Americas. These tasty treats were a beloved staple among many Native American tribes, who'd fry up freshly harvested corn into crispy, golden-brown fritters.

The recipe was later adopted by European settlers, who put their own spin on the dish, often adding ingredients like eggs, flour, and spices to create an even more delectable version.

Over the centuries, corn fritters have become a cherished part of many regional cuisines, from the American South to the Caribbean. They've been enjoyed as a comforting breakfast, a satisfying side dish, and even a sweet dessert.

Today, the humble corn fritter remains a beloved comfort food, bringing people together with its irresistible blend of crispy texture and sweet, corny flavor. Whether you're enjoying them at a family barbecue or indulging in a batch fresh from the kitchen, corn fritters continue to delight and inspire generations of food lovers.

Recipe

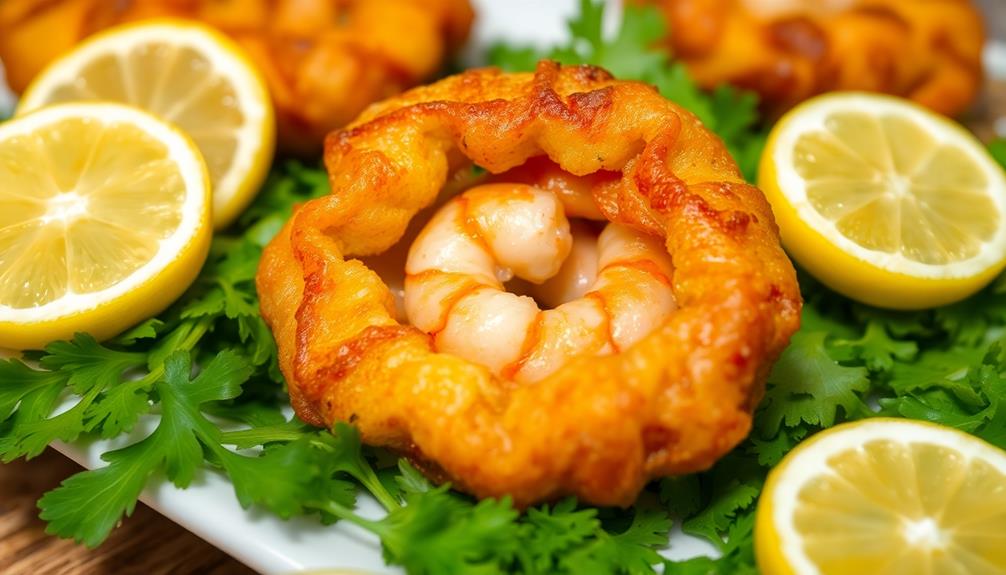
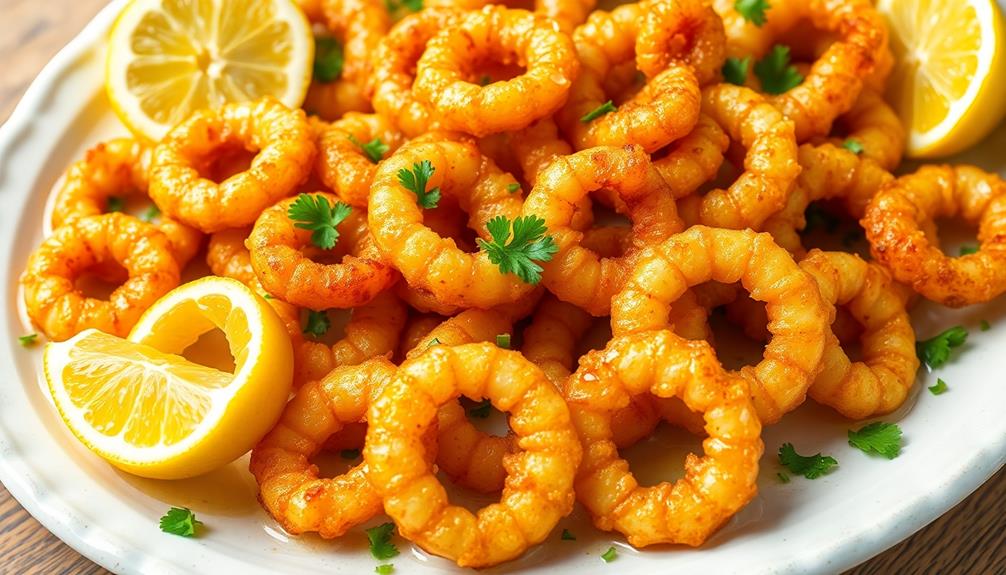
Corn fritters are a delightful and versatile dish that can be enjoyed as a side, appetizer, or even a main course. These crispy, golden-brown bites are a beloved classic, showcasing the natural sweetness of fresh corn kernels. For those who are looking to add a twist to the traditional corn fritters, consider trying a recipe for shrimp fritters. By incorporating succulent shrimp into the batter, these fritters take on a savory and seafood-infused flavor that is sure to impress. Whether served with a spicy aioli dipping sauce or on their own, these shrimp fritters are a delicious alternative to the classic corn fritter.

Advertisement

To create the perfect corn fritters, it's important to start with high-quality ingredients and follow a straightforward recipe. With a few simple steps, you can have a batch of these tasty treats ready to share with family and friends.

Ingredients:

  • 2 cups fresh or frozen corn kernels
  • 1 cup all-purpose flour
  • 1 teaspoon baking powder
  • 1/2 teaspoon salt
  • 1/4 teaspoon black pepper
  • 1 egg, beaten
  • 1/2 cup milk
  • 2 tablespoons unsalted butter, melted

In a large bowl, combine the corn kernels, flour, baking powder, salt, and black pepper. Stir to mix well.

In a separate bowl, whisk together the beaten egg and milk. Pour the wet ingredients into the dry ingredients and stir until just combined, being careful not to overmix.

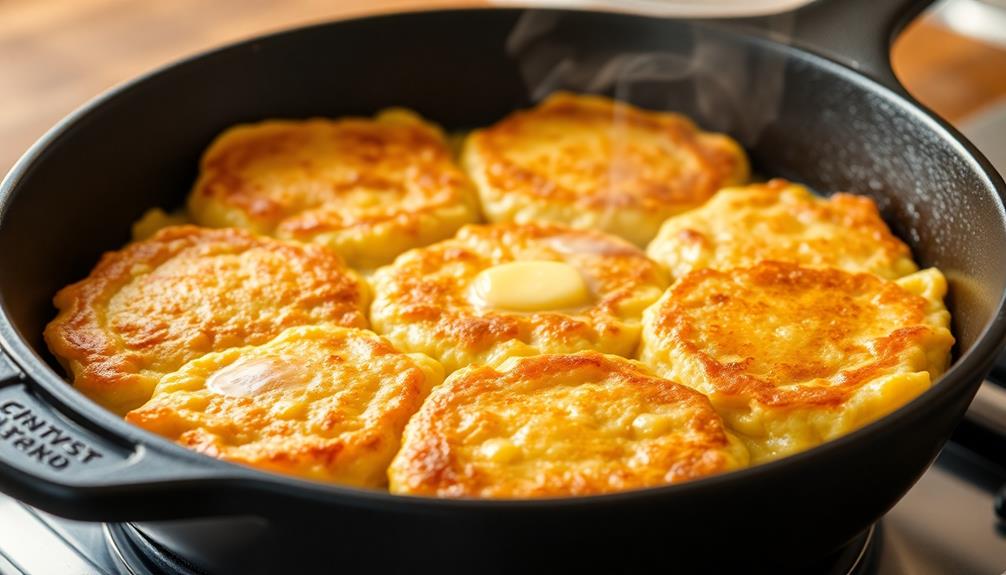
Heat a large skillet or griddle over medium-high heat. Add the melted butter, swirling to coat the surface.

Scoop heaping tablespoonfuls of the batter onto the hot surface, spacing them apart. Cook for 2-3 minutes per side, or until golden brown and crispy. Serve the corn fritters hot, with your favorite dipping sauce or toppings.

Advertisement

To ensure the best results, it's important to use fresh or high-quality frozen corn kernels. If the batter seems too thick, add a bit more milk to achieve the desired consistency.

Additionally, be mindful not to overcrowd the pan, as this can prevent the fritters from crisping up properly.

Cooking Steps

Gather your corn kernels and flour – it's time to get cooking!

Crack an egg, pour in some milk, and whisk it all together.

Next, heat up that oil in your pan and get ready to scoop in those delicious corn fritter bites.

Advertisement

Watch them sizzle and turn a gorgeous golden brown as you fry them to perfection.

Step 1. Combine Corn Kernels and Flour

combine corn and flour

Next, you'll want to combine the fresh corn kernels with the all-purpose flour. This is a crucial step in creating those delightful, golden-brown corn fritters.

Take the sweet, juicy corn kernels you've just cut from the cob and gently fold them into the flour. Use a large bowl to ensure you have plenty of room to mix everything together without making a mess.

As you stir, you'll notice the flour coating the corn, creating a nice, even mixture. Be sure to handle the corn kernels with care to prevent them from breaking apart. You want to maintain their lovely, whole shape.

Once the corn and flour are fully combined, you're ready for the next step. This simple combination of ingredients is the foundation for the perfect corn fritter batter. With the corn and flour united, you're one step closer to enjoying those crispy, flavorful fritters.

Step 2. Add Egg and Milk

incorporate egg and milk

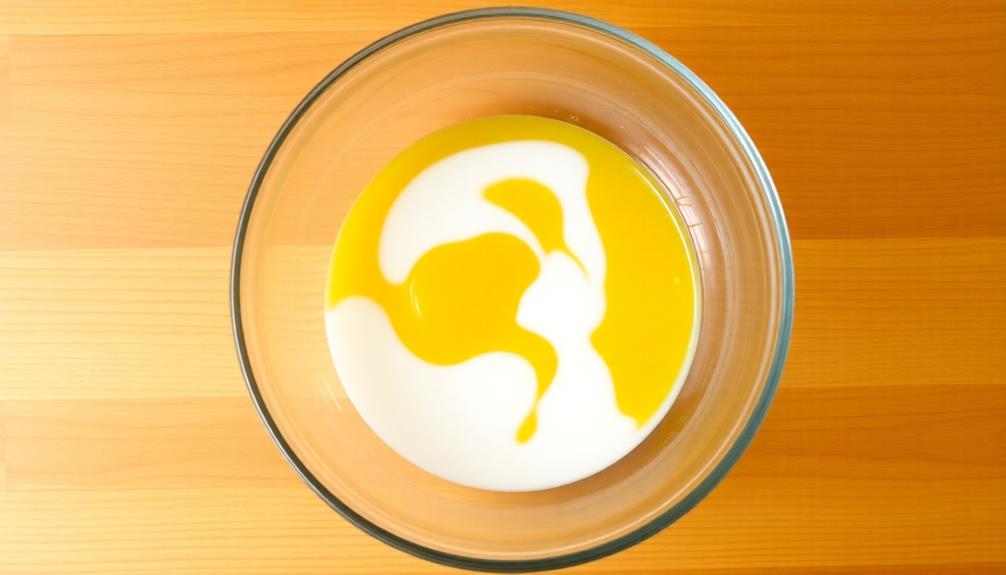
After combining the corn kernels and flour, you'll need to add the egg and milk. This step is crucial for creating the perfect texture and flavor in your corn fritters.

Start by cracking a fresh egg into a small bowl. Use a fork to lightly beat the egg until it's nice and smooth. Next, pour in some milk. The amount of milk you'll need will depend on the recipe, but you'll generally want to use around 1/4 to 1/2 cup. Whisk the egg and milk together until they're fully incorporated.

Advertisement

Now, you can gently fold the egg and milk mixture into the corn and flour mixture. Be careful not to overmix, as this can make your fritters tough. You want to mix just until everything is combined.

The batter should have a thick, pancake-like consistency. If it seems too thick, you can add a bit more milk. If it's too thin, a little extra flour should do the trick. With the egg and milk added, your corn fritter batter is now ready to be fried to golden perfection!

Step 3. Heat Oil in Pan

heat oil in pan

With the corn fritter batter ready, it's time to start cooking.

Heat a large skillet or frying pan over medium heat and add enough oil to coat the bottom. You want the oil to be hot but not smoking. Once the oil is shimmering, it's time to start frying the corn fritters.

Carefully scoop heaping tablespoons of the batter and gently drop them into the hot oil. Fry the fritters for 2-3 minutes per side, or until they're golden brown and crispy. Be sure to flip them carefully with a spatula to prevent them from falling apart.

As the fritters cook, the oil should stay at a steady temperature. If it starts to get too hot, reduce the heat slightly. You may need to fry the fritters in batches to maintain the right oil temperature.

Advertisement

Once the first batch is done, transfer the crispy fritters to a paper towel-lined plate to drain any excess oil.

Step 4. Scoop Spoonfuls Into Hot Oil

scoop spoonfuls into oil

Carefully scoop heaping tablespoons of the batter and, with a gentle motion, drop them into the hot oil. You'll see the batter sizzle and begin to turn a lovely golden brown.

Gently nudge the fritters with a slotted spoon to help them cook evenly. Be patient and let them fry for about 2-3 minutes per side, or until they're crispy and delectable.

Once the fritters are cooked, use the slotted spoon to transfer them to a paper towel-lined plate. This will help absorb any excess oil, leaving you with perfectly crisp and golden corn fritters.

Repeat this process, working in batches, until you've cooked all the batter. Remember to maintain the oil temperature between 350-375°F for the best results.

The key is to resist the urge to overcrowd the pan, which can cause the fritters to steam rather than fry. With a little care and attention, you'll have a plate of irresistible corn fritters ready to enjoy.

Advertisement

Step 5. Fry Until Golden Brown

fry until golden brown

Gently lower the scooped batter into the hot oil. The sound of the sizzle is music to your ears! Watch as the fritters start to turn a beautiful golden brown. This is the moment you've been waiting for – when the corn fritters transform from simple batter into delectable fried treats.

As you enjoy the cooking process, consider how modern heating solutions can enhance your kitchen comfort with quieter operation while you fry.

Adjust the heat as needed to maintain a steady sizzle, but not so high that the fritters burn. Flip them gently with a slotted spoon, ensuring even cooking on all sides. The fritters should develop a crispy, golden-brown exterior while remaining soft and tender inside.

Keep a close eye on them, cooking in batches if needed to avoid overcrowding the pan. Once they reach that perfect shade of golden brown, carefully remove the fritters from the oil and place them on a paper towel-lined plate to drain any excess oil.

Serve the corn fritters hot, savoring the irresistible combination of sweet corn and crispy fried perfection.

Final Thoughts

Corn fritters are a versatile and delicious dish that can be enjoyed year-round. Whether you prefer them as a side, a snack, or even a main course, these golden bites are sure to delight your taste buds.

Advertisement

The combination of sweet corn and savory batter creates a harmonious flavor profile that's hard to resist. Once you've mastered the art of frying them to perfection, you'll find yourself craving these corn fritters again and again.

They're a great way to use up any leftover corn, and you can even experiment with different add-ins, like jalapeños or cheese, to suit your personal preferences.

Serve them hot and fresh, with a side of your favorite dipping sauce or a sprinkle of powdered sugar. Corn fritters are the perfect way to bring a taste of summer to your table, no matter the season.

Frequently Asked Questions

What Is the Best Type of Corn to Use for Bakwan Jagung?

You'll want to use a sweet corn variety for the best flavor and texture in your fritters. Look for corn that's young, juicy, and tender – it'll result in crispy yet moist bakwan jagung.

Can I Substitute the Corn With Other Vegetables?

You can certainly substitute the corn with other vegetables. Try using potatoes, carrots, or zucchini for a twist on the classic recipe. Just be sure to adjust the cooking time and seasoning accordingly.

Advertisement

How Long Can the Batter Be Stored Before Frying?

The batter can be stored in the refrigerator for up to 2-3 days before frying. Be sure to give it a good stir before using, as the ingredients may settle. This makes it a convenient option for quick snacks or appetizers.

What Is the Ideal Oil Temperature for Frying Bakwan Jagung?

The ideal oil temperature for frying is between 350°F and 375°F. This temperature range ensures the exterior crisps up nicely while the interior cooks through without burning. Maintain this temperature throughout the frying process for best results.

Can I Freeze the Cooked Bakwan Jagung for Later?

You can absolutely freeze the cooked bakwan jagung for later. Just let them cool completely, then store them in an airtight container or freezer bag. They'll keep for a few months in the freezer, making for a convenient snack or side dish.

Advertisement

Indonesian Cuisine

Cooking With Durian: the King of Fruits

Aromatic and divisive, the “king of fruits” durian captivates with its creamy texture and bold flavors, inviting culinary adventurers to explore its gastronomic potential.

Published

on

durian culinary delights explored

Durian, the "king of fruits," has captivated culinary enthusiasts worldwide with its distinctive flavor and versatility. Rooted in Southeast Asian cuisine, this pungent tropical fruit offers a delightful journey for the open-minded. Carefully crack open the spiky shell to reveal the creamy flesh, then blend it into silky smoothies or sauté it with spices. Pair the rich durian with complementary ingredients like coconut milk and sticky rice for a harmonious experience. While the pungent aroma may challenge some, patience and experimentation are essential to unlock the depth of durian's gastronomic potential.

Key Takeaways

  • Durian has a long history and cultural significance as a revered culinary ingredient in Southeast Asian cuisine.
  • Durian is known for its unique flavor profile, ranging from sweet to savory, and its creamy, nutrient-dense flesh.
  • Cooking with durian offers health benefits, such as providing energy, supporting heart health, and boosting immune function.
  • Durian can be incorporated into a variety of sweet and savory dishes, including desserts, curries, and rice-based preparations.
  • Proper preparation techniques, such as opening the fruit, removing the flesh, and blending or cooking it, are crucial for successfully utilizing durian in recipes.

History

Durian's history as a culinary ingredient dates back centuries, with evidence of its use in Southeast Asian cuisines as early as the 13th century. The pungent, spiky fruit has long been revered in the region, with its unique flavor and texture playing a central role in traditional dishes.

Over time, the popularity of durian has spread globally, capturing the imagination of adventurous eaters and sparking a culinary renaissance.

Today, durian's versatility is celebrated by chefs and home cooks alike, who incorporate it into a wide range of sweet and savory preparations. From creamy durian ice cream to savory durian curries, the fruit's rich, custard-like flesh lends itself beautifully to both sweet and savory applications.

As durian's global appeal continues to grow, its history as a beloved ingredient in Southeast Asian cuisine remains a testament to its enduring culinary significance.

Recipe

Durian, the divisive tropical fruit with a pungent aroma and a unique, creamy texture, can be a delightful ingredient when incorporated into the right dishes. While its distinctive flavor may not appeal to everyone, those who embrace it can discover a world of culinary possibilities.

Advertisement

When used judiciously, durian can lend a luxurious creaminess and a subtle sweetness to both savory and sweet preparations. Its versatility allows it to shine in various Southeast Asian cuisines, as well as in fusion dishes that highlight its distinctive qualities.

  • 2 ripe durians, peeled and flesh removed
  • 1 cup coconut milk
  • 1/2 cup granulated sugar
  • 1/2 teaspoon salt
  • 2 cups glutinous rice, soaked for at least 4 hours or overnight
  • Pandan leaves (optional)

In a large pot, combine the durian flesh, coconut milk, sugar, and salt. Bring the mixture to a gentle simmer, stirring occasionally, until the sugar has dissolved and the flavors have melded, about 15-20 minutes.

Meanwhile, steam the soaked glutinous rice until tender, about 25-30 minutes.

When ready to serve, scoop the steamed glutinous rice into bowls and top with the warm durian custard. Garnish with pandan leaves, if desired. This dish is best enjoyed warm, as the contrast between the warm, creamy durian and the chewy, sticky rice creates a delightful textural experience. To complete the sensory experience, pair this delightful dessert with a refreshing beverage like iced pandan tea or coconut water. For a full Southeast Asian culinary experience, consider serving this durian and glutinous rice dessert after a meal of traditional Indonesian dishes, such as rendang or sate. And if you’re looking to add more Indonesian flavors to your repertoire, try your hand at an authentic asinan recipe for a tasty and tangy salad.

Cooking Steps

Crack open the durian shell with a sturdy knife.

Scoop out the creamy flesh and blend it into a smooth puree.

Advertisement

Then, cook the durian puree and serve it warm alongside sticky rice for a truly indulgent experience.

Step 1. Crack Open the Durian Shell

open the durian shell

Carefully, you'll want to commence the process of cracking open the durian's tough, spiky exterior. Using a sharp knife, slowly work your way around the fruit, cutting through the thick, thorny rind. Be mindful of the strong, pungent odor that will likely fill the air.

Once you've made a full circumference, firmly grasp the two halves and gently pull them apart. Inside, you'll find the bright yellow, creamy flesh nestled between the large, inedible seeds. Using a spoon, scoop out the precious durian pulp, being careful to avoid the bitter rind.

Durian's complex, savory-sweet flavor makes it a polarizing fruit, but its unique taste is undoubtedly worth the effort. Crack open the durian with care, and you'll be rewarded with a culinary experience like no other.

Prepare to be captivated by the intense aroma and indulgent texture of this remarkable tropical delight.

Step 2. Remove the Flesh

flesh removal process step

With the durian's tough exterior now breached, you can move on to extracting the creamy flesh within.

Gently pry open the fruit, being mindful of the sharp edges. Scoop out the pale yellow segments, taking care not to lose any precious flesh. The texture is soft and luxurious, like custard or crème brûlée. Discard any stringy bits or hard seeds as you go.

Advertisement

Work quickly, as the flesh can oxidize and darken if left exposed. Once you've collected all the usable flesh, give it a gentle rinse to remove any debris or lingering odor.

The durian's pungent aroma may linger, but the flavor is worth it. Now you're ready to incorporate this unique tropical treasure into your culinary creations.

Step 3. Blend the Durian Flesh

blend durian flesh smoothly

Once you've collected the durian flesh, it's time to blend it into a smooth, creamy texture. Start by transferring the durian flesh into a high-powered blender or food processor.

Add a splash of water or coconut milk to help the blending process. Pulse the mixture, gradually increasing the speed, until the durian is completely broken down and the texture is silky-smooth.

Be careful not to overmix, as this can cause the durian to become too liquid. Aim for a thick, velvety consistency that's perfect for incorporating into your cooking.

Taste the blended durian and adjust the consistency as needed, adding more liquid for a thinner texture or letting it blend a bit longer for a thicker, creamier result.

Advertisement

With the durian flesh now blended to perfection, you're ready to explore the diverse culinary applications of this unique and flavorful ingredient.

Incorporate the durian puree into sweet or savory dishes, or use it as a base for sauces, dips, and more.

Step 4. Cook the Durian Flesh

cook durian flesh step

The durian flesh, now smoothly blended, offers a versatile canvas for your culinary creations.

You can sauté the durian flesh with fragrant spices like garlic, shallots, and chili to create a savory side dish.

Alternatively, you can fold the durian purée into a rich custard base and bake it into a decadent crème brûlée.

For a unique twist on a classic, try incorporating the durian flesh into pancake or waffle batter for a tropical breakfast treat.

Advertisement

If you're feeling adventurous, experiment by blending the durian into a smoothie or milkshake, adding a touch of sweetness from honey or coconut milk.

No matter how you choose to cook the durian, the creamy, intense flavor will shine through, delighting your taste buds.

With a little culinary creativity, the durian flesh can be transformed into a wide array of delectable dishes, each one a celebration of this extraordinary fruit.

Step 5. Serve Warm With Sticky Rice

serve warm with rice

Serving the warm, fragrant durian flesh alongside fluffy, sticky rice creates a harmonious pairing that tantalizes the senses. Scoop the soft, custard-like durian into a serving bowl, being careful to avoid any bitter or stringy parts.

Prepare the sticky rice according to package instructions, ensuring it's cooked to a moist, glutinous texture. Spoon the steaming rice around the durian, creating a visually appealing presentation.

The durian's rich, creamy flavor pairs beautifully with the sticky rice's slightly sweet and chewy nature. Encourage guests to scoop up bites of the two components together, allowing the flavors to mingle on the palate.

Advertisement

You can serve this dish as a dessert or an indulgent snack, perhaps with a sprinkle of toasted coconut or a drizzle of palm sugar syrup for added texture and sweetness. Enjoy the contrast of temperatures and textures as you savor each bite of this quintessential Southeast Asian delicacy.

Final Thoughts

Ultimately, cooking with durian can be a rewarding yet challenging endeavor. The pungent aroma and unique texture of this fruit require a certain level of culinary expertise and an open mind. While it may not be for everyone, those who embrace the durian's flavor profile can discover a world of delicious possibilities.

When working with durian, patience and a willingness to experiment are key. Adjusting recipes, balancing flavors, and finding the right pairings can take time and practice. But the satisfaction of creating a harmonious dish that showcases the durian's complex notes is well worth the effort.

Whether you're incorporating durian into sweet or savory recipes, the key is to let the fruit's natural excellence shine. Don't be afraid to let the durian take center stage, and allow its unique characteristics to guide your culinary journey.

With an adventurous spirit and a touch of creativity, you can unlock the true potential of this remarkable fruit.

Advertisement

Frequently Asked Questions

How Can I Avoid the Strong Smell of Durian When Cooking?

To avoid the strong smell of durian when cooking, you can try using airtight containers, cooking outdoors, or using a fan to disperse the odor. Additionally, you might want to consider using frozen or canned durian instead of fresh.

Is It Possible to Make Durian-Based Dishes That Are Not Sweet?

Yes, you can absolutely make savory durian-based dishes. The fruit's creamy texture and subtle nutty flavor lend themselves well to savory preparations like curries, stir-fries, and even durian-stuffed dumplings or pastries.

What Are the Best Ways to Store Leftover Cooked Durian Dishes?

For leftover cooked durian dishes, store them in airtight containers in the refrigerator. This will help preserve the flavor and texture. Consume within 3-5 days for best quality.

Can Durian Be Used in Savory Dishes Like Curries or Stir-Fries?

Yes, you can absolutely use durian in savory dishes like curries and stir-fries. The unique flavor of durian can add a creamy, rich taste to these savory preparations, complementing the other ingredients.

Does the Texture of Cooked Durian Vary Depending on the Ripeness?

Yes, the texture of cooked durian does vary depending on its ripeness. Riper durian will be softer and creamier, while less ripe durian will be firmer and chunkier when cooked.

Advertisement

Continue Reading

Indonesian Cuisine

Shrimp Fritters

Kinetic and crispy, shrimp fritters are a must-try seafood delight that blends juicy shrimp with a golden-brown batter, leaving you craving more.

Published

on

crispy shrimp fritters recipe

Shrimp fritters are a must-try seafood delight! These crispy bites originated in ancient Asia and have become a global sensation, blending juicy shrimp with a golden-brown, crunchy batter. To make them, you'll combine shrimp, flour, and seasonings before frying to perfection. Serve these fritters piping hot with delectable dipping sauces like spicy aioli or tangy cocktail sauce. The key is selecting the freshest shrimp and achieving the ideal texture through careful frying. Once you get a taste, you'll understand why shrimp fritters have become a beloved staple, from lively street food to refined dining experiences. There's so much more to discover about these delightful fritters!

Key Takeaways

  • Shrimp fritters are a beloved global dish with origins tracing back to ancient Asian cuisines, featuring a crispy batter and juicy shrimp.
  • The recipe involves combining shrimp, flour, cornstarch, and seasonings, followed by frying to achieve the perfect texture.
  • Fresh shrimp selection and proper frying techniques are crucial for creating the desired crispy exterior and flavorful interior.
  • Shrimp fritters can be served as appetizers or main courses, often accompanied by various dipping sauces to complement the dish.
  • This versatile dish can be adapted to suit different occasions, from casual street food to fine dining, making it a popular choice for diverse settings.

History

Shrimp fritters have a rich history that dates back centuries. These delectable treats have been enjoyed by people all over the world, from coastal communities to bustling cities.

The origins of shrimp fritters can be traced back to ancient Asian cuisines, where cooks would skillfully fry up these crispy bites. Over time, the recipe has evolved, with different regions putting their own unique spin on the classic dish.

Whether you're enjoying them as a snack or a side dish, shrimp fritters have a way of bringing people together. The combination of juicy shrimp and crispy batter is simply irresistible.

As you take a bite, you can almost feel the history and culture infused in every morsel. From street food to fine dining, shrimp fritters have become a beloved staple that continues to delight and captivate food enthusiasts everywhere.

Recipe

Shrimp fritters are a delightful and crispy seafood dish that can be enjoyed as an appetizer or a main course. These savory bites are a popular street food in many coastal regions, often served hot and fresh from the fryer.

Advertisement

The key to making exceptional shrimp fritters lies in the balance of flavors and the perfect texture. The tender shrimp are coated in a light and flavorful batter, then fried to golden perfection, resulting in a crispy exterior and a juicy, flavorful interior.

  • Shrimp, peeled and deveined
  • All-purpose flour
  • Cornstarch
  • Baking powder
  • Salt
  • Pepper
  • Eggs
  • Milk
  • Vegetable oil for frying

To prepare the shrimp fritters, begin by mixing the dry ingredients – flour, cornstarch, baking powder, salt, and pepper – in a bowl. In a separate bowl, whisk the eggs and milk together. Gradually add the wet ingredients to the dry ingredients, stirring until a smooth batter forms. Gently fold in the shrimp.

Heat the vegetable oil in a large skillet or Dutch oven to 350°F (175°C). Working in batches, carefully drop spoonfuls of the shrimp batter into the hot oil and fry until golden brown, about 2-3 minutes per side. Drain the cooked fritters on a paper towel-lined plate.

For best results, serve the shrimp fritters hot, while they're crispy and fresh from the fryer. You can accompany them with a variety of dipping sauces, such as a spicy aioli, sweet chili sauce, or a classic remoulade. Enjoy these delectable shrimp fritters as a tasty and satisfying treat.

Cooking Steps

First, you'll need to combine the flour, shrimp, and your favorite seasonings in a bowl.

Next, heat some oil in a pan over medium heat.

Advertisement

Then, carefully drop spoonfuls of the shrimp mixture into the hot oil and fry until they're a lovely golden brown. Don’t overcrowd the pan, as this can cause the temperature of the oil to drop and result in soggy shrimp fritters. Once they’re done, remove them from the oil and place them on a paper towel to drain any excess oil. Now, for a sweet treat, try out our crispy fried banana recipe, which makes for a delicious dessert or snack option for any occasion. Simply coat banana slices in a light batter and fry them until they’re golden and crispy. Serve them with a sprinkle of powdered sugar or a drizzle of honey for a delectable treat.

Don't forget to drain the excess oil from the fritters before serving them hot with a delicious chili sauce on the side.

Step 1. Combine Flour, Shrimp, and Seasoning

combine flour shrimp seasoning

Next, you'll want to combine the flour, shrimp, and seasonings in a large mixing bowl. First, measure out the all-purpose flour and add it to the bowl.

Then, gently fold in the peeled and deveined shrimp. Be careful not to overmix, as you don't want to break up the shrimp.

Now, sprinkle in the salt, ground black pepper, and any other spices you'd like, such as paprika or garlic powder. Use a wooden spoon to stir everything together until the shrimp is evenly coated with the seasoned flour.

This mixture is the base for your delicious shrimp fritters. The flour helps the fritters hold their shape when frying, while the shrimp and spices provide the mouthwatering flavor.

Advertisement

Once the ingredients are combined, you're ready to scoop the mixture and fry up those crispy, golden-brown shrimp fritters!

Step 2. Heat Oil in Pan

heat oil in pan

Once the shrimp mixture is ready, you'll need to prepare the pan for frying. Grab a large skillet and pour in enough oil to come about 1/4 inch up the sides. You want to use a neutral-flavored oil with a high smoke point, like vegetable or canola oil.

Turn the heat to medium-high and let the oil heat up. You'll know it's ready when the oil starts to shimmer and tiny bubbles form around the edge of the pan.

While the oil heats, it's a good idea to do a quick test. Gently drop a small spoonful of the shrimp mixture into the hot oil. If it sizzles immediately and turns golden brown, you're all set. If it takes a while to cook or the color isn't right, adjust the heat as needed.

Once the oil is at the perfect temperature, you can start frying the shrimp fritters in batches, being careful not to overcrowd the pan. Get ready for crispy, golden-brown deliciousness!

Step 3. Fry Until Golden Brown

fry until golden brown

With the oil heated and ready, gently lower spoonfuls of the shrimp mixture into the pan. Watch as the fritters sizzle and turn a beautiful golden brown!

Be careful not to overcrowd the pan – you'll want to fry them in batches to ensure even cooking.

Advertisement

As the fritters cook, use a slotted spoon to gently flip them over, ensuring they brown evenly on both sides. The delicate shrimp pieces should become crispy and delightful, with a subtle crunch that's simply irresistible.

Keep a close eye on the fritters, adjusting the heat as needed to prevent burning.

Once they've reached that perfect golden hue, carefully remove the fritters from the oil and place them on a paper towel-lined plate. This will help absorb any excess oil, leaving you with shrimp fritters that are light, crispy, and ready to enjoy.

Repeat the process until all the batter has been transformed into these delectable morsels.

Step 4. Drain Excess Oil From Fritters

drain excess oil thoroughly

After gently removing the golden brown shrimp fritters from the oil, place them on a paper towel-lined plate. The paper towels will absorb the excess oil, leaving your fritters crispy and delicious.

To enhance the overall cooking experience, it's beneficial to ensure proper airflow around the frying area, similar to how air purifier maintenance dos and don'ts can affect performance. Gently pat the tops of the fritters with another paper towel to soak up any remaining oil. This step is crucial to prevent the fritters from becoming greasy or soggy.

Advertisement

Next, transfer the drained fritters to a serving platter or plate. The paper towels will have done their job, so you can discard them now.

Arrange the fritters in a single layer, making sure they don't touch each other. This will allow any final traces of oil to evaporate, keeping the texture just right. Remember, the key is to remove the excess oil without drying out the delicate shrimp inside.

With a little care, you'll have perfectly crisp and flavorful shrimp fritters ready to enjoy.

Step 5. Serve Hot With Chili Sauce

serve hot with chili

Serve the hot shrimp fritters immediately, as their crispy texture is best enjoyed straight from the oil.

Carefully transfer the golden-brown fritters to a serving plate using a slotted spoon. The piping hot shrimp morsels are the perfect canvas for a vibrant chili sauce.

Whisk together a simple dipping sauce by combining tangy rice vinegar, fiery chili garlic sauce, and a touch of soy sauce. The sweet-spicy-savory flavors will perfectly complement the savory shrimp.

Advertisement

Invite your guests to dunk the fritters into the zesty sauce, savoring the contrast of hot and cool, crispy and creamy.

Don't be afraid to get a little messy – the sheer joy of these shrimp fritters is in the hands-on experience. Encourage your loved ones to dig in with their fingers, relishing each bite.

The combination of crunchy exterior and tender interior is truly irresistible. Serve these shrimp fritters hot, with plenty of napkins nearby, and watch them disappear in no time.

Final Thoughts

All in all, you've now learned the essential steps to crafting delectable shrimp fritters. From selecting the freshest shrimp to perfecting the crispy exterior, you've mastered the art of creating this beloved snack.

The key is to strike the right balance – not too greasy, not too dry, but just the right amount of crunch and flavor in every bite.

Advertisement

As you continue to experiment with this recipe, don't be afraid to put your own spin on it. Try adding different seasonings or serving it with a variety of dipping sauces. The possibilities are endless, so have fun and get creative in the kitchen.

Remember, the joy of cooking is in the process, so savor each step and enjoy the delicious results.

Shrimp fritters are a versatile dish that can be enjoyed as an appetizer, a side, or even a main course.

Whether you're hosting a gathering or simply indulging in a tasty treat, these fritters are sure to impress and delight.

Frequently Asked Questions

What Is the Best Way to Clean the Shrimp Before Frying?

To clean the shrimp, you'll want to devein and peel them. Rinse the shrimp under cold running water, then use a small knife to remove the dark vein running along the back. Pat the shrimp dry before frying.

Advertisement

Can I Use Frozen Shrimp Instead of Fresh?

You can definitely use frozen shrimp instead of fresh. Just make sure to thaw them completely and pat them dry before using. Frozen shrimp can work just as well as fresh in many recipes.

How Do I Achieve the Perfect Crispiness in the Fritters?

To achieve the perfect crispiness, you'll want to ensure the oil's at the right temperature and that you're frying the fritters in small batches. Gently squeeze out excess moisture from the ingredients before frying for maximum crispiness.

Can I Make the Batter Ahead of Time?

Yes, you can make the batter ahead of time. Just be sure to cover and refrigerate it until you're ready to fry the fritters. This will help the batter stay fresh and crisp when you cook it.

What Is the Recommended Dipping Sauce for Bakwan Udang?

For a tasty dipping sauce, you can't go wrong with a simple yet flavorful blend of soy sauce, rice vinegar, and a touch of chili oil. This classic combination complements the crispy fritters beautifully.

Advertisement

Continue Reading

Indonesian Cuisine

Kue Putu (Bamboo Rice Cake)

Graced with a unique bamboo-steamed shape, Kue Putu is an enchanting Indonesian rice cake that captivates with its sweet, caramelized filling and rich cultural heritage. Discover more about this timeless delicacy.

Published

on

bamboo rice cake delight

Step into the vibrant world of Kue Putu, Indonesia's beloved bamboo-steamed rice cake! This centuries-old delicacy enchants with its unique shape, crafted by steaming rice batter in bamboo tubes – a nod to the country's rich culinary heritage. Made with a simple yet delectable blend of rice flour, coconut milk, and palm sugar, Kue Putu boasts a soft, sticky texture and a sweet, caramelized filling that tantalizes the taste buds. Enjoyed as a snack or dessert, it's a cherished symbol of hospitality and cultural connection, often found at family gatherings and street markets. Intrigued to learn more about this captivating Indonesian treat? Look no further than Kue Putu’s charming presence at local festivities and traditional ceremonies, where its comforting aroma and delightful flavor are celebrated. Pair a plate of Kue Putu with a cup of fragrant Indonesian coffee or a refreshing glass of iced tea for a truly indulgent experience. And don’t forget to savor this delightful snack alongside a popular Indonesian noodle dish, such as Mie Goreng or Mie Ayam, for a complete culinary adventure through Indonesia’s diverse and delicious cuisine.

Key Takeaways

  • Kue Putu is a traditional Indonesian rice cake with a unique shape and flavor, originating in the 17th century and deeply rooted in local culinary traditions.
  • The key ingredients for Kue Putu include rice flour, coconut milk, and palm sugar, which are steamed in bamboo tubes to achieve its distinctive texture and aroma.
  • Preparation of Kue Putu involves soaking bamboo leaves, grinding the rice flour mixture, and steaming the filled bamboo leaves to create the final product.
  • Kue Putu is commonly consumed as a snack or dessert, often served warm and accompanied by fresh grated coconut or additional palm sugar, evoking nostalgia and cultural pride.
  • Nutritionally, Kue Putu offers a balance of carbohydrates, healthy fats, and fiber, making it a wholesome option when consumed in moderation as part of a balanced diet.

History

When did the iconic Indonesian steamed rice cake, Kue Putu, first emerge? Historians believe this delightful treat has origins dating back to the 17th century. It was likely inspired by similar rice-based snacks enjoyed across Southeast Asia.

In the early days, Kue Putu was often served during special occasions and celebrations. The unique shape, made by steaming the rice batter in hollowed-out bamboo tubes, gave the cake a distinctive look and texture.

As the popularity of Kue Putu grew, it became a beloved part of Indonesian culinary traditions.

Over time, the recipe evolved, with creative cooks experimenting with different fillings and flavors. Today, you can find Kue Putu made with a variety of ingredients, from the classic brown sugar and coconut to more modern variations.

No matter the recipe, this timeless treat remains a cherished icon of Indonesian cuisine, connecting generations through its delicious and unique taste.

Advertisement

Recipe

Kue Putu is a traditional Indonesian steamed rice cake with a sweet palm sugar filling. It's a popular snack that's often enjoyed as a breakfast or afternoon treat.

The unique flavor and texture of Kue Putu comes from the combination of the chewy rice flour dough and the gooey, caramelized palm sugar filling. The steaming process also imparts a delightful aroma that makes this treat irresistible.

Ingredients:

  • 200 grams rice flour
  • 100 grams tapioca flour
  • 1/2 teaspoon salt
  • 150 milliliters coconut milk
  • 50 grams grated fresh coconut
  • 100 grams palm sugar, chopped

Cooking Instructions:

In a large bowl, mix the rice flour, tapioca flour, and salt. Gradually add the coconut milk, stirring constantly until a smooth, pliable dough forms.

Divide the dough into small, equal-sized balls. Press a small amount of palm sugar into the center of each ball, then shape the dough around the filling to completely enclose it.

Advertisement

Place the filled dough balls in a greased steamer and steam for 15-20 minutes, or until cooked through.

To ensure the best texture and flavor, it's important to use fresh, high-quality ingredients. The palm sugar should be grated or chopped into small pieces to allow it to melt evenly during the steaming process.

Serve the Kue Putu warm, garnished with the grated fresh coconut, for a truly authentic and delightful experience.

Cooking Steps

First, you'll need to soak the bamboo leaves overnight to get them ready.

Next, grab your rice flour and mix it all up.

Advertisement

Once that's done, it's time to steam the rice mixture until it's just right.

Now, carefully fill those bamboo leaves and serve your warm, fresh kue putu!

Step 1. Soak Bamboo Leaves Overnight

soak bamboo leaves overnight

Soaking the bamboo leaves overnight is a crucial step in preparing the perfect Kue Putu. These leaves will serve as the outer layer, or wrapper, for the delicious rice cakes.

Start by gathering fresh bamboo leaves. They should be green, pliable, and free of any blemishes or tears. Gently rinse the leaves under cool running water to remove any dirt or debris.

Next, place the leaves in a large bowl or container and cover them with water. Let them soak for at least 8 hours, or overnight. This softens the leaves, making them more pliable and easier to work with when it's time to assemble the Kue Putu.

Once the soaking is complete, drain the leaves and pat them dry with a clean towel. They're now ready to be used in the next step of the recipe.

Advertisement

Soaking the bamboo leaves is an essential preparation that ensures your Kue Putu will have a beautifully wrapped, tender exterior.

Step 2. Grind Rice Flour Mixture

grind rice flour mixture

To prepare the rice flour mixture, you'll need to grind the core ingredients. Start by gathering your rice flour, palm sugar, and salt.

You'll want to use a mortar and pestle to grind these together into a fine, even consistency. Gently spoon the rice flour into the mortar, followed by the palm sugar and a pinch of salt.

Begin grinding the mixture in a circular motion, applying steady pressure. Keep going until the grains of rice flour have been completely broken down, and the palm sugar has been fully incorporated.

The goal is to create a smooth, powdery texture that will come together beautifully when you add the water later on.

Take your time with this step – the more thoroughly you grind the ingredients, the better the final kue putu will turn out. Once you're satisfied with the consistency, you're ready to move on to the next part of the process.

Advertisement

Step 3. Steam the Rice Mixture

steam the rice mixture

The next step is to steam the rice mixture.

You'll need a steamer pot or a bamboo steamer lined with banana leaves. Gently place the rice mixture into the steamer, being careful not to pack it down too tightly. This allows the steam to circulate evenly and cook the putu perfectly.

Set the steamer over a pot of boiling water, making sure the water doesn't touch the bottom of the steamer. Cover the steamer with a lid and let the rice mixture steam for about 15-20 minutes.

The putu should turn a lovely, vibrant green color as it cooks.

Keep an eye on the water level and add more boiling water if needed to maintain the steam. When the putu is done, the grains will be soft and tender.

Carefully remove the steamer and let the putu cool slightly before serving. The fragrant, steamed rice cakes are now ready to enjoy!

Advertisement

Step 4. Fill Bamboo Leaves

fill bamboo leaves step

After the rice mixture has been steamed, it's time to fill the bamboo leaves.

Grab a piece of bamboo leaf and place a spoonful of the warm, fragrant rice mixture in the center. Carefully fold the leaf over, creating a little packet. Secure the packet with a small bamboo skewer or toothpick to keep it closed.

Repeat this process, filling each bamboo leaf until you've used up all the rice mixture.

Be gentle as you handle the delicate leaves – you don't want to tear them. Arrange the filled bamboo packets on a serving platter or steamer basket, preparing them for the final steaming step.

The aroma of the steamed rice and fragrant leaves will have your mouth watering!

Soon, you'll be able to unwrap these little bundles of joy and savor the warm, sticky-sweet goodness inside. Get ready for a truly authentic Indonesian treat.

Advertisement

Step 5. Serve Warm and Fresh

serve immediately for enjoyment

Once the bamboo packets are arranged, it's time to steam them. Carefully place the filled bamboo leaves into a steamer, making sure they're not crowded. Cover the steamer and let the cakes steam for about 15 minutes.

As the timer ticks down, the scent of the warm, fragrant putu will start to fill the air, making your mouth water in anticipation.

When the timer goes off, it's time to serve these delightful treats. Using tongs, gently remove the steaming hot bamboo packets from the steamer. Be careful, as the leaves will be very hot.

Unwrap the packets to reveal the soft, fluffy putu cakes inside. Serve them immediately while they're still warm and fresh, as this is when they'll be at their absolute best.

The soft, sticky texture and sweet, coconutty flavor are simply irresistible. Enjoy these traditional Indonesian delights with family and friends, savoring every bite.

Final Thoughts

As we reach the conclusion of our exploration of Kue Putu, it's clear that this traditional Indonesian delicacy holds a special place in the hearts and culinary traditions of the region.

Advertisement

The combination of the warm, fluffy rice cake, the sweet palm sugar filling, and the fresh pandan leaf aroma creates a truly unique and satisfying experience.

While Kue Putu may seem simple, its preparation requires skill and attention to detail. The steaming process, the careful shaping of the dough, and the perfect timing of the final cooking all contribute to the perfection of this beloved treat.

As you savor each bite, you can't help but appreciate the rich history and cultural significance that Kue Putu carries.

Whether you're enjoying it as a morning snack or an afternoon pick-me-up, Kue Putu is a delightful reminder of the joys of traditional Indonesian cuisine.

As you venture forth, we hope you'll keep this special cake in mind and seek out opportunities to indulge in its comforting and delicious flavors.

Advertisement

Frequently Asked Questions

How Long Can Kue Putu Be Stored?

Freshly made, you can store the cakes for up to 3 days in the fridge. However, they won't last much longer as the texture and flavor will start to deteriorate. For best quality, enjoy them within a day or two.

Can Kue Putu Be Made Without Bamboo?

Yes, you can make this traditional rice cake without using bamboo. Instead, you can use other steaming vessels like a metal or silicone mold to achieve the same texture and flavor.

Is Kue Putu Gluten-Free or Vegan-Friendly?

Yes, kue putu can be made gluten-free and vegan-friendly. You can use rice flour, coconut milk, and palm sugar to create a delicious and allergy-friendly version of this traditional Indonesian snack.

What Is the Traditional Way to Serve Kue Putu?

Traditionally, you'd serve kue putu steaming hot, often with a sprinkle of grated coconut and a drizzle of palm sugar syrup. It's a delightful combination of textures and flavors that makes for a tasty and authentic Indonesian treat.

Can Kue Putu Be Frozen for Later Use?

Can you freeze kue putu for later use? Absolutely! Cooked kue putu can be frozen for up to 2 months. Just reheat them in a steamer when ready to serve, and you'll enjoy that signature taste and texture.

Advertisement

Continue Reading

Affiliate Disclaimer
As an affiliate, we may earn a commission from qualifying purchases. We get commissions for purchases made through links on this website from Amazon and other third parties.

Advertisement

Vetted

top local car washes top local car washes
Vetted2 months ago

14 Best Car Washes Near You for a Sparkling Clean Ride

I discovered the 14 best car washes near you that promise a sparkling clean ride, and you won't want to...

top mops for 2024 top mops for 2024
Vetted2 months ago

The 15 Best Mops of 2025 – Your Ultimate Guide to a Spotless Home

Find the perfect mop for your cleaning needs in 2025, and discover how these top choices can revolutionize your home...

top women s fragrances 2024 top women s fragrances 2024
Vetted2 months ago

15 Best Perfumes for Women in 2025 – A Fragrance Guide You Can’t Miss

Keen to discover the top 15 perfumes for women in 2025? Uncover unique scents that will elevate your fragrance game!

top local bars guide top local bars guide
Vetted2 months ago

14 Best Bars Near You for an Unforgettable Night Out

Looking for the perfect bar to elevate your night out? Discover the 14 best spots that promise unforgettable experiences!

luxurious beard oil selection luxurious beard oil selection
Vetted2 months ago

15 Best Beard Oils for a Luxurious Grooming Experience in 2025

Shop the 15 best beard oils for a luxurious grooming experience in 2025 and discover which ones will elevate your...

top college laptops 2024 top college laptops 2024
Vetted2 months ago

15 Best College Laptops of 2025: The Ultimate Guide for Students

With our guide to the 15 best college laptops of 2025, discover which powerful models will elevate your academic experience...

waterproof mascaras for tears waterproof mascaras for tears
Vetted2 months ago

15 Best Waterproof Mascaras That Will Survive Any Tear-Jerker

Outstanding waterproof mascaras await to keep your lashes flawless through any emotional moment; discover which ones made the top 15...

top flavorful disposable vapes top flavorful disposable vapes
Vetted2 months ago

15 Best Disposable Vapes of 2025: Top Picks for Flavor and Convenience

Prepare to discover the 15 best disposable vapes of 2025 that blend exceptional flavor and convenience, but which ones truly...

refreshing lunch salad ideas refreshing lunch salad ideas
Vetted2 months ago

15 Best Salads Near You That Will Freshen Up Your Lunch Routine

Transform your lunch with the 15 best salads nearby that will tantalize your taste buds and leave you craving more...

top convertible car seats top convertible car seats
Vetted2 months ago

15 Best Convertible Car Seats of 2025 – Safety and Comfort for Your Little One

Get ready to discover the top 15 convertible car seats of 2025 that blend safety and comfort—find out which models...

delicious fast food breakfast delicious fast food breakfast
Vetted2 months ago

15 Best Fast Food Breakfast Options That Will Make Your Mornings Delicious

Uncover the 15 best fast food breakfast options that will transform your mornings into a delicious experience you won't want...

stylish contacts for vision stylish contacts for vision
Vetted2 months ago

14 Best America’s Contacts for Clear Vision and Style

Browse through the 14 best contact lenses in America for clear vision and style, and discover which one perfectly complements...

Trending