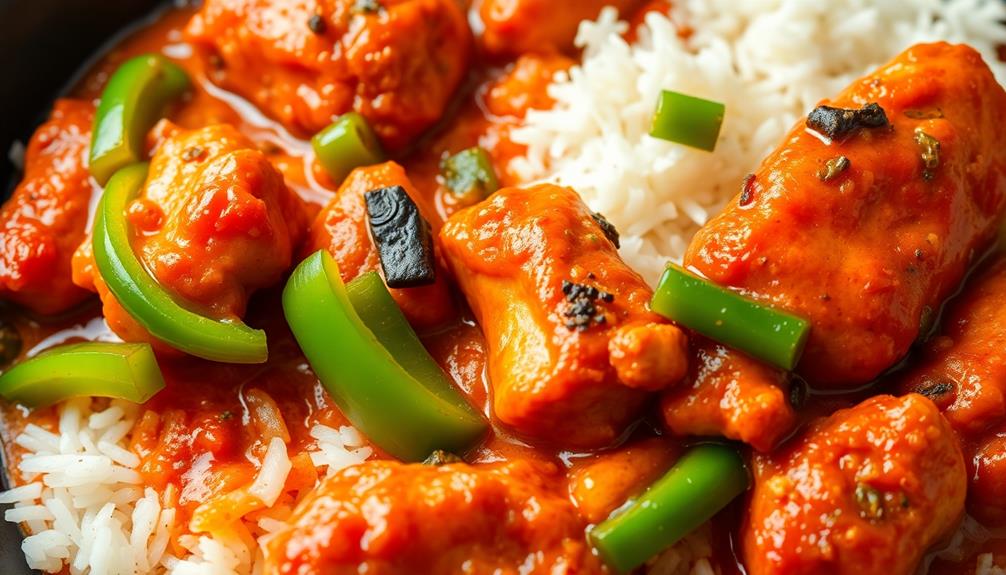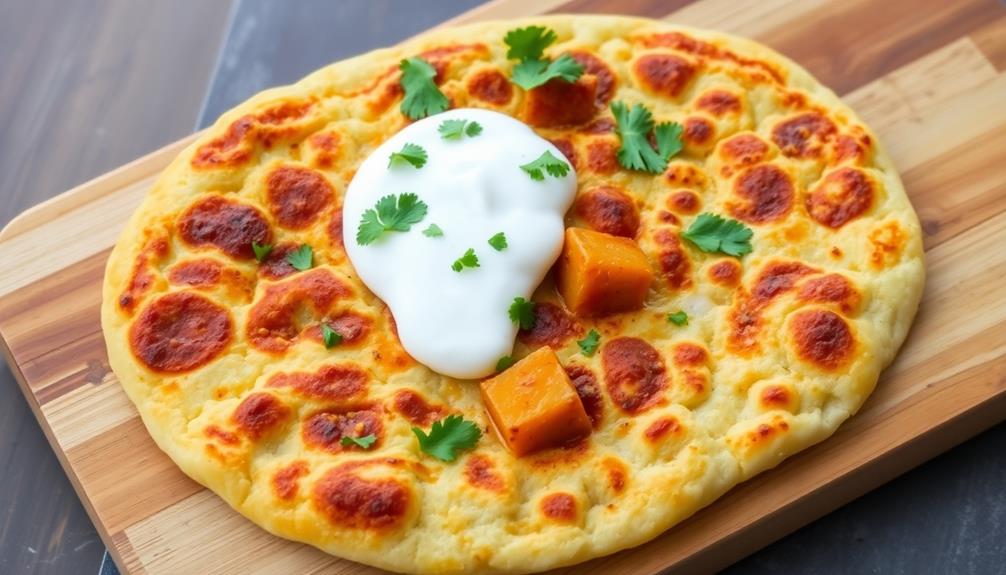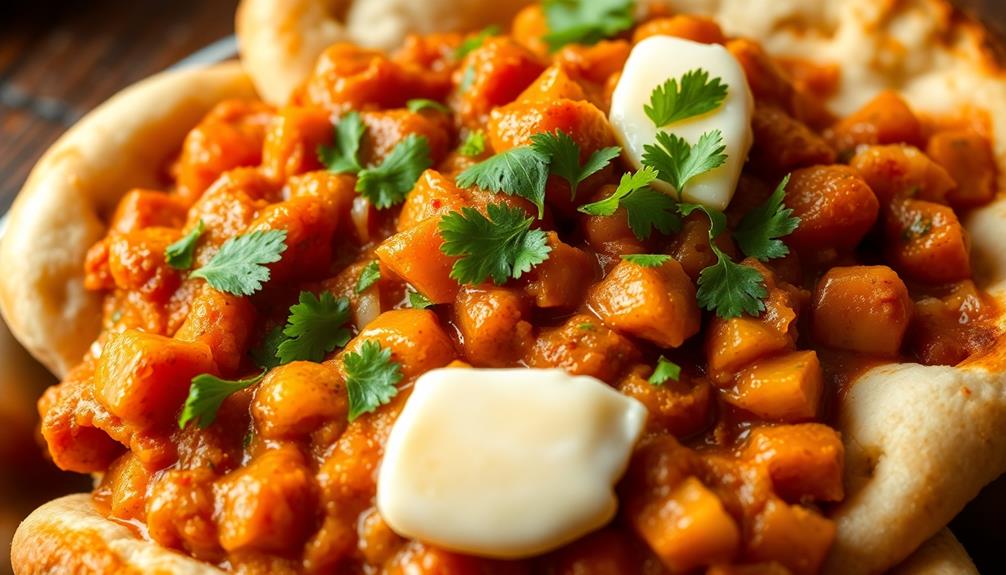

Get ready to indulge in the flaky, buttery delight that is paratha! This beloved Indian flatbread has captivated hearts and stomachs for generations, with its mouthwatering fillings and delectable regional variations. Whether you crave the classic aloo (potato) paratha or the savory gobi (cauliflower) version, there's a paratha to suit every palate. Packed with carbs to fuel your day and fiber to keep you satisfied, this versatile bread can be served as a standalone meal or the perfect accompaniment to curries and chutneys. Ready to discover the art of paratha-making? Keep reading to uncover the secrets to this culinary treasure!
Key Takeaways
- Paratha is a flaky and savory flatbread originating from the Indian subcontinent, with regional variations in texture and preparation.
- The most popular types of paratha include aloo (potato), gobi (cauliflower), paneer (cottage cheese), and methi (fenugreek leaves).
- Parathas are high in carbohydrates, provide dietary fiber, and can be enriched with vegetables for added nutrients.
- Paratha can be cooked on a tava (flat griddle) or in an oven, requiring proper heat management for even cooking.
- Paratha is a versatile flatbread that offers opportunities for creativity with fillings and toppings, appealing to many palates.
Top picks for "paratha"
Open Amazon search results for this keyword.
As an affiliate, we earn on qualifying purchases.
History
Paratha, the flaky and savory flatbread, traces its origins back to the Indian subcontinent, where it has been a staple for centuries. This beloved dish has evolved over time, with each region and culture putting its own unique spin on the recipe.
From the crisp, layered parathas of North India to the fluffy, pan-fried varieties of the South, the diversity of paratha is a true testament to the culinary creativity of the Indian people.
As you delve into the history of this humble yet delightful bread, you'll discover that the word "paratha" is derived from the Sanskrit words "pra" (meaning "full" or "complete") and "itha" (meaning "flat bread"). Parathas have been a staple in Indian cuisine for centuries, with regional variations and fillings adding to their popularity. In fact, parathas are not only enjoyed as part of a hearty meal but are also a popular street food in Mumbai, where they are often served with a variety of fillings and accompaniments, such as spicy chutneys and yogurt. The versatility and satisfying nature of parathas have made them a beloved and enduring part of Indian culinary tradition.
This suggests that the paratha has been an integral part of Indian cuisine for generations, nourishing both body and soul.
Enjoy exploring the rich history and mouthwatering flavors of this iconic Indian delicacy!
Recipe
Paratha is a type of flatbread that originated in the Indian subcontinent. It's a versatile dish that can be enjoyed as a standalone meal or as an accompaniment to various curries and dishes. The flaky texture and buttery flavor of paratha make it a beloved part of many cuisines in the region.
To prepare paratha, a simple dough is made and then rolled and folded repeatedly to create the signature layers. The process of making paratha may seem time-consuming, but the end result is well worth the effort.
Ingredients:
- 2 cups all-purpose flour
- 1 teaspoon salt
- 1/2 cup warm water
- 2 tablespoons unsalted butter, melted
Cooking Instructions:
In a large bowl, combine the flour and salt. Gradually add the warm water and knead the dough until it becomes smooth and elastic. Cover the dough and let it rest for 30 minutes.
Divide the dough into equal-sized balls. On a lightly floured surface, roll each ball into a thin circle. Brush the surface with melted butter and fold the circle in half, then in half again to create a triangle shape.
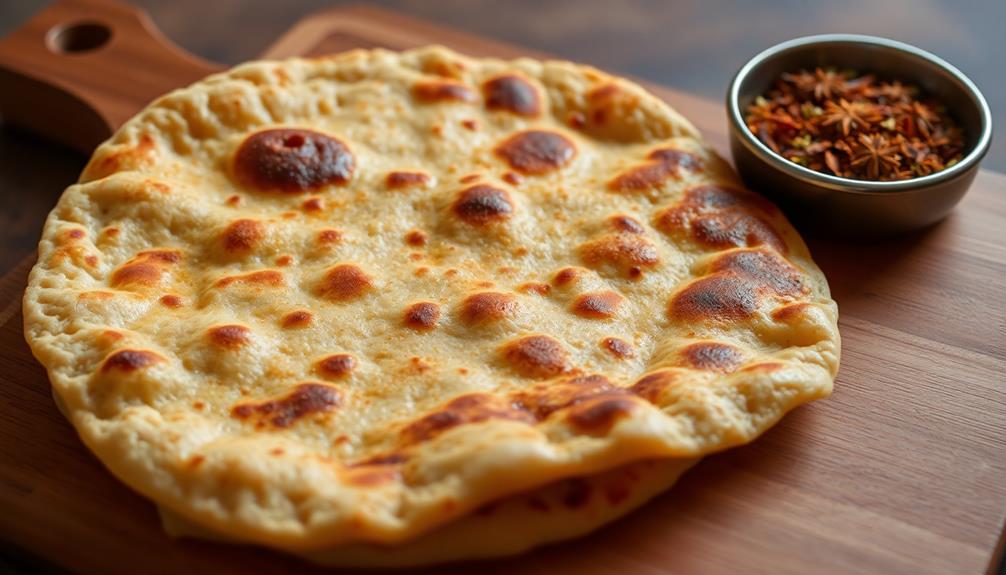
Heat a non-stick pan over medium heat and cook the paratha, flipping it occasionally, until both sides are golden brown and crispy.
Tips:
To achieve the perfect flaky texture, it's important to knead the dough well and allow it to rest before rolling and cooking. Additionally, using a non-stick pan and ensuring the heat isn't too high will help prevent the paratha from sticking or burning.
Serve the paratha warm, with your choice of accompaniments such as curries, chutneys, or raita.
Cooking Steps
First, you'll need to knead the dough until it's smooth and pliable.
Then, roll the dough into little balls.
Step 1. Knead Dough Until Smooth and Pliable

After gathering your ingredients, it's time to knead the dough until it's smooth and pliable. This is an important step that will ensure your paratha turns out perfectly.
Start by placing the dough on a clean, lightly floured surface. Using the heels of your hands, begin to push and fold the dough, rotating it as you go. Keep kneading for about 5 minutes, or until the dough becomes soft, silky, and easy to work with.
Don't be afraid to add a little more flour if the dough starts to stick. You'll know it's ready when you can gently poke the dough and it bounces back.
Once it's reached the right consistency, cover the dough and let it rest for about 30 minutes. This will allow the gluten to develop, making the dough even more pliable and easy to roll out.
Get ready to start shaping your paratha!
Step 2. Roll Dough Into Balls
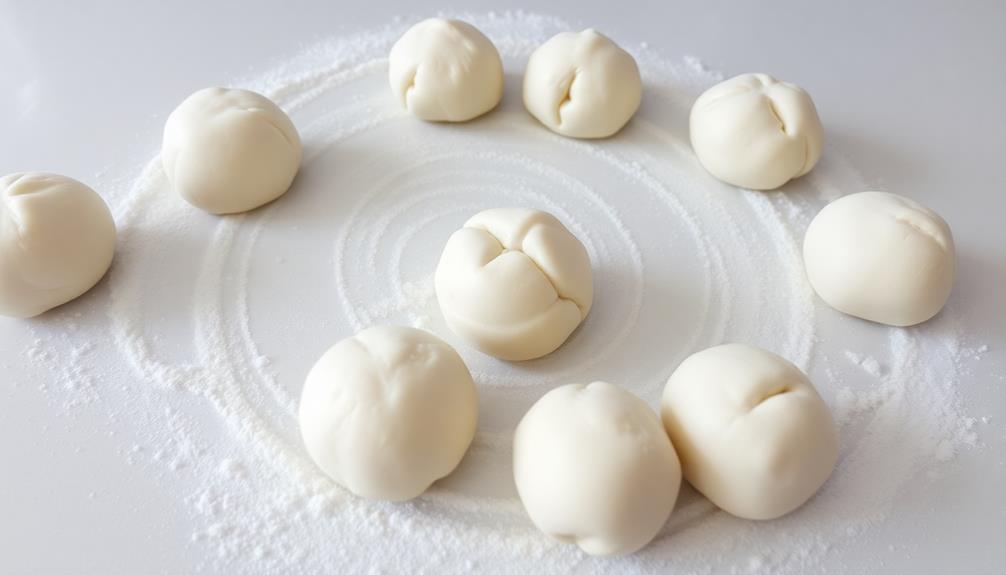
After letting the dough rest, it's time to start shaping your paratha. Take a small portion of the dough, about the size of a golf ball, and gently roll it between your palms to form a smooth, round ball.
Don't worry if it's not perfect – the beauty of homemade paratha is in its rustic charm!
Once you have your ball of dough, use a rolling pin to flatten it into a round, thin circle, about 1/8 inch thick.
Don't be afraid to use a little extra flour to prevent sticking. As you roll, be gentle and patient, taking your time to ensure an even thickness throughout. If the dough starts to stick, simply dust your work surface with a bit more flour.
Repeat this process, rolling each portion of dough into a ball and then flattening it, until you've shaped all the dough.
With a little practice, you'll be rolling out perfect paratha in no time!
Step 3. Roll Out Dough Into Thin Rounds

Take the dough ball and use a rolling pin to gently flatten it into a thin, round circle about 1/8 inch thick.
Don't be afraid to apply a little pressure – you want the dough to become as thin and even as possible. Rotate the dough as you roll to ensure it doesn't stick to the surface. If it starts to resist, let it rest for a minute before continuing.
Keep rolling until the dough is translucent and you can almost see through it. Be careful not to tear the dough as you work.
Once it's the perfect thickness, use your hands to gently stretch and shape the round into an even circle. Lightly flour the surface if needed to prevent sticking.
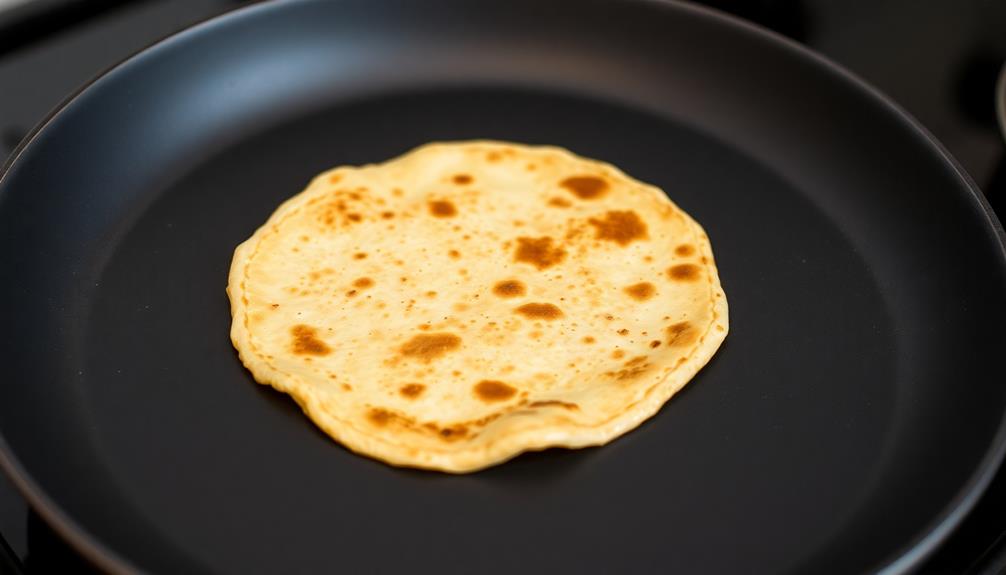
Now you're ready to cook your paratha! Heat a skillet or griddle over medium heat and cook the dough rounds one at a time, flipping occasionally, until golden brown spots appear on both sides.
Serve hot and enjoy!
Step 4. Brush With Melted Butter

Brush a thin layer of melted butter over the surface of the cooked paratha. This step adds a rich, delicious flavor and helps create the signature flaky texture.
Use a pastry brush to gently spread the butter, making sure to cover the entire surface. The warmth of the paratha will help the butter melt and soak in, leaving a glossy sheen.
Be careful not to use too much butter, as you don't want the paratha to become greasy. A light coating is all you need to achieve the perfect balance of flavors and textures.
Once the butter has been applied, the paratha is ready to be folded and enjoyed. This simple yet essential step takes just a moment but makes all the difference in the final result.
Get ready to savor the buttery goodness of your homemade paratha!
Step 5. Cook Over Medium Heat
With the paratha's surface now coated in a delectable layer of melted butter, it's time to focus on the cooking process.
Grab your trusty skillet and place it over medium heat on the stovetop. Wait patiently as the pan warms up, then carefully slide the paratha into the hot surface. You'll want to keep a close eye on it, gently flipping it over every minute or so to ensure even cooking.
As the paratha sizzles and browns, you'll notice the dough puffing up in delightful little bubbles. That's exactly what you're looking for!
Keep flipping and cooking until both sides are a lovely golden-brown color. Don't be afraid to adjust the heat as needed to prevent burning.
When the paratha is cooked through, remove it from the pan and place it on a plate or cutting board. Repeat this process for the remaining dough, adding a little more butter to the pan as needed.
Soon, you'll have a stack of perfectly cooked parathas, ready to be enjoyed!
Final Thoughts
Paratha is a versatile and delightful flatbread that has captivated the hearts and palates of many.
Whether you're a seasoned cook or just starting to explore the wonders of Indian cuisine, this humble bread is a must-try. It's a great way to add some excitement to your meals and impress your friends and family.
Once you've mastered the art of cooking paratha over medium heat, the possibilities are endless.
You can get creative with fillings, toppings, and dips, transforming this simple staple into a truly satisfying and indulgent experience.
Imagine the delightful crunch of the outer layers giving way to the soft, pillowy interior – it's a culinary delight that's sure to become a new favorite.
Frequently Asked Questions
What Is the Nutritional Value of Paratha?
Paratha is a nutritious flatbread that can be a great part of your diet!
It's made from whole wheat flour, which gives you fiber to keep you feeling full. Plus, it has some protein and healthy fats that provide energy.
While it's not the lowest in calories, you can still enjoy paratha in moderation as part of a balanced meal.
Just be mindful of portion sizes and pair it with lots of veggies for a wholesome and satisfying dish!
How Long Does Paratha Dough Last in the Refrigerator?
Paratha dough can last in the fridge for up to 5 days!
That's plenty of time to enjoy fresh, homemade parathas all week long.
Just be sure to store the dough in an airtight container or plastic bag so it doesn't dry out.
When you're ready to cook, simply take the dough out, knead it for a minute, and you're good to go.
Easy peasy! Your taste buds will thank you.
Can Paratha Be Frozen for Later Use?
Sure, you can absolutely freeze paratha dough for later use!
Just take the dough, divide it into portions, and pop it into the freezer.
When you're ready to use it, simply thaw it out in the fridge overnight.
Then, you can roll and cook the paratha as usual. Easy peasy!
The frozen dough will keep for up to 3 months, so you can always have fresh paratha on hand whenever the craving strikes.
Enjoy!
What Is the Best Way to Reheat Leftover Paratha?
Reheating leftover food is a breeze!
The best way to reheat paratha is in a dry skillet or on a griddle over medium heat. Simply place the paratha in the pan and warm it up for 1-2 minutes per side until it's nice and toasty.
You can also pop it in the microwave for 20-30 seconds, but be careful not to overheat it.
Whichever method you choose, your paratha will be hot, fresh, and ready to enjoy in no time!
Can Paratha Be Made With Whole Wheat Flour?
Absolutely! You can definitely make paratha with whole wheat flour.
In fact, it's a great way to add some extra fiber and nutrients to your homemade paratha. The process is pretty much the same as using all-purpose flour, but you might need to add a bit more water to the dough since whole wheat flour can be a bit drier.
Give it a try, and you'll have a delicious, wholesome paratha that's perfect for any meal!