
Gluten, the magical protein found in wheat, is the key to mouthwatering breads, flaky pastries, and delectable baked goods. For thousands of years, bakers have kneaded dough to develop gluten, trapping air bubbles that create that light, airy texture we adore. Gluten provides structure, allowing dough to rise and hold its shape during baking. Get the gluten right, and you'll enjoy soft, chewy breads, tender cakes, and flaky pies. Mastering gluten techniques takes practice, but the reward is well worth it – just imagine the scrumptious possibilities waiting to be discovered.
Key Takeaways
- Gluten provides structure, texture, and elasticity to doughs and batters, allowing dough to rise and maintain shape during baking.
- Kneading enhances gluten formation by aligning protein strands, while the autolyse method allows flour and water to rest, promoting gluten formation.
- Bread requires high gluten content for structure and chewiness, while cakes prefer lower gluten levels for a tender, soft texture.
- Gluten-free baking uses alternative flours like almond or rice flour, often with binders like xanthan gum to compensate for the lack of gluten.
- Mastery of gluten techniques is crucial for elevating the quality and mouthfeel of baked products, from breads to pastries.
Top picks for "role gluten"
Open Amazon search results for this keyword.
As an affiliate, we earn on qualifying purchases.
History
Gluten has a long and storied history in the world of baking. This amazing protein has been part of the bread-making process for thousands of years, dating back to the ancient Egyptians.
Back then, people would grind wheat into flour, mix it with water, and then knead the dough to develop the gluten. As they baked the dough, the gluten would trap the gas bubbles, causing the bread to rise and become light and fluffy.
Over time, bakers learned to harness the power of gluten to create all sorts of delicious baked goods, from crusty loaves of bread to tender pastries.
Gluten is the secret ingredient that gives baked goods their satisfying texture and structure. Without gluten, breads would be dense and crumbly, and cakes would fall flat.
Recipe
Gluten, the primary protein found in wheat, rye, and barley, plays a crucial role in baking. It provides structure, texture, and elasticity to doughs and batters, allowing them to rise and hold their shape during the baking process.
In this recipe, we'll demonstrate how to harness the power of gluten to create a delicious and satisfying dish. Whether you're an experienced baker or just starting to explore the world of gluten-based baking, this recipe is sure to impress.
Ingredients:
- 2 cups (250g) all-purpose flour
- 1 teaspoon salt
- 1 teaspoon baking powder
- 1/2 cup (115g) unsalted butter, softened
- 3/4 cup (150g) granulated sugar
- 2 large eggs
- 1 teaspoon vanilla extract
- 1/2 cup (120ml) milk
Instructions:
Preheat your oven to 375°F (190°C). Grease a 9-inch (23cm) baking pan and set it aside. In a medium bowl, whisk together the flour, salt, and baking powder.
In a separate large bowl, cream the softened butter and sugar until light and fluffy. Beat in the eggs one at a time, then stir in the vanilla extract. Gradually add the dry ingredients to the wet ingredients, alternating with the milk, and mix until just combined, being careful not to overmix.
Tips:
When working with gluten-based recipes, it's important to handle the dough or batter gently to avoid overworking the gluten, which can lead to a tough, chewy texture.
Additionally, be mindful of the baking time, as over-baking can result in a dry, crumbly final product. Remember, the key to a successful gluten-based dish is finding the right balance between structure and tenderness.
Cooking Steps
Combine the flour and water thoroughly until a smooth, elastic dough forms.
Then, knead the dough vigorously for several minutes to develop the gluten.
Next, let the dough rise in a warm place until it doubles in size.
Once it's risen, punch down the dough to release the air bubbles and shape it into your desired form.
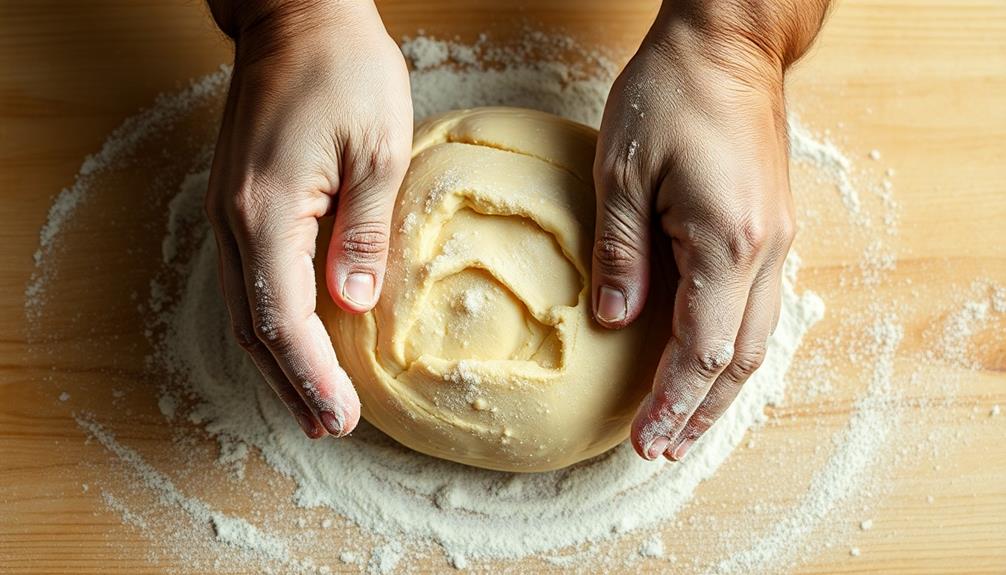
Step 1. Combine Flour and Water Thoroughly
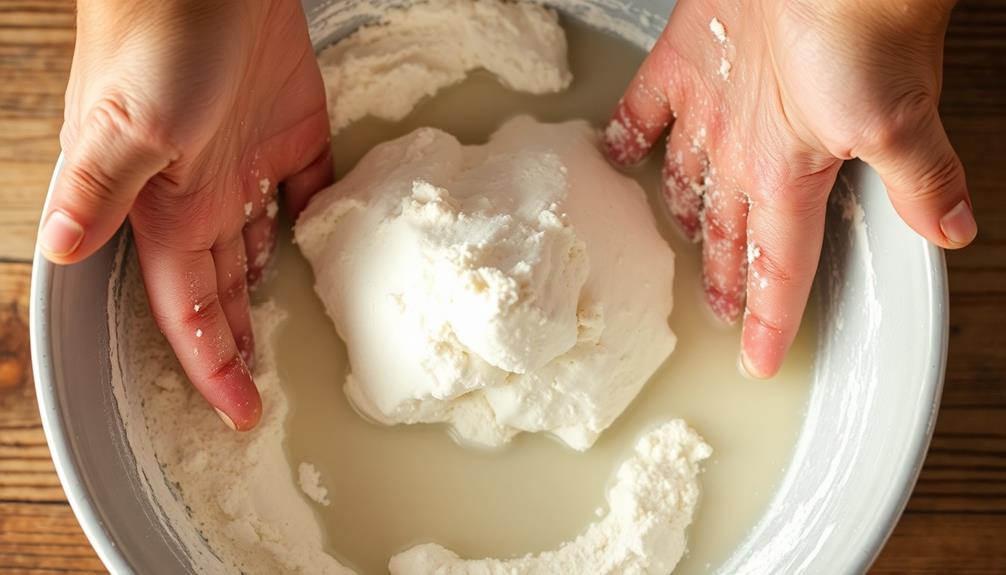
Adding the right amount of water to the flour is a crucial step in baking. You'll want to make sure you combine them thoroughly, so the dough has the perfect texture. Get ready to get your hands a little messy!
First, pour the flour into a large bowl. Slowly add water a little at a time, mixing with your hands as you go. Squish the flour and water together, using your fingers to work it into a smooth, elastic dough.
Don't be afraid to get in there and really knead it! The key is to mix until there are no dry spots left.
Once the dough comes together nicely, you're ready for the next step. Knead it a bit more to develop the gluten, which will give your baked goods a lovely chewy texture.
With the flour and water combined just right, you're on your way to baking up something delicious!
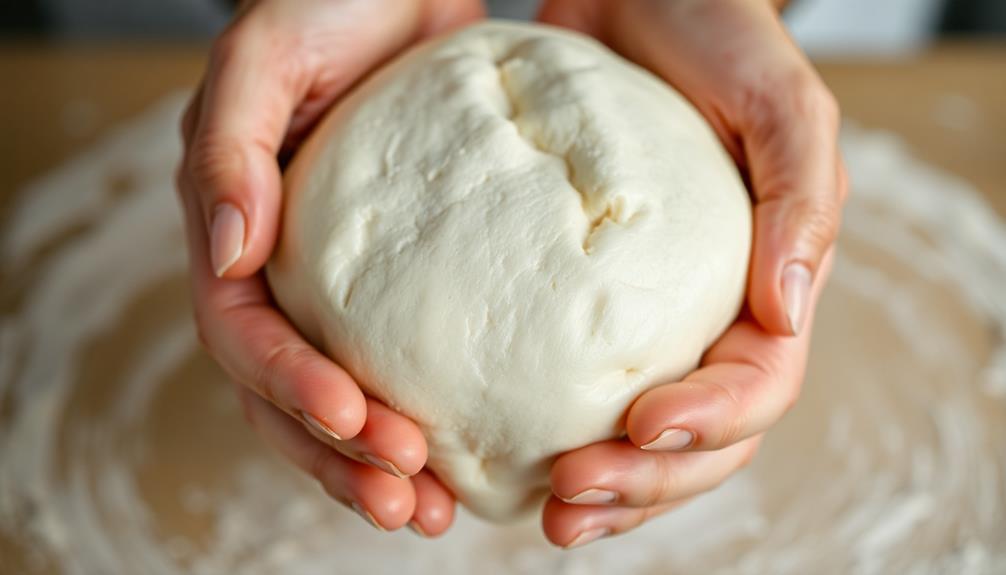
Step 2. Knead the Dough Vigorously
Now that you've combined the flour and water thoroughly, it's time to knead the dough vigorously.
Grab the dough and start pressing it down with the heels of your hands. Push, fold, and turn the dough, working it with enthusiasm. You'll feel the dough becoming smoother and more elastic as the gluten strands develop.
Knead for about 5 to 10 minutes, until the dough is nice and stretchy. Don't be afraid to put some muscle into it! The more you knead, the better the gluten structure will become, creating a light and airy texture in your baked goods.
Imagine the dough transforming under your skilled hands. Relish the satisfying feeling as the dough responds to your kneading.
Keep at it until the dough is smooth, springy, and ready for the next step. Kneading is an essential part of bringing out the best in your dough, so have fun with it!
Step 3. Allow Dough to Rise
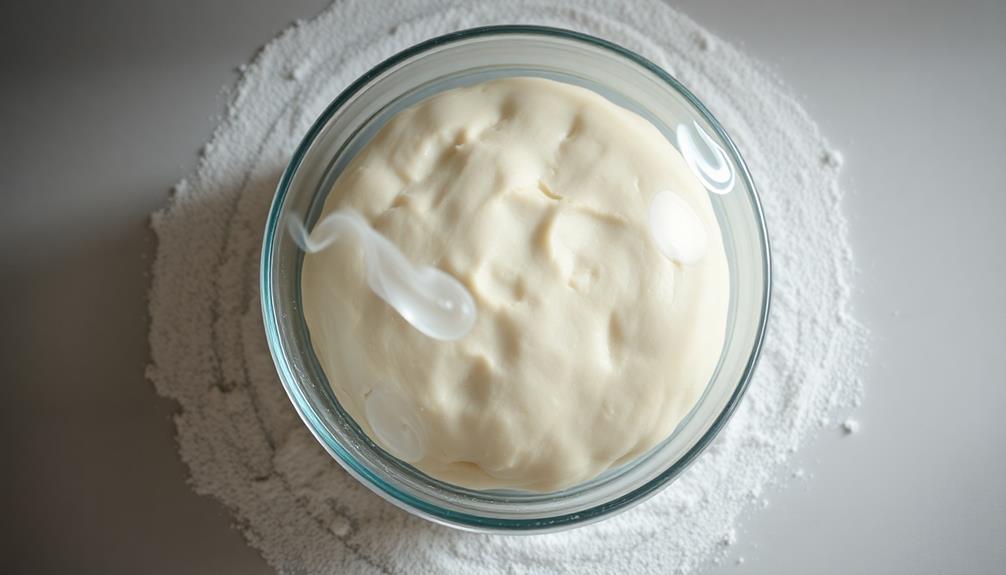
After kneading, it's time to let the dough rise. This is an exciting step where the dough will puff up and become nice and soft. To do this, simply place the dough in a lightly greased bowl, cover it with a damp towel, and let it sit in a warm spot for about an hour.
You'll know the dough is ready when it has doubled in size. Isn't that amazing?
Once the dough has risen, gently punch it down to release any air bubbles. This will make the dough smooth and ready for the next step.
Be careful not to over-knead it, or you might undo all that lovely rising! Now the dough is primed and ready to be shaped into your favorite baked goods.
Get excited, because the best part is yet to come – the baking! With the dough nicely risen, you're well on your way to creating something delicious.
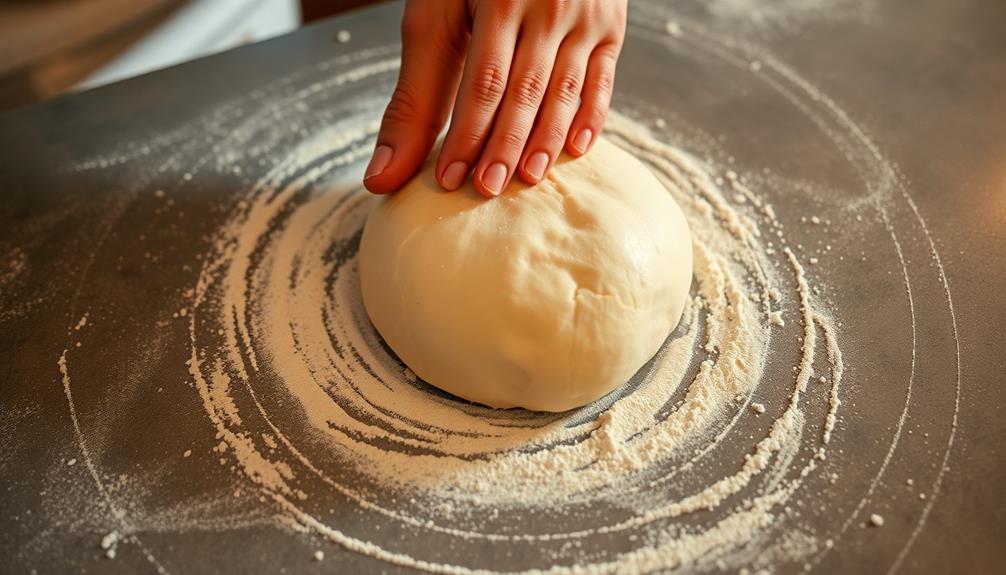
Step 4. Punch Down the Risen Dough
Once the dough has puffed up and doubled in size, it's time to punch it down! This step is so much fun – you'll get to use your fist to gently press the air out of the dough. Don't be afraid to really dig in there and give it a good whack. This releases all the gas bubbles that have built up, making the dough nice and smooth again.
After you've given it a firm punch, use your hands to fold the dough over itself a few times. This evenly distributes the remaining air pockets.
Once it's nice and deflated, the dough is ready for the next step – shaping it into your desired form, whether that's a loaf, rolls, or pizza crust. Punching down the dough is an important part of the process, helping to create that perfect, light and airy texture we all love in baked goods.
Step 5. Shape the Dough
With the air pockets released, you can now begin shaping the dough into your desired form. Lightly flour your work surface and gently press the dough into a rectangle.
Fold the dough in half, then in half again to create a smaller, dense square. Flip the dough over and use your hands to tuck the edges underneath, creating a smooth, rounded loaf.
If you want to make dinner rolls, divide the dough into equal pieces and shape them into small, round balls. Place the rolls close together on a baking sheet so they'll rise and bake into soft, fluffy little breads.
For a classic braided loaf, simply divide the dough into three equal pieces and gently roll each one into a long rope. Braid the ropes together, then tuck the ends under to finish.
No matter the shape, be gentle as you work to preserve those precious air pockets you created earlier. Your delicious dough is now ready for the oven!
Final Thoughts
Gluten plays a vital role in baking, and understanding its function can significantly enhance the quality and texture of baked goods.
Now that you've learned how gluten shapes the dough, let's reflect on the final thoughts. When you knead the dough, you're actually developing the gluten, creating a stronger, more elastic structure. This is crucial for breads, cakes, and pastries, as it helps them hold their shape and rise beautifully in the oven.
Remember, the more you knead, the more gluten you develop, resulting in a chewier, heartier texture. But don't overdo it – too much kneading can make the dough tough.
With the right balance, you'll end up with light, fluffy, and delicious baked goods that will have your family and friends asking for seconds. Embrace the power of gluten, and let your baking skills shine!
Frequently Asked Questions
What Are the Health Benefits of Gluten?
Gluten can provide you with a good source of protein, which is essential for maintaining muscle mass and supporting overall health. However, those with gluten sensitivities may experience adverse effects and should consult a healthcare professional.
Can Gluten Be Substituted in Baked Goods?
You can substitute gluten in baked goods, but it'll change the texture and structure. Gluten-free flours like rice, almond, or coconut flour work well, but you'll need to adjust recipes to achieve the desired result.
How Does Gluten Affect the Texture of Baked Goods?
Gluten gives baked goods structure and chewiness. Without it, they'll be crumbly and dry. Gluten-free flours require special techniques to recreate these desirable textures.
Is Gluten Necessary for All Types of Baking?
No, gluten isn't necessary for all types of baking. While it's essential for breads, you can make delicious cakes, cookies, and pastries without it by using alternative flours or ingredients that don't contain gluten.
What Are the Signs of Gluten Intolerance?
Signs of gluten intolerance may include bloating, gas, diarrhea, constipation, fatigue, and headaches. If you experience these symptoms after consuming gluten-containing foods, it's best to consult a healthcare professional for proper diagnosis and management.