Connect with us

Farm-to-Table Cooking

Slow-Cooked Pork Belly

Achieve melt-in-your-mouth perfection with slow-cooked pork belly, a culinary masterpiece that blends crispy skin and succulent meat after hours of patient cooking.

Published

on

tender flavorful pork dish

Slow-cooked pork belly is a celebrated dish that's captivated culinary traditions worldwide. Its origins trace back to ancient Chinese and Korean cuisines, and today it's a staple from Asia to Europe. The key? Patience – the long, slow cooking process transforms fatty pork into a melt-in-your-mouth delight, balancing crispy skin and succulent meat. All you need are simple ingredients like pork belly, salt, and broth. After searing, let the slow cooker work its magic for 8-10 hours, then rest and serve. The rich, flavorful result is worth the wait – and there's more to discover about this beloved dish.

Key Takeaways

  • Slow-cooked pork belly delivers a melt-in-your-mouth texture by transforming fatty pork into a tender delight through a long cooking process.
  • The cooking method allows for maximum tenderness and flavor absorption, achieving a balance of crispy skin and succulent meat.
  • Slow cooking the pork belly in a simple broth intensifies the natural flavors, creating a deeply satisfying and rich dish.
  • Allowing the pork belly to rest after cooking is essential to redistribute the juices, enhancing the overall eating experience.
  • Slow-cooked pork belly is considered a labor of love, but the end result rewards the effort with an irresistible and flavorful meal.

History

Tracing its origins to ancient Chinese and Korean cuisines, pork belly has long been a cherished ingredient in various culinary traditions. This versatile cut of meat, with its mouthwatering layers of succulent fat and tender, flavorful flesh, has captured the hearts and palates of food enthusiasts for centuries.

Throughout history, pork belly has been a staple in the diets of many cultures, from the sizzling street food of East Asia to the slow-cooked delicacies of European cuisines. Its ability to absorb and enhance a wide range of seasonings and cooking methods has made it a favorite among home cooks and professional chefs alike.

Whether braised, roasted, or grilled, pork belly has consistently delivered a rich, satisfying eating experience that has stood the test of time.

Today, the popularity of pork belly continues to grow, as more and more people discover the joys of this beloved cut of meat and its diverse culinary applications. Its history is a testament to its enduring appeal and the timeless pleasure it brings to the table.

Recipe

Slow-Cooked Pork Belly is a melt-in-your-mouth dish that rewards patience and careful preparation. The long, gentle cooking process transforms the rich, fatty pork into a sublime, tender delight. This recipe captures the essence of this classic dish, guiding you through the steps to achieve the perfect balance of crispy skin and succulent meat.

Advertisement

The key to success lies in the slow cooking method, which allows the connective tissues to break down and the flavors to meld together seamlessly. The result is a pork belly that's both decadent and deeply satisfying, perfect for sharing with family and friends.

  • 3 lbs pork belly, skin on
  • 2 tbsp sea salt
  • 1 tsp black pepper
  • 1 tbsp brown sugar
  • 2 cloves garlic, minced
  • 1 onion, diced
  • 1 cup chicken or vegetable broth

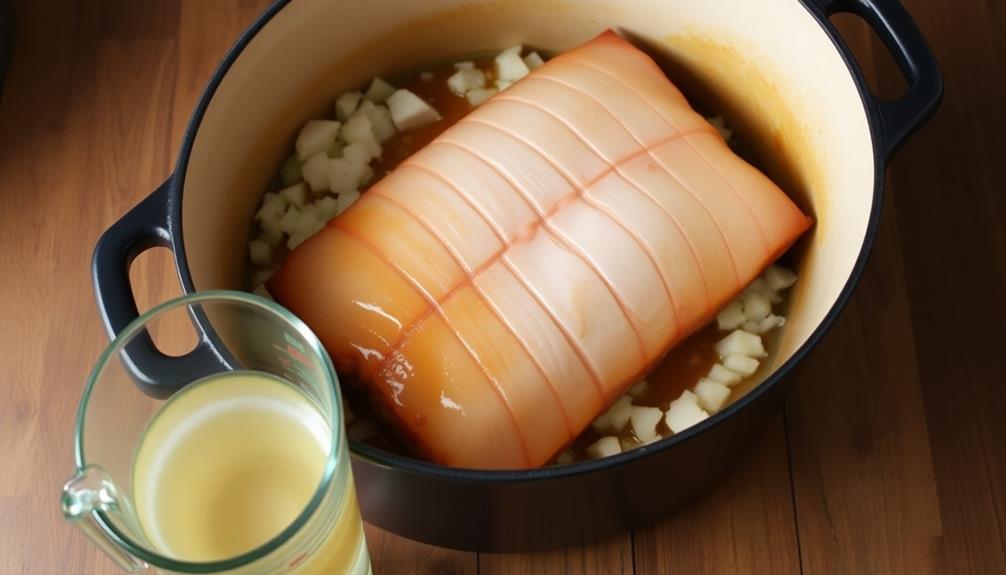
Preheat your oven to 275°F. Score the pork belly skin in a criss-cross pattern, being careful not to cut too deeply into the meat. Rub the salt, pepper, and brown sugar all over the pork belly, making sure to get the seasoning into the scored skin.

Place the pork belly, skin-side up, in a large, oven-safe Dutch oven or heavy-bottomed pot. Add the garlic and onion around the pork. Pour the broth into the bottom of the pot. Cover the pot with a tight-fitting lid or aluminum foil.

Slow-cook the pork belly in the oven for 3-4 hours, or until the meat is fork-tender and the skin is crispy. Baste the pork every 30 minutes with the cooking liquid.

Once the pork is cooked, remove it from the oven and let it rest for 10-15 minutes before slicing and serving. The slow, low-temperature cooking ensures the pork belly develops a melt-in-your-mouth texture, while the crispy skin adds an irresistible crunch.

Serve the slow-cooked pork belly with your favorite sides, such as roasted vegetables or a fresh salad, for a truly indulgent meal.

Advertisement

Cooking Steps

Season the pork with your favorite spices.

Sear the pork belly in a hot pan to lock in the flavor.

Then, place the pork in your slow cooker and let it cook on low for 8 hours for melt-in-your-mouth tenderness.

Step 1. Season the Pork

season the pork today

Generously season the pork belly all over with salt and pepper. This crucial step adds layers of flavor that will develop as the pork cooks low and slow.

Be liberal with the seasoning – you want the exterior to form a nice crust as it roasts. Rub the salt and pepper into every nook and cranny for maximum coverage.

Next, let the seasoned pork sit at room temperature for 30 minutes before cooking. This allows the flavors to meld and the meat to come closer to room temperature, which helps it cook more evenly.

Advertisement

You can also optionally rub the pork with a spice blend of your choice, like smoked paprika, garlic powder, or herbs de Provence, to customize the flavor profile.

When you're ready to start cooking, preheat your oven to 300°F. The low, slow cooking method is key for rendering the fat and making the pork meltingly tender.

With just a little prep work, you're well on your way to pork belly perfection!

Step 2. Sear the Pork Belly

sear the pork belly

Once the pork belly has been seasoned and rested, heat a large oven-safe skillet or Dutch oven over medium-high heat.

You'll want to let the pan get nice and hot before adding the pork. When it's sizzling, carefully place the pork belly, fat-side down, into the pan. Let it sear for about 5 minutes, or until the fat has rendered and the bottom is nicely browned.

Now, use tongs to flip the pork over and sear the other side for another 5 minutes. You're looking for that beautiful caramelized crust to develop on both sides.

Advertisement

Be careful not to move the pork too much during the searing process – let it sit and do its thing. Once it's golden brown all over, transfer the pan to the preheated oven.

This initial searing will help lock in the juices and give your slow-cooked pork belly an amazing texture and flavor.

Step 3. Place Pork in Slow Cooker

pork placed in slow cooker

After searing the pork belly to achieve that perfect, caramelized crust, it's time to move on to the next step.

Grab your slow cooker and give it a quick spray with non-stick cooking oil. Then, carefully place the seared pork belly, fatty side up, into the slow cooker. Don't worry about arranging it perfectly – just get it in there.

Next, pour in the beef broth, making sure the pork is mostly submerged. You can add a bit more broth if needed to cover the top.

Finally, sprinkle the pork with the reserved spice rub, ensuring an even coating. Put the lid on your slow cooker and set it to low heat.

Advertisement

Let the pork belly cook low and slow for 8-10 hours, until it's incredibly tender and practically falling apart. Your patience will be rewarded with melt-in-your-mouth pork perfection!

Step 4. Cook on Low for 8 Hours

cook low for 8 hours

With the pork belly now nestled in the slow cooker, set the heat to low and let it cook for 8-10 hours. This slow, steady cooking process will transform the tough cut of meat into a melt-in-your-mouth delight.

As the pork simmers, the connective tissues will break down, and the fat will render, creating a rich, flavorful dish.

Don't be tempted to lift the lid and check on the pork too often – each time you do, you'll release valuable heat and steam, prolonging the cooking time. Instead, let the slow cooker work its magic, filling your home with the tantalizing aroma of tender, succulent pork.

After 8-10 hours, the pork should be fall-apart tender. Use two forks to shred the meat directly in the slow cooker, or carefully transfer it to a cutting board.

Serve the pork belly with your favorite sides, such as mashed potatoes, roasted vegetables, or a fresh salad, and enjoy the fruits of your patient, hands-off cooking.

Advertisement

Step 5. Remove Pork From Slow Cooker

remove pork from cooker

How do you remove the pork from the slow cooker once it's finished cooking?

After 8 hours of low, slow cooking, the pork belly should be incredibly tender and falling apart. Using a pair of tongs or two forks, carefully lift the pork out of the slow cooker and transfer it to a cutting board or serving platter.

The pork may be so soft that it starts to fall apart as you lift it, so take your time and support it gently.

Once the pork is out, use the tongs or forks to shred or slice the meat as desired. The long cooking time will have rendered the fat, leaving you with melt-in-your-mouth pork that's perfect for tacos, sandwiches, or just on its own.

Don't discard the cooking liquid – it's packed with flavor and can be used to baste the pork or make a sauce.

Serve the slow-cooked pork belly hot, garnished with your favorite toppings. Enjoy the fruits of your patient, delicious labor!

Advertisement

Final Thoughts

Truly, slow-cooked pork belly is a revelation. You'll be amazed at how the meat transforms from tough to melt-in-your-mouth tender after hours of low and slow cooking. The result is an incredibly rich, flavorful dish that's simply irresistible.

Once you've removed the pork from the slow cooker, don't be tempted to dig in right away. Let it rest for 10-15 minutes, which allows the juices to redistribute throughout the meat. This ensures your first bite will be an explosion of savory goodness.

When you're ready to serve, consider pairing the pork belly with something crunchy, like a fresh slaw or roasted vegetables, to balance the unctuous texture. A drizzle of the cooking liquid or a tangy sauce can also elevate the dish.

Slow-cooked pork belly is a true labor of love, but the end result is well worth the wait. Savor every bite and enjoy the deeply satisfying flavors that only slow cooking can achieve.

Frequently Asked Questions

What Are the Health Benefits of Eating Pork Belly?

Pork belly can provide a good source of protein, essential vitamins, and minerals. However, it's high in saturated fat and calories, so you should consume it in moderation as part of a balanced diet to maintain optimal health.

Advertisement

How Can I Make Pork Belly Less Fatty?

To make pork belly less fatty, you can trim excess fat, braise or roast it, and baste it with flavorful liquids like broth or vinegar. Slow cooking also helps render some of the fat.

Can I Substitute Another Type of Meat for Pork Belly?

You can substitute another type of meat for pork belly, but the texture and flavor won't be the same. Pork belly's high fat content is what makes it so tender and flavorful. Consider using a different cut of pork or even beef if you want a leaner option.

How Long Can I Store Cooked Pork Belly?

Cooked pork belly can be stored in the refrigerator for up to 3-4 days or in the freezer for 2-3 months. Always store it in an airtight container to keep it fresh and prevent any bacterial growth.

Is Pork Belly Suitable for a Low-Carb Diet?

Absolutely, pork belly can be a great option for a low-carb diet. It's high in protein and healthy fats, making it a satisfying and nutrient-dense choice. Just be mindful of portion sizes and pair it with low-carb veggies for a balanced meal.

Advertisement
Continue Reading
Advertisement

Farm-to-Table Cooking

Whole Roasted Heritage Chicken

Nurture your taste buds with the captivating flavors of a whole roasted heritage chicken, where every bite reveals a culinary journey worth exploring.

Published

on

heritage chicken roasted whole

Whole roasted heritage chicken is a delightful culinary experience. You'll love its golden-brown skin, juicy meat, and complex flavors from aromatic spices. This poultry breed has a rich history – it was carefully bred to maintain unique traits when commercial varieties threatened their diversity. Start by brining the chicken to retain moisture, then rub it with an herb-garlic butter before roasting at high heat. Baste frequently for a crispy exterior. Serve with roasted veggies for a complete meal. Savor the joy of this homemade dish and the satisfaction it brings. There's more to discover about this impressive heritage bird.

Key Takeaways

  • Whole roasted heritage chickens are a result of preservation efforts to maintain genetic diversity of traditional chicken breeds.
  • The preparation process involves brining the chicken, trussing it, and rubbing it with a herb-garlic butter mixture for enhanced flavor and crispy skin.
  • The chicken is roasted at a high temperature of 425°F (220°C) for 60-75 minutes, basting it every 15 minutes to ensure juicy and tender meat.
  • Serving suggestions include pairing the roasted chicken with roasted vegetables, a side salad, and offering sauces or gravies for a complete meal.
  • Enjoying the whole roasted heritage chicken creates a warm, family-style atmosphere and highlights the importance of quality ingredients and homemade cooking.

History

The heritage chicken's rich history can be traced back to the early 20th century, when small-scale farmers and homesteaders across America sought to preserve the genetic diversity of poultry breeds.

These dedicated individuals recognized the importance of maintaining traditional chicken varieties, which were gradually being replaced by commercially-bred birds optimized for industrial production.

Through careful breeding and selection, they worked to keep alive the unique traits and characteristics of heritage chicken breeds, ensuring that these precious genetic resources wouldn't be lost to future generations.

Today, the term "heritage chicken" refers to poultry that can trace its lineage back to these early preservation efforts, showcasing the remarkable diversity and resilience of America's poultry heritage.

Recipe

Roasting a whole heritage chicken is a simple yet impressive way to prepare this flavorful and succulent bird. The slow roasting process allows the chicken to cook evenly, resulting in a juicy interior and a crisp, golden-brown skin.

Advertisement

The key to a successful whole roasted heritage chicken is to start with a high-quality bird. Heritage chickens are known for their rich, intense flavor and firm texture, making them an excellent choice for this type of preparation. With the right technique and a few essential ingredients, you can create a truly exceptional meal.

  • 1 (4-5 pound) heritage chicken, at room temperature
  • 2 tablespoons unsalted butter, softened
  • 1 tablespoon kosher salt
  • 1 teaspoon freshly ground black pepper
  • 1 lemon, halved
  • 4 sprigs of fresh thyme
  • 2 cloves of garlic, peeled and crushed

Preheat your oven to 425°F (220°C). Pat the chicken dry with paper towels and rub the softened butter all over the skin. Generously season the chicken with the kosher salt and black pepper, making sure to season both the inside and outside of the bird.

Place the chicken in a large roasting pan and tuck the lemon halves and thyme sprigs inside the cavity. Scatter the crushed garlic cloves around the chicken. Roast the chicken for 60-75 minutes, or until the internal temperature reaches 165°F (75°C) in the thickest part of the thigh. Baste the chicken occasionally with the pan juices during the cooking process.

Once the chicken is cooked, let it rest for 15 minutes before carving and serving. This resting period allows the juices to redistribute throughout the meat, ensuring a perfectly moist and flavorful result. Enjoy your delicious whole roasted heritage chicken!

Cooking Steps

First, brine the chicken overnight to help it stay moist and flavorful.

Next, truss the chicken tightly for even cooking.

Advertisement

Then, preheat your oven to 425°F and rub the chicken with a delicious herb-garlic butter before roasting until it's golden brown perfection.

Step 1. Brine the Chicken Overnight

brine chicken overnight preparation

Brining the chicken overnight is a crucial first step in ensuring your Whole Roasted Heritage Chicken turns out moist and flavorful. In a large container, mix together water, salt, sugar, and any aromatics you'd like, such as herbs, garlic, or citrus. Submerge the whole chicken in the brine, cover, and refrigerate for at least 8 hours, or up to 24 hours.

The brine helps the meat retain moisture during the roasting process. The salt and sugar also season the chicken from the inside out, infusing it with delicious flavor.

Be sure to pat the chicken dry with paper towels before seasoning and roasting – you don't want any excess moisture interfering with getting that beautiful crispy skin.

After brining, the chicken is ready for the next step: seasoning and roasting to perfection. This simple but essential technique sets the stage for a juicy, well-seasoned Whole Roasted Heritage Chicken.

Step 2. Truss the Chicken for Roasting

truss chicken for roasting

After brining the chicken, go ahead and truss it up for roasting.

Trussing helps the chicken cook evenly and retains its shape. Start by tucking the wing tips under the body.

Advertisement

Then, use a piece of kitchen string to tie the legs together at the ankles. Pull the string tight, then loop it around the body and tie it off.

Next, take the string and make a loop around the neck, pulling the skin taut. Finally, tie the ends of the string together at the back.

This secures the chicken for even cooking in the oven. Be sure to tuck any loose skin under the string as you go.

With the chicken nicely trussed, it's ready for the oven. This step ensures a beautiful presentation and even heat distribution throughout the bird as it roasts to perfection.

Step 3. Preheat Oven to 425°F

preheat oven 425 f

With the chicken neatly trussed, you're now ready to start cooking. Preheat your oven to 425°F. This high temperature is crucial for achieving a crisp, golden-brown skin on your heritage chicken.

As the oven heats up, the intense heat will render the fat under the skin, helping it to crisp to perfection.

Advertisement

While the oven is preheating, take a moment to gather your baking sheet or roasting pan. You'll want to use a rimmed baking sheet or a shallow roasting pan to catch any juices that may drip from the chicken as it cooks.

Line the pan with foil or parchment paper for easy cleanup later.

Once the oven is hot and ready, carefully place the trussed chicken, breast-side up, in the prepared pan. The high heat will help the skin become wonderfully crispy, while the interior remains juicy and flavorful.

Get ready to enjoy the mouthwatering aroma that will soon fill your kitchen!

Step 4. Rub With Herb-Garlic Butter

herb garlic butter application

Next, create a flavorful herb-garlic butter to rub all over the chicken. In a small bowl, combine 4 tablespoons of softened unsalted butter, 2 cloves of minced garlic, 1 teaspoon of chopped fresh thyme, 1 teaspoon of chopped fresh rosemary, and a pinch of salt and pepper.

Mix the ingredients together until they're well-incorporated. Gently loosen the skin of the chicken, being careful not to tear it. Spread half of the herb-garlic butter directly onto the meat under the skin.

Advertisement

Rub the remaining butter all over the outside of the chicken, making sure to cover every nook and cranny. This aromatic, golden-brown layer of butter will baste the chicken as it roasts, infusing it with mouthwatering flavor.

Once the chicken is fully coated, it's ready to go into the preheated oven. The herb-garlic butter will transform this heritage bird into a showstopping main course.

Step 5. Roast Chicken Until Golden Brown

roast chicken golden brown

Preheat your oven to 425°F. Place the prepared chicken in a large roasting pan or rimmed baking sheet. Make sure the chicken is centered and not touching the sides of the pan.

Roast the chicken for 45-55 minutes, basting it every 15 minutes with the pan juices. The chicken is done when the juices run clear, and the internal temperature reaches 165°F in the thickest part of the thigh.

Once the chicken is cooked through, transfer it to a cutting board and let it rest for 10-15 minutes. This allows the juices to redistribute throughout the meat, resulting in a more tender and flavorful bird.

While the chicken rests, take a moment to admire its beautiful golden-brown skin. The herb-garlic butter has done its job, creating a crisp, flavorful exterior that's sure to impress your guests.

Advertisement

Final Thoughts

As you set the table and gather your loved ones, savor the delightful aromas that have filled your home. The whole roasted heritage chicken you've just prepared is sure to impress with its golden-brown skin and juicy, flavorful meat. This dish isn't just a meal – it's an experience to be savored.

With your first bite, you'll be transported by the complex interplay of spices and the natural sweetness of the heritage breed. Each slice reveals the care and attention you've put into this roast, from the perfect seasoning to the gentle basting that's produced such a stunning presentation.

As you enjoy this special meal together, take a moment to appreciate the joy of sharing a homemade dish made with quality ingredients. This is the kind of meal that nourishes both the body and the soul, and it's sure to become a new family favorite.

Savor every last morsel, then sit back and bask in the satisfied smiles all around.

Frequently Asked Questions

Can I Substitute a Regular Chicken for a Heritage Chicken?

You certainly can substitute a regular chicken for a heritage chicken. The cooking time and method will be similar, though the flavor and texture may differ slightly. Feel free to experiment and find what works best for your preferences.

Advertisement

How Long Does It Take to Prepare a Whole Roasted Heritage Chicken?

The preparation time for a whole roasted heritage chicken can vary, but it typically takes 60-90 minutes to properly cook it. The exact time will depend on the size of the bird and your oven temperature.

What Are the Best Side Dishes to Serve With Roasted Heritage Chicken?

When serving roasted chicken, you'll want complementary side dishes that enhance the flavors. Consider roasted vegetables, mashed potatoes, a fresh salad, or crusty bread to create a well-balanced and delightful meal.

Can I Use This Recipe for a Smaller or Larger Heritage Chicken?

You can certainly use this recipe for a smaller or larger heritage chicken. Just adjust the cooking time accordingly – a smaller bird will need less time, while a larger one will require more. The core technique remains the same.

How Can I Tell if a Heritage Chicken Is Cooked Through?

To tell if a heritage chicken is cooked through, use a meat thermometer. Insert it into the thickest part of the thigh, avoiding the bone. The internal temperature should reach 165°F (74°C) for doneness.

Advertisement
Continue Reading

Farm-to-Table Cooking

Nettle and Potato Soup

Savor the earthly delights of Nettle and Potato Soup, a budget-friendly dish packed with vitamins and minerals that will keep you feeling full and nourished.

Published

on

hearty nettle potato soup

Nettles and potatoes combine for a comforting, nourishing soup enjoyed across Europe for centuries. You'll love the earthy, balanced flavors. First, sauté onions and garlic, then add potatoes and broth. Towards the end, toss in fresh nettle leaves – their vitamins and minerals make this soup super healthy. The potatoes provide carbs for energy, while the high fiber keeps you feeling full. This budget-friendly dish is easy to customize with different herbs or veggies. Discover how versatile this soup can be as you continue exploring its benefits.

Key Takeaways

  • Nettle and potato soup is a traditional dish with a history traced back to ancient Greece and Rome, where nettles were used as a survival food.
  • Nettles are highly nutritious, containing essential vitamins, minerals, antioxidants, and fiber, making them a healthy addition to this comforting soup.
  • The recipe involves sautéing onions and garlic, then adding potatoes, nettles, and broth to create a flavorful and satisfying soup.
  • Proper handling and cooking of nettles are crucial to remove bitterness and enhance the overall taste and texture of the dish.
  • The versatility of the recipe allows for adaptations with different herbs, seasonal vegetables, and the ability to adjust consistency and serve as a base for other soups or stews.

History

Nettles, with their stinging leaves, have long been a part of culinary traditions across Europe. These resilient plants have been foraged and used in cooking for centuries, prized for their nutritional benefits and unique flavor.

Interestingly, the earliest known records of nettle consumption date back to ancient Greece and Rome, where the leaves were used in soups, stews, and even as a green vegetable.

During the Middle Ages, nettles became an important survival food, particularly in times of scarcity. Peasants and the working class would gather the wild plants, which were abundant and easy to obtain, to supplement their diets.

The nettle's ability to thrive in a variety of soil conditions made it a reliable and accessible ingredient, even in the harshest of environments.

Today, the humble nettle continues to be celebrated in regional cuisines, with nettle and potato soup being a classic example of its enduring presence in European culinary traditions.

Advertisement

Recipe

Nettle and Potato Soup

Nettle, a common weed often found in damp areas, is a surprisingly versatile and nutritious ingredient. Its earthy, spinach-like flavor lends itself beautifully to hearty soups and stews. Pairing it with the humble potato creates a comforting, nourishing dish that's sure to delight the senses.

This recipe showcases the harmony of these two ingredients, resulting in a vibrant, flavorful soup that's both satisfying and easy to prepare. The nettle's subtle bitterness is balanced by the potato's starchy creaminess, making for a well-rounded and deeply satisfying experience.

  • 1 lb (450g) fresh nettle leaves, washed and stems removed
  • 3 medium potatoes, peeled and diced
  • 1 onion, diced
  • 3 cloves of garlic, minced
  • 4 cups (1 liter) vegetable or chicken broth
  • 2 tbsp olive oil
  • Salt and pepper to taste

In a large pot, sauté the onion and garlic in the olive oil over medium heat until translucent. Add the diced potatoes and broth, and bring to a boil. Reduce heat and simmer for 15-20 minutes, until the potatoes are tender.

Gently stir in the nettle leaves and continue to simmer for another 5-10 minutes, until the nettle is wilted and tender. Season with salt and pepper to taste.

It's important to handle the nettle with care, as the leaves can cause a stinging sensation on the skin. Be sure to wear gloves when harvesting and preparing the nettle.

Advertisement

The soup can be served as a main course or as a side, and it pairs wonderfully with crusty bread or a fresh salad.

Cooking Steps

First, harvest some fresh nettle leaves from your garden or local forager.

Then, peel and chop the potatoes into bite-sized pieces.

Next, sauté the onions in a pot until they're translucent, about 5 minutes.

After that, add the nettles and pour in the vegetable stock.

Advertisement

Step 1. Harvest Fresh Nettle Leaves

gather fresh nettle leaves

Gather your gardening gloves and a pair of scissors as you venture into the lush greenery to collect the delicate nettle leaves.

These remarkable plants thrive in moist, shaded areas, so keep an eye out for them along the edges of forests or near stream banks. When you spot a nettle plant, gently grasp the leaves near the stem and snip them off, taking care to avoid the prickly stems.

Be sure to wear your gloves, as the leaves contain tiny, stinging hairs that can irritate unprotected skin. Collect only the fresh, vibrant green leaves, leaving behind any damaged or discolored ones.

Aim to gather about a handful of leaves per serving of soup. With your nettle bounty in hand, you're ready to bring their delightful flavor and nutritional benefits to your delectable Nettle and Potato Soup.

Step 2. Peel and Chop Potatoes

peel and chop potatoes

With the fresh nettle leaves safely collected, turn your attention to the potatoes.

You'll need to peel them first, so grab a sharp paring knife and get to work. Carefully slice off the skin, making sure to remove any eyes or blemishes. Once peeled, rinse the potatoes under cool water to wash away any dirt or debris.

Next, it's time to chop the potatoes into bite-sized pieces. Place them on a cutting board and, using a chef's knife, slice them into thin, even rounds.

Advertisement

Then, stack the rounds and cut them crosswise into cubes. Aim for pieces that are about 1/2-inch to 1-inch in size – this will help them cook evenly in the soup.

As you chop, be mindful of your fingers and use the knife safely. Take your time and focus on creating uniform potato pieces.

With the potatoes prepped, you're ready to add them to the soup and let the flavors meld together.

Step 3. Sauté Onions Until Translucent

saut onions until translucent

Having peeled and chopped the potatoes, you'll now sauté the onions until they're translucent.

In a large pot or Dutch oven, heat a couple of tablespoons of olive oil over medium heat. Once the oil is shimmering, add the diced onions.

Stir the onions occasionally, letting them cook for about 5-7 minutes. You'll know they're ready when they've softened and turned a lovely, pale golden color.

Advertisement

Be careful not to let them brown too much, as you want the onions to be sweet and aromatic, not caramelized.

As the onions sauté, they'll release their natural sugars, creating a delightful aroma that will fill your kitchen.

This step is crucial for building the flavor base of the soup, so take your time and enjoy the process.

Once the onions are perfectly translucent, you can move on to the next step in creating your delicious Nettle and Potato Soup.

Step 4. Add the Nettles

incorporate the nettles

Next, add the freshly harvested nettle leaves to the pot. Be careful when handling the nettles, as they can sting your skin.

Gently add them to the sautéed onions, stirring to combine. The nettles will quickly wilt down, releasing their earthy, bold flavor into the soup. Allow the nettles to cook for about 2-3 minutes, until they've softened. Their vibrant green color will contrast beautifully with the golden onions.

Advertisement

Nettles are packed with essential vitamins and minerals, so you're getting a nutritious boost in this soup.

Once the nettles have wilted, it's time to add the potatoes. Carefully cube the potatoes and gently stir them into the pot. The nettles and potatoes will now simmer together, blending their flavors and textures to create a hearty, comforting soup.

Get ready for the delicious aroma to fill your kitchen!

Step 5. Add Vegetable Stock

incorporate vegetable stock now

After adding the nettles, pour in the vegetable stock. You'll want to use about 4 cups of stock to cover the nettles and potatoes.

Bring the mixture to a gentle simmer, then let it cook for 15-20 minutes. This allows the flavors to meld and the vegetables to become nice and tender.

As the soup simmers, the stock will infuse the nettles and potatoes with a delicious savory flavor. The stock helps to balance out the slight bitterness of the nettles. You can use a homemade vegetable stock, or opt for a high-quality store-bought version.

Advertisement

Either way, the stock ties all the ingredients together into a harmonious, comforting soup.

Be sure to taste the soup as it cooks and adjust the seasoning as needed. You may want to add a pinch of salt and pepper to enhance the flavors.

The soup should have a nice, velvety texture when it's done. Serve it hot, garnished with a sprinkle of fresh herbs if desired.

Final Thoughts

This nettle and potato soup is a comforting and nourishing dish that showcases the humble ingredients in a delightful way. The combination of earthy nettles and starchy potatoes creates a flavorful and satisfying soup that's perfect for cool evenings or as a light meal.

The key is to handle the nettles carefully and thoroughly cook them to remove any unpleasant bitterness. The potato chunks add substance and creaminess, while the vegetable stock provides a savory backdrop.

Advertisement

Don't be afraid to experiment with different herbs and seasonings to suit your personal preferences. Once you've mastered this recipe, you can easily adapt it to use up other seasonal vegetables or adjust the consistency to your liking.

This soup is a versatile and budget-friendly option that's sure to become a staple in your recipe repertoire. Enjoy the comforting flavors and nourishing benefits of this simple yet delicious nettle and potato soup.

Frequently Asked Questions

Are Nettles Edible, and How Do I Safely Handle Them?

Yes, nettles are edible and packed with nutrients. To handle them safely, wear gloves to avoid the stinging leaves. Gently rinse them and cook thoroughly to remove the sting before enjoying their earthy, spinach-like flavor.

What Are the Health Benefits of Consuming Nettles?

Consuming nettles provides an array of health benefits. They're rich in vitamins and minerals, like vitamins A, C, and K, as well as iron and calcium. Nettles also have anti-inflammatory properties, making them a nutritious addition to your diet.

Can I Substitute Spinach or Kale for Nettles in the Recipe?

You can substitute spinach or kale for nettles in a recipe, but you won't get the same nutritional benefits. Nettles are packed with vitamins, minerals, and antioxidants that spinach and kale may not provide in the same quantities.

Advertisement

How Long Does the Soup Keep, and Can It Be Frozen?

The soup can typically last 3-4 days in the refrigerator and can be frozen for up to 3 months. When ready to serve, simply thaw it in the fridge and reheat it on the stovetop.

Can I Use a Blender Instead of a Hand Blender for the Soup?

You can certainly use a blender instead of a hand blender for the soup. Just be careful not to overfill the blender and work in batches, if needed, to ensure a smooth and consistent texture.

Continue Reading

Farm-to-Table Cooking

Roasted Bone Marrow With Herb Salad

Captivating the senses, roasted bone marrow with a vibrant herb salad offers a decadent and intriguing culinary experience. Uncover the secrets behind this prized delicacy.

Published

on

herb salad with bone marrow

You'll love the rich, indulgent roasted bone marrow, with its creamy texture and savory flavor. This prized delicacy was cherished in ancient Rome and is making a comeback today. Roast the marrow to perfection, then pair it with a bright, herbaceous salad for a memorable flavor experience. Handle the hot marrow carefully and finish it off with a sprinkle of flaky sea salt. You'll be wowed by how the luxurious marrow contrasts with the fresh herbs – an engaging blend of textures and tastes. Let's explore the history and cooking steps in more detail.

Key Takeaways

  • Roasted bone marrow offers a rich, creamy texture and depth of flavor that can be highlighted by pairing it with a bright and herbaceous salad.
  • Preparation of the dish involves properly roasting the bone marrow and assembling a simple yet flavorful herb salad to balance the indulgent nature of the marrow.
  • The recipe can be served as an appetizer or as part of a larger meal, impressing guests with its unique combination of flavors and textures.
  • Proper handling and presentation of the roasted marrow are essential, as it should be served warm with small forks or spoons for easy enjoyment.
  • The dish can be further enhanced by adding a drizzle of fresh lemon juice to help balance the richness of the marrow and complement the freshness of the herbs.

History

Bone marrow has long been a prized delicacy, with its rich, creamy texture and savory flavor. Throughout history, various cultures have cherished this nutrient-dense food. In ancient Rome, bone marrow was considered a luxurious treat, often served as a spread or added to soups and stews.

During the Middle Ages, bone marrow was highly sought after, and it became a symbol of wealth and status.

In many traditional cuisines, bone marrow has been used in hearty, nourishing dishes. In France, it's commonly roasted and served with a simple salad, showcasing its delicate flavor. Similarly, in Mexico, bone marrow is scooped out of the bone and used in stews and sauces, providing a velvety mouthfeel.

Today, the popularity of bone marrow has experienced a resurgence, with chefs and home cooks alike rediscovering its versatility and unique taste. Whether roasted, braised, or incorporated into other dishes, bone marrow remains a treasured ingredient that connects us to the culinary past.

Recipe

Roasted bone marrow is a delicacy that offers a rich, creamy texture and a depth of flavor that pairs beautifully with a bright and herbaceous salad. This recipe combines the indulgent nature of the bone marrow with the freshness of a vibrant herb salad, creating a harmonious balance of flavors and textures.

Advertisement

The key to perfectly roasted bone marrow lies in the proper preparation and cooking technique. By seasoning the marrow with a simple blend of salt and pepper and roasting it until it's hot and spreadable, you can unlock its full potential and create a luxurious base for the accompanying salad.

  • 4 to 6 beef marrow bones, cut crosswise into 1-inch slices
  • Kosher salt and freshly ground black pepper
  • 1 bunch fresh parsley, leaves only
  • 1 bunch fresh chives, chopped
  • 1 bunch fresh tarragon, leaves only
  • 1 bunch fresh mint, leaves only
  • 2 tablespoons extra-virgin olive oil
  • 1 tablespoon fresh lemon juice
  • Flaky sea salt, for serving

Preheat your oven to 400°F (200°C). Arrange the marrow bones on a baking sheet and season them generously with kosher salt and freshly ground black pepper. Roast the bones for 15 to 20 minutes, or until the marrow is hot and spreadable.

While the marrow is roasting, prepare the herb salad by combining the parsley, chives, tarragon, and mint leaves in a bowl. Drizzle the olive oil and lemon juice over the herbs, and toss gently to coat.

To serve, transfer the roasted marrow bones to plates and top with the herb salad. Finish the dish with a sprinkle of flaky sea salt.

For the best results, be sure to use fresh, high-quality ingredients and handle the marrow bones with care to prevent any spillage. Additionally, keep a close eye on the marrow during the roasting process, as it can go from perfectly cooked to overcooked quickly. Enjoy this decadent and flavorful dish as an appetizer or a unique side to your meal.

Cooking Steps

Slice the bone marrow lengthwise, then roast it at 450°F until golden brown.

Advertisement

Whip up a quick parsley herb salad while the marrow cooks.

Step 1. Slice Bone Marrow Lengthwise

slice bone marrow lengthwise

After preheating the oven, grab the bone marrow and carefully slice it lengthwise using a sharp knife.

You'll want to work slowly and steadily, applying gentle pressure to avoid breaking the marrow. Each piece should be about 1-inch thick, revealing the creamy interior.

Once you've sliced the marrow, arrange the pieces in a single layer on a baking sheet.

This will ensure they cook evenly and the edges get nice and crispy. Drizzle a bit of olive oil over the top, just enough to lightly coat the marrow. You can also sprinkle on some salt and pepper at this stage if you'd like.

Now pop the baking sheet into the preheated oven and let the marrow roast for 12-15 minutes.

Advertisement

Keep an eye on it, as you want the outside to be golden brown but the insides to stay soft and spreadable. When it's ready, the marrow will be sizzling and the aroma will be mouthwatering.

Careful, it'll be hot!

Step 2. Roast Bone Marrow at 450°F

roast bone marrow 450 f

Preheat your oven to 450°F.

Once it's nice and hot, carefully place the marrow bones on a rimmed baking sheet. Make sure they're not touching each other – you want plenty of room for the marrow to sizzle and caramelize.

Pop them in the oven and roast for 12 to 15 minutes. Keep an eye on them, as you want the tops to be golden brown but not burnt.

The marrow should be soft and jiggly when the time's up. Use tongs to transfer the bones to a serving platter.

Advertisement

Let them cool for a couple of minutes before serving. The interior will be steaming hot, so be careful when you scoop it out.

Drizzle the marrow with a bit of lemon juice and sprinkle with flaky sea salt.

Serve it up with your herb salad on the side for a truly decadent appetizer.

Get ready for oohs and aahs from your guests!

Step 3. Make Parsley Herb Salad

prepare parsley herb salad

Gather a mix of fresh herbs, such as parsley, chives, and tarragon, and roughly chop them. You'll want a generous handful of each herb. Incorporating herbs like parsley can also provide potential health benefits, including essential oils for respiratory health that help support your overall well-being.

Next, thinly slice a shallot and add it to the chopped herbs. Drizzle the herb mixture with a bit of olive oil and a splash of red wine vinegar. Season with a pinch of salt and freshly cracked black pepper, then gently toss everything together.

Advertisement

The goal is to create a vibrant, flavorful salad that pairs perfectly with the rich, savory roasted bone marrow. Let the salad sit for a few minutes to allow the flavors to meld.

When you're ready to serve, spoon the bone marrow onto plates and top each portion with a generous helping of the herby salad. The contrast of the creamy marrow and the bright, fresh salad is simply divine. Enjoy this delightful combination of textures and tastes.

Step 4. Serve Bone Marrow With Salad

serve marrow with salad

Once the herby salad is ready, it's time to serve the roasted bone marrow. Gently transfer the roasted bone marrow from the baking dish to a serving platter or individual plates. Be careful, as the bone marrow will be very hot! Drizzle any pan juices over the top.

Now, it's time to assemble the dish. Place a generous spoonful of the parsley herb salad directly next to the bone marrow. The cool, fresh flavors of the salad will provide a lovely contrast to the rich, savory bone marrow. You can even top the bone marrow with a bit of the salad if you'd like.

Serve the roasted bone marrow and herb salad immediately, while the marrow is still warm and the salad is crisp. Provide small forks or spoons for your guests to easily scoop out and enjoy the bone marrow.

This dish makes for an impressive and delicious appetizer or side. Bon appétit!

Advertisement

Step 5. Drizzle With Lemon Juice

drizzle with lemon juice

To finish off the dish, drizzle a bit of fresh lemon juice over the roasted bone marrow. The tart and bright acidity of the lemon helps to balance the rich, fatty texture of the bone marrow.

Just a light drizzle is all you need – you don't want to overwhelm the delicate flavor of the marrow. The lemon juice also helps to enhance the herbal notes in the salad, creating a harmonious blend of flavors on the plate.

Be sure to use freshly squeezed lemon juice for the best results. Bottled juice just won't have the same vibrant, zesty punch.

If you have a lemon wedge or two leftover, you can even offer those on the side so your guests can add a little extra lemon to their taste.

The final touch of lemon really takes this dish to the next level, so don't skip this simple but essential step!

Final Thoughts

Ultimately, roasted bone marrow with a vibrant herb salad makes for a delightful and indulgent dish. The rich, buttery texture of the bone marrow pairs beautifully with the bright, fresh flavors of the herbs.

Advertisement

The lemon juice provides a welcome zing, cutting through the richness and elevating the entire dish. This recipe is sure to impress your guests, whether served as an appetizer or as part of a larger meal.

The best part? It's surprisingly simple to prepare, requiring minimal hands-on time. Simply roast the bone marrow, whip up the quick salad, and you're ready to enjoy.

The contrasts in texture and flavor create a truly memorable experience. So don't hesitate – give this roasted bone marrow dish a try and savor the delightful combination of indulgence and freshness.

Frequently Asked Questions

What Nutrients Does Bone Marrow Provide?

Bone marrow provides you with an abundance of essential nutrients, including protein, iron, zinc, and vitamins A, C, and K. It's a nutritional powerhouse that can support your overall health and well-being.

Is Bone Marrow Suitable for Vegetarians?

Bone marrow isn't suitable for vegetarians, as it's a purely animal-derived product. Since vegetarians avoid all animal products, including those derived from animals, bone marrow wouldn't align with their dietary restrictions.

Advertisement

How Long Can Roasted Bone Marrow Be Stored?

Roasted bone marrow can typically be stored for up to 3 days in the refrigerator when stored properly in an airtight container. However, it's best to consume it within 1-2 days for optimal freshness and flavor.

Can Bone Marrow Be Substituted in Other Recipes?

Absolutely! Bone marrow can substitute for other fats or oils in various recipes. It adds a rich, creamy texture and deep, savory flavor to dishes like soups, sauces, and even baked goods.

Does the Type of Bone Affect the Taste of Roasted Bone Marrow?

The type of bone does affect the taste of roasted bone marrow. Bones from different animals, like beef or lamb, have distinct flavors that'll come through when you roast the marrow. Try experimenting to find your preferred taste.

Continue Reading
Advertisement

Affiliate Disclaimer
As an affiliate, we may earn a commission from qualifying purchases. We get commissions for purchases made through links on this website from Amazon and other third parties.

Advertisement

Latest

sweet and savory delight sweet and savory delight
Christmas Recipes50 seconds ago

Honey Glazed Ham

Joyfully elevate your holiday meal with a honey-glazed ham that promises a mouthwatering fusion of sweet and savory flavors. Continue...

non alcoholic cocktail alternatives non alcoholic cocktail alternatives
Graduations/Birthdays3 mins ago

Mocktails

Knock yourself out with these vibrant, bubbly mocktails that let you enjoy the sophisticated taste of cocktails without the effects...

ice cream soda bar ice cream soda bar
Graduations/Birthdays8 mins ago

Soda Float Bar

Kicking it old-school with soda float bars, a classic American delight that blends carbonated fizz and rich ice cream, uncovering...

delicious nutritious blended beverages delicious nutritious blended beverages
Graduations/Birthdays13 mins ago

Smoothies

Kicking off your day with a nourishing smoothie is an easy way to pack in essential vitamins, minerals, and fiber,...

refreshing chilled beverage choice refreshing chilled beverage choice
Graduations/Birthdays19 mins ago

Iced Tea

You'll be amazed at the refreshing delight of iced tea, a timeless summertime favorite that's easy to prepare and perfect...

refreshing citrus beverage delight refreshing citrus beverage delight
Graduations/Birthdays24 mins ago

Lemonade

Whisking up a batch of homemade lemonade is a refreshing summertime ritual that has captivated palates for centuries, but the...

refreshing mixed fruit beverage refreshing mixed fruit beverage
Graduations/Birthdays30 mins ago

Fruit Punch

Fruit punch, a timeless delight tracing its origins to colonial exploration, offers a vibrant, customizable experience that will leave you...

delicious s mores dessert station delicious s mores dessert station
Graduations/Birthdays35 mins ago

S’mores Bar

Gather the perfect ingredients and craft your own delightful s'mores with endless flavor combinations, from milk chocolate to white chocolate...

creamy italian dessert delight creamy italian dessert delight
Graduations/Birthdays41 mins ago

Panna Cotta

Originating in the Piedmont region of Italy, panna cotta is a delightfully creamy and versatile dessert that has captured the...

delicious baked fruit dessert delicious baked fruit dessert
Graduations/Birthdays47 mins ago

Fruit Cobbler

Yes, you can discover the surprising origins and irresistible flavors of this classic American dessert by exploring the history and...

sweet baked treats recipe sweet baked treats recipe
Graduations/Birthdays53 mins ago

Sugar Cookies

Flavorful and versatile, sugar cookies have captivated bakers for generations, with a rich history and perfected techniques waiting to be...

decadent chocolate dessert delight decadent chocolate dessert delight
Graduations/Birthdays58 mins ago

Chocolate Mousse

Blissful spoonfuls of velvety chocolate mousse will transport you to a world of decadence, beckoning you to discover the rich,...

Advertisement

Trending