Connect with us

Farm-to-Table Cooking

Heirloom Bean Stew

Masterfully crafted, this heirloom bean stew celebrates the rich flavors of ancient bean varieties, inviting you on a culinary journey through history.

Published

on

heirloom bean vegetable stew

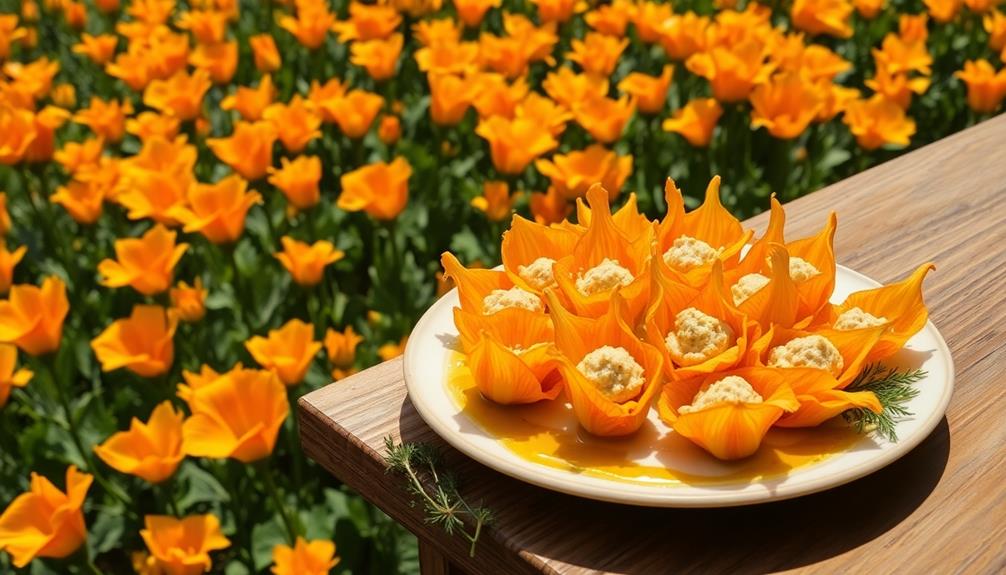
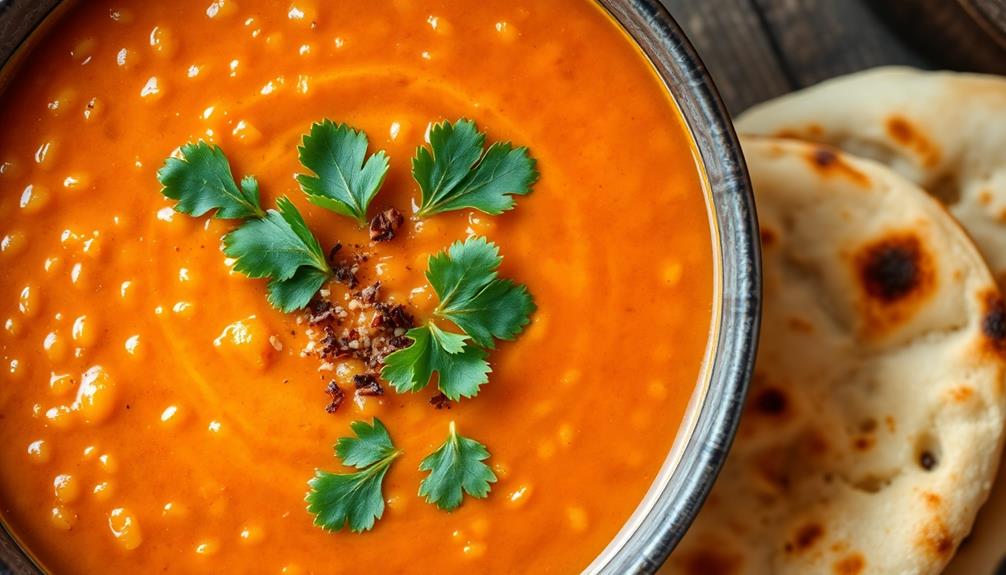
Heirloom bean stew is a comforting dish that's been around for centuries, celebrating the diverse flavors of ancient bean varieties. You'll love the creamy, tender beans simmered with aromatic vegetables and spices. Start by soaking the beans overnight, then sauté onions and garlic before adding them to the pot. Simmer for 1-2 hours, adjusting the cooking time based on the bean type. Garnish with fresh herbs for a vibrant finish. Experiment with different bean varieties, grains, and seasonal vegetables to create your own signature stew. This nourishing blend of tradition and culinary creativity is sure to delight your senses.

Key Takeaways

  • Heirloom bean stew features a variety of ancient bean varieties with unique flavors and textures, providing essential nutrients and a connection to traditional cuisines.
  • The stew requires soaking beans overnight, sautéing aromatic vegetables, and simmering the beans for 1-2 hours to achieve a creamy, flavorful dish.
  • Heirloom beans are high in protein, fiber, vitamins, and minerals, making the stew a nutritious and versatile option for various dietary needs.
  • Customization is encouraged, allowing for the incorporation of different bean types, grains, seasonings, and vegetables to create unique flavor profiles.
  • Serving the stew with accompaniments like bread, salad, or as a filling for tacos or burritos provides a complete and satisfying meal.

History

Although heirloom beans have been a staple in many traditional cuisines for centuries, their popularity has recently surged as people rediscover the unique flavors and textures these varieties offer.

These ancient bean types, often passed down through generations, have a rich history and cultural significance in various regions around the world.

Many heirloom beans, like the iconic pinto or the vibrant scarlet runner, were crucial crops for indigenous communities, providing essential nutrients and playing a central role in their culinary traditions.

As these communities interacted and traded, the beans spread, adapting to different climates and developing distinct characteristics.

Today, heirloom beans are prized for their complex tastes, diverse colors, and connections to traditional foodways.

Advertisement

Exploring the history of these beloved legumes can deepen your appreciation for the layers of tradition and diversity they represent on your plate.

Recipe

Heirloom bean stew is a hearty, comforting dish that celebrates the rich, earthy flavors of premium quality beans. This recipe showcases a variety of heirloom beans, each with its unique texture and nuanced taste. Simmered slowly with a blend of aromatic vegetables and spices, the resulting stew is a symphony of flavors that warms the soul.

The key to this dish lies in the careful selection and preparation of the beans. Heirloom varieties, such as cranberry, Jacob's Cattle, or Tongues of Fire, lend depth and character to the stew, each contributing its own personality to the final dish. Soak the beans overnight to ensure even cooking and tender texture.

Ingredients:

  • 1 lb assorted heirloom beans, soaked overnight and drained
  • 1 onion, diced
  • 3 cloves garlic, minced
  • 2 carrots, peeled and diced
  • 2 celery stalks, diced
  • 1 bay leaf
  • 1 tsp dried thyme
  • 1 tsp smoked paprika
  • 4 cups vegetable or chicken stock
  • Salt and pepper to taste

Instructions: In a large pot, sauté the onion, garlic, carrots, and celery in a bit of oil until softened, about 5-7 minutes.

Add the drained beans, bay leaf, thyme, paprika, and stock. Bring to a boil, then reduce heat and simmer for 60-90 minutes, or until the beans are tender and the flavors have melded.

Advertisement

When serving, season the stew with salt and pepper to taste. The longer the stew simmers, the more the flavors will develop, so consider making it a day in advance to allow the ingredients to fully integrate.

Serve with crusty bread or cornbread for a hearty, comforting meal.

Cooking Steps

Start by soaking your beans overnight to get them nice and tender.

Drain and rinse the soaked beans, then add your vegetables and let the whole mixture simmer for 1 to 2 hours until the beans are creamy and delicious.

Don't forget to garnish with fresh herbs for that extra pop of flavor!

Advertisement

Step 1. Soak Beans Overnight Before Cooking

soak beans overnight first

Soaking the beans overnight is a crucial step in crafting this satisfying stew. This simple process helps to soften the beans, making them more tender and digestible. It also removes some of the indigestible sugars that can cause gas and discomfort.

To soak the beans, simply place them in a large bowl and cover them with several inches of water. Let them sit at room temperature for at least 8 hours or up to 24 hours. You'll know the beans are ready when they've expanded in size and the water has turned a bit cloudy.

Drain the beans, give them a quick rinse, and they're ready to be added to your stew. This easy step ensures your heirloom beans will cook evenly and develop a rich, creamy texture.

Don't skip it – your belly (and your guests) will thank you!

Step 2. Drain and Rinse Soaked Beans

drain and rinse beans

After soaking your beans overnight, it's time to prepare them for the stew.

Grab a colander or mesh strainer and drain the beans, discarding the soaking water. This step is crucial, as the soaking water can contain compounds that may cause gas or discomfort.

Once drained, give the beans a gentle rinse under cool, running water. This helps remove any remaining debris or impurities. Be careful not to over-rinse, as you don't want to wash away the valuable nutrients.

Advertisement

Gently pat the beans dry with a clean kitchen towel or paper towels. This extra step helps ensure they cook evenly in the stew.

Now your beans are ready to be added to the pot, where they'll soak up all the delicious flavors of the other ingredients.

Get ready for a hearty and satisfying heirloom bean stew!

Step 3. Add Vegetables

incorporate fresh vegetables now

Next, add the chopped vegetables to the pot. Toss in the crisp carrots, tender celery, and fragrant onions. These veggies will add a lovely, earthy flavor to the stew. Be sure to chop them into bite-sized pieces so they cook evenly.

Stir the vegetables into the beans, then pour in the broth or stock. Bring the mixture to a gentle simmer, then reduce the heat to low.

Let the stew simmer for 30-45 minutes, or until the vegetables are tender and the flavors have melded together. Stir occasionally to prevent sticking. Feel free to add a pinch of salt and pepper to taste.

Advertisement

You can also toss in some fresh herbs, like thyme or rosemary, to brighten up the dish. The stew should have a hearty, comforting texture when it's ready. Ladle it into bowls and enjoy the delicious heirloom bean and vegetable combination.

Step 4. Simmer Beans 1 to 2 Hours

simmer beans for hours

Once the vegetables have been incorporated, let the beans simmer gently for 1 to 2 hours. This slow cooking process allows the beans to fully tender and develop their rich, earthy flavors.

You'll want to keep a close eye on the pot, stirring occasionally to prevent sticking or burning. The beans should be simmering at a low, steady rate – not boiling rapidly, which can cause them to become tough.

As the beans cook, you'll notice the liquid thickening and the individual beans starting to break down, creating a creamy, comforting texture. Feel free to add a splash of water if the stew becomes too thick for your liking.

The long simmer time is crucial for allowing the beans to fully tenderize and for the flavors to meld together seamlessly. Be patient and let the pot do its magic on the stovetop.

In about an hour or so, your heirloom beans will be fork-tender and ready to enjoy.

Advertisement

Step 5. Garnish With Fresh Herbs

garnish using fresh herbs

To finish off the heirloom bean stew, garnish it with a handful of freshly chopped herbs. This last step adds a vibrant, aromatic touch that really brings the dish together.

You can use a variety of herbs, like fragrant basil, earthy thyme, or peppery oregano – just pick what you love most. For an added element of freshness, consider incorporating some indoor plants to create a cozy home atmosphere while you cook.

Chop the herbs finely so they distribute evenly throughout the stew. Sprinkle them generously over the top, letting them cascade down the sides. The herbs won't just look beautiful; they'll also infuse each bite with their distinctive flavors.

The bright, herbal notes perfectly complement the rich, savory beans. Once you've added the herbs, give the stew a final gentle stir to incorporate them. Then ladle it into bowls and enjoy!

The fresh herbs elevate this simple heirloom bean stew, making it something truly special.

Final Thoughts

As you've now had the chance to prepare this delectable heirloom bean stew, consider how the flavors have melded and the textures have come together. The slow-simmered beans should be creamy and tender, while the aromatic vegetables and herbs lend a depth of flavor that's both comforting and complex.

Advertisement

Don't forget to garnish with those fresh herbs – they'll add a bright, fragrant finishing touch.

Now that you've mastered this hearty, nourishing dish, you can experiment with different bean varieties or add your own unique twist. Perhaps you'll try a spicier version with a kick of chili pepper, or switch up the herbs to suit your personal preferences.

The beauty of a good bean stew is its versatility – it's the perfect blank canvas for your culinary creativity. Enjoy the fruits of your labor, and don't be afraid to make this recipe your own.

Frequently Asked Questions

How Do I Store Heirloom Beans for Long-Term Use?

To store heirloom beans for long-term use, you can store them in an airtight container in a cool, dark place. It's best to keep them away from moisture, light, and high temperatures to maintain their quality.

Can I Substitute Canned Beans for Dried Heirloom Beans?

You can substitute canned beans for dried heirloom beans, but the flavor and texture won't be the same. Canned beans are pre-cooked, while dried heirloom beans need to be soaked and simmered for the best results.

Advertisement

What Are the Health Benefits of Eating Heirloom Beans?

You'll enjoy more fiber, protein, and minerals when you eat heirloom beans compared to canned beans. They're also often less processed, providing more of the natural nutrients your body needs.

How Can I Incorporate Heirloom Beans Into Other Dishes?

You can easily incorporate heirloom beans into various dishes. Try adding them to soups, stews, chilis, or even use them as a side dish. Their unique flavors and textures can enhance the overall taste of your meals.

Do Heirloom Beans Require Special Preparation Techniques?

Heirloom beans often do require special prep techniques. You may need to soak them longer, simmer them gently, and be mindful of cooking times. Taking these steps ensures they remain tender and flavorful in your dishes.

Continue Reading
Advertisement

Farm-to-Table Cooking

Whole Roasted Heritage Chicken

Nurture your taste buds with the captivating flavors of a whole roasted heritage chicken, where every bite reveals a culinary journey worth exploring.

Published

on

heritage chicken roasted whole

Whole roasted heritage chicken is a delightful culinary experience. You'll love its golden-brown skin, juicy meat, and complex flavors from aromatic spices. This poultry breed has a rich history – it was carefully bred to maintain unique traits when commercial varieties threatened their diversity. Start by brining the chicken to retain moisture, then rub it with an herb-garlic butter before roasting at high heat. Baste frequently for a crispy exterior. Serve with roasted veggies for a complete meal. Savor the joy of this homemade dish and the satisfaction it brings. There's more to discover about this impressive heritage bird.

Key Takeaways

  • Whole roasted heritage chickens are a result of preservation efforts to maintain genetic diversity of traditional chicken breeds.
  • The preparation process involves brining the chicken, trussing it, and rubbing it with a herb-garlic butter mixture for enhanced flavor and crispy skin.
  • The chicken is roasted at a high temperature of 425°F (220°C) for 60-75 minutes, basting it every 15 minutes to ensure juicy and tender meat.
  • Serving suggestions include pairing the roasted chicken with roasted vegetables, a side salad, and offering sauces or gravies for a complete meal.
  • Enjoying the whole roasted heritage chicken creates a warm, family-style atmosphere and highlights the importance of quality ingredients and homemade cooking.

History

The heritage chicken's rich history can be traced back to the early 20th century, when small-scale farmers and homesteaders across America sought to preserve the genetic diversity of poultry breeds.

These dedicated individuals recognized the importance of maintaining traditional chicken varieties, which were gradually being replaced by commercially-bred birds optimized for industrial production.

Through careful breeding and selection, they worked to keep alive the unique traits and characteristics of heritage chicken breeds, ensuring that these precious genetic resources wouldn't be lost to future generations.

Today, the term "heritage chicken" refers to poultry that can trace its lineage back to these early preservation efforts, showcasing the remarkable diversity and resilience of America's poultry heritage.

Recipe

Roasting a whole heritage chicken is a simple yet impressive way to prepare this flavorful and succulent bird. The slow roasting process allows the chicken to cook evenly, resulting in a juicy interior and a crisp, golden-brown skin.

Advertisement

The key to a successful whole roasted heritage chicken is to start with a high-quality bird. Heritage chickens are known for their rich, intense flavor and firm texture, making them an excellent choice for this type of preparation. With the right technique and a few essential ingredients, you can create a truly exceptional meal.

  • 1 (4-5 pound) heritage chicken, at room temperature
  • 2 tablespoons unsalted butter, softened
  • 1 tablespoon kosher salt
  • 1 teaspoon freshly ground black pepper
  • 1 lemon, halved
  • 4 sprigs of fresh thyme
  • 2 cloves of garlic, peeled and crushed

Preheat your oven to 425°F (220°C). Pat the chicken dry with paper towels and rub the softened butter all over the skin. Generously season the chicken with the kosher salt and black pepper, making sure to season both the inside and outside of the bird.

Place the chicken in a large roasting pan and tuck the lemon halves and thyme sprigs inside the cavity. Scatter the crushed garlic cloves around the chicken. Roast the chicken for 60-75 minutes, or until the internal temperature reaches 165°F (75°C) in the thickest part of the thigh. Baste the chicken occasionally with the pan juices during the cooking process.

Once the chicken is cooked, let it rest for 15 minutes before carving and serving. This resting period allows the juices to redistribute throughout the meat, ensuring a perfectly moist and flavorful result. Enjoy your delicious whole roasted heritage chicken!

Cooking Steps

First, brine the chicken overnight to help it stay moist and flavorful.

Next, truss the chicken tightly for even cooking.

Advertisement

Then, preheat your oven to 425°F and rub the chicken with a delicious herb-garlic butter before roasting until it's golden brown perfection.

Step 1. Brine the Chicken Overnight

brine chicken overnight preparation

Brining the chicken overnight is a crucial first step in ensuring your Whole Roasted Heritage Chicken turns out moist and flavorful. In a large container, mix together water, salt, sugar, and any aromatics you'd like, such as herbs, garlic, or citrus. Submerge the whole chicken in the brine, cover, and refrigerate for at least 8 hours, or up to 24 hours.

The brine helps the meat retain moisture during the roasting process. The salt and sugar also season the chicken from the inside out, infusing it with delicious flavor.

Be sure to pat the chicken dry with paper towels before seasoning and roasting – you don't want any excess moisture interfering with getting that beautiful crispy skin.

After brining, the chicken is ready for the next step: seasoning and roasting to perfection. This simple but essential technique sets the stage for a juicy, well-seasoned Whole Roasted Heritage Chicken.

Step 2. Truss the Chicken for Roasting

truss chicken for roasting

After brining the chicken, go ahead and truss it up for roasting.

Trussing helps the chicken cook evenly and retains its shape. Start by tucking the wing tips under the body.

Advertisement

Then, use a piece of kitchen string to tie the legs together at the ankles. Pull the string tight, then loop it around the body and tie it off.

Next, take the string and make a loop around the neck, pulling the skin taut. Finally, tie the ends of the string together at the back.

This secures the chicken for even cooking in the oven. Be sure to tuck any loose skin under the string as you go.

With the chicken nicely trussed, it's ready for the oven. This step ensures a beautiful presentation and even heat distribution throughout the bird as it roasts to perfection.

Step 3. Preheat Oven to 425°F

preheat oven 425 f

With the chicken neatly trussed, you're now ready to start cooking. Preheat your oven to 425°F. This high temperature is crucial for achieving a crisp, golden-brown skin on your heritage chicken.

As the oven heats up, the intense heat will render the fat under the skin, helping it to crisp to perfection.

Advertisement

While the oven is preheating, take a moment to gather your baking sheet or roasting pan. You'll want to use a rimmed baking sheet or a shallow roasting pan to catch any juices that may drip from the chicken as it cooks.

Line the pan with foil or parchment paper for easy cleanup later.

Once the oven is hot and ready, carefully place the trussed chicken, breast-side up, in the prepared pan. The high heat will help the skin become wonderfully crispy, while the interior remains juicy and flavorful.

Get ready to enjoy the mouthwatering aroma that will soon fill your kitchen!

Step 4. Rub With Herb-Garlic Butter

herb garlic butter application

Next, create a flavorful herb-garlic butter to rub all over the chicken. In a small bowl, combine 4 tablespoons of softened unsalted butter, 2 cloves of minced garlic, 1 teaspoon of chopped fresh thyme, 1 teaspoon of chopped fresh rosemary, and a pinch of salt and pepper.

Mix the ingredients together until they're well-incorporated. Gently loosen the skin of the chicken, being careful not to tear it. Spread half of the herb-garlic butter directly onto the meat under the skin.

Advertisement

Rub the remaining butter all over the outside of the chicken, making sure to cover every nook and cranny. This aromatic, golden-brown layer of butter will baste the chicken as it roasts, infusing it with mouthwatering flavor.

Once the chicken is fully coated, it's ready to go into the preheated oven. The herb-garlic butter will transform this heritage bird into a showstopping main course.

Step 5. Roast Chicken Until Golden Brown

roast chicken golden brown

Preheat your oven to 425°F. Place the prepared chicken in a large roasting pan or rimmed baking sheet. Make sure the chicken is centered and not touching the sides of the pan.

Roast the chicken for 45-55 minutes, basting it every 15 minutes with the pan juices. The chicken is done when the juices run clear, and the internal temperature reaches 165°F in the thickest part of the thigh.

Once the chicken is cooked through, transfer it to a cutting board and let it rest for 10-15 minutes. This allows the juices to redistribute throughout the meat, resulting in a more tender and flavorful bird.

While the chicken rests, take a moment to admire its beautiful golden-brown skin. The herb-garlic butter has done its job, creating a crisp, flavorful exterior that's sure to impress your guests.

Advertisement

Final Thoughts

As you set the table and gather your loved ones, savor the delightful aromas that have filled your home. The whole roasted heritage chicken you've just prepared is sure to impress with its golden-brown skin and juicy, flavorful meat. This dish isn't just a meal – it's an experience to be savored.

With your first bite, you'll be transported by the complex interplay of spices and the natural sweetness of the heritage breed. Each slice reveals the care and attention you've put into this roast, from the perfect seasoning to the gentle basting that's produced such a stunning presentation.

As you enjoy this special meal together, take a moment to appreciate the joy of sharing a homemade dish made with quality ingredients. This is the kind of meal that nourishes both the body and the soul, and it's sure to become a new family favorite.

Savor every last morsel, then sit back and bask in the satisfied smiles all around.

Frequently Asked Questions

Can I Substitute a Regular Chicken for a Heritage Chicken?

You certainly can substitute a regular chicken for a heritage chicken. The cooking time and method will be similar, though the flavor and texture may differ slightly. Feel free to experiment and find what works best for your preferences.

Advertisement

How Long Does It Take to Prepare a Whole Roasted Heritage Chicken?

The preparation time for a whole roasted heritage chicken can vary, but it typically takes 60-90 minutes to properly cook it. The exact time will depend on the size of the bird and your oven temperature.

What Are the Best Side Dishes to Serve With Roasted Heritage Chicken?

When serving roasted chicken, you'll want complementary side dishes that enhance the flavors. Consider roasted vegetables, mashed potatoes, a fresh salad, or crusty bread to create a well-balanced and delightful meal.

Can I Use This Recipe for a Smaller or Larger Heritage Chicken?

You can certainly use this recipe for a smaller or larger heritage chicken. Just adjust the cooking time accordingly – a smaller bird will need less time, while a larger one will require more. The core technique remains the same.

How Can I Tell if a Heritage Chicken Is Cooked Through?

To tell if a heritage chicken is cooked through, use a meat thermometer. Insert it into the thickest part of the thigh, avoiding the bone. The internal temperature should reach 165°F (74°C) for doneness.

Advertisement
Continue Reading

Farm-to-Table Cooking

Nettle and Potato Soup

Savor the earthly delights of Nettle and Potato Soup, a budget-friendly dish packed with vitamins and minerals that will keep you feeling full and nourished.

Published

on

hearty nettle potato soup

Nettles and potatoes combine for a comforting, nourishing soup enjoyed across Europe for centuries. You'll love the earthy, balanced flavors. First, sauté onions and garlic, then add potatoes and broth. Towards the end, toss in fresh nettle leaves – their vitamins and minerals make this soup super healthy. The potatoes provide carbs for energy, while the high fiber keeps you feeling full. This budget-friendly dish is easy to customize with different herbs or veggies. Discover how versatile this soup can be as you continue exploring its benefits.

Key Takeaways

  • Nettle and potato soup is a traditional dish with a history traced back to ancient Greece and Rome, where nettles were used as a survival food.
  • Nettles are highly nutritious, containing essential vitamins, minerals, antioxidants, and fiber, making them a healthy addition to this comforting soup.
  • The recipe involves sautéing onions and garlic, then adding potatoes, nettles, and broth to create a flavorful and satisfying soup.
  • Proper handling and cooking of nettles are crucial to remove bitterness and enhance the overall taste and texture of the dish.
  • The versatility of the recipe allows for adaptations with different herbs, seasonal vegetables, and the ability to adjust consistency and serve as a base for other soups or stews.

History

Nettles, with their stinging leaves, have long been a part of culinary traditions across Europe. These resilient plants have been foraged and used in cooking for centuries, prized for their nutritional benefits and unique flavor.

Interestingly, the earliest known records of nettle consumption date back to ancient Greece and Rome, where the leaves were used in soups, stews, and even as a green vegetable.

During the Middle Ages, nettles became an important survival food, particularly in times of scarcity. Peasants and the working class would gather the wild plants, which were abundant and easy to obtain, to supplement their diets.

The nettle's ability to thrive in a variety of soil conditions made it a reliable and accessible ingredient, even in the harshest of environments.

Today, the humble nettle continues to be celebrated in regional cuisines, with nettle and potato soup being a classic example of its enduring presence in European culinary traditions.

Advertisement

Recipe

Nettle and Potato Soup

Nettle, a common weed often found in damp areas, is a surprisingly versatile and nutritious ingredient. Its earthy, spinach-like flavor lends itself beautifully to hearty soups and stews. Pairing it with the humble potato creates a comforting, nourishing dish that's sure to delight the senses.

This recipe showcases the harmony of these two ingredients, resulting in a vibrant, flavorful soup that's both satisfying and easy to prepare. The nettle's subtle bitterness is balanced by the potato's starchy creaminess, making for a well-rounded and deeply satisfying experience.

  • 1 lb (450g) fresh nettle leaves, washed and stems removed
  • 3 medium potatoes, peeled and diced
  • 1 onion, diced
  • 3 cloves of garlic, minced
  • 4 cups (1 liter) vegetable or chicken broth
  • 2 tbsp olive oil
  • Salt and pepper to taste

In a large pot, sauté the onion and garlic in the olive oil over medium heat until translucent. Add the diced potatoes and broth, and bring to a boil. Reduce heat and simmer for 15-20 minutes, until the potatoes are tender.

Gently stir in the nettle leaves and continue to simmer for another 5-10 minutes, until the nettle is wilted and tender. Season with salt and pepper to taste.

It's important to handle the nettle with care, as the leaves can cause a stinging sensation on the skin. Be sure to wear gloves when harvesting and preparing the nettle.

Advertisement

The soup can be served as a main course or as a side, and it pairs wonderfully with crusty bread or a fresh salad.

Cooking Steps

First, harvest some fresh nettle leaves from your garden or local forager.

Then, peel and chop the potatoes into bite-sized pieces.

Next, sauté the onions in a pot until they're translucent, about 5 minutes.

After that, add the nettles and pour in the vegetable stock.

Advertisement

Step 1. Harvest Fresh Nettle Leaves

gather fresh nettle leaves

Gather your gardening gloves and a pair of scissors as you venture into the lush greenery to collect the delicate nettle leaves.

These remarkable plants thrive in moist, shaded areas, so keep an eye out for them along the edges of forests or near stream banks. When you spot a nettle plant, gently grasp the leaves near the stem and snip them off, taking care to avoid the prickly stems.

Be sure to wear your gloves, as the leaves contain tiny, stinging hairs that can irritate unprotected skin. Collect only the fresh, vibrant green leaves, leaving behind any damaged or discolored ones.

Aim to gather about a handful of leaves per serving of soup. With your nettle bounty in hand, you're ready to bring their delightful flavor and nutritional benefits to your delectable Nettle and Potato Soup.

Step 2. Peel and Chop Potatoes

peel and chop potatoes

With the fresh nettle leaves safely collected, turn your attention to the potatoes.

You'll need to peel them first, so grab a sharp paring knife and get to work. Carefully slice off the skin, making sure to remove any eyes or blemishes. Once peeled, rinse the potatoes under cool water to wash away any dirt or debris.

Next, it's time to chop the potatoes into bite-sized pieces. Place them on a cutting board and, using a chef's knife, slice them into thin, even rounds.

Advertisement

Then, stack the rounds and cut them crosswise into cubes. Aim for pieces that are about 1/2-inch to 1-inch in size – this will help them cook evenly in the soup.

As you chop, be mindful of your fingers and use the knife safely. Take your time and focus on creating uniform potato pieces.

With the potatoes prepped, you're ready to add them to the soup and let the flavors meld together.

Step 3. Sauté Onions Until Translucent

saut onions until translucent

Having peeled and chopped the potatoes, you'll now sauté the onions until they're translucent.

In a large pot or Dutch oven, heat a couple of tablespoons of olive oil over medium heat. Once the oil is shimmering, add the diced onions.

Stir the onions occasionally, letting them cook for about 5-7 minutes. You'll know they're ready when they've softened and turned a lovely, pale golden color.

Advertisement

Be careful not to let them brown too much, as you want the onions to be sweet and aromatic, not caramelized.

As the onions sauté, they'll release their natural sugars, creating a delightful aroma that will fill your kitchen.

This step is crucial for building the flavor base of the soup, so take your time and enjoy the process.

Once the onions are perfectly translucent, you can move on to the next step in creating your delicious Nettle and Potato Soup.

Step 4. Add the Nettles

incorporate the nettles

Next, add the freshly harvested nettle leaves to the pot. Be careful when handling the nettles, as they can sting your skin.

Gently add them to the sautéed onions, stirring to combine. The nettles will quickly wilt down, releasing their earthy, bold flavor into the soup. Allow the nettles to cook for about 2-3 minutes, until they've softened. Their vibrant green color will contrast beautifully with the golden onions.

Advertisement

Nettles are packed with essential vitamins and minerals, so you're getting a nutritious boost in this soup.

Once the nettles have wilted, it's time to add the potatoes. Carefully cube the potatoes and gently stir them into the pot. The nettles and potatoes will now simmer together, blending their flavors and textures to create a hearty, comforting soup.

Get ready for the delicious aroma to fill your kitchen!

Step 5. Add Vegetable Stock

incorporate vegetable stock now

After adding the nettles, pour in the vegetable stock. You'll want to use about 4 cups of stock to cover the nettles and potatoes.

Bring the mixture to a gentle simmer, then let it cook for 15-20 minutes. This allows the flavors to meld and the vegetables to become nice and tender.

As the soup simmers, the stock will infuse the nettles and potatoes with a delicious savory flavor. The stock helps to balance out the slight bitterness of the nettles. You can use a homemade vegetable stock, or opt for a high-quality store-bought version.

Advertisement

Either way, the stock ties all the ingredients together into a harmonious, comforting soup.

Be sure to taste the soup as it cooks and adjust the seasoning as needed. You may want to add a pinch of salt and pepper to enhance the flavors.

The soup should have a nice, velvety texture when it's done. Serve it hot, garnished with a sprinkle of fresh herbs if desired.

Final Thoughts

This nettle and potato soup is a comforting and nourishing dish that showcases the humble ingredients in a delightful way. The combination of earthy nettles and starchy potatoes creates a flavorful and satisfying soup that's perfect for cool evenings or as a light meal.

The key is to handle the nettles carefully and thoroughly cook them to remove any unpleasant bitterness. The potato chunks add substance and creaminess, while the vegetable stock provides a savory backdrop.

Advertisement

Don't be afraid to experiment with different herbs and seasonings to suit your personal preferences. Once you've mastered this recipe, you can easily adapt it to use up other seasonal vegetables or adjust the consistency to your liking.

This soup is a versatile and budget-friendly option that's sure to become a staple in your recipe repertoire. Enjoy the comforting flavors and nourishing benefits of this simple yet delicious nettle and potato soup.

Frequently Asked Questions

Are Nettles Edible, and How Do I Safely Handle Them?

Yes, nettles are edible and packed with nutrients. To handle them safely, wear gloves to avoid the stinging leaves. Gently rinse them and cook thoroughly to remove the sting before enjoying their earthy, spinach-like flavor.

What Are the Health Benefits of Consuming Nettles?

Consuming nettles provides an array of health benefits. They're rich in vitamins and minerals, like vitamins A, C, and K, as well as iron and calcium. Nettles also have anti-inflammatory properties, making them a nutritious addition to your diet.

Can I Substitute Spinach or Kale for Nettles in the Recipe?

You can substitute spinach or kale for nettles in a recipe, but you won't get the same nutritional benefits. Nettles are packed with vitamins, minerals, and antioxidants that spinach and kale may not provide in the same quantities.

Advertisement

How Long Does the Soup Keep, and Can It Be Frozen?

The soup can typically last 3-4 days in the refrigerator and can be frozen for up to 3 months. When ready to serve, simply thaw it in the fridge and reheat it on the stovetop.

Can I Use a Blender Instead of a Hand Blender for the Soup?

You can certainly use a blender instead of a hand blender for the soup. Just be careful not to overfill the blender and work in batches, if needed, to ensure a smooth and consistent texture.

Continue Reading

Farm-to-Table Cooking

Roasted Bone Marrow With Herb Salad

Captivating the senses, roasted bone marrow with a vibrant herb salad offers a decadent and intriguing culinary experience. Uncover the secrets behind this prized delicacy.

Published

on

herb salad with bone marrow

You'll love the rich, indulgent roasted bone marrow, with its creamy texture and savory flavor. This prized delicacy was cherished in ancient Rome and is making a comeback today. Roast the marrow to perfection, then pair it with a bright, herbaceous salad for a memorable flavor experience. Handle the hot marrow carefully and finish it off with a sprinkle of flaky sea salt. You'll be wowed by how the luxurious marrow contrasts with the fresh herbs – an engaging blend of textures and tastes. Let's explore the history and cooking steps in more detail.

Key Takeaways

  • Roasted bone marrow offers a rich, creamy texture and depth of flavor that can be highlighted by pairing it with a bright and herbaceous salad.
  • Preparation of the dish involves properly roasting the bone marrow and assembling a simple yet flavorful herb salad to balance the indulgent nature of the marrow.
  • The recipe can be served as an appetizer or as part of a larger meal, impressing guests with its unique combination of flavors and textures.
  • Proper handling and presentation of the roasted marrow are essential, as it should be served warm with small forks or spoons for easy enjoyment.
  • The dish can be further enhanced by adding a drizzle of fresh lemon juice to help balance the richness of the marrow and complement the freshness of the herbs.

History

Bone marrow has long been a prized delicacy, with its rich, creamy texture and savory flavor. Throughout history, various cultures have cherished this nutrient-dense food. In ancient Rome, bone marrow was considered a luxurious treat, often served as a spread or added to soups and stews.

During the Middle Ages, bone marrow was highly sought after, and it became a symbol of wealth and status.

In many traditional cuisines, bone marrow has been used in hearty, nourishing dishes. In France, it's commonly roasted and served with a simple salad, showcasing its delicate flavor. Similarly, in Mexico, bone marrow is scooped out of the bone and used in stews and sauces, providing a velvety mouthfeel.

Today, the popularity of bone marrow has experienced a resurgence, with chefs and home cooks alike rediscovering its versatility and unique taste. Whether roasted, braised, or incorporated into other dishes, bone marrow remains a treasured ingredient that connects us to the culinary past.

Recipe

Roasted bone marrow is a delicacy that offers a rich, creamy texture and a depth of flavor that pairs beautifully with a bright and herbaceous salad. This recipe combines the indulgent nature of the bone marrow with the freshness of a vibrant herb salad, creating a harmonious balance of flavors and textures.

Advertisement

The key to perfectly roasted bone marrow lies in the proper preparation and cooking technique. By seasoning the marrow with a simple blend of salt and pepper and roasting it until it's hot and spreadable, you can unlock its full potential and create a luxurious base for the accompanying salad.

  • 4 to 6 beef marrow bones, cut crosswise into 1-inch slices
  • Kosher salt and freshly ground black pepper
  • 1 bunch fresh parsley, leaves only
  • 1 bunch fresh chives, chopped
  • 1 bunch fresh tarragon, leaves only
  • 1 bunch fresh mint, leaves only
  • 2 tablespoons extra-virgin olive oil
  • 1 tablespoon fresh lemon juice
  • Flaky sea salt, for serving

Preheat your oven to 400°F (200°C). Arrange the marrow bones on a baking sheet and season them generously with kosher salt and freshly ground black pepper. Roast the bones for 15 to 20 minutes, or until the marrow is hot and spreadable.

While the marrow is roasting, prepare the herb salad by combining the parsley, chives, tarragon, and mint leaves in a bowl. Drizzle the olive oil and lemon juice over the herbs, and toss gently to coat.

To serve, transfer the roasted marrow bones to plates and top with the herb salad. Finish the dish with a sprinkle of flaky sea salt.

For the best results, be sure to use fresh, high-quality ingredients and handle the marrow bones with care to prevent any spillage. Additionally, keep a close eye on the marrow during the roasting process, as it can go from perfectly cooked to overcooked quickly. Enjoy this decadent and flavorful dish as an appetizer or a unique side to your meal.

Cooking Steps

Slice the bone marrow lengthwise, then roast it at 450°F until golden brown.

Advertisement

Whip up a quick parsley herb salad while the marrow cooks.

Step 1. Slice Bone Marrow Lengthwise

slice bone marrow lengthwise

After preheating the oven, grab the bone marrow and carefully slice it lengthwise using a sharp knife.

You'll want to work slowly and steadily, applying gentle pressure to avoid breaking the marrow. Each piece should be about 1-inch thick, revealing the creamy interior.

Once you've sliced the marrow, arrange the pieces in a single layer on a baking sheet.

This will ensure they cook evenly and the edges get nice and crispy. Drizzle a bit of olive oil over the top, just enough to lightly coat the marrow. You can also sprinkle on some salt and pepper at this stage if you'd like.

Now pop the baking sheet into the preheated oven and let the marrow roast for 12-15 minutes.

Advertisement

Keep an eye on it, as you want the outside to be golden brown but the insides to stay soft and spreadable. When it's ready, the marrow will be sizzling and the aroma will be mouthwatering.

Careful, it'll be hot!

Step 2. Roast Bone Marrow at 450°F

roast bone marrow 450 f

Preheat your oven to 450°F.

Once it's nice and hot, carefully place the marrow bones on a rimmed baking sheet. Make sure they're not touching each other – you want plenty of room for the marrow to sizzle and caramelize.

Pop them in the oven and roast for 12 to 15 minutes. Keep an eye on them, as you want the tops to be golden brown but not burnt.

The marrow should be soft and jiggly when the time's up. Use tongs to transfer the bones to a serving platter.

Advertisement

Let them cool for a couple of minutes before serving. The interior will be steaming hot, so be careful when you scoop it out.

Drizzle the marrow with a bit of lemon juice and sprinkle with flaky sea salt.

Serve it up with your herb salad on the side for a truly decadent appetizer.

Get ready for oohs and aahs from your guests!

Step 3. Make Parsley Herb Salad

prepare parsley herb salad

Gather a mix of fresh herbs, such as parsley, chives, and tarragon, and roughly chop them. You'll want a generous handful of each herb. Incorporating herbs like parsley can also provide potential health benefits, including essential oils for respiratory health that help support your overall well-being.

Next, thinly slice a shallot and add it to the chopped herbs. Drizzle the herb mixture with a bit of olive oil and a splash of red wine vinegar. Season with a pinch of salt and freshly cracked black pepper, then gently toss everything together.

Advertisement

The goal is to create a vibrant, flavorful salad that pairs perfectly with the rich, savory roasted bone marrow. Let the salad sit for a few minutes to allow the flavors to meld.

When you're ready to serve, spoon the bone marrow onto plates and top each portion with a generous helping of the herby salad. The contrast of the creamy marrow and the bright, fresh salad is simply divine. Enjoy this delightful combination of textures and tastes.

Step 4. Serve Bone Marrow With Salad

serve marrow with salad

Once the herby salad is ready, it's time to serve the roasted bone marrow. Gently transfer the roasted bone marrow from the baking dish to a serving platter or individual plates. Be careful, as the bone marrow will be very hot! Drizzle any pan juices over the top.

Now, it's time to assemble the dish. Place a generous spoonful of the parsley herb salad directly next to the bone marrow. The cool, fresh flavors of the salad will provide a lovely contrast to the rich, savory bone marrow. You can even top the bone marrow with a bit of the salad if you'd like.

Serve the roasted bone marrow and herb salad immediately, while the marrow is still warm and the salad is crisp. Provide small forks or spoons for your guests to easily scoop out and enjoy the bone marrow.

This dish makes for an impressive and delicious appetizer or side. Bon appétit!

Advertisement

Step 5. Drizzle With Lemon Juice

drizzle with lemon juice

To finish off the dish, drizzle a bit of fresh lemon juice over the roasted bone marrow. The tart and bright acidity of the lemon helps to balance the rich, fatty texture of the bone marrow.

Just a light drizzle is all you need – you don't want to overwhelm the delicate flavor of the marrow. The lemon juice also helps to enhance the herbal notes in the salad, creating a harmonious blend of flavors on the plate.

Be sure to use freshly squeezed lemon juice for the best results. Bottled juice just won't have the same vibrant, zesty punch.

If you have a lemon wedge or two leftover, you can even offer those on the side so your guests can add a little extra lemon to their taste.

The final touch of lemon really takes this dish to the next level, so don't skip this simple but essential step!

Final Thoughts

Ultimately, roasted bone marrow with a vibrant herb salad makes for a delightful and indulgent dish. The rich, buttery texture of the bone marrow pairs beautifully with the bright, fresh flavors of the herbs.

Advertisement

The lemon juice provides a welcome zing, cutting through the richness and elevating the entire dish. This recipe is sure to impress your guests, whether served as an appetizer or as part of a larger meal.

The best part? It's surprisingly simple to prepare, requiring minimal hands-on time. Simply roast the bone marrow, whip up the quick salad, and you're ready to enjoy.

The contrasts in texture and flavor create a truly memorable experience. So don't hesitate – give this roasted bone marrow dish a try and savor the delightful combination of indulgence and freshness.

Frequently Asked Questions

What Nutrients Does Bone Marrow Provide?

Bone marrow provides you with an abundance of essential nutrients, including protein, iron, zinc, and vitamins A, C, and K. It's a nutritional powerhouse that can support your overall health and well-being.

Is Bone Marrow Suitable for Vegetarians?

Bone marrow isn't suitable for vegetarians, as it's a purely animal-derived product. Since vegetarians avoid all animal products, including those derived from animals, bone marrow wouldn't align with their dietary restrictions.

Advertisement

How Long Can Roasted Bone Marrow Be Stored?

Roasted bone marrow can typically be stored for up to 3 days in the refrigerator when stored properly in an airtight container. However, it's best to consume it within 1-2 days for optimal freshness and flavor.

Can Bone Marrow Be Substituted in Other Recipes?

Absolutely! Bone marrow can substitute for other fats or oils in various recipes. It adds a rich, creamy texture and deep, savory flavor to dishes like soups, sauces, and even baked goods.

Does the Type of Bone Affect the Taste of Roasted Bone Marrow?

The type of bone does affect the taste of roasted bone marrow. Bones from different animals, like beef or lamb, have distinct flavors that'll come through when you roast the marrow. Try experimenting to find your preferred taste.

Continue Reading
Advertisement

Affiliate Disclaimer
As an affiliate, we may earn a commission from qualifying purchases. We get commissions for purchases made through links on this website from Amazon and other third parties.

Advertisement

Latest

tangy citrus dessert squares tangy citrus dessert squares
Graduations/Birthdays2 mins ago

Lemon Bars

Unlock the secrets to making the perfect lemon bars, a classic American dessert that combines a buttery crust with a...

delicious chocolate dessert squares delicious chocolate dessert squares
Graduations/Birthdays8 mins ago

Brownies

Joyful and decadent, the story of brownies dates back to a historic culinary mishap, unveiling a rich legacy of chocolate-infused...

delicious homemade chocolate treats delicious homemade chocolate treats
Graduations/Birthdays13 mins ago

Chocolate Chip Cookies

Homemade chocolate chip cookies with their buttery, crispy edges and soft, chewy centers have captivated taste buds for generations, but...

celebratory dessert for gatherings celebratory dessert for gatherings
Graduations/Birthdays19 mins ago

Sheet Cake

Discover the delectable world of sheet cake, a versatile and crowd-pleasing dessert that has captured the hearts of celebrations for...

delicious baked sweet treats delicious baked sweet treats
Graduations/Birthdays25 mins ago

Cupcakes

Baking cupcakes is a delightful endeavor that unveils a world of endless possibilities, from classic flavors to imaginative creations.

creamy egg salad delight creamy egg salad delight
Graduations/Birthdays30 mins ago

Egg Salad Sandwiches

Unlock the secrets to crafting the perfect egg salad sandwich, a timeless classic that delights the senses and satisfies the...

fresh mozzarella tomato basil fresh mozzarella tomato basil
Graduations/Birthdays35 mins ago

Caprese Sandwiches

Indulge in the irresistible blend of creamy mozzarella, juicy tomatoes, and fragrant basil that makes the Caprese sandwich a beloved...

turkey avocado wrap recipe turkey avocado wrap recipe
Graduations/Birthdays40 mins ago

Turkey and Avocado Wraps

Craving a quick, nutritious, and delicious lunch that satisfies your taste buds? Discover the irresistible combination of Turkey and Avocado...

stuffed flatbread delights stuffed flatbread delights
Graduations/Birthdays45 mins ago

Pita Pockets

Juicy fillings, crisp veggies, and savory grilled meats come together in these versatile pita pockets that are easy to prepare...

bacon lettuce tomato delight bacon lettuce tomato delight
Graduations/Birthdays51 mins ago

BLT Sandwiches

A timeless classic, the BLT sandwich captivates with its harmonious blend of crisp bacon, fresh lettuce, and juicy tomatoes, leaving...

artisanal melted cheese delight artisanal melted cheese delight
Graduations/Birthdays56 mins ago

Gourmet Grilled Cheese

Mouth-watering gourmet grilled cheese sandwiches with artisanal breads and premium cheeses that transform this lunchtime classic into an indulgent culinary...

delicious italian sub sandwiches delicious italian sub sandwiches
Graduations/Birthdays1 hour ago

Italian Sub Sandwiches

Perennially popular for their blend of savory Italian cured meats, creamy cheeses, and crisp veggies, Italian sub sandwiches are a...

Advertisement

Trending