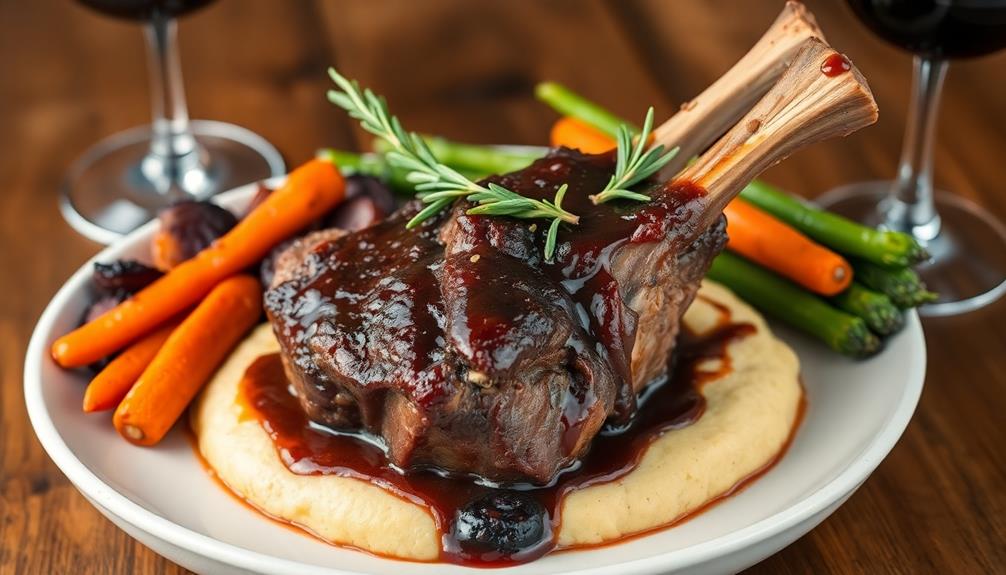

Braised local lamb shank is a classic dish that'll turn tough meat into a tender delight. You'll start by seasoning the shanks and searing them for a flavorful crust. Then, you'll add vegetables and broth, creating a rich base. The magic happens as you slow-cook the lamb for about 2.5 hours, turning it every 30 minutes. This process infuses the meat with complex flavors from wine, herbs, and veggies. When done, the lamb should be falling off the bone. Serve it with creamy mashed potatoes or soft polenta for a comforting meal. There's more to discover about perfecting this culinary masterpiece.
Key Takeaways
- Braised lamb shank transforms tough meat into a tender, flavorful dish through slow cooking.
- The recipe uses local lamb to support regional farmers and enhance freshness.
- Key ingredients include lamb shanks, vegetables, red wine, and beef or lamb stock.
- Searing the meat before braising creates a flavorful crust and enhances the final dish.
- The braising process takes 2.5 to 3 hours in a 325°F (165°C) oven until meat is falling off the bone.
Top picks for "brais local lamb"
Open Amazon search results for this keyword.
As an affiliate, we earn on qualifying purchases.
History
The humble lamb shank has graced dinner tables for centuries. You'll find this cut of meat has a rich history that spans cultures and continents. In ancient times, people valued lamb for its versatility and flavor. They'd often cook the shank slowly to tenderize the meat and extract its rich flavors.
As cooking methods evolved, so did the ways people prepared lamb shanks. You might be surprised to learn that braising became popular in the Middle Ages. Cooks discovered that this method could turn tough cuts of meat into tender, flavorful dishes. They'd use wine, herbs, and vegetables to create complex flavors.
In more recent history, lamb shanks have become a staple in many cuisines. You'll find them in Mediterranean, Middle Eastern, and European dishes. Chefs and home cooks alike have embraced the cut for its rich taste and ability to absorb flavors.
Today, you can enjoy braised lamb shanks in restaurants and homes around the world, each with its own unique twist on this classic dish.
Recipe
Braised lamb shank is a classic dish that transforms a tough cut of meat into a tender, flavorful masterpiece. This recipe utilizes local lamb, celebrating the flavors of your region and supporting local farmers. The slow cooking process allows the meat to become incredibly tender while infusing it with rich, complex flavors.
This hearty dish is perfect for a comforting weekend meal or a special dinner with friends and family. The combination of aromatic herbs, vegetables, and wine creates a delicious sauce that perfectly complements the succulent lamb. Served over creamy mashed potatoes or soft polenta, braised lamb shank is sure to impress your guests and satisfy even the most discerning palates.
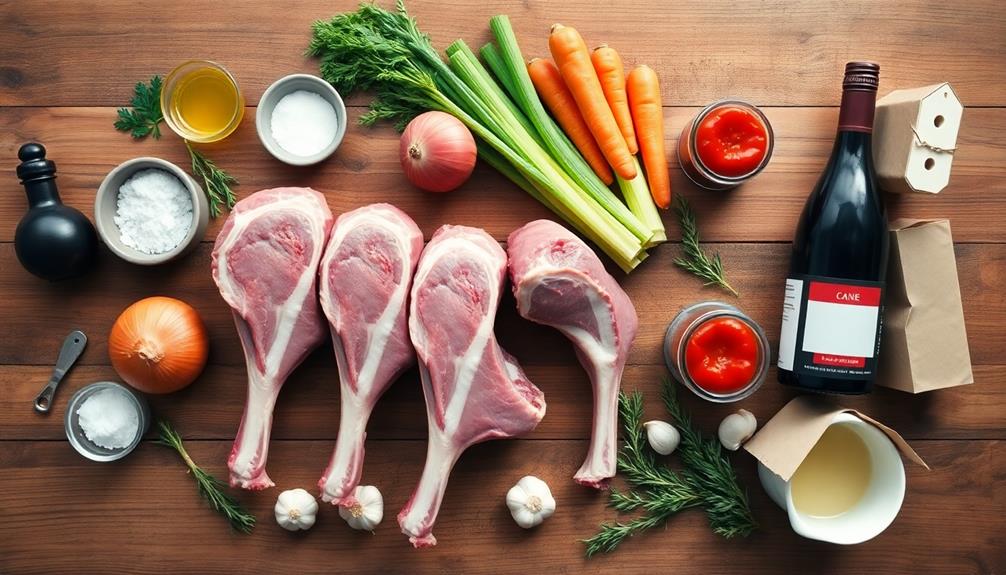
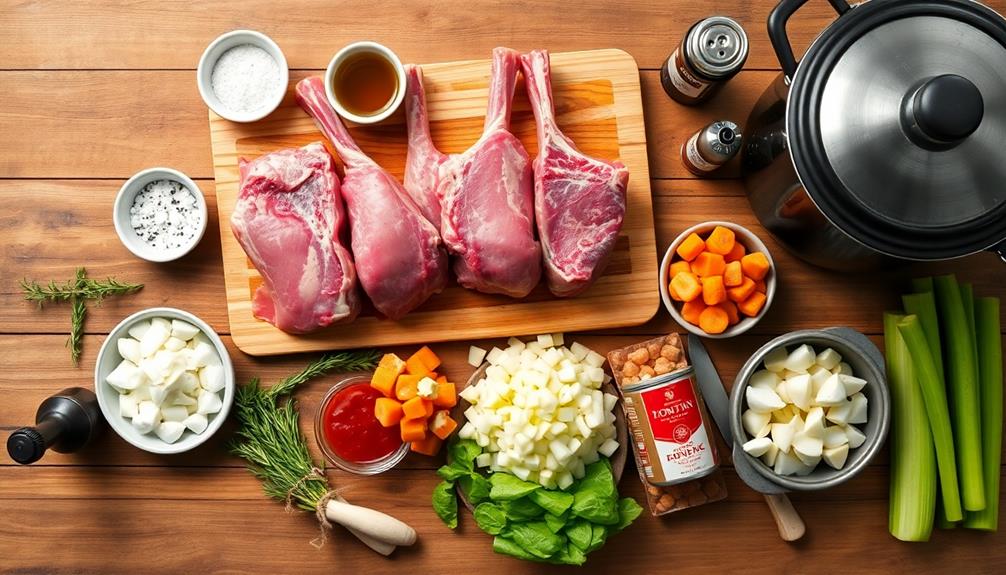
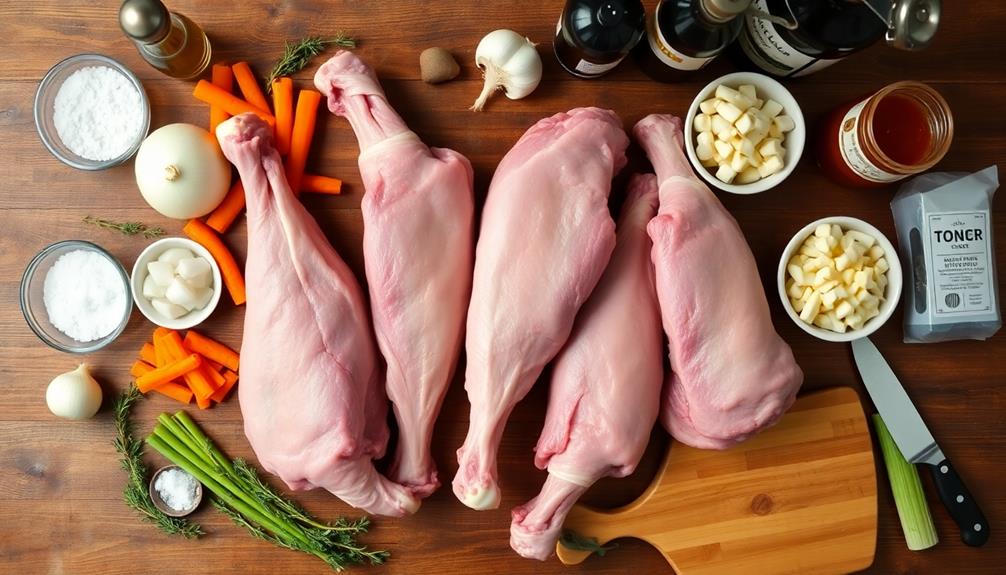
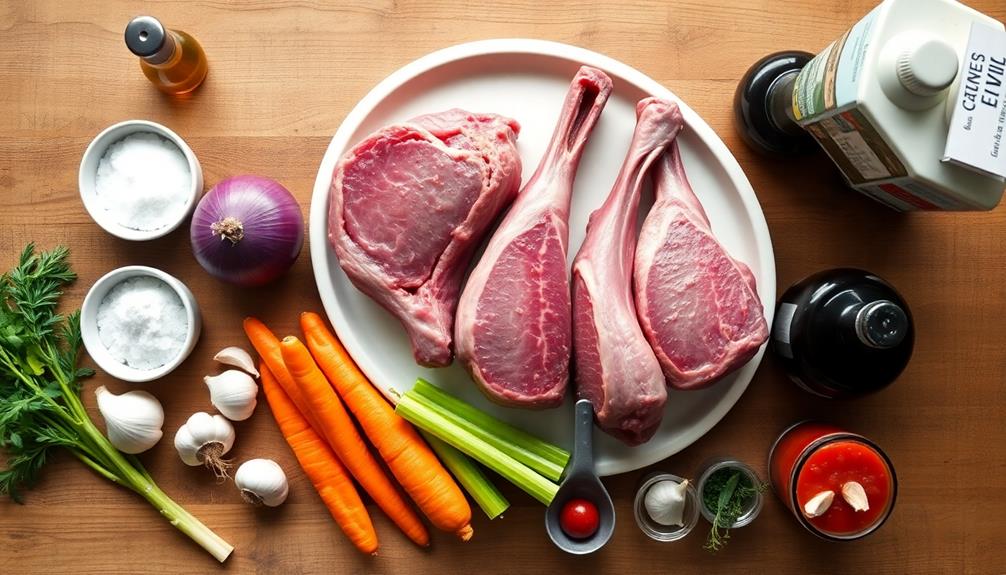
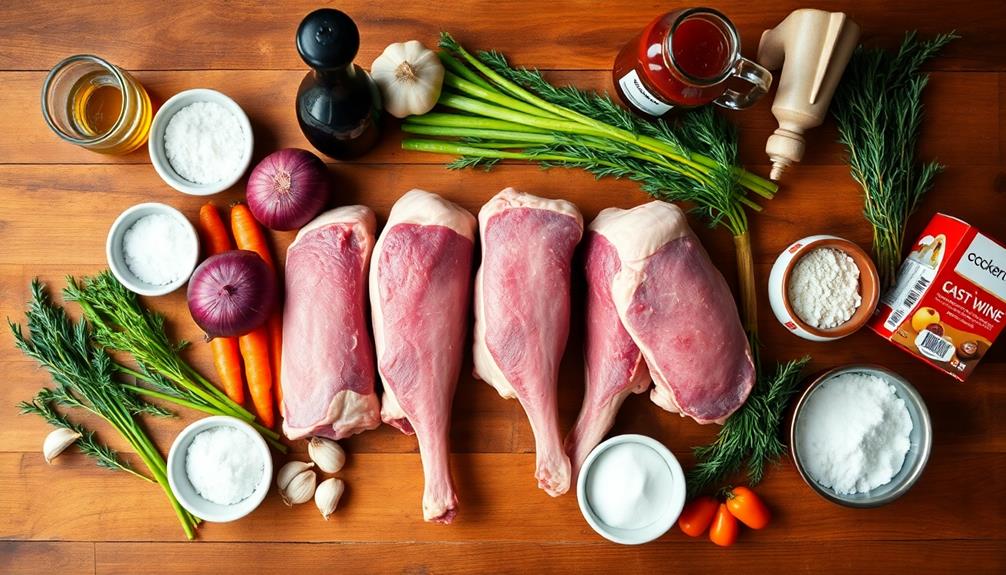
- 4 local lamb shanks
- Salt and freshly ground black pepper
- 2 tablespoons olive oil
- 1 large onion, diced
- 2 carrots, diced
- 2 celery stalks, diced
- 4 garlic cloves, minced
- 2 tablespoons tomato paste
- 1 cup red wine
- 2 cups beef or lamb stock
- 2 sprigs fresh rosemary
- 2 sprigs fresh thyme
- 2 bay leaves
- 1 tablespoon cornstarch (optional)
Preheat the oven to 325°F (165°C). Season the lamb shanks generously with salt and pepper. In a large Dutch oven, heat the olive oil over medium-high heat. Brown the lamb shanks on all sides, then remove and set aside.
Reduce the heat to medium and add the onion, carrots, celery, and garlic to the pot. Cook until softened, about 5 minutes. Stir in the tomato paste and cook for another minute.
Pour in the red wine, scraping up any browned bits from the bottom of the pot. Add the stock, herbs, and return the lamb shanks to the pot. Bring to a simmer, cover, and transfer to the oven. Cook for 2.5 to 3 hours, or until the meat is tender and falling off the bone.
Remove the lamb shanks and strain the sauce if desired. If the sauce needs thickening, mix the cornstarch with a little cold water and stir it into the simmering sauce until it reaches the desired consistency.
For the best results, choose lamb shanks that are similar in size to ensure even cooking. If possible, prepare this dish a day in advance and reheat it before serving, as the flavors will continue to develop overnight.
When serving, consider garnishing with fresh herbs or gremolata for a bright, fresh contrast to the rich, savory flavors of the braised lamb.
Cooking Steps
To cook your braised lamb shank, you'll start by preheating your oven and seasoning the meat well.
Next, you'll sear the shanks in hot oil to lock in flavor, then add vegetables and broth to the pot.
Step 1. Preheat Oven to 350°F
Before diving into the main preparation, you'll need to preheat your oven to 350°F (175°C). This step is crucial for ensuring your lamb shank cooks evenly and reaches the perfect tenderness.
While your oven is heating up, you can start preparing other ingredients. Make sure your oven rack is positioned in the center, as this will help distribute heat evenly around your cooking vessel.
If you're using a convection oven, you might want to lower the temperature by 25°F, as these ovens tend to cook food faster. It's a good idea to use an oven thermometer to double-check the temperature, especially if your oven is older or you're not sure about its accuracy.
While waiting for the oven to reach the right temperature, you can gather your cooking tools and ingredients. This is also a great time to season your lamb shanks or prepare any vegetables you'll be cooking alongside them.
Step 2. Season Lamb Shanks Generously
With your oven preheating, it's time to focus on the star of the dish: the lamb shanks. Take them out of the fridge and pat them dry with paper towels. This helps the seasoning stick better and promotes a nice sear later on.
Now, let's season generously. You'll need salt and black pepper as your base. Don't be shy – lamb can handle a good amount of seasoning. Sprinkle salt all over each shank, making sure to cover every side. Follow up with freshly ground black pepper.
For extra flavor, you can add some dried herbs like rosemary or thyme. Rub the seasonings into the meat with your hands.
If you want to take it up a notch, crush a clove of garlic and mix it with a bit of olive oil. Spread this mixture over the lamb shanks for an extra boost of flavor. Remember, seasoning isn't just about taste – it also helps create a delicious crust when you sear the meat.
Let the seasoned shanks sit at room temperature for about 15 minutes. This allows the flavors to sink in and the meat to warm up slightly, which will help it cook more evenly.
Step 3. Sear Shanks in Hot Oil
After seasoning, it's time to sear those lamb shanks.
Heat a large, heavy-bottomed pan over medium-high heat and add a few tablespoons of oil. You'll want the oil to be hot but not smoking.
Once it's ready, carefully place the seasoned lamb shanks in the pan. Don't overcrowd them; work in batches if needed.
Let the shanks cook undisturbed for about 3-4 minutes on each side. You're looking for a deep, golden-brown color. This searing process is crucial as it helps lock in the juices and creates a flavorful crust.
Use tongs to turn the shanks, making sure all sides get evenly browned.
As you sear, you might notice some bits sticking to the bottom of the pan. Don't worry, that's normal and will add flavor to your dish later.
Once all the shanks are nicely seared, remove them from the pan and set them aside.
You'll see they've developed a beautiful color, and your kitchen will be filled with an amazing aroma. This step sets the stage for the braising process that follows.
Step 4. Add Vegetables and Broth
Now that your lamb shanks are beautifully seared, it's time to build the flavorful base for braising. Remove the shanks from the pot and set them aside.
In the same pot, add chopped onions, carrots, and celery. Cook these vegetables until they're soft and starting to brown, stirring often. This will take about 5-7 minutes.
Next, add minced garlic and cook for another minute until it's fragrant.
Pour in a cup of red wine to deglaze the pot, scraping up any browned bits from the bottom. These bits are packed with flavor, so don't let them go to waste!
Now, it's time to add your broth. You can use chicken, beef, or vegetable broth – whatever you prefer. Pour in enough to almost cover the lamb shanks when you put them back in. Next, bring the broth to a gentle simmer before covering the oven-safe pot and transferring it to the oven. This heritage chicken recipe has been passed down for generations, and the rich flavors of the broth will enhance the succulent lamb shanks as they braise. Let the lamb shanks braise in the oven for 2 to 2 ½ hours, or until the meat is tender and falling off the bone.
Add some fresh herbs like rosemary and thyme, and don't forget to season with salt and pepper.
Carefully place the lamb shanks back into the pot, nestling them among the vegetables and broth.
Step 5. Cover and Braise Until Tender
The lid of your pot becomes the key to transforming tough lamb shanks into melt-in-your-mouth perfection. Once you've added your vegetables and broth, it's time to cover the pot and let the magic happen. Make sure the lid fits tightly to keep all the moisture and flavors inside.
Now, you'll want to lower the heat to a gentle simmer. This slow, steady cooking process is what braising is all about. You're aiming for a temperature where you see small bubbles rising to the surface, but not a rolling boil. This gentle heat will slowly break down the tough fibers in the lamb, making it incredibly tender.
The braising time can vary, but you're looking at about 2 to 2.5 hours. Every 30 minutes or so, carefully lift the lid and turn the lamb shanks. This helps them cook evenly and soak up all those delicious flavors.
You'll know they're done when the meat is falling off the bone and easily pierced with a fork. Be patient – the wait is worth it for that mouthwatering, tender lamb!
Final Thoughts
Braised local lamb shank offers a delightful culinary experience that's sure to impress. You've now mastered the art of creating this tender, flavorful dish.
Remember, patience is key when braising lamb shanks. The slow cooking process allows the meat to become incredibly tender and absorb all the delicious flavors from the herbs and vegetables.
Don't forget to let the lamb rest for a few minutes before serving. This helps the juices redistribute, making each bite even more succulent.
Pair your braised lamb shank with creamy mashed potatoes, roasted vegetables, or a simple green salad for a well-rounded meal. The rich sauce from the braising liquid is perfect for drizzling over the lamb and sides.
If you have leftovers, they'll taste even better the next day as the flavors continue to develop. You can reheat the lamb gently in the oven or use it to create a hearty soup or stew.
With this recipe in your cooking arsenal, you're ready to impress family and friends with a restaurant-quality meal right at home.
Frequently Asked Questions
How Do I Choose the Best Lamb Shanks at the Market?
You'll want to look for lamb shanks that are pinkish-red in color with white fat. They should feel firm and have a fresh smell. Choose larger shanks for meatier portions. Don't hesitate to ask the butcher for advice.
Can I Substitute Lamb Shoulder for Lamb Shanks in This Recipe?
Yes, you can substitute lamb shoulder for lamb shanks. They're both flavorful cuts that work well for braising. You'll need to adjust cooking time, as shoulder may cook faster. Remember to cut the shoulder into large chunks before cooking.
What Side Dishes Pair Well With Braised Lamb Shank?
You'll love pairing braised lamb shank with creamy mashed potatoes, roasted root vegetables, or a fresh green salad. Don't forget crusty bread to soak up the rich sauce. Mint jelly can add a traditional touch.
How Long Can I Store Leftover Braised Lamb Shank in the Refrigerator?
You can safely store leftover braised lamb shank in the refrigerator for up to 3-4 days. Make sure it's cooled completely before storing in an airtight container. For longer storage, consider freezing it for up to 3 months.
Is It Possible to Make This Dish in a Slow Cooker?
Yes, you can definitely make this dish in a slow cooker. You'll need to adjust the cooking time and liquid amount, but it's a great hands-off method. Just sear the shanks first for better flavor.