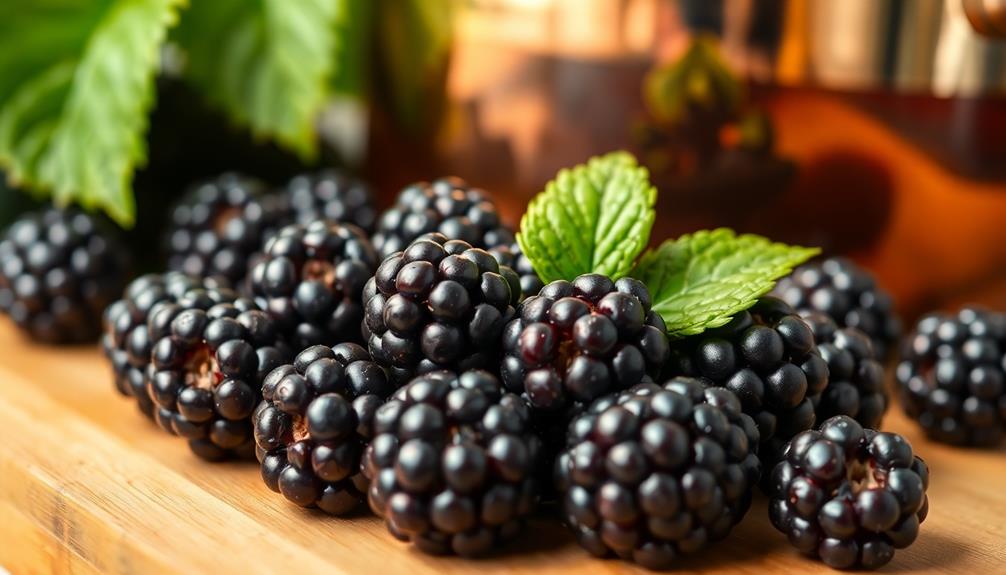
Blackberries have been part of human foraging and cooking for centuries. You can find wild blackberries in forests, fields, and along roadsides – just look for plump, dark purple to black berries in late summer to early fall. To make delicious blackberry jam, simply mash the berries, add sugar and lemon juice, then cook until thickened. For a thicker consistency, use extra pectin. Canned properly, the jam will last up to a year. Enjoy the sweet-tart flavor on toast, scones, or as a topping. The process of foraging and jam-making promotes a deeper connection to nature and culinary heritage – there's more to discover.
Key Takeaways
- Blackberries have a long history as a valued foraging and culinary plant, featuring prominently in ancient and medieval European cuisines.
- Wild blackberries can be sustainably foraged in late summer to early fall, selecting ripe, dark purple berries and avoiding unripe or overly mushy ones.
- Homemade blackberry jam offers a balance of sweetness and tartness, with a vibrant purple color indicating high anthocyanin content, and versatile uses in recipes.
- The process of making blackberry jam from foraged berries promotes creativity, mindfulness, and a deeper appreciation for local, seasonal ingredients and traditional cooking methods.
- Homemade blackberry jam can serve as a pantry staple with a long shelf life, providing a convenient and satisfying addition to meals or snacks, and making a thoughtful gift.
Top picks for "blackberry forag"
Open Amazon search results for this keyword.
As an affiliate, we earn on qualifying purchases.
History
Blackberries have been a part of human foraging and culinary traditions for centuries. These resilient and versatile fruits have long been valued for their tart, sweet flavor and impressive nutritional profile.
From ancient Greece and Rome to the medieval kitchens of Europe, blackberries have featured prominently in jams, pies, and other delectable treats.
In colonial America, Native American tribes shared their knowledge of blackberry harvesting and preparation with early settlers, who quickly incorporated these berries into their own recipes and preserves.
As the United States expanded westward, blackberry patches became a common sight, sustaining pioneers and homesteaders alike.
Today, the humble blackberry remains a beloved ingredient, celebrated for its versatility and nostalgic connections to our collective culinary heritage.
Whether foraged from the wild or cultivated in backyard gardens, blackberries continue to captivate and inspire home cooks and professional chefs alike, showcasing the enduring allure of this remarkable fruit.
Recipe
Blackberry Jam
Blackberries are a delightful summer fruit, bursting with vibrant flavor and a perfect balance of sweetness and tanginess. Transforming these wild berries into a homemade jam is a rewarding and satisfying culinary experience. The process of foraging for the berries and then preserving their essence in a jar of jam can be both relaxing and rewarding.
Jam-making is a time-honored tradition that allows you to capture the fleeting moments of the berry season and enjoy their flavor throughout the year. The process is simple, but the results are truly exceptional, with a depth of flavor that far surpasses any store-bought variety.
Ingredients:
- 4 cups fresh blackberries, washed and stems removed
- 2 cups white granulated sugar
- 2 tablespoons lemon juice
- 1 packet powdered pectin
Cooking Instructions:
In a large saucepan, combine the blackberries, sugar, and lemon juice. Bring the mixture to a boil over medium-high heat, stirring frequently.
Once it reaches a full boil, stir in the pectin and continue to cook for 1 minute, continuing to stir. Remove the jam from the heat and skim off any foam that has formed on the surface.
Tips:
For a thicker consistency, you can add an extra packet of pectin.
Be sure to let the jam cool slightly before transferring it to sterilized jars, as this will help the jam set properly. Store the jars in a cool, dark place, and enjoy your homemade blackberry jam on toast, scones, or as a topping for yogurt or ice cream.
Cooking Steps
Once you've gathered your blackberries on a sunny morning, rinse and pat them dry.
Next, grab a potato masher and mash the berries until they're pulpy.
Then, stir in the sugar and pectin, and simmer the mixture until it's nicely thickened.
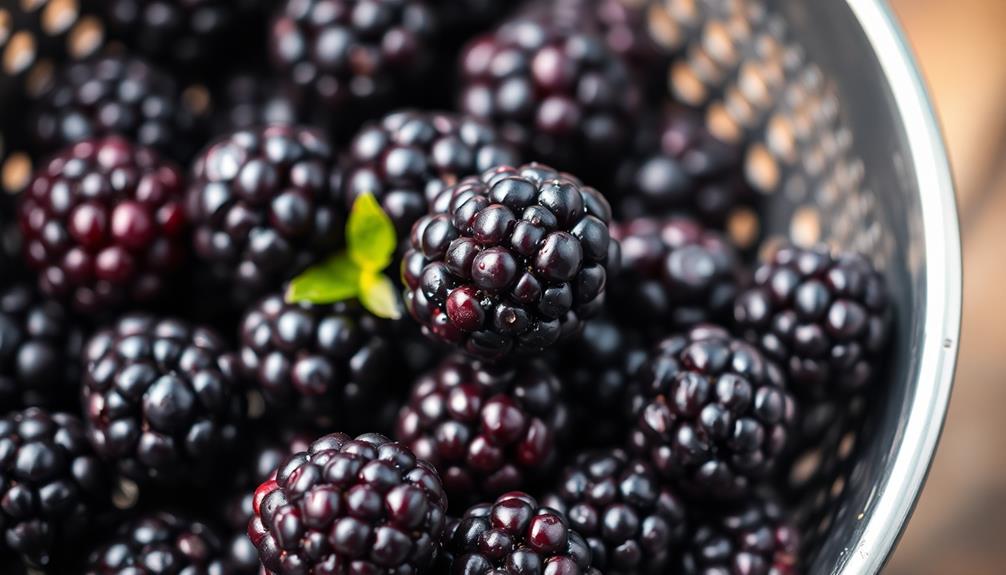
Step 1. Harvest Blackberries on Sunny Morning

Rise early on a sunny summer morning to hunt for the juicy, ripe blackberries scattered across the nearby brambles.
Wear long sleeves and pants to protect yourself from thorns, and bring a sturdy basket or container to collect your bounty.
Carefully inspect each cluster, selecting the blackberries that are a deep, glossy black – these are the ripest and sweetest.
Gently pluck the berries, taking care not to crush or damage them.
Move methodically through the patch, being mindful of your surroundings to avoid getting scratched.
As your basket fills, take a moment to appreciate the beauty of the sun-dappled leaves and the buzz of honeybees pollinating the flowers.
With your basket brimming, head back to the kitchen, eager to transform these foraged gems into a delectable homemade jam.
Step 2. Rinse and Pat Dry Blackberries
Upon returning from your berry-picking adventure, gently rinse the delicate blackberries under cool running water to remove any debris or impurities.
Be mindful not to let the berries soak, as they'll absorb too much water and become mushy. After rinsing, it's time to pat them dry.
Lay the blackberries out on a clean kitchen towel or paper towels, gently blotting the excess moisture. Avoid rubbing or pressing too hard, as you don't want to crush the fragile fruits.
Once they're nice and dry, carefully transfer the blackberries to a clean bowl or container, ready for the next step in your jam-making journey.
Properly preparing the berries is crucial, as it'll ensure they retain their bright flavor and firm texture when you begin cooking them down into a delectable homemade jam.
With your blackberries rinsed and dried, you're one step closer to enjoying the sweet, tart goodness of your own handcrafted blackberry preserves.
Step 3. Mash Blackberries With Potato Masher

With your blackberries neatly prepared, it's time to start the cooking process. Grab your trusty potato masher and dive in. Gently mash the berries, taking care not to overwork them. You want to maintain some texture, so avoid turning them into a completely smooth purée.
As you mash, you'll notice the juices begin to flow, releasing the natural sweetness of the berries. Continue working the masher, pressing down and twisting to extract as much liquid as possible. This step is crucial, as the juice will form the base of your delicious blackberry jam.
Keep an eye on the consistency, stopping once the berries have reached your desired level of mashed-ness. You're looking for a mixture that's thick and chunky, with just the right balance of whole and crushed berries.
With this step complete, you're one step closer to creating a heavenly homemade blackberry jam.
Step 4. Add Sugar and Pectin
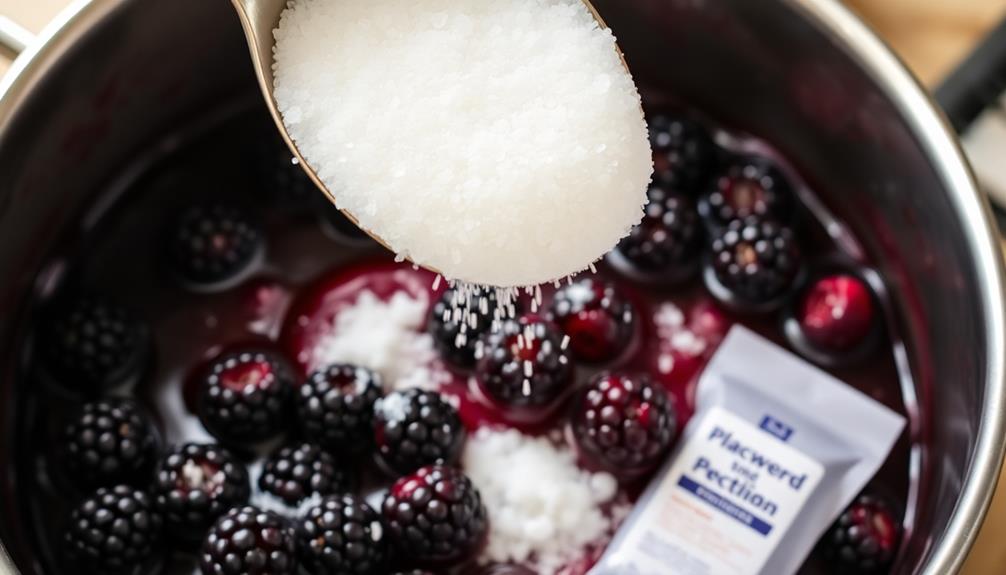
Now that you've mashed the blackberries, it's time to add the sugar and pectin. The amount of sugar you'll need depends on the sweetness of the berries and your personal taste preferences. As a general guideline, use about 3/4 cup to 1 cup of sugar for every 4 cups of mashed blackberries. Stir the sugar into the berry pulp until it's fully dissolved.
Next, add the pectin. Pectin is a natural thickening agent that'll help your jam set properly. Follow the instructions on your pectin package, as the amount can vary. Typically, you'll need around 1 to 2 tablespoons of powdered pectin per 4 cups of mashed fruit.
Stir the pectin in thoroughly, then bring the mixture to a full rolling boil, stirring constantly. Let it boil for 1 minute, then remove it from the heat. This step activates the pectin and ensures your jam will thicken as it cools.
Step 5. Simmer Mixture Until Thickened

Simmering the berry and sugar mixture is a crucial step in creating the perfect jam. Bring the mixture to a gentle boil over medium heat, stirring frequently to prevent scorching.
Once it's bubbling, reduce the heat to low and let it simmer, continuing to stir, for 20-25 minutes. You'll know it's ready when the mixture has thickened and coats the back of a spoon.
Keep a close eye on the pot, as the jam can quickly go from perfectly thickened to burnt. Stir constantly, and adjust the heat as needed to maintain a steady, gentle simmer.
The longer you simmer, the thicker the jam will become, so be patient and let it do its thing. Once it's reached the desired consistency, remove the pot from the heat and let it cool slightly before ladling it into sterilized jars.
This simmering step is essential for developing the rich, jam-like texture you're after.
Final Thoughts
Blackberry foraging and jam-making can be a delightful and rewarding experience.
You've foraged for the berries, cooked the jam, and now it's time to consider the final product. The homemade jam you've created is a true labor of love, infused with the flavors of summer and the satisfaction of your own hard work. You spread the jam onto warm, buttered toast and savor the sweet-tart taste that reminds you of lazy afternoons spent in the berry patch. As you enjoy your creation, you begin to brainstorm other ways to use the homemade jam. Perhaps you’ll try it in a yogurt parfait, or as a filling in a thumbprint cookie. And you can’t wait to pair it with a grilled peach recipe you’ve been eager to try. The possibilities are endless, and each one is a testament to your dedication and creativity.
As you spoon the deep purple jam onto warm scones or toast, you'll savor the burst of sweetness and tartness that perfectly captures the essence of the wild blackberries.
This jam will become a cherished staple in your pantry, a reminder of the joys of connecting with nature and the simple pleasures of homemade preserves.
Whether you share it with friends and family or keep it all to yourself, this blackberry jam will bring a taste of the outdoors into your home, reminding you of the fulfillment that comes from foraging and creating something truly special.
Frequently Asked Questions
What Are the Best Locations to Find Wild Blackberries?
You'll find wild blackberries thriving in abandoned lots, along roadsides, and near the edges of forests. Look for areas with plenty of sunlight and moist soil – that's where these tasty berries grow best.
How Can I Identify Poisonous Berries From Edible Ones?
When foraging for wild berries, it's crucial to be able to distinguish between edible and poisonous varieties. Look for berries with a glossy, plump appearance and a deep, rich color. Avoid any that are white, yellow, or have a dull finish.
How Do I Properly Wash and Prepare the Blackberries for Jam?
To properly prepare the blackberries for jam, you'll want to gently rinse them under cool running water, removing any debris or damaged berries. Then, pat them dry with a clean towel before proceeding with your jam-making process.
What Are the Health Benefits of Consuming Homemade Blackberry Jam?
Consuming homemade blackberry jam can provide you with a range of health benefits. It's rich in antioxidants, fiber, and vitamins that can support immune function, gut health, and overall wellness. The natural sweetness also makes it a tasty and nutritious treat.
Can I Substitute Other Fruits for Blackberries in the Jam Recipe?
Yes, you can substitute other fruits for blackberries in the jam recipe. Many types of berries, stone fruits, and citrus work well, and you can experiment to find your favorite combination.