
Dairy-free desserts let you indulge your sweet tooth guilt-free. You'll find plenty of creamy, satisfying options made with cashews, coconut milk, and other natural ingredients. Whip up a decadent dairy-free cheesecake with just a few simple steps. Bake cookies, cakes, and brownies that are free of dairy but full of flavor. And don't forget the fun of experimenting – try mixing nut milks or using fruit purees for natural sweetness. Whether you're lactose-intolerant, vegan, or just looking for healthier sweets, dairy-free desserts offer endless possibilities to satisfy your cravings. Keep reading to discover more delectable dairy-free recipes and tips.
Key Takeaways
- Dairy-free desserts provide satisfying alternatives for people with dietary needs like lactose intolerance or vegan lifestyle.
- Common dairy-free ingredients include cashews, coconut milk, almond milk, avocado, and natural sweeteners like maple syrup.
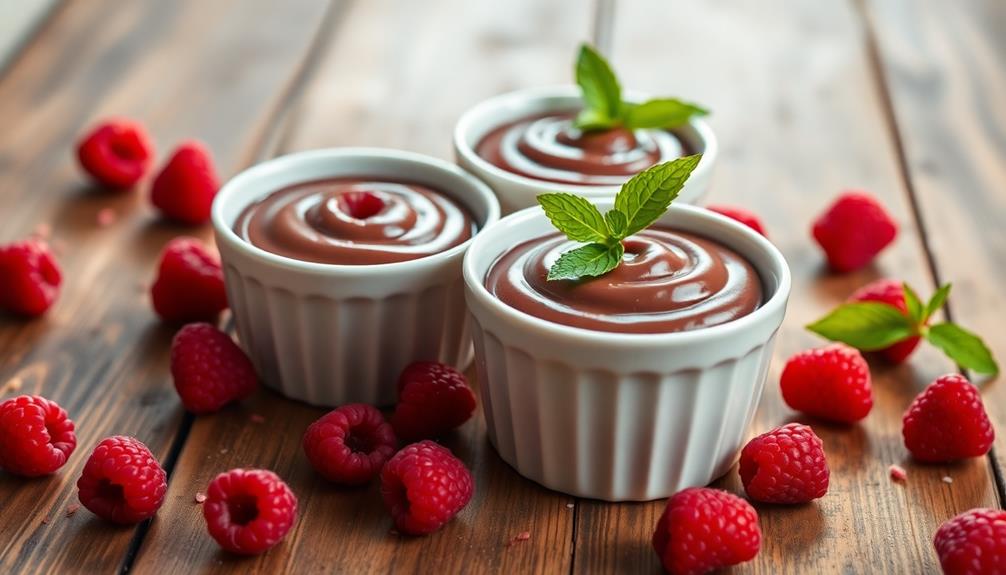
- Popular dairy-free desserts include ice creams, whipped toppings, cakes, puddings, and cookies made with alternative ingredients.
- A recipe for dairy-free cheesecake features blended cashews, coconut milk, maple syrup, lemon juice, and vanilla.
- Experimentation with various nut milks, spices, fruit purees, and baking techniques can enhance the diversity of dairy-free desserts.
History
Dairy-based desserts have a long and storied history, dating back to ancient civilizations. From the rich custards of Egypt to the creamy puddings of Greece, dairy has been a staple ingredient in sweet treats for thousands of years.
As cultures around the world developed their own unique dessert traditions, the use of dairy products like milk, cream, and butter became widespread.
During the Middle Ages, the elite classes in Europe indulged in elaborate dairy-based desserts, showcasing their wealth and status. As technology and trade improved, dairy became more accessible, and the variety of dairy-based sweets expanded.
From English trifles to French crème brûlée, the versatility of dairy allowed bakers to create a wide range of delectable desserts.
While dairy-free options have gained popularity in recent decades, the legacy of dairy-based sweets continues to influence and inspire modern dessert-making.
The rich history of these indulgent treats continues to fascinate and delight dessert enthusiasts around the world.
Recipe
Dairy-free desserts can be just as delicious and satisfying as their traditional counterparts. By using plant-based ingredients, you can create indulgent treats that are suitable for a variety of dietary needs. Incorporating ingredients like cashews provides not only a creamy texture but also nutritional benefits that align with a healthy lifestyle.
This recipe for a creamy, dreamy dairy-free cheesecake is a perfect example. Instead of relying on cream cheese and sour cream, this recipe uses a blend of cashews, coconut milk, and lemon juice to achieve a rich, creamy texture. The result is a decadent dessert that's sure to impress your guests, whether they follow a dairy-free lifestyle or not.
- 2 cups raw cashews, soaked for at least 4 hours (or overnight)
- 1 cup full-fat coconut milk
- 1/2 cup maple syrup
- 1/4 cup lemon juice
- 1 teaspoon vanilla extract
- 1/4 teaspoon sea salt
- 1 pre-baked 9-inch pie crust (gluten-free or traditional)
Drain and rinse the soaked cashews. In a high-speed blender, combine the cashews, coconut milk, maple syrup, lemon juice, vanilla, and salt. Blend until smooth and creamy, about 2-3 minutes.
Pour the cashew mixture into the pre-baked pie crust. Refrigerate the cheesecake for at least 4 hours, or until completely set. Serve chilled and enjoy!
For best results, use high-quality, full-fat coconut milk and raw, unroasted cashews. The longer you soak the cashews, the creamier the texture will be. Top the cheesecake with your favorite dairy-free toppings, such as fresh berries, toasted coconut, or a drizzle of melted dark chocolate.
Cooking Steps
First, gather all the necessary ingredients.
Next, preheat your oven to the desired temperature.
Then, mix the wet and dry ingredients together until the batter is smooth and ready to pour.
Step 1. Gather All Ingredients

Before you can create your delightful dairy-free desserts, you'll need to gather all the necessary ingredients. Start by taking stock of your pantry and fridge to see what you already have on hand.
You'll likely need dairy-free milk alternatives, such as almond, oat, or coconut milk. Depending on the recipe, you may also need plant-based butter or oil, sweeteners like maple syrup or agave, and thickening agents like cornstarch or arrowroot powder.
Don't forget the star ingredients – whether it's chocolate, fruit, or nuts. Take the time to measure out each item precisely, as baking is a science.
Once you have everything ready to go, you can begin the fun part: mixing, blending, and assembling your dairy-free dessert. With your ingredients prepped, you're one step closer to satisfying that sweet tooth in a healthier, more sustainable way.
Step 2. Preheat Oven to Desired Temperature

Typically, you'll want to preheat your oven to the temperature specified in the recipe before beginning any baking. This step is crucial, as it ensures your oven is at the right temperature when you're ready to pop your creation in.
Most dairy-free desserts require baking at temperatures ranging from 350°F to 375°F, so be sure to check the recipe and adjust your oven accordingly.
Once you've set the oven temperature, it's a good idea to give it a few minutes to fully preheat. This helps maintain a consistent heat throughout the baking process, which is essential for achieving the perfect texture and doneness.
While you're waiting, you can start preparing the other ingredients or gather any necessary tools and equipment.
Step 3. Mix Wet and Dry Ingredients

With the oven preheated, you can now turn your attention to mixing the wet and dry ingredients. In a large bowl, combine the dairy-free milk, oil, and any other wet ingredients called for in the recipe. Give this mixture a good whisk until it's well-blended.
In a separate bowl, sift together the flour, sugar, baking powder, and any other dry ingredients. Gently fold the dry ingredients into the wet ingredients, being careful not to overmix. You want to stop mixing as soon as the ingredients are just combined, as overmixing can result in a tough, dense texture.
Once the batter is ready, you can pour it into your prepared baking dish and pop it in the oven. Bake according to the recipe instructions until a toothpick inserted in the center comes out clean.
With the wet and dry ingredients combined, your dairy-free dessert is well on its way to deliciousness.
Step 4. Pour Batter Into Prepared Pan

Go ahead and pour the prepared batter into your greased and floured baking pan. Be sure to distribute it evenly, using a spatula to gently smooth the top. This will help ensure your dairy-free dessert bakes up nice and flat.
Once the batter's in the pan, you'll want to tap it a few times on the counter to release any air bubbles that may have formed during mixing. This step helps create a uniform texture throughout your finished treat.
Now, carefully slide the pan into your preheated oven. Set a timer so you don't lose track of the baking time – you'll need to keep a close eye on your dairy-free dessert as it cooks.
Depending on the recipe, it may take anywhere from 20 to 40 minutes to fully bake. When the edges start to turn golden brown and a toothpick inserted in the center comes out clean, your dessert is ready to come out of the oven.
Be sure to let it cool completely before removing from the pan and enjoying your dairy-free delight!
Step 5. Bake Until Golden Brown

Once your dairy-free dessert batter is evenly distributed in the prepared pan, it's time to bake. Preheat your oven according to the recipe instructions, usually between 350°F to 375°F. This is the perfect temperature to ensure your dessert bakes evenly and develops a lovely golden-brown crust on top.
As the oven heats up, carefully slide the pan onto the middle rack. Set a timer so you don't forget about it. Depending on the recipe, baking times can range from 20 to 45 minutes. Keep an eye on it, and use the oven light to peek in every so often.
You'll know it's done when the top is golden brown and a toothpick inserted in the center comes out clean.
Once the timer goes off, use oven mitts to remove the hot pan from the oven. Allow the dairy-free dessert to cool for at least 10 minutes before slicing or serving. This gives the structure time to set up, making it easier to handle.
Now you're ready to enjoy your homemade, dairy-free treat!
Final Thoughts
Ultimately, dairy-free desserts offer a delightful alternative for those seeking to indulge without compromising their dietary preferences.
Whether you're lactose intolerant, vegan, or simply looking to reduce your dairy intake, these sweet treats prove that you don't need milk, butter, or cream to satisfy your cravings. From rich and creamy cashew-based ice creams to fluffy coconut whipped toppings, the possibilities are endless.
As you explore the world of dairy-free desserts, remember to have fun and experiment with different ingredients and flavors.
Don't be afraid to get creative in the kitchen, and don't hesitate to share your delicious creations with friends and family.
With a little bit of practice, you'll be whipping up impressive dairy-free desserts that will impress everyone.
Frequently Asked Questions
How Can I Store Dairy-Free Desserts for Longer Shelf Life?
To store dairy-free desserts for longer shelf life, keep them refrigerated or frozen. Wrap them tightly in plastic or foil to prevent air exposure. Check expiration dates and consume within the recommended timeframe for optimal freshness and taste.
What Are the Best Dairy-Free Substitutes for Common Dessert Ingredients?
When swapping dairy in desserts, try using plant-based milks, coconut cream, aquafaba, nut butters, or fruit purees. These substitutes can provide creaminess, richness, and sweetness without the dairy. Experiment to find the best fit for your recipe.
Can Dairy-Free Desserts Be Frozen and Reheated Without Losing Quality?
You can definitely freeze and reheat dairy-free desserts without sacrificing quality. Many plant-based ingredients like coconut milk and nut butters hold up well in frozen desserts, maintaining their texture and flavor even after thawing and reheating.
Are There Any Health Benefits to Choosing Dairy-Free Dessert Options?
Choosing dairy-free desserts can provide several health benefits. They're often lower in saturated fat and cholesterol, making them a heart-healthier option. Plus, they accommodate those with lactose intolerance or dairy allergies, allowing them to enjoy sweet treats without discomfort.
How Do I Adjust Recipes to Make Them Completely Dairy-Free?
To make a recipe dairy-free, you'll need to substitute dairy ingredients like milk, butter, and cream with plant-based alternatives such as almond milk, coconut oil, and cashew cream. This will ensure your dessert is completely dairy-free.