Connect with us

Chinese Cuisine

Lanzhou Beef Noodle Soup

Originating from the Silk Road, Lanzhou Beef Noodle Soup is a regional delicacy that captivates the senses with its slow-simmered broth and hand-pulled noodles. Learn the secrets to making this comforting dish yourself.

Published

on

delicious lanzhou noodle dish

Oh, you're in for a real treat! Lanzhou Beef Noodle Soup is a beloved regional specialty that's captivated palates for centuries. Its origins trace back to the Silk Road, where travelers and merchants blended cultures to create this aromatic masterpiece. The key is the slow-simmered beef broth, infused with spices like cinnamon and star anise. Then there are the hand-pulled noodles – so chewy and delightful! Top it all off with tender beef, fresh cilantro, and a kick of chili oil. It's a feast for the senses that'll have you coming back for more. And if you keep reading, you'll discover the secrets to making this comforting dish yourself!

Key Takeaways

  • Lanzhou Beef Noodle Soup has its origins in the Silk Road era, reflecting cultural exchanges that influenced the recipe's evolution over centuries.
  • The soup is a regional specialty and a source of local pride in Lanzhou, representing the culinary heritage of the region.
  • The dish is made with key ingredients like slow-cooked beef, hand-pulled noodles, and a broth simmered with spices and aromatics.
  • The cooking process involves soaking beef bones, boiling them, and adding spices to create a rich, flavorful broth.
  • The soup is often enjoyed as a breakfast dish or late-night snack, and its popularity has spread globally with various adaptations.

History

It's widely believed that the origins of Lanzhou beef noodle soup can be traced back to the Silk Road era. During this time, travelers and merchants would stop in the city of Lanzhou, located in northwest China, to rest and refuel.

As they mingled with the local people, the recipe for this delicious dish slowly evolved, blending diverse cultures and flavors from across the ancient trade route.

Over the centuries, the people of Lanzhou perfected the art of making this beloved soup. They carefully selected high-quality beef, hand-pulled the noodles, and simmered the broth for hours to achieve the perfect balance of savory, fragrant, and comforting flavors.

Today, Lanzhou beef noodle soup is considered a beloved regional specialty, with its unique taste and preparation methods becoming a source of local pride and culinary tradition.

Recipe

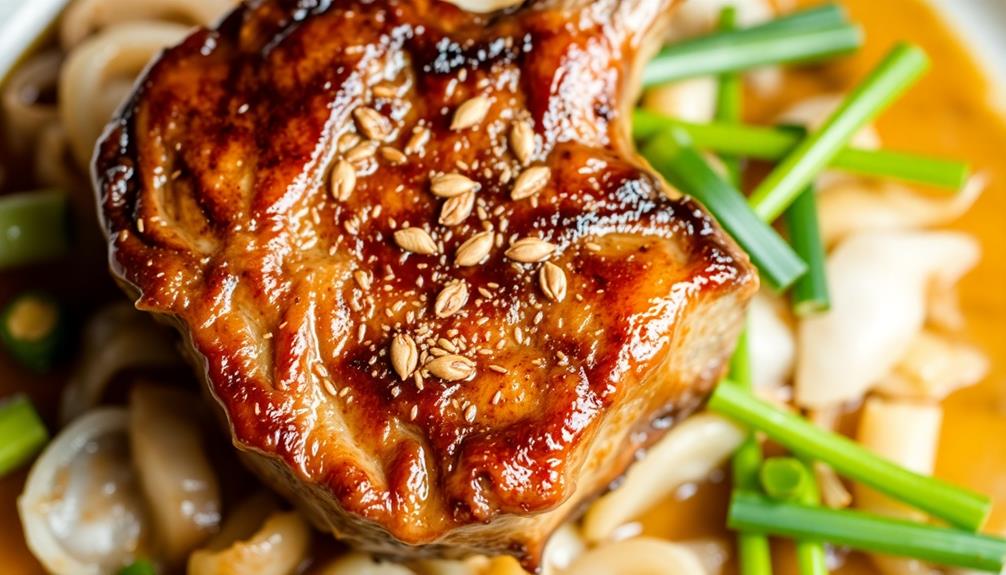
Lanzhou beef noodle soup is a beloved dish from the city of Lanzhou in China's Gansu province. This hearty and flavorful soup features hand-pulled noodles, tender beef, and a rich, aromatic broth that has been simmered for hours to develop its deep, complex flavors.

Advertisement

The key to making an authentic Lanzhou beef noodle soup is in the careful preparation of each component. From the hand-pulled noodles to the slow-cooked beef, every step is crucial in creating the perfect balance of textures and tastes.

Ingredients:

  • 1 lb beef brisket or chuck, cut into 1-inch cubes
  • 1 onion, diced
  • 3 cloves garlic, minced
  • 2 inches ginger, peeled and sliced
  • 2 star anise
  • 2 cinnamon sticks
  • 4 cups beef broth
  • 2 tbsp soy sauce
  • 1 tbsp rice vinegar
  • 1 tsp Sichuan peppercorns
  • 1 lb fresh hand-pulled noodles
  • Chopped cilantro, for garnish

Instructions:

In a large pot, brown the beef cubes over high heat until they develop a nice sear on all sides. Remove the beef and set aside.

Add the onion, garlic, and ginger to the pot and sauté until fragrant, about 2-3 minutes. Return the beef to the pot, along with the star anise, cinnamon sticks, beef broth, soy sauce, rice vinegar, and Sichuan peppercorns.

Bring to a boil, then reduce heat and simmer for 2-3 hours, until the beef is fork-tender.

Advertisement

Extra Tips:

For the most authentic experience, use freshly made hand-pulled noodles. If you can't find them, you can substitute with fresh or dried Chinese egg noodles.

Additionally, feel free to adjust the seasonings to your taste, adding more soy sauce, vinegar, or Sichuan peppercorns to suit your preferences.

Garnish the soup with plenty of fresh cilantro for a bright, aromatic finish.

Cooking Steps

Soak the beef bones overnight to extract their rich flavor.

Advertisement

Next, boil the bones for 2 hours, then add fragrant spices and aromatic veggies.

Let the broth simmer for another hour, straining it to get a clear, flavorful base.

Step 1. Soak Beef Bones Overnight

soak beef bones overnight

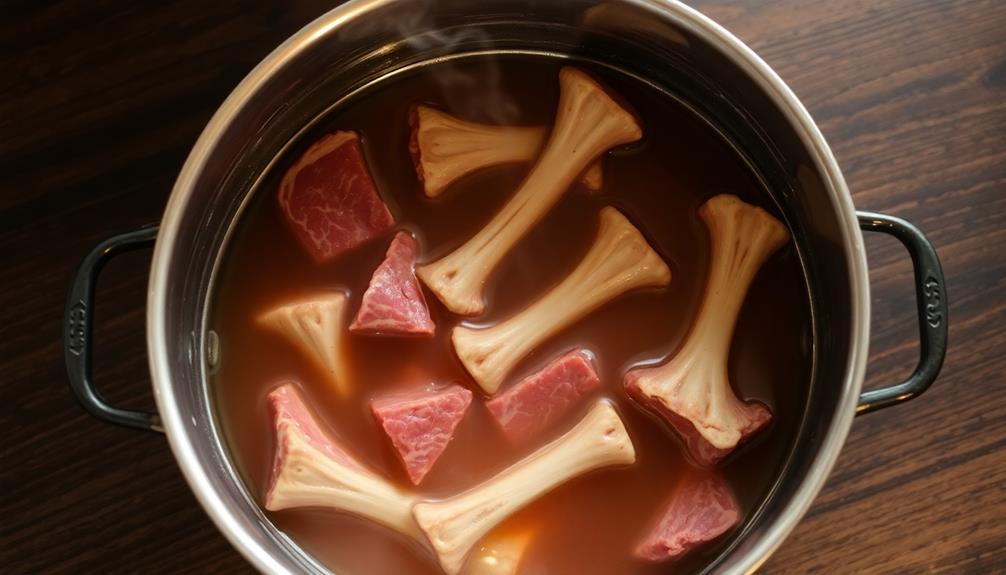
Gathering the necessary components is the first step in crafting an authentic Lanzhou beef noodle soup. First up? Soaking the beef bones overnight.

You'll want to grab a large pot and fill it with cold water. Toss in those beefy bones and let 'em soak for 8 to 12 hours. This helps remove any impurities and gives the broth a richer, more intense flavor.

Once the bones have had their beauty sleep, it's time to drain the water and give 'em a good rinse. This ensures your broth will be crystal clear – no one wants a murky soup!

Grab a fresh pot, add the bones back in, and cover with water. Bring it all to a boil, then reduce the heat and let it simmer for 3 to 4 hours. During this time, the bones will release their gelatin, creating a wonderfully thick and velvety broth.

Advertisement

Get ready for some serious flavor!

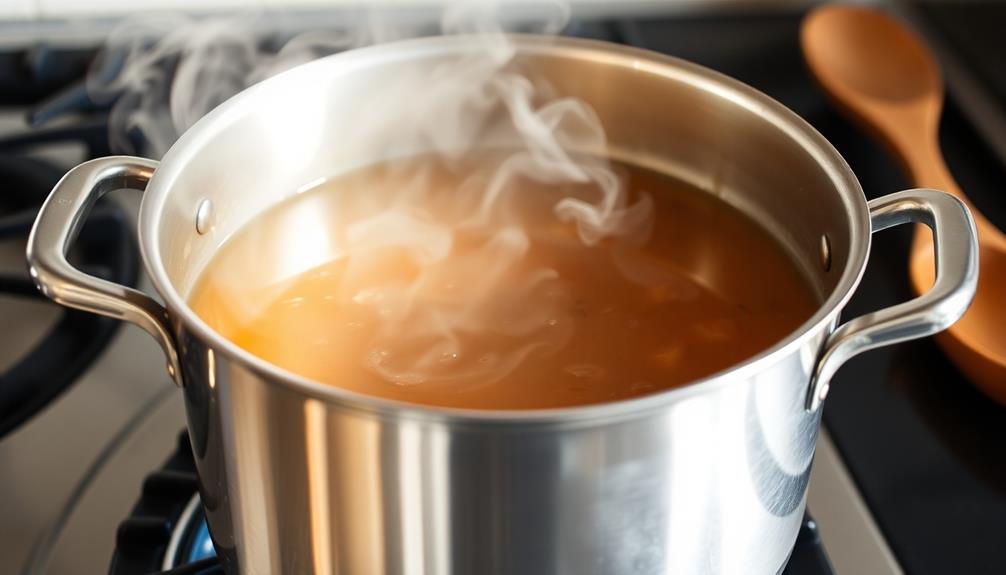
Step 2. Boil Bones for 2 Hours

boil bones for two hours

With the beef bones having soaked overnight, the next step is to boil them for a couple hours.

Grab a large pot and fill it up with fresh water, then toss in those beefy bones. Bring the pot to a boil over high heat, and once it's bubbling away, you'll want to reduce the heat to medium-low.

Now, let the bones simmer for 2 full hours, making sure to skim off any foam or impurities that rise to the surface. As the bones cook, you'll start to see a rich, golden broth developing – that's exactly what you want!

This slow simmering process helps extract all the delicious flavor and nutrients from the bones, creating a super flavorful foundation for your Lanzhou beef noodle soup.

Just be patient and let the pot do its thing for the next 120 minutes. Your taste buds will thank you later!

Advertisement

Step 3. Add Spices and Aromatics

incorporate spices and aromatics

Once the bones have simmered for two hours, it's time to infuse the broth with a blend of aromatic spices and herbs. First, add a few cinnamon sticks, some star anise, and a handful of Sichuan peppercorns. These ingredients will lend the soup a warm, subtly spicy flavor that's simply irresistible.

Don't forget the garlic and ginger too – they'll add a lovely fragrance and a little kick to the broth.

Next, toss in a bundle of green onions, sliced into 2-inch pieces. The onions will gently release their savory essence, complementing the other flavors beautifully. For a touch of freshness, add a few sprigs of cilantro. Their vibrant green color and bright, herbal notes will really make the soup shine.

Simmer this aromatic medley for about 30 minutes, allowing the spices to infuse the broth with their magnificent essence.

Get ready for your kitchen to be filled with the most tantalizing aroma – it's sure to get your taste buds tingling in anticipation!

Step 4. Simmer for 1 Hour

simmer for one hour

After infusing the broth with the aromatic spices and herbs, you'll want to let it simmer for an additional hour. This step is crucial for developing the rich, complex flavors that make Lanzhou beef noodle soup so irresistible.

As the pot bubbles away on the stovetop, the spices will continue to release their essence, filling your kitchen with a tantalizing aroma. Be sure to keep an eye on the pot, giving it an occasional stir to ensure the ingredients blend together seamlessly.

Advertisement

Don't be tempted to crank up the heat – slow and steady is the way to go here. After an hour of gentle simmering, you'll have a broth that's deep, savory, and oh-so-satisfying.

Now, it's time to add the tender beef and fresh noodles, transforming this culinary masterpiece into a dish that's worthy of the renowned Lanzhou noodle shops. Get ready to indulge in a bowl of pure comfort and flavor!

Step 5. Strain Broth, Add Cooked Noodles

strain broth add noodles

Grab a fine-mesh strainer and carefully pour the fragrant broth through it, leaving behind the spent aromatics. This will give you a clear, golden liquid that's ready for the next step.

Now, grab your cooked noodles and gently place them into the strained broth. Ooh, can you smell that heavenly aroma? The tender beef and aromatic spices have infused the broth with so much flavor.

Give the noodles a gentle stir to make sure they're fully submerged. This'll allow them to soak up all that delicious beefy goodness.

Now, it's time to serve! Ladle the piping hot noodles and broth into your bowls. Top each portion with some of the reserved cooked beef, a sprinkle of fresh cilantro, and a squeeze of zesty lime juice. Mmm, doesn't that look absolutely scrumptious?

Advertisement

Get ready to dive in and enjoy the incredible taste of Lanzhou-style beef noodle soup!

Final Thoughts

In the end, Lanzhou beef noodle soup stands out as a culinary delight that showcases the harmonious blend of regional traditions and flavors.

The tender beef, the chewy noodles, and the savory broth come together in a symphony of tastes that'll have you coming back for more. You might've started your journey with a simple bowl, but by the time you're done, you'll feel like you've taken a delicious trip through the vibrant streets of Lanzhou.

The garnishes like cilantro, scallions, and chili oil add the perfect finishing touches, elevating the dish to new heights.

So, whether you're a seasoned foodie or just looking to try something new, Lanzhou beef noodle soup is a must-try that'll leave you satisfied and eager to explore more of this incredible regional cuisine.

Advertisement

Bon appétit!

Frequently Asked Questions

What Is the Origin of the Name "Lanzhou Beef Noodle Soup"?

You likely wonder about the origin of the name "Lanzhou Beef Noodle Soup." The dish is named after the city of Lanzhou, where it's believed to have originated, featuring the classic combination of tender beef and chewy noodles.

How Long Does It Take to Make Lanzhou Beef Noodle Soup?

Making this dish takes time and patience. Typically, it can take up to 4 hours to prepare the noodles, braise the beef, and bring all the flavors together. But the results are well worth the effort for a truly authentic and delicious dish.

Can Lanzhou Beef Noodle Soup Be Made With Different Types of Meat?

Yes, you can make this dish with different types of meat. While beef is the traditional choice, you can experiment with other proteins like pork, chicken, or even lamb to create your own unique flavor profile.

What Are the Health Benefits of Eating Lanzhou Beef Noodle Soup?

Eating a hearty soup like this can provide numerous health benefits. You'll get a boost of protein, vitamins, and minerals that can support your overall well-being. Plus, the warmth and nourishment will leave you feeling satisfied.

Advertisement

How Can I Store Leftover Lanzhou Beef Noodle Soup?

To store leftover soup, let it cool completely before transferring to an airtight container. It'll keep in the fridge for 3-4 days or freeze for up to 3 months. Reheat gently when ready to enjoy.

Continue Reading
Advertisement

Chinese Cuisine

Yunnan Cross-Bridge Rice Noodles

Nestled in the heart of Yunnan, China, Yunnan cross-bridge rice noodles offer a mouthwatering journey through the province’s rich culinary heritage, leaving you craving for more.

Published

on

yunnan rice noodle dish

Yunnan cross-bridge rice noodles are a mouthwatering dish hailing from the vibrant province of Yunnan, China. Tracing their roots to the late Qing dynasty, these noodles were accidentally created by Yunnanese scholars crossing the Long Bridge over the Yangtze River. Today, this UNESCO-recognized culinary treasure features a unique cooking method – you'll assemble the ingredients, then pour in hot, flavorful broth to create an unforgettable dining experience. Get ready to dive into tender rice noodles, fresh veggies, and succulent proteins, all expertly blended for a true taste of Yunnan's rich heritage.

Key Takeaways

  • Yunnan Cross-Bridge Rice Noodles have their origins in the late Qing dynasty of Yunnan province, created by Yunnanese scholars crossing the Long Bridge over the Yangtze River.
  • This noodle dish is recognized as a UNESCO intangible cultural heritage, representing the rich heritage and culinary traditions of Yunnan province.
  • The unique cooking method involves assembling ingredients and pouring hot broth over them, creating a multi-textural dining experience with robust flavors.
  • Yunnan Cross-Bridge Rice Noodles are traditionally served at family gatherings and celebrations, reflecting the dish's cultural significance and symbolism of hospitality.
  • The dish features a flavorful broth, chewy rice noodles, fresh vegetables, and various proteins, offering a balanced and customizable nutritional profile.

History

The origins of Yunnan cross-bridge rice noodles can be traced back to the late Qing dynasty, when Yunnan province's diverse culinary traditions began to take shape.

This unique dish was created by a group of diligent Yunnanese scholars who'd often carry their lunch with them as they crossed the Long Bridge over the Yangtze River. One day, as they were eating, the noodles fell into the hot soup below – and a tasty new dish was born!

The scholars quickly realized that submerging the noodles in the hot broth was actually the key to the dish's delectable flavor. The heat softened the rice noodles while infusing them with the rich, aromatic broth.

Over time, cross-bridge noodles became a beloved specialty in Yunnan, known for their springy texture and mouthwatering savory notes.

Today, this centuries-old recipe is still prepared with care, using fresh regional ingredients that celebrate Yunnan's vibrant culinary heritage.

Advertisement

Recipe

Yunnan cross-bridge rice noodles, also known as "Crossing the Bridge" noodles, is a popular dish originating from the Yunnan province in China. This dish is renowned for its flavorful broth and chewy rice noodles. The unique cooking method involves carefully assembling the ingredients and pouring hot broth over them, creating a visually stunning and delicious meal.

The dish is typically served family-style, with the broth and noodles presented separately, allowing each diner to customize their bowl to their liking. The process of "crossing the bridge" refers to the tradition of the chef bringing the hot broth to the table, creating a sense of anticipation and theater.

Ingredients:

  • 8 oz rice noodles
  • 4 cups chicken or vegetable broth
  • 1 lb boneless, skinless chicken thighs, thinly sliced
  • 2 eggs, beaten
  • 1 cup thinly sliced cabbage
  • 1 cup bean sprouts
  • 1/2 cup thinly sliced green onions
  • 2 cloves garlic, minced
  • 1 tbsp soy sauce
  • 1 tsp sesame oil
  • 1/2 tsp white pepper

Cooking Instructions:

In a large pot, bring the broth to a boil. Reduce heat to low and keep the broth at a gentle simmer.

Arrange the chicken, eggs, cabbage, bean sprouts, and green onions on a serving platter. Serve the hot broth, noodles, and garnishes separately, allowing each diner to customize their bowl.

Advertisement

When cooking this dish, it's important to slice the ingredients thinly to ensure quick cooking and easy assembly. Additionally, make sure the broth is piping hot when served, as the contrast between the hot broth and the fresh, cool ingredients is a key part of the experience.

Enjoy your Yunnan cross-bridge rice noodles!

Cooking Steps

Soak those rice noodles in water until they're nice and soft.

Once the broth's bubbling away, you can start arranging everything – the noodles, the broth, and all the tasty toppings.

Don't forget to add your favorite fixings, then serve it up piping hot for the best slurping experience!

Advertisement

Step 1. Soak Rice Noodles in Water

soak rice noodles thoroughly

Grab a large bowl and fill it with lukewarm water. This is where you'll soak your rice noodles to get them nice and soft.

Make sure the water covers the noodles completely, as they'll expand as they soak. Give the noodles about 20-30 minutes to soak, stirring them occasionally to ensure even softening. You'll know they're ready when they've become pliable and easy to bend without breaking.

Once the noodles have soaked, drain them in a colander. Rinse them under cool running water to remove any excess starch.

This step helps prevent the noodles from sticking together later on. Gently squeeze out any excess water, being careful not to damage the delicate noodles.

Now they're all set to be added to your hot broth or stir-fried dishes! Get ready to enjoy the chewy, slurpable goodness of your Yunnan cross-bridge rice noodles.

Step 2. Bring Broth to a Boil

bring broth to boil

Next, bring a large pot of broth to a rolling boil. This'll be the key to unlocking the mouthwatering flavors of your Yunnan cross-bridge rice noodles.

Make sure to use a generous amount of broth – you want enough to fully submerge the noodles. As the broth heats up, you'll start to see those lively bubbles burst on the surface. That's your cue that it's ready!

Advertisement

Don't be afraid to crank up the heat to get it going. Once it's at a full boil, you can reduce the heat slightly to maintain that steady simmer.

Now, grab your soaked rice noodles and gently add them to the hot broth. Stir them around to make sure they're fully submerged and separated.

Let the noodles cook for just a minute or two until they're tender and pliable. You want them to have a nice bite, not be mushy.

With the broth boiling and the noodles ready, you're one step closer to slurping up a delicious bowl of Yunnan goodness!

Step 3. Arrange Noodles, Broth, and Toppings

arrange noodles broth toppings

With the broth at a rolling boil and the noodles ready, it's time to assemble your Yunnan cross-bridge rice noodle dish.

First, grab a large bowl and carefully pour in some of the steaming hot broth.

Advertisement

Now, use your chopsticks to gently lower the freshly cooked noodles into the broth. Arrange them neatly, making sure they're fully submerged.

Next, it's time for the fun part – adding your favorite toppings! You can load up your bowl with slices of tender beef, juicy chicken, or crisp veggies like baby bok choy.

Don't forget to sprinkle on some chopped scallions and cilantro for extra flavor and color.

Finally, give everything a gentle stir to combine the ingredients.

Your Yunnan cross-bridge rice noodle masterpiece is now ready to enjoy! The hot, fragrant broth, chewy noodles, and tasty toppings make for a truly delightful and satisfying meal.

Advertisement

Step 4. Add Desired Toppings

add toppings as desired

With the noodles and broth ready, you can now start adding your desired toppings. The fun part is choosing all the tasty treats to top off your bowl!

First, you'll want to add some fresh, crunchy vegetables like thinly sliced cabbage, carrot, and green onion. These add great texture and flavor.

Next, consider adding a protein like roasted chicken, beef, or even soft-boiled eggs for extra heartiness.

Don't forget the herbs – fresh cilantro, mint, and Thai basil will really make the dish pop with their aromatic flavors.

For a bit of crunch, try topping it off with crispy wonton strips or peanuts.

Finally, a drizzle of chili oil or sriracha will give it a delightful kick of heat.

Advertisement

Get creative and customize your bowl exactly how you like it! With all these amazing toppings, your Yunnan Cross-Bridge Rice Noodles are about to be taken to the next level of deliciousness.

Step 5. Serve Immediately, While Hot

serve hot immediately enjoy

Once the noodles and toppings are ready, serve the dish immediately while it's hot. The steaming broth, tender noodles, and aromatic toppings are at their best when enjoyed right away.

Don't let the food cool down – dive in and savor every delicious bite!

Transfer the noodles and toppings to a big bowl, then ladle the hot broth over the top. The noodles will soak up the flavorful liquid, creating a comforting and satisfying meal.

Make sure to include all your favorite toppings for the ultimate Cross-Bridge Rice Noodle experience.

As you take that first slurpy spoonful, you'll be transported to the bustling markets of Yunnan. The combination of textures and flavors is simply irresistible.

Advertisement

Final Thoughts

As you've explored the depths of Yunnan's renowned cross-bridge rice noodles, it's clear that this culinary delight offers a unique and captivating dining experience.

From the artful preparation to the robust flavors, every bite transports you to the heart of this vibrant region. What truly sets these noodles apart is the dedication and passion of the chefs who've perfected the craft over generations.

As you reflect on your journey through this culinary adventure, take a moment to savor the memories.

Picture the steaming bowls, the aromatic broth, and the interplay of textures that make each mouthful a delightful discovery.

This is more than just a meal – it's a cultural experience that celebrates the rich heritage of Yunnan and the enduring power of food to bring people together.

Advertisement

Frequently Asked Questions

Can the Noodles Be Made With Different Types of Rice?

You can certainly use different types of rice to make rice noodles. The choice of rice variety will affect the texture and flavor, so experiment to find the one that suits your preferences best.

How Long Do the Noodles Typically Last After Being Cooked?

How long do the cooked noodles typically last? Well, it depends on the type of noodles, but generally, they'll stay fresh for 3-5 days when stored properly in the fridge. Just be sure to keep 'em covered to prevent drying out.

Are There Any Dietary Restrictions Associated With This Dish?

Regarding dietary restrictions, the dish may not be suitable for individuals with gluten or nut allergies. It's always best to inquire about the specific ingredients used to ensure it aligns with your dietary needs.

Can the Toppings Be Customized to Individual Preferences?

You can customize the toppings to your individual preferences. The dish is highly versatile, allowing you to tailor the ingredients to your liking and dietary needs. You have the freedom to create a personalized version of this dish.

Are There Any Health Benefits to Consuming Yunnan Cross-Bridge Rice Noodles?

When you consume rice noodles, you can enjoy some health benefits. They're typically low in fat and calories, and provide complex carbs that can fuel your body. Plus, they're gluten-free, making them a great option for those with dietary restrictions.

Advertisement
Continue Reading

Chinese Cuisine

Red-Braised Pork Belly

A succulent Hunan classic, red-braised pork belly is a melt-in-your-mouth delight that has captivated generations, with its rich soy and brown sugar flavors. Discover the secrets behind this…

Published

on

savory chinese pork dish

Red-braised pork belly is a scrumptious Chinese dish from Hunan Province that's been passed down for generations. You'll start by searing the pork to get a mouthwatering crust, then simmer it in a rich soy and brown sugar sauce with fragrant spices like star anise and cinnamon. The long, slow cooking makes the pork belly melt-in-your-mouth tender. Garnish it with fresh green onions for a pop of color and crunch. Serve this comforting dish with steamed rice, and you'll see why it's considered a true culinary treasure. Want to learn more about the storied history and cooking techniques behind this irresistible dish?

Key Takeaways

  • Red-Braised Pork Belly is a traditional Chinese dish originating from Hunan province, known for its savory, sweet, and aromatic flavors.
  • The recipe features tender pork belly simmered in a rich sauce with key ingredients like soy sauce, rice wine, and brown sugar.
  • Cooking techniques such as blanching, searing, and long braising are essential for achieving the desired tenderness and flavor complexity.
  • The harmonious balance of flavors and textures, including the tender pork and the crunchy green onion garnish, creates an irresistible culinary experience.
  • Patience and skill development are crucial in preparing this dish, as it can be improved by allowing the flavors to meld over time.

History

The origins of red-braised pork belly can be traced back to the Hunan province of China, where this savory and aromatic dish has been a beloved regional delicacy for centuries.

The heart of this classic recipe lies in the slow-cooking process, which allows the pork's natural flavors to mingle with the rich, caramelized sauce. As the pork simmers away, the fat renders down, creating a melt-in-your-mouth texture that's simply irresistible.

Over time, the dish has become a beloved part of Chinese culinary heritage, with families passing down their cherished techniques and secret ingredients from generation to generation.

Whether enjoyed as a family meal or a special occasion feast, red-braised pork belly remains a beloved staple that continues to delight taste buds across China and beyond.

Its captivating combination of savory, sweet, and aromatic notes makes it a true culinary treasure, steeped in the rich traditions of Chinese cuisine.

Advertisement

Recipe

Red-Braised Pork Belly is a classic Chinese dish that features tender, flavorful pork belly slowly simmered in a rich, savory sauce. The long braising time allows the pork to become meltingly tender, while the aromatic spices and soy sauce infuse the meat with deep, complex flavors.

The key to the perfect red-braised pork belly is patience. The dish requires a bit of time and attention, but the results are well worth it. The pork belly is first seared to create a golden-brown crust, then simmered in a mixture of soy sauce, rice wine, and spices until the meat is fall-apart tender.

  • 2 lbs pork belly, cut into 1-inch cubes
  • 3 cloves garlic, minced
  • 1 inch ginger, peeled and sliced
  • 1/2 cup soy sauce
  • 1/4 cup rice wine or Shaoxing wine
  • 2 tablespoons brown sugar
  • 2 star anise
  • 2 cinnamon sticks
  • 4 cups chicken or beef stock

In a large Dutch oven or heavy-bottomed pot, sear the pork belly over medium-high heat until golden brown on all sides, about 5-7 minutes. Remove the pork from the pot and set aside.

Reduce the heat to medium, add the garlic and ginger to the pot, and cook for 1-2 minutes until fragrant. Pour in the soy sauce, rice wine, brown sugar, star anise, and cinnamon sticks, and stir to combine.

Add the seared pork belly and stock, and bring the mixture to a boil. Reduce the heat to low, cover the pot, and simmer for 2-3 hours, or until the pork is tender and the sauce has thickened. Adjust the seasoning to taste, and serve the red-braised pork belly with steamed rice, a side of vegetables, and your favorite condiments.

For the best results, be patient and let the pork braise for as long as possible. The longer it cooks, the more tender and flavorful the pork will become.

Advertisement

Additionally, you can prepare the dish a day in advance and let the flavors meld together overnight before reheating and serving.

Cooking Steps

Slice that pork belly into chunky pieces, then blanch them in boiling water to get rid of any impurities.

Next, you'll caramelize the pork in a skillet to lock in the flavor.

Step 1. Slice Pork Belly Into Chunks

slice pork belly chunks

Before you can begin cooking the pork belly, you'll need to slice it into bite-sized chunks. First, grab a sharp knife and a sturdy cutting board.

Carefully place the pork belly on the board, then use the knife to cut the meat into 1-inch pieces. Don't worry if they're not perfectly uniform – the irregular shapes will add to the rustic charm of the dish.

As you work, try to keep the pieces evenly sized so they cook at the same rate. Once you've sliced the entire pork belly, you can give the chunks a quick rinse under cold water to remove any stray bits of fat or skin.

Advertisement

Dry them off with some paper towels, and you're ready to move on to the next step! Cooking the pork belly low and slow is the key to achieving that melt-in-your-mouth texture, so take your time and enjoy the process.

Your patience will definitely pay off in the end.

Step 2. Blanch Pork Belly in Boiling Water

blanch pork belly boiling

The first step in the cooking process is to blanch the pork belly chunks in boiling water. This important step helps to remove any impurities or excess fat from the meat, giving you a cleaner, more refined flavor in the final dish.

Simply fill a large pot with water and bring it to a rolling boil over high heat. Once the water is bubbling vigorously, carefully add the sliced pork belly pieces. Let them soak for about 2 to 3 minutes, then use a slotted spoon to scoop them out and transfer them to a clean bowl or plate.

Don't worry if the pork looks a bit pale and bland at this stage – the real magic will happen during the next steps of the cooking process. With the pork belly now prepped and ready, you can move on to the next exciting phase of this delicious recipe!

Step 3. Caramelize Pork Belly in Skillet

caramelize pork belly skillet

With the pork belly now prepped and ready, grab a large, heavy-bottomed skillet and place it over medium-high heat.

Once the skillet is nice and hot, add a generous drizzle of oil and let it heat up for a minute or two.

Advertisement

Now, carefully add the blanched pork belly slices to the pan, making sure they don't overlap.

You'll want to let them sizzle and brown for about 2-3 minutes per side, turning them occasionally with tongs.

As the pork sears, you'll start to see the edges turn golden and crispy – that's exactly what you're going for!

Keep an eye on them, adjusting the heat as needed to prevent burning.

Once both sides are beautifully caramelized, transfer the pork to a plate and set it aside.

Advertisement

Don't worry, we're not done yet – there are still a few steps to go before this delicious pork belly is ready to enjoy!

Step 4. Simmer Pork in Aromatic Liquid

pork simmered in aromatics

Next, add the caramelized pork belly slices to a Dutch oven or large, heavy-bottomed pot.

Pour in enough water or broth to just cover the pork. Toss in some fragrant ingredients like star anise, cinnamon sticks, cloves, and ginger slices. The pungent aroma will make your mouth water!

To complement your meal, consider serving it with a soothing cup of herbal tea, as many varieties can aid in digestion and enhance your dining experience, such as herbal teas with digestion benefits.

Bring the liquid to a boil, then reduce the heat to a gentle simmer. Let the pork slowly braise for about an hour, or until it's meltingly tender. The longer you simmer it, the more the flavors will blend together.

Be patient – it's well worth the wait! Occasionally, skim any foam or fat that rises to the surface. This will keep your dish nice and clean.

Advertisement

When the pork is super soft, you're ready for the next step. Get ready to experience the deep, rich flavors of this classic Chinese dish!

Step 5. Garnish With Green Onions

garnish dish with onions

Finely slice some green onions to garnish the tender, red-braised pork belly. You'll want those vibrant, green slices to create a colorful contrast against the rich, caramelized meat. Sprinkle them generously over the top – the fresh, oniony flavor will perfectly complement the savory-sweet pork.

Don't be shy with the green onions! The more, the merrier. They'll add a lovely crunch and brightness to each bite. Plus, the pop of green makes the dish look extra appetizing. Imagine how nice those slender green onion pieces will look, nestled among the shiny, reddish-brown pork cubes.

Once you've added the green onions, your red-braised pork belly is ready to serve. Scoop it up and enjoy the delightful interplay of flavors and textures. The tender pork, the aromatic cooking liquid, and the crisp green onions – it's a harmony of yum that's sure to delight your taste buds.

Final Thoughts

Ultimately, the essence of this red-braised pork belly dish lies in its harmonious balance of flavors and textures. The tender, melt-in-your-mouth pork, combined with the rich, caramelized sauce, creates a truly irresistible experience.

The vibrant green onions you sprinkled on top not only add a pop of color but also a delightful crunch, complementing the dish perfectly.

Advertisement

As you savor the final bites, you can't help but feel a sense of accomplishment. This recipe has allowed you to explore the depths of Chinese cuisine and expand your culinary horizons.

The techniques you've learned, from searing the pork to expertly reducing the sauce, will undoubtedly serve you well in future culinary adventures.

Frequently Asked Questions

Is Red-Braised Pork Belly Suitable for Vegetarians?

No, red-braised pork belly is not suitable for vegetarians. Pork belly is a type of meat, and the dish is prepared using animal-based ingredients, making it unsuitable for those following a vegetarian diet.

Can I Substitute the Pork Belly With Another Cut of Meat?

You can absolutely substitute the pork belly with another cut of meat. Try using chicken thighs, beef brisket, or even tofu for a vegetarian option. The key is to adjust the cooking time accordingly.

How Long Can the Dish Be Stored in the Refrigerator?

Stored leftovers can typically last 3-4 days in the refrigerator. Be sure to refrigerate the dish in an airtight container as soon as it's cooled down. This will help preserve the flavors and prevent spoilage.

Advertisement

Can I Use a Slow Cooker Instead of a Stovetop?

You can absolutely use a slow cooker instead of a stovetop. The slow cooking process will infuse the flavors and tenderize the meat, just like on the stovetop. Give it a try and see how it turns out!

Does the Dish Contain Any Gluten or Nut Ingredients?

The dish does not contain any gluten or nut ingredients. It's a gluten-free and nut-free recipe, so you don't have to worry about those dietary restrictions when preparing it.

Continue Reading

Chinese Cuisine

Chicken Feet (Dim Sum Style)

You’ll be surprised at the umami flavor and satisfying texture of these Cantonese dim sum delicacies – learn how to prepare chicken feet like a pro.

Published

on

dim sum chicken feet

Chicken feet are a delightful Cantonese dim sum delicacy that have been enjoyed for centuries! These savory nuggets start with a good boiling to make them nice and tender. Then, you'll sauté some garlic and ginger, add soy sauce and spices, and braise the feet until they're fork-tender. The result is a flavorful, chewy treat that's high in collagen – perfect for your skin and joints. While they may seem daunting at first, chicken feet offer a unique eating experience that'll have you exploring more of the diverse culinary traditions across Asia. Want to learn how to prepare them like a pro?

Key Takeaways

  • Chicken feet have been a staple in Cantonese dim sum for centuries, showcasing resourcefulness and respect for ingredients in Cantonese culinary culture.
  • The dish involves simmering, braising, and sautéing chicken feet with key ingredients like chicken stock, soy sauce, and spices for a flavorful and tender result.
  • Chicken feet offer a unique texture with cartilage and skin, providing an interesting chewing experience and promoting shared dining experiences in dim sum settings.
  • Chicken feet are high in collagen, beneficial for skin and joint health, and low in calories compared to other meat options.
  • Chicken feet are increasingly available in Asian grocery stores and restaurants, gaining popularity among adventurous eaters and foodies as a delicacy.

History

Dim sum, the Cantonese culinary tradition, has long been intertwined with the humble chicken foot. This unassuming part of the bird has been a beloved component of the dim sum experience for centuries, with its unique texture and savory flavor contributing to the vibrant and diverse flavors of this shared dining style.

The origins of chicken feet in dim sum can be traced back to the Cantonese region of China, where resourcefulness and a reverence for all parts of the animal have long been hallmarks of the local cuisine.

As dim sum evolved from a simple teahouse snack into the elaborate, family-style feasts we know today, the chicken foot became an integral part of the experience, showcasing the ingenuity and respect for ingredients that define Cantonese culinary culture.

Today, the chicken foot remains a beloved and iconic dim sum dish, beloved by locals and visitors alike who relish the opportunity to savor this unique and flavorful delicacy.

Recipe

Chicken feet are a beloved delicacy in Chinese cuisine, particularly in the dim sum tradition. When cooked properly, these seemingly unassuming ingredients transform into a flavorful and textural delight. The key to succulent chicken feet lies in a careful preparation process that involves braising and simmering to tenderize the tough cartilage and skin.

Advertisement

Dim sum-style chicken feet are typically served as bite-sized morsels, often accompanied by a zesty dipping sauce that complements the savory, slightly gelatinous texture. The dish isn't only a culinary experience but also a cultural one, as it has been a staple of Cantonese cuisine for generations.

Ingredients:

  • 1 lb chicken feet, cleaned and trimmed
  • 2 cups chicken stock
  • 1/4 cup soy sauce
  • 2 tablespoons rice vinegar
  • 1 tablespoon brown sugar
  • 3 cloves garlic, minced
  • 1-inch piece fresh ginger, peeled and sliced
  • 2 green onions, sliced
  • 1 teaspoon sesame oil
  • 1/2 teaspoon white pepper

Instructions:

In a large pot, combine the chicken feet, chicken stock, soy sauce, rice vinegar, brown sugar, garlic, and ginger. Bring the mixture to a boil, then reduce the heat and simmer for 1-1.5 hours, or until the chicken feet are tender and the skin is gelatinous.

Remove the pot from heat, stir in the green onions and sesame oil, and season with white pepper. Serve the chicken feet warm, with the cooking liquid drizzled over the top, along with your desired dipping sauce.

Tips:

Advertisement

When selecting chicken feet, look for those that are plump and free of blemishes. It's important to clean and trim the feet thoroughly before cooking to remove any excess skin or debris.

Additionally, be patient during the simmering process, as it may take some time for the tough cartilage to become tender and the skin to develop the desired gelatinous texture.

Cooking Steps

Okay, let's get cooking!

First, you'll boil the chicken feet in water to tenderize them. After that, drain and rinse the feet to get rid of any gunk.

Next, you'll sauté some garlic and ginger in a pan, then add soy sauce and other seasonings.

Advertisement

Step 1. Boil Chicken Feet in Water

boil chicken feet preparation

To begin, start by placing the chicken feet in a large pot and covering them with an ample amount of water.

You'll want to make sure the water level is at least an inch above the chicken feet. Now, turn on the heat and bring the water to a boil.

Once it's bubbling away, let the chicken feet simmer for about 45 minutes to an hour. This lengthy boiling time helps to soften the tough, leathery skin and release the natural gelatin from the bones.

As the chicken feet cook, you'll notice the water turning a cloudy, opaque color. This is a good sign – it means all the collagen and nutrients are being drawn out of the feet and into the broth.

Feel free to skim off any foam or impurities that rise to the surface. When the time is up, carefully remove the pot from the heat and let the chicken feet cool slightly before handling.

They're now ready to be seasoned and served as part of your delicious dim sum feast!

Advertisement

Step 2. Drain and Rinse Chicken Feet

drain and rinse chicken

Once the chicken feet have finished simmering, carefully drain them in a colander.

You'll want to make sure all the water has gone, so gently shake the colander to help it along.

Next, rinse the chicken feet under cool running water. This will wash away any remaining scum or impurities.

As you run your fingers through the feet, you might notice some small, hard nubs – these are the toe nails, and you'll want to remove them.

Simply pinch each one and pull it off.

Now your chicken feet are ready for the next step! Aren't they looking cleaner already?

Advertisement

With the water drained and the feet rinsed, you're one step closer to enjoying delicious, authentic dim sum.

Keep up the good work – the tasty payoff is almost here!

Step 3. Sauté Garlic and Ginger

saut garlic and ginger

With the chicken feet now washed and ready, you'll want to start by sautéing the garlic and ginger. This is a crucial step that will infuse your dish with mouthwatering aromas and flavors.

Heat a large skillet or wok over medium heat and add a couple tablespoons of oil. Once the oil is shimmering, toss in the minced garlic and grated ginger. Stir-fry for about a minute, until the garlic becomes fragrant and starts to turn golden. Be careful not to let it burn, as that can make the flavor bitter.

Next, add the blanched chicken feet to the pan. Toss everything together, making sure the feet are well coated in the garlicky-ginger oil. Let them sizzle and brown for a few minutes, stirring occasionally.

This will help develop a delicious crust on the outside of the chicken feet. Soon, your kitchen will be filled with the most tantalizing scents, getting you excited for the flavorful dim sum dish to come.

Advertisement

Step 4. Add Soy Sauce and Seasonings

add soy sauce seasonings

After the chicken feet have had a chance to brown, it's time to add the soy sauce and other seasonings.

First, pour in a few tablespoons of soy sauce – this will give the chicken feet a lovely, deep brown color and a savory flavor. Don't be shy with the soy sauce, as it's a key ingredient that really makes the dish pop.

Next, sprinkle in a pinch or two of white pepper. The peppery kick will complement the salty soy sauce perfectly.

You can also add a dash of sesame oil, which will add a nutty aroma and a silky mouthfeel.

Step 5. Braise Chicken Feet Until Tender

braise chicken feet tenderly

Having added the soy sauce and seasonings, it's time to braise the chicken feet until they become fork-tender.

First, place the seasoned chicken feet in a large pot and cover with water. Bring the pot to a boil over high heat, then reduce the heat to medium-low and let the feet simmer for 45 minutes to an hour.

You'll know they're done when you can easily pierce them with a fork. The long cooking time helps break down the tough connective tissues, making the feet wonderfully soft and gelatinous.

Advertisement

Once they're tender, you can remove the feet from the pot and serve them up hot. Don't forget to provide plenty of napkins – these juicy chicken feet can get a bit messy to eat!

With their savory, umami-packed flavor, these braised chicken feet make a truly delightful dim sum treat. Enjoy exploring this unique and tasty part of the chicken.

Final Thoughts

Though chicken feet dim sum may not be for everyone, the unique flavors and textures it offers can be a delightful experience for those willing to try it. The braise process transforms the tough, rubbery texture into something surprisingly tender and succulent. The aromatic spices and sauces infuse the chicken feet with a robust, savory taste that's unlike anything else.

For those feeling adventurous, chicken feet dim sum is a fun way to expand your culinary horizons. The cartilage and skin provide an interesting chewing experience, and the subtle flavors make each bite an enjoyable discovery.

Don't be afraid to get your hands a little messy – that's part of the fun! With a bit of practice, you'll be expertly plucking the meat off the bones in no time.

Advertisement

Whether you're a seasoned dim sum enthusiast or a curious newcomer, chicken feet offer a unique and tasty addition to your culinary adventures. Give them a try and see for yourself the pleasures of this unique dim sum delicacy.

Frequently Asked Questions

Are Chicken Feet Considered a Delicacy?

You might consider chicken feet a delicacy, as they're a popular appetizer in certain Asian cuisines. While they may not be everyone's cup of tea, they're prized for their unique texture and flavor.

Can I Find Chicken Feet at Regular Grocery Stores?

You can usually find chicken feet at regular grocery stores, though their availability may vary by location. Check the poultry section or ask a store employee for assistance in locating them.

How Do I Clean and Prepare Chicken Feet?

You can clean and prepare chicken feet by rinsing them thoroughly, trimming any excess skin or nails, and boiling them for about 30 minutes to tenderize the texture. Then, you're ready to use them in your desired recipe.

What's the Difference Between Cantonese and Sichuan-Style Chicken Feet?

The key difference between Cantonese and Sichuan-style chicken feet lies in the flavor profile. Cantonese-style is typically more mild and savory, while Sichuan-style features a bold, spicy kick from the use of Sichuan peppercorns and chili peppers.

Advertisement

How Long Do I Need to Cook Chicken Feet?

You'll need to simmer the chicken feet for about 1-2 hours until they're tender and the cartilage can be easily chewed. The longer they cook, the more the tough connective tissues will break down.

Continue Reading
Advertisement

Affiliate Disclaimer
As an affiliate, we may earn a commission from qualifying purchases. We get commissions for purchases made through links on this website from Amazon and other third parties.

Advertisement

Latest

ice cream soda bar ice cream soda bar
Graduations/Birthdays3 mins ago

Soda Float Bar

Kicking it old-school with soda float bars, a classic American delight that blends carbonated fizz and rich ice cream, uncovering...

delicious nutritious blended beverages delicious nutritious blended beverages
Graduations/Birthdays8 mins ago

Smoothies

Kicking off your day with a nourishing smoothie is an easy way to pack in essential vitamins, minerals, and fiber,...

refreshing chilled beverage choice refreshing chilled beverage choice
Graduations/Birthdays13 mins ago

Iced Tea

You'll be amazed at the refreshing delight of iced tea, a timeless summertime favorite that's easy to prepare and perfect...

refreshing citrus beverage delight refreshing citrus beverage delight
Graduations/Birthdays19 mins ago

Lemonade

Whisking up a batch of homemade lemonade is a refreshing summertime ritual that has captivated palates for centuries, but the...

refreshing mixed fruit beverage refreshing mixed fruit beverage
Graduations/Birthdays24 mins ago

Fruit Punch

Fruit punch, a timeless delight tracing its origins to colonial exploration, offers a vibrant, customizable experience that will leave you...

delicious s mores dessert station delicious s mores dessert station
Graduations/Birthdays30 mins ago

S’mores Bar

Gather the perfect ingredients and craft your own delightful s'mores with endless flavor combinations, from milk chocolate to white chocolate...

creamy italian dessert delight creamy italian dessert delight
Graduations/Birthdays36 mins ago

Panna Cotta

Originating in the Piedmont region of Italy, panna cotta is a delightfully creamy and versatile dessert that has captured the...

delicious baked fruit dessert delicious baked fruit dessert
Graduations/Birthdays41 mins ago

Fruit Cobbler

Yes, you can discover the surprising origins and irresistible flavors of this classic American dessert by exploring the history and...

sweet baked treats recipe sweet baked treats recipe
Graduations/Birthdays47 mins ago

Sugar Cookies

Flavorful and versatile, sugar cookies have captivated bakers for generations, with a rich history and perfected techniques waiting to be...

decadent chocolate dessert delight decadent chocolate dessert delight
Graduations/Birthdays53 mins ago

Chocolate Mousse

Blissful spoonfuls of velvety chocolate mousse will transport you to a world of decadence, beckoning you to discover the rich,...

delicious bite sized treats delicious bite sized treats
Graduations/Birthdays58 mins ago

Cake Pops

Gooey, bite-sized cake pops are the delectable dessert you never knew you needed, offering a world of creative possibilities to...

delicious bite sized desserts delicious bite sized desserts
Graduations/Birthdays1 hour ago

Mini Pies

Mini pies, the bite-sized delights, offer a world of flavor in every mouthwatering morsel, captivating taste buds with their flaky...

Advertisement

Trending