Brazilian Cuisine
Pastel
Glowing with vibrant hues, pastels offer endless possibilities for artists, but mastering their soft, powdery nature requires…
Pastels are versatile art tools that have been around since the Renaissance. You can use them to create stunning artwork, from soft landscapes to vibrant portraits. They come in different types, like soft and oil pastels, each with unique qualities for you to explore. Pastels are fun and forgiving, making them great for beginners and experienced artists alike. Practice helps you improve your blending and texture-creating skills. Don't be afraid to make mistakes – they're part of the learning process! With pastels, you can let your imagination soar and create beautiful artwork. There's so much more to discover about this colorful medium!
Key Takeaways
- Pastels are versatile art materials available in soft, chalky, oil-based, and creamy forms.
- The medium originated in the Renaissance and gained popularity in 18th-century France.
- Pastels offer vibrant colors and blending capabilities suitable for various artistic styles.
- Regular practice with pastels enhances blending techniques and texture creation skills.
- Brazilian pastels are crispy, filled pastries introduced by Japanese immigrants as street food.
History
Pastels have a rich and colorful history dating back to the Renaissance. You might be surprised to learn that artists have been using these vibrant, chalky sticks for centuries! In the 1400s, painters started experimenting with pastel colors, creating soft, dreamy effects in their artwork. Leonardo da Vinci, the famous Italian artist, was one of the first to use pastels in his sketches.
As time went on, pastels became more popular. In the 1700s, they were all the rage in France, where artists like Rosalba Carriera made beautiful portraits using these versatile tools. You'd be amazed at how lifelike these paintings looked!
The 18th century saw a real pastel boom, with artists all over Europe embracing this medium.
Recipe
Pastel is a beloved Brazilian street food that consists of a thin, crispy pastry filled with various savory ingredients. This versatile snack can be found in street markets, bars, and casual restaurants throughout Brazil. Its popularity has spread beyond the country's borders, making it a favorite among food enthusiasts worldwide.
While the origins of pastel are debated, it's believed to have been introduced by Japanese immigrants in Brazil during the early 20th century. The dish has since evolved to incorporate a wide range of fillings, from traditional ground beef and cheese to more creative options like shrimp, heart of palm, or even sweet variations with chocolate and fruit.
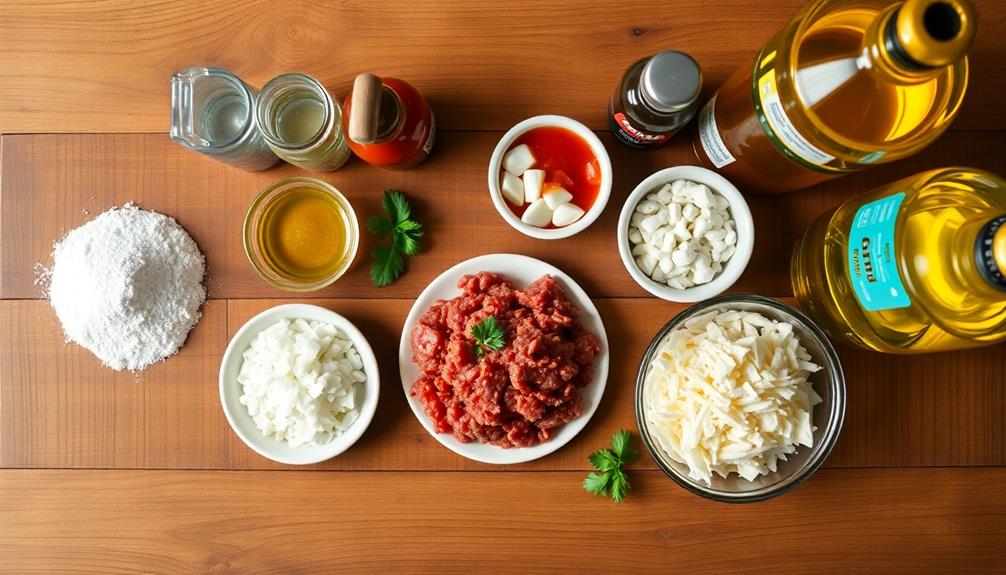
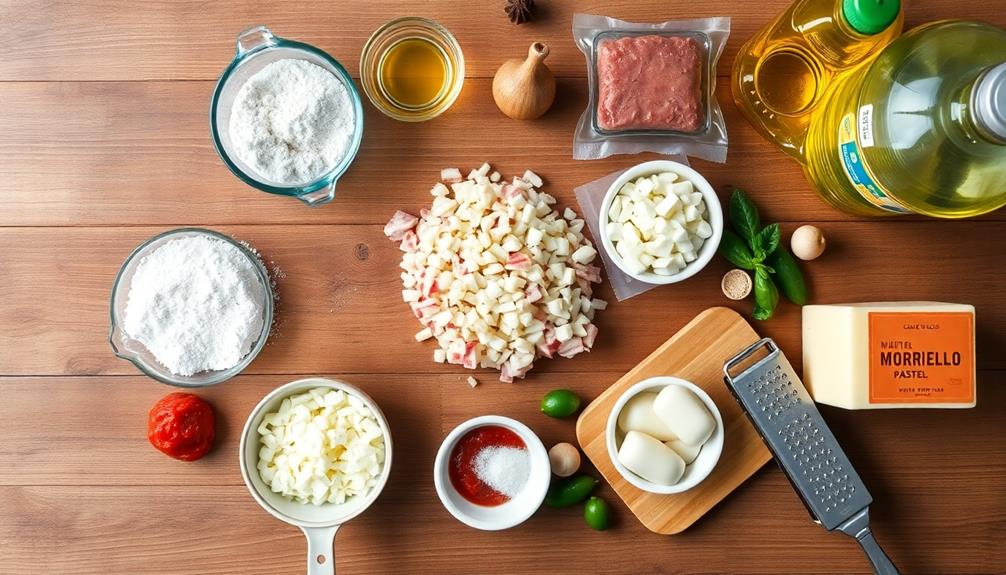
- 2 cups all-purpose flour
- 1/2 teaspoon salt
- 1/4 cup vegetable oil
- 1/2 cup warm water
- 1 cup ground beef
- 1/2 cup diced onions
- 2 cloves minced garlic
- 1/4 cup tomato sauce
- Salt and pepper to taste
- 1 cup shredded mozzarella cheese
- Vegetable oil for frying
To prepare the pasteis, start by making the dough. Mix the flour and salt in a bowl, then add the oil and water. Knead the dough until smooth and let it rest for 30 minutes.
Meanwhile, cook the ground beef with onions, garlic, tomato sauce, salt, and pepper. Roll out the dough thinly and cut into circles. Place a spoonful of the meat mixture and some cheese on each circle, fold in half, and seal the edges.
Heat oil in a deep fryer or large pot and fry the pasteis until golden brown and crispy. For best results, ensure the oil is hot enough before frying to achieve a crispy texture. Avoid overfilling the pasteis to prevent them from bursting during frying.
Serve immediately while hot and crispy, accompanied by a tangy hot sauce or chimichurri for dipping. Experiment with different fillings to create your own unique variations of this delicious Brazilian snack.
Cooking Steps
You're about to embark on a tasty cooking adventure with pastels!
First, you'll gather and prepare your filling ingredients, then mix up the dough and roll it out nice and thin.
Once you've got your dough ready, you'll fill it with your prepared ingredients and carefully seal each pastel before frying them to a perfect golden brown.
Step 1. Prepare Filling Ingredients
The heart of any delicious pastel lies in its filling. You'll want to gather all your ingredients before you start cooking.
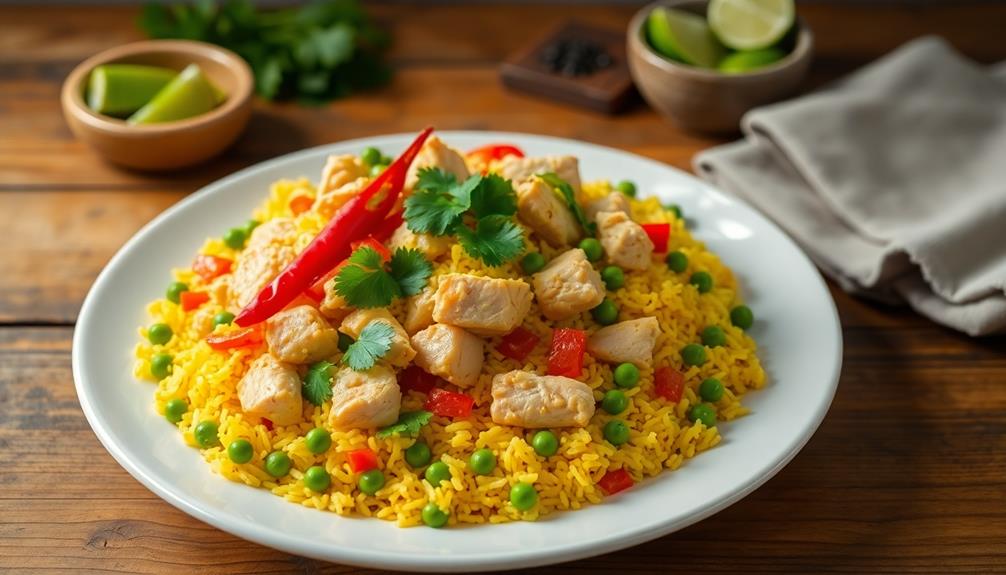
First, chop up some onions and garlic – they'll add lots of flavor to your pastel. Next, dice your meat of choice, whether it's chicken, beef, or pork. Don't forget to wash and chop your veggies too! Carrots, peas, and corn are great options, but feel free to get creative.
Now, it's time to season your filling. You'll need salt and pepper, of course, but why not add some paprika or cumin for extra zing? If you're feeling adventurous, throw in some chopped herbs like parsley or cilantro. They'll make your pastel taste even better!
Remember to have your cheese ready too. Grated mozzarella or a nice sharp cheddar will melt perfectly inside your pastel.
Oh, and don't forget to grab an egg – you'll need it to seal the pastry later. With all these yummy ingredients prepared, you're ready to start cooking up a storm!
Step 2. Mix Dough Ingredients
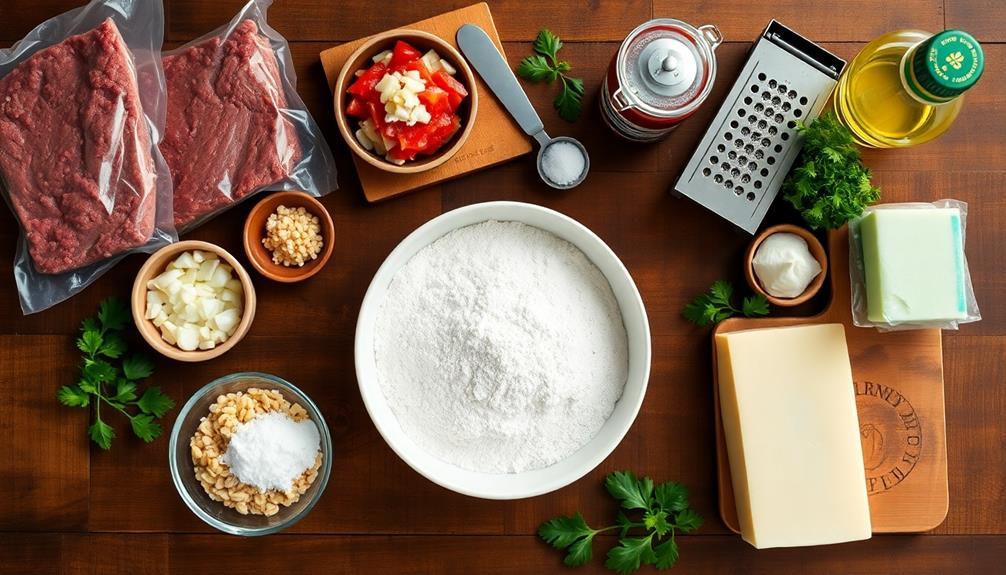
Now that your filling ingredients are ready, it's time to tackle the dough. Gather your flour, salt, baking powder, and vegetable oil. In a large mixing bowl, combine the dry ingredients.
Make a well in the center and pour in the oil and warm water. Using your hands, start mixing the ingredients together. Don't be afraid to get messy – it's part of the fun!
As you mix, you'll feel the dough coming together. Keep kneading until it forms a smooth, elastic ball. If it's too sticky, add a little more flour. If it's too dry, sprinkle in some water. The perfect dough should be soft and pliable, not sticky or crumbly.
Once you've achieved the right consistency, cover the bowl with a damp cloth and let it rest for about 30 minutes. This resting period allows the gluten to relax, making the dough easier to roll out later.
While you wait, you can clean up your workspace and get ready for the next exciting step – shaping your pastels!
Step 3. Roll Out Dough Thinly
After your dough has rested, it's time to roll it out. Grab your rolling pin and lightly dust your work surface with flour to prevent sticking. Place the dough in the center and start rolling from the middle outwards, using gentle pressure. Keep rotating the dough as you go to ensure an even thickness.
You'll want to roll the dough until it's very thin, about 1/8 inch thick or even less if you can manage it. Don't worry if it's not perfectly round – we're going for thin and even here! If the dough starts to stick, sprinkle a little more flour on the surface or the rolling pin.
As you roll, you might notice the dough becoming more elastic and stretchy. That's a good sign! It means the gluten is developing, which will help your pastry become nice and flaky.
If the dough starts to shrink back, let it rest for a few minutes before continuing. Remember, patience is key when working with pastry dough. Keep at it, and soon you'll have a beautifully thin sheet of dough ready for your delicious pastel filling!
Step 4. Fill With Prepared Ingredients
Filling your pastel is where the magic happens. Now that you've rolled out your dough, it's time to add the delicious ingredients that'll make your pastel burst with flavor. Start by scooping a generous spoonful of your prepared filling onto one half of the dough circle. You can use all sorts of tasty fillings, like seasoned ground beef, chicken and cheese, or even a veggie mix!
Remember not to overfill your pastel, or it might burst during cooking. Leave about a half-inch border around the edges so you can seal it properly.
Once you've added your filling, it's time to close up your pastel. Carefully fold the empty half of the dough over the filled side, creating a half-moon shape. Press the edges together firmly with your fingers, then use a fork to crimp the edges and create a pretty pattern.
This step is important because it helps keep all the yummy filling inside while your pastel cooks. And there you have it – your pastel is ready for the next exciting step!
Step 5. Fry Until Golden Brown
The final step in creating your perfect pastel is frying it to a delicious golden brown.
Heat up some vegetable oil in a deep frying pan or pot, making sure it's hot enough before you start cooking. You'll know it's ready when a small piece of dough sizzles and floats to the surface.
Carefully lower your filled pastels into the hot oil using a slotted spoon or tongs. Don't overcrowd the pan, as this will lower the oil temperature and make your pastels greasy.
Watch them closely as they cook, turning them gently to ensure even browning on all sides. It'll take about 3-5 minutes for your pastels to reach that perfect golden color.
Once they're beautifully crisp and golden, remove them from the oil and place them on a paper towel-lined plate to drain excess oil.
Let them cool for a minute or two before you dig in. Your homemade pastels are now ready to enjoy! Serve them hot with your favorite dipping sauce or just munch on them as they are. Yum!
Final Thoughts
Versatility defines pastel as a medium, offering artists endless possibilities for creative expression. You'll find that pastels can create soft, dreamy landscapes or bold, vibrant portraits with equal ease. They're perfect for both quick sketches and detailed masterpieces, giving you the freedom to explore your artistic vision.
As you've learned, pastels come in various forms, from soft and chalky to oil-based and creamy. Each type has its own unique qualities, allowing you to experiment and find the perfect fit for your style. Don't be afraid to mix and match different pastel types to achieve exciting effects!
Remember, practice makes perfect. The more you work with pastels, the better you'll become at blending colors and creating textures. It's a fun and forgiving medium, so don't worry about making mistakes. Embrace the learning process and enjoy the journey of discovering your artistic voice.
Whether you're a beginner or an experienced artist, pastels offer a world of creative possibilities. So grab your pastels, let your imagination soar, and start creating beautiful artwork today!
Frequently Asked Questions
Can Pastel Be Made With Alternative Flours for Gluten-Free Diets?
You can make gluten-free pastels using alternative flours like rice, almond, or tapioca. They'll require some experimentation to achieve the right texture, but it's definitely possible. You'll need to adjust liquid ratios and binding agents accordingly.
How Long Can Leftover Pastel Be Stored in the Refrigerator?
You can store leftovers in the refrigerator for up to 3-4 days. Make sure to cool them completely before refrigerating. For best quality, wrap them tightly in plastic wrap or store in an airtight container.
Are There Regional Variations of Pastel in Different Parts of Brazil?
You'll find regional variations of pastel across Brazil. In the northeast, you might encounter seafood fillings, while in the south, you'll see more meat-based options. Some regions add local ingredients or unique spices to their pastels.
What Are Some Common Side Dishes Served With Pastel?
You'll often find pastel paired with vinaigrette sauce, a spicy tomato-based dip. Other common sides include rice, beans, french fries, and salads. Don't forget to try it with a refreshing glass of caldo de cana! If you’re feeling adventurous, you can also try pastel with the traditional Brazilian tacacá recipe, a spicy soup made with jambu leaves and tucupi broth. The combination of the crispy crust of the pastel with the bold flavors of the tacacá recipe is a culinary experience not to be missed. Be sure to ask for extra napkins, as this delicious combination can be a bit messy but well worth it!
Can Pastel Be Baked Instead of Fried for a Healthier Option?
You can definitely bake instead of fry for a healthier option. It'll change the texture slightly, making it less crispy, but you'll still enjoy the flavors. Just brush with oil and bake until golden brown.
Brazilian Cuisine
Chicken in Brown Sauce
Appetizing chicken in brown sauce, a classic Chinese dish with tender chicken simmered in a rich, savory sauce – discover the secrets to making it.
You'll love this tasty chicken in brown sauce! This classic Chinese dish features tender chicken simmered in a rich, savory sauce. The key ingredients are soy sauce, chicken broth, and a touch of cornstarch for a glossy finish. You'll brown the chicken first, then add the sauce to let it simmer until the chicken is perfectly cooked. Don't forget to season it with garlic, ginger, and herbs for maximum flavor. Serve it over rice or noodles for a complete meal that's sure to satisfy. This dish is super versatile, so you can have fun experimenting with different spices and veggies. If you keep reading, you'll discover even more cooking tips and ways to make this dish your own.
Key Takeaways
- Chicken in Brown Sauce is a Chinese culinary tradition with a rich, savory sauce made from soy sauce, chicken broth, and cornstarch.
- The recipe has evolved over time, with the addition of ingredients like ginger, garlic, and vinegar, resulting in complex flavors.
- The dish is easy to prepare, with the chicken being browned and then simmered in the sauce until tender.
- Chicken in Brown Sauce is a versatile dish that can be customized with different herbs, spices, and vegetables to suit personal preferences.
- This comforting and satisfying meal is suitable for weeknight dinners and family gatherings, making it a popular choice.
History
The origins of chicken in brown sauce can be traced back to the culinary traditions of China. This savory dish has been enjoyed for centuries, with recipes passed down through generations.
In ancient times, Chinese cooks would simmer chicken in a rich, aromatic sauce made from soy sauce, brown sugar, and aromatic spices. Over time, the recipe evolved, with the addition of ingredients like ginger, garlic, and vinegar, creating the familiar brown sauce we know and love today.
As Chinese cuisine spread around the world, the dish found its way into the kitchens of many cultures. In the West, chicken in brown sauce became a popular menu item at Chinese restaurants, delighting diners with its complex flavors and tender chicken.
Today, the dish remains a classic, enjoyed for its comforting taste and versatility. Whether served over rice or noodles, chicken in brown sauce continues to be a beloved culinary treasure, connecting us to the rich history of Chinese cooking.
Recipe
Chicken in Brown Sauce is a classic Chinese dish that features tender chicken pieces cooked in a rich, savory sauce. This dish is easy to prepare and can be served over steamed rice or noodles for a satisfying meal.
The key to this dish is the sauce, which is made by combining a few simple ingredients like soy sauce, chicken broth, and cornstarch. The sauce not only adds flavor to the chicken but also creates a glossy, appetizing appearance.
Ingredients:
- 1 lb boneless, skinless chicken thighs, cut into 1-inch pieces
- 2 tablespoons vegetable oil
- 3 cloves garlic, minced
- 1 tablespoon grated ginger
- 1/2 cup chicken broth
- 2 tablespoons soy sauce
- 1 tablespoon brown sugar
- 1 tablespoon cornstarch
- Salt and pepper to taste
- Chopped scallions for garnish (optional)
Instructions:
In a large skillet or wok, heat the vegetable oil over medium-high heat. Add the chicken pieces and cook until lightly browned, about 5 minutes. Remove the chicken from the pan and set aside.
In the same pan, sauté the garlic and ginger for 1 minute, or until fragrant. Add the chicken broth, soy sauce, and brown sugar, and bring the mixture to a simmer.
In a small bowl, whisk together the cornstarch and 2 tablespoons of water until smooth. Slowly pour the cornstarch mixture into the sauce, stirring constantly, until the sauce thickens, about 2 minutes.
Return the cooked chicken to the pan and toss to coat the pieces evenly in the sauce. Season with salt and pepper to taste. Serve the chicken in brown sauce immediately, garnished with chopped scallions if desired.
For best results, use high-quality, fresh ingredients. You can also adjust the amount of soy sauce or brown sugar to suit your personal taste preferences. Enjoy your delicious Chicken in Brown Sauce!
Cooking Steps
First, you'll need to cut and brown the chicken.
Then, add some vegetable stock and let it simmer until the chicken is nice and tender.
Step 1. Cut and Brown Chicken
With chicken breasts or thighs at the ready, you'll want to start by cutting them into bite-sized pieces. This will help the chicken cook evenly and make it easier to eat. Be sure to use a sharp knife and a clean cutting board for this step.
Once the chicken is all cut up, it's time to get cooking! Ensuring your kitchen is clean and organized can also enhance your cooking experience, similar to how proper hamster care involves maintaining a clean environment for your pet.
Next, you'll need to brown the chicken in a large skillet or pan. Heat up a bit of oil over medium-high heat, then add the chicken pieces. Let them sizzle and cook for a few minutes on each side until they're nicely browned. This will help lock in all the delicious chicken flavor.
Be careful not to overcrowd the pan – you want the chicken to have room to brown properly.
As the chicken browns, you can start preparing the brown sauce. This savory sauce is the star of the dish, so you'll want to make sure it's full of flavor. We'll cover that in the next step!
Step 2. Add Vegetable Stock
As the chicken sizzles away, it's time to focus on the brown sauce. First, grab that trusty vegetable stock you've got on hand.
Slowly pour it into the pan, being careful not to splatter. As the stock hits the hot pan, it'll start to create a delightful sizzling sound – that's music to a chef's ears!
Now, use a wooden spoon to gently scrape up all those tasty browned bits from the bottom of the pan. This will help infuse your sauce with even more flavor.
Give the mixture a good stir, making sure the stock incorporates fully. Let the sauce simmer for a few minutes, allowing it to thicken and develop its rich, savory notes.
The aroma filling your kitchen will have your mouth watering, so get ready for the next step in creating this delicious chicken dish!
Step 3. Simmer Until Chicken Is Tender
Now that the aromatic brown sauce is simmering, it's time to nestle the chicken back into the pan.
Gently lower the chicken pieces into the simmering liquid, ensuring they're completely submerged. This will allow the chicken to absorb all the delicious flavors of the sauce.
Maintain a gentle simmer, not a rapid boil, as that could make the chicken tough. Let the chicken cook for about 25-30 minutes, or until it's fall-off-the-bone tender.
You'll know it's done when the meat easily pulls away from the bone. As the chicken simmers, the sauce will thicken and become rich and velvety.
Give the pan a gentle stir every now and then to ensure even cooking. The aroma wafting through your kitchen will have your mouth watering in anticipation!
Soon, you'll have perfectly cooked chicken in a luscious brown sauce, ready to serve over fluffy rice or crusty bread. For an extra special treat, you can use the leftover chicken and sauce to make a delicious homemade chicken pie. Simply add some mixed vegetables to the filling, cover it with a flaky pastry, and bake until golden brown. Your family and friends will be impressed with your culinary skills and savor every bite of this comforting dish.
Step 4. Add Seasonings and Herbs
To deepen the flavor profile, you'll want to add some fragrant seasonings and herbs to the simmering sauce.
Begin by stirring in a teaspoon of ground cumin – its earthy, slightly smoky notes will complement the chicken beautifully.
Next, add a sprinkle of dried oregano, whose woodsy aroma will infuse the dish with Mediterranean flair.
Don't forget the garlic! Mince a couple of cloves and toss them in. As the garlic sizzles, it'll release its pungent yet delightful scent, making your kitchen smell absolutely amazing.
For a touch of freshness, tear in a handful of chopped parsley right at the end. The vibrant green flecks and bright, herbaceous taste will liven up the whole dish.
Step 5. Finish by Adjusting Consistency
With the seasonings and herbs incorporated, it's time to adjust the consistency of the sauce to your liking. You'll want a thick and velvety texture that coats the chicken beautifully.
Start by adding a bit of the reserved cooking liquid, a few tablespoons at a time, and giving it a good stir. This will help loosen up the sauce and blend everything together seamlessly.
Keep an eye on the consistency, adding more liquid if it's too thick or letting it simmer a bit longer if it's too thin. You're aiming for a nice, saucy consistency that clings nicely to the chicken.
Don't be afraid to play around until you get it just right! Once you're satisfied, give it one final taste and adjust any seasonings as needed.
Then, you're ready to serve this delicious Galinha Ao Molho Pardo! Your family is going to love the rich, flavorful sauce paired with the tender chicken.
Final Thoughts
The chicken in brown sauce dish you've prepared is a comforting and satisfying meal. You can feel proud of your culinary skills! The rich, savory sauce complements the tender chicken perfectly, and the accompanying rice or potatoes make it a complete and nourishing dinner.
As you savor the final bites, consider how versatile this dish can be. You could experiment with different herbs and spices to tweak the flavor profile.
Or, you might add some vegetables like mushrooms or carrots to make it even heartier. The possibilities are endless!
This recipe is a keeper, so be sure to add it to your repertoire. Whenever you're craving a cozy, homemade meal, you can turn to this chicken in brown sauce.
It's sure to become a new family favorite that you'll enjoy making again and again.
Frequently Asked Questions
How Long Does Galinha Ao Molho Pardo Take to Prepare?
To prepare this dish, you'll need about an hour and a half. The active cooking time is relatively short, but the simmering process takes some time to achieve the desired tenderness and flavor.
What Are the Essential Ingredients in Galinha Ao Molho Pardo?
The essential ingredients in this dish are chicken, onions, tomatoes, garlic, herbs, and a savory brown sauce. You'll also need some oil or butter to cook the ingredients. With these key elements, you can create a flavorful and satisfying meal.
Can Galinha Ao Molho Pardo Be Made in Advance?
Absolutely! You can prepare this dish ahead of time. The flavors will meld together beautifully, and it'll be even more delicious when you reheat it. Just be sure to store it properly in the fridge or freezer.
What Side Dishes Pair Well With Galinha Ao Molho Pardo?
When pairing side dishes with a hearty stew, you'll want to choose accompaniments that complement the flavors and textures. Consider serving it with fluffy white rice, roasted vegetables, or a fresh, crisp salad for a balanced and delicious meal.
Is Galinha Ao Molho Pardo a Traditional Brazilian Dish?
Yes, galinha ao molho pardo is considered a traditional Brazilian dish. It's a popular chicken stew from the northeastern region, featuring a rich, savory sauce that's often served with rice, beans, and farofa.
Brazilian Cuisine
Caldeirada
You’ll be captivated by the aromatic and flavorful Caldeirada, a traditional Portuguese seafood stew that’s been delighting taste buds for centuries.
Caldeirada is a wonderfully comforting seafood stew that's been delighting Portuguese folks for centuries. It all started with clever fishermen, using the abundant local seafood and veggies to create a hearty, tomato-based broth. Over time, the dish evolved with unique regional twists, each reflecting the diverse culinary traditions across Portugal's coastline. Today, Caldeirada is a beloved part of Portuguese cuisine, symbolizing the warmth and richness of their maritime heritage. It's a truly delightful dish that'll have you eager to explore even more of Portugal's culinary wonders.
Key Takeaways
- Caldeirada is a traditional Portuguese seafood stew originating from the country's rich maritime history and coastal culinary traditions.
- The dish features a variety of fresh seafood like fish, shellfish, and octopus, cooked in a rich, tomato-based broth with herbs and spices.
- Caldeirada has evolved over centuries with regional variations, reflecting the diverse culinary influences across different parts of Portugal.
- Preparing and sharing Caldeirada is a cherished part of the Portuguese culinary tradition, symbolizing the comfort and warmth of the country's cuisine.
- Caldeirada encourages the exploration of regional ingredients and traditional cooking methods, offering a balance of flavors for a comforting dining experience.
History
Caldeirada, a beloved seafood stew native to Portugal, traces its roots to the country's rich maritime history. For centuries, Portuguese fishermen braved the open seas, returning with bountiful catches of fresh fish and shellfish. This abundance of seafood inspired the creation of traditional dishes like caldeirada, which is typically made with a variety of fish, clams, and potatoes in a flavorful tomato-based broth. The dish is a testament to the Portuguese appreciation for fresh, simple ingredients and the bounty of the sea. In fact, the influence of Portugal’s maritime history can be seen in the cuisine of other countries with strong ties to the Portuguese, such as Brazil, where dishes like the Brazilian coxinha recipe bear similarities to traditional Portuguese fare.
These hardworking sailors would gather their daily haul, tossing it into a large pot along with local vegetables, herbs, and spices, creating a hearty, aromatic dish that nourished both body and soul.
Over time, this simple but delicious meal evolved, with different regions developing their own unique takes on the classic caldeirada.
Whether enjoyed seaside or inland, this time-honored recipe remains a cherished part of Portuguese culinary tradition, connecting generations through the flavors of the sea.
Today, caldeirada continues to delight both locals and visitors, a tasty testament to Portugal's enduring seafaring legacy.
Recipe
Caldeirada is a traditional Portuguese seafood stew that originated in the coastal regions of the country. It's a hearty and flavorful dish that showcases the bountiful seafood available in the local waters.
The key to a delicious Caldeirada is the careful selection and combination of fresh, high-quality seafood. This dish typically features a variety of fish, shellfish, and even octopus, all simmered together in a rich, tomato-based broth seasoned with aromatic herbs and spices.
Ingredients:
- 1 lb cod fillets, cut into chunks
- 1 lb clams, scrubbed
- 1 lb shrimp, peeled and deveined
- 1 lb mussels, scrubbed and debearded
- 1 lb octopus, cleaned and cut into bite-sized pieces
- 3 tomatoes, diced
- 1 onion, diced
- 3 cloves garlic, minced
- 1 cup white wine
- 2 cups fish or vegetable stock
- 2 bay leaves
- 1 tsp paprika
- 1 tsp dried oregano
- Salt and pepper to taste
- Chopped parsley for garnish
In a large pot or Dutch oven, sauté the onion and garlic in a bit of olive oil over medium heat until translucent. Add the tomatoes, wine, stock, bay leaves, paprika, and oregano.
Bring the mixture to a simmer and let it cook for about 10 minutes to allow the flavors to meld.
Next, add the seafood to the pot in the following order: first the cod, then the clams, shrimp, mussels, and finally the octopus. Cover the pot and let the seafood cook until it's all opaque and cooked through, about 15-20 minutes.
Discard any unopened clams or mussels. Season the stew with salt and pepper to taste.
Serve the Caldeirada immediately, garnished with chopped parsley. This dish is best enjoyed with crusty bread to soak up the flavorful broth. For an authentic experience, pair it with a crisp, chilled white wine.
Cooking Steps
First, you'll need to gather and prepare all your tasty ingredients.
Next, you'll add the seafood to the pot and let it simmer in the broth until it's cooked through.
Step 1. Gather and Prepare Ingredients
To prepare for the flavorful Caldeirada dish, gather your array of fresh seafood and aromatic vegetables. You'll need a mix of white fish, shrimp, and clams or mussels. Rinse the seafood and set it aside.
Next, chop onions, garlic, bell peppers, and tomatoes. Don't forget to peel and slice potatoes too. Have all your ingredients ready to go, as the cooking process moves quickly.
In a large pot, sauté the onions and garlic until fragrant. Add the bell peppers and tomatoes, letting them soften. Toss in the potatoes and just enough water to cover. Simmer until the potatoes are tender.
Now it's time for the seafood! Gently place the fish, shrimp, and clams or mussels into the pot. Season with salt, pepper, and a splash of white wine or vinegar. Cover and cook until the seafood is cooked through.
Serve your steaming hot Caldeirada, and enjoy the flavors of the sea!
Step 2. Add Seafood
Now, gently add the fish, shrimp, and clams or mussels into the simmering pot.
First, carefully place the chunks of white fish into the aromatic broth. They'll soak up all those wonderful flavors!
Next, toss in the tender shrimp, letting them cook until they turn a vibrant pink.
Don't forget the juicy clams or mussels – they'll open up and release their delectable juices as they steam.
Stir everything together, making sure each piece of seafood is submerged. The scents wafting through your kitchen will have your mouth watering!
Slowly, the seafood will become flaky and the shells will pop open, signaling that your caldeirada is ready.
Keep an eye on the pot, gently nudging anything that needs a little more time.
Soon, you'll have a delectable medley of the ocean's bounty, all coming together in one incredibly tasty dish. Yum!
Step 3. Simmer Seafood in Broth
Gently lower the chunks of white fish into the simmering aromatic broth, allowing them to soak up the wonderful flavors. Toss in the shrimp, clams, and mussels, letting them simmer until they've opened up and are cooked through. The broth will become rich with the essence of the sea as the seafood releases its natural juices.
Stir in the diced tomatoes, onions, and garlic, then season with a pinch of salt and a grind of black pepper. Let the mixture bubble away for 10-15 minutes, allowing the flavors to meld together. The broth should have a lovely, deep orange hue by now.
Tear in some fresh parsley leaves to add a bright, herbal note just before serving.
Ladle the aromatic caldeirada into bowls and enjoy with crusty bread for dipping. The tender seafood and flavorful broth make for a comforting and satisfying meal. Yum!
Step 4. Add Vegetables
After simmering the seafood in the aromatic broth, you'll want to stir in the diced tomatoes, onions, and garlic. These colorful veggies will add a lovely burst of flavor and texture to your caldeirada. Don't be shy – pile them in! The tomatoes will lend a tangy sweetness, while the onions and garlic provide a savory backbone.
As the vegetables simmer, they'll meld together beautifully with the fish and broth.
Next, toss in some sliced potatoes. These starchy spuds will soak up all the delicious juices, making your caldeirada hearty and satisfying.
Feel free to experiment with other veggies too, like bell peppers or zucchini. Just chop them into bite-sized pieces so they cook through.
Keep an eye on the pot, giving everything a gentle stir every now and then. Before you know it, your caldeirada will be brimming with vibrant, tender vegetables that complement the seafood perfectly.
Step 5. Adjust Seasoning to Taste
With the vegetables incorporated, take a moment to taste the caldeirada and adjust the seasoning as needed. This is where you really make the dish your own!
First, give it a try with a spoon. What flavors stand out? Is it a bit too salty, or could it use a touch more? Don't be afraid to tweak things until it's perfect for your tastes.
If it needs a little more salt, simply add a pinch or two and stir it in. Taste again, and keep adjusting until you're satisfied.
Maybe it could use a bit more garlic or onion flavor? Try adding a sprinkle of dried herbs or a squeeze of lemon juice. You can even toss in some crushed red pepper flakes if you want a little kick.
The key is to keep tasting and experimenting until the caldeirada is seasoned just right. This is the fun part, so enjoy bringing your personal flair to the dish!
Final Thoughts
Ultimately, Caldeirada is a remarkable seafood stew that transports you to the coastal regions of Portugal. This hearty dish is a true celebration of the bountiful ocean, with its mix of fresh fish, succulent shrimp, and tender clams simmered in a flavorful broth.
The blend of spices, herbs, and acidic ingredients creates a harmonious symphony of tastes that will delight your palate.
Caldeirada isn't only delicious but also a reflection of the rich culinary heritage of Portugal. Each region may have its own unique twist, but the core elements remain the same – a comforting, satisfying meal that warms the soul. However, beyond the flavors, caldeirada also tells a story of the Portuguese people and their connection to the sea. The use of fish and seafood in this dish reflects centuries of coastal living and reliance on the ocean for sustenance. This dish also has ties to the history of tapioca, as the use of potatoes and other root vegetables in the stew speaks to the influence of Portuguese exploration and trade in the New World.
Whether you're enjoying it with friends and family or savoring it on a cozy night in, Caldeirada is sure to leave you feeling content and eager to explore more of Portugal's incredible culinary wonders.
Frequently Asked Questions
Is Caldeirada a Soup or a Stew?
Is it a soup or a stew? That's a great question! Soups and stews can be tricky to distinguish, but they're generally differentiated by their thickness and ingredients. Let's dive in and explore the specifics of this dish.
What Kind of Fish Is Used in Caldeirada?
The type of fish used in this dish varies, but it's typically a mix of different types of white fish. You'd commonly find cod, hake, or monkfish in a traditional caldeirada.
Can Caldeirada Be Made With Vegetarian Ingredients?
Absolutely, you can make a vegetarian version of this dish. Instead of fish, you can use a variety of veggies like potatoes, bell peppers, and onions. It'll be just as flavorful and satisfying without the meat.
How Long Does Caldeirada Take to Prepare?
How long the dish takes to prepare depends on your culinary skills and the ingredients you choose. With careful planning and execution, you can have it ready in under an hour, making it a quick and satisfying meal.
Can Caldeirada Be Frozen for Later Use?
Yes, you can freeze caldeirada for later use. It's a great way to meal prep and have a delicious seafood stew on hand whenever you need it. Just make sure to let it cool completely before freezing.
Brazilian Cuisine
Tacacá
Uncover the captivating flavors of Tacacá, a mouthwatering Brazilian dish that blends the zest of Amazonian herbs, the richness of tucupi sauce, and the delightful crunch of fried corn patties.
Tacacá is a scrumptious Brazilian dish that'll delight your taste buds! Originating from the Amazon, it's made with mouthwatering ingredients like tucupi (a savory yellow sauce), jambu (a zesty Amazonian herb), and shrimp. The dish is then seasoned to perfection with garlic, pepper, and other spices. Once the corn is soaked, ground, and fried into crispy patties, you'll savor the combination of crispy exteriors and soft, flavorful centers. Tacacá is often served hot as a snack or appetizer, perfect for sharing with friends and family. You're sure to love this unique and delectable taste of Brazil – and that's just the beginning!
Key Takeaways
- Tacacá is a traditional Brazilian dish originating from the Amazon basin, made with manioc, dried shrimp, garlic, and spices.
- The dish has evolved over time, with different regional variations across Brazil, reflecting local tastes and ingredients.
- Tacacá is typically served hot, often as a snack or appetizer, and is popular among both locals and tourists for its unique flavor profile.
- The main ingredients in Tacacá include tucupi (yellow sauce from manioc), jambu (Amazonian herb), shrimp, and various spices.
- Tacacá can be customized with different toppings and can be served as a snack or a light meal, often paired with rice or bread.
History
The origins of Tacaca can be traced back to the indigenous populations of the Amazon basin. These skilled cooks developed a delicious dish using manioc, a root vegetable native to the region. They'd grate the manioc, then press out the liquid to create a savory, starchy base.
Next, they'd add flavorful ingredients like dried shrimp, garlic, and spices, creating a warm, comforting meal. As time passed, the recipe spread throughout Brazil, evolving to suit local tastes.
In the state of Pará, for example, the dish became known as Tacaca, with a distinct broth made from the manioc liquid. Today, you can find Tacaca served in restaurants and street stalls across the country, a beloved part of Brazilian cuisine.
Whether you enjoy it for breakfast, lunch, or a tasty snack, this traditional dish offers a delicious taste of the Amazon's rich culinary heritage.
Recipe
Tacaca is a popular Brazilian dish, originating from the northern region of the country. It's a savory and comforting soup made with tapioca pearls, shrimp, and a variety of spices and herbs.
The creamy and hearty texture of the tapioca pearls, combined with the bold flavors of the shrimp and seasonings, make Tacaca a true delight for the senses. This dish is often enjoyed as a snack or a light meal, and is a staple in many Brazilian households.
- 1 cup of tapioca pearls
- 1 lb of peeled and deveined shrimp
- 1 onion, diced
- 3 cloves of garlic, minced
- 1 tablespoon of annatto oil (or olive oil)
- 1 teaspoon of cumin
- 1 teaspoon of paprika
- 1 teaspoon of salt
- 1/4 cup of freshly chopped cilantro
In a large pot, heat the annatto oil (or olive oil) over medium heat. Add the diced onion and minced garlic, and sauté until fragrant and translucent.
Add the shrimp, cumin, paprika, and salt, and cook until the shrimp are pink and cooked through. Pour in enough water to cover the ingredients, and then add the tapioca pearls.
Stir continuously until the tapioca pearls have softened and the mixture has thickened. Remove from heat, and stir in the freshly chopped cilantro.
When serving Tacaca, it's important to note that the tapioca pearls will continue to absorb the liquid, so the consistency may thicken up over time.
You can adjust the consistency by adding more water or broth if desired. Additionally, some people enjoy adding a squeeze of lime juice or a sprinkle of additional seasonings to their individual servings.
Cooking Steps
First, you'll need to soak the corn overnight to soften it up.
Then, you'll grind the soaked corn into a smooth paste.
Next, you'll mix the corn with some lime to bring out the flavors.
Step 1. Soak the Corn Overnight
Before you begin cooking the tacaca, you'll want to soak the corn overnight. This important step helps to soften the kernels, making them easier to work with later on.
Start by finding a large bowl or container that can hold all the corn you plan to use. Fill it with cool, clean water, then add the corn. Make sure all the kernels are fully submerged. Cover the bowl and let it sit at room temperature for at least 8 hours, or overnight if possible.
In the morning, you'll notice the corn has expanded and become more pliable. Drain the water and give the corn a gentle rinse. It's now ready for the next step in the tacaca-making process.
Soaking the corn is a simple but crucial part of the recipe, so don't skip this step if you want your tacaca to turn out just right. With the corn softened and prepped, you can move on to grinding it into a flour.
Step 2. Grind the Soaked Corn
With the corn soaked and softened, it's time to grind it into a fine flour. You'll need a sturdy mortar and pestle or a food processor for this step. Carefully transfer the softened kernels into your chosen tool, making sure not to spill any.
Then, start grinding or pulsing the corn until it becomes a smooth, powdery flour. Don't be afraid to put some elbow grease into it – the more thoroughly you grind the corn, the finer and more consistent the flour will be.
Once you've achieved the desired texture, transfer the ground corn flour to a clean bowl or container. You may need to do this in batches, depending on the size of your mortar or food processor.
Be mindful of any stray bits that might've escaped – you want to collect every last bit of that precious cornmeal! With the corn now ground, you're one step closer to creating your delicious Tacaca.
Step 3. Mix With Lime
The next crucial step in the Tacaca preparation involves the integration of lime. You'll want to carefully measure out the right amount of lime to perfectly complement the soaked corn. Don't be afraid to get a little messy – this is where the real magic happens!
First, take the ground corn and place it in a large bowl. Slowly sprinkle in the lime, mixing it in with your hands to ensure an even distribution. The lime will react with the corn, creating a delightful chemical reaction that gives Tacaca its signature flavor.
Keep mixing until the mixture takes on a smooth, creamy texture.
Now, you can add any other seasonings or ingredients to really make the Tacaca your own. Perhaps a pinch of salt, or a dash of your favorite spice? Get creative and have fun with it!
The key is to keep tasting and adjusting until you achieve the perfect balance of flavors. Once you're satisfied, you're ready to move on to the next step. Tacaca is coming together beautifully!
Step 4. Form Tacaca Patties
Now that you've perfectly mixed the corn and lime, it's time to start forming the Tacaca patties.
Grab a handful of the corn mixture and gently shape it into a small, round patty about the size of your palm. Be careful not to squeeze it too tightly – you want the patty to have a nice, fluffy texture.
Once you've made your first patty, place it on a clean surface.
Continue forming the rest of the mixture into patties, lining them up neatly. Don't worry if they're not all exactly the same size – that's part of the charm of homemade Tacaca!
When you've made as many patties as you can from the mixture, it's time to start cooking them.
Heat up a large skillet or griddle over medium heat, and carefully transfer the patties onto the hot surface.
Cook for a few minutes on each side, until they're golden brown and crispy on the outside.
Serve your freshly made Tacaca patties warm, and enjoy the delicious flavors of this traditional dish!
Step 5. Fry the Tacaca Patties
Heat a large skillet or griddle over medium heat. Once it's nice and hot, add a few tablespoons of oil to the pan.
Carefully place the tacaca patties into the sizzling oil. Fry them for 2-3 minutes per side, or until they're golden brown and crispy. Be sure to flip them gently so they don't fall apart.
While the patties are frying, keep an eye on them and adjust the heat if needed to prevent burning. The oil should be hot enough to create a delicious, crunchy exterior, but not so hot that the centers stay raw.
When the patties are done, use a slotted spoon to transfer them to a paper towel-lined plate. This will help soak up any excess oil.
Serve the tacaca patties warm, and enjoy their amazing flavor and texture! They're the perfect snack or side dish.
Final Thoughts
As we reach the conclusion of this article on Tacacá, it's important to reflect on the key takeaways.
You've learned how to fry the delicious Tacacá patties to perfection, creating a crispy exterior and a soft, savory interior. Remember to use high-quality ingredients and follow the step-by-step instructions carefully for the best results.
While Tacacá may be a traditional dish, it's one that can be enjoyed by people of all ages. Serve it as a snack, appetizer, or even a light meal.
The versatility of Tacacá means you can get creative and experiment with different toppings or dipping sauces to suit your taste buds.
As you continue your culinary journey, don't hesitate to share your Tacacá creations with friends and family. You never know, they may be just as eager to experience the flavors and traditions of Brazilian cuisine as you are. Sharing your culinary creations can also lead to new discoveries and connections, as others may have their own favorite Brazilian dishes or recipes to share with you. So go ahead, invite your loved ones to join you on this culinary journey through the vibrant and diverse world of Brazilian cuisine.
Who knows, you might even inspire them to try this unique and flavorful dish for themselves. Enjoy your delicious Tacacá and savor every bite!
Frequently Asked Questions
What Is the Origin of the Name "Tacacá"?
You're asking about the origin of the name "Tacaca." Unfortunately, without additional context, I don't have enough information to provide a definitive answer. The origin of place names can vary and require more details to determine its source.
How Long Has Tacacá Been a Traditional Dish?
How long has this traditional dish been around? It's a great question! The exact origins are unclear, but many believe it's been part of the local cuisine for centuries, passed down through generations. The dish has deep roots in the region's culinary traditions.
What Are the Typical Serving Sizes for Tacacá?
When serving a traditional dish, typical serving sizes can vary. Portion sizes often depend on the dish, the number of guests, and personal preferences. Consider your guests' appetites and the overall meal when determining an appropriate serving size.
Are There Any Health Benefits Associated With Tacacá?
Yes, many plant-based foods like tacaca can provide health benefits. They often contain beneficial nutrients and antioxidants that may support your overall wellness. While the specific benefits of tacaca are unclear, incorporating a variety of whole foods into your diet is generally recommended.
Can Tacacá Be Made Vegan or Vegetarian?
Yes, you can make a vegan or vegetarian version of this dish. By omitting any animal-derived ingredients and using plant-based alternatives, you can enjoy the flavors without compromising your dietary preferences.
-
Brazilian Cuisine3 months ago
Tacacá
-
Polish Comfort Food3 months ago
Krupnik (Barley Soup)
-
Brazilian Cuisine3 months ago
Caldeirada
-
Brazilian Cuisine3 months ago
Chicken in Brown Sauce
-
Southern Comfort Food3 months ago
Cheese Straws
-
African Cuisine3 months ago
Kedjenou (Ivory Coast)
-
Polish Comfort Food3 months ago
Vegetable Salad
-
American Diner Classics3 months ago
The Maillard Reaction: Understanding the Chemistry of Browning {Food Science and Cooking}