Connect with us

Brazilian Cuisine

Moqueca

Nestled in Brazilian cuisine, Moqueca tantalizes taste buds with its creamy coconut-tomato base and tender fish, but its cultural significance goes beyond…

Published

on

brazilian fish stew dish

Moqueca is a mouthwatering Brazilian fish stew that'll make your taste buds dance! You'll love its creamy coconut milk base, tangy tomatoes, and zesty lime juice. This coastal dish combines fresh white fish with colorful bell peppers, onions, and garlic. As it simmers, the flavors meld together, creating a rich, orange-colored stew that's bursting with taste. You can serve it hot with fluffy white rice or farofa for an authentic experience. Moqueca's history is as diverse as its ingredients, reflecting Brazil's cultural melting pot. If you're curious about the secrets behind this delicious dish, there's so much more to discover!

Key Takeaways

  • Moqueca is a traditional Brazilian fish stew originating from coastal regions, particularly Bahia.
  • Key ingredients include white fish, coconut milk, tomatoes, peppers, and palm oil.
  • The dish reflects Brazil's cultural diversity, blending indigenous, African, and Portuguese influences.
  • Moqueca is typically served hot with white rice and garnished with fresh cilantro.
  • Two popular regional variations are moqueca baiana from Bahia and moqueca capixaba from Espírito Santo.

History

Moqueca's origins can be traced back centuries to Brazil's coastal regions. You'll find that this delicious fish stew has roots in both indigenous and African cooking traditions. As Portuguese settlers arrived in Brazil, they brought their own culinary influences, adding to the dish's rich history.

In the early days, moqueca was cooked in clay pots by native Brazilians. These pots gave the stew its unique flavor and texture. When African slaves were brought to Brazil, they introduced palm oil and coconut milk to the recipe, creating the creamy base we know today.

You might be surprised to learn that moqueca has different versions depending on the region. In Bahia, you'll find a version called "moqueca baiana" that's known for its vibrant orange color from dende oil. In Espírito Santo, they make "moqueca capixaba" without the coconut milk. Both are equally delicious!

Over time, moqueca has become a beloved national dish. It's a testament to Brazil's diverse cultural heritage and the way food can bring people together. When you taste moqueca, you're experiencing centuries of history in every spoonful!

Recipe

Moqueca is a traditional Brazilian fish stew that originated in the state of Bahia. This flavorful dish combines fresh white fish, coconut milk, and aromatic vegetables to create a rich and satisfying meal. The key to a perfect moqueca lies in the balance of flavors and the use of high-quality, fresh ingredients.

Advertisement

While there are several regional variations of moqueca, the most popular version is the Moqueca Baiana, which incorporates palm oil (dendê) and coconut milk. This recipe focuses on that style, offering a taste of authentic Brazilian coastal cuisine that can be easily prepared in your own kitchen.

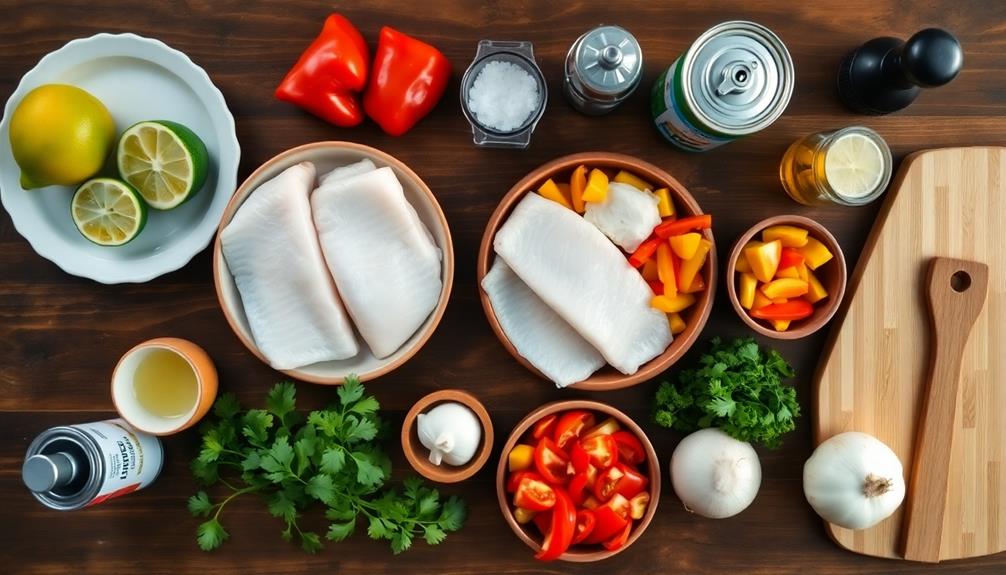
  • 2 lbs white fish fillets (such as cod, halibut, or sea bass), cut into chunks
  • 1 lime, juiced
  • 2 cloves garlic, minced
  • 1 onion, sliced
  • 1 red bell pepper, sliced
  • 1 yellow bell pepper, sliced
  • 2 tomatoes, chopped
  • 1 cup coconut milk
  • 2 tablespoons palm oil (dendê)
  • 1 tablespoon olive oil
  • 2 tablespoons cilantro, chopped
  • Salt and pepper to taste

To prepare the moqueca, start by marinating the fish in lime juice, garlic, salt, and pepper for about 30 minutes. In a large, heavy-bottomed pot, heat the olive oil and sauté the onions and bell peppers until softened.

Add the tomatoes and cook for a few more minutes. Layer the marinated fish on top of the vegetables, then pour in the coconut milk and palm oil. Cover and simmer gently for about 15-20 minutes, or until the fish is cooked through. Avoid stirring to keep the fish pieces intact. Garnish with chopped cilantro before serving.

For the best results, use the freshest fish available and adjust the cooking time based on the thickness of your fish fillets. If palm oil is unavailable, you can substitute it with a mixture of paprika and additional olive oil to achieve a similar color and flavor profile.

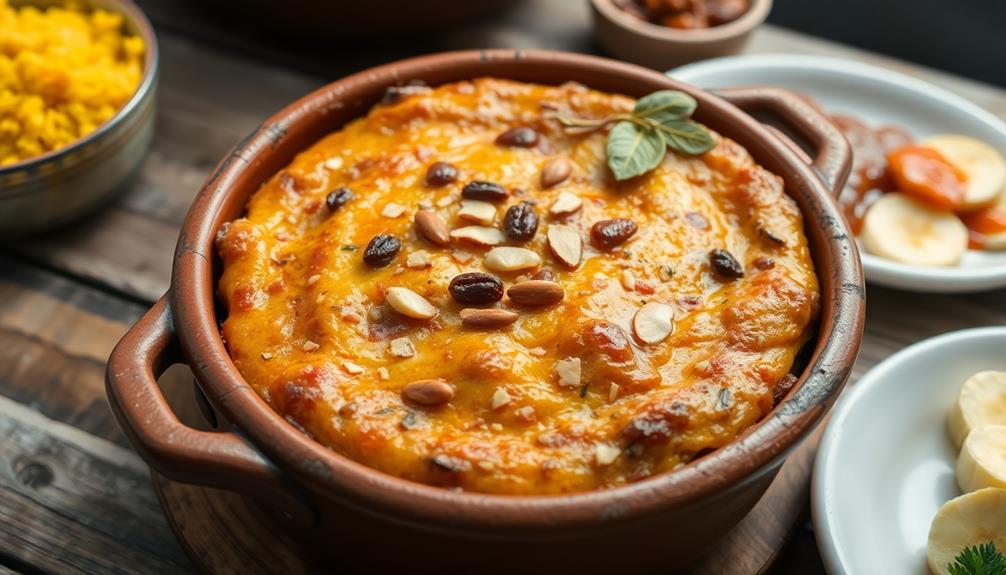
Serve the moqueca hot, accompanied by white rice or farofa (toasted manioc flour) for an authentic Brazilian dining experience.

Cooking Steps

You're about to embark on a culinary adventure with moqueca!

Advertisement

First, you'll heat oil in a pan and add your seafood and veggies, creating a colorful base for your dish.

Next, you'll pour in coconut milk and sprinkle in spices, letting everything simmer until the fish is perfectly cooked.

Step 1. Heat Oil in Pan

heat oil in pan

To begin the cooking process, heat a large, heavy-bottomed pan or Dutch oven over medium heat.

Once your pan is warm, it's time to add some oil! Pour in about two tablespoons of vegetable oil or coconut oil, whichever you prefer.

You'll want to swirl the pan gently to make sure the oil coats the bottom evenly.

Now, here's the fun part: watch the oil closely as it starts to shimmer and dance! This is how you'll know it's getting hot enough.

Advertisement

You might even see tiny ripples forming on the surface – that's a good sign!

If you're feeling brave, you can carefully flick a tiny drop of water into the pan. If it sizzles and evaporates right away, your oil is ready for action!

Step 2. Add Seafood and Vegetables

incorporate seafood and vegetables

With the oil hot and ready, it's time to add your seafood and vegetables to the pan. First, gently place your chosen seafood into the hot oil. You can use fish, shrimp, or a mix of both – whatever you like best! Let them sizzle for a minute or two, then carefully flip them over.

If you're looking for a healthy twist, consider incorporating some of the beneficial foods for gout management into your dish, such as some fresh vegetables that can enhance both flavor and nutrition.

Next, it's veggie time! Toss in your colorful bell peppers, juicy tomatoes, and fragrant onions. Don't forget to add some minced garlic for extra flavor. Give everything a good stir, making sure the veggies are evenly spread out in the pan.

You'll start to smell the amazing aroma of the seafood and vegetables cooking together. As everything cooks, you'll notice the vegetables softening and the seafood turning a beautiful golden color.

Advertisement

This is when the magic happens! The flavors are starting to blend, creating that delicious Moqueca taste you've been waiting for. Keep an eye on your pan, stirring occasionally to make sure nothing sticks.

In just a few minutes, your seafood and vegetables will be perfectly cooked and ready for the next step in your Moqueca adventure!

Step 3. Add Coconut Milk and Spices

incorporate coconut milk spices

The sizzling pan of seafood and vegetables is now ready for the next crucial step. It's time to add the creamy coconut milk and aromatic spices that'll transform your dish into a true moqueca.

Pour in a generous amount of coconut milk, watching as it mingles with the other ingredients, creating a luscious sauce. Now, let's spice things up!

Grab your favorite spices – don't be shy! Sprinkle in some paprika for a touch of sweetness and color. Add a pinch of red pepper flakes if you're feeling adventurous. Don't forget the cilantro; its fresh, zesty flavor will make your moqueca sing.

Stir everything gently, making sure the coconut milk and spices coat all the seafood and veggies evenly. As you mix, you'll notice the enticing aroma filling your kitchen. It's like a preview of the delicious meal to come!

Advertisement

Let the mixture simmer for a few minutes, allowing the flavors to meld together. Keep an eye on it, giving it an occasional stir to prevent sticking. Your moqueca is almost ready to serve!

Step 4. Simmer Until Fish Is Cooked

simmer fish until cooked

Now that your moqueca is simmering with all its flavorful components, it's time to focus on cooking the fish to perfection. Gently lower the fish pieces into the simmering broth, making sure they're mostly submerged.

Don't worry if some parts stick out a little – the steam will help cook them too!

Cover the pot with a lid and let the moqueca simmer for about 10 to 15 minutes. You'll know the fish is done when it's opaque and flakes easily with a fork.

Be careful not to overcook it, or you'll end up with tough, rubbery fish. While it's simmering, resist the urge to stir too much – you don't want to break up those beautiful fish pieces!

If you're using different types of seafood, remember that they might've different cooking times. Shrimp, for example, cook faster than most fish fillets.

Advertisement

You can add quicker-cooking seafood towards the end of the simmering time to ensure everything's perfectly cooked. Once your fish is done, your moqueca is ready to serve!

Get ready for a delicious, aromatic feast that'll transport you straight to the beaches of Brazil.

Step 5. Garnish With Fresh Cilantro

garnish with fresh cilantro

Just before serving, you'll want to add a final touch of freshness to your moqueca. Grab a handful of fresh cilantro and give it a quick rinse under cool water. Gently pat it dry with a clean kitchen towel or paper towels.

Now, it's time to chop! Hold the cilantro bunch together and use a sharp knife to finely chop the leaves and tender stems. Don't worry if you're not a pro – a rough chop will do just fine!

Sprinkle the chopped cilantro generously over the top of your steaming moqueca. The vibrant green leaves will create a beautiful contrast against the rich, orange-colored stew.

As you scatter the cilantro, you'll notice its fresh, citrusy aroma wafting up, adding an extra layer of excitement to your dish. The cilantro not only looks pretty but also adds a burst of flavor that complements the spices in your moqueca.

Advertisement

It's like adding a little culinary confetti to celebrate your cooking success! Your moqueca is now ready to be served and enjoyed by all.

Final Thoughts

Moqueca stands out as a true gem of Brazilian cuisine, offering a perfect balance of flavors and textures. You'll love how the creamy coconut milk blends perfectly with the tangy tomatoes and zesty lime juice. It's a dish that'll make your taste buds dance with joy!

When you're cooking moqueca, remember that patience is key. Let the flavors meld together as the stew simmers, and you'll be rewarded with a truly delicious meal.

Don't forget to serve it with some fluffy white rice to soak up all that yummy sauce.

Moqueca isn't just tasty; it's also a great way to explore Brazilian culture through food. Each spoonful tells a story of the country's rich culinary heritage.

Advertisement

Frequently Asked Questions

Is Moqueca Spicy?

Is it spicy? Well, that depends on how you prepare it. You'll find some versions can pack a fiery punch, while others are milder. It's customizable, so you can adjust the spice level to your liking.

Can Moqueca Be Made Vegetarian?

You can definitely make a vegetarian version! Simply swap out the seafood for your favorite veggies. Try using eggplant, mushrooms, or hearts of palm. You'll still get that rich, flavorful stew you're craving.

What's the Best Side Dish to Serve With Moqueca?

You'll want to serve a side dish that complements the rich flavors. Try white rice, farofa, or pirão. These traditional accompaniments soak up the delicious broth. Don't forget some crusty bread for dipping!

How Long Does Leftover Moqueca Last in the Refrigerator?

You'll want to consume your leftovers within 3-4 days for best quality and safety. Store them in an airtight container in the fridge. Reheat thoroughly before eating, and if it smells off, don't risk it.

Are There Regional Variations of Moqueca in Brazil?

You'll find regional variations of this dish across Brazil. In Bahia, you'll encounter moqueca baiana with palm oil and coconut milk. Espírito Santo's version, called moqueca capixaba, uses annatto oil instead of palm oil.

Advertisement
Continue Reading
Advertisement

Brazilian Cuisine

Chicken in Brown Sauce

Appetizing chicken in brown sauce, a classic Chinese dish with tender chicken simmered in a rich, savory sauce – discover the secrets to making it.

Published

on

savory chicken brown sauce

You'll love this tasty chicken in brown sauce! This classic Chinese dish features tender chicken simmered in a rich, savory sauce. The key ingredients are soy sauce, chicken broth, and a touch of cornstarch for a glossy finish. You'll brown the chicken first, then add the sauce to let it simmer until the chicken is perfectly cooked. Don't forget to season it with garlic, ginger, and herbs for maximum flavor. Serve it over rice or noodles for a complete meal that's sure to satisfy. This dish is super versatile, so you can have fun experimenting with different spices and veggies. If you keep reading, you'll discover even more cooking tips and ways to make this dish your own.

Key Takeaways

  • Chicken in Brown Sauce is a Chinese culinary tradition with a rich, savory sauce made from soy sauce, chicken broth, and cornstarch.
  • The recipe has evolved over time, with the addition of ingredients like ginger, garlic, and vinegar, resulting in complex flavors.
  • The dish is easy to prepare, with the chicken being browned and then simmered in the sauce until tender.
  • Chicken in Brown Sauce is a versatile dish that can be customized with different herbs, spices, and vegetables to suit personal preferences.
  • This comforting and satisfying meal is suitable for weeknight dinners and family gatherings, making it a popular choice.

History

The origins of chicken in brown sauce can be traced back to the culinary traditions of China. This savory dish has been enjoyed for centuries, with recipes passed down through generations.

In ancient times, Chinese cooks would simmer chicken in a rich, aromatic sauce made from soy sauce, brown sugar, and aromatic spices. Over time, the recipe evolved, with the addition of ingredients like ginger, garlic, and vinegar, creating the familiar brown sauce we know and love today.

As Chinese cuisine spread around the world, the dish found its way into the kitchens of many cultures. In the West, chicken in brown sauce became a popular menu item at Chinese restaurants, delighting diners with its complex flavors and tender chicken.

Today, the dish remains a classic, enjoyed for its comforting taste and versatility. Whether served over rice or noodles, chicken in brown sauce continues to be a beloved culinary treasure, connecting us to the rich history of Chinese cooking.

Recipe

Chicken in Brown Sauce is a classic Chinese dish that features tender chicken pieces cooked in a rich, savory sauce. This dish is easy to prepare and can be served over steamed rice or noodles for a satisfying meal.

Advertisement

The key to this dish is the sauce, which is made by combining a few simple ingredients like soy sauce, chicken broth, and cornstarch. The sauce not only adds flavor to the chicken but also creates a glossy, appetizing appearance.

Ingredients:

  • 1 lb boneless, skinless chicken thighs, cut into 1-inch pieces
  • 2 tablespoons vegetable oil
  • 3 cloves garlic, minced
  • 1 tablespoon grated ginger
  • 1/2 cup chicken broth
  • 2 tablespoons soy sauce
  • 1 tablespoon brown sugar
  • 1 tablespoon cornstarch
  • Salt and pepper to taste
  • Chopped scallions for garnish (optional)

Instructions:

In a large skillet or wok, heat the vegetable oil over medium-high heat. Add the chicken pieces and cook until lightly browned, about 5 minutes. Remove the chicken from the pan and set aside.

In the same pan, sauté the garlic and ginger for 1 minute, or until fragrant. Add the chicken broth, soy sauce, and brown sugar, and bring the mixture to a simmer.

In a small bowl, whisk together the cornstarch and 2 tablespoons of water until smooth. Slowly pour the cornstarch mixture into the sauce, stirring constantly, until the sauce thickens, about 2 minutes.

Advertisement

Return the cooked chicken to the pan and toss to coat the pieces evenly in the sauce. Season with salt and pepper to taste. Serve the chicken in brown sauce immediately, garnished with chopped scallions if desired.

For best results, use high-quality, fresh ingredients. You can also adjust the amount of soy sauce or brown sugar to suit your personal taste preferences. Enjoy your delicious Chicken in Brown Sauce!

Cooking Steps

First, you'll need to cut and brown the chicken.

Then, add some vegetable stock and let it simmer until the chicken is nice and tender.

Step 1. Cut and Brown Chicken

cut and brown chicken

With chicken breasts or thighs at the ready, you'll want to start by cutting them into bite-sized pieces. This will help the chicken cook evenly and make it easier to eat. Be sure to use a sharp knife and a clean cutting board for this step.

Once the chicken is all cut up, it's time to get cooking! Ensuring your kitchen is clean and organized can also enhance your cooking experience, similar to how proper hamster care involves maintaining a clean environment for your pet.

Advertisement

Next, you'll need to brown the chicken in a large skillet or pan. Heat up a bit of oil over medium-high heat, then add the chicken pieces. Let them sizzle and cook for a few minutes on each side until they're nicely browned. This will help lock in all the delicious chicken flavor.

Be careful not to overcrowd the pan – you want the chicken to have room to brown properly.

As the chicken browns, you can start preparing the brown sauce. This savory sauce is the star of the dish, so you'll want to make sure it's full of flavor. We'll cover that in the next step!

Step 2. Add Vegetable Stock

incorporate vegetable stock now

As the chicken sizzles away, it's time to focus on the brown sauce. First, grab that trusty vegetable stock you've got on hand.

Slowly pour it into the pan, being careful not to splatter. As the stock hits the hot pan, it'll start to create a delightful sizzling sound – that's music to a chef's ears!

Now, use a wooden spoon to gently scrape up all those tasty browned bits from the bottom of the pan. This will help infuse your sauce with even more flavor.

Advertisement

Give the mixture a good stir, making sure the stock incorporates fully. Let the sauce simmer for a few minutes, allowing it to thicken and develop its rich, savory notes.

The aroma filling your kitchen will have your mouth watering, so get ready for the next step in creating this delicious chicken dish!

Step 3. Simmer Until Chicken Is Tender

simmer chicken until tender

Now that the aromatic brown sauce is simmering, it's time to nestle the chicken back into the pan.

Gently lower the chicken pieces into the simmering liquid, ensuring they're completely submerged. This will allow the chicken to absorb all the delicious flavors of the sauce.

Maintain a gentle simmer, not a rapid boil, as that could make the chicken tough. Let the chicken cook for about 25-30 minutes, or until it's fall-off-the-bone tender.

You'll know it's done when the meat easily pulls away from the bone. As the chicken simmers, the sauce will thicken and become rich and velvety.

Advertisement

Give the pan a gentle stir every now and then to ensure even cooking. The aroma wafting through your kitchen will have your mouth watering in anticipation!

Soon, you'll have perfectly cooked chicken in a luscious brown sauce, ready to serve over fluffy rice or crusty bread.

Step 4. Add Seasonings and Herbs

seasonings and herbs addition

To deepen the flavor profile, you'll want to add some fragrant seasonings and herbs to the simmering sauce.

Begin by stirring in a teaspoon of ground cumin – its earthy, slightly smoky notes will complement the chicken beautifully.

Next, add a sprinkle of dried oregano, whose woodsy aroma will infuse the dish with Mediterranean flair.

Don't forget the garlic! Mince a couple of cloves and toss them in. As the garlic sizzles, it'll release its pungent yet delightful scent, making your kitchen smell absolutely amazing.

Advertisement

For a touch of freshness, tear in a handful of chopped parsley right at the end. The vibrant green flecks and bright, herbaceous taste will liven up the whole dish.

Step 5. Finish by Adjusting Consistency

adjust consistency as needed

With the seasonings and herbs incorporated, it's time to adjust the consistency of the sauce to your liking. You'll want a thick and velvety texture that coats the chicken beautifully.

Start by adding a bit of the reserved cooking liquid, a few tablespoons at a time, and giving it a good stir. This will help loosen up the sauce and blend everything together seamlessly.

Keep an eye on the consistency, adding more liquid if it's too thick or letting it simmer a bit longer if it's too thin. You're aiming for a nice, saucy consistency that clings nicely to the chicken.

Don't be afraid to play around until you get it just right! Once you're satisfied, give it one final taste and adjust any seasonings as needed.

Then, you're ready to serve this delicious Galinha Ao Molho Pardo! Your family is going to love the rich, flavorful sauce paired with the tender chicken.

Advertisement

Final Thoughts

The chicken in brown sauce dish you've prepared is a comforting and satisfying meal. You can feel proud of your culinary skills! The rich, savory sauce complements the tender chicken perfectly, and the accompanying rice or potatoes make it a complete and nourishing dinner.

As you savor the final bites, consider how versatile this dish can be. You could experiment with different herbs and spices to tweak the flavor profile.

Or, you might add some vegetables like mushrooms or carrots to make it even heartier. The possibilities are endless!

This recipe is a keeper, so be sure to add it to your repertoire. Whenever you're craving a cozy, homemade meal, you can turn to this chicken in brown sauce.

It's sure to become a new family favorite that you'll enjoy making again and again.

Advertisement

Frequently Asked Questions

How Long Does Galinha Ao Molho Pardo Take to Prepare?

To prepare this dish, you'll need about an hour and a half. The active cooking time is relatively short, but the simmering process takes some time to achieve the desired tenderness and flavor.

What Are the Essential Ingredients in Galinha Ao Molho Pardo?

The essential ingredients in this dish are chicken, onions, tomatoes, garlic, herbs, and a savory brown sauce. You'll also need some oil or butter to cook the ingredients. With these key elements, you can create a flavorful and satisfying meal.

Can Galinha Ao Molho Pardo Be Made in Advance?

Absolutely! You can prepare this dish ahead of time. The flavors will meld together beautifully, and it'll be even more delicious when you reheat it. Just be sure to store it properly in the fridge or freezer.

What Side Dishes Pair Well With Galinha Ao Molho Pardo?

When pairing side dishes with a hearty stew, you'll want to choose accompaniments that complement the flavors and textures. Consider serving it with fluffy white rice, roasted vegetables, or a fresh, crisp salad for a balanced and delicious meal.

Is Galinha Ao Molho Pardo a Traditional Brazilian Dish?

Yes, galinha ao molho pardo is considered a traditional Brazilian dish. It's a popular chicken stew from the northeastern region, featuring a rich, savory sauce that's often served with rice, beans, and farofa.

Advertisement
Continue Reading

Brazilian Cuisine

Caldeirada

You’ll be captivated by the aromatic and flavorful Caldeirada, a traditional Portuguese seafood stew that’s been delighting taste buds for centuries.

Published

on

portuguese fish stew recipe

Caldeirada is a wonderfully comforting seafood stew that's been delighting Portuguese folks for centuries. It all started with clever fishermen, using the abundant local seafood and veggies to create a hearty, tomato-based broth. Over time, the dish evolved with unique regional twists, each reflecting the diverse culinary traditions across Portugal's coastline. Today, Caldeirada is a beloved part of Portuguese cuisine, symbolizing the warmth and richness of their maritime heritage. It's a truly delightful dish that'll have you eager to explore even more of Portugal's culinary wonders.

Key Takeaways

  1. Caldeirada is a traditional Portuguese seafood stew originating from the country's rich maritime history and coastal culinary traditions.
  2. The dish features a variety of fresh seafood like fish, shellfish, and octopus, cooked in a rich, tomato-based broth with herbs and spices.
  3. Caldeirada has evolved over centuries with regional variations, reflecting the diverse culinary influences across different parts of Portugal.
  4. Preparing and sharing Caldeirada is a cherished part of the Portuguese culinary tradition, symbolizing the comfort and warmth of the country's cuisine.
  5. Caldeirada encourages the exploration of regional ingredients and traditional cooking methods, offering a balance of flavors for a comforting dining experience.

History

Caldeirada, a beloved seafood stew native to Portugal, traces its roots to the country's rich maritime history. For centuries, Portuguese fishermen braved the open seas, returning with bountiful catches of fresh fish and shellfish.

These hardworking sailors would gather their daily haul, tossing it into a large pot along with local vegetables, herbs, and spices, creating a hearty, aromatic dish that nourished both body and soul.

Over time, this simple but delicious meal evolved, with different regions developing their own unique takes on the classic caldeirada.

Whether enjoyed seaside or inland, this time-honored recipe remains a cherished part of Portuguese culinary tradition, connecting generations through the flavors of the sea.

Today, caldeirada continues to delight both locals and visitors, a tasty testament to Portugal's enduring seafaring legacy.

Advertisement

Recipe

Caldeirada is a traditional Portuguese seafood stew that originated in the coastal regions of the country. It's a hearty and flavorful dish that showcases the bountiful seafood available in the local waters.

The key to a delicious Caldeirada is the careful selection and combination of fresh, high-quality seafood. This dish typically features a variety of fish, shellfish, and even octopus, all simmered together in a rich, tomato-based broth seasoned with aromatic herbs and spices.

Ingredients:

  • 1 lb cod fillets, cut into chunks
  • 1 lb clams, scrubbed
  • 1 lb shrimp, peeled and deveined
  • 1 lb mussels, scrubbed and debearded
  • 1 lb octopus, cleaned and cut into bite-sized pieces
  • 3 tomatoes, diced
  • 1 onion, diced
  • 3 cloves garlic, minced
  • 1 cup white wine
  • 2 cups fish or vegetable stock
  • 2 bay leaves
  • 1 tsp paprika
  • 1 tsp dried oregano
  • Salt and pepper to taste
  • Chopped parsley for garnish

In a large pot or Dutch oven, sauté the onion and garlic in a bit of olive oil over medium heat until translucent. Add the tomatoes, wine, stock, bay leaves, paprika, and oregano.

Bring the mixture to a simmer and let it cook for about 10 minutes to allow the flavors to meld.

Next, add the seafood to the pot in the following order: first the cod, then the clams, shrimp, mussels, and finally the octopus. Cover the pot and let the seafood cook until it's all opaque and cooked through, about 15-20 minutes.

Advertisement

Discard any unopened clams or mussels. Season the stew with salt and pepper to taste.

Serve the Caldeirada immediately, garnished with chopped parsley. This dish is best enjoyed with crusty bread to soak up the flavorful broth. For an authentic experience, pair it with a crisp, chilled white wine.

Cooking Steps

First, you'll need to gather and prepare all your tasty ingredients.

Next, you'll add the seafood to the pot and let it simmer in the broth until it's cooked through.

Step 1. Gather and Prepare Ingredients

gather and prepare ingredients

To prepare for the flavorful Caldeirada dish, gather your array of fresh seafood and aromatic vegetables. You'll need a mix of white fish, shrimp, and clams or mussels. Rinse the seafood and set it aside.

Next, chop onions, garlic, bell peppers, and tomatoes. Don't forget to peel and slice potatoes too. Have all your ingredients ready to go, as the cooking process moves quickly.

Advertisement

In a large pot, sauté the onions and garlic until fragrant. Add the bell peppers and tomatoes, letting them soften. Toss in the potatoes and just enough water to cover. Simmer until the potatoes are tender.

Now it's time for the seafood! Gently place the fish, shrimp, and clams or mussels into the pot. Season with salt, pepper, and a splash of white wine or vinegar. Cover and cook until the seafood is cooked through.

Serve your steaming hot Caldeirada, and enjoy the flavors of the sea!

Step 2. Add Seafood

incorporate seafood ingredients

Now, gently add the fish, shrimp, and clams or mussels into the simmering pot.

First, carefully place the chunks of white fish into the aromatic broth. They'll soak up all those wonderful flavors!

Next, toss in the tender shrimp, letting them cook until they turn a vibrant pink.

Advertisement

Don't forget the juicy clams or mussels – they'll open up and release their delectable juices as they steam.

Stir everything together, making sure each piece of seafood is submerged. The scents wafting through your kitchen will have your mouth watering!

Slowly, the seafood will become flaky and the shells will pop open, signaling that your caldeirada is ready.

Keep an eye on the pot, gently nudging anything that needs a little more time.

Soon, you'll have a delectable medley of the ocean's bounty, all coming together in one incredibly tasty dish. Yum!

Advertisement

Step 3. Simmer Seafood in Broth

simmer seafood in broth

Gently lower the chunks of white fish into the simmering aromatic broth, allowing them to soak up the wonderful flavors. Toss in the shrimp, clams, and mussels, letting them simmer until they've opened up and are cooked through. The broth will become rich with the essence of the sea as the seafood releases its natural juices.

Stir in the diced tomatoes, onions, and garlic, then season with a pinch of salt and a grind of black pepper. Let the mixture bubble away for 10-15 minutes, allowing the flavors to meld together. The broth should have a lovely, deep orange hue by now.

Tear in some fresh parsley leaves to add a bright, herbal note just before serving.

Ladle the aromatic caldeirada into bowls and enjoy with crusty bread for dipping. The tender seafood and flavorful broth make for a comforting and satisfying meal. Yum!

Step 4. Add Vegetables

incorporate additional vegetable ingredients

After simmering the seafood in the aromatic broth, you'll want to stir in the diced tomatoes, onions, and garlic. These colorful veggies will add a lovely burst of flavor and texture to your caldeirada. Don't be shy – pile them in! The tomatoes will lend a tangy sweetness, while the onions and garlic provide a savory backbone.

As the vegetables simmer, they'll meld together beautifully with the fish and broth.

Next, toss in some sliced potatoes. These starchy spuds will soak up all the delicious juices, making your caldeirada hearty and satisfying.

Advertisement

Feel free to experiment with other veggies too, like bell peppers or zucchini. Just chop them into bite-sized pieces so they cook through.

Keep an eye on the pot, giving everything a gentle stir every now and then. Before you know it, your caldeirada will be brimming with vibrant, tender vegetables that complement the seafood perfectly.

Step 5. Adjust Seasoning to Taste

season to your preference

With the vegetables incorporated, take a moment to taste the caldeirada and adjust the seasoning as needed. This is where you really make the dish your own!

First, give it a try with a spoon. What flavors stand out? Is it a bit too salty, or could it use a touch more? Don't be afraid to tweak things until it's perfect for your tastes.

If it needs a little more salt, simply add a pinch or two and stir it in. Taste again, and keep adjusting until you're satisfied.

Maybe it could use a bit more garlic or onion flavor? Try adding a sprinkle of dried herbs or a squeeze of lemon juice. You can even toss in some crushed red pepper flakes if you want a little kick.

Advertisement

The key is to keep tasting and experimenting until the caldeirada is seasoned just right. This is the fun part, so enjoy bringing your personal flair to the dish!

Final Thoughts

Ultimately, Caldeirada is a remarkable seafood stew that transports you to the coastal regions of Portugal. This hearty dish is a true celebration of the bountiful ocean, with its mix of fresh fish, succulent shrimp, and tender clams simmered in a flavorful broth.

The blend of spices, herbs, and acidic ingredients creates a harmonious symphony of tastes that will delight your palate.

Caldeirada isn't only delicious but also a reflection of the rich culinary heritage of Portugal. Each region may have its own unique twist, but the core elements remain the same – a comforting, satisfying meal that warms the soul.

Whether you're enjoying it with friends and family or savoring it on a cozy night in, Caldeirada is sure to leave you feeling content and eager to explore more of Portugal's incredible culinary wonders.

Advertisement

Frequently Asked Questions

Is Caldeirada a Soup or a Stew?

Is it a soup or a stew? That's a great question! Soups and stews can be tricky to distinguish, but they're generally differentiated by their thickness and ingredients. Let's dive in and explore the specifics of this dish.

What Kind of Fish Is Used in Caldeirada?

The type of fish used in this dish varies, but it's typically a mix of different types of white fish. You'd commonly find cod, hake, or monkfish in a traditional caldeirada.

Can Caldeirada Be Made With Vegetarian Ingredients?

Absolutely, you can make a vegetarian version of this dish. Instead of fish, you can use a variety of veggies like potatoes, bell peppers, and onions. It'll be just as flavorful and satisfying without the meat.

How Long Does Caldeirada Take to Prepare?

How long the dish takes to prepare depends on your culinary skills and the ingredients you choose. With careful planning and execution, you can have it ready in under an hour, making it a quick and satisfying meal.

Can Caldeirada Be Frozen for Later Use?

Yes, you can freeze caldeirada for later use. It's a great way to meal prep and have a delicious seafood stew on hand whenever you need it. Just make sure to let it cool completely before freezing.

Advertisement
Continue Reading

Brazilian Cuisine

Tacacá

Uncover the captivating flavors of Tacacá, a mouthwatering Brazilian dish that blends the zest of Amazonian herbs, the richness of tucupi sauce, and the delightful crunch of fried corn patties.

Published

on

traditional brazilian fish stew

Tacacá is a scrumptious Brazilian dish that'll delight your taste buds! Originating from the Amazon, it's made with mouthwatering ingredients like tucupi (a savory yellow sauce), jambu (a zesty Amazonian herb), and shrimp. The dish is then seasoned to perfection with garlic, pepper, and other spices. Once the corn is soaked, ground, and fried into crispy patties, you'll savor the combination of crispy exteriors and soft, flavorful centers. Tacacá is often served hot as a snack or appetizer, perfect for sharing with friends and family. You're sure to love this unique and delectable taste of Brazil – and that's just the beginning!

Key Takeaways

  • Tacacá is a traditional Brazilian dish originating from the Amazon basin, made with manioc, dried shrimp, garlic, and spices.
  • The dish has evolved over time, with different regional variations across Brazil, reflecting local tastes and ingredients.
  • Tacacá is typically served hot, often as a snack or appetizer, and is popular among both locals and tourists for its unique flavor profile.
  • The main ingredients in Tacacá include tucupi (yellow sauce from manioc), jambu (Amazonian herb), shrimp, and various spices.
  • Tacacá can be customized with different toppings and can be served as a snack or a light meal, often paired with rice or bread.

History

The origins of Tacaca can be traced back to the indigenous populations of the Amazon basin. These skilled cooks developed a delicious dish using manioc, a root vegetable native to the region. They'd grate the manioc, then press out the liquid to create a savory, starchy base.

Next, they'd add flavorful ingredients like dried shrimp, garlic, and spices, creating a warm, comforting meal. As time passed, the recipe spread throughout Brazil, evolving to suit local tastes.

In the state of Pará, for example, the dish became known as Tacaca, with a distinct broth made from the manioc liquid. Today, you can find Tacaca served in restaurants and street stalls across the country, a beloved part of Brazilian cuisine.

Whether you enjoy it for breakfast, lunch, or a tasty snack, this traditional dish offers a delicious taste of the Amazon's rich culinary heritage.

Recipe

Tacaca is a popular Brazilian dish, originating from the northern region of the country. It's a savory and comforting soup made with tapioca pearls, shrimp, and a variety of spices and herbs.

Advertisement

The creamy and hearty texture of the tapioca pearls, combined with the bold flavors of the shrimp and seasonings, make Tacaca a true delight for the senses. This dish is often enjoyed as a snack or a light meal, and is a staple in many Brazilian households.

  • 1 cup of tapioca pearls
  • 1 lb of peeled and deveined shrimp
  • 1 onion, diced
  • 3 cloves of garlic, minced
  • 1 tablespoon of annatto oil (or olive oil)
  • 1 teaspoon of cumin
  • 1 teaspoon of paprika
  • 1 teaspoon of salt
  • 1/4 cup of freshly chopped cilantro

In a large pot, heat the annatto oil (or olive oil) over medium heat. Add the diced onion and minced garlic, and sauté until fragrant and translucent.

Add the shrimp, cumin, paprika, and salt, and cook until the shrimp are pink and cooked through. Pour in enough water to cover the ingredients, and then add the tapioca pearls.

Stir continuously until the tapioca pearls have softened and the mixture has thickened. Remove from heat, and stir in the freshly chopped cilantro.

When serving Tacaca, it's important to note that the tapioca pearls will continue to absorb the liquid, so the consistency may thicken up over time.

You can adjust the consistency by adding more water or broth if desired. Additionally, some people enjoy adding a squeeze of lime juice or a sprinkle of additional seasonings to their individual servings.

Advertisement

Cooking Steps

First, you'll need to soak the corn overnight to soften it up.

Then, you'll grind the soaked corn into a smooth paste.

Next, you'll mix the corn with some lime to bring out the flavors.

Step 1. Soak the Corn Overnight

soak corn overnight thoroughly

Before you begin cooking the tacaca, you'll want to soak the corn overnight. This important step helps to soften the kernels, making them easier to work with later on.

Start by finding a large bowl or container that can hold all the corn you plan to use. Fill it with cool, clean water, then add the corn. Make sure all the kernels are fully submerged. Cover the bowl and let it sit at room temperature for at least 8 hours, or overnight if possible.

In the morning, you'll notice the corn has expanded and become more pliable. Drain the water and give the corn a gentle rinse. It's now ready for the next step in the tacaca-making process.

Advertisement

Soaking the corn is a simple but crucial part of the recipe, so don't skip this step if you want your tacaca to turn out just right. With the corn softened and prepped, you can move on to grinding it into a flour.

Step 2. Grind the Soaked Corn

grind soaked corn thoroughly

With the corn soaked and softened, it's time to grind it into a fine flour. You'll need a sturdy mortar and pestle or a food processor for this step. Carefully transfer the softened kernels into your chosen tool, making sure not to spill any.

Then, start grinding or pulsing the corn until it becomes a smooth, powdery flour. Don't be afraid to put some elbow grease into it – the more thoroughly you grind the corn, the finer and more consistent the flour will be.

Once you've achieved the desired texture, transfer the ground corn flour to a clean bowl or container. You may need to do this in batches, depending on the size of your mortar or food processor.

Be mindful of any stray bits that might've escaped – you want to collect every last bit of that precious cornmeal! With the corn now ground, you're one step closer to creating your delicious Tacaca.

Step 3. Mix With Lime

mix ingredients with lime

The next crucial step in the Tacaca preparation involves the integration of lime. You'll want to carefully measure out the right amount of lime to perfectly complement the soaked corn. Don't be afraid to get a little messy – this is where the real magic happens!

First, take the ground corn and place it in a large bowl. Slowly sprinkle in the lime, mixing it in with your hands to ensure an even distribution. The lime will react with the corn, creating a delightful chemical reaction that gives Tacaca its signature flavor.

Advertisement

Keep mixing until the mixture takes on a smooth, creamy texture.

Now, you can add any other seasonings or ingredients to really make the Tacaca your own. Perhaps a pinch of salt, or a dash of your favorite spice? Get creative and have fun with it!

The key is to keep tasting and adjusting until you achieve the perfect balance of flavors. Once you're satisfied, you're ready to move on to the next step. Tacaca is coming together beautifully!

Step 4. Form Tacaca Patties

forming tacaca patties

Now that you've perfectly mixed the corn and lime, it's time to start forming the Tacaca patties.

Grab a handful of the corn mixture and gently shape it into a small, round patty about the size of your palm. Be careful not to squeeze it too tightly – you want the patty to have a nice, fluffy texture.

Once you've made your first patty, place it on a clean surface.

Advertisement

Continue forming the rest of the mixture into patties, lining them up neatly. Don't worry if they're not all exactly the same size – that's part of the charm of homemade Tacaca!

When you've made as many patties as you can from the mixture, it's time to start cooking them.

Heat up a large skillet or griddle over medium heat, and carefully transfer the patties onto the hot surface.

Cook for a few minutes on each side, until they're golden brown and crispy on the outside.

Serve your freshly made Tacaca patties warm, and enjoy the delicious flavors of this traditional dish!

Advertisement

Step 5. Fry the Tacaca Patties

fry tacaca patties now

Heat a large skillet or griddle over medium heat. Once it's nice and hot, add a few tablespoons of oil to the pan.

Carefully place the tacaca patties into the sizzling oil. Fry them for 2-3 minutes per side, or until they're golden brown and crispy. Be sure to flip them gently so they don't fall apart.

While the patties are frying, keep an eye on them and adjust the heat if needed to prevent burning. The oil should be hot enough to create a delicious, crunchy exterior, but not so hot that the centers stay raw.

When the patties are done, use a slotted spoon to transfer them to a paper towel-lined plate. This will help soak up any excess oil.

Serve the tacaca patties warm, and enjoy their amazing flavor and texture! They're the perfect snack or side dish.

Final Thoughts

As we reach the conclusion of this article on Tacacá, it's important to reflect on the key takeaways.

Advertisement

You've learned how to fry the delicious Tacacá patties to perfection, creating a crispy exterior and a soft, savory interior. Remember to use high-quality ingredients and follow the step-by-step instructions carefully for the best results.

While Tacacá may be a traditional dish, it's one that can be enjoyed by people of all ages. Serve it as a snack, appetizer, or even a light meal.

The versatility of Tacacá means you can get creative and experiment with different toppings or dipping sauces to suit your taste buds.

As you continue your culinary journey, don't hesitate to share your Tacacá creations with friends and family.

Who knows, you might even inspire them to try this unique and flavorful dish for themselves. Enjoy your delicious Tacacá and savor every bite!

Advertisement

Frequently Asked Questions

What Is the Origin of the Name "Tacacá"?

You're asking about the origin of the name "Tacaca." Unfortunately, without additional context, I don't have enough information to provide a definitive answer. The origin of place names can vary and require more details to determine its source.

How Long Has Tacacá Been a Traditional Dish?

How long has this traditional dish been around? It's a great question! The exact origins are unclear, but many believe it's been part of the local cuisine for centuries, passed down through generations. The dish has deep roots in the region's culinary traditions.

What Are the Typical Serving Sizes for Tacacá?

When serving a traditional dish, typical serving sizes can vary. Portion sizes often depend on the dish, the number of guests, and personal preferences. Consider your guests' appetites and the overall meal when determining an appropriate serving size.

Are There Any Health Benefits Associated With Tacacá?

Yes, many plant-based foods like tacaca can provide health benefits. They often contain beneficial nutrients and antioxidants that may support your overall wellness. While the specific benefits of tacaca are unclear, incorporating a variety of whole foods into your diet is generally recommended.

Can Tacacá Be Made Vegan or Vegetarian?

Yes, you can make a vegan or vegetarian version of this dish. By omitting any animal-derived ingredients and using plant-based alternatives, you can enjoy the flavors without compromising your dietary preferences.

Advertisement
Continue Reading
Advertisement

Affiliate Disclaimer
As an affiliate, we may earn a commission from qualifying purchases. We get commissions for purchases made through links on this website from Amazon and other third parties.

Advertisement

Latest

sweet and savory delight sweet and savory delight
Christmas Recipes1 min ago

Honey Glazed Ham

Joyfully elevate your holiday meal with a honey-glazed ham that promises a mouthwatering fusion of sweet and savory flavors. Continue...

non alcoholic cocktail alternatives non alcoholic cocktail alternatives
Graduations/Birthdays3 mins ago

Mocktails

Knock yourself out with these vibrant, bubbly mocktails that let you enjoy the sophisticated taste of cocktails without the effects...

ice cream soda bar ice cream soda bar
Graduations/Birthdays8 mins ago

Soda Float Bar

Kicking it old-school with soda float bars, a classic American delight that blends carbonated fizz and rich ice cream, uncovering...

delicious nutritious blended beverages delicious nutritious blended beverages
Graduations/Birthdays13 mins ago

Smoothies

Kicking off your day with a nourishing smoothie is an easy way to pack in essential vitamins, minerals, and fiber,...

refreshing chilled beverage choice refreshing chilled beverage choice
Graduations/Birthdays19 mins ago

Iced Tea

You'll be amazed at the refreshing delight of iced tea, a timeless summertime favorite that's easy to prepare and perfect...

refreshing citrus beverage delight refreshing citrus beverage delight
Graduations/Birthdays24 mins ago

Lemonade

Whisking up a batch of homemade lemonade is a refreshing summertime ritual that has captivated palates for centuries, but the...

refreshing mixed fruit beverage refreshing mixed fruit beverage
Graduations/Birthdays30 mins ago

Fruit Punch

Fruit punch, a timeless delight tracing its origins to colonial exploration, offers a vibrant, customizable experience that will leave you...

delicious s mores dessert station delicious s mores dessert station
Graduations/Birthdays35 mins ago

S’mores Bar

Gather the perfect ingredients and craft your own delightful s'mores with endless flavor combinations, from milk chocolate to white chocolate...

creamy italian dessert delight creamy italian dessert delight
Graduations/Birthdays41 mins ago

Panna Cotta

Originating in the Piedmont region of Italy, panna cotta is a delightfully creamy and versatile dessert that has captured the...

delicious baked fruit dessert delicious baked fruit dessert
Graduations/Birthdays47 mins ago

Fruit Cobbler

Yes, you can discover the surprising origins and irresistible flavors of this classic American dessert by exploring the history and...

sweet baked treats recipe sweet baked treats recipe
Graduations/Birthdays53 mins ago

Sugar Cookies

Flavorful and versatile, sugar cookies have captivated bakers for generations, with a rich history and perfected techniques waiting to be...

decadent chocolate dessert delight decadent chocolate dessert delight
Graduations/Birthdays58 mins ago

Chocolate Mousse

Blissful spoonfuls of velvety chocolate mousse will transport you to a world of decadence, beckoning you to discover the rich,...

Advertisement

Trending