Cheese bread is a delicious treat that combines two of the world's favorite foods: bread and cheese! You'll love how it's crispy on the outside and gooey on the inside. This tasty snack has been around for centuries, with roots in ancient Rome and Brazil. It's easy to make at home, too. Just mix flour, yeast, and cheese, then bake until golden brown. You can add herbs or spices to make it even yummier. Serve it warm as a snack, appetizer, or side dish. There's so much more to discover about this cheesy delight, from its fascinating history to mouthwatering variations.
Key Takeaways
- Cheese bread is a baked good that incorporates cheese into the dough or as a topping.
- It has ancient origins, with variations found in many cultures, including Brazilian pão de queijo.
- Common ingredients include flour, yeast, cheese, and sometimes herbs or spices for added flavor.
- Preparation typically involves mixing ingredients, kneading dough, allowing it to rise, and baking until golden brown.
- Cheese bread can be served as a snack, appetizer, or side dish, and pairs well with various meals.

Alpha Grillers Meat Shredder Claws - Grilling Accessories Fathers Day Gift for Dad - BBQ Bear Claws Puller for Shredding Pulled Pork Chicken Smoker Grilling Gifts for Men Him Husband Boyfriend
Heavy-Duty Meat Claws - Alpha Grillers meat shredder claws are heavy-duty BBQ tools designed for shredding pulled pork,...
As an affiliate, we earn on qualifying purchases.
History
Throughout the ages, cheese bread has been a beloved staple in many cultures. You might be surprised to learn that this tasty treat has roots in ancient civilizations! The Romans were among the first to mix cheese into their bread dough, creating a savory delight that quickly spread across Europe.
As time went on, different regions put their own spin on cheese bread, making it uniquely theirs. In Brazil, you'll find a special type of cheese bread called "pão de queijo." It's made with cassava flour and has a chewy, gooey texture that's absolutely irresistible! This Brazilian favorite dates back to the 18th century when African slaves created it using leftover cheese and cassava, a root vegetable.
Over time, it became a popular snack throughout the country. In the United States, you've probably enjoyed cheese bread in various forms, from garlic cheese bread to stuffed crust pizza. These modern twists on the classic recipe show how cheese bread has evolved to suit different tastes and preferences.
No matter where you go, you're likely to find a delicious version of this timeless treat!

Alpha Grillers Meat Thermometer Digital – Instant Read Food Thermometer for Cooking & Grilling – Professional Kitchen Fathers Day Gift for Dad Men Him Husband
Instant Read Food Thermometer | Our instant read thermometer features a temperature probe and advanced, highly accurate technology...
As an affiliate, we earn on qualifying purchases.
Recipe
Cheese bread is a delightful and versatile treat that combines the comforting flavors of freshly baked bread with the savory richness of cheese. This recipe yields a soft, fluffy loaf with pockets of melted cheese throughout, making it perfect for serving as a side dish, snack, or even as the base for a hearty sandwich. Keeping your kitchen clean while baking can enhance your overall experience; health benefits of clean homes contribute to a more enjoyable atmosphere.
Whether you're a seasoned baker or new to bread-making, this cheese bread recipe is straightforward and rewarding. The addition of cheese not only enhances the flavor but also contributes to the bread's moisture and texture. You can customize this recipe by using your favorite cheese varieties or adding herbs and spices to suit your taste preferences.
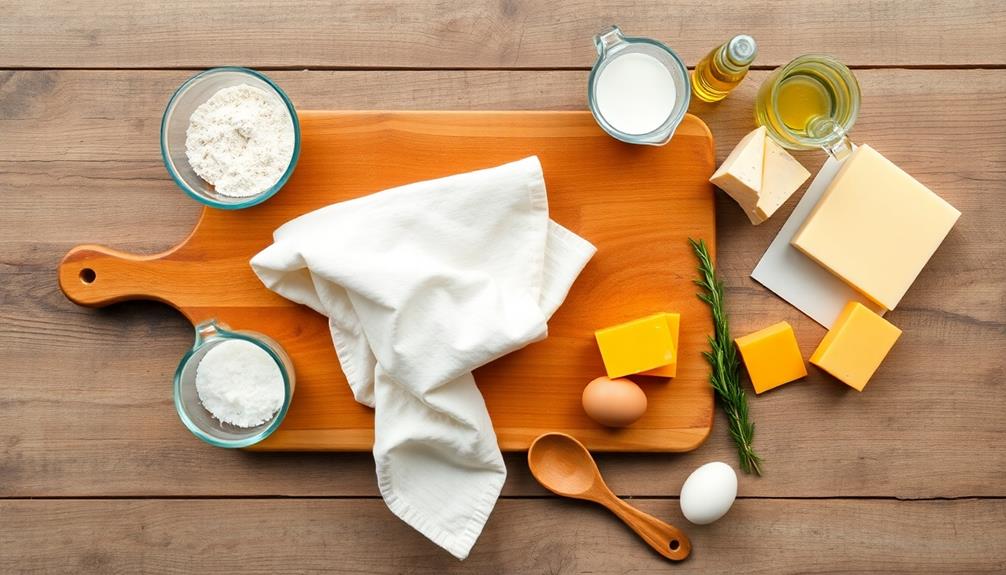
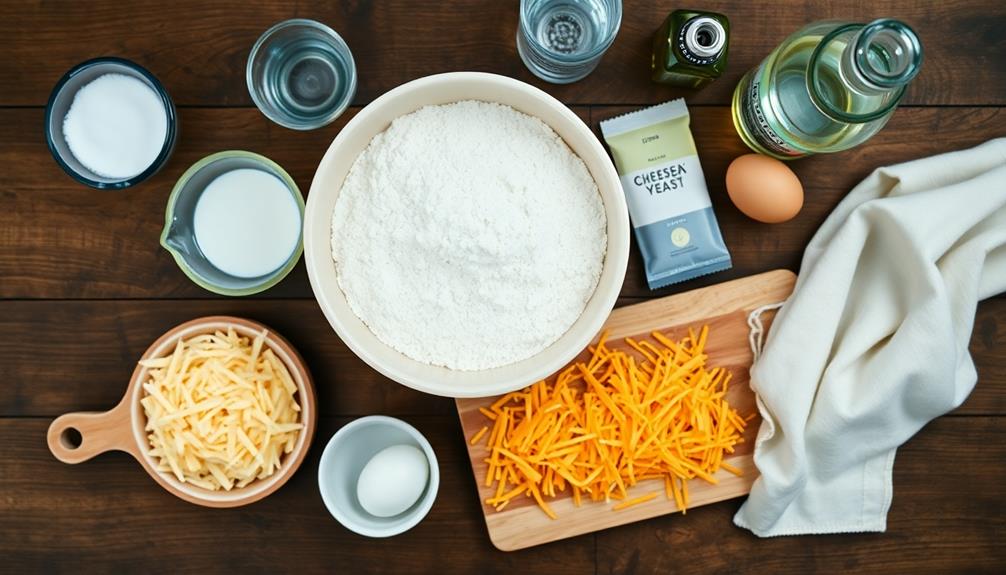
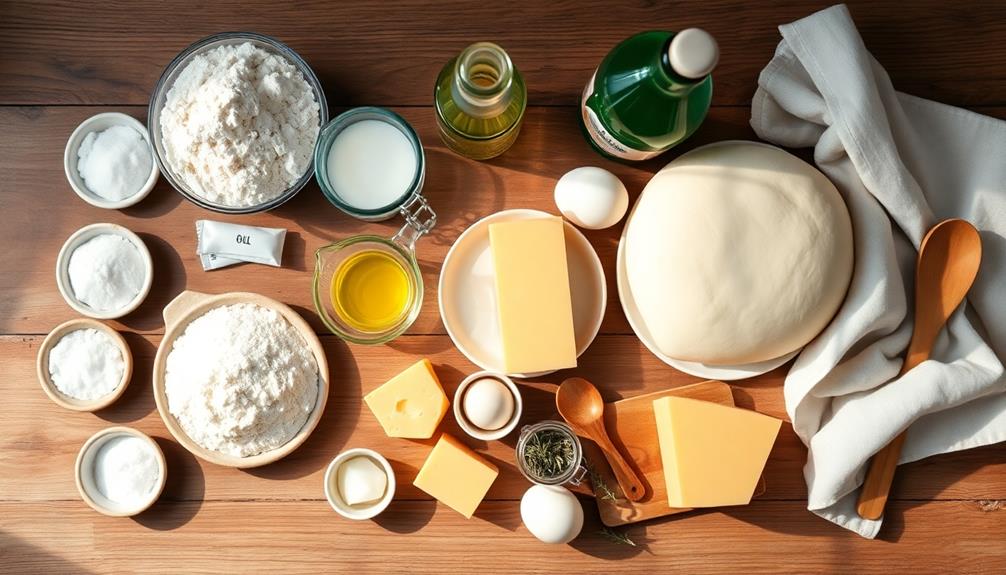
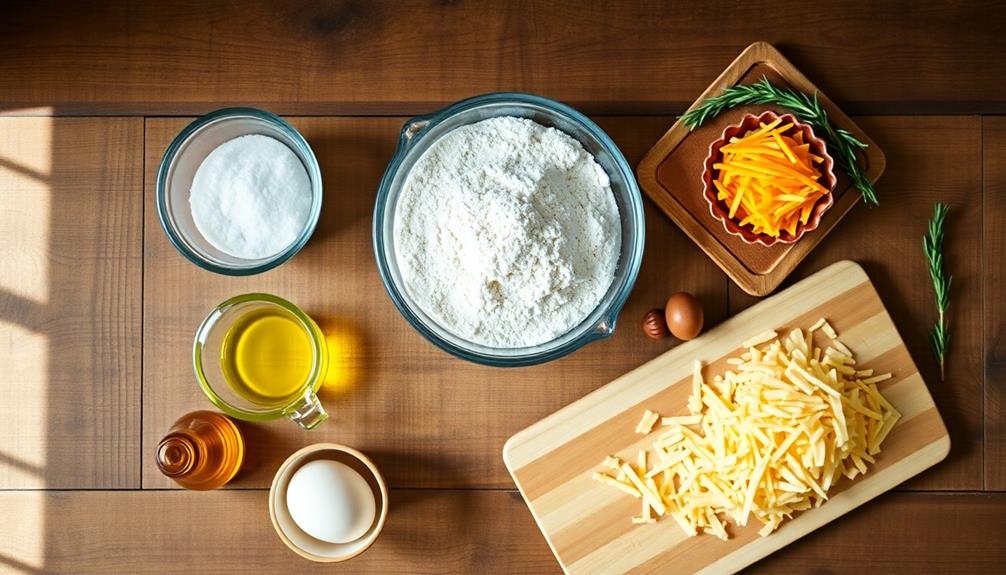
- 3 cups all-purpose flour
- 1 tablespoon sugar
- 1 teaspoon salt
- 1 tablespoon active dry yeast
- 1 cup warm water
- 2 tablespoons olive oil
- 2 cups shredded cheese (cheddar, mozzarella, or a blend)
- 1 egg (for egg wash)
- Optional: 1 teaspoon dried herbs (rosemary, thyme, or oregano)
In a large mixing bowl, combine the flour, sugar, salt, and yeast. Add warm water and olive oil, then mix until a shaggy dough forms. Knead the dough on a floured surface for about 10 minutes until smooth and elastic.
Place the dough in a greased bowl, cover with a damp cloth, and let it rise in a warm place for about an hour or until doubled in size. Punch down the dough, knead in the shredded cheese, and shape into a loaf.
Place the loaf in a greased bread pan, cover, and let it rise for another 30 minutes. Preheat the oven to 375°F (190°C). Brush the top of the loaf with beaten egg for a golden crust. Bake for 30-35 minutes or until the bread is golden brown and sounds hollow when tapped on the bottom.
For the best results, use freshly shredded cheese rather than pre-shredded varieties, as they melt more evenly. Experiment with different cheese combinations to create unique flavors. To prevent the cheese from sticking to the pan, lightly dust the bottom of the pan with cornmeal before placing the dough.
Allow the bread to cool for at least 15 minutes before slicing to ensure the cheese sets properly. This bread is best enjoyed fresh but can be stored in an airtight container for up to 3 days or frozen for longer storage.
2 in 1 Kitchen Scissors for Food – Stainless Steel 9.5" Tomato Knife Chops Vegetables, Fruit, Cheese, Meat in Seconds | Dishwasher Safe Cutting Board Scissors with Safety Lock – Kitchen Gift for Dad
Skip the Knife & Board: This tomato cutter slices cheese, herbs, & soft meats in seconds (NOT for...
As an affiliate, we earn on qualifying purchases.
Cooking Steps
You'll start by preheating your oven to 375°F, which ensures it's nice and hot when you're ready to bake.
Next, you'll mix the dry ingredients together in a bowl, and then blend in the melted butter until the mixture looks crumbly.
Step 1. Preheat Oven to 375°F
To kick off the baking process, preheat your oven to 375°F (190°C). This step is super important because it ensures your cheese bread will cook evenly and rise perfectly.
While you're waiting for the oven to heat up, you can start preparing your ingredients and mixing bowl.
Make sure you've got an oven thermometer handy to double-check the temperature. Sometimes ovens can be a bit off, and you don't want your cheese bread to burn or come out undercooked.
If you're using a convection oven, you might want to lower the temperature by about 25°F, as these ovens tend to cook things faster.
Don't forget to position your oven rack in the middle. This will help your cheese bread bake evenly on all sides.
It's also a good idea to clear out any pots or pans you might've stored in the oven – we don't want any surprises!
Once your oven's preheated, you'll be all set to start mixing your ingredients and shaping your delicious cheese bread.
Step 2. Mix Dry Ingredients Together

Now that your oven's preheating, it's time to tackle the dry ingredients. Grab a large mixing bowl and get ready to combine the stars of our cheese bread show!
You'll need tapioca flour, which is the main ingredient that gives pão de queijo its unique texture. Measure out 2 cups and pour it into your bowl.
Next, add a pinch of salt to enhance the flavors. Don't forget the baking powder – it's the secret to making your bread puff up nicely! Add 1 teaspoon and watch the magic happen later. If you're feeling adventurous, you can sprinkle in some dried herbs like oregano or thyme for extra flavor.
Now, here's the fun part: whisk everything together! Use a fork or a whisk to mix the dry ingredients thoroughly.
Make sure there are no lumps and that everything's evenly distributed. This step is crucial because it ensures your cheese bread will have a consistent texture throughout. As you're mixing, imagine how delicious your pão de queijo will taste when it's fresh out of the oven!
Step 3. Blend in Melted Butter
With our dry ingredients thoroughly mixed, it's time to add some richness to our cheese bread. Grab your melted butter and get ready to make magic happen! Pour the warm, golden liquid into your bowl of dry ingredients. You'll notice how the butter immediately starts to coat the mixture, giving it a lovely sheen.
Now, roll up your sleeves and dive in with clean hands. It's time to get messy! Gently knead the butter into the dry ingredients, feeling the warmth as you work.
Don't worry if it seems a bit crumbly at first – that's perfectly normal. Keep blending and squeezing until everything comes together. You'll know you're done when the dough feels smooth and pliable, like soft clay.
As you blend, take a moment to appreciate the amazing aroma. The butter's rich scent will mingle with the cheesy goodness, making your kitchen smell divine.
Step 4. Add Eggs and Milk
The next crucial step in our cheese bread journey involves adding eggs and milk to the mixture. You'll want to crack open a few eggs and pour them into the bowl with your blended ingredients. Don't worry if you get a bit of shell in there – you can fish it out with a spoon!
Next, it's time to add some milk. This will help make your cheese bread nice and moist. As you pour in the milk, you'll notice the mixture starting to come together. It might look a bit runny at first, but don't panic! That's exactly how it should be.
Now, grab your trusty wooden spoon or whisk and start stirring. You'll want to mix everything until it's well combined and smooth. It's like you're giving the ingredients a little dance party in the bowl!
Keep stirring until you can't see any lumps of flour or streaks of egg. The batter should be thick and gooey, kind of like pancake batter. If it seems too thick, you can add a splash more milk. Too thin? Just sprinkle in a bit more flour. You're doing great!
Step 5. Form Dough Into Small Balls
Scoop up a handful of the delicious cheese bread dough and start forming it into small, bite-sized balls. Aim for each ball to be about the size of a ping-pong ball, which is perfect for popping into your mouth in one go.
Once you’ve formed all the dough into balls, place them on a greased baking sheet and let them rise for another 30 minutes. While they’re rising, preheat your oven to 350°F. Once they’ve risen, pop them in the oven and bake for 15-20 minutes, or until they’re golden brown and delicious. Now, if you’re looking for another delicious recipe to try, I highly recommend this recipe for delicious codfish cake. It’s a crowd-pleaser every time!
As you roll the dough between your palms, you'll feel its sticky texture becoming smoother and more uniform.
Don't worry if your first few balls aren't perfect – you'll get the hang of it quickly! Place each ball on a baking sheet lined with parchment paper, leaving a little space between them. They'll puff up as they bake, so give them room to grow.
If the dough starts sticking to your hands, just wet them slightly with cool water. This'll make the rolling process easier and keep the balls nice and round.
Keep going until you've used up all the dough. You'll probably end up with about 20 to 30 balls, depending on how big you've made them.

AMMZO Meat Thermometer Digital, Instant Read Food Thermometer for Cooking, Grilling, Baking, Frying & Candy Making, Essentials Kitchen Gadgets Accessory, Gifts for Men Women Dad Mom Birthday
ULTRA-FAST & HIGHLY ACCURATE: With a precision sensor, this Digital meat thermometer reads temperature in 2 to 4...
As an affiliate, we earn on qualifying purchases.
Final Thoughts
Cheese bread is a versatile and delicious treat that's sure to please any crowd. You've now learned how to make this tasty Brazilian snack, and it's time to enjoy the fruits of your labor!
Remember, practice makes perfect, so don't worry if your first batch isn't exactly like the ones you've tasted before. Each time you make pão de queijo, you'll get better at it.
Feel free to experiment with different types of cheese or add herbs for extra flavor. You can serve these warm, cheesy puffs as a snack, appetizer, or even as a side dish with your favorite meal.
They're great for parties, family gatherings, or just a cozy night in. If you have leftovers, store them in an airtight container and reheat them in the oven for a few minutes to bring back that crispy exterior and gooey interior.
Don't forget to share your cheese bread with friends and family – they'll be amazed at your baking skills! So go ahead, enjoy your homemade pão de queijo, and savor every bite of this Brazilian delight.
Frequently Asked Questions
Can Pão De Queijo Be Frozen for Later Consumption?
Yes, you can freeze pão de queijo for later consumption. You'll want to freeze them before baking. When you're ready to eat, just pop the frozen balls directly into a preheated oven. They'll turn out delicious and fresh.
Are There Any Gluten-Free Variations of Pão De Queijo?
You're in luck! Traditional pão de queijo is naturally gluten-free, as it's made with tapioca flour. You don't need to look for variations, as the original recipe already fits your gluten-free needs perfectly.
What Are the Best Cheese Substitutes for Lactose-Intolerant Individuals?
You'll find several great cheese substitutes for lactose intolerance. Try nutritional yeast, cashew cheese, or coconut-based options. Plant-based cheeses made from almonds or soy are also tasty alternatives. Don't forget about lactase enzyme supplements for occasional dairy indulgence.
How Long Does Pão De Queijo Stay Fresh at Room Temperature?
You'll want to eat your freshly baked cheese bread within 24 hours for the best taste and texture. If you've left it out longer, it's still safe to consume for up to 2-3 days at room temperature.
Can Pão De Queijo Be Made in an Air Fryer?
You can definitely make pão de queijo in an air fryer! It's a quick and easy method. You'll get a crispy exterior and chewy interior. Just adjust the temperature and time to ensure they're cooked through properly.