Beverage Deep Dives
Melon Spritz
Grab a glass and escape to the sun-drenched Mediterranean with the refreshing and sophisticated Melon Spritz – a harmonious blend of sweet melon, sparkling wine, and tart lime.
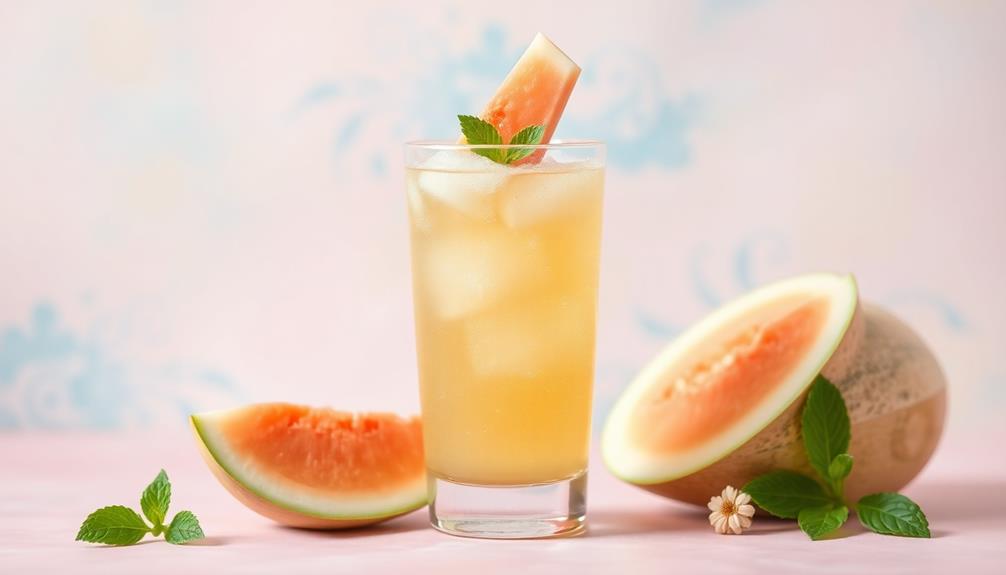
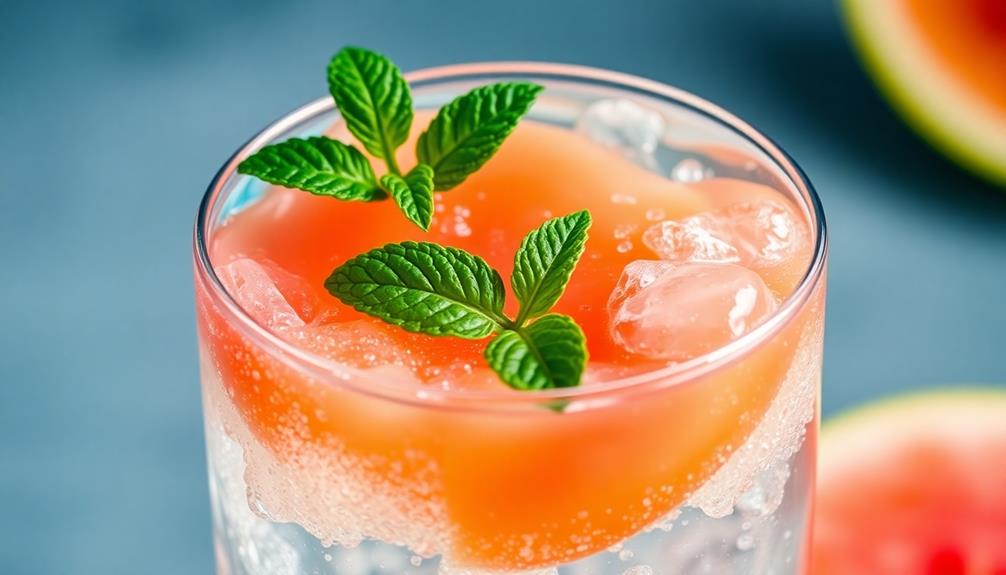
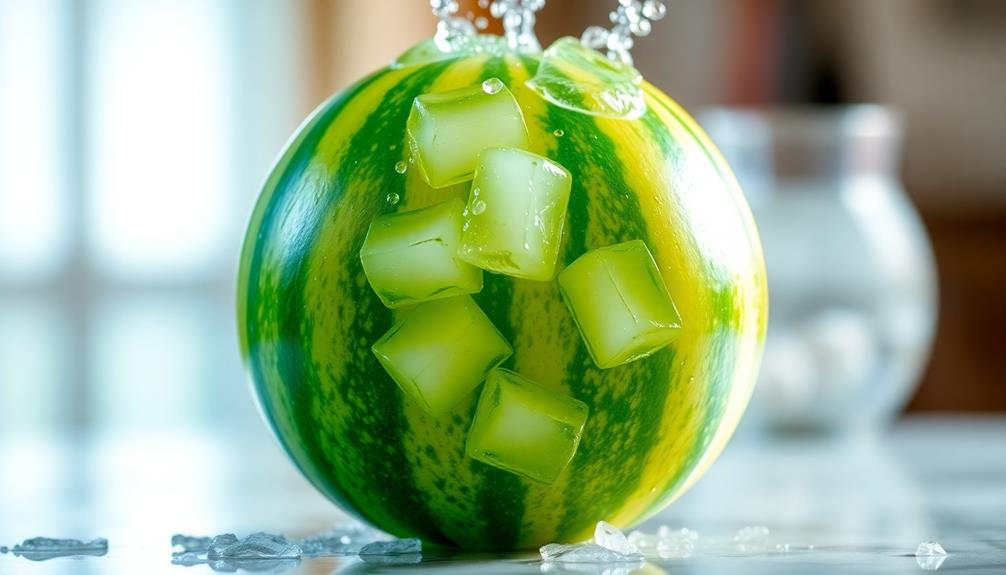
The melon spritz is a refreshing cocktail that transports you to the sun-drenched Mediterranean. Its origins trace back to Italy in the 1920s, when bartenders first experimented with blending sweet melon and effervescent sparkling wine. Today, this beloved summertime beverage offers a sophisticated twist on the classic spritz. You'll love the harmonious balance of the melon's natural sweetness, the sparkling wine's bubbly effervescence, and a splash of tart lime juice. Garnished with a sprig of mint, the melon spritz is a visually stunning treat for the senses. And if you're intrigued, you'll find the full step-by-step recipe details just ahead.
Key Takeaways
- The Melon Spritz is a refreshing cocktail that originated in Italy during the 1920s, combining the sweetness of melon with the effervescence of sparkling wine.
- The cocktail's core ingredients include ripe melon, dry sparkling wine, melon liqueur, and lime juice, creating a balanced and sophisticated flavor profile.
- The preparation involves muddling fresh melon, adding Aperol for bittersweet notes, shaking with ice, and topping with sparkling water for a bubbly finish.
- Melon Spritz has become a popular summertime favorite on cocktail menus worldwide, offering a twist on the classic spritz drink.
- The vibrant green hue and garnishes like mint leaves contribute to the Melon Spritz's visually appealing presentation, making it an ideal choice for social gatherings and celebrations.
History
The Melon Spritz has a history dating back to the 1920s, when bartenders in Italy began experimenting with fruit-based cocktails. They discovered that the refreshing, slightly sweet flavor of melon paired perfectly with the fizzy, effervescent nature of sparkling wine.
Over the years, the Melon Spritz has evolved, with different variations and techniques emerging, but the core elements – melon, sparkling wine, and a splash of something else – have remained.
Today, the Melon Spritz is a beloved summertime favorite, offering a light, sophisticated twist on the classic spritz. You can find it on cocktail menus across the globe, from beachside bars to chic rooftop lounges.
Whether you're sipping it on a hot day or enjoying it as an aperitif, the Melon Spritz is sure to transport you to a Mediterranean oasis, with its refreshing flavors and bubbly effervescence.
Recipe
The Melon Spritz is a refreshing and vibrant cocktail that combines the sweetness of melon with the effervescence of sparkling wine. This easy-to-make drink is perfect for warm weather gatherings or as a palate-cleansing aperitif.
To create the Melon Spritz, you'll need to start by preparing a melon puree. This can be made by blending fresh, ripe melon until it's smooth and creamy. The resulting puree will serve as the base for the cocktail, adding a burst of fruity flavor.
- 2 cups ripe melon, cubed
- 4 ounces dry sparkling wine
- 2 ounces melon liqueur
- 1 ounce freshly squeezed lime juice
- Mint leaves, for garnish
In a shaker filled with ice, combine the melon puree, melon liqueur, and lime juice. Shake vigorously until well-chilled. Strain the mixture into two chilled glasses and top each with 2 ounces of sparkling wine. Garnish with fresh mint leaves.
For best results, use a high-quality dry sparkling wine, such as Prosecco or Cava, to balance the sweetness of the melon and create a refreshing, effervescent experience.
Additionally, be sure to use ripe, flavorful melon for the puree to ensure the best possible taste.
Cooking Steps
Grab a cocktail shaker and get ready to craft a refreshing Melon Spritz.
First, muddle the melon to release its juices. Then, add a splash of Aperol and give it a good stir.
Now, toss in some ice and shake it all up vigorously.
Finally, strain the mixture into a chilled cocktail glass and top it off with fizzy soda water.
Get ready to sip on the perfect balance of sweet and bitter flavors!
Step 1. Muddle Melon in Cocktail Shaker
Grab a sturdy cocktail shaker and toss in a few juicy chunks of fresh melon. Use a muddler to gently press down on the melon, releasing its sweet juices.
Be careful not to over-muddle, as you don't want to end up with a mushy mess. Once the melon's flavors have infused the shaker, add the remaining ingredients – your preferred spirit, a splash of citrus, and a hint of sweetness.
Secure the lid and give the shaker a vigorous shake for 10-15 seconds. This will chill the cocktail and marry all the flavors together beautifully.
Strain the mixture into your serving glass, being sure to leave any pulp behind. Top it off with a splash of sparkling water or soda for a refreshing melon spritz.
Garnish with a fresh melon wedge or mint sprig, and enjoy this bright, summery cocktail.
Step 2. Add Aperol and Stir
Once the melon's vibrant flavors have been extracted, it's time to introduce a touch of bittersweet Aperol.
Pour in 1 ounce of Aperol into the cocktail shaker and give it a gentle stir. The Aperol's citrusy and slightly bitter notes will complement the fresh melon perfectly, creating a well-balanced and refreshing cocktail.
Be sure to stir the mixture slowly and gently, taking care not to over-dilute the drink. You want the Aperol to seamlessly integrate with the muddled melon, forming a harmonious blend of sweet and bitter.
After a few seconds of stirring, your Melon Spritz is ready for the next step.
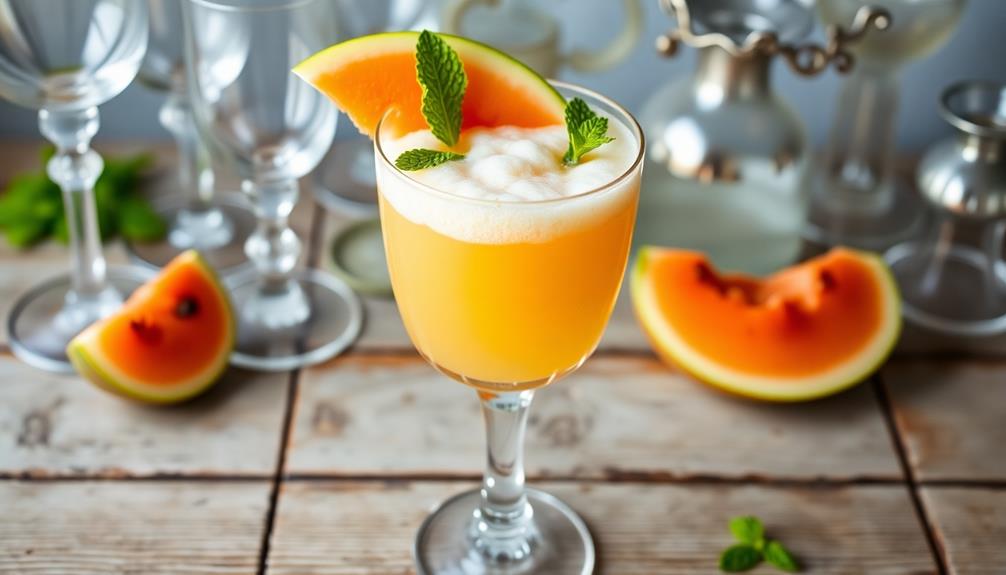
The addition of Aperol not only enhances the flavor profile but also contributes a vibrant orange hue to the cocktail.
This vibrant color will make your Melon Spritz visually appealing and sure to impress your guests.
Step 3. Add Ice and Shake Vigorously
With the Aperol now integrated, it's time to chill the Melon Spritz.
Grab a cocktail shaker and fill it with ice cubes. Pour in the melon liqueur and the Aperol mixture you prepared earlier. Give it a vigorous shake for about 10 seconds to thoroughly combine the ingredients and chill the drink.
Once shaken, strain the Melon Spritz into two chilled wine glasses or spritz glasses. You'll want to fill the glasses about three-quarters full.
Top each one off with a splash of sparkling wine or soda water. The carbonation will create a light, effervescent finish to the cocktail.
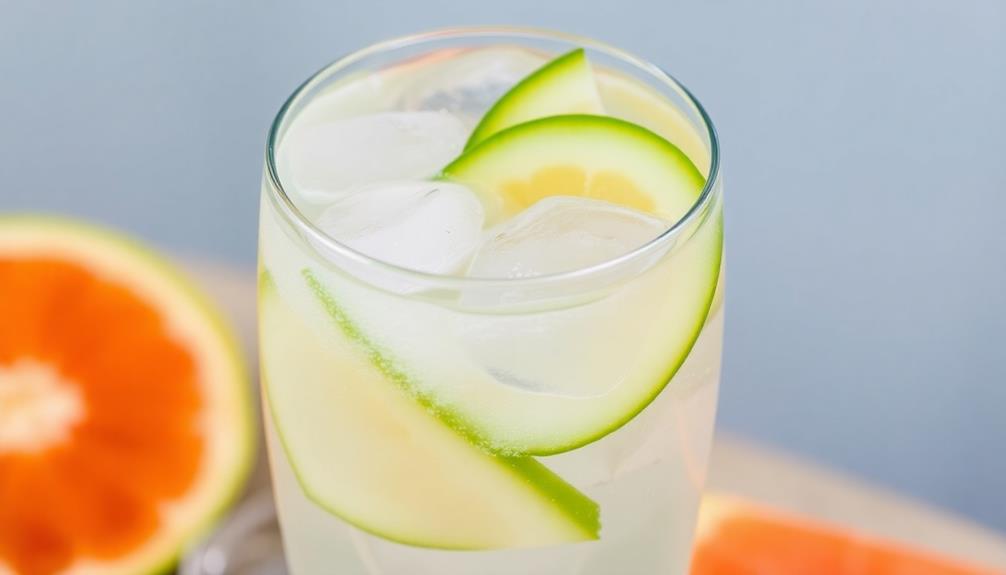
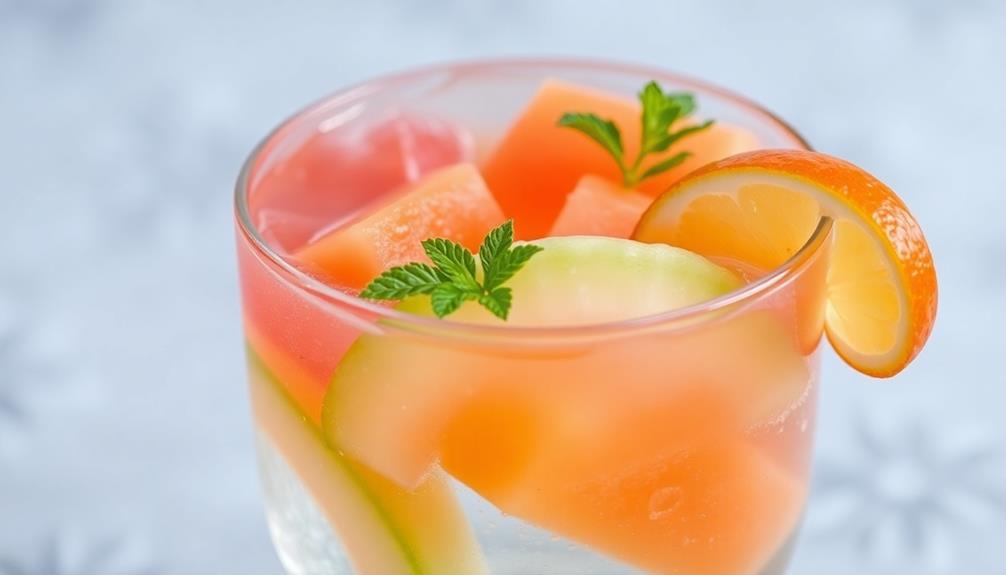
Garnish each glass with a thin slice of cantaloupe or honeydew melon to complement the fruit flavors.
Serve the Melon Spritz immediately while it's ice-cold and refreshing. The combination of the chilled melon liqueur, Aperol, and bubbly topper makes for a perfect warm-weather sipper.
Step 4. Strain Into Chilled Cocktail Glass
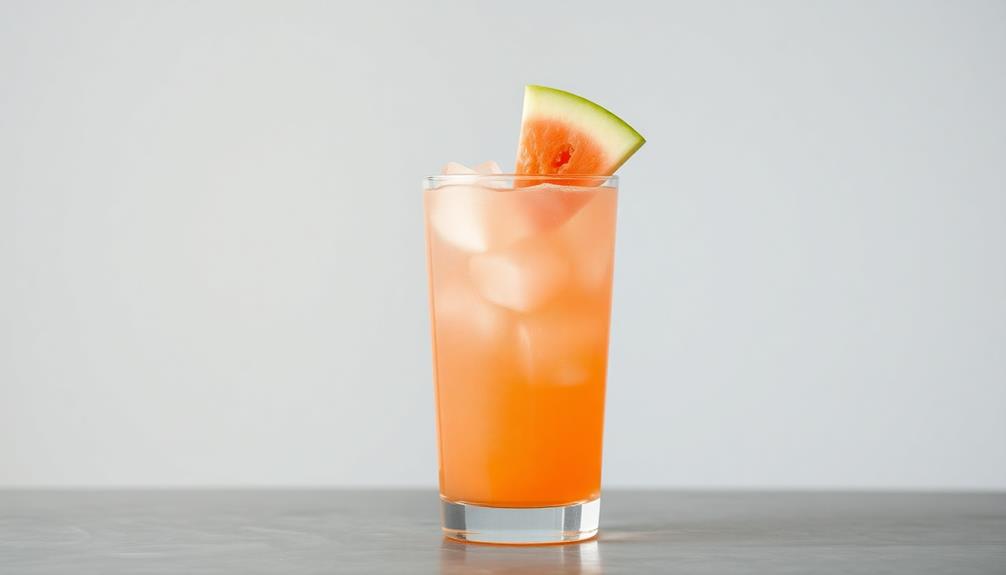
Strain the vibrant mixture into two chilled wine glasses or spritz glasses, filling them about three-quarters full. The crisp, refreshing liquid should glide into the glasses, creating a lovely layered effect.
Hold a mesh strainer over each glass and carefully pour the cocktail through, capturing any small pieces of fruit or ice. This step ensures a smooth, polished presentation in the final drink.
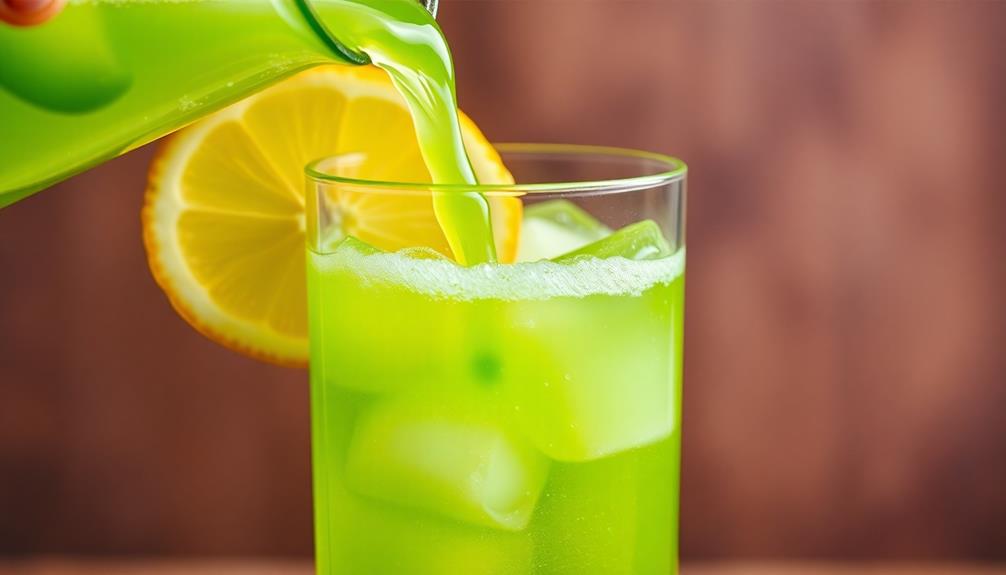
Once strained, the Melon Spritz is ready to enjoy. The pale green hue and gentle fizz will entice your senses.
Take a sip and savor the bright, fruity flavors of the melon liqueur and lemon juice, balanced by the lively carbonation. The cocktail's light, effervescent nature makes it wonderfully refreshing, perfect for sipping on a warm day or as a pre-dinner aperitif.
Garnish with a melon slice or lemon twist for a final flourish before serving.
Step 5. Top With Soda Water
After straining the vibrant mixture into the chilled glasses, top off each one with a splash of chilled soda water.
This final touch adds a refreshing fizz and lightens up the drink, balancing the sweetness from the melon.
Be sure to pour the soda in gently, as you don't want to disturb the beautiful layered look you've created.
Just a small amount is all you need – about 1-2 ounces per glass should do the trick.
The carbonation will lift the flavors and give the Melon Spritz a delightful spritziness.
Take a moment to admire the finished cocktail, with its enticing layers of color and texture.
Now it's time to grab a straw, take a sip, and savor the taste of summer.
Enjoy your chilled and bubbly Melon Spritz!
Final Thoughts
The Melon Spritz is a refreshing and versatile cocktail that can be enjoyed year-round. Whether you're lounging by the pool on a hot summer day or cozying up by the fireplace on a chilly evening, this effervescent libation is sure to delight your senses. For a unique twist on this classic cocktail, consider adding fresh herbs like basil and a squeeze of lemon for a refreshing lemon basil spritz recipe. The combination of sweet melon, zesty lemon, and aromatic basil creates a delightful flavor profile that will elevate your drinking experience. Whether you’re entertaining guests or simply looking to unwind after a long day, the Melon Spritz with a lemon basil twist is the perfect beverage to sip and savor.
The balance of sweet and tart flavors, coupled with the bubbly fizz of soda water, creates a truly unique and satisfying drinking experience.
Plus, the vibrant green hue of the melon syrup makes for a visually stunning presentation that's sure to impress your guests.
As you savor each sip, let the flavors transport you to a sun-drenched oasis or a cozy, intimate gathering.
The Melon Spritz is a versatile cocktail that can be enjoyed in a variety of settings, making it a must-try addition to your repertoire.
Frequently Asked Questions
What Is the Alcohol Content in Melon Spritz?
The alcohol content of a Melon Spritz can vary, but it's typically around 5-7% ABV.
This means it has a moderate amount of alcohol, similar to a glass of wine or a light beer.
The exact percentage can depend on the specific recipe and how much alcohol is used.
When enjoying a Melon Spritz, be sure to drink responsibly and stay hydrated.
Can Melon Spritz Be Made Non-Alcoholic?
Yes, you can absolutely make a non-alcoholic version of melon spritz!
All you need to do is substitute the alcoholic ingredients with non-alcoholic ones. Instead of using a spirit, you can use a fruit juice or a non-alcoholic sparkling beverage.
This way, you can still enjoy the refreshing and fruity flavors of a spritz, but without the boozy kick.
It's a great option for those who want to enjoy a tasty and festive drink without the alcohol.
How Long Does Melon Spritz Keep in the Fridge?
Non-alcoholic drinks like juices, sodas, and mocktails can generally keep in the fridge for 3-5 days.
The exact shelf life depends on the ingredients and how they were stored. When kept chilled at 40°F or below, your non-alcoholic spritz should stay fresh and flavorful for 3-5 days.
Just make sure to give it a sniff before enjoying – if it smells off, it's time to toss it!
Can Melon Spritz Be Served Over Ice?
Absolutely, you can serve melon spritz over ice!
The chilled ice will help keep your refreshing beverage nice and cold. Just pour your melon spritz over a few ice cubes in a glass, and you're good to go.
The icy addition will also help dilute the drink a bit, making it even more thirst-quenching on a hot day.
Give it a try – you'll love how the flavors come together over the ice.
Is Melon Spritz Gluten-Free?
Yes, melon spritz is generally gluten-free! Since it's made with just melon juice, soda water, and ice, there's no gluten in the main ingredients.
However, always double-check the specific brands and mixers you use, just in case any of them contain gluten.
As long as you stick to naturally gluten-free components, you can enjoy this refreshing spritz without worry. It's a great option for anyone following a gluten-free diet!
Beverage Deep Dives
Milkshake Madness: From Classic Flavors to Gourmet Creations
Tantalize your taste buds with a delicious dive into the world of milkshakes, from classic flavors to gourmet creations that will ignite your culinary adventure.
Dive into the delicious world of milkshakes! You'll find classic flavors like creamy vanilla and rich chocolate, as well as gourmet creations bursting with unique ingredients. Milkshakes have a long and fascinating history, tracing back to American soda fountains in the late 1800s. Today, you can enjoy the classic thick and creamy texture, or explore innovative twists like salted caramel and matcha. Whether you prefer nostalgic favorites or modern masterpieces, milkshakes offer a sweet journey of culinary creativity. It's a delectable adventure you won't want to miss!
Key Takeaways
- Milkshakes have a rich history, originating in American soda fountains and evolving to include ice cream for a thick, creamy texture.
- The classic milkshake recipe features essential ingredients like milk, ice cream, and flavorings, with optional toppings like whipped cream and cherries.
- While classic flavors like vanilla, chocolate, and strawberry remain popular, gourmet milkshake creations feature innovative flavors and premium ingredients for a more indulgent experience.
- Milkshake variations cater to diverse dietary preferences, including vegan, protein-packed, and seasonal options, as well as regional specialties.
- The rise of social media and milkshake bars has led to a trend of increasingly extravagant milkshake presentations and customization, showcasing culinary creativity and nostalgia.
History
The origins of the milkshake can be traced back to the late 19th century, when soda fountains across America began experimenting with blended dairy beverages.
These early milkshakes were simple concoctions, often made with just milk, sweetener, and flavoring. As the years passed, soda jerks got more creative, adding ice cream to create the thick, creamy treat we know and love today.
By the early 20th century, milkshakes had become a staple of the classic American soda fountain. People flocked to these soda shops, eager to try the latest flavor combinations.
Vanilla, chocolate, and strawberry were always crowd-pleasers, but inventive soda jerks also experimented with more unique flavors like banana, coffee, and even malted milk.
The milkshake's popularity continued to grow, becoming a quintessential part of American culture.
From malt shops to drive-ins, the milkshake was a refreshing and indulgent way to cool off on a hot summer day.
Recipe
Milkshakes are a classic dessert that have the power to transport us back to simpler times. Whether you're craving a creamy vanilla delight or a decadent chocolate indulgence, a homemade milkshake can hit the spot like nothing else. In this recipe, we'll guide you through the steps to create a delightful milkshake that's sure to satisfy your sweet tooth.
Crafting the perfect milkshake requires a delicate balance of ingredients and technique. The key is to strike the right consistency – not too thick, not too thin – and to perfectly blend the flavors to create a harmonious treat. With a few simple steps, you can whip up a milkshake that will leave your taste buds dancing with joy.
- 2 cups vanilla ice cream
- 1 cup whole milk
- 2 tablespoons chocolate syrup (or more to taste)
- Whipped cream (optional)
- Maraschino cherry (optional)
In a blender, combine the ice cream and milk. Blend on high speed until smooth and creamy, about 30 seconds to 1 minute. Add the chocolate syrup and blend again until fully incorporated. Pour the milkshake into a tall glass. If desired, top with whipped cream and a maraschino cherry.
For an extra-indulgent milkshake, try using a higher-quality vanilla ice cream or adding a scoop of your favorite chocolate or peanut butter ice cream to the mix. You can also experiment with different mix-ins, such as crushed Oreos, peanut butter, or bananas, to create your own signature flavor.
Enjoy your homemade milkshake and savor the nostalgia of a timeless treat.
Cooking Steps
First, chill all the ingredients beforehand to get that refreshingly cool milkshake texture.
Next, add the milk and ice cream, then blend until you've got a smooth and creamy consistency.
Step 1. Chill All Ingredients Beforehand
Before assembling your milkshake, be sure to chill all the ingredients. This simple step makes a big difference in the final result. When your milk, ice cream, and any other additions are cold, they'll blend together more smoothly and create a thick, creamy texture.
Take the time to let your ingredients cool in the fridge for at least 30 minutes. The colder they are, the better they'll combine. This helps prevent the milkshake from becoming too thin or watery. Plus, chilled ingredients maintain their fresh flavors better.
Once everything is nice and cold, you're ready to start blending. Toss the chilled ingredients into your blender and mix until smooth and creamy. The cold temperatures ensure your milkshake stays cool and indulgent from the first sip to the last.
With this simple prep step, you'll be sipping on a delightfully thick and flavorful treat in no time.
Step 2. Add Milk and Ice Cream
Add the milk and ice cream to your blender. You'll want to use about 1 cup of milk and 2 scoops of ice cream for each milkshake you plan to make. Go ahead and toss them in – don't be shy!
The milk will help create that classic, creamy milkshake texture, while the ice cream adds a rich, decadent flavor.
Once everything is in the blender, put the lid on firmly. Now it's time to blend! Start on a low speed and gradually increase to high. Blend until the mixture is smooth and creamy, with no lumps or chunks. This should take around 30 seconds to 1 minute, depending on your blender's power.
Give the blender a few pauses during the blending process to scrape down the sides. This will ensure all the ingredients mix together evenly.
When it's nice and smooth, your milkshake is ready to pour and enjoy!
Step 3. Blend Until Smooth Consistency
With the milk and ice cream now in the blender, it's time to blend until the mixture reaches a smooth, creamy consistency.
Hold down the blender's lid firmly and turn it on to the highest setting. Listen as the blades whir and the ingredients begin to combine. Slowly, the mixture will start to thicken and become uniform in texture.
Keep blending for about 30 seconds to a minute, checking the consistency as you go. You'll know it's ready when the milkshake has a luxuriously smooth, velvety feel. No lumps or chunks should remain.
Once it reaches the perfect thickness, turn off the blender and take a peek. The milkshake should be thick enough to hold its shape when you scoop it out with a spoon.
If it seems too thick, add a splash of milk and blend again briefly. Now you're ready to pour the milkshake into a tall glass and enjoy!
Step 4. Top With Whipped Cream and Cherries
Now that you've blended the milkshake to perfection, it's time to take it to the next level. Grab a tall glass and get ready to add the final touches.
First, take a dollop of whipped cream and pile it high on top of your milkshake. Smooth it out with the back of a spoon, creating a fluffy cloud-like topping.
Next, add a vibrant maraschino cherry right in the center of the whipped cream. Watch as the deep red color pops against the white topping. For an extra special touch, add a few more cherries around the edge of the glass, creating a delightful display.
The combination of the creamy milkshake, the light and airy whipped cream, and the sweet burst of the cherries is simply irresistible.
Take a moment to admire your creation before diving in. This milkshake is sure to delight your taste buds and leave you craving more of this delicious treat.
Step 5. Drizzle Caramel or Chocolate Sauce
Occasionally, you may want to elevate your milkshake even further by drizzling a decadent caramel or chocolate sauce over the whipped cream topping. This simple addition can take your milkshake to a whole new level of indulgence.
For a caramel drizzle, start by heating up some store-bought or homemade caramel sauce. You can use a spoon to carefully drizzle the warm, gooey caramel over the whipped cream, letting it cascade down the sides of the glass. The sweet, buttery flavor of the caramel will complement the creaminess of the milkshake perfectly.
Alternatively, melt some high-quality chocolate chips or chopped chocolate in a double boiler or the microwave. Once it's smooth and silky, use a spoon to drizzle the warm chocolate sauce over the whipped cream. The chocolate will harden slightly as it cools, creating a delightful contrast against the cold, creamy milkshake.
Final Thoughts
As the milkshake journey comes to a close, you can’t help but reflect on the remarkable varieties and flavors that have been explored. From the classic vanilla and chocolate to the more adventurous blended fruits and specialty toppings, the possibilities are truly endless. One standout milkshake that left a lasting impression was the classic french recipe, featuring rich custard and just a hint of nutmeg. In contrast, the tropical mango and coconut concoction transported taste buds to a beachside paradise. And let’s not forget the indulgent toppings like whipped cream, chocolate drizzle, and even a sprinkle of sea salt for a sweet and savory twist. Overall, the milkshake journey has been a delightful and delicious experience.
Who would've thought that a simple milkshake could be elevated to such gourmet heights?
The key is to experiment and have fun with it. Why not try a salted caramel shake or a mint chocolate chip masterpiece? The beauty of milkshakes is that they allow you to unleash your creativity and satisfy your sweet tooth all at once.
Whether you prefer a thick and creamy consistency or a lighter, frothy texture, there's a milkshake out there that's perfect for you.
As you savor the final sips, you can't help but feel a sense of satisfaction and excitement for the next milkshake adventure. The possibilities are truly limitless, and the journey has only just begun.
Frequently Asked Questions
How Long Do Milkshakes Stay Fresh?
Milkshakes typically stay fresh for 2-3 days when stored in the refrigerator. However, their quality and flavor can start to degrade over time. For best results, enjoy your milkshake shortly after it's been made.
Can Milkshakes Be Made Dairy-Free?
Yes, you can absolutely make dairy-free milkshakes! Simply swap the traditional dairy milk with plant-based milk like almond, oat, or coconut milk. Throw in your favorite non-dairy ice cream, and you've got a delicious, creamy dairy-free treat.
What's the Best Way to Store Leftover Milkshakes?
To store leftover milkshakes, pour them into an airtight container and place in the fridge. This will help maintain the thick, creamy texture for a few days. Remember to give it a good stir before enjoying your refreshing treat.
Can Milkshakes Be Made Ahead of Time?
Yes, you can make milkshakes ahead of time. Store them in an airtight container in the fridge for up to 3 days. When ready to serve, simply give it a good stir and enjoy your chilled, homemade treat.
How Do I Achieve the Perfect Milkshake Consistency?
To achieve the perfect milkshake consistency, blend the ingredients thoroughly, use the right ratio of ice cream to milk, and chill the mixture before serving. Don't overmix, as this can make the texture too thick and gritty.
Beverage Deep Dives
The Art of Espresso: Perfecting the Perfect Shot
Luring coffee enthusiasts on a journey of rich flavors and artistry, “The Art of Espresso: Perfecting the Perfect Shot” unveils the captivating history and intricate techniques behind crafting the ultimate espresso.
Espresso, the captivating elixir of Italian cafes, beckons coffee enthusiasts on a journey of flavor and artistry. From its humble beginnings to its current status as a celebrated craft, the history of espresso is a fascinating tale. Mastering the perfect shot requires precision – the right coffee, temperature, pressure, and extraction time. With freshly roasted beans and a keen eye for detail, you'll craft a rich, syrupy espresso brimming with aroma and crema. Balancing the variables takes practice, but the pursuit is a rewarding one that deepens your appreciation for this beloved beverage. There's so much more to explore about the art of espresso.
Key Takeaways
- The art of espresso brewing involves mastering parameters like grind size, tamp pressure, water temperature, and extraction time for optimal flavor extraction.
- Selecting high-quality, freshly roasted coffee beans is foundational to crafting a rich, balanced espresso with a signature crema.
- Monitoring the espresso flow and adjusting temperature and pressure are crucial techniques for achieving the desired texture and flavor profile.
- Serving espresso immediately in preheated cups preserves the peak aroma and maintains the integrity of the shot.
- Continuous experimentation and practice are essential for developing the instincts and skills required to consistently produce the perfect espresso shot.
History
As the years passed, these early espresso machines became more advanced, incorporating innovative features like steam wands and programmable settings for enhanced brewing capabilities.
Inventors tinkered with the design, making them easier to use and producing an even more flavorful result.
By the 1930s, espresso had become a beloved part of Italian culture, with cafes popping up all over the country.
Today, the art of making the perfect espresso shot is still celebrated, with baristas honing their skills to extract the finest flavors, often utilizing high-quality brewing capabilities for home use.
Recipe
Crafting the perfect espresso is an art form that requires precision and attention to detail. The foundation of a delightful espresso lies in the careful selection and preparation of high-quality coffee beans. From the roast profile to the grind size, each step plays a vital role in unlocking the rich, complex flavors that define this beloved beverage.
Mastering the technique of espresso extraction is a journey of experimentation and fine-tuning. The interplay of water temperature, pressure, and brew time must be meticulously balanced to extract the optimal flavors and create a velvety, crema-topped espresso that can be enjoyed on its own or as the base for a variety of coffee-based drinks.
- 18-22 grams of freshly ground coffee
- 195-205°F (91-96°C) water temperature
- 25-30 seconds of extraction time
- 1-1.5 ounces (30-45 ml) of espresso
Begin by grinding the coffee beans to a fine, consistent texture. Tamp the ground coffee into the portafilter with a firm, even pressure. Attach the portafilter to the espresso machine and start the extraction process, ensuring the water temperature is within the optimal range.
Observe the flow of the espresso, aiming for a steady, even stream that produces a rich, golden-brown crema.
To ensure the best possible outcome, it's crucial to use freshly roasted coffee beans and to adjust the grind size, dose, and extraction time based on the specific characteristics of the beans and the espresso machine. Experiment with different brewing parameters to find the perfect combination that suits your personal taste preferences.
Cooking Steps
To make a perfect espresso, you'll need to start by grinding your beans to just the right consistency.
Next, tamp the ground coffee evenly in the portafilter.
Then, extract the water at the perfect temperature and pressure to pull a rich, aromatic shot.
Serve your espresso immediately in preheated cups for the ultimate coffee experience.
Step 1. Grind Beans to the Right Consistency
Grinding your beans to the right consistency is a crucial step in brewing a perfect espresso. You'll want to aim for a fine, even grind – not too coarse, not too fine. Imagine sand, with each grain about the size of granulated sugar. This consistency helps water flow through the grounds evenly, extracting all the rich, delicious flavors.
Use a high-quality burr grinder for the best results. Burr grinders crush the beans between two abrasive surfaces, giving you precise control over the grind size. Adjust the grind setting until you achieve that perfect, sand-like texture.
Too fine, and the water won't flow through; too coarse, and you'll end up with a weak, watery shot.
Take your time and experiment to find the ideal grind for your beans and brewing method. The right grind is the foundation for crafting an exceptional espresso. Get this step just right, and you're well on your way to pulling the perfect shot.
Step 2. Tamp the Ground Coffee Evenly
After grinding your beans to the perfect consistency, it's time to tamp the ground coffee evenly. Tamping is a crucial step in making an espresso, and it's all about creating the right amount of pressure.
Start by placing your portafilter (the basket that holds the ground coffee) on a level surface. Gently spoon the ground coffee into the portafilter, filling it up to the top.
Now, it's time to tamp. Hold the tamper (a small, flat tool) firmly in your hand and press down with a steady, even pressure. Apply about 15-30 pounds of pressure, making sure to tamp the coffee down evenly.
The goal is to create a smooth, compact puck of coffee that will allow the water to flow through it at the perfect rate. If the tamp is uneven, the water will create channels through the coffee, resulting in an uneven extraction and a poor-quality espresso.
Take your time and practice to get the perfect tamp every time.
Step 3. Extract Water
Now that you've tamped the ground coffee evenly, it's time to extract the water. This is a crucial step in making a perfect espresso shot.
First, position your portafilter, the handle that holds the ground coffee, under the group head of your espresso machine. The group head is where the hot water will come out and extract the coffee.
Next, turn on your machine and let the water flow through the ground coffee. You'll see the espresso start to pour out, slowly at first, then picking up speed.
Keep a close eye on the extraction, watching for the perfect color and consistency. The ideal espresso should have a rich, syrupy texture and a beautiful crema, the foamy layer on top.
Once you've extracted the perfect amount, turn off the machine and remove the portafilter.
Admire your handiwork – you've just made a delicious, authentic espresso!
Step 4. Adjust Temperature and Pressure Accordingly
The temperature and pressure settings of your espresso machine play a critical role in extracting the perfect shot. Getting these just right takes some practice, but it's worth the effort!
You'll want to ensure the water temperature is between 195°F and 205°F. Any cooler, and the espresso will taste sour; any hotter, and it'll taste burnt.
Additionally, just like achieving high refresh rates for gaming enhances the experience, finding the right balance in temperature and pressure elevates your espresso game.
Next, you'll need to adjust the pressure. The optimal pressure range is between 15 and 19 bars. This allows the water to be forced through the tightly packed coffee grounds, extracting all the delicious flavors.
Too little pressure, and the shot will be weak; too much, and it'll be over-extracted and bitter.
Keep experimenting with the temperature and pressure until you find the perfect combination for your espresso machine and coffee beans.
It may take some trial and error, but trust us, the reward of a perfectly balanced shot is worth it!
Step 5. Serve Immediately in Preheated Cups
Once your espresso is brewed, it's crucial to serve it immediately in preheated cups. This helps maintain the perfect temperature and ensures your guests can enjoy the full flavor and aroma of the coffee. Preheating the cups prevents the espresso from cooling too quickly, allowing you to savor every sip.
To preheat your cups, simply run them under hot water or place them in a warm oven for a few minutes. Be careful not to overheat them, as this can affect the taste.
Once your cups are nice and toasty, carefully pour the freshly brewed espresso into each one. The rich, velvety crema should be immediately visible, signaling that your espresso is at its peak.
Serve the espresso straight away, without delay. This way, your guests can experience the coffee at its finest, with all the complexity of flavors and the perfect balance of bitterness and sweetness.
Enjoy your expertly crafted espresso in a preheated cup, and savor the moment!
Final Thoughts
Mastering the art of espresso takes dedication, but the rewards are unparalleled. As you've learned, crafting the perfect shot requires attention to detail at every step – from selecting the right beans to tamping the grounds just so.
But when you nail it, the result is a rich, intensely flavorful elixir that can transport you to the cafes of Italy.
Don't be discouraged if it takes some practice to get the hang of it. Each shot is a chance to refine your technique and develop your palate.
Pay close attention to the color, aroma, and mouthfeel of the espresso. Experiment with different bean origins, roasts, and brewing methods to find what you love.
Over time, you'll develop the instincts to consistently pull shots that satisfy your taste buds. The journey is half the fun! So keep exploring, savoring each sip, and enjoy the art of espresso. As you refine your skills, don’t be afraid to experiment with different beans, grinds, and techniques to elevate your coffee game even further. Pair your perfect shot of espresso with unique treats from around the world, like trying a delicious Vietnamese fruit cocktail recipe for a refreshing and vibrant complement. There’s always something new to discover in the world of flavors, so let your curiosity guide you.
Frequently Asked Questions
What Is the Optimal Water Temperature for Espresso Brewing?
The optimal water temperature for brewing espresso is between 195-205°F (91-96°C). This temperature range helps extract the coffee's flavors and aromas without burning the grounds or resulting in a bitter, over-extracted shot. Experiment to find your perfect temperature within this range.
How Do I Clean and Maintain My Espresso Machine?
To clean and maintain your espresso machine, regularly backflush the portafilter, descale the machine, and wipe down the exterior. Disassemble and wash the steam wand and group head to ensure optimal performance and longevity of your appliance.
What Are the Common Mistakes in Making Espresso at Home?
You might be making common mistakes like using stale beans, grinding too fine, tamping unevenly, or extracting for too long. Avoid these pitfalls to brew delicious espresso at home. Proper maintenance and attention to detail are key.
How Can I Achieve a Thicker Crema on My Espresso?
To achieve a thicker crema on your espresso, be sure to use freshly roasted beans, grind them fine, and tamp the grounds evenly. Experiment with water temperature and pressure to find the perfect balance for your setup.
What Are the Best Coffee Beans for Making Espresso?
For a rich, creamy espresso, choose dark-roasted arabica beans. Look for blends that emphasize body and sweetness. Experiment with single-origin beans too, as they can offer unique flavor profiles. The best coffee for you depends on your personal taste.
Beverage Deep Dives
Mixology 101: The Science and Art of Cocktail Creation
Unlock the captivating realm of mixology, where the art of crafting cocktails blends tradition, creativity, and the pursuit of flavor perfection.
Dive into the captivating world of mixology, where the science and art of cocktail creation come alive! Tracing its roots back to early 19th-century bartender innovations, this evolving craft has blossomed into a global phenomenon. Mastering the harmonious blending of flavors, precise measurements, and skillful presentation unlocks a delightful realm of libations. Explore the importance of premium spirits, thoughtfully selected ingredients, and the role of garnishes in elevating the cocktail experience. From muddling fresh mint to crafting the perfect balance of sweetness, this journey combines tradition and creativity, inviting you to discover the joy of mixology.
Key Takeaways
- Mixology encompasses the harmonious blending of flavors, precise measurements, and skillful presentation to create delightful libations.
- Mastering fundamental techniques, such as muddling, simple syrup preparation, and ice selection, unlocks the potential for crafting exceptional cocktails.
- The choice of spirits and thoughtfully selected ingredients are crucial in shaping the character and balance of a cocktail.
- Garnishes play a vital role in enhancing the overall cocktail experience, elevating aroma and visual appeal.
- Mixology is an ever-evolving art that encourages creativity, personalization of classic cocktails, and a balanced approach between tradition and innovation.
History
Mixology can be traced back to the early 19th century, when bartenders began experimenting with various spirits, juices, and bitters to create unique cocktail recipes.
These early mixologists were pioneers, blending and shaking to find the perfect balance of flavors. Over time, their innovations led to the rise of classic cocktails like the Manhattan, Negroni, and Old Fashioned.
As the 20th century progressed, mixology evolved into a true art form. Bartenders became scientists, meticulously measuring and adjusting their creations.
Cocktail culture flourished, with speakeasies and glamorous lounges showcasing the creativity of these skilled professionals.
Today, mixology is a global phenomenon, with bartenders around the world pushing the boundaries of what's possible with a shaker and some ice.
From its humble beginnings to its current status as a culinary craft, the history of mixology is a fascinating journey.
Each cocktail tells a story, and every bartender is a storyteller, weaving together the flavors of the past and the present.
Recipe
Crafting the perfect cocktail is an art form that combines the harmonious blending of flavors, the precision of measurements, and the skill of presentation.
Whether you're a seasoned mixologist or a budding bartender, mastering the fundamentals of mixology is the key to unlocking a world of delightful libations.
In this recipe, we'll guide you through the creation of a classic cocktail that showcases the nuances of premium spirits, the depth of thoughtfully selected ingredients, and the beauty of thoughtful garnishes.
Get ready to impress your guests and tantalize their taste buds.
- 2 oz of your preferred premium gin
- 1 oz of fresh lemon juice
- 3/4 oz of simple syrup
- 1/2 oz of egg white (optional)
- 4-5 fresh basil leaves
- Ice cubes
In a cocktail shaker, combine the gin, lemon juice, simple syrup, and egg white (if using).
Shake vigorously for 10-15 seconds until the mixture is frothy.
Add several ice cubes and shake again for another 10-15 seconds to chill the cocktail.
Strain the mixture into a chilled coupe or martini glass.
Gently place the basil leaves on top of the drink, allowing their aroma to waft through the air.
Cooking Steps
First, you'll need to muddle some fresh mint leaves and lime wedges in the bottom of a glass.
Then, add a bit of simple syrup to sweeten things up.
Next, fill the glass with ice and pour in your favorite rum.
Step 1. Muddle Mint and Lime Wedges
To begin, grab a sturdy muddling tool and place a handful of fresh mint leaves in the bottom of your cocktail shaker. Using the muddler, gently press down and twist the mint, releasing its fragrant oils.
This step is crucial for building layers of flavor in your cocktail and can be likened to the way mindfulness practices enhance emotional well-being.
Next, slice a lime in half and squeeze the juice of one half directly into the shaker. Add a few lime wedges as well, and continue muddling until the mint is well-bruised and the lime juice has fully combined.
You'll know you've done it right when the mixture takes on a vibrant, aromatic quality. The key is to muddle gently, without crushing the mint too aggressively, which can lead to bitterness.
Once you've achieved the perfect balance of mint and citrus, you're ready to move on to the next step in crafting your delicious cocktail. Get ready to shake things up! Fill your cocktail shaker with ice, add your carefully measured ingredients, and give it a vigorous shake to blend the flavors beautifully. As you pour your creation into a glass and garnish it to impress, don’t forget that attention to detail makes all the difference—just like when you follow perfect Vietnamese noodle soup tips to craft an ideal bowl of pho. The key is passion and precision, so raise your glass and enjoy the fruits of your effort!
Step 2. Add Simple Syrup
Now that you've perfectly muddled the mint and lime, it's time to add a touch of sweetness to balance the cocktail. Simple syrup is the perfect ingredient for this. It's made by dissolving sugar in water, creating a thick, syrupy liquid that adds a subtle sweetness to your drink.
To make simple syrup, combine equal parts sugar and water in a small saucepan. Heat the mixture, stirring frequently, until the sugar has completely dissolved.
Then, remove the pan from the heat and let the syrup cool. Once it's at room temperature, you can add it to your cocktail.
Start with just a splash of simple syrup and give your drink a good stir. Taste it, and add more syrup if you'd like it a little sweeter.
The amount you use will depend on your personal preference and the other flavors in your cocktail. With the simple syrup added, your drink will be perfectly balanced and ready to enjoy!
Step 3. Add Ice
With your mint, lime, and simple syrup now perfectly incorporated, it's time to chill your cocktail.
Adding ice is an essential step in the mixology process. Not only does it cool down your drink, but it also helps to dilute the flavors, creating a smoother, more balanced taste.
To add ice, simply fill your cocktail shaker or glass with ice cubes. Be generous with the amount – you want to ensure that your drink is chilled to perfection.
Gently stir or shake the mixture to incorporate the ice, allowing the flavors to meld together. As the ice melts, it will slowly dilute the drink, bringing out the subtle notes and creating a refreshing, balanced cocktail.
Step 4. Add Rum
Add the rum to your shaker or glass, pouring it in a gentle stream. The rich, aromatic spirit will instantly bring your cocktail to life. Rum adds a unique flavor that can range from smooth and subtle to bold and spicy, depending on the type you choose.
For a classic daiquiri, go with a light, white rum that will let the flavors of the lime juice and simple syrup shine. If you're mixing up a mojito, a gold or amber rum will provide a deeper, more caramelized taste.
And for a tropical vacation in a glass, try a dark, aged rum – its complex notes of vanilla, oak, and molasses will transport you to a Caribbean beach.
No matter which rum you select, be sure to pour with a steady hand, allowing it to gently blend with the other ingredients. The rum is the star of the show, so you want to make sure its personality shines through in every sip.
Step 5. Add Mint Sprig Garnish
To complete your cocktail, pluck a fresh sprig of mint from the garnish tray. The vibrant green leaves and fragrant aroma will elevate your drink, adding a burst of freshness and sophistication.
Gently place the mint sprig between your thumb and forefinger, then lightly slap it against your palm to release the essential oils. This simple action awakens the mint's flavor, allowing it to infuse the cocktail and tantalize your senses. Understanding the importance of self-regulation can also enhance your cocktail experience, as it encourages you to savor each sip mindfully.
Now, carefully place the mint sprig on top of the drink, positioning it just so. The leaves should fan out elegantly, showcasing their beauty.
As your guests take a sip, the mint will dance across their tongues, complementing the other flavors seamlessly. This final touch transforms your creation into a work of art, turning a simple cocktail into an experience to remember.
Final Thoughts
As you wrap up your bartending journey, remember that mixology is an ever-evolving art.
There's always more to learn and experiment with, whether it's trying new ingredients, techniques, or flavor combinations. The best part? You get to be a part of that exciting process.
Embrace your creativity and don't be afraid to put your own spin on classic cocktails.
Mixology is all about finding the balance between tradition and innovation. Keep an open mind, and you'll be surprised by the unique and delicious drinks you can create.
Frequently Asked Questions
What Equipment Is Essential for Home Cocktail Making?
You'll need a few essential tools for making cocktails at home: a cocktail shaker, a jigger for precise measurements, a bar spoon for stirring, a strainer, and a muddler for crushing herbs and fruits. With these basics, you can craft delicious drinks.
How Can I Create My Own Unique Cocktail Recipes?
To create your own unique cocktail recipes, start by understanding the basic flavor profiles and ratios of different spirits, mixers, and garnishes. Experiment with combining them in new ways to craft signature drinks that reflect your personal taste.
What Are the Best Ways to Garnish and Present Cocktails?
To garnish and present cocktails uniquely, consider using fresh herbs, citrus twists, edible flowers, or even dehydrated fruit. Experiment with glassware, ice shapes, and layering ingredients to create visually stunning and Instagram-worthy cocktails that'll impress your guests.
How Do I Properly Store and Maintain Cocktail Ingredients?
To properly store and maintain cocktail ingredients, keep them in airtight containers, refrigerate perishables, label everything, and rotate stock. Avoid direct sunlight and extreme temperatures to preserve freshness and prevent spoilage.
What Are Some Tips for Creating Balanced and Flavorful Cocktails?
To create balanced and flavorful cocktails, experiment with flavor combinations, use high-quality ingredients, and pay attention to proportions. Don't be afraid to adjust recipes to suit your personal taste preferences.
-
Brazilian Cuisine3 months ago
Tacacá
-
Brazilian Cuisine3 months ago
Caldeirada
-
Polish Comfort Food3 months ago
Krupnik (Barley Soup)
-
Brazilian Cuisine3 months ago
Chicken in Brown Sauce
-
Southern Comfort Food3 months ago
Cheese Straws
-
African Cuisine3 months ago
Kedjenou (Ivory Coast)
-
Polish Comfort Food3 months ago
Vegetable Salad
-
American Diner Classics3 months ago
The Maillard Reaction: Understanding the Chemistry of Browning {Food Science and Cooking}