Beverage Deep Dives
Discover Organic Wine: Pure, Natural, Delicious
Uncork the essence of sustainability with organic wine, where eco-friendly viticulture meets pure, natural flavors for your sipping pleasure.
Have you ever taken a sip of wine and felt a rush of connection with the earth? When you choose organic wine, you’re inviting a story into your glass—one that speaks of sustainable viticulture and the passionate care of the land. Imagine savoring a red or white crafted from grapes that thrive apart from synthetic pesticides and harmful chemicals. This choice not only tantalizes your palate but also contributes to a healthier planet. As you embark on this flavorful journey, you become part of a movement that celebrates eco-friendly winemaking and supports agriculture that honors both nature and our future. As you swirl and sip your glass of organic wine, you can truly appreciate the dedication of the winemakers to preserving the environment and producing a product that is not only delicious but also sustainable. The rich, complex flavors and aromas of the wine will transport you to the vineyards where the grapes were grown with the utmost care and respect for the land. This red wine tasting experience becomes more than just a leisurely activity – it becomes a celebration of the harmony between nature and human ingenuity. Cheers to a glass of organic wine that embodies the beauty and integrity of eco-friendly winemaking.
Key Takeaways
- Organic wines must be made with 95% organically produced ingredients.
- Wines labeled “made with organic grapes” exclude toxic pesticides and synthetic fertilizers.
- Organic wines can contain under 10 ppm of naturally occurring sulfites.
- Certification guarantees that these wines define a commitment to environmental sustainability.
- Choosing organic wines supports eco-conscious farming and enhances your overall drinking experience.
What is Organic Wine?
Organic wine represents a growing movement in the wine industry, focusing on environmentally friendly practices and healthier choices for consumers. You may wonder what distinguishes organic wine from its conventional counterparts, and this section unpacks those details.
Defining Organic Wine
Organic wine is crafted from organically grown grapes, which means the vineyard uses sustainable practices that eliminate toxic pesticides, GMOs, and synthetic fertilizers. In the United States, organic wine is required to be made from at least 95% organic ingredients, primarily focusing on organic grapes. It is essential to note that while certified organic wine limits additives, European and Canadian standards are somewhat more lenient, allowing for certain sulfites in organic wines. This emphasizes the emphasis placed on keeping winemaking natural and true to its roots.
Difference Between Organic and Conventional Wine
The differences between organic wine and conventional wine extend beyond the growing practices. In conventional vineyards, over 30 different chemicals are often employed, which have severe consequences for local ecosystems and water sources. Reports indicate that ground water contamination is a significant threat associated with conventional wine production. On the other hand, organic wines are produced under stringent certification programs like Sip Certified and USDA National Organic Program, ensuring compliance with sustainable practices.
The journey of organic grape growing may present challenges, such as requiring a minimum distance from neighboring non-organic vineyards during organic audits, aiming to minimize contamination risks. Despite these challenges, many vineyards, like Sokol Blosser Winery, emphasize how organic farming cultivates not just grapes, but a vibrant vineyard environment, showcasing commitment to land stewardship.
Aspect | Organic Wine | Conventional Wine |
---|---|---|
Grapes | 100% Organic Grapes | Can contain synthetic chemicals |
Additives | No toxic pesticides or herbicides | May use various additives |
Certification | USDA National Organic Program, Sip Certified | Varies, often no organic certification |
Environmental Impact | Supports biodiversity and soil health | Can lead to ground water contamination |
Sustainable Viticulture Practices
Sustainable viticulture practices have gained significant attention in recent years, reflecting a shift towards more eco-friendly approaches in winemaking. This form of agriculture emphasizes an ecological balance, minimizing chemical usage while promoting long-term viability in wine production. You might wonder how these methods specifically contribute to the quality and sustainability of organic wines.
Importance of Sustainable Farming
Sustainable farming plays a crucial role in fostering healthier ecosystems and addressing environmental concerns. By reducing harmful impacts through organic vineyard practices, wineries can enjoy numerous benefits. Some key aspects include:
- Minimizing the use of chemical pesticides and fertilizers, enhancing both environmental and health benefits.
- Reducing environmental pollution by up to 50% when compared to conventional methods.
- Encouraging biodiversity, which has been reported to be up to 30% higher in organic vineyards.
- Enhancing soil health, a vital factor affecting the chemical composition of the grapes.
- Generating economic advantages, as organic wines can command prices on average 20% higher than their conventional counterparts.
How Organic Vineyard Practices Contribute to Sustainability
Organic vineyard practices serve as a cornerstone for sustainable viticulture. Techniques such as crop rotation, composting, and integrated pest management not only improve soil health but also support eco-friendly winemaking. In fact, vineyards implementing these practices experience less soil degradation, with studies indicating 40% fewer instances over time.
The demand for organic and sustainable wines is on the rise, with a growth rate of approximately 10% annually. Various certification programs, including SIP Certification and Napa Green, highlight the industry’s commitment to sustainability standards. Furthermore, the adoption of ISO 14001 certification in viticulture demonstrates effective environmental management. Notable wineries, such as Cono Sur in Chile, succeed in this space by showcasing their biodynamic wines, focusing on creating self-sustaining ecosystems.
Ultimately, as more consumers prioritize sustainability and healthier planet initiatives, the popularity of organic wines continues to soar. Embracing these sustainable viticulture practices not only yields better grapes and wine but contributes significantly to a healthier environment.
The Benefits of Organic Wine
Exploring the benefits of organic wine reveals a wealth of advantages for both your health and the environment. Choosing organic wine means you’re making decisions that not only enrich your drinking experience but also support sustainable farming practices that contribute positively to our planet.
Health Benefits of Choosing Organic
Organic wine offers remarkable health benefits that make it a preferred choice for many. The primary reason stems from its production methods, which eliminate harmful chemicals and additives common in conventional wines. Studies highlight that resveratrol, a potent antioxidant prominent in grape skin, plays a key role in the health benefits of organic wine. It promotes increased longevity and offers protection against age-related diseases.
- Resveratrol has been linked to enhanced brain health, reducing the risk of Alzheimer’s and dementia.
- A study involving 5,500 light to moderate drinkers indicated that consuming two to seven glasses of wine weekly correlates with lower chances of depression.
- Organic wine can improve skin health, aiding in preventing aging and boosting circulation.
- The high antioxidant content in organic wine may also help in boosting immunity, offering a protective advantage when combined with vaccinations.
Environmental Impact of Organic Winemaking
The environmental impact of organic winemaking is significantly more favorable compared to conventional practices. Organic vineyards avoid synthetic chemicals, which not only helps preserve local ecosystems but also promotes biodiversity. A recent report indicated that organic grape production has surged by 120%, reflecting a growing commitment to sustainable farming.
Aspect | Conventional Wine | Organic Wine |
---|---|---|
Added Ingredients | Up to 70 | None |
Sulphur Dioxide Content | Standard levels | Half the amount |
Resveratrol Levels | Standard | 80% higher |
Choosing organic wine not only enhances your palate with richer, more complex flavors but also aligns with practices that support healthier soil and cleaner water sources. The commitment to sustainable farming promotes a healthier environment for future generations.
Understanding Natural Wine
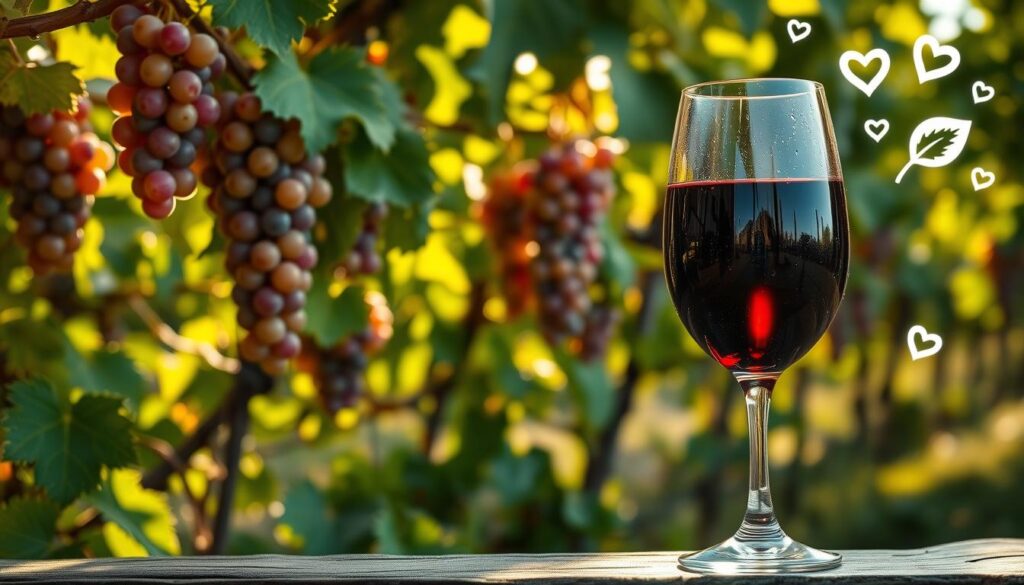
Natural wine represents a unique approach within the wine industry, distinguished by specific characteristics that set it apart from other types, particularly organic wine. This category thrives on minimal intervention in winemaking. Many enthusiasts appreciate the often spontaneous fermentation processes and distinctive flavor profiles that natural wines can showcase. Familiarizing yourself with the nuances of natural wine will enhance your tasting experience.
Characteristics of Natural Wine
When exploring natural wine, you’ll notice several defining features:
- Minimal additives: Natural wine generally avoids sulfites and other chemicals, resulting in a purer expression of the grape.
- Unique flavors: Each bottling often varies significantly from year to year, emphasizing a strong sense of terroir.
- Hazy appearance: You might find that many natural wines appear cloudy, with settled grape solids often visible at the bottom of the bottle.
- Limited filtering and fining: This process often leaves natural wines with a more authentic texture and complexity.
- Sulfite levels: Natural wines can contain no or low sulfites, typically ranging from 10 to 100 parts per million, compared to the 350 ppm permitted in conventional wines.
How Natural Wine Differs from Organic Wine
Understanding how natural wine differs from organic wine enhances your knowledge of these distinct categories:
Aspect | Natural Wine | Organic Wine |
---|---|---|
Certification | No official certifying body exists for natural wine | USDA and EU certifications available |
Additives | Generally free of additives, including sulfites | May contain sulfites, with allowances up to 100 mg/L |
Production methods | Focus on minimal intervention, spontaneous fermentation | Follows specific agricultural methods, including organic farming |
Flavor profile | Highly variable, with emphasis on terroir | More consistent, following established winemaking practices |
This examination of how natural wine differs from organic wine reveals the broader spectrum of choices within the wine world. Whether you lean toward the unpredictability of natural wine or appreciate the defined regulations surrounding organic wine, understanding these categories truly enriches your journey into the realm of fine wines.
Exploring Biodynamic Farming
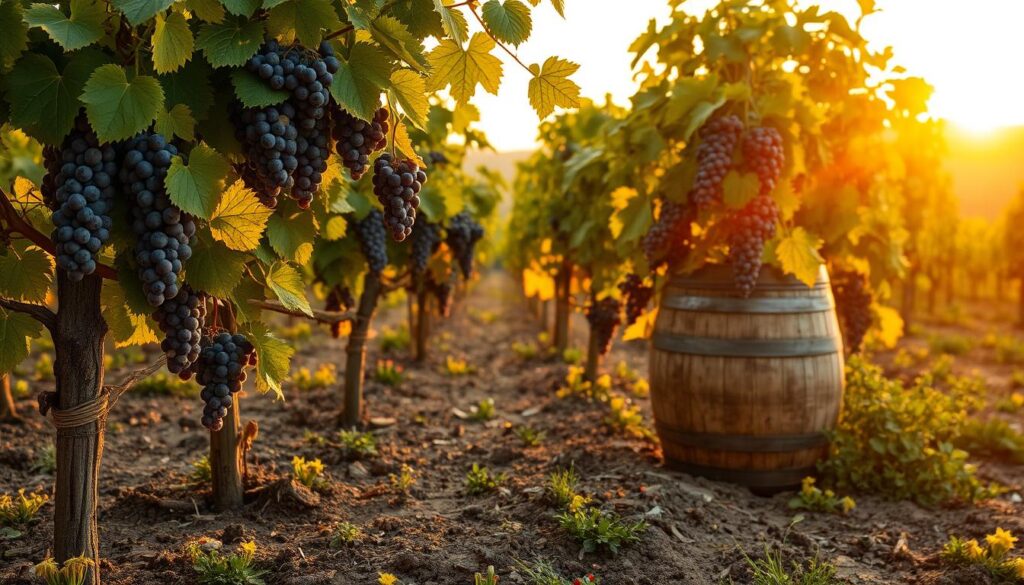
Biodynamic farming represents an innovative approach that transcends organic farming practices. This philosophy integrates ecological and spiritual principles into vineyard management. By focusing on creating healthy ecosystems, biodynamic farming emphasizes the interconnectedness of all living things, enhancing soil health and grape quality. Numerous wineries are adopting these practices, showing a growing interest in biodynamic wines.
Principles of Biodynamic Farming
The essence of biodynamic farming involves several core principles:
- Understanding Cosmic Rhythms: Biodynamic farmers align their planting and harvesting schedules with astronomical timings, believing this enhances growth and vitality.
- Soil Health: Practices such as composting and crop rotation are employed to improve soil structure and fertility.
- Biodiversity: Biodynamic farming encourages diverse ecosystems, promoting beneficial insects and wildlife.
- Minimal Intervention: The focus lies on low-intervention winemaking, allowing grapes to express their true terroir.
Certification Process for Biodynamic Wines
Biodynamic certification, overseen by organizations like the Demeter Association, requires adherence to stringent guidelines. These standards include:
- Using no synthetic pesticides, herbicides, or fertilizers, which are commonly used in conventional farming.
- Maintaining a minimum percentage of biodynamic practices, with many growers achieving over 90% compliance.
- Proven connections to holistic farming practices that enrich not only soil but also biodiversity.
Among the wineries represented by Vinifera, many follow sustainable and biodynamic practices, highlighting the commitment to quality and environmental stewardship in winemaking.
Wineries | Biodynamic Practices | Organic Farming Since | Certification Type |
---|---|---|---|
Cakebread Cellars | Selected vineyard acreage | 2008 | Napa Green Certified |
Grgich Hills Estate | Regenerative organic practices | N/A | Certified Regenerative Organic |
Robert Mondavi Winery | All vineyards | N/A | Organic Certified |
Spring Mountain Vineyard | Organic practices | 1981 | USDA Organic |
Trefethen Family Vineyards | Biodynamic and organic practices | N/A | Certified California Sustainable |
This commitment not only adheres to biodynamic certification but also contributes to the broader goal of sustainable winemaking, encouraging biodiversity and enhancing the expression of terroir. By embracing biodynamic farming, you can support wines that reflect deep connections between vines, land, and the environment.
Popular Organic Wine Varieties
When exploring the world of organic wine varieties, you will encounter a delightful range of options that highlight the best organic wines available today. From familiar favorites to unique selections, there’s always something new to discover in organic wines. Here, we focus on types of organic wines you should try and recommend specific bottles based on distinct regions.
Types of Organic Wines You Should Try
Organic wine varieties offer an incredible array of flavors and characteristics. Here are some noteworthy types to explore:
- Cabernet Sauvignon: A quintessential red that often carries rich, bold flavors.
- Merlot: Known for its smooth texture and fruit-forward profile.
- Pinot Noir: Celebrated for its elegance and complexity, making it a favorite among wine enthusiasts.
- Petite Sirah: A lesser-known varietal, it packs a punch with deep colors and full-bodied flavor.
- Grenache: A versatile grape often found in blends and famous for its berry flavors.
Region-Specific Organic Wine Recommendations
The best organic wines can often be found in esteemed wine regions across the globe. Consider these outstanding organic options tailored to specific locations:
Wine | Region | Price | Notes |
---|---|---|---|
2020 Martorana Family Winery Petite Sirah | Dry Creek Valley, CA | 94+ Points | Rich and full-bodied with dark fruit notes. |
2021 Obvious Wines No. 6 Simply Rosé | California | Moderate | Light and refreshing with floral undertones. |
2018 Horse & Plow Grenache | Napa Valley, CA | Bulk Buy | Classic organic option at an accessible price. |
Domaine Bousquet Gaia Organic Malbec | Argentina | Affordable | Delicious organic red with dark fruit character. |
Alavida Organic Kosher Malbec | Argentina | Premium | Richly flavored and certified kosher. |
Les Vignes de Paradis | Savoie, France | $115 | Luxurious and unique option for special occasions. |
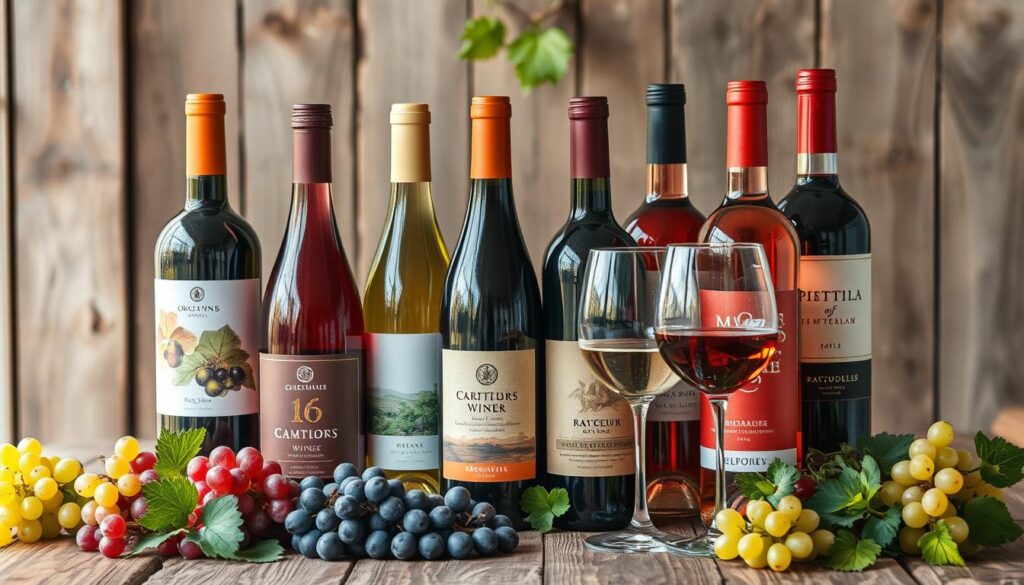
As you explore organic wine varieties, remember that preferences vary greatly. Each bottle has its own story and flavor profile, waiting for you to uncover. Whether you opt for a familiar Cabernet Sauvignon or venture into intriguing blends, top-quality organic wines offer something truly special for every palate.
How to Identify Certified Organic Wine
Recognizing certified organic wine involves understanding the nuances of organic wine labels and the specific certifications that guarantee the wine’s authenticity. Key terms on these labels provide insight into the production process, quality, and commitment to sustainable practices. Familiarizing yourself with these labels ensures transparency and builds trust in your wine choices.
Understanding Labels and Certifications
When evaluating organic wine labels, you may encounter terms like “100% organic” and “made with organic grapes.” These distinctions are significant in the organic wine world:
- 100% organic: Indicates that all ingredients are sourced organically without harmful additives.
- Made with organic grapes: At least 70% of the grapes used are certified organic, with the remaining 30% allowed to contain non-organic ingredients.
Another critical element is the certification seal. In the European Union, the European leaf logo is a hallmark for organic wines, ensuring compliance with stringent regulations. This certification guarantees lower sulfite levels and minimal additives compared to conventional wines. For instance, the EU norm allows up to 150 mg/litre of sulfites in conventional wines, whereas organic wine must not exceed 100 mg/litre. In biodynamic winemaking, certified under Demeter standards, the limit is even lower at 70 mg/litre.
In the United States, the certification processes are somewhat less stringent, allowing sulfite levels to reach 350 mg/litre. Thus, knowing these distinctions can help you make informed choices about the organic wines on your shelf.
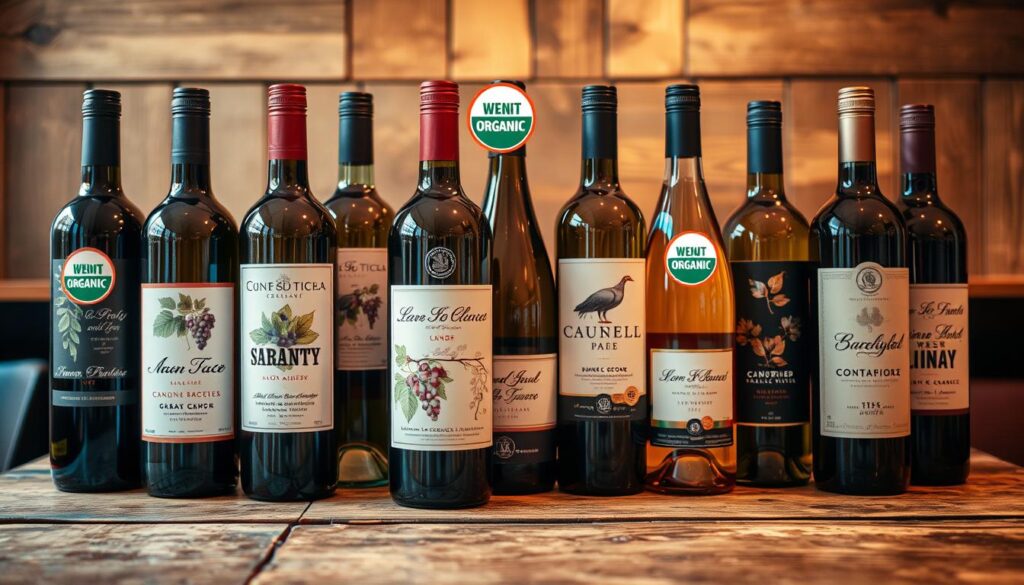
Understanding the journey of wine from vine to bottle is essential. Soil must undergo a three-year organic conversion before vines can be certified organic, reflecting a commitment to sustainable farming. This process showcases the dedication of producers to organic principles, including the use of natural fertilizers, manual harvesting, and avoidance of chemical treatments.
In 2022, sales of organic wine are expected to reach around 87.5 million bottles worldwide, emphasizing a growing consumer preference for certified organic wine. Familiarizing yourself with these organic wine labels and certifications enables you to confidently choose wines that meet your standards for quality and sustainability.
Where to Buy Organic Wine
Finding the perfect organic wine can be an enjoyable adventure. You may want to explore various options, including specialized wine shops, online retailers, and local farmers’ markets. The growing trend of organic offerings has even led to supermarkets and delivery apps including selections of organic wines. With numerous avenues available, you will surely have access to a diverse range of organic wines.
Best Places to Find Organic Wines
When searching for where to buy organic wine, consider these sources:
- Specialized Organic Wine Stores: These shops focus on organic and biodynamic wines, providing expert knowledge on their selections.
- Local Farmers’ Markets: Often featuring local producers, these markets are a great place to discover organic options directly from growers.
- Dynamic Online Retailers: Websites dedicated to organic products frequently have vast collections and can ship directly to your home.
- Supermarkets: Many grocery chains have started to stock organic wines, allowing for easy access on regular shopping trips.
Tips for Selecting Quality Organic Wine
To choose the best organic wines, keep these tips in mind:
- Familiarize Yourself with Regions: Certain areas, such as Napa Valley or Sonoma County, are renowned for producing quality organic wines.
- Consider Vintage: Some years produce better-quality wine due to favorable weather conditions, enhancing the flavor and character.
- Ask Knowledgeable Staff: Don’t hesitate to seek guidance from staff at wine stores—experts can offer invaluable insights based on your preferences.
Source | Description |
---|---|
Specialized Wine Stores | Focused on organic selections, with expert staff to help you choose. |
Online Retailers | A convenient way to browse various organic wines from home. |
Farmers’ Markets | Direct access to local organic wines and producers. |
Supermarkets | Growing availability of organic wines in mainstream grocery stores. |
Conclusion
In exploring the world of organic wine, you’ve uncovered a delightful fusion of quality, health, and sustainability. By choosing organic wines, you support a winemaking process that avoids harmful synthetic chemicals, resulting in a product that is not only better for your health but also friendlier to the environment. The benefits of organic wine extend beyond its rich flavors; they encompass a commitment to biodiversity, soil health, and eco-friendly winemaking practices, creating a positive impact on the planet.
As discussed, organic vineyards adhere to strict standards set by regulatory bodies like the USDA’s National Organic Program, ensuring that what you sip is genuinely organic. With fewer sulfites and no artificial additives, organic wines allow the unique terroir of the grapes to shine through, offering you a taste that is both authentic and complex. Every bottle reflects the careful cultivation and dedication of winemakers who prioritize environmental stewardship.
Embracing organic wine isn’t just about selection; it’s an invitation to engage in meaningful conversations about sustainability and conscious consumption. By being an informed wine lover, you’re championing eco-friendly winemaking and making a choice that supports healthier lifestyles and a healthier planet. So, the next time you raise a glass, consider the benefits of organic wine and the difference it makes, both in your glass and for the world.
FAQ
What makes organic wine different from conventional wine?
Are all organic wines free from sulfites?
What practices are involved in sustainable viticulture?
How can I identify a certified organic wine?
What are the benefits of choosing organic wine?
What is natural wine?
What is biodynamic farming, and how does it relate to organic wine?
Are there specific organic wine varieties I should try?
Where can I find organic wines for purchase?
Amara brings her deep knowledge of African cuisine to the table, with a focus on the rich and hearty flavors of Senegal. She loves to share slow-cooked dishes like thieboudienne (rice and fish), which reflect the warmth and hospitality of African cooking. Amara’s approach to food is all about creating comforting meals that nourish the soul.
Beverage Deep Dives
Mixology 101: Classic Cocktails
Longing for a new cocktail adventure? Dive into the captivating world of mixology, where the possibilities are endless.
Dive into the captivating world of mixology! It all started centuries ago, with ancient civilizations like the Egyptians, Greeks, and Romans experimenting with unique cocktail recipes using local ingredients. Fast forward to colonial America, where bartenders created signature drinks with the flavors of the land. Today, modern mixologists keep innovating, blending spirits, juices, and botanicals to craft unforgettable cocktails. Learning the basics – like balancing ingredient ratios and mastering mixing techniques – is key to becoming a confident cocktail maker. Whether you're stirring up a classic Negroni or dreaming up your own signature sip, the art of mixology is a journey filled with endless possibilities.
Key Takeaways
- The history of mixology traces back to ancient civilizations, with unique cocktail recipes incorporating diverse ingredients like honey, herbs, and spices.
- Mastering the basics of mixology, including understanding ingredient ratios, experimenting with measurements, and maintaining attention to detail, is crucial for crafting balanced cocktails.
- The process of crafting classic cocktails involves gathering the necessary ingredients and glassware, combining them in a shaker, straining into a chilled glass, and adding a complementary garnish.
- The Negroni, a classic cocktail made with equal parts gin, Campari, and sweet vermouth, originated in early 20th century Florence, Italy, and exemplifies the balance of flavors essential in mixology.
- Creativity in cocktail making is encouraged, allowing for the exploration of unique flavor combinations, the incorporation of seasonal ingredients, and the development of personalized presentation techniques to elevate the drinking experience.
History
Tracing its roots back to ancient civilizations, the practice of mixology has a rich and storied history. Did you know that people were mixing drinks thousands of years ago? The ancient Egyptians, Greeks, and Romans all had their own unique cocktail recipes, using ingredients like honey, herbs, and even spices!
As the centuries passed, the art of mixing drinks evolved and spread around the world. In the 1700s, bartenders in colonial America started creating signature cocktails using local ingredients.
Then, during the 1800s, classic drinks like the Old Fashioned and the Martini became popular. Bartenders became true artists, experimenting with different flavors and techniques.
Today, mixology is more exciting than ever. Bartenders continue to push the boundaries, dreaming up new and innovative cocktails.
Whether you prefer sweet, sour, or somewhere in between, there's a cocktail out there for everyone to enjoy. So grab a shaker and get ready to explore the fascinating history of mixology!
Recipe
Mixology is the art of crafting cocktails, and it's a skill that can be honed through practice and experimentation. Whether you're a seasoned bartender or a home mixologist, having a solid foundation in mixology techniques can elevate your cocktail game.
In this recipe, we'll explore the classic Negroni, a timeless and sophisticated aperitif that strikes the perfect balance between bitter, sweet, and aromatic flavors.
The Negroni is a simple yet elegant cocktail, made with equal parts gin, Campari, and sweet vermouth. It's believed to have originated in Florence, Italy, in the early 20th century, when Count Camillo Negroni requested his usual Americano cocktail (Campari, sweet vermouth, and club soda) to be made with gin instead of soda. This substitution created the iconic drink we know and love today.
Ingredients:
- 1 oz gin
- 1 oz Campari
- 1 oz sweet vermouth
Instructions:
Fill a mixing glass with ice. Add the gin, Campari, and sweet vermouth. Stir the mixture until well-chilled, about 20-30 seconds. Strain the cocktail into a chilled rocks glass filled with fresh ice. Garnish with an orange slice or a twist of orange peel.
When making a Negroni, be sure to use high-quality ingredients. The balance of the three components is crucial, so consider experimenting with different gins, vermouths, and even Campari alternatives to find your perfect ratio.
Additionally, the stirring technique is important, as it helps to properly dilute and integrate the flavors. Enjoy your Negroni as an aperitif or as a digestif, and savor the complexity of this timeless cocktail.
Cooking Steps
Alright, let's get started!
First, you'll need to gather all your ingredients and glassware.
Then, combine everything in a shaker and give it a good shake.
Step 1. Gather Ingredients and Glassware
Assembling the right ingredients and glassware is the foundation for crafting delectable cocktails. You'll want to gather all the essential liquors, mixers, and garnishes before you start shaking or stirring. Smooth vodka, crisp gin, or rich bourbon – the spirit you choose sets the tone.
Pair it with fresh juices, bubbly club soda, or zesty bitters. Don't forget the garnishes! A juicy orange slice or a sprig of mint adds the perfect finishing touch.
For the glassware, you'll need the right vessel to showcase your cocktail. Tall Collins glasses are perfect for long, refreshing drinks, while short rocks glasses are ideal for spirit-forward sips.
Delicate coupe or Martini glasses lend an elegant flair. Whichever you choose, make sure it's clean and chilled before you pour.
With your ingredients and glassware ready to go, you're all set to shake, stir, and sip your way to cocktail perfection!
Step 2. Combine Ingredients in Shaker
Now that you have gathered all the necessary elements, it's time to put them to use! Grab your trusty cocktail shaker and get ready to mix up a delightful drink.
First, add the base spirit, like vodka or gin, along with any other liquid ingredients like juices or syrups. Next, toss in some ice cubes – the more the merrier!
Put the lid on the shaker and give it a good, vigorous shake. You'll want to shake it for about 10-15 seconds, until the outside of the shaker gets nice and frosty. This helps chill the drink and dilute it just the right amount.
Once you're done shaking, carefully strain the mixture into your waiting glass. Voila! Your cocktail is now ready to enjoy.
Remember to garnish it with a slice of fruit, a sprig of herb, or any other fancy touch to make it look as good as it tastes. Cheers!
Step 3. Strain Into Chilled Cocktail Glass
After vigorously shaking the cocktail, it's time to strain the mixture into your chilled cocktail glass.
Grab your trusty cocktail strainer and gently place it over the top of the shaker. Slowly tilt the shaker, allowing the delicious liquid to pour through the strainer and into the waiting glass.
You'll see the ice-cold cocktail come to life, its colors dancing in the light. Isn't it beautiful?
Now, take a moment to admire your creation. The smooth, shiny surface is just begging to be sipped. Go ahead, give it a try! The flavors will burst in your mouth, leaving you refreshed and delighted.
Remember, the key is to strain the cocktail carefully, ensuring no unwanted bits make their way into your glass.
With a little practice, you'll be straining like a pro in no time. Cheers to your perfect pour!
Step 4. Add Garnish
With your chilled cocktail now perfectly poured, it's time to put the finishing touches on your creation. Adding a garnish is the perfect way to enhance the presentation and aroma of your drink.
Carefully select a garnish that complements the flavors of your cocktail. For example, a slice of lemon or lime adds a bright, citrusy note, while a sprig of fresh mint brings a refreshing, herbal touch. Get creative and let your imagination shine!
Gently place the garnish on the rim of the glass, or let it rest delicately on the surface of the drink. Avoid overpowering the cocktail with a large or bulky garnish. The goal is to create a visually appealing and inviting presentation that entices your senses.
Now that your cocktail is complete, take a moment to admire your handiwork. With the perfect balance of flavors and a beautiful garnish, you're ready to sit back, relax, and enjoy your masterpiece.
Step 5. Enjoy Your Classic Cocktail
Take a moment to savor the aromatic and visually captivating cocktail you've just created. Breathe in the inviting scent, notice the vibrant colors, and admire the elegant presentation. This is your masterpiece – a testament to your mixology skills!
Now, it's time to enjoy the fruits of your labor. Gently pick up the glass, feeling its weight and coolness in your hand. Bring the rim to your lips and take a sip, allowing the flavors to dance across your tongue. Savor the perfect balance of sweet, sour, and spirit.
As you swallow, feel the liquid warmth travel down your throat, leaving a delightful sensation. Sit back, relax, and continue to sip your creation. Allow the cocktail to enhance your mood and conversation.
This is a moment to be savored, a chance to appreciate the art of mixology. Enjoy every last drop, knowing you've crafted a truly remarkable classic cocktail.
Final Thoughts
Mixology, the art of crafting remarkable beverages, is a journey of exploration and discovery. As you've learned about classic cocktails, you're now ready to take your skills to the next level. Mixing drinks is all about finding the perfect balance of flavors, textures, and aromas.
Don't be afraid to experiment and try new things. Swap out ingredients, adjust measurements, and see how it changes the final product. The more you practice, the better you'll become at creating your own unique concoctions.
Remember, the joy of mixology is in the process. Savor each step, from carefully measuring the ingredients to the satisfying final sip.
Whether you're hosting a party or simply enjoying a quiet evening at home, let your creativity shine. Impress your friends with your bartending prowess, or treat yourself to a delightful homemade cocktail.
The possibilities are endless when you embrace the art of mixology.
Frequently Asked Questions
What Is the Proper Glassware for Each Cocktail?
The proper glassware for a cocktail depends on the drink. You'll want to choose a glass that complements the flavors and presentation of the cocktail, whether it's a highball, coupe, or rocks glass.
How Can I Make My Cocktails Visually Appealing?
To make your cocktails visually appealing, focus on presentation. Use the right glassware, garnish creatively, and pay attention to color and texture. Experiment with ice shapes, citrus twists, and other eye-catching elements to elevate your drink's appearance.
What Are the Common Garnishes Used in Classic Cocktails?
To make your cocktails visually appealing, you can use a variety of common garnishes like citrus peels, olives, cherries, herbs, and spices. These simple additions can elevate the presentation and enhance the overall drinking experience.
How Do I Measure Ingredients Accurately for Cocktails?
To measure cocktail ingredients accurately, use a jigger or measured pour spout. Don't eyeball it – that'll throw off your ratios. Take the time to measure precisely for consistently great drinks.
What Are Some Tips for Perfecting the Ice for Cocktails?
To perfect the ice for cocktails, use filtered water and mold it into large, clear cubes or spheres. This will melt slowly, dilute your drink less, and create a visually appealing presentation.
Beverage Deep Dives
Smoothie Bowl Art: Instagram-Worthy Breakfasts
Joyful, colorful, and nutrient-rich, smoothie bowls have become a social media sensation, tempting you to discover the secrets behind these visually stunning and satisfying treats.
Smoothie bowls are all the rage these days, blending together delicious fruits and superfoods into a beautiful and nutritious breakfast. You'll be amazed at the vibrant colors and fun designs that people create, making these bowls totally Instagram-worthy. Just imagine a creamy smoothie as your base, topped with crunchy granola, juicy berries, and a sprinkle of toasted coconut – yum! Preparing these bowls at home lets you get creative, and the options are endless. Want to learn more about crafting your own smoothie bowl masterpieces? Keep reading to discover the secrets behind these visually stunning and satisfying treats.
Key Takeaways
- Smoothie bowls have gained immense popularity on social media due to their visually appealing and creative presentation, making them Instagram-worthy breakfast options.
- Vibrant ingredients, intricate designs, and themed arrangements contribute to the artistic appeal of smoothie bowls, allowing for self-expression and showcasing on social media platforms.
- Smoothie bowls are not only aesthetically pleasing but also nutritionally dense, with customizable ingredients providing essential vitamins, minerals, and fiber to support overall health.
- The transformation in flavor and texture, from blended smoothie to a frozen, ice cream-like consistency, creates a unique and refreshing breakfast experience.
- Topping suggestions such as crunchy granola, juicy berries, toasted coconut, and drizzles of honey or nut butter further enhance the visual appeal and flavor complexity of smoothie bowls.
History
Although smoothie bowls have been around for decades, the art of creating intricate designs and patterns on their surfaces has gained significant popularity in recent years. You can thank social media and the rise of "foodie" culture for this tasty trend!
Suddenly, people couldn't just blend up a nutritious smoothie – they'd to turn it into a colorful masterpiece, complete with fresh fruits, nuts, seeds, and all sorts of eye-catching toppings.
This Instagram-worthy craze started popping up in trendy cafes and health food stores, where baristas and chefs showcased their smoothie bowl creativity. Soon, home cooks got in on the action, experimenting with different flavor combinations and decorative techniques to make their breakfasts as beautiful as they're delicious.
From swirling nut butters to arranging berries in vibrant patterns, the possibilities for smoothie bowl art are endless. Whether you're a seasoned pro or just starting out, get ready to have fun and make your morning meal a true work of art!
Recipe
Smoothie bowls are a delightful way to enjoy a nutritious and visually appealing breakfast or snack. These frozen blended concoctions aren't only packed with essential vitamins and minerals but also allow for endless creative possibilities.
Transforming a simple smoothie into an edible work of art is a fun and engaging activity that the whole family can enjoy. Whether you're a seasoned smoothie enthusiast or new to the world of blended beverages, this recipe will guide you through the steps to create a visually stunning smoothie bowl.
Get ready to impress your friends and nourish your body with this delicious and Instagram-worthy treat.
Ingredients:
- 1 cup frozen mixed berries
- 1 banana, frozen
- 1/2 cup almond milk
- 1 tablespoon honey (optional)
- 1 tablespoon chia seeds
- 1 tablespoon granola
- Assorted fresh fruit (such as sliced kiwi, strawberries, and blueberries)
- Toasted coconut flakes (optional)
Instructions:
Combine the frozen mixed berries, banana, almond milk, and honey (if using) in a high-speed blender. Blend until smooth and creamy.
Pour the smoothie into a bowl. Sprinkle the chia seeds and granola on top. Arrange the assorted fresh fruit and coconut flakes (if using) in a visually appealing design on the smoothie. Serve immediately and enjoy your masterpiece!
Tips:
For a thicker consistency, use less almond milk. Adjust the sweetness to your liking by adding more or less honey.
Feel free to experiment with different fruit combinations and toppings to create your own unique smoothie bowl. Have fun and let your creativity shine through!
Cooking Steps
Blend your favorite frozen fruit and yogurt until smooth and creamy.
Pour the vibrant mixture into a bowl, then get creative by topping it with fresh fruit, nuts, seeds, or even a sprinkle of toasted coconut.
For an icy treat, stick the whole bowl in the freezer overnight and enjoy your delicious smoothie bowl the next day!
Step 1. Blend Frozen Fruit and Yogurt
Gather your blender and dive into the vibrant world of frozen fruit and creamy yogurt. The possibilities are endless when it comes to creating your own delectable smoothie bowl masterpiece. Start by choosing your favorite frozen fruit – maybe it's sweet and juicy mango, or perhaps tart and refreshing raspberries are more your style. Toss those frozen gems into your trusty blender, then add a generous scoop of thick, tangy yogurt.
For an added boost of nutrition, consider incorporating some fresh herbs like mint for a refreshing twist, as seen in unique combinations enhance flavor. Blend until the mixture is smooth and creamy, just the way you like it.
Now, the real fun begins! Carefully pour your frozen fruit and yogurt blend into a bowl, creating a blank canvas for your edible artwork. Grab an assortment of fresh fruit, nuts, granola, and any other tasty toppings that catch your eye.
Artfully arrange these vibrant ingredients to transform your smoothie bowl into an Instagram-worthy breakfast that's almost too pretty to eat – almost! With each spoonful, savor the burst of flavors and the satisfying crunch of your customized creation.
Step 2. Pour Into Bowl
With your blended fruit and yogurt mixture ready, it's time to pour the luscious, creamy concoction into a bowl, creating a blank canvas for your edible masterpiece.
To enhance your smoothie bowl experience, consider adding a soothing herbal tea like chamomile on the side, known for its calming effects.
Grab your favorite bowl – maybe one with a pretty pattern or a bright, cheerful color. Slowly and carefully, pour the smooth, thick smoothie into the bowl, making sure to get every last delicious drop.
Watch as the vibrant purples, oranges, and greens swirl together, just waiting for you to transform them into a work of art.
Now it's time to get creative! Grab your toppings – things like fresh berries, toasted coconut, crunchy granola, or a drizzle of nut butter.
Arrange them in fun, colorful designs, letting your imagination run wild. Will you make a smiley face with banana slices? Or maybe a rainbow with vibrant fruit?
The possibilities are endless! Just have fun and get ready to impress your friends and family with your smoothie bowl masterpiece.
Step 3. Garnish With Fresh Toppings
After you've poured the smoothie into the bowl, it's time to add the finishing touches. Grab a handful of fresh, colorful toppings and start arranging them on top of the creamy smoothie base.
Slice up some juicy strawberries and scatter them around the edges, creating a bright red border. Strawberries aren't only delicious but also rich in vitamin C, which can help promote skin health and give you that radiant glow benefits of vitamin C.
Sprinkle on a few plump blueberries, their deep purple hue providing a nice contrast. Don't forget the banana slices – they add a sunny, tropical vibe to your creation.
For a finishing touch, sprinkle on a sprinkling of toasted coconut flakes, their sweet, nutty flavor complementing the smoothie perfectly.
Step back and admire your work – your smoothie bowl is now a true work of art, ready to be shared on Instagram and enjoyed.
With all these vibrant, fresh toppings, your breakfast isn't only delicious, but visually stunning too.
Step 4. Sprinkle With Toasted Coconut
To elevate your smoothie bowl even further, sprinkle a generous amount of toasted coconut flakes over the top. The golden-brown, crunchy pieces will add a delightful texture and a sweet, nutty flavor that perfectly complements the fresh fruit and creamy yogurt.
Imagine the aroma of the toasted coconut wafting through the air as you take your first bite.
The toasted coconut flakes are easy to prepare – simply place them in a dry skillet over medium heat and cook, stirring occasionally, until they turn a lovely golden brown.
Be sure to keep a close eye on them, as they can go from perfectly toasted to burnt in the blink of an eye!
Once they've reached that delicious, toasted perfection, remove the skillet from the heat and let the coconut cool slightly before sprinkling it over your smoothie bowl.
The combination of the smooth, creamy smoothie and the crunch of the toasted coconut is simply irresistible.
Go ahead, give it a try – your taste buds will thank you!
Step 5. Freeze Smoothie Bowl Overnight
Freeze your smoothie bowl overnight for a delightfully chilled and thick treat in the morning.
You'll be amazed at how the flavors meld and the texture transforms when your vibrant, fruity creation sits in the freezer. Simply prepare your smoothie as usual, then pour it into your favorite bowl.
Pop it in the freezer, and let the magic happen! In the morning, you'll have a deliciously frozen breakfast that's almost like ice cream. Just give it a few minutes to thaw slightly, then dig in with a spoon.
Top it with all your favorite toppings – maybe some crunchy granola, juicy berries, or toasted coconut. The frozen smoothie will keep you feeling full and satisfied until lunchtime.
It's a delightful way to start your day, and your Instagram followers will be drooling over your artful masterpiece!
Final Thoughts
Creativity in the kitchen can be a source of profound satisfaction. Crafting eye-catching smoothie bowls allows you to unlock your inner artist and share your masterpieces with the world.
Whether you prefer vibrant, fruit-filled creations or earthy, veggie-based designs, the possibilities are endless.
As you continue your smoothie bowl journey, don't be afraid to experiment. Mix and match different ingredients, textures, and colors to find what inspires you.
The best part? Your unique smoothie bowl art can brighten someone's day and spread joy through the power of a delicious, nutritious breakfast.
Frequently Asked Questions
What Are the Best Fruits to Use in a Smoothie Bowl?
When crafting your smoothie bowl, consider using a variety of fresh fruits like bananas, berries, mango, and pineapple. These vibrant ingredients not only taste great but also create a visually appealing and nutrient-dense foundation for your customized breakfast creation.
How Can I Make My Smoothie Bowl More Visually Appealing?
To make your smoothie bowl more visually appealing, try arranging your fruits and toppings in a decorative pattern. Add a drizzle of nut butter or honey for texture and contrast. Get creative with colorful ingredients to make your bowl pop.
Is It Necessary to Use a Blender for a Smoothie Bowl?
You don't necessarily need a blender to make a smoothie bowl. You can simply chop up the ingredients and mix them together in a bowl. This method may not create as smooth a texture, but it can still be visually appealing.
Can I Make a Smoothie Bowl the Night Before?
You can make a smoothie bowl the night before, but it's best to assemble it right before serving. Preparing it ahead of time may result in a watery or separated texture, so it's better to blend and layer it fresh.
How Do I Store Leftover Smoothie Bowl Ingredients?
You can store leftover smoothie bowl ingredients in airtight containers in the fridge. The fruits and veggies will stay fresh for 3-4 days, so you can easily prep them ahead of time for a quick breakfast.
Beverage Deep Dives
Bubble Tea: Tapioca Pearl Perfection
Nourish your taste buds with the captivating blend of black tea and chewy tapioca pearls that make up the irresistible treat known as bubble tea.
Bubble tea's tapioca pearls are the perfect chewy treat! This delightful drink was born in Taiwan in the 80s, mixing black tea with those irresistible pearls. Now, bubble tea shops around the world offer endless flavors – from classic milk tea to fruity fusions. You can customize your drink however you'd like, with different tea types, milks, and sweeteners. The pearls are soaked, boiled, and chilled to achieve that signature soft and bouncy texture. Exciting toppings like fruit jellies and popping boba take the experience to new heights. Bubble tea is a sensory delight that'll capture your taste buds – and you'll want to dive in for more!
Key Takeaways
- Bubble tea's signature feature is the chewy and satisfying tapioca pearls, which provide a unique texture and mouthfeel to the refreshing tea-based drink.
- The cooking process for tapioca pearls is crucial, involving soaking, boiling, and chilling to achieve the perfect soft yet bouncy consistency.
- Bubble tea offers endless customization options, allowing consumers to personalize their drink with a variety of tea bases, milk types, sweeteners, and toppings.
- The vibrant colors and playful presentation of bubble tea contribute to its widespread appeal, especially among younger generations and social media enthusiasts.
- Bubble tea has become a global phenomenon, transcending its Taiwanese roots and captivating taste buds around the world with its fusion of traditional tea culture and modern trends.
History
Bubble tea, also known as boba tea, has a rich and fascinating history that traces back to the 1980s in Taiwan.
Originating from a small tea shop, the beloved beverage was created by mixing black tea with chewy, tapioca pearls known as "boba." These unique pearls quickly became the star of the drink, adding a delightful textural contrast and fun, playful element.
As the trend spread throughout Asia, bubble tea's popularity skyrocketed, captivating taste buds with its irresistible blend of sweet and creamy flavors.
Soon, the refreshing concoction found its way to the Western world, where it continued to enchant new audiences.
Today, bubble tea shops can be found in every corner of the globe, offering a dazzling array of flavors and customization options to suit every palate.
From classic milk tea to innovative fruit-infused varieties, the humble beginnings of this beloved beverage have blossomed into a global phenomenon.
Recipe
Bubble tea, also known as boba tea, is a beloved Taiwanese beverage that has gained global popularity. This refreshing and customizable drink combines tea, tapioca pearls, and a variety of flavorful additives, creating a unique and delightful experience.
Originating in the 1980s, bubble tea has evolved over the years, with countless flavor combinations and variations. Whether you prefer a classic milk tea or a vibrant fruit-based concoction, the versatility of bubble tea allows you to explore and discover your perfect blend.
- Black tea
- Milk (dairy or non-dairy)
- Tapioca pearls
- Sugar (or alternative sweetener)
- Ice cubes
In a saucepan, bring water to a boil. Add the tapioca pearls and cook according to the package instructions, typically about 20-25 minutes. Drain the pearls and rinse them under cold water to stop the cooking process.
In a separate container, brew the black tea according to your preference. In a serving glass, combine the cooked tapioca pearls, brewed tea, milk, and sugar (or alternative sweetener) to taste. Stir well and add ice cubes.
When preparing bubble tea, it's important to ensure that the tapioca pearls are cooked to the desired texture, which should be chewy and bouncy. Additionally, you can experiment with different tea varieties, milk types, and sweeteners to find your personal favorite combination.
Enjoy your homemade bubble tea and explore the endless possibilities of this delightful beverage.
Cooking Steps
First, you'll need to soak the tapioca pearls in water until they're nice and plump.
Once they're ready, just pop them into a pot and boil 'em up until they're all nice and translucent.
Step 1. Soak Tapioca Pearls in Water
To prepare the tapioca pearls, you'll want to soak them in water for a specified duration. This crucial step helps the pearls soften and plump up, ensuring they've the perfect, chewy texture you'll love.
Start by grabbing a large bowl and filling it with clean, filtered water. Gently pour in the dry, uncooked tapioca pearls, making sure they're fully submerged. Let them soak for 30 minutes to an hour, depending on the size of the pearls. You'll know they're ready when they appear translucent and have a soft, pliable feel.
Drain the pearls in a mesh strainer, then transfer them to your pot or saucepan. From here, you'll cook the pearls according to the package instructions, simmering them until they float to the top.
With these juicy, bouncy pearls, you're well on your way to creating a delightful bubble tea masterpiece!
Step 2. Boil Tapioca Pearls Until Translucent
With the soaking step complete, the plump tapioca pearls are ready to be cooked.
Bring a pot of water to a rolling boil on the stove. Gently drop the soaked pearls into the boiling water and let them cook. As they heat up, you'll see them start to turn translucent and expand in size.
Stir the pearls occasionally to ensure they cook evenly. It'll take about 15-20 minutes for the tapioca to become fully cooked and transparent. Once they reach this stage, they're ready to be enjoyed!
The pearls should have a soft, chewy texture that's simply delightful. Now you can add the cooked tapioca to your favorite bubble tea recipe.
Get ready to sip on a refreshing and fun treat that's bursting with flavor. The cooking process may take a bit of time, but it's worth it to achieve those perfectly cooked, glossy tapioca pearls.
Step 3. Add Milk and Sweetener
Now that you have perfectly cooked tapioca pearls, it's time to assemble the rest of your bubble tea. In a separate pitcher or container, combine your desired amount of milk and sweetener. You can use regular milk, almond milk, or even condensed milk for a creamier taste.
As for the sweetener, you've got plenty of options – try brown sugar, honey, or even maple syrup to give your bubble tea a unique flavor. Stir everything together until the sweetener has fully dissolved.
Now it's time to put it all together! Grab your glass and fill it about halfway with the cooked tapioca pearls. Gently pour the milk and sweetener mixture over the top, making sure to get an even distribution.
Give it a gentle stir to incorporate everything. Finally, add some ice cubes to chill your delightful bubble tea creation. The sweet milk, chewy tapioca, and refreshing ice make for an irresistible treat! Sip and enjoy your homemade bubble tea masterpiece.
Step 4. Chill Tapioca Pearls in Ice Bath
After cooking, you'll want to chill the tapioca pearls in an ice bath. This is a crucial step to get those pearls to the perfect texture – chewy, bouncy, and oh-so-satisfying!
Simply fill a large bowl with ice water and gently transfer the cooked pearls into the bath. Let them soak for about 15 minutes, stirring occasionally to ensure even cooling.
You'll see the pearls transform from sticky and soft to firm and springy. Mmm, can you just imagine biting into one of those delightful little orbs? The contrast of the cool, slippery exterior and the warm, gummy interior is what makes bubble tea so heavenly.
Once the pearls are perfectly chilled, drain them well and they're ready to be added to your favorite bubble tea recipe. Get ready for an explosion of flavor and texture in every refreshing sip!
Step 5. Serve With Desired Beverage
Once you've perfectly chilled the tapioca pearls, it's time to start building your bubble tea. Grab your favorite beverage – maybe it's sweet and creamy milk tea, or perhaps you're in the mood for a refreshing fruit-flavored tea. Whatever your preference, pour it into a tall glass, leaving a bit of room at the top.
Now, it's time to add those delightfully chewy tapioca pearls. Scoop up a generous helping from your ice bath and let them tumble into the tea. Watch as they sink to the bottom, ready to be sipped up through your wide bubble tea straw.
Don't forget to add any desired toppings, like fluffy whipped cream or a drizzle of sweet syrup. The possibilities are endless!
Give your drink a gentle stir, then grab that straw and take a sip. The burst of flavor and satisfying texture is sure to delight your taste buds. Enjoy your perfectly crafted bubble tea masterpiece!
Final Thoughts
Bubble tea, with its distinct visual appeal and delightful flavors, has undoubtedly captivated the hearts and taste buds of many. From the chewy tapioca pearls to the refreshing tea base, this unique beverage offers a sensory experience like no other. As you sip and savor each sip, you'll be transported to a world of pure joy and indulgence.
The beauty of bubble tea lies in its versatility. Whether you prefer fruity, creamy, or even coffee-inspired concoctions, there's a flavor to suit every palate. The vibrant colors and playful toppings add an element of fun, making it the perfect treat for both kids and adults alike.
As you embark on your bubble tea journey, embrace the opportunity to experiment and discover your personal favorite. With endless possibilities, the only limit is your imagination.
Frequently Asked Questions
How Long Do Tapioca Pearls Last After Being Cooked?
Freshly cooked tapioca pearls last up to 4 hours at room temperature. To extend their shelf life, you can store them in the refrigerator for up to 3 days or freeze them for longer term storage.
Can I Make Bubble Tea With Non-Dairy Milk Alternatives?
You can certainly make bubble tea with non-dairy milk alternatives. Almond, soy, or oat milk work well, providing a creamy base for the chewy tapioca pearls. Experiment to find your preferred non-dairy combination.
What Are the Health Benefits of Drinking Bubble Tea?
Drinking bubble tea can provide some health benefits, though the sugary content means you should enjoy it in moderation. The tapioca pearls offer a source of complex carbohydrates, while non-dairy milk alternatives may offer additional nutritional value depending on the type you choose.
How Can I Customize the Sweetness Level of My Bubble Tea?
To customize the sweetness level of your bubble tea, you can ask the provider to adjust the sugar content. Many shops offer options like 25%, 50%, or 75% sweetness, allowing you to control the level that suits your taste.
Is Bubble Tea Gluten-Free?
Yes, bubble tea is typically gluten-free. The primary ingredients in bubble tea, like tapioca pearls, milk, and tea, don't contain gluten. However, it's always a good idea to check with the café or vendor to confirm the specific recipe.
-
Southern Comfort Food1 month ago
Cheese Straws
-
Brazilian Cuisine1 month ago
Caldeirada
-
Southern Comfort Food1 month ago
Creamed Corn
-
Brazilian Cuisine1 month ago
Chicken in Brown Sauce
-
Brazilian Cuisine1 month ago
Tacacá
-
Southern Comfort Food1 month ago
Squash Casserole
-
Ethiopian Cuisine1 month ago
Buna (Coffee)
-
Polish Comfort Food1 month ago
Krupnik (Barley Soup)