Connect with us

Beverage Deep Dives

Aperol Spritz

Just when you thought you knew all about classic Italian cocktails, the Aperol Spritz surprises with its vibrant hue and refreshing, bittersweet taste. Discover more about this global sensation.

Published

on

refreshing italian cocktail delight

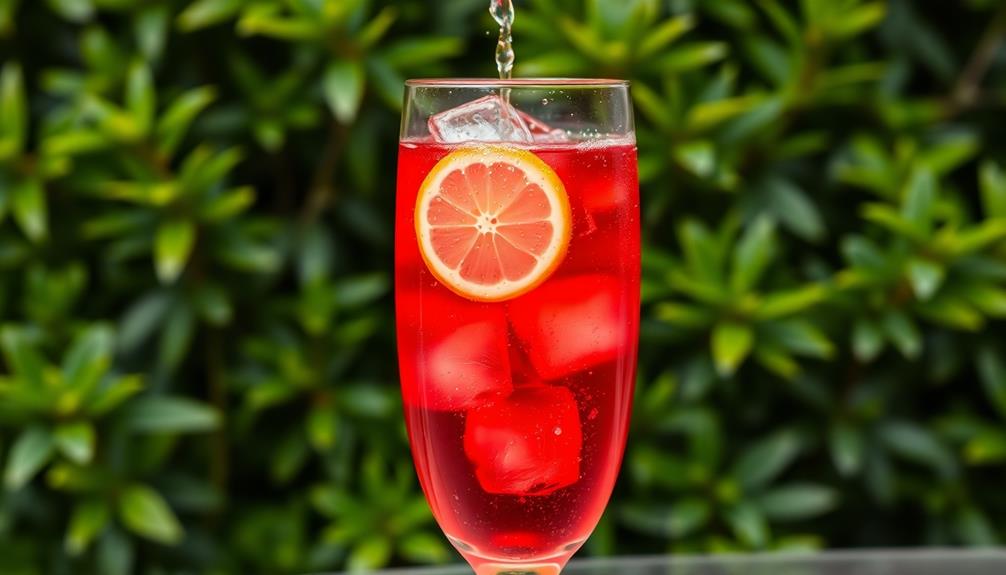
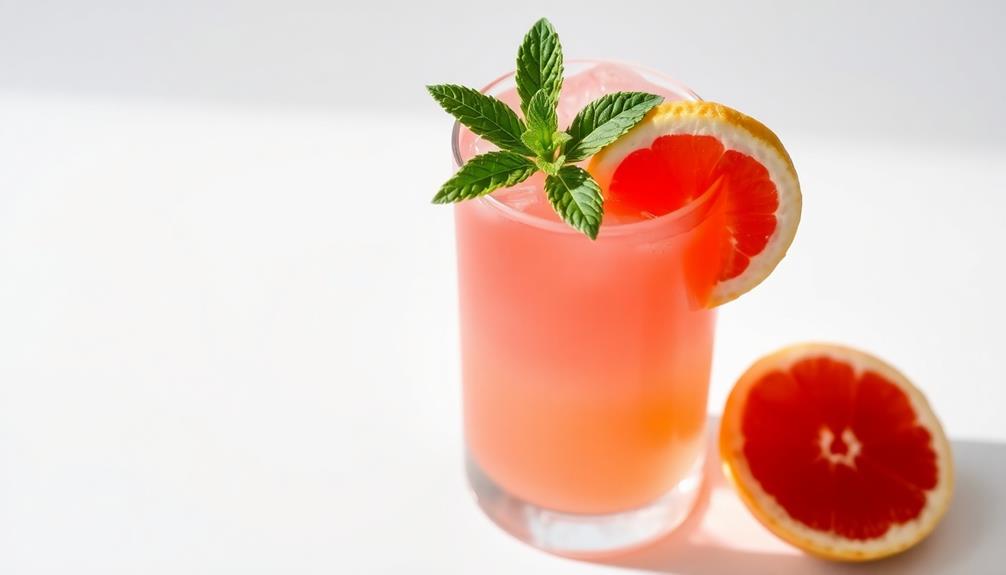
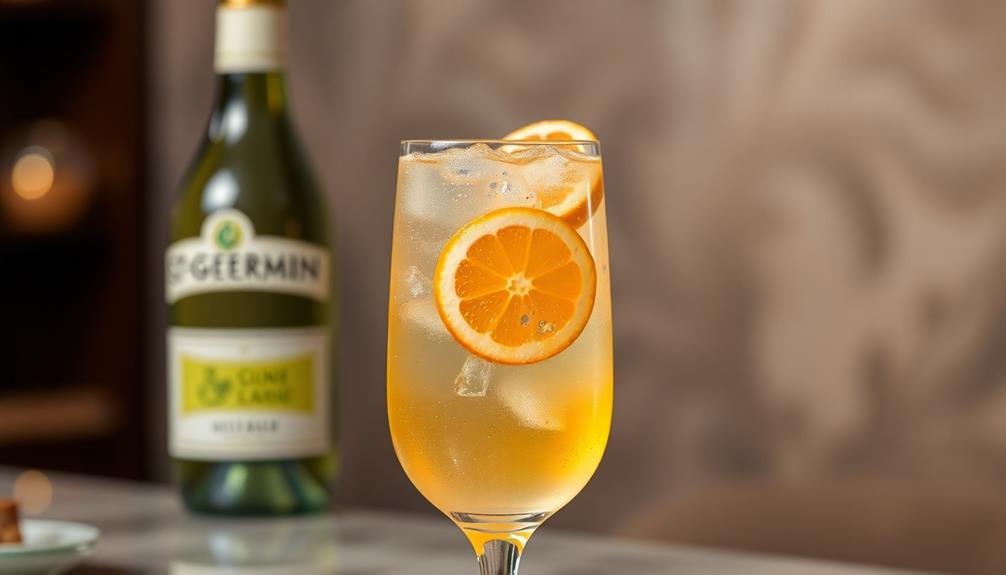
You'll love the Aperol Spritz – it's a classic Italian cocktail that perfectly blends bittersweet Aperol, crisp sparkling wine, and refreshing soda water. The vibrant orange hue and citrusy notes make it a summertime staple. To craft the perfect Spritz, just fill a glass with ice, add a splash of Aperol, then gently pour in the sparkling wine and soda. Garnish with an orange slice for an extra burst of flavor. This effervescent delight is best enjoyed with friends or light meals. There's more to discover about this beloved Italian drink and how it became a global sensation.

Key Takeaways

  • Aperol Spritz is a classic Italian cocktail made with Aperol, prosecco, and soda water, known for its bittersweet flavor and vibrant orange color.
  • The cocktail's origins can be traced back to the late 19th century in Padua, Italy, with the Aperol aperitif introduced in 1919.
  • The standard recipe calls for a 3-2-1 ratio of prosecco, Aperol, and soda water, respectively, garnished with a fresh orange slice.
  • Aperol Spritz is a summertime staple in Italy and has gained global popularity as a refreshing and social drink, often enjoyed with light meals.
  • The quality of the ingredients, such as high-quality prosecco and Aperol, is crucial for achieving the perfect balance of flavors and carbonation.

History
past events and significance

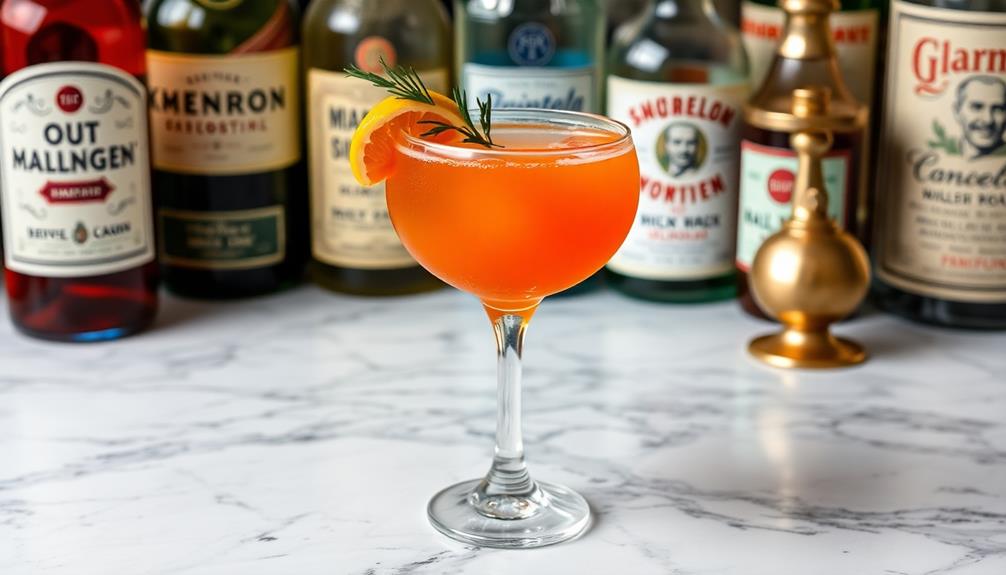
In the late 19th century, the Aperol Spritz was born in Padua, Italy. This iconic cocktail has its roots in the Veneto region, where folks have long appreciated the joys of an effervescent, bittersweet drink.

Aperol, the orange-hued liqueur that forms the base of the Spritz, was first introduced in 1919 by the Barbieri brothers. They crafted it to be a lighter, more accessible take on the traditional bitter Italian aperitifs.

Over time, the Aperol Spritz evolved, becoming a beloved summertime staple across Italy and beyond. Today, it's enjoyed for its perfect balance of bitter and sweet, its vibrant color, and its ability to transport you to the sun-drenched piazzas of northern Italy. Many households have their own special aperitivo spritz recipe, often passed down through generations. It’s a drink that brings people together, whether they’re sitting outside a cafe in Milan or hosting a backyard barbecue in America. The Aperol Spritz has truly become a symbol of leisure and relaxation, representing the carefree spirit of summer.

Whether you're sipping one on the Rialto Bridge in Venice or mixing one up at home, the Aperol Spritz remains a refreshing and iconic Italian classic.

Recipe

culinary instructions and ingredients

The Aperol Spritz is a classic Italian cocktail that perfectly captures the essence of summer. Its vibrant orange hue and refreshing effervescence make it a popular choice for social gatherings, al fresco dining, and enjoying the warm weather.

Originating in the Veneto region of Italy, the Aperol Spritz has become a global phenomenon, captivating the hearts and palates of cocktail enthusiasts worldwide. This simple, yet delightful libation is a harmonious blend of Aperol, prosecco, and a splash of soda water, creating a delicate balance of bitterness, sweetness, and carbonation.

Advertisement
  • 3 parts prosecco
  • 2 parts Aperol
  • 1 part soda water
  • Orange slice for garnish

In a wine glass filled with ice, combine the prosecco, Aperol, and soda water. Gently stir to combine the ingredients. Garnish with an orange slice and serve immediately. The Aperol Spritz is best enjoyed in the company of friends, on a sun-drenched terrace, or as a refreshing accompaniment to a light meal.

When preparing the Aperol Spritz, it's important to use high-quality ingredients, as the simplicity of the cocktail allows the flavors to shine.

Opt for a dry, crisp prosecco and ensure the Aperol is fresh and hasn't been sitting on the shelf for too long. Lastly, don't be afraid to experiment with the ratio of ingredients to suit your personal taste preferences.

Cooking Steps
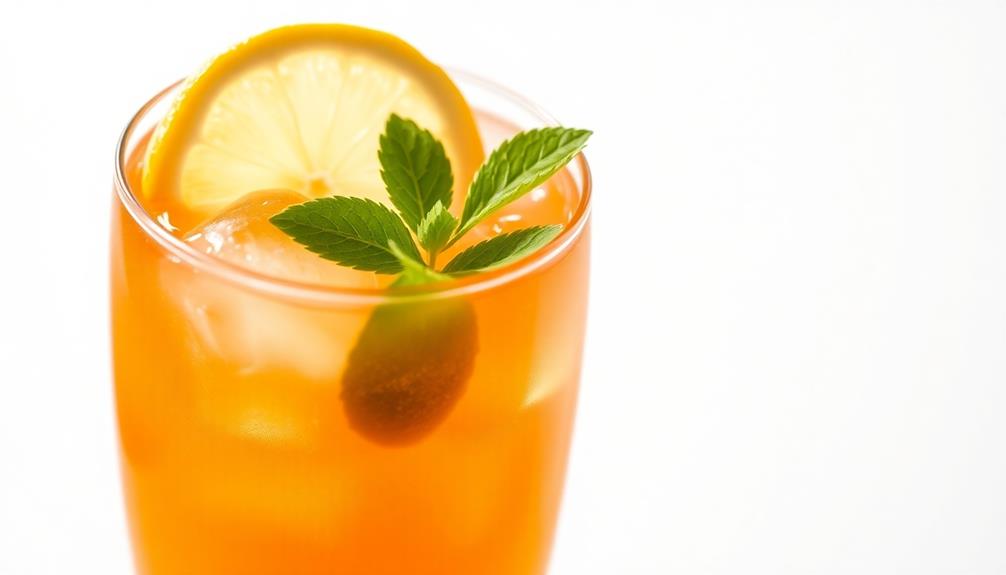
step by step cooking instructions

Fill a wine glass with ice, then add a generous portion of Aperol.

Next, top it off with some sparkling wine and stir gently to combine.

Step 1. Fill a Wine Glass With Ice
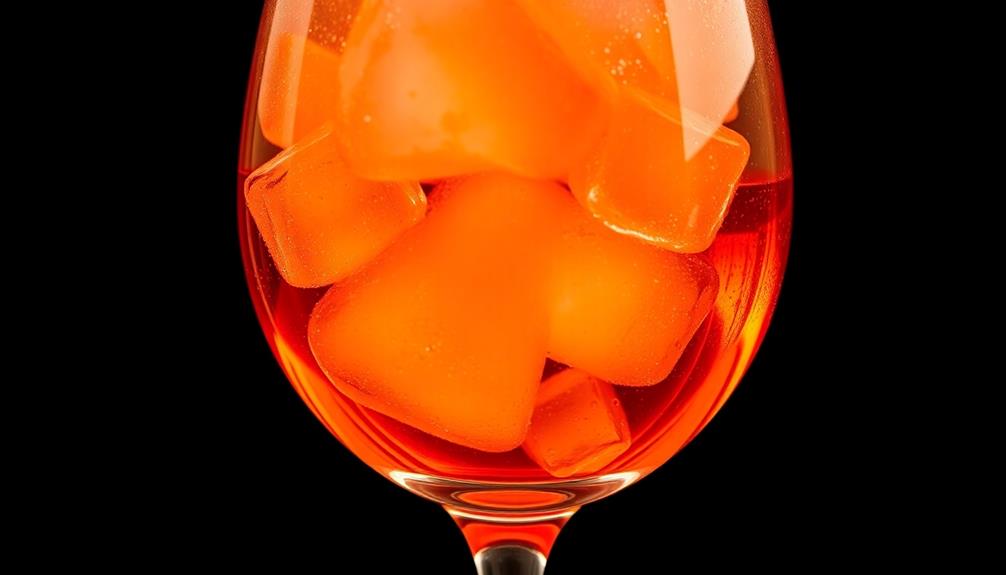
fill glass with ice

Start by grabbing a wine glass and filling it with ice cubes. This helps chill the glass and will keep your Aperol Spritz nice and cold. Be sure to use plenty of ice – you'll want to fill the glass almost to the top. This ensures the drink stays icy and refreshing as you sip it.

Next, add a splash of Aperol, the signature orange-hued Italian aperitif that gives the Spritz its vibrant color and slightly bitter, herbal flavor. Try to pour the Aperol gently down the side of the glass to avoid a big splash.

After the Aperol, top up the glass with chilled Prosecco, the effervescent Italian sparkling wine. Fill it about three-quarters of the way up.

Advertisement

Finally, give the drink a gentle stir with a bar spoon to combine the ingredients. Garnish with an orange slice or wedge for a lovely finishing touch.

And there you have it – a perfectly poured Aperol Spritz, ready to enjoy!

Step 2. Add Aperol
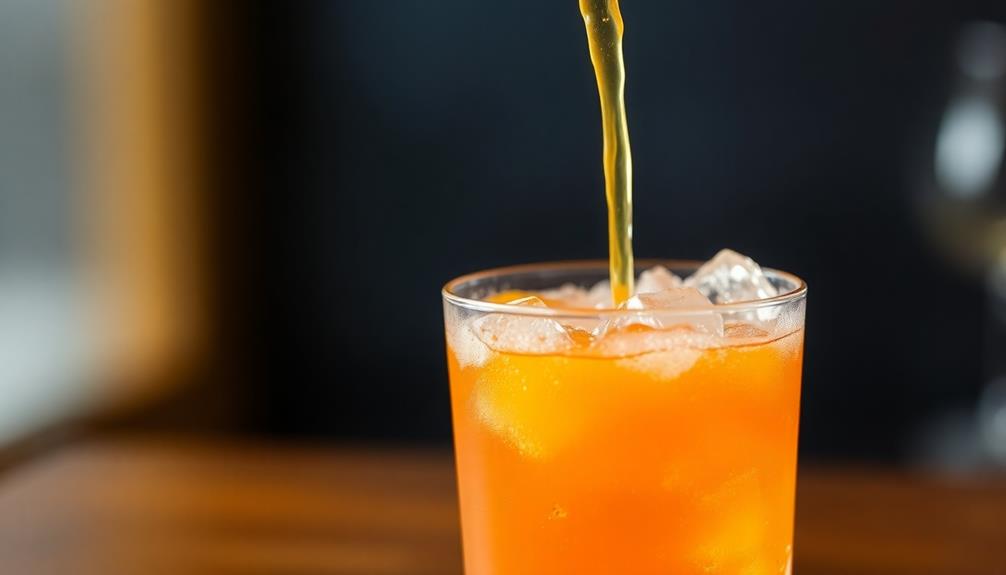
add aperol to mixture

Next, add a splash of Aperol, the signature orange-hued Italian aperitif that gives the Spritz its vibrant color and slightly bitter, herbal flavor.

Aperol is the key ingredient that sets this cocktail apart, so be generous with it. Start with around 2 ounces, or about a quarter of the glass. You can add a bit more if you'd like a stronger Aperol taste.

Be sure to pour it in slowly, so it mixes evenly with the chilled ice. The Aperol will create a beautiful ombre effect, transitioning from deep orange at the bottom to a lighter, more translucent hue at the top.

Swirl the glass gently to combine the Aperol with the cold water and ice. Now you're one step closer to sipping on this refreshing, quintessential Italian aperitif!

Advertisement

Step 3. Add Sparkling Wine

incorporate sparkling wine

With the Aperol now gracefully incorporated, it's time to add the sparkling wine that brings this Aperol Spritz cocktail to life.

Slowly pour the chilled sparkling wine into the glass, filling it about three-quarters full. The effervescence of the sparkling wine will create a beautiful, bubbly crown that sits atop the orange-hued Aperol.

Be gentle as you pour, allowing the wine to gently cascade down the inside of the glass. This will help preserve the carbonation and create an inviting, light and airy texture.

Once the glass is filled, give it a gentle stir to fully combine the Aperol and sparkling wine. The result is a vibrant, refreshing cocktail with a harmonious balance of flavors.

The citrusy notes of the Aperol mingle seamlessly with the crisp, lively effervescence of the sparkling wine, making each sip a delightful experience.

Step 4. Stir Gently to Combine
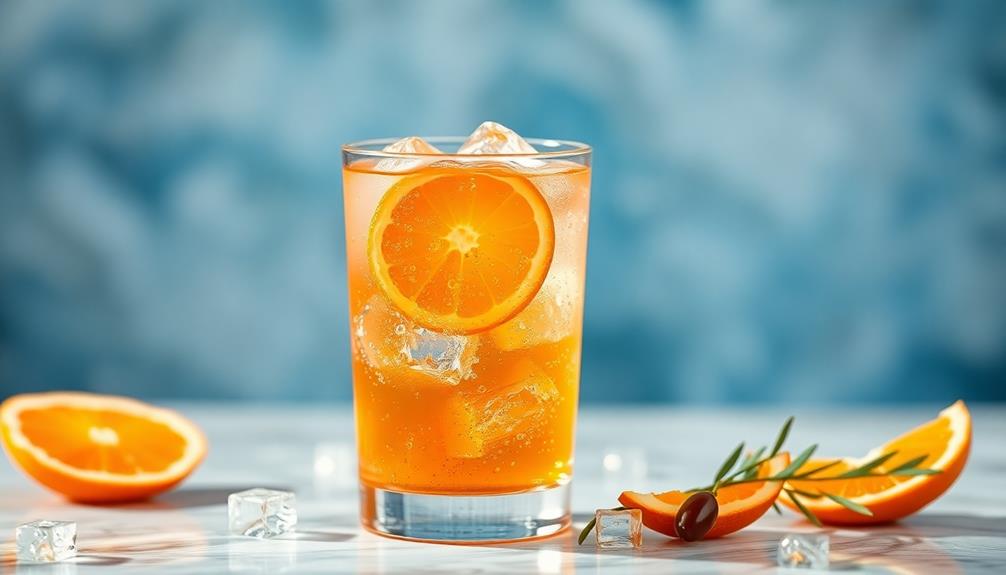
gently stir for combination

Once the glass is filled, give it a gentle stir to fully combine the Aperol and sparkling wine.

You don't want to over-mix, but a few slow rotations of the spoon will ensure the cocktail is properly blended. This step helps the flavors meld together, creating a harmonious sip.

Advertisement

The Aperol's bittersweet notes will marry with the effervescence of the sparkling wine, resulting in a balanced, refreshing drink.

Be mindful not to stir too vigorously, as that could cause the bubbles to dissipate prematurely. A light touch is key.

After the brief stirring, the Aperol Spritz is ready to enjoy. Its vibrant orange hue and fizzy texture make for a truly delightful aperitif.

Sip slowly and savor the interplay of citrus, herbs, and carbonation that makes this cocktail so irresistible.

Step 5. Garnish With Orange Slice
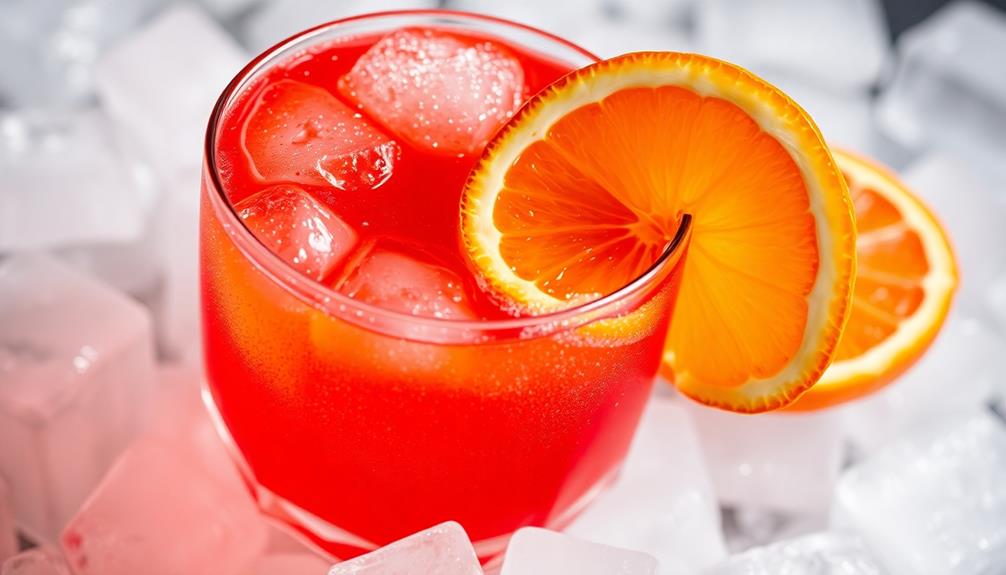
garnish with orange slice

To complete your Aperol Spritz, add a fresh orange slice as a garnish. The bright, vibrant color of the orange slice not only looks beautiful but also enhances the overall flavor of the drink.

Carefully select a juicy, ripe orange and slice it into a thin, circular piece. Gently place the orange slice on the edge of the glass, allowing it to hang over the side slightly.

Advertisement

This presentation not only looks stunning but also allows the citrus aroma to waft up and mingle with the other flavors in the cocktail. The orange slice acts as a lovely finishing touch, providing a final burst of bright, zesty flavor that complements the bittersweet Aperol and the effervescent prosecco.

Enjoy your perfectly garnished Aperol Spritz and savor the refreshing and balanced flavors that this classic cocktail has to offer.

Final Thoughts

reflective concluding remarks

The Aperol Spritz is a refreshing and popular cocktail that's perfect for summer gatherings.

It's a great choice for hosting outdoor parties or sipping by the pool. The bright, citrusy flavors and bubbly fizz make it a crowd-pleaser.

While the basic recipe is simple, there are a few tips to help you craft the perfect Aperol Spritz every time.

Be sure to use quality ingredients, like chilled Prosecco and a generous pour of Aperol.

Advertisement

The optional orange slice garnish not only looks pretty, but it also enhances the drink's citrusy notes.

Stir gently to combine the flavors without losing the carbonation.

Frequently Asked Questions

What Is the Alcohol Content of an Aperol Spritz?

The alcohol content of an Aperol Spritz is typically around 8-11% ABV. This is a moderate level of alcohol, making it a refreshing and easy-to-enjoy cocktail.

The Spritz combines the bittersweet Aperol liqueur, prosecco, and soda water, creating a light, bubbly, and subtly citrusy drink. It's the perfect choice for sipping on a warm day or enjoying with friends.

Just remember to drink responsibly and pace yourself to truly savor the Aperol Spritz experience.

Advertisement

How Long Does an Aperol Spritz Take to Prepare?

Preparing an Aperol Spritz is a quick and easy process. You can whip one up in just a few minutes.

First, fill a wine glass with ice. Then, pour in 3 parts Prosecco, 2 parts Aperol, and 1 part soda water.

Give it a gentle stir, and you're good to go! The whole process takes no more than 2-3 minutes from start to finish.

It's a refreshing cocktail that's perfect for any occasion.

Can I Substitute the Aperol With Other Liqueurs?

Absolutely! You can substitute Aperol with other liqueurs in your cocktail.

Advertisement

While Aperol is a classic choice, you can experiment with different flavors like Campari, Cynar, or even sweet vermouth.

The key is to maintain the general proportions of the drink – typically 3 parts sparkling wine, 2 parts liqueur, and 1 part soda water.

Play around and find a liqueur that suits your taste buds. Just be sure to adjust the sweetness level as needed.

Is the Aperol Spritz Suitable for Non-Alcoholic Drinkers?

As a non-alcoholic drinker, you may be wondering if the Aperol Spritz is a suitable option for you.

The good news is that you can absolutely enjoy this refreshing and vibrant cocktail without the alcohol.

Advertisement

Simply substitute the Aperol with a non-alcoholic aperitif or bitter, and the sparkling wine with a non-alcoholic sparkling beverage.

This way, you can still experience the bright, citrusy flavors and the bubbly, festive nature of the Aperol Spritz, but without the alcohol content.

How Long Can an Aperol Spritz Be Stored?

An Aperol Spritz is best enjoyed fresh, so you'll want to consume it right away.

However, if you've got leftovers, you can store it in the refrigerator for up to 2-3 days.

Just make sure to cover the drink to prevent it from absorbing any fridge odors.

Advertisement

When you're ready to enjoy it again, give it a gentle stir before serving over ice.

Cheers!
Advertisement

Beverage Deep Dives

Mixology 101: Classic Cocktails

Longing for a new cocktail adventure? Dive into the captivating world of mixology, where the possibilities are endless.

Published

on

essential classic cocktail techniques

Dive into the captivating world of mixology! It all started centuries ago, with ancient civilizations like the Egyptians, Greeks, and Romans experimenting with unique cocktail recipes using local ingredients. Fast forward to colonial America, where bartenders created signature drinks with the flavors of the land. Today, modern mixologists keep innovating, blending spirits, juices, and botanicals to craft unforgettable cocktails. Learning the basics – like balancing ingredient ratios and mastering mixing techniques – is key to becoming a confident cocktail maker. Whether you're stirring up a classic Negroni or dreaming up your own signature sip, the art of mixology is a journey filled with endless possibilities.

Key Takeaways

  1. The history of mixology traces back to ancient civilizations, with unique cocktail recipes incorporating diverse ingredients like honey, herbs, and spices.
  2. Mastering the basics of mixology, including understanding ingredient ratios, experimenting with measurements, and maintaining attention to detail, is crucial for crafting balanced cocktails.
  3. The process of crafting classic cocktails involves gathering the necessary ingredients and glassware, combining them in a shaker, straining into a chilled glass, and adding a complementary garnish.
  4. The Negroni, a classic cocktail made with equal parts gin, Campari, and sweet vermouth, originated in early 20th century Florence, Italy, and exemplifies the balance of flavors essential in mixology.
  5. Creativity in cocktail making is encouraged, allowing for the exploration of unique flavor combinations, the incorporation of seasonal ingredients, and the development of personalized presentation techniques to elevate the drinking experience.

History

Tracing its roots back to ancient civilizations, the practice of mixology has a rich and storied history. Did you know that people were mixing drinks thousands of years ago? The ancient Egyptians, Greeks, and Romans all had their own unique cocktail recipes, using ingredients like honey, herbs, and even spices!

As the centuries passed, the art of mixing drinks evolved and spread around the world. In the 1700s, bartenders in colonial America started creating signature cocktails using local ingredients.

Then, during the 1800s, classic drinks like the Old Fashioned and the Martini became popular. Bartenders became true artists, experimenting with different flavors and techniques.

Today, mixology is more exciting than ever. Bartenders continue to push the boundaries, dreaming up new and innovative cocktails.

Whether you prefer sweet, sour, or somewhere in between, there's a cocktail out there for everyone to enjoy. So grab a shaker and get ready to explore the fascinating history of mixology!

Advertisement

Recipe

Mixology is the art of crafting cocktails, and it's a skill that can be honed through practice and experimentation. Whether you're a seasoned bartender or a home mixologist, having a solid foundation in mixology techniques can elevate your cocktail game.

In this recipe, we'll explore the classic Negroni, a timeless and sophisticated aperitif that strikes the perfect balance between bitter, sweet, and aromatic flavors.

The Negroni is a simple yet elegant cocktail, made with equal parts gin, Campari, and sweet vermouth. It's believed to have originated in Florence, Italy, in the early 20th century, when Count Camillo Negroni requested his usual Americano cocktail (Campari, sweet vermouth, and club soda) to be made with gin instead of soda. This substitution created the iconic drink we know and love today.

Ingredients:

  • 1 oz gin
  • 1 oz Campari
  • 1 oz sweet vermouth

Instructions:

Fill a mixing glass with ice. Add the gin, Campari, and sweet vermouth. Stir the mixture until well-chilled, about 20-30 seconds. Strain the cocktail into a chilled rocks glass filled with fresh ice. Garnish with an orange slice or a twist of orange peel.

Advertisement

When making a Negroni, be sure to use high-quality ingredients. The balance of the three components is crucial, so consider experimenting with different gins, vermouths, and even Campari alternatives to find your perfect ratio.

Additionally, the stirring technique is important, as it helps to properly dilute and integrate the flavors. Enjoy your Negroni as an aperitif or as a digestif, and savor the complexity of this timeless cocktail.

Cooking Steps

Alright, let's get started!

First, you'll need to gather all your ingredients and glassware.

Then, combine everything in a shaker and give it a good shake.

Advertisement

Step 1. Gather Ingredients and Glassware

collect ingredients and tools

Assembling the right ingredients and glassware is the foundation for crafting delectable cocktails. You'll want to gather all the essential liquors, mixers, and garnishes before you start shaking or stirring. Smooth vodka, crisp gin, or rich bourbon – the spirit you choose sets the tone.

Pair it with fresh juices, bubbly club soda, or zesty bitters. Don't forget the garnishes! A juicy orange slice or a sprig of mint adds the perfect finishing touch.

For the glassware, you'll need the right vessel to showcase your cocktail. Tall Collins glasses are perfect for long, refreshing drinks, while short rocks glasses are ideal for spirit-forward sips.

Delicate coupe or Martini glasses lend an elegant flair. Whichever you choose, make sure it's clean and chilled before you pour.

With your ingredients and glassware ready to go, you're all set to shake, stir, and sip your way to cocktail perfection!

Step 2. Combine Ingredients in Shaker

combine ingredients in shaker

Now that you have gathered all the necessary elements, it's time to put them to use! Grab your trusty cocktail shaker and get ready to mix up a delightful drink.

First, add the base spirit, like vodka or gin, along with any other liquid ingredients like juices or syrups. Next, toss in some ice cubes – the more the merrier!

Advertisement

Put the lid on the shaker and give it a good, vigorous shake. You'll want to shake it for about 10-15 seconds, until the outside of the shaker gets nice and frosty. This helps chill the drink and dilute it just the right amount.

Once you're done shaking, carefully strain the mixture into your waiting glass. Voila! Your cocktail is now ready to enjoy.

Remember to garnish it with a slice of fruit, a sprig of herb, or any other fancy touch to make it look as good as it tastes. Cheers!

Step 3. Strain Into Chilled Cocktail Glass

strain into chilled glass

After vigorously shaking the cocktail, it's time to strain the mixture into your chilled cocktail glass.

Grab your trusty cocktail strainer and gently place it over the top of the shaker. Slowly tilt the shaker, allowing the delicious liquid to pour through the strainer and into the waiting glass.

You'll see the ice-cold cocktail come to life, its colors dancing in the light. Isn't it beautiful?

Advertisement

Now, take a moment to admire your creation. The smooth, shiny surface is just begging to be sipped. Go ahead, give it a try! The flavors will burst in your mouth, leaving you refreshed and delighted.

Remember, the key is to strain the cocktail carefully, ensuring no unwanted bits make their way into your glass.

With a little practice, you'll be straining like a pro in no time. Cheers to your perfect pour!

Step 4. Add Garnish

garnish addition step four

With your chilled cocktail now perfectly poured, it's time to put the finishing touches on your creation. Adding a garnish is the perfect way to enhance the presentation and aroma of your drink.

Carefully select a garnish that complements the flavors of your cocktail. For example, a slice of lemon or lime adds a bright, citrusy note, while a sprig of fresh mint brings a refreshing, herbal touch. Get creative and let your imagination shine!

Gently place the garnish on the rim of the glass, or let it rest delicately on the surface of the drink. Avoid overpowering the cocktail with a large or bulky garnish. The goal is to create a visually appealing and inviting presentation that entices your senses.

Advertisement

Now that your cocktail is complete, take a moment to admire your handiwork. With the perfect balance of flavors and a beautiful garnish, you're ready to sit back, relax, and enjoy your masterpiece.

Step 5. Enjoy Your Classic Cocktail

savor your classic cocktail

Take a moment to savor the aromatic and visually captivating cocktail you've just created. Breathe in the inviting scent, notice the vibrant colors, and admire the elegant presentation. This is your masterpiece – a testament to your mixology skills!

Now, it's time to enjoy the fruits of your labor. Gently pick up the glass, feeling its weight and coolness in your hand. Bring the rim to your lips and take a sip, allowing the flavors to dance across your tongue. Savor the perfect balance of sweet, sour, and spirit. As you savor the perfect balance, notice how each note lingers, unfolding with subtle complexity. If you close your eyes, you might even detect hints of vanilla or citrus, enhancing the depth of the experience. It’s reminiscent of the smooth, playful texture of bubble tea tapioca pearls, offering a delightful contrast with each sip.

As you swallow, feel the liquid warmth travel down your throat, leaving a delightful sensation. Sit back, relax, and continue to sip your creation. Allow the cocktail to enhance your mood and conversation.

This is a moment to be savored, a chance to appreciate the art of mixology. Enjoy every last drop, knowing you've crafted a truly remarkable classic cocktail.

Final Thoughts

Mixology, the art of crafting remarkable beverages, is a journey of exploration and discovery. As you've learned about classic cocktails, you're now ready to take your skills to the next level. Mixing drinks is all about finding the perfect balance of flavors, textures, and aromas.

Advertisement

Don't be afraid to experiment and try new things. Swap out ingredients, adjust measurements, and see how it changes the final product. The more you practice, the better you'll become at creating your own unique concoctions.

Remember, the joy of mixology is in the process. Savor each step, from carefully measuring the ingredients to the satisfying final sip.

Whether you're hosting a party or simply enjoying a quiet evening at home, let your creativity shine. Impress your friends with your bartending prowess, or treat yourself to a delightful homemade cocktail.

The possibilities are endless when you embrace the art of mixology.

Frequently Asked Questions

What Is the Proper Glassware for Each Cocktail?

The proper glassware for a cocktail depends on the drink. You'll want to choose a glass that complements the flavors and presentation of the cocktail, whether it's a highball, coupe, or rocks glass.

Advertisement

How Can I Make My Cocktails Visually Appealing?

To make your cocktails visually appealing, focus on presentation. Use the right glassware, garnish creatively, and pay attention to color and texture. Experiment with ice shapes, citrus twists, and other eye-catching elements to elevate your drink's appearance.

What Are the Common Garnishes Used in Classic Cocktails?

To make your cocktails visually appealing, you can use a variety of common garnishes like citrus peels, olives, cherries, herbs, and spices. These simple additions can elevate the presentation and enhance the overall drinking experience.

How Do I Measure Ingredients Accurately for Cocktails?

To measure cocktail ingredients accurately, use a jigger or measured pour spout. Don't eyeball it – that'll throw off your ratios. Take the time to measure precisely for consistently great drinks.

What Are Some Tips for Perfecting the Ice for Cocktails?

To perfect the ice for cocktails, use filtered water and mold it into large, clear cubes or spheres. This will melt slowly, dilute your drink less, and create a visually appealing presentation.

Advertisement

Continue Reading

Beverage Deep Dives

Smoothie Bowl Art: Instagram-Worthy Breakfasts

Joyful, colorful, and nutrient-rich, smoothie bowls have become a social media sensation, tempting you to discover the secrets behind these visually stunning and satisfying treats.

Published

on

instagrammable smoothie bowl creations

Smoothie bowls are all the rage these days, blending together delicious fruits and superfoods into a beautiful and nutritious breakfast. You'll be amazed at the vibrant colors and fun designs that people create, making these bowls totally Instagram-worthy. Just imagine a creamy smoothie as your base, topped with crunchy granola, juicy berries, and a sprinkle of toasted coconut – yum! Preparing these bowls at home lets you get creative, and the options are endless. Want to learn more about crafting your own smoothie bowl masterpieces? Keep reading to discover the secrets behind these visually stunning and satisfying treats.

Key Takeaways

  • Smoothie bowls have gained immense popularity on social media due to their visually appealing and creative presentation, making them Instagram-worthy breakfast options.
  • Vibrant ingredients, intricate designs, and themed arrangements contribute to the artistic appeal of smoothie bowls, allowing for self-expression and showcasing on social media platforms.
  • Smoothie bowls are not only aesthetically pleasing but also nutritionally dense, with customizable ingredients providing essential vitamins, minerals, and fiber to support overall health.
  • The transformation in flavor and texture, from blended smoothie to a frozen, ice cream-like consistency, creates a unique and refreshing breakfast experience.
  • Topping suggestions such as crunchy granola, juicy berries, toasted coconut, and drizzles of honey or nut butter further enhance the visual appeal and flavor complexity of smoothie bowls.

History

Although smoothie bowls have been around for decades, the art of creating intricate designs and patterns on their surfaces has gained significant popularity in recent years. You can thank social media and the rise of "foodie" culture for this tasty trend!

Suddenly, people couldn't just blend up a nutritious smoothie – they'd to turn it into a colorful masterpiece, complete with fresh fruits, nuts, seeds, and all sorts of eye-catching toppings.

This Instagram-worthy craze started popping up in trendy cafes and health food stores, where baristas and chefs showcased their smoothie bowl creativity. Soon, home cooks got in on the action, experimenting with different flavor combinations and decorative techniques to make their breakfasts as beautiful as they're delicious.

From swirling nut butters to arranging berries in vibrant patterns, the possibilities for smoothie bowl art are endless. Whether you're a seasoned pro or just starting out, get ready to have fun and make your morning meal a true work of art!

Recipe

Smoothie bowls are a delightful way to enjoy a nutritious and visually appealing breakfast or snack. These frozen blended concoctions aren't only packed with essential vitamins and minerals but also allow for endless creative possibilities.

Advertisement

Transforming a simple smoothie into an edible work of art is a fun and engaging activity that the whole family can enjoy. Whether you're a seasoned smoothie enthusiast or new to the world of blended beverages, this recipe will guide you through the steps to create a visually stunning smoothie bowl.

Get ready to impress your friends and nourish your body with this delicious and Instagram-worthy treat.

Ingredients:

  • 1 cup frozen mixed berries
  • 1 banana, frozen
  • 1/2 cup almond milk
  • 1 tablespoon honey (optional)
  • 1 tablespoon chia seeds
  • 1 tablespoon granola
  • Assorted fresh fruit (such as sliced kiwi, strawberries, and blueberries)
  • Toasted coconut flakes (optional)

Instructions:

Combine the frozen mixed berries, banana, almond milk, and honey (if using) in a high-speed blender. Blend until smooth and creamy.

Pour the smoothie into a bowl. Sprinkle the chia seeds and granola on top. Arrange the assorted fresh fruit and coconut flakes (if using) in a visually appealing design on the smoothie. Serve immediately and enjoy your masterpiece!

Advertisement

Tips:

For a thicker consistency, use less almond milk. Adjust the sweetness to your liking by adding more or less honey.

Feel free to experiment with different fruit combinations and toppings to create your own unique smoothie bowl. Have fun and let your creativity shine through!

Cooking Steps

Blend your favorite frozen fruit and yogurt until smooth and creamy.

Pour the vibrant mixture into a bowl, then get creative by topping it with fresh fruit, nuts, seeds, or even a sprinkle of toasted coconut.

Advertisement

For an icy treat, stick the whole bowl in the freezer overnight and enjoy your delicious smoothie bowl the next day!

Step 1. Blend Frozen Fruit and Yogurt

blend fruit yogurt mixture

Gather your blender and dive into the vibrant world of frozen fruit and creamy yogurt. The possibilities are endless when it comes to creating your own delectable smoothie bowl masterpiece. Start by choosing your favorite frozen fruit – maybe it's sweet and juicy mango, or perhaps tart and refreshing raspberries are more your style. Toss those frozen gems into your trusty blender, then add a generous scoop of thick, tangy yogurt.

For an added boost of nutrition, consider incorporating some fresh herbs like mint for a refreshing twist, as seen in unique combinations enhance flavor. Blend until the mixture is smooth and creamy, just the way you like it. You can also experiment by using these fresh herbs in classic cocktail recipes, adding a natural, healthful element to your drinks. Whether it’s muddling basil into a homemade mojito or garnishing a mint julep, these herbs provide layers of complexity while boosting both flavor and nutrition. Don’t hesitate to get creative and explore how fresh ingredients can transform both your beverages and your well-being.

Now, the real fun begins! Carefully pour your frozen fruit and yogurt blend into a bowl, creating a blank canvas for your edible artwork. Grab an assortment of fresh fruit, nuts, granola, and any other tasty toppings that catch your eye.

Artfully arrange these vibrant ingredients to transform your smoothie bowl into an Instagram-worthy breakfast that's almost too pretty to eat – almost! With each spoonful, savor the burst of flavors and the satisfying crunch of your customized creation.

Step 2. Pour Into Bowl

pour contents into bowl

With your blended fruit and yogurt mixture ready, it's time to pour the luscious, creamy concoction into a bowl, creating a blank canvas for your edible masterpiece.

To enhance your smoothie bowl experience, consider adding a soothing herbal tea like chamomile on the side, known for its calming effects.

Advertisement

Grab your favorite bowl – maybe one with a pretty pattern or a bright, cheerful color. Slowly and carefully, pour the smooth, thick smoothie into the bowl, making sure to get every last delicious drop.

Watch as the vibrant purples, oranges, and greens swirl together, just waiting for you to transform them into a work of art.

Now it's time to get creative! Grab your toppings – things like fresh berries, toasted coconut, crunchy granola, or a drizzle of nut butter.

Arrange them in fun, colorful designs, letting your imagination run wild. Will you make a smiley face with banana slices? Or maybe a rainbow with vibrant fruit?

The possibilities are endless! Just have fun and get ready to impress your friends and family with your smoothie bowl masterpiece.

Advertisement

Step 3. Garnish With Fresh Toppings

garnish with fresh toppings

After you've poured the smoothie into the bowl, it's time to add the finishing touches. Grab a handful of fresh, colorful toppings and start arranging them on top of the creamy smoothie base.

Slice up some juicy strawberries and scatter them around the edges, creating a bright red border. Strawberries aren't only delicious but also rich in vitamin C, which can help promote skin health and give you that radiant glow benefits of vitamin C.

Sprinkle on a few plump blueberries, their deep purple hue providing a nice contrast. Don't forget the banana slices – they add a sunny, tropical vibe to your creation.

For a finishing touch, sprinkle on a sprinkling of toasted coconut flakes, their sweet, nutty flavor complementing the smoothie perfectly.

Step back and admire your work – your smoothie bowl is now a true work of art, ready to be shared on Instagram and enjoyed.

With all these vibrant, fresh toppings, your breakfast isn't only delicious, but visually stunning too.

Advertisement

Step 4. Sprinkle With Toasted Coconut

toasted coconut sprinkling step

To elevate your smoothie bowl even further, sprinkle a generous amount of toasted coconut flakes over the top. The golden-brown, crunchy pieces will add a delightful texture and a sweet, nutty flavor that perfectly complements the fresh fruit and creamy yogurt.

Imagine the aroma of the toasted coconut wafting through the air as you take your first bite.

The toasted coconut flakes are easy to prepare – simply place them in a dry skillet over medium heat and cook, stirring occasionally, until they turn a lovely golden brown.

Be sure to keep a close eye on them, as they can go from perfectly toasted to burnt in the blink of an eye!

Once they've reached that delicious, toasted perfection, remove the skillet from the heat and let the coconut cool slightly before sprinkling it over your smoothie bowl.

The combination of the smooth, creamy smoothie and the crunch of the toasted coconut is simply irresistible.

Advertisement

Go ahead, give it a try – your taste buds will thank you!

Step 5. Freeze Smoothie Bowl Overnight

freeze smoothie bowl overnight

Freeze your smoothie bowl overnight for a delightfully chilled and thick treat in the morning.

You'll be amazed at how the flavors meld and the texture transforms when your vibrant, fruity creation sits in the freezer. Simply prepare your smoothie as usual, then pour it into your favorite bowl.

Pop it in the freezer, and let the magic happen! In the morning, you'll have a deliciously frozen breakfast that's almost like ice cream. Just give it a few minutes to thaw slightly, then dig in with a spoon.

Top it with all your favorite toppings – maybe some crunchy granola, juicy berries, or toasted coconut. The frozen smoothie will keep you feeling full and satisfied until lunchtime.

It's a delightful way to start your day, and your Instagram followers will be drooling over your artful masterpiece!

Advertisement

Final Thoughts

Creativity in the kitchen can be a source of profound satisfaction. Crafting eye-catching smoothie bowls allows you to unlock your inner artist and share your masterpieces with the world.

Whether you prefer vibrant, fruit-filled creations or earthy, veggie-based designs, the possibilities are endless.

As you continue your smoothie bowl journey, don't be afraid to experiment. Mix and match different ingredients, textures, and colors to find what inspires you.

The best part? Your unique smoothie bowl art can brighten someone's day and spread joy through the power of a delicious, nutritious breakfast.

Frequently Asked Questions

What Are the Best Fruits to Use in a Smoothie Bowl?

When crafting your smoothie bowl, consider using a variety of fresh fruits like bananas, berries, mango, and pineapple. These vibrant ingredients not only taste great but also create a visually appealing and nutrient-dense foundation for your customized breakfast creation.

Advertisement

How Can I Make My Smoothie Bowl More Visually Appealing?

To make your smoothie bowl more visually appealing, try arranging your fruits and toppings in a decorative pattern. Add a drizzle of nut butter or honey for texture and contrast. Get creative with colorful ingredients to make your bowl pop.

Is It Necessary to Use a Blender for a Smoothie Bowl?

You don't necessarily need a blender to make a smoothie bowl. You can simply chop up the ingredients and mix them together in a bowl. This method may not create as smooth a texture, but it can still be visually appealing.

Can I Make a Smoothie Bowl the Night Before?

You can make a smoothie bowl the night before, but it's best to assemble it right before serving. Preparing it ahead of time may result in a watery or separated texture, so it's better to blend and layer it fresh.

How Do I Store Leftover Smoothie Bowl Ingredients?

You can store leftover smoothie bowl ingredients in airtight containers in the fridge. The fruits and veggies will stay fresh for 3-4 days, so you can easily prep them ahead of time for a quick breakfast.

Advertisement

Continue Reading

Beverage Deep Dives

Bubble Tea: Tapioca Pearl Perfection

Nourish your taste buds with the captivating blend of black tea and chewy tapioca pearls that make up the irresistible treat known as bubble tea.

Published

on

tapioca pearl bubble tea

Bubble tea's tapioca pearls are the perfect chewy treat! This delightful drink was born in Taiwan in the 80s, mixing black tea with those irresistible pearls. Now, bubble tea shops around the world offer endless flavors – from classic milk tea to fruity fusions. You can customize your drink however you'd like, with different tea types, milks, and sweeteners. The pearls are soaked, boiled, and chilled to achieve that signature soft and bouncy texture. Exciting toppings like fruit jellies and popping boba take the experience to new heights. Bubble tea is a sensory delight that'll capture your taste buds – and you'll want to dive in for more!

Key Takeaways

  • Bubble tea's signature feature is the chewy and satisfying tapioca pearls, which provide a unique texture and mouthfeel to the refreshing tea-based drink.
  • The cooking process for tapioca pearls is crucial, involving soaking, boiling, and chilling to achieve the perfect soft yet bouncy consistency.
  • Bubble tea offers endless customization options, allowing consumers to personalize their drink with a variety of tea bases, milk types, sweeteners, and toppings.
  • The vibrant colors and playful presentation of bubble tea contribute to its widespread appeal, especially among younger generations and social media enthusiasts.
  • Bubble tea has become a global phenomenon, transcending its Taiwanese roots and captivating taste buds around the world with its fusion of traditional tea culture and modern trends.

History

Bubble tea, also known as boba tea, has a rich and fascinating history that traces back to the 1980s in Taiwan.

Originating from a small tea shop, the beloved beverage was created by mixing black tea with chewy, tapioca pearls known as "boba." These unique pearls quickly became the star of the drink, adding a delightful textural contrast and fun, playful element.

As the trend spread throughout Asia, bubble tea's popularity skyrocketed, captivating taste buds with its irresistible blend of sweet and creamy flavors.

Soon, the refreshing concoction found its way to the Western world, where it continued to enchant new audiences.

Today, bubble tea shops can be found in every corner of the globe, offering a dazzling array of flavors and customization options to suit every palate.

Advertisement

From classic milk tea to innovative fruit-infused varieties, the humble beginnings of this beloved beverage have blossomed into a global phenomenon.

Recipe

Bubble tea, also known as boba tea, is a beloved Taiwanese beverage that has gained global popularity. This refreshing and customizable drink combines tea, tapioca pearls, and a variety of flavorful additives, creating a unique and delightful experience.

Originating in the 1980s, bubble tea has evolved over the years, with countless flavor combinations and variations. Whether you prefer a classic milk tea or a vibrant fruit-based concoction, the versatility of bubble tea allows you to explore and discover your perfect blend.

  • Black tea
  • Milk (dairy or non-dairy)
  • Tapioca pearls
  • Sugar (or alternative sweetener)
  • Ice cubes

In a saucepan, bring water to a boil. Add the tapioca pearls and cook according to the package instructions, typically about 20-25 minutes. Drain the pearls and rinse them under cold water to stop the cooking process.

In a separate container, brew the black tea according to your preference. In a serving glass, combine the cooked tapioca pearls, brewed tea, milk, and sugar (or alternative sweetener) to taste. Stir well and add ice cubes.

When preparing bubble tea, it's important to ensure that the tapioca pearls are cooked to the desired texture, which should be chewy and bouncy. Additionally, you can experiment with different tea varieties, milk types, and sweeteners to find your personal favorite combination.

Advertisement

Enjoy your homemade bubble tea and explore the endless possibilities of this delightful beverage.

Cooking Steps

First, you'll need to soak the tapioca pearls in water until they're nice and plump.

Once they're ready, just pop them into a pot and boil 'em up until they're all nice and translucent.

Step 1. Soak Tapioca Pearls in Water

soak tapioca pearls underwater

To prepare the tapioca pearls, you'll want to soak them in water for a specified duration. This crucial step helps the pearls soften and plump up, ensuring they've the perfect, chewy texture you'll love.

Start by grabbing a large bowl and filling it with clean, filtered water. Gently pour in the dry, uncooked tapioca pearls, making sure they're fully submerged. Let them soak for 30 minutes to an hour, depending on the size of the pearls. You'll know they're ready when they appear translucent and have a soft, pliable feel.

Drain the pearls in a mesh strainer, then transfer them to your pot or saucepan. From here, you'll cook the pearls according to the package instructions, simmering them until they float to the top.

Advertisement

With these juicy, bouncy pearls, you're well on your way to creating a delightful bubble tea masterpiece!

Step 2. Boil Tapioca Pearls Until Translucent

boil tapioca pearls translucent

With the soaking step complete, the plump tapioca pearls are ready to be cooked.

Bring a pot of water to a rolling boil on the stove. Gently drop the soaked pearls into the boiling water and let them cook. As they heat up, you'll see them start to turn translucent and expand in size.

Stir the pearls occasionally to ensure they cook evenly. It'll take about 15-20 minutes for the tapioca to become fully cooked and transparent. Once they reach this stage, they're ready to be enjoyed!

The pearls should have a soft, chewy texture that's simply delightful. Now you can add the cooked tapioca to your favorite bubble tea recipe. For an extra layer of flavor, try infusing the tapioca pearls with a hint of brown sugar syrup before adding them to your drink. This method, much like the Japanese rolled omelette technique, requires careful attention to timing and temperature to achieve the perfect balance of sweetness and texture. With your pearls ready, all that’s left is to enjoy your delicious bubble tea!

Get ready to sip on a refreshing and fun treat that's bursting with flavor. The cooking process may take a bit of time, but it's worth it to achieve those perfectly cooked, glossy tapioca pearls.

Advertisement

Step 3. Add Milk and Sweetener

incorporate milk and sweetener

Now that you have perfectly cooked tapioca pearls, it's time to assemble the rest of your bubble tea. In a separate pitcher or container, combine your desired amount of milk and sweetener. You can use regular milk, almond milk, or even condensed milk for a creamier taste.

As for the sweetener, you've got plenty of options – try brown sugar, honey, or even maple syrup to give your bubble tea a unique flavor. Stir everything together until the sweetener has fully dissolved.

Now it's time to put it all together! Grab your glass and fill it about halfway with the cooked tapioca pearls. Gently pour the milk and sweetener mixture over the top, making sure to get an even distribution.

Give it a gentle stir to incorporate everything. Finally, add some ice cubes to chill your delightful bubble tea creation. The sweet milk, chewy tapioca, and refreshing ice make for an irresistible treat! Sip and enjoy your homemade bubble tea masterpiece.

Step 4. Chill Tapioca Pearls in Ice Bath

chill tapioca pearls ice bath

After cooking, you'll want to chill the tapioca pearls in an ice bath. This is a crucial step to get those pearls to the perfect texturechewy, bouncy, and oh-so-satisfying!

Simply fill a large bowl with ice water and gently transfer the cooked pearls into the bath. Let them soak for about 15 minutes, stirring occasionally to ensure even cooling.

You'll see the pearls transform from sticky and soft to firm and springy. Mmm, can you just imagine biting into one of those delightful little orbs? The contrast of the cool, slippery exterior and the warm, gummy interior is what makes bubble tea so heavenly.

Advertisement

Once the pearls are perfectly chilled, drain them well and they're ready to be added to your favorite bubble tea recipe. Get ready for an explosion of flavor and texture in every refreshing sip!

Step 5. Serve With Desired Beverage

serve with preferred drink

Once you've perfectly chilled the tapioca pearls, it's time to start building your bubble tea. Grab your favorite beverage – maybe it's sweet and creamy milk tea, or perhaps you're in the mood for a refreshing fruit-flavored tea. Whatever your preference, pour it into a tall glass, leaving a bit of room at the top.

Now, it's time to add those delightfully chewy tapioca pearls. Scoop up a generous helping from your ice bath and let them tumble into the tea. Watch as they sink to the bottom, ready to be sipped up through your wide bubble tea straw.

Don't forget to add any desired toppings, like fluffy whipped cream or a drizzle of sweet syrup. The possibilities are endless!

Give your drink a gentle stir, then grab that straw and take a sip. The burst of flavor and satisfying texture is sure to delight your taste buds. Enjoy your perfectly crafted bubble tea masterpiece!

Final Thoughts

Bubble tea, with its distinct visual appeal and delightful flavors, has undoubtedly captivated the hearts and taste buds of many. From the chewy tapioca pearls to the refreshing tea base, this unique beverage offers a sensory experience like no other. As you sip and savor each sip, you'll be transported to a world of pure joy and indulgence.

Advertisement

The beauty of bubble tea lies in its versatility. Whether you prefer fruity, creamy, or even coffee-inspired concoctions, there's a flavor to suit every palate. The vibrant colors and playful toppings add an element of fun, making it the perfect treat for both kids and adults alike.

As you embark on your bubble tea journey, embrace the opportunity to experiment and discover your personal favorite. With endless possibilities, the only limit is your imagination.

Frequently Asked Questions

How Long Do Tapioca Pearls Last After Being Cooked?

Freshly cooked tapioca pearls last up to 4 hours at room temperature. To extend their shelf life, you can store them in the refrigerator for up to 3 days or freeze them for longer term storage.

Can I Make Bubble Tea With Non-Dairy Milk Alternatives?

You can certainly make bubble tea with non-dairy milk alternatives. Almond, soy, or oat milk work well, providing a creamy base for the chewy tapioca pearls. Experiment to find your preferred non-dairy combination.

What Are the Health Benefits of Drinking Bubble Tea?

Drinking bubble tea can provide some health benefits, though the sugary content means you should enjoy it in moderation. The tapioca pearls offer a source of complex carbohydrates, while non-dairy milk alternatives may offer additional nutritional value depending on the type you choose.

Advertisement

How Can I Customize the Sweetness Level of My Bubble Tea?

To customize the sweetness level of your bubble tea, you can ask the provider to adjust the sugar content. Many shops offer options like 25%, 50%, or 75% sweetness, allowing you to control the level that suits your taste.

Is Bubble Tea Gluten-Free?

Yes, bubble tea is typically gluten-free. The primary ingredients in bubble tea, like tapioca pearls, milk, and tea, don't contain gluten. However, it's always a good idea to check with the café or vendor to confirm the specific recipe.

Continue Reading

Affiliate Disclaimer
As an affiliate, we may earn a commission from qualifying purchases. We get commissions for purchases made through links on this website from Amazon and other third parties.

Advertisement

Latest

must see black friday deals must see black friday deals
Vetted6 minutes ago

11 Best Black Friday Deals You Can’t Afford to Miss This Year

Discover unbeatable Black Friday deals that will elevate your winter wardrobe and home essentials—find out what you can't afford to...

unforgettable western movie night unforgettable western movie night
Vetted21 minutes ago

9 Best Westerns to Watch for an Unforgettable Movie Night

Kickstart your unforgettable movie night with the 9 best Westerns that promise thrilling tales and iconic performances, but which classic...

fragrant east african pilau fragrant east african pilau
East African Cuisine24 minutes ago

Pilau: a Fragrant East African Rice Dish With Spices

Master the art of making pilau, a fragrant East African rice dish, and discover the secret spices that make it...

vibrant vietnamese papaya salad vibrant vietnamese papaya salad
Vietnamese Cuisine35 minutes ago

Goi Du Du: Vietnamese Papaya Salad Bursting With Fresh Flavors

Welcoming your taste buds to a Vietnamese culinary adventure, Goi Du Du: Vietnamese Papaya Salad Bursting With Fresh Flavors is...

savory vietnamese pork hock savory vietnamese pork hock
Vietnamese Cuisine35 minutes ago

Vietnamese Giò Heo: The Savory Pork Hock Recipe You’ll Love

Offering a mouthwatering fusion of fragrant spices and tender pork, this cherished Vietnamese dish promises a culinary adventure that will...

flavorful middle eastern eggplant rice flavorful middle eastern eggplant rice
Middle Eastern Cuisine35 minutes ago

Eggplant Rice: A Simple and Flavorful Middle Eastern Dish

Hailing from the vibrant cuisines of the Middle East, eggplant rice is a simple yet flavor-packed dish that transports your...

crispy vietnamese sticky rice crispy vietnamese sticky rice
Vietnamese Cuisine35 minutes ago

Bánh Ram It: Vietnamese Sticky Rice Cakes With Crispy Goodness

Luring the senses with its soft, chewy interior and crispy outer shell, Bánh ram it, a centuries-old Vietnamese sticky rice...

bold korean bbq wings bold korean bbq wings
Korean Cuisine44 minutes ago

Galbi Wings: Korean BBQ Chicken Wings With Bold Flavors

Perfectly crispy and packed with Korean barbecue flavors, these galbi wings will transport your taste buds on an unforgettable culinary...

essential classic cocktail techniques essential classic cocktail techniques
Beverage Deep Dives6 hours ago

Mixology 101: Classic Cocktails

Longing for a new cocktail adventure? Dive into the captivating world of mixology, where the possibilities are endless.

easy italian one pan pasta easy italian one pan pasta
One-Pot Wonders6 hours ago

One-Pan Pasta Dishes: Simplifying Italian Cuisine

Grab a single pan and unlock the secrets of traditional Italian cuisine with these one-pan pasta dishes that simplify mealtime...

hearty scottish oatmeal tradition hearty scottish oatmeal tradition
Kitchen Hacks and Tips9 hours ago

Scottish Porridge: The Hearty Oatmeal Tradition

Oatmeal has long been a staple in Scottish cuisine, with its rich history and cherished traditions still captivating palates today....

alternative flours for baking alternative flours for baking
Cooking for Special Diets14 hours ago

Gluten-Free Baking: Flour Alternatives

Delve into the world of gluten-free baking with an array of unique flour alternatives that offer distinct flavors and textures,...

Trending