
If you're eager to bake King Arthur's milk bread, get ready for a fun and rewarding experience! First, gather your ingredients: flour, sugar, yeast, milk, butter, and salt. You'll combine warm milk, sugar, and yeast, letting it froth up. Then, mix in softened butter and flour, kneading the dough until it's smooth and elastic. Let it rise until doubled, shape it into a lovely loaf, and bake. Your home will smell amazing, and you'll end up with a soft, fluffy bread perfect for meals or snacks. Stick around, and you'll discover even more tips for success!
Key Takeaways
- King Arthur's milk bread recipe emphasizes the use of warm milk, sugar, and yeast for a soft and fluffy texture.
- Kneading the dough for 8 to 10 minutes ensures proper gluten development for elasticity.
- Allowing the dough to rise until doubled in size contributes to the lightness of the final loaf.
- Shaping the dough into a loaf and letting it rise again enhances the bread's structure and flavor.
- Enjoy the comforting aroma and versatile uses of homemade milk bread in various meals.
Top picks for "bread milk recipe"
Open Amazon search results for this keyword.
As an affiliate, we earn on qualifying purchases.
History
Milk bread has a rich history that dates back centuries, with variations found in many cultures around the world. You might be surprised to learn that this soft and fluffy bread has roots in places like Japan, China, and even Europe! Each culture adds its own special twist, making milk bread a delightful treat for everyone.
In Japan, for instance, you'll find a version known as "shokupan." It's incredibly soft and slightly sweet, perfect for breakfast or a sandwich. Meanwhile, in Europe, bakers have crafted their own recipes for generations, often using rich milk to create a tender crumb.
Isn't it amazing how one type of bread can bring together different cultures?
Milk bread's popularity soared because it's comforting and versatile. Families have enjoyed it for breakfast, lunch, and dinner, sharing memories around the table.
You might even imagine the wonderful aroma wafting through the kitchen as it bakes, enticing everyone to gather around.
Cooking Steps
To make delicious milk bread, you'll start by gathering your ingredients and preparing your workspace. You'll need flour, sugar, yeast, milk, butter, and salt.
Once you have everything, clear a clean area on your counter for mixing and kneading.
Next, combine the warm milk with sugar and yeast in a bowl. Let it sit for about five minutes until it's frothy.
Then, mix in the softened butter and salt. Gradually add the flour, stirring until a dough forms.
Now, it's time to knead! Flour your surface lightly and knead the dough for about 10 minutes. It should become smooth and elastic.
After kneading, place the dough in a greased bowl, cover it with a cloth, and let it rise in a warm spot for about an hour.
When it's doubled in size, punch it down gently and shape it into a loaf. Place it in a greased pan, cover it again, and let it rise for another 30 minutes.
Step 1. Gather Ingredients and Tools
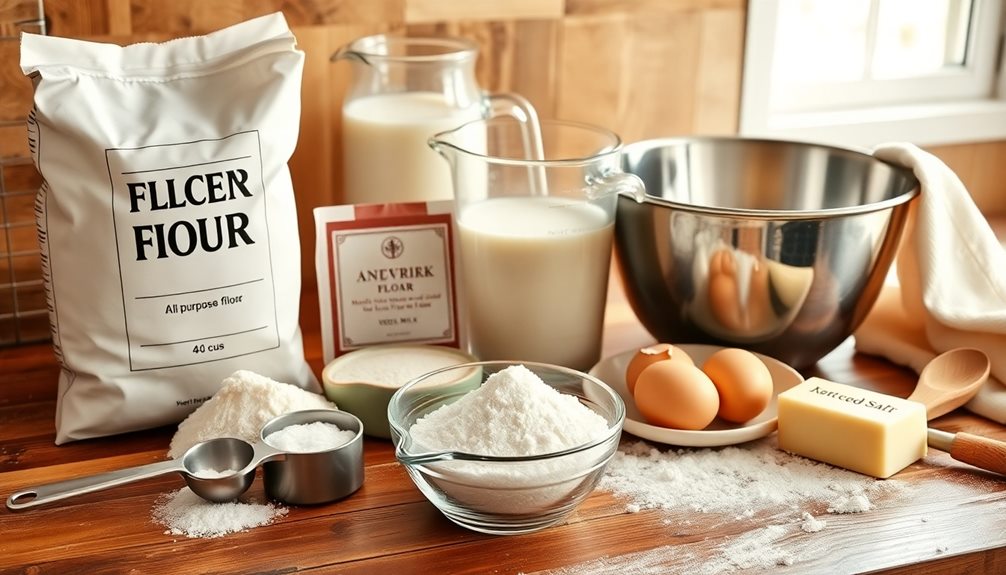
Gathering the right ingredients and tools is essential for creating the perfect milk bread. First, check your pantry for milk, sugar, salt, and butter. You'll also need flour and yeast to help your bread rise and become fluffy.
Don't forget to grab a large mixing bowl, a measuring cup, and measuring spoons. These tools are super important for getting the right amounts of each ingredient.
Next, find a whisk or a wooden spoon to mix everything together. A dough scraper can also be handy for kneading and shaping your bread.
You may want to have a clean surface ready for kneading, like a countertop or a cutting board.
Lastly, you'll need a loaf pan to bake your bread in. If you have parchment paper, it's a great idea to use that to line the pan. It makes removal so much easier!
With all your ingredients and tools gathered, you're one step closer to baking your soft and fluffy milk bread. So, take a deep breath and get ready to mix everything together for a delicious treat that'll make your kitchen smell amazing! Begin by gently combining the wet and dry ingredients, taking care not to overmix, as you work the dough to perfection. As you let the dough rest and rise, you might find yourself tempted to search for a baked cheese tart recipe to complement your meal. Once your milk bread is out of the oven, golden on top and irresistibly soft inside, you’ll feel the satisfaction of a successful baking adventure.
Step 2. Mix Wet Ingredients Thoroughly
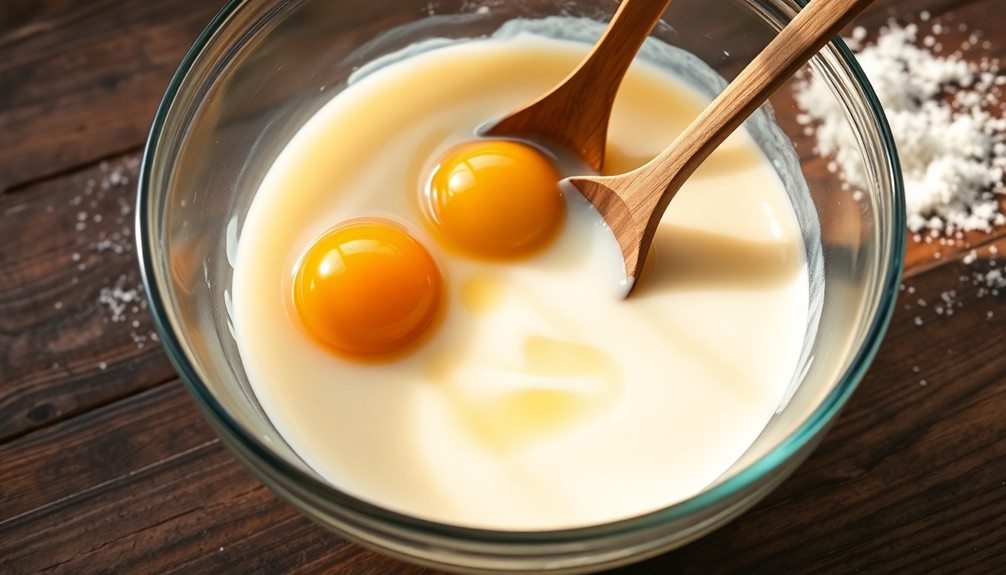
Now that you've gathered all your ingredients and tools, it's time to mix the wet ingredients thoroughly. This step is super important because it helps create that soft and fluffy texture you love in milk bread!
Start by taking a large mixing bowl and adding your warm milk, sugar, melted butter, and eggs.
Use a whisk or a fork to blend everything together until it's nice and smooth. You want to make sure the sugar dissolves completely, so keep mixing until you can't see any grains left. This part can be really fun, and you can even invite a friend or family member to help you out!
Once everything's combined, take a moment to enjoy the lovely smell of the warm milk and butter. It's like a cozy hug in a bowl!
Make sure there are no lumps in your mixture, as a smooth blend will lead to a better dough.
When you're happy with how it looks, you're ready to move on to the next step in your milk bread journey. So grab your dry ingredients, and let's keep going!
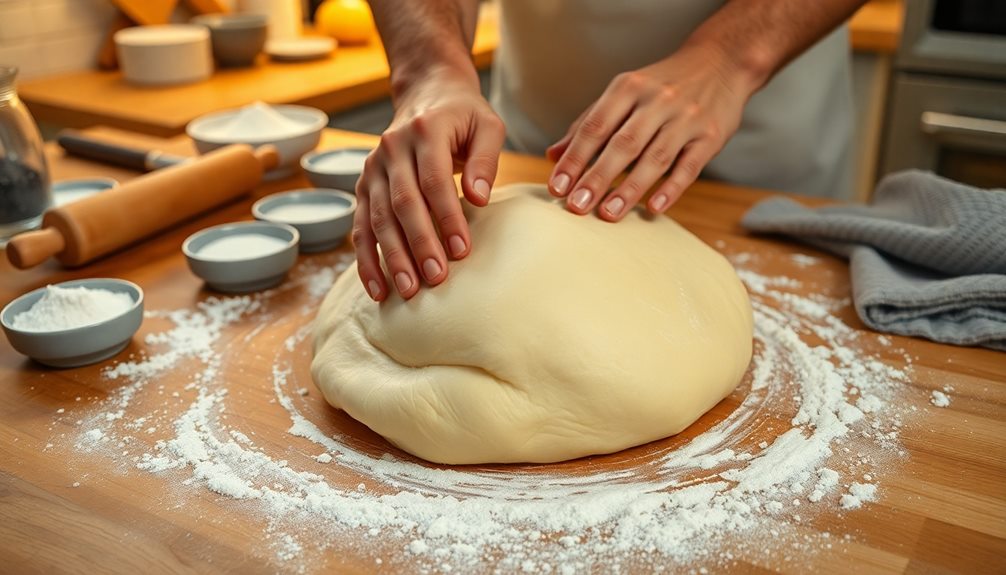
Step 3. Knead Dough Until Smooth
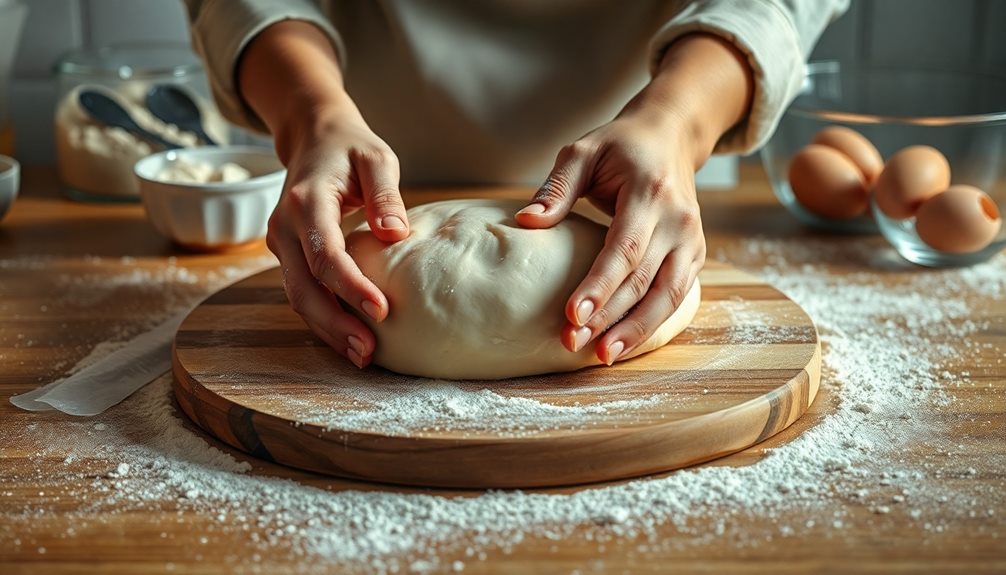
Kneading the dough is where the magic happens, transforming your wet and dry ingredients into a smooth, elastic mixture. Once you've combined everything, it's time to roll up your sleeves and get kneading!
Place the dough on a clean, lightly floured surface. Using the palms of your hands, push the dough away from you, then fold it back toward yourself. Repeat this motion, giving it a good stretch!
You'll want to knead the dough for about 8 to 10 minutes. As you work, you'll feel the dough start to change. It'll go from sticky and rough to soft and smooth. If it sticks to your hands, sprinkle a little more flour, but be careful not to add too much. You want your dough to be just right—slightly tacky, but not overly sticky.
To check if it's ready, perform the "windowpane test." Grab a small piece of dough and stretch it gently. If it stretches without tearing, you've done it! Your dough is now ready to rise.
Step 4. Let Dough Rise Until Doubled
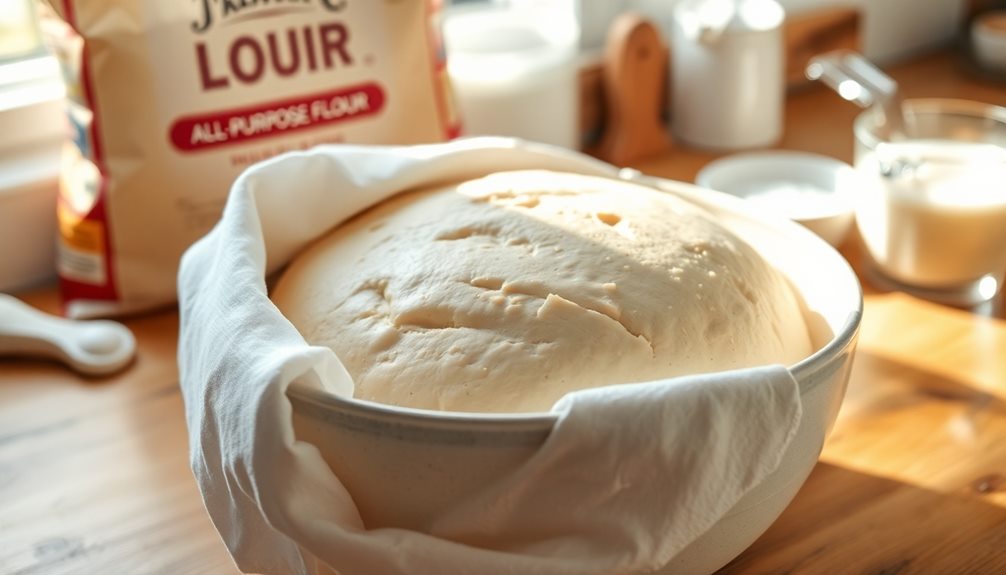
After you've kneaded the dough to a smooth, elastic texture, it's time to let it rise. This part is super important because it helps the bread become soft and fluffy.
First, find a warm, cozy spot in your kitchen. You want the dough to feel snug and happy while it grows!
Place your dough in a large bowl and cover it with a clean, damp kitchen towel or plastic wrap. This keeps the dough from drying out.
Now, be patient! You'll need to wait about 1 to 2 hours. During this time, the dough will puff up and double in size. Isn't that exciting?
If you want to check if it's ready, gently poke the dough with your finger. If the indentation stays and doesn't spring back, it's time to move on!
If it does spring back quickly, give it a little more time to rise. Watching the dough grow can be a fun part of baking, so make sure to keep an eye on it.
Once it's doubled, you're all set to shape it into a loaf! Happy baking!
Step 5. Shape Dough Into Loaf
How do you transform that beautifully risen dough into a loaf? First, you'll want to gently punch down the dough to release the air bubbles. Don't worry; this won't hurt it at all!
Next, turn the dough out onto a clean, floured surface.
Now, it's time to shape! Start by flattening the dough into a rectangle, about the size of a baking sheet. Then, fold the shorter sides in toward the center, like you're closing a book.
Roll the dough away from you, starting from one of the longer sides, and tuck it in tightly as you go. This helps create those fluffy layers we all love!
Once you've got a nice roll, pinch the seams to seal it. Place your shaped loaf, seam side down, into a greased loaf pan. Make sure it fits snugly but isn't squished.
Cover the pan with a clean cloth and let it rise again, until it doubles in size. This final rise will give you that soft and fluffy texture.
Final Thoughts
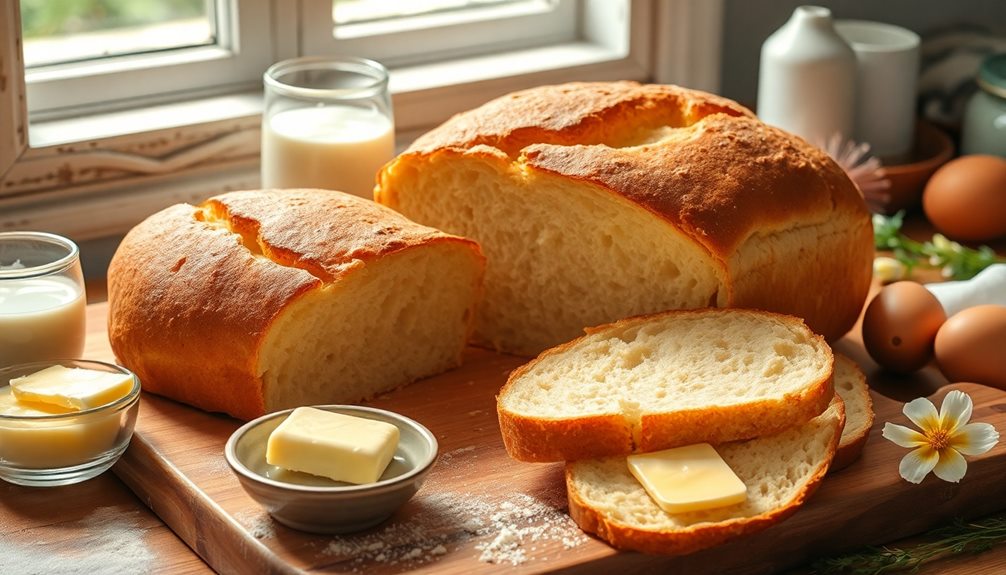
Making milk bread is a rewarding experience that results in a soft, fluffy loaf perfect for sandwiches or toast. When you take that first bite of your homemade bread, you'll feel proud of your accomplishment. The wonderful aroma that fills your kitchen is just a bonus!
You might be surprised at how easy it's to make this tasty bread. With just a few simple ingredients, you can create something special that your family and friends will love. It's a great way to spend time in the kitchen, and you can even get the kids involved. They'll enjoy kneading the dough and watching it rise.
Remember, practice makes perfect! If your first loaf isn't quite what you hoped for, don't get discouraged. Each time you bake, you'll learn something new and improve your skills.
Plus, even a not-so-perfect loaf can still taste amazing.
Frequently Asked Questions
Can I Use Whole Wheat Flour Instead of All-Purpose Flour?
Yes, you can use whole wheat flour instead of all-purpose flour, but keep in mind it'll change the texture and flavor. You might need to adjust the liquid to achieve the desired consistency.
How Long Does Milk Bread Stay Fresh?
Milk bread typically stays fresh for about three to five days when stored at room temperature in an airtight container. If you want it to last longer, you can freeze it for up to three months.
Can I Freeze the Milk Bread?
Yes, you can freeze milk bread! Just wrap it tightly in plastic wrap or foil, then place it in an airtight container. When you're ready to enjoy it, let it thaw at room temperature.
What Are the Best Toppings for Milk Bread?
When it comes to toppings for milk bread, you can't go wrong with butter, jam, or honey. For a savory twist, try cream cheese or avocado. Experiment and find your favorite combinations!
Is This Recipe Suitable for Beginners?
Yes, this recipe's perfect for beginners. You'll find straightforward instructions and simple ingredients, making it easy to follow. Don't worry if your first loaf isn't perfect; practice will help you improve your skills!