
Unleash your inner pastry chef and whip up the creamy, dreamy goodness of homemade Japanese cheese tarts! This sophisticated delight combines a buttery, flaky crust with a rich, creamy filling. The key lies in balancing flavors and textures – a light, crisp shell with a smooth, just-sweet-enough filling. Get ready to impress guests or treat yourself to this irresistible treat. With high-quality ingredients and a few simple steps, you'll have a decadent dessert or tea-time companion that'll transport you straight to the heart of Japan. Sounds delightful, doesn't it? Dive in to uncover the full recipe and cooking instructions.
Key Takeaways
- Prepare a buttery, flaky crust by combining all-purpose flour and chilled butter, then chill the dough before rolling and baking.
- Create a smooth and creamy filling by beating softened cream cheese, sugar, egg, and vanilla until fluffy.
- Bake the filled tarts until set, then allow them to cool completely on a wire rack before serving.
- Customize the cheese tarts by experimenting with different flavors, such as vanilla, lemon zest, or matcha.
- Serve the cheese tarts as a sophisticated dessert or tea accompaniment, garnishing with fresh fruits, whipped cream, or a dusting of powdered sugar.
Top picks for "cheese tart recipe"
Open Amazon search results for this keyword.
As an affiliate, we earn on qualifying purchases.
History

The origins of the cheese tart can be traced back to the medieval era, when pastries filled with cheese were a popular treat among the European aristocracy.
These early versions often featured rich, creamy fillings made from fresh cheeses, eggs, and cream, all nestled within a buttery, flaky crust.
Over the centuries, the cheese tart evolved, with different regions and cultures putting their own unique spin on the classic recipe.
In Japan, the cheese tart found a particularly devoted following, with bakers crafting delicate, bite-sized versions that showcased the tangy flavors of high-quality cheeses.
These Japanese-style cheese tarts became a beloved snack, often enjoyed as a sweet treat or an accompaniment to a cup of tea.
Whether you're a cheese lover or simply looking to try something new, the history of the cheese tart is a delicious tale worth exploring.
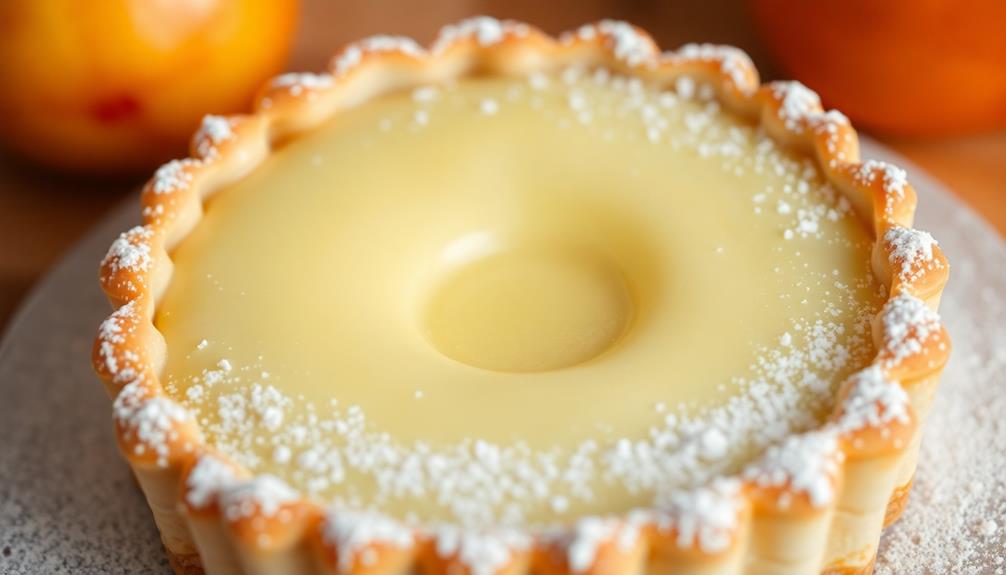
Recipe

Cheese Tarts are a delectable pastry treat that combines a buttery, flaky crust with a rich, creamy filling. These petite tarts are perfect for serving as a dessert or as a sophisticated accompaniment to a cup of tea or coffee.
The secret to the perfect cheese tart lies in the balance of flavors and textures. The crust should be light and crisp, providing a sturdy foundation for the luscious filling. The filling, on the other hand, should be smooth, velvety, and just sweet enough to complement the pastry.
Ingredients:
- 1 1/2 cups all-purpose flour
- 1/2 cup unsalted butter, chilled and cubed
- 1/4 teaspoon salt
- 3-4 tablespoons ice water
- 8 ounces cream cheese, softened
- 1/2 cup granulated sugar
- 1 egg
- 1 teaspoon vanilla extract
Cooking Instructions:
Preheat your oven to 375°F (190°C). In a food processor, pulse the flour, butter, and salt until the mixture resembles coarse crumbs.
Add the ice water, one tablespoon at a time, and process until the dough just begins to come together. Form the dough into a disc, wrap in plastic, and refrigerate for 30 minutes.
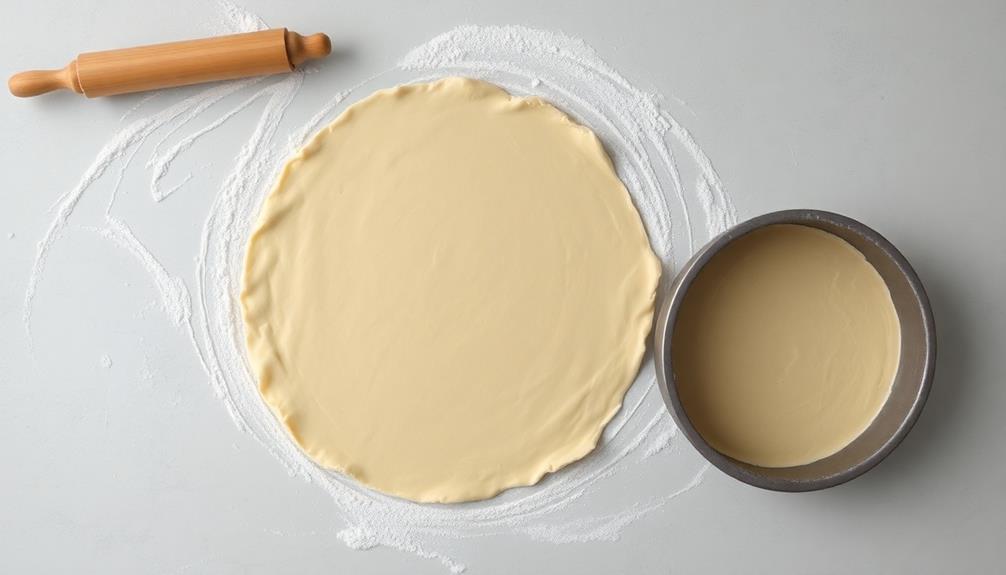
Roll the dough out on a lightly floured surface and cut into circles to fit your tart pans. Gently press the dough into the pans, trimming any excess.
In a medium bowl, beat the cream cheese and sugar until smooth. Beat in the egg and vanilla until well combined. Spoon the filling into the prepared tart shells.
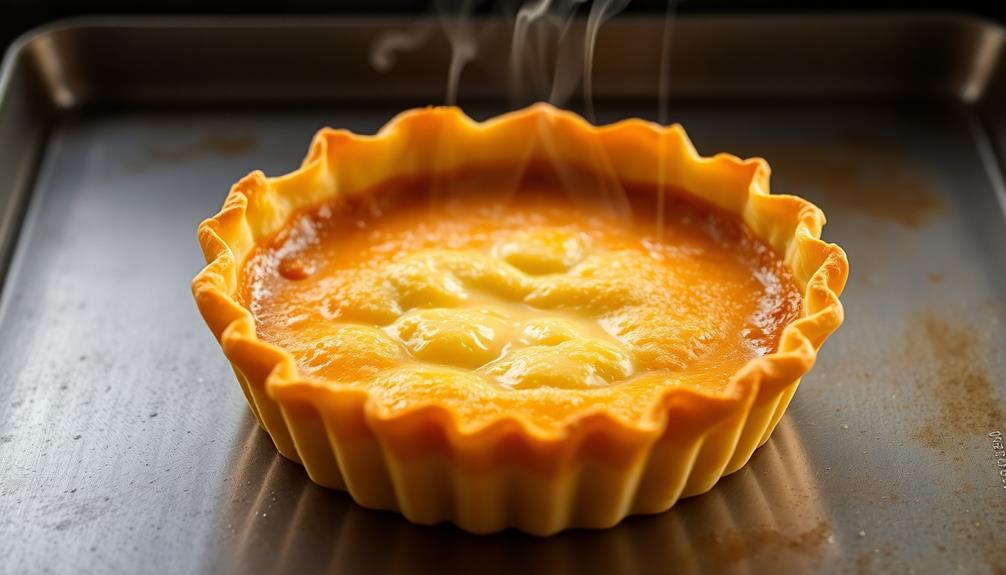
Bake for 20-25 minutes, or until the filling is set and the crust is golden brown. Allow the tarts to cool completely before serving.
To ensure the perfect cheese tart, it's important to use high-quality cream cheese and to chill the dough thoroughly before rolling and baking. The chilled dough will be easier to work with and will result in a flakier crust.
Additionally, be careful not to overfill the tart shells, as the filling can expand during baking and spill over the edges.
Cooking Steps
First, you'll need to prepare the tart shell.
Next, make the creamy and indulgent cheese filling.
Then, bake the shell until golden and let it cool completely before serving chilled with a delightful fruit garnish.
Step 1. Prepare the Tart Shell

Preheat your oven to 375°F (190°C). Lightly grease a 9-inch tart pan with a removable bottom.
In a large bowl, combine the all-purpose flour, granulated sugar, and a pinch of salt. Cut in the chilled unsalted butter until the mixture resembles coarse crumbs.
Gradually add the ice-cold water, mixing just until the dough starts to come together. Don't overmix! Shape the dough into a disc, wrap it in plastic, and refrigerate for 30 minutes.
Once chilled, roll out the dough on a lightly floured surface to fit your prepared tart pan. Gently press the dough into the bottom and up the sides of the pan. Trim any excess dough from the edges.
Prick the bottom of the tart shell with a fork to prevent it from puffing up during baking. Bake for 15-18 minutes, until the crust is lightly golden. Remove from the oven and let cool completely before filling.
Step 2. Make the Cream Cheese Filling
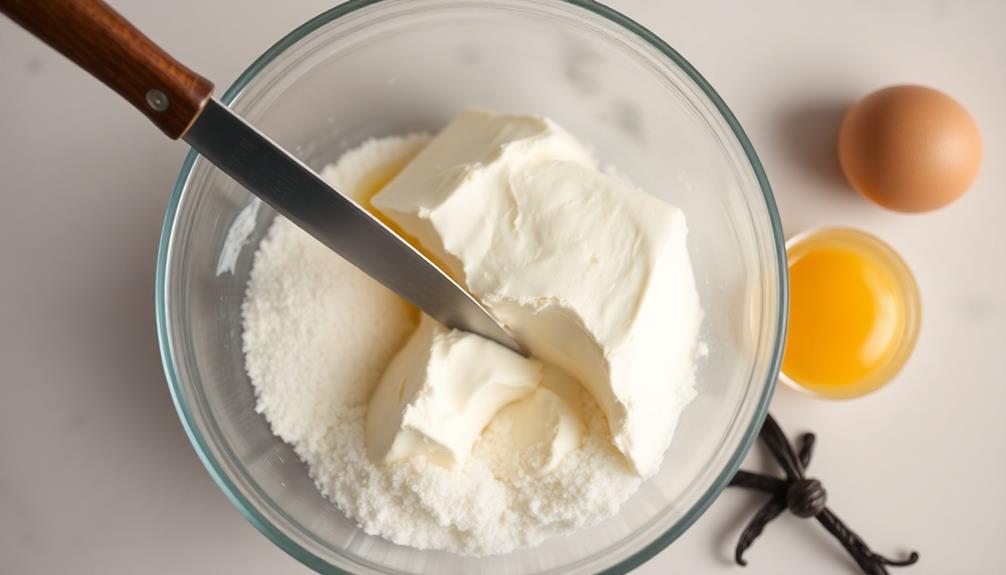
With the tart shell baked and cooled, you'll now create the creamy cheese filling. In a large bowl, combine the cream cheese, sugar, and vanilla extract. Use an electric mixer to beat the ingredients until they're light and fluffy. Scrape down the sides of the bowl as needed to ensure everything is evenly mixed.
Next, crack the eggs into the bowl, one at a time, beating well after each addition. This helps the filling get that lovely, silky texture.
Once the eggs are incorporated, pour in the heavy cream and mix until the filling is smooth and creamy.
Now, grab your pre-baked tart shell and carefully pour the cheese filling into it. Use a spatula to spread the filling evenly to the edges. Gently tap the tart on the counter to release any air bubbles.
Pop it in the fridge and let it chill for at least 2 hours, or until the filling is set. Get ready to savor this delightful Japanese-inspired treat!
Step 3. Bake the Tart Shell
To begin the baking process, preheat your oven to 375°F (190°C). Grab your prepared tart dough and gently press it into a 9-inch tart pan with a removable bottom. Use your fingers to evenly spread the dough along the bottom and up the sides of the pan, creating a nice, even layer.
Once the dough is in place, use a fork to prick the bottom a few times. This will help prevent the dough from puffing up during baking.
Now, line the tart shell with a piece of parchment paper and fill it with pie weights or dried beans. This will keep the dough from shrinking.
Bake the tart shell for 20 minutes. After that, remove the parchment paper and weights, then return the shell to the oven for an additional 10-15 minutes, until the crust is golden brown.
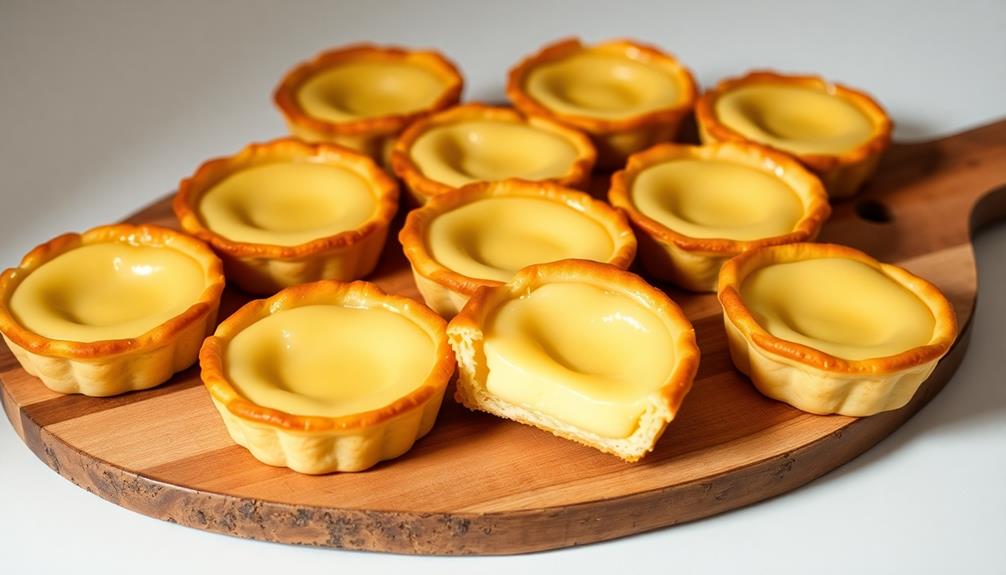
Once it's done, let the shell cool completely on a wire rack before filling it with the creamy cheese mixture.
Step 4. Cool the Tart Shell
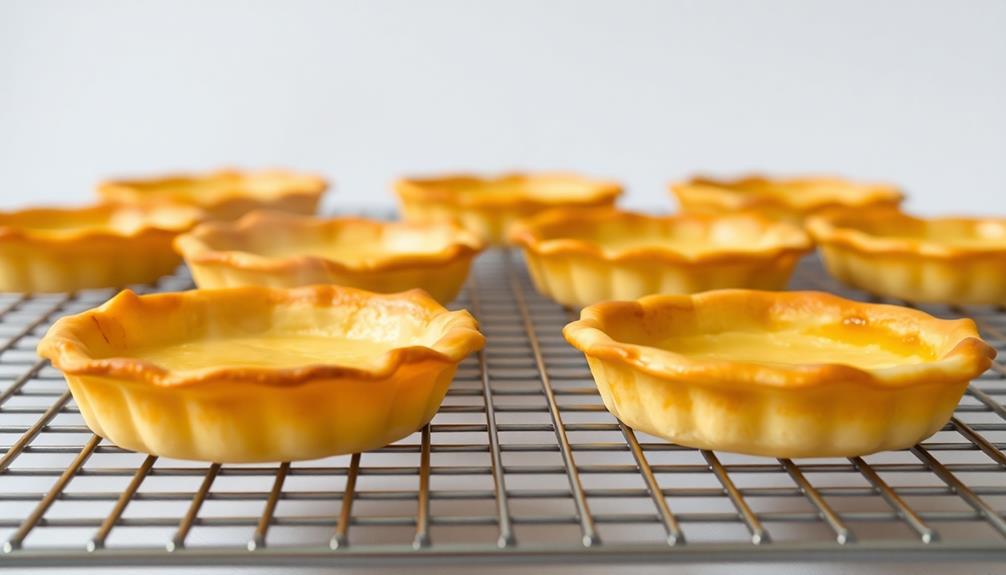
Once the tart shell has finished baking and turned a lovely golden brown, let it cool completely on a wire rack.
This step is crucial – you don't want to fill a piping hot shell, or it'll melt the delicate filling! As the shell rests, it'll firm up and become sturdy enough to hold all that creamy, dreamy cheese goodness.
The cooling process should take about 30 minutes. You'll know it's ready when the shell is no longer warm to the touch.
Once it's at room temperature, you can start preparing the filling. Resist the urge to dive in too soon – patience is key for the perfect cheese tart!
While you wait, take a moment to admire your handiwork. Isn't that buttery, flaky crust a beauty? Soon, it'll be the perfect vessel for your creamy Japanese-inspired treat.
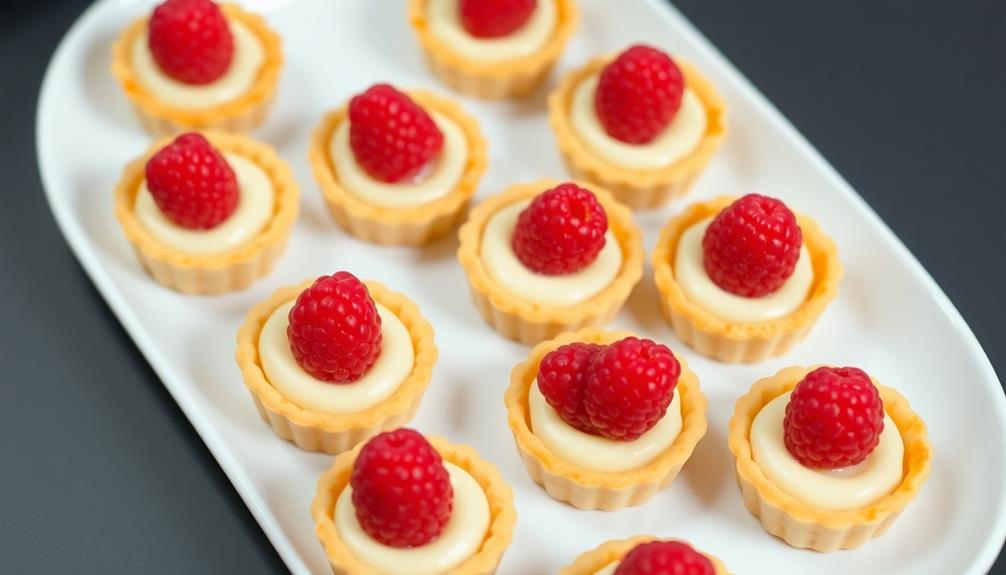
Step 5. Serve Chilled With Fruit Garnish
The tart shell has now cooled completely, and it's time to assemble the final dish. Gently remove the tart from the pan and place it on a serving plate. You're almost done!
Now, it's time to add the creamy cheese filling. Spoon the filling into the tart shell, smoothing the top with a knife or offset spatula. The filling should be chilled and set, creating a luscious, velvety texture.
To finish, garnish the tart with your favorite fresh fruit. Sliced strawberries, kiwi, or even a sprinkle of blueberries would be lovely. The vibrant colors and juicy flavors will complement the rich, creamy cheese tart perfectly.
Once the garnish is in place, refrigerate the tart for at least 30 minutes to allow the flavors to meld.
When ready to serve, slice the tart and enjoy its cool, refreshing goodness. This cheese tart is sure to delight your family and friends!
Final Thoughts
Although cheese tarts are a delightful treat, you shouldn't feel obligated to make them regularly. They're a special indulgence, perfect for celebrating special occasions or impressing guests.
But don't worry if you can't whip them up every week – your family and friends will still love you, tart or no tart!
When you do have the chance to make these creamy Japanese delights, have fun with it!
Get the kids involved in the decorating process, or put together a cheese tart-making party with friends. The joy is in the process as much as the final product.
And don't be afraid to experiment with different toppings and flavors – that's half the fun!
Frequently Asked Questions
How Long Do Cheese Tarts Last Once Baked?
Baked cheese tarts will typically last 3-5 days when stored properly in an airtight container at room temperature. However, their freshness and texture will start to decline after the first 2-3 days.
Can I Freeze the Baked Cheese Tarts?
Yes, you can freeze the baked cheese tarts. Wrap them individually in plastic wrap or aluminum foil and store them in an airtight container or freezer bag. They'll keep for up to 2 months in the freezer.
What's the Best Way to Store Leftover Cheese Tarts?
The best way to store leftover cheese tarts is to keep them in an airtight container in the refrigerator. This will help preserve their freshness and prevent them from drying out. You can enjoy the tarts for up to 3-4 days this way.
Can I Use Different Types of Cheese in the Recipe?
You can certainly use different types of cheese in the recipe. Feel free to experiment with combinations like cream cheese and ricotta or even cheddar and parmesan for a unique twist on the classic cheese tart.
How Do I Ensure the Perfect Flaky Crust for the Cheese Tarts?
To ensure a flaky crust for your cheese tarts, you'll want to use chilled butter, work the dough as little as possible, and give it time to rest before baking. This helps create the perfect tender, flaky texture.