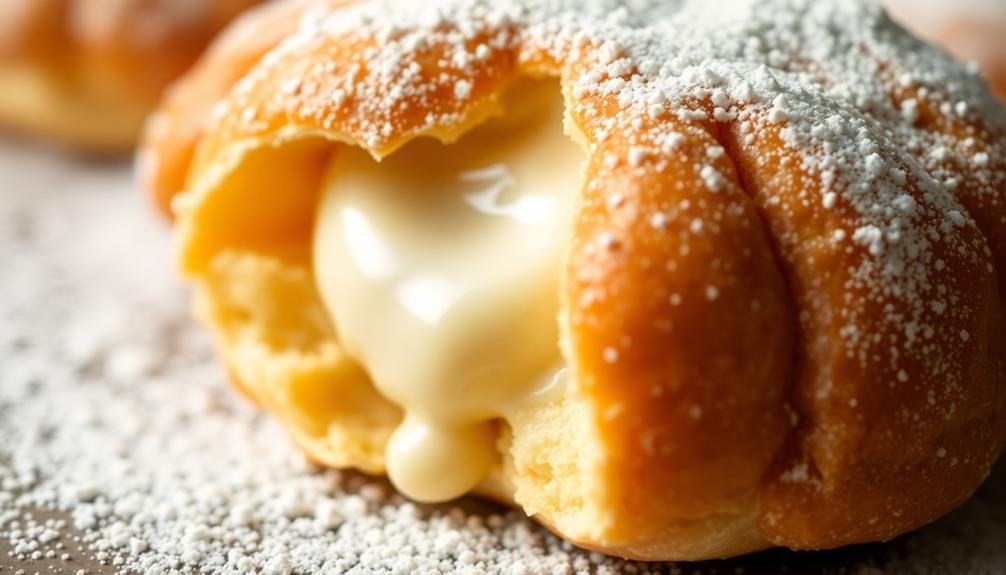

You're in for a real treat – this Japanese cheese tart is both creamy and irresistible! This beloved pastry originated in the late 1990s in Hokkaido, Japan, and has since captivated dessert lovers worldwide. With its velvety smooth filling nestled in a crisp, flaky crust, it's a perfect balance of indulgence and delicacy. The recipe requires careful preparation, but the result is a visually appealing and mouthwatering delight that engages all your senses. Once you try this cheesy goodness, you'll be craving more – and if you keep reading, you'll learn how to make this irresistible treat yourself!
Key Takeaways
- Achieve a velvety smooth cheese filling by carefully blending cream cheese, sugar, eggs, and heavy cream for a rich, indulgent taste.
- Create a flaky, buttery tart crust that provides a perfect contrast to the creamy cheese filling.
- Bake the tart at the right temperature and duration to ensure a golden-brown exterior and a fully set filling.
- Allow the tart to cool completely before slicing to ensure a clean, presentable cut.
- Savor the irresistible combination of textures and flavors that make this Japanese cheese tart a truly decadent treat.
Top picks for "creamy irresistible make"
Open Amazon search results for this keyword.
As an affiliate, we earn on qualifying purchases.
History

The origins of the Japanese cheese tart can be traced back to the late 1990s, when a small bakery in Hokkaido, Japan, first introduced this delectable treat.
The owners had a vision – to create a dessert that combined the rich, creamy texture of cheese with the buttery, flaky goodness of a tart crust. They experimented tirelessly, perfecting the recipe until they achieved the perfect balance of flavors and textures.
Word soon spread about this unique and irresistible pastry, and before long, cheese tarts were popping up in bakeries across Japan.
People couldn't get enough of the way the velvety cheese filling melted in their mouths, perfectly complemented by the crisp, golden crust.
The popularity of Japanese cheese tarts quickly grew, with fans eagerly awaiting the release of seasonal flavors and limited-edition varieties.
Today, the Japanese cheese tart has become a beloved classic, beloved by dessert lovers around the world.
Its journey from a small Hokkaido bakery to a global phenomenon is a testament to the power of innovation and the enduring appeal of a truly delicious treat.
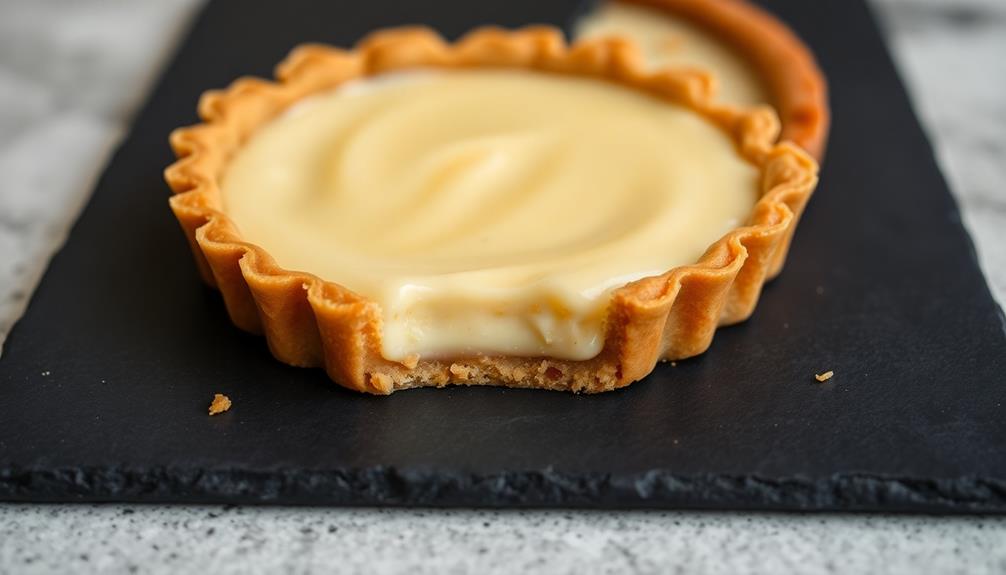
Recipe
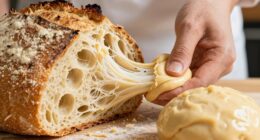
Japanese Cheese Tarts are a delectable treat that have gained popularity worldwide. These miniature tarts feature a buttery, flaky crust that encases a rich and creamy cheese filling. The combination of the delicate pastry and the indulgent cheese creates a harmonious balance of flavors and textures.
The key to these cheese tarts lies in the careful selection and preparation of the ingredients. Each component is carefully crafted to ensure a consistent and satisfying result. Whether enjoyed as a snack or as a decadent dessert, Japanese Cheese Tarts are a true delight for the senses.
Ingredients:
- 1 cup all-purpose flour
- 1/2 cup unsalted butter, chilled and cubed
- 1/4 cup granulated sugar
- 1 egg yolk
- 1 tablespoon cold water
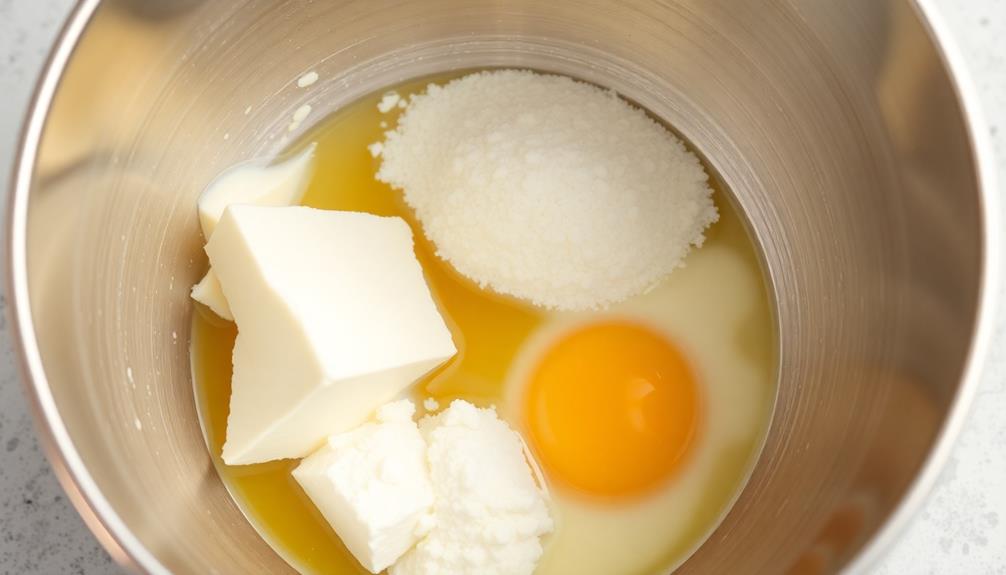
- 16 ounces cream cheese, softened
- 3/4 cup granulated sugar
- 2 eggs
- 1 teaspoon vanilla extract
- 1/4 cup heavy cream
Cooking Instructions:
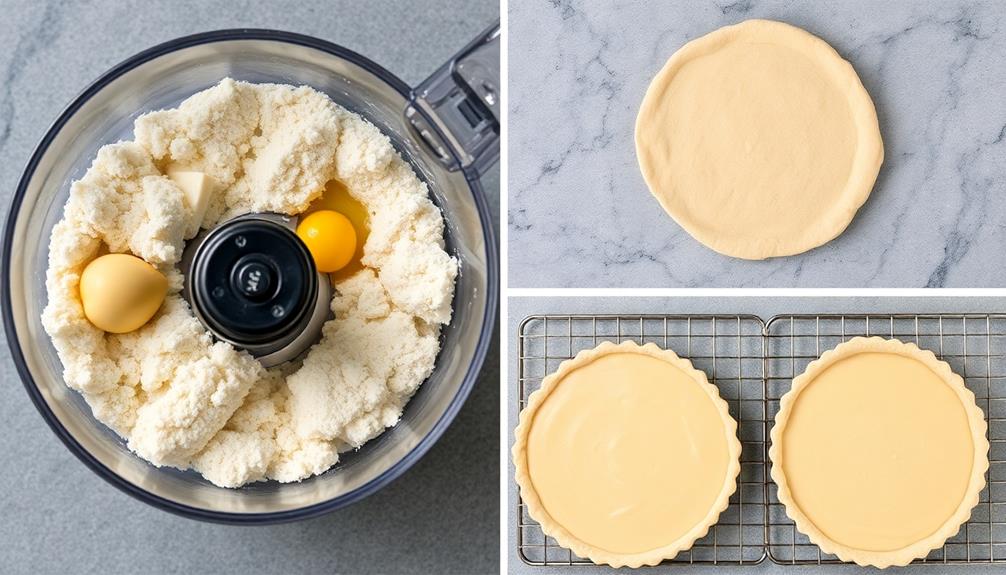
Preheat the oven to 375°F (190°C). In a food processor, blend the flour, butter, and 1/4 cup of sugar until the mixture resembles coarse crumbs.
Add the egg yolk and cold water, and pulse until the dough just begins to come together. Shape the dough into a disk, wrap in plastic, and chill for 30 minutes.
Roll the dough out to 1/8-inch thickness and cut into 12 circles using a 4-inch tart pan. Press the dough into the tart pans and chill for an additional 30 minutes.
In a large bowl, beat the cream cheese and 3/4 cup of sugar until smooth. Add the eggs one at a time, beating well after each addition.
Stir in the vanilla and heavy cream until well combined. Divide the filling evenly among the tart shells. Bake for 20-22 minutes, or until the filling is set. Allow the tarts to cool completely before serving.
Tips:
For an extra indulgent touch, top the cooled tarts with a dusting of powdered sugar or a drizzle of caramel sauce.
Be sure to chill the dough thoroughly before baking to ensure a flaky and crisp crust. If you prefer a more pronounced cheese flavor, consider using a blend of cream cheese and mascarpone or ricotta cheese.
Cooking Steps
Preheat your oven to 350°F.
Next, you'll make the crust in your food processor.
Once that's done, pour the batter into the prepared crust and bake until the tart is golden-brown, about 25-30 minutes.
Step 1. Preheat Oven to 350°F
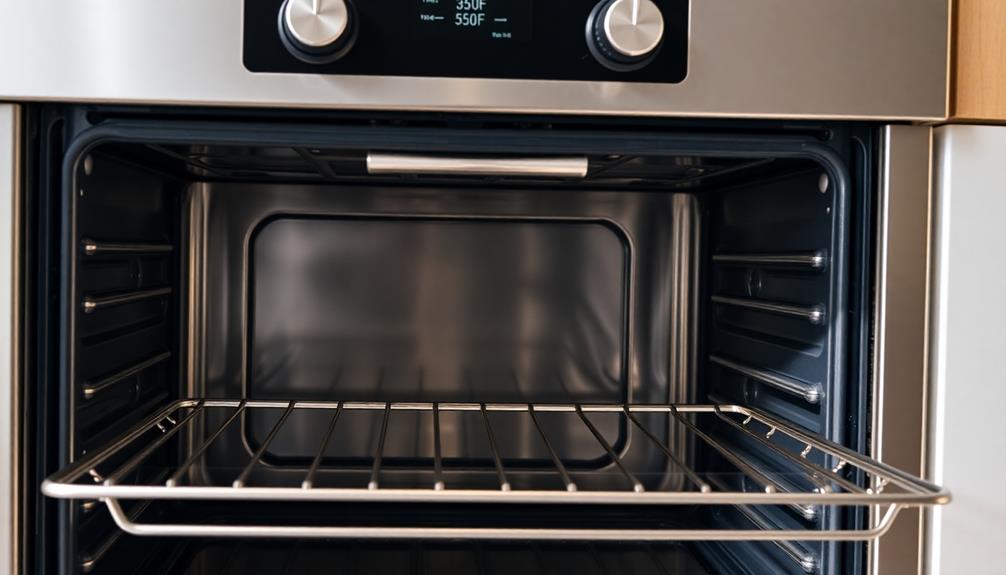
Preheating the oven to 350°F is a crucial first step in preparing these delectable Japanese cheese tarts. This ensures your oven is nice and toasty, ready to bake the tarts to golden perfection.
Just turn the dial to 350°F and let the oven do its thing. While it's heating up, you can gather the rest of your ingredients and equipment. This step only takes a minute, but it'll make a big difference in the final result.
Once the oven is preheated, you'll be one step closer to sinking your teeth into a creamy, dreamy Japanese cheese tart. So don't skip this important preparation – a warm oven is key for baking these irresistible treats just right.
With the oven preheated, you're on your way to creating a truly authentic Japanese dessert experience in your own kitchen.
Step 2. Make Crust in Food Processor
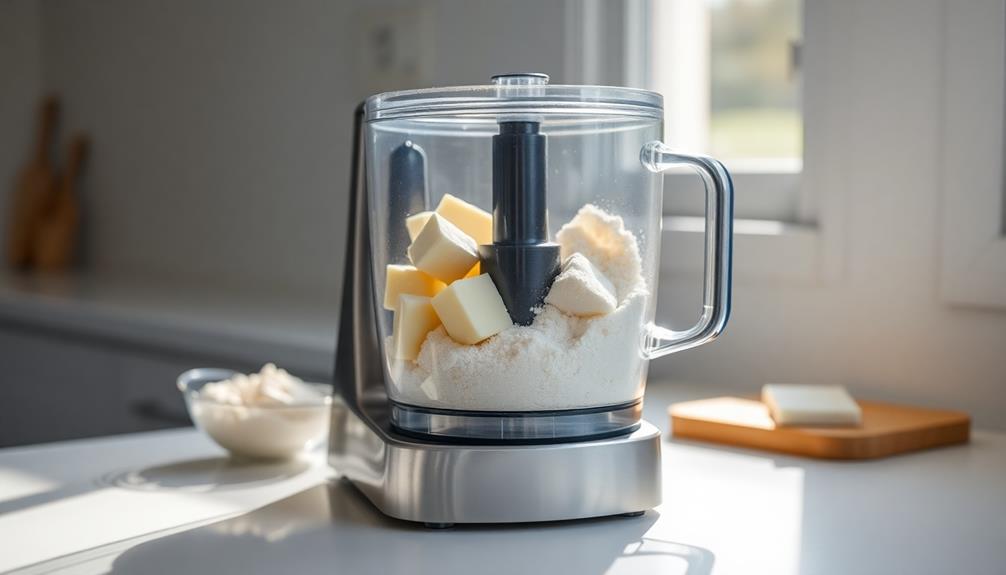
After preheating the oven, the next step is to make the crust in a food processor. This is where the magic begins! Gather your ingredients – flour, sugar, and butter. Toss them into the food processor and let it work its wonders. The machine will quickly blend everything together, creating a delightfully crumbly dough.
Now, it's time to press the dough into your tart pan. Don't be shy – use your fingers to gently press the dough into the sides and bottom of the pan. Get those edges nice and crisp!
Once the crust is ready, pop it in the oven and let it bake until it's golden brown and irresistible.
While the crust is in the oven, you can start preparing the creamy cheese filling. This is the real star of the show – a smooth, rich blend of cream cheese, eggs, and just the right amount of sweetness.
Get ready to dive into a slice of pure, Japanese-inspired bliss!
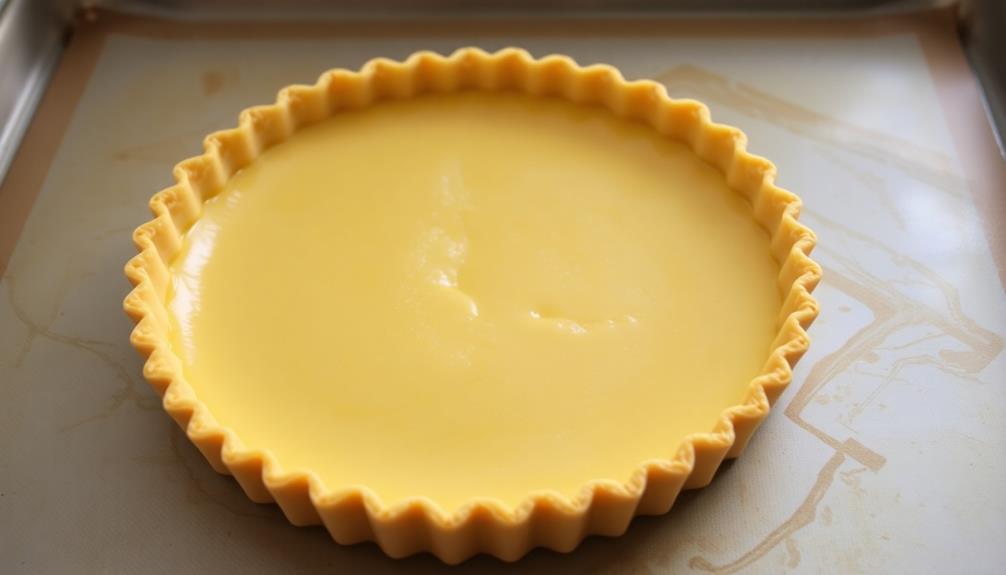
Step 3. Pour Batter Into Prepared Crust
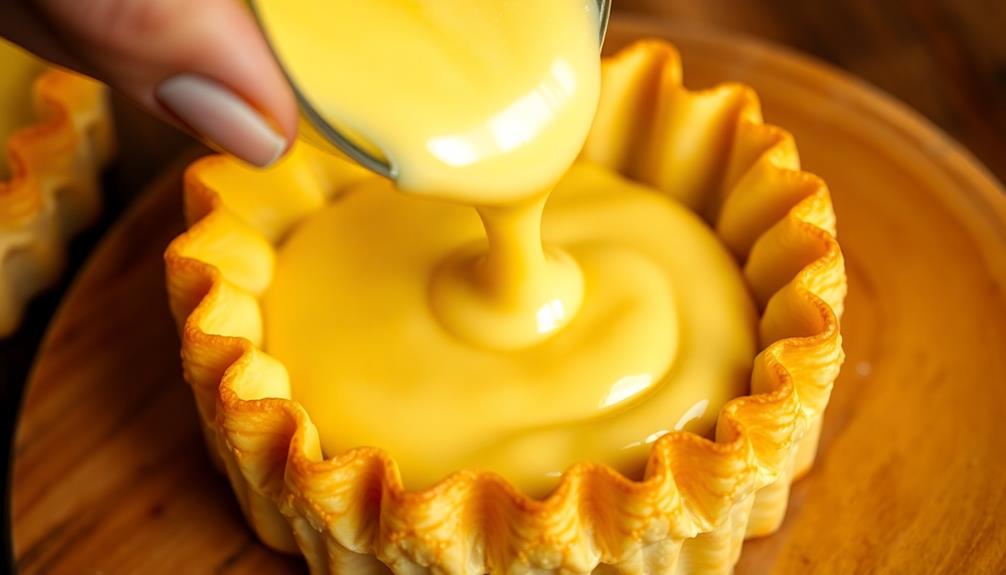
With the crust freshly baked and cooled, it's time to pour the delectable cheese batter into the prepared tart pan. Grab your whisk and give the batter a quick, final stir to ensure it's smooth and creamy.
Slowly and carefully, pour the batter into the center of the crust, letting it gently spread to the edges. Be sure to fill the crust all the way to the top – you want that rich, velvety cheese filling to shine!
Once the batter is in, take a moment to admire your handiwork. The shiny, golden surface is just begging to be tasted.
Now, it's time to bake your Japanese cheese tart to perfection. Slide the filled tart pan into the preheated oven and set a timer.
In no time, your kitchen will be filled with the tantalizing aroma of freshly baked cheese. Get ready for an indulgent treat that will have your taste buds dancing with joy!
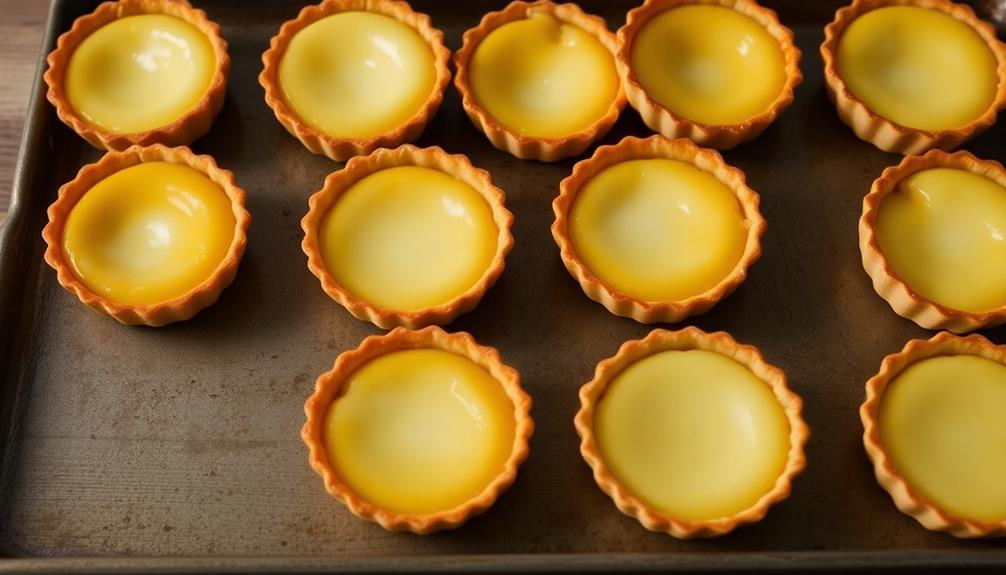
Step 4. Bake Until Golden-Brown, 25-30 Minutes
Once the batter is poured, place the filled tart pan into the preheated 350°F (175°C) oven.
Now, get ready for the delightful aroma that'll fill your kitchen as the Japanese cheese tart bakes! Keep a close eye on it, because in just 25-30 minutes, it'll transform into a beautiful, golden-brown masterpiece.
As the tart bakes, the cheese will melt and the crust will turn crisp and flaky. You'll know it's ready when the top is a lovely shade of golden-brown.
Be sure to use oven mitts when you remove the tart from the oven – you don't want to risk burning your hands on the hot pan.
Once it's out, let the tart cool for a few minutes before slicing into it. This will give the filling a chance to set, so you can enjoy each delectable bite.
Can't you just imagine how creamy and indulgent it's going to taste? Get ready for the ultimate Japanese cheese tart experience!
Step 5. Allow to Cool Completely
Allow the baked Japanese cheese tart to cool completely on a wire rack. This important step helps the tart set and prevents it from crumbling when you slice into it.
As it cools, you'll notice the golden-brown top turn into a delightfully smooth and creamy surface. Be patient – this process can take up to an hour, but it's well worth the wait!
Once the tart has reached room temperature, you can transfer it to a serving plate. Admire the beautiful presentation with its flaky crust and luscious filling.
Now, it's time for the best part – digging in! Slice the tart into generous wedges and savor the incredible flavors. The smooth, velvety cheese paired with the buttery pastry is an absolute delight.
Enjoy every bite of this irresistible Japanese treat! Whether you're serving it for dessert or as a special snack, this cheese tart is sure to impress.
Final Thoughts

Savoring the last bite of the decadent Japanese cheese tart, you can't help but reflect on the experience. The rich, velvety filling has melted in your mouth, leaving behind a lingering sweetness that's both satisfying and addictive. You marvel at the way the buttery crust crumbles with each delicate forkful, complementing the smooth, creamy texture of the cheese.
This tart has truly been a journey for the senses. From the moment you first laid eyes on its golden-brown exterior to the final, indulgent mouthful, it's been a delight.
The process of making it may have taken some time and care, but the end result is undoubtedly worth it. As you savor the last traces, you can't help but feel a sense of accomplishment. Not only have you created a delicious treat, but you've also experienced a bit of Japanese culinary tradition.
This tart has become a new favorite, and you're already looking forward to the next time you can indulge in its irresistible flavors.
Frequently Asked Questions
What Type of Cheese Is Used in Japanese Cheese Tarts?
You'll typically find a blend of cream cheese and other cheeses, like mascarpone or ricotta, used in Japanese cheese tarts. The combination results in a rich, creamy, and indulgent filling for the delicate pastry shell.
How Long Do the Cheese Tarts Need to Chill Before Serving?
The cheese tarts need to chill for at least 2 hours before serving. This allows the filling to set and the flavors to meld together, creating a rich and creamy texture you'll love.
Can the Cheese Tart Recipe Be Made in Advance?
You can certainly make the cheese tart recipe in advance. The tarts can be prepared and chilled up to 3 days before serving, making them a convenient make-ahead dessert option. Just be sure to chill them thoroughly before serving.
What Is the Best Way to Reheat Leftover Cheese Tarts?
To reheat leftover cheese tarts, you can place them in a preheated oven at 350°F for 5-7 minutes. This will help restore the flaky crust and warm the creamy filling. You can also microwave them for 20-30 seconds, but be careful not to overheat.
Are There Any Variations or Alternate Fillings for the Cheese Tarts?
You can try different fillings for the cheese tarts, like chocolate, fruit compote, or even savory options like ham and mushroom. Get creative and experiment with your favorite flavors to find new variations.