Asian Cuisine
Korean Ramen Vs Japanese Ramen: What’S the Difference?
Explore the passionate differences between Korean and Japanese ramen, from flavors to toppings, and discover which bowl will steal your heart!
Korean ramen and Japanese ramen are both delicious, but they have some exciting differences! Korean ramen usually has a spicy kick from gochujang, while Japanese ramen focuses on rich, savory flavors with ingredients like soy sauce or miso. Their noodles also vary; Korean uses instant noodles that cook quickly, while Japanese noodles are often fresh and chewy. Plus, the toppings are different—think kimchi and boiled eggs for Korean ramen versus chashu pork and green onions for Japanese. Each type brings a unique taste to your bowl, so why not explore them both for a tasty adventure? More tasty details await!
Key Takeaways
- Korean ramen is known for its spicy flavors, often incorporating gochujang, while Japanese ramen emphasizes umami with soy sauce or miso broths.
- Korean ramen typically includes diverse toppings like kimchi and seaweed, whereas Japanese ramen features chashu pork, green onions, and soft-boiled eggs.
- Preparation methods differ, with Korean ramen often using instant noodles and Japanese ramen favoring fresh noodles for a chewier texture.
- Broth preparation varies, as Korean ramen focuses on a quicker, spicier broth, while Japanese ramen often requires a longer simmer for depth of flavor.
- Both styles reflect cultural exchanges, showcasing unique regional variations and culinary histories in their respective countries.
History
The rich history of ramen reflects the cultural exchanges between Korea and Japan, showcasing how culinary traditions evolve over time. You might be surprised to learn that ramen actually has roots in China! It first made its way to Japan in the late 19th century when Chinese immigrants opened noodle shops. The Japanese loved the dish, and it quickly became popular. Over the years, Japan adapted the dish, incorporating local flavors and ingredients, giving rise to the iconic bowls we know today. The ramen origins and cultural roots highlight a fascinating story of cross-border influence, where a Chinese staple transformed into a uniquely Japanese comfort food. This interconnected culinary journey underscores the power of food in bridging cultures and creating shared traditions.
In Korea, ramen took on a unique twist. After World War II, instant ramen was introduced, making it a convenient meal for busy families. Korean ramen often features spicy flavors and a variety of toppings, like vegetables and eggs.
Both countries' versions of ramen show how food can tell stories about culture and history. You can see how ingredients and cooking methods changed as people shared their food traditions.
Today, ramen is a beloved dish in both Korea and Japan, but each country adds its own special touch. So, whether you enjoy a spicy Korean bowl or a savory Japanese one, you're savoring a piece of history!
Embrace the flavors and stories behind your next ramen meal, and you'll appreciate it even more.
Cooking Steps
When you're ready to dive into the world of Korean and Japanese ramen, understanding the cooking steps is crucial for achieving that authentic taste.
First, gather your ingredients. For Korean ramen, you'll need instant noodles, broth, vegetables, and maybe some spicy gochujang. For Japanese ramen, focus on fresh noodles, rich broth, and toppings like chashu pork and green onions.
Next, boil some water in a pot. If you're making Korean ramen, add the instant noodles and cook for about three to four minutes until they're soft. Stir in the seasoning packet and any gochujang for that spicy kick.
For Japanese ramen, cook the fresh noodles according to the package instructions, usually around two to three minutes.
Once your noodles are ready, it's time to assemble your bowl. Pour your hot broth over the noodles and add your favorite toppings.
For Korean ramen, toss in some kimchi or a boiled egg. For Japanese ramen, layer on the chashu and sprinkle green onions.
Step 1. Prepare Broth Ingredients Separately
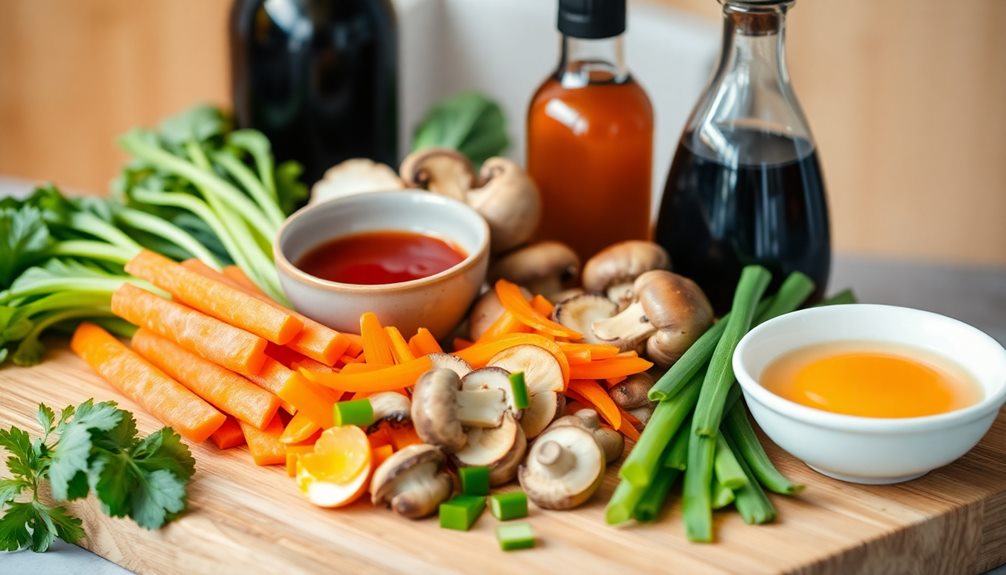
To create a rich and flavorful broth, preparing the ingredients separately is key. Start by gathering your essential components, like bones, vegetables, and aromatics. If you're making Korean ramen, you might choose beef bones for a hearty base, while Japanese ramen often uses chicken or pork bones for a lighter touch.
Next, roast the bones in the oven for about 30 minutes. This step adds a delicious depth to your broth.
While the bones roast, chop up your vegetables like onions, garlic, and ginger. You'll want to sauté these in a pot with a bit of oil until they're soft and fragrant.
Once the bones are ready, transfer them to your pot of sautéed veggies. Fill the pot with water and let it simmer! It's important to let the broth cook for a while, so the flavors meld together beautifully.
Skim off any foam that rises to the top to keep your broth clear.
Separately preparing these ingredients helps you build a robust flavor profile, setting the stage for the delicious ramen you'll create!
Enjoy the process, and know you're making something truly special.
Step 2. Add Seasonings and Flavorings
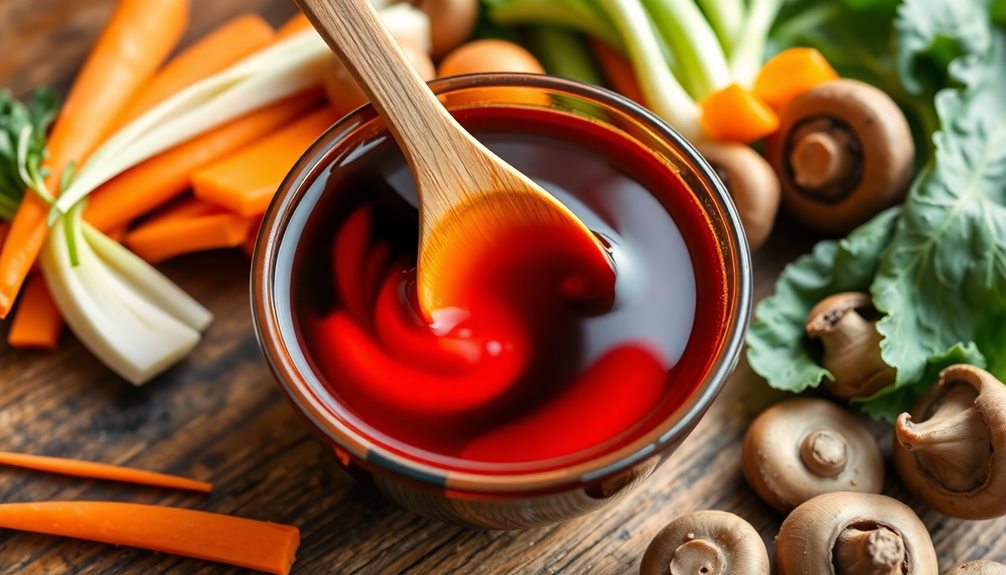
Once your broth has simmered to perfection, it's time to enhance its flavor with seasonings and flavorings. This step is where the magic happens!
Start by adding soy sauce or gochujang for that delicious umami kick. If you're making Japanese ramen, you might prefer a splash of mirin for a touch of sweetness. For Korean ramen, adding sesame oil gives a nutty flavor that warms your heart.
Next, consider garlic and ginger. They're like the dynamic duo of flavor! Mince or grate a little and stir it in.
Don't forget to add some salt and pepper, too, but taste as you go. You want to make sure you don't overpower the broth.
If you're feeling adventurous, sprinkle in some chili flakes or a dash of hot sauce for a spicy twist. Remember, it's all about finding the right balance that suits your taste buds.
Once you've added your seasonings, let the broth simmer for a few more minutes to let those flavors blend together beautifully. Trust me, your kitchen will smell amazing!
Now you're ready for the next exciting step!
Step 3. Incorporate Noodles and Toppings
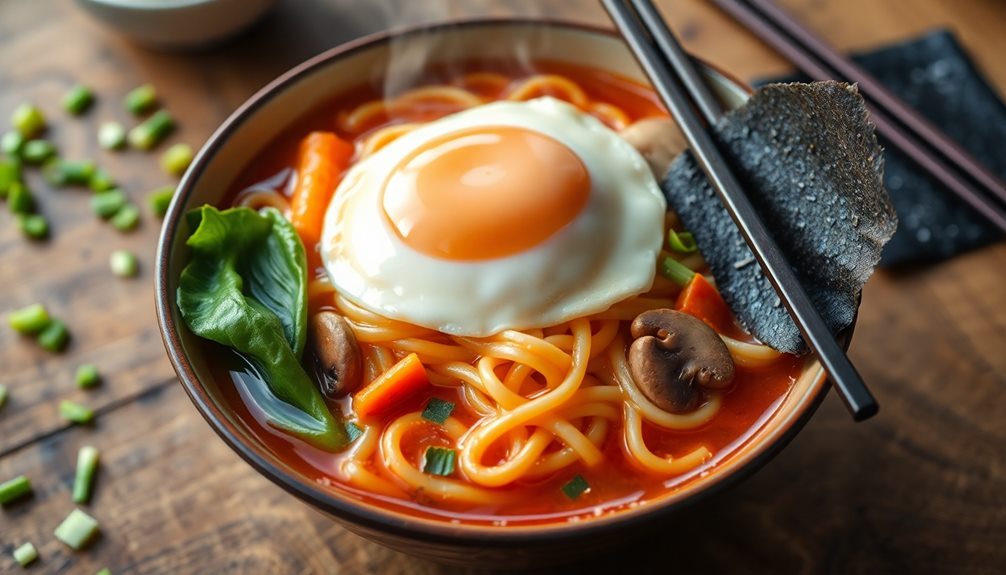
With your flavorful broth ready, it's time to bring your ramen to life by incorporating the noodles and toppings. First, grab your noodles! If you're using fresh noodles, they'll cook quickly, usually in just a couple of minutes. For dried noodles, follow the package instructions. Once they're soft, gently swirl them into your bubbling broth. You'll see your beautiful creation start to take shape!
Next, let's add the toppings. This is where you can get really creative! For Japanese ramen, consider adding slices of tender chashu (braised pork), green onions, and a soft-boiled egg with a gooey yolk.
If you're leaning towards Korean ramen, try some kimchi for a spicy kick, or even pieces of seaweed for a tasty crunch.
Don't forget the finishing touches! A sprinkle of sesame seeds or a drizzle of chili oil can elevate your dish even more. As you place everything into your bowl, take a moment to appreciate the colors and textures.
It's not just a meal; it's a work of art! Now, grab your chopsticks, and get ready for a delicious ramen experience!
Step 4. Simmer for Optimal Flavor
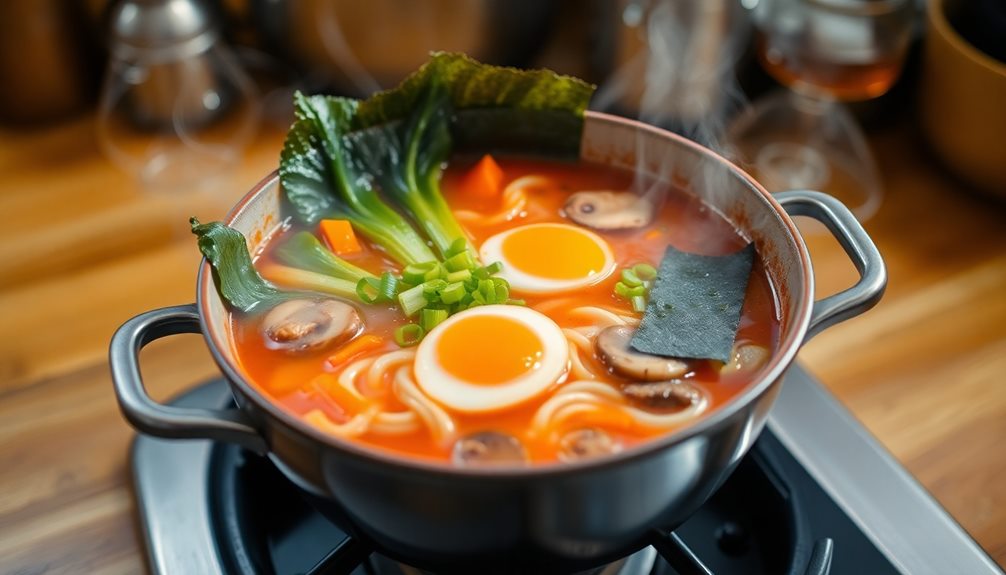
You'll want to simmer your broth for at least 30 minutes, but if you can, aim for an hour or more. The longer you simmer, the more the flavors will deepen.
Keep an eye on it and stir occasionally, so nothing sticks to the bottom of the pot. If you notice any foam or scum floating on the surface, skim it off with a spoon. It helps keep your broth clear and tasty!
As it's simmering, your kitchen will fill with wonderful aromas that'll make your mouth water. Trust me, you'll be so excited to taste the results!
Step 5. Add Garnishes Before Serving
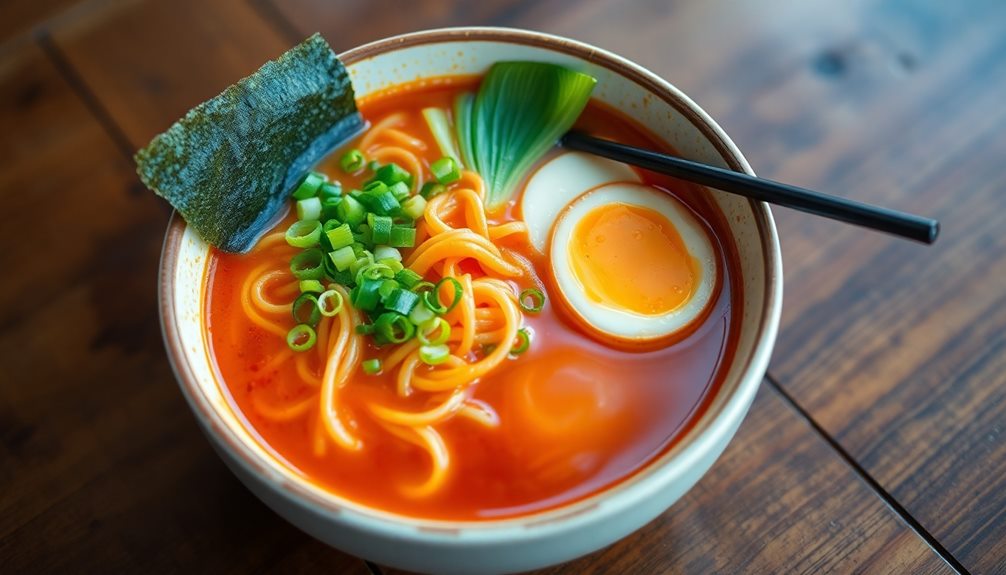
Before serving your ramen, adding garnishes elevates the dish and enhances its visual appeal. Think of garnishes as the finishing touches that make your ramen look and taste amazing!
You can sprinkle some sliced green onions on top for a fresh crunch. Don't forget about nori, the seaweed that adds a bit of ocean flavor and a cool texture. If you want to make it extra special, add a soft-boiled egg, cut in half, so you can see that lovely, runny yolk.
You can also toss in some sesame seeds for a nutty flavor and a nice pop of color. For those who like a little spice, a drizzle of chili oil or a sprinkle of red pepper flakes can really kick things up!
When you're ready to serve, take a moment to arrange everything beautifully in the bowl. This isn't just about taste; it's about making your meal look appetizing, too!
Final Thoughts
The debate between Korean and Japanese ramen reveals a rich tapestry of flavors and traditions that each culture brings to the table.
You might find it exciting to explore the differences and similarities between these two delicious dishes!
Korean ramen often has a spicy kick, thanks to ingredients like gochujang, which gives it a unique flavor.
On the other hand, Japanese ramen tends to be more about umami, with rich broths made from soy sauce or miso.
When you taste these ramens, you're not just enjoying a meal; you're experiencing a part of each culture's history and creativity.
Whether you prefer the heat of Korean ramen or the comforting warmth of Japanese ramen, there's no wrong choice!
It's all about what makes your taste buds dance with joy.
Frequently Asked Questions
What Are the Primary Ingredients in Korean Ramen?
Korean ramen typically includes wheat noodles, spicy broth, and various seasonings. You'll often find ingredients like gochujang, kimchi, and vegetables. It's a flavorful dish that's known for its bold, spicy kick. Enjoy!
How Does the Spiciness of Korean Ramen Compare to Japanese Ramen?
When you taste Korean ramen, you'll notice it's generally spicier than Japanese ramen. The bold flavors and heat from ingredients like gochugaru really kick things up, while Japanese ramen tends to be milder and more savory.
Are There Vegetarian Options for Korean and Japanese Ramen?
Absolutely! You can find vegetarian options for both Korean and Japanese ramen. Look for varieties that use vegetable broth and fresh veggies. Just check the ingredients to ensure there are no hidden animal products. Enjoy!
What Types of Noodles Are Commonly Used in Both Ramen Styles?
You'll find that both styles typically use wheat noodles, but their thickness and texture can differ. Korean noodles might be chewier, while Japanese noodles can be smoother. Enjoy exploring these delightful variations in your meals!
Can I Find Authentic Korean or Japanese Ramen Outside Their Countries?
You can definitely find authentic Korean or Japanese ramen outside their countries. Many restaurants specialize in these dishes, and some even use imported ingredients. With a bit of exploration, you'll discover delicious options nearby.
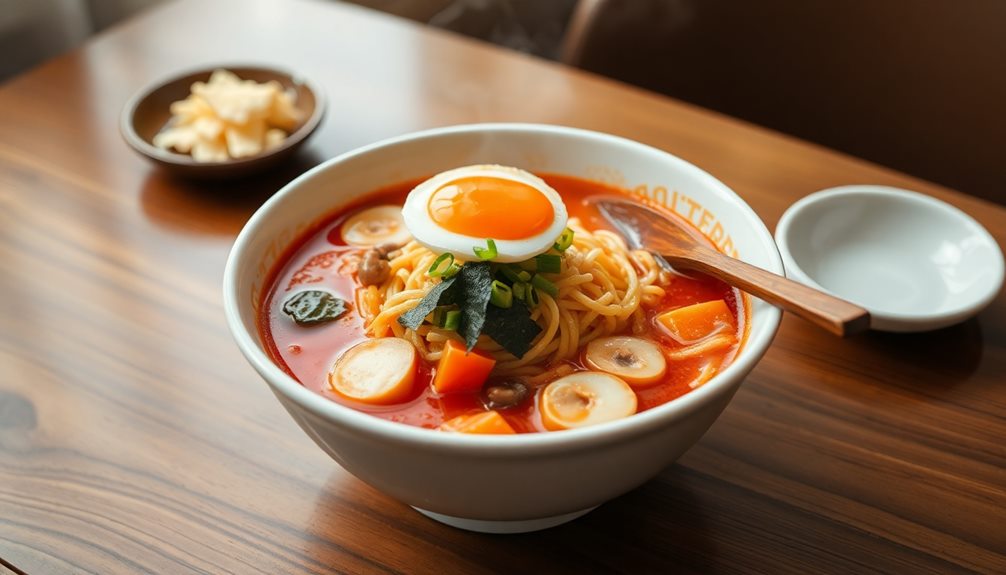
Li Wei is an authentic Chinese cooking expert specializing in regional and classic Chinese dishes. From hand-pulled noodles to delicate dim sum and traditional stir-fries, his culinary expertise showcases the variety of Chinese cuisine. Li Wei’s recipes emphasize simplicity, tradition, and rich, flavorful sauces.
Asian Cuisine
What Is Pork Sung? the Sweet and Savory Meat Floss Explained
You won’t believe how this sweet and savory meat floss has become a cherished treat in many cultures; discover its fascinating history and uses!
Pork sung, or meat floss, is a yummy treat made from shredded pork. It's cooked, dried, and fluffed up, giving it a light and airy texture. The flavors are sweet and savory, making it perfect for many dishes. You can sprinkle it on rice, mix it into soups, or use it in sandwiches and wraps. This tasty meat floss has roots in Chinese cooking and dates back to the 16th century. It's not just food; it brings people together during celebrations and family gatherings! Stick around, and you'll discover even more fun facts about this delicious dish!
Key Takeaways
- Pork sung, or meat floss, is a light, fluffy dried meat product made primarily from tender pork.
- Originating from Chinese cuisine, pork sung dates back to the 16th century and was developed for meat preservation.
- It is seasoned and cooked, then shredded into fine strands, resulting in a sweet and savory flavor profile.
- Commonly used as a topping or filling, pork sung enhances rice, congee, sandwiches, and baked goods.
- Nutritionally, it is high in protein and typically lower in carbohydrates, making it a substantial food option.
History
When you dive into the history of pork sung, you'll discover a fascinating journey that traces back to its origins in Chinese cuisine. This tasty treat, also known as meat floss, has delighted taste buds for generations.
It's believed that pork sung first appeared in the 16th century during the Ming Dynasty. People wanted to preserve meat for longer periods, and they came up with a clever way to do it!
By cooking pork until it's tender, they could then shred it into fine, fluffy strands. After that, they'd mix it with a bit of soy sauce and sugar, creating a perfect blend of sweet and savory flavors.
As time passed, pork sung became popular not just in China but also in many other countries. You might find it sprinkled on rice or used as a filling for buns!
Pork sung is more than just a snack; it's a symbol of creativity and resourcefulness in cooking. Whether you're enjoying it on its own or as a topping, it connects you to a rich history of culinary tradition.
Isn't it amazing how food can tell such wonderful stories?
Cooking Steps
To whip up delicious pork sung, you'll want to start by preparing your ingredients carefully. First, gather your pork, sugar, soy sauce, and spices. You can use pork shoulder or any cut you prefer.
Once you have everything, cook the pork in a pot of boiling water until it's tender. This usually takes about an hour, so be patient!
After the pork's cooked, shred it into tiny pieces. This part's fun! You can use two forks or your hands (just be careful, it'll be hot!).
Next, heat some oil in a large pan and toss in the shredded pork. Add sugar, soy sauce, and your favorite spices. Stir everything together well. The goal is to let the pork absorb all those yummy flavors.
Continue cooking, stirring often until the pork becomes crispy and fluffy, which may take around 20 to 30 minutes.
Once it's ready, let it cool before you store it. You can enjoy your pork sung on rice, in sandwiches, or just by itself as a tasty snack.
And there you go! You've made your very own pork sung. Enjoy!
Step 1. Prepare the Pork Shoulder
Start by selecting a well-marbled pork shoulder, ideally weighing around 3 to 5 pounds. This cut of meat is perfect because the fat adds flavor and helps keep it juicy while cooking.
Once you've got your pork shoulder, it's time to give it a good rinse under cold water. This helps remove any unwanted bits and keeps it clean.
Next, pat the pork dry with paper towels. This step is important because it helps the meat cook evenly.
Now, look over the pork shoulder for any excess fat or silver skin. If you see any, trim it away with a sharp knife. Don't worry; a little fat is good, but too much can make the final product too greasy.
After you've trimmed the meat, you can place it in a large pot or slow cooker. Make sure it fits comfortably, as this will help with even cooking later on.
Lastly, remember to wash your hands and any surfaces that came into contact with raw meat to keep everything safe and clean.
You're now ready to move on to seasoning your pork shoulder, which will really make it shine!
Step 2. Season the Pork Shoulder
Now that your pork shoulder is prepped and ready, it's time to add some flavor. This step is super important because seasoning makes your pork really tasty!
Start by mixing together some salt, pepper, garlic powder, and a little bit of sugar. The sugar helps balance the flavors and adds a touch of sweetness.
Once your seasoning mix is ready, rub it all over the pork shoulder. Make sure you cover every inch, even the sides! This step is where all the magic happens, so don't rush. You want the flavors to soak in beautifully.
If you have time, let the seasoned pork sit for about 30 minutes. This waiting period lets the spices get cozy with the meat.
If you're feeling adventurous, you can also add some soy sauce or hoisin sauce for an extra kick! Just drizzle a bit over the pork and rub it in.
After that, your pork shoulder will be bursting with flavor, and you'll be one step closer to making delicious pork sung! Get excited, because the best is yet to come!
Step 3. Shred the Cooked Pork
Once your pork shoulder is cooked to perfection, it's time to shred that tender meat into delicious, bite-sized pieces. First, let the pork cool for a few minutes. This helps you avoid burning your fingers!
Then, grab two forks or your hands (if it's cool enough) and start pulling the meat apart. You'll notice how easily it comes apart—it's like magic!
Make sure to shred the meat into small, fluffy pieces. You want them to be light and airy, not clumpy. If you find any bits of fat or gristle, toss those aside; we want only the tasty parts!
As you shred, you might get a whiff of that amazing aroma. It'll make your mouth water!
Once you've shredded all the pork, give it a quick toss to break up any larger chunks. You want it to be uniform so every bite is equally delicious.
This step is super important because it helps the flavors mix later on. Now, you're ready to move on to the next step, where you'll add some sweet and savory goodness. Get excited—your pork sung adventure is just getting started!
Step 4. Stir in Sugar Mixture
With the shredded pork ready, it's time to enhance its flavor by stirring in the sugar mixture. Grab a mixing bowl, and let's make this tasty blend! You'll need sugar, salt, and maybe a dash of five-spice powder if you're feeling adventurous.
Start by adding the sugar to the bowl. The sweet touch will balance the savory taste of the pork, making it super delicious.
Next, sprinkle in the salt. This little ingredient is a secret weapon; it helps to bring out all those great flavors. Now, if you decided to add five-spice powder, go ahead and mix it in too! Use a fork or a whisk to blend everything together until it looks like a fluffy, sweet snow.
Now, take the shredded pork and add it to the bowl with the sugar mixture. Stir it all together gently, so every piece of pork is coated perfectly. You want to make sure the sweetness is spread evenly.
As you mix, you'll notice how the flavors start to come alive, making your pork sung unique and tasty. Once you're done, you'll be one step closer to creating a delightful treat!
Step 5. Dry the Shredded Pork
To achieve that perfect texture in your pork sung, drying the shredded pork is crucial. After you've stirred in the sugar mixture, it's time to get that pork ready for the next step.
Preheat your oven to a low temperature, around 200°F (93°C). This gentle heat will help remove moisture without overcooking the pork.
Spread the shredded pork evenly on a baking sheet lined with parchment paper. Make sure it's in a thin layer, so it dries evenly.
Pop it into the oven and let it bake for about 2 to 3 hours. Yes, it takes time, but that's what makes the magic happen! Every 30 minutes, take a peek and give it a good stir. This way, you'll ensure it dries out thoroughly and doesn't stick together.
You'll know it's done when the pork looks light and fluffy, and it easily pulls apart.
Once it's ready, let it cool completely before storing it in an airtight container. Now, you're one step closer to enjoying your delicious pork sung! Can't wait for you to taste it!
Final Thoughts
Pork sung often surprises those who first encounter it, revealing a delightful blend of flavor and texture that's hard to resist. This unique meat floss adds a special touch to many dishes, making it a favorite for both kids and adults. You can sprinkle it on rice, mix it into noodles, or even enjoy it straight from the package!
When you try pork sung, you'll notice its sweet and savory taste dances on your tongue, making every bite exciting. Plus, it's light and fluffy, which is part of what makes it so fun to eat. If you haven't tasted it yet, you're in for a treat!
Pork sung isn't just about flavor; it's also a part of many cultures, bringing people together around delicious food. Whether you're discovering it for the first time or enjoying it again, you'll find it's a fantastic addition to your meals.
Frequently Asked Questions
Is Pork Sung Gluten-Free?
Yes, pork sung is generally gluten-free. It's made from cooked pork and seasonings, but you should always check the specific brand's ingredients to ensure there's no gluten contamination or additives. Enjoy it worry-free!
Can Vegetarians Eat Pork Sung?
If you're a vegetarian, you won't be able to eat pork sung. It's made from pork, which doesn't fit into a vegetarian diet. You might want to explore plant-based alternatives for a similar taste experience.
How Should Pork Sung Be Stored?
To store pork sung, keep it in an airtight container in a cool, dry place. If opened, refrigerate it to maintain freshness. Avoid moisture, as it can affect the texture and flavor. Enjoy it later!
What Are Common Dishes That Use Pork Sung?
You can sprinkle pork sung on rice, top your congee, or use it in sandwiches for extra flavor. It also enhances salads and wraps, adding a delightful crunch and a savory touch to your meals.
Where Can I Buy Pork Sung Online?
You can easily buy pork sung online at various retailers. Check out popular sites like Amazon, Asian grocery stores, or specialty food shops. They often offer convenient delivery options to satisfy your cravings.
Mai is a passionate chef specializing in Vietnamese cuisine. From fragrant pho to fresh spring rolls and banh mi, Mai’s dishes showcase the balance of sweet, salty, sour, and spicy that defines Vietnamese cooking. Her recipes emphasize fresh herbs, flavorful broths, and the light, vibrant ingredients that make Vietnamese food so special.
Asian Cuisine
Konjac Shuang Snack: The Low-Calorie Treat Sweeping Asia
Uncover the delicious world of Konjac Shuang snacks, the low-calorie treat sweeping Asia, and find out why everyone is raving about them!
Konjac Shuang snacks are the exciting low-calorie treats everyone's talking about! Made from konjac root, these snacks are chewy and delicious, perfect for satisfying your cravings without the guilt. They're rich in fiber, which helps keep your tummy happy and can even support weight management. Whether sweet or savory, there's a flavor for every taste bud! You can enjoy them at home, school, or while on the go. They're a smart choice for anyone looking to snack mindfully. Want to learn more about how to enjoy these fun treats? There's plenty to discover!
Key Takeaways
- Konjac Shuang Snack is a low-calorie treat made from konjac root, promoting digestive health and aiding in weight management.
- Originating from ancient Asian cultures, konjac has a long history of culinary use, particularly in Japan as "konnyaku."
- The snack offers a chewy texture and comes in various flavors, satisfying both sweet and savory cravings.
- Easy to prepare, konjac snacks involve mixing konjac flour with water and flavorings, then cooling to create a pudding-like treat.
- Ideal for guilt-free snacking, konjac Shuang provides a light alternative to traditional snacks, perfect for health-conscious individuals.
History
Konjac's rich history dates back over a thousand years, rooted in ancient Asian cultures where it was first cultivated for its versatile tuber.
Imagine farmers in China and Japan carefully tending to these unique plants, knowing they held something special. They discovered that konjac could be turned into delicious foods, and it quickly became a favorite!
As time went on, konjac spread across Asia, delighting people with its chewy texture and low-calorie properties. It wasn't just tasty; it also had health benefits, making it popular among those looking to eat healthier.
You've probably seen konjac used in different snacks, noodles, and even desserts!
In Japan, konjac is known as "konnyaku," and it's been used for centuries in traditional dishes. People enjoyed it as a filling food that didn't weigh them down. Isn't that cool?
As cultures embraced this amazing tuber, they created various recipes that showcased its versatility.
Today, konjac snacks are sweeping across Asia and beyond, showing just how much people love this ancient treat.
Cooking Steps
To create a delicious Konjac Shuang snack, start by gathering all your ingredients and tools.
You'll need konjac flour, water, your favorite sweeteners, and any flavorings like fruit or chocolate. Don't forget a pot, a mixing bowl, and a whisk!
First, mix the konjac flour with water in a bowl. Stir it well until it forms a smooth paste. If you want to add sweetness or flavor, now's the time! You can toss in some honey or a sprinkle of cocoa powder for a yummy twist.
Next, pour the mixture into a pot and heat it over low heat. Keep stirring until it thickens. This part is fun, so keep mixing until it's nice and gooey!
Once it reaches a pudding-like consistency, remove it from the heat.
Now, pour the mixture into molds or a baking dish. Let it cool down for a bit, then pop it in the fridge for at least an hour.
When it's set, cut it into bite-sized pieces. Enjoy your tasty and low-calorie Konjac Shuang snack with friends or family! Happy snacking!
Step 1. Prepare Konjac Noodles First
Start by rinsing the konjac noodles under cold water for a couple of minutes. This simple step helps get rid of any extra smell and makes them taste even better!
Once you've rinsed them, drain the noodles well. You want to remove as much water as possible, so they don't become too soggy later on. In addition, consider enhancing your cooking environment with soothing scents, as certain aromas can help promote relaxation and reduce stress, creating an enjoyable cooking experience aromatherapy can enhance mood.
Next, it's time to cook those noodles! You can either boil them or stir-fry them. If you choose to boil, bring a pot of water to a boil, then add the noodles. Let them cook for about 2-3 minutes. Stir occasionally to prevent sticking.
If you prefer stir-frying, heat a bit of oil in a pan over medium heat. Toss the noodles in and let them cook for about 5 minutes, stirring frequently.
Now, your konjac noodles are ready! You'll notice they become soft and slightly chewy, just the way you want them. They're like little sponges, ready to soak up all the delicious flavors you'll add next.
Get excited because you're just a step away from making a tasty meal!
Step 2. Add Seasonings and Mix
Now that your konjac noodles are perfectly cooked and ready, it's time to elevate their flavor with seasonings. You can really make these noodles your own! Start by gathering your favorite seasonings. Soy sauce, sesame oil, garlic powder, and a pinch of chili flakes work wonders.
In a mixing bowl, pour in a splash of soy sauce. Add a drizzle of sesame oil for a nutty taste. Then, sprinkle in some garlic powder—this will add a delightful aroma. If you like a little heat, toss in those chili flakes!
Once you've got your seasonings in the bowl, give it a good stir. You want everything to blend together nicely. The noodles should soak up the flavors, turning them into a tasty treat!
Don't be afraid to taste as you go. If you think it needs more soy sauce or oil, feel free to adjust. Remember, cooking is all about experimenting and having fun!
When you're happy with the flavor, set your seasoned noodles aside. You're one step closer to enjoying your delicious konjac shuang snack!
Step 3. Stir in Vegetables Thoroughly
After you've seasoned your konjac noodles, it's time to stir in the vegetables thoroughly. This step is super important because you want all those yummy flavors to blend together!
Grab your favorite veggies—like bell peppers, carrots, or broccoli—and chop them into small pieces. This way, they'll cook evenly and mix well with the noodles.
Now, heat a little oil in your pan over medium heat. Toss in those colorful veggies and stir them around for about three to four minutes. You want them to get a little soft, but not mushy. As you cook, the wonderful smells will fill your kitchen, making it feel warm and inviting.
Once the veggies are ready, add your seasoned konjac noodles to the pan. Mix everything together really well! Make sure every noodle gets a taste of those delicious vegetables.
Keep stirring for another couple of minutes, so everything heats up nicely. You're almost done! This colorful mix of noodles and veggies isn't just tasty; it's also packed with nutrients. Enjoy this healthy treat, and get ready for the next exciting step!
Step 4. Serve With Fresh Herbs
Fresh herbs can elevate your konjac noodle dish to a whole new level of flavor. They add freshness and a burst of color that makes your meal even more inviting. To get started, pick herbs like cilantro, basil, or green onions—these will work wonders with your konjac noodles!
First, rinse your fresh herbs under cool water to clean them. Then, gently pat them dry with a clean kitchen towel. Next, chop the herbs finely. You want those tiny bits to spread the flavor throughout your dish.
After you've stirred in your cooked vegetables, sprinkle the fresh herbs on top. Don't be shy—add a generous handful! The herbs will brighten up the flavors and make your dish look beautiful.
If you like a bit of zing, squeeze some lime juice over the top just before serving. It pairs wonderfully with the herbs and adds a fresh twist.
Now, grab your fork and dig in! Each bite will be a delicious mix of textures and flavors, and you'll wonder how you ever enjoyed konjac noodles without fresh herbs. Enjoy your tasty creation!
Step 5. Garnish With Sesame Seeds
To enhance the visual appeal and add a delightful crunch to your konjac noodle dish, garnishing with sesame seeds is a fantastic choice. First, gather some toasted sesame seeds from your pantry. You can find them in most grocery stores or easily toast raw seeds in a pan over low heat until they turn golden brown. This step brings out their nutty flavor!
Next, once you've finished preparing your konjac noodles, take a moment to let them cool slightly. This prevents the seeds from toasting or burning on contact.
Now, sprinkle a generous amount of those beautiful sesame seeds over your dish. You can use your fingers or a small spoon to get an even coating.
Don't forget to give it a gentle toss to make sure every noodle gets some of that tasty crunch! As a final touch, you might want to add a few fresh herbs or a squeeze of lemon juice to brighten things up.
Enjoy your deliciously garnished konjac noodles! You've created a dish that's not only healthy but also looks and tastes fantastic. Happy cooking!
Final Thoughts
Wrapping up our exploration of Konjac Shuang snacks, it's clear that these unique treats offer more than just a low-calorie option.
They're not only fun to eat but also pack a punch when it comes to health benefits. Made from konjac root, these snacks are rich in fiber, which can help keep your tummy happy and full.
Plus, they come in a variety of flavors and textures, making snack time exciting!
You can enjoy Konjac Shuang snacks guilt-free, whether you're at home, school, or on the go.
If you're looking for a tasty treat without all the extra calories, these snacks are perfect for you.
They're a great way to satisfy your cravings without feeling heavy afterward.
Frequently Asked Questions
What Are the Main Ingredients in Konjac Shuang Snack?
You'll find that the main ingredients in konjac shuang snack include konjac flour, water, and flavoring agents. These simple components combine to create a unique, low-calorie treat you can enjoy guilt-free.
Where Can I Buy Konjac Shuang Snack Online?
You can buy konjac shuang snack online at various retailers like Amazon, Walmart, or specialty health food stores. Just search for it on their websites, and you'll find multiple options available for delivery.
Is Konjac Shuang Snack Suitable for Vegetarians or Vegans?
Yes, Konjac Shuang Snack's suitable for both vegetarians and vegans. It's made from konjac root, a plant-based ingredient. So, if you're looking for a tasty, low-calorie option, this snack fits your diet perfectly.
How Long Does Konjac Shuang Snack Last Once Opened?
Once you open the konjac shuang snack, it typically lasts about 3 to 5 days in the fridge. Make sure to store it in an airtight container to maintain freshness and prevent spoilage.
Are There Any Allergens in Konjac Shuang Snack?
You should check the ingredient list for allergens before trying Konjac Shuang Snack. While it's primarily made from konjac, some versions may contain additives or flavorings that could trigger allergies. Always read labels carefully!
Ji-hoon is a skilled chef specializing in traditional and modern Korean cuisine. From savory bulgogi and kimchi to hearty stews and sizzling bibimbap, Ji-hoon’s recipes bring Korea’s bold, spicy, and umami-rich flavors to your kitchen. He focuses on authentic techniques and fresh ingredients that make Korean food so vibrant and flavorful.
Asian Cuisine
Ramen Vs Ramyun: Discover the Differences in These Noodle Giants
Jump into the flavorful world of ramen and ramyun, and uncover the surprising distinctions that make each noodle dish a global favorite!
Ramen and ramyun might look similar, but they're different noodle stars! Ramen, which comes from Japan, is usually rich and comforting with fresh ingredients. It often takes a bit more time to prepare, focusing on that delicious broth. Ramyun, created in Korea, is spicier and super quick to cook. It's perfect for when you need a tasty meal fast! Just add water, cook the noodles, and add that seasoning packet. Both dishes have their unique charm, making them favorites around the world! Keep exploring to discover even more about these noodle treasures!
Key Takeaways
- Ramen originated in Japan, evolving from Chinese noodles, while Ramyun is a Korean adaptation influenced by ramen with a spicier profile.
- Ramen features fresh, handmade noodles and rich, flavorful broths, whereas Ramyun typically uses instant noodles with a seasoning packet.
- Cooking ramen is a more involved process, often including various toppings, while ramyun is quick and convenient, ideal for fast meals.
- Ramen emphasizes complex flavors and textures, while ramyun offers bold, straightforward tastes and is often spicier, appealing to diverse palates.
- Both dishes reflect cultural adaptations and global popularity, catering to different dining experiences—ramen for comfort and ramyun for speed.
History
When you dive into the history of ramen and ramyun, you'll uncover a fascinating evolution that reflects cultural exchanges between Japan and Korea. Ramen, which originated in China, made its way to Japan in the late 1800s. Japanese people quickly embraced this delicious noodle dish, adding their own unique flavors and ingredients.
You'd be amazed at how ramen transformed over the years, becoming a beloved comfort food throughout Japan.
On the other hand, ramyun found its roots in Korea, influenced by Japanese ramen but with its own special twist. After the Korean War, ramyun became popular as a quick and easy meal, perfect for busy families.
It's often spicier than ramen, featuring bold flavors and toppings like kimchi and vegetables.
Both dishes tell stories of adaptation, creativity, and the blending of cultures. Today, you can find ramen and ramyun all over the world, each dish offering something special to enjoy.
Whether you prefer the warm, savory broth of ramen or the spicy kick of ramyun, both have rich histories that connect people through their love of noodles.
Cooking Steps
While the ingredients for ramen and ramyun may seem similar, the cooking steps differ significantly, making each dish unique.
When you cook ramen, you start by boiling water and adding fresh, handmade noodles. You'll let them cook for about three to five minutes until they're just right. Meanwhile, prepare your broth on the side! This could be a delicious pork, chicken, or vegetarian broth. Once the noodles are ready, you'll drain them and place them in a bowl, pouring the rich broth over the top.
Now, let's talk about ramyun! You'll also start with boiling water, but this time, you'll toss in the instant noodles. They cook super fast, usually in just three to four minutes. After cooking, you can add the seasoning packet that comes with it for that extra kick of flavor. If you want, you can toss in some veggies or an egg for a special treat!
Whether you're slurping up ramen or ramyun, both dishes are fun to make and taste amazing.
Step 1. Boil Water for Noodles
To get started on your noodle dish, bring a pot of water to a rolling boil. This step is super important because the hot water cooks your noodles evenly, making them soft and delicious.
Choose a pot that's big enough so the noodles have room to move around. If you use a smaller pot, they might stick together!
As you wait for the water to boil, you can add a pinch of salt. This'll help flavor your noodles and make them taste even better.
You'll know the water is ready when you see big bubbles popping up. It should be bubbling like a little hot spring!
Make sure to keep an eye on it, though. If you leave it unattended, it might boil over, and that can make quite the mess. Plus, the steam can be hot, so be careful if you're standing close.
Once your water is boiling, you're one step closer to enjoying a tasty bowl of ramen or ramyun.
Step 2. Add Noodles to Boiling Water
Now that your water's bubbling away, it's time to add the noodles! Carefully take the pack of ramen or ramyun and open it up. If you're using instant noodles, you'll notice they're often in a block shape. Just gently place the noodles into the boiling water. Make sure to stand back a little to avoid any splashes!
As the noodles hit the water, you'll hear that satisfying sizzle. It's a sign that deliciousness is on the way! Depending on what type you're cooking, the noodles will usually take around 3 to 5 minutes to become soft and tender. You can peek at them after a couple of minutes.
While they cook, the water will start to turn slightly cloudy, and you might even catch a lovely aroma wafting up. That's a good sign!
Remember, you don't want to overcook them, so keep an eye on the timer. When the noodles are just right, they'll be perfect for whatever broth or sauce you plan to add.
Get ready for a delightful bowl of goodness that you can enjoy with friends or family! Happy cooking!
Step 3. Stir Noodles Gently
As the noodles cook, you'll want to stir them gently to prevent clumping and ensure even cooking. This step is super important! When you add those lovely noodles to the boiling water, they can stick together if you don't give them a little love.
Grab a pair of chopsticks or a fork—whatever you find easier—and carefully swirl the noodles around.
Make sure you stir them every minute or so. This way, they'll cook perfectly and won't turn into a sticky mess. You'll notice the noodles start to soften and become a bit more flexible. That's when the magic happens!
Keep an eye on the clock, too. Most ramen and ramyun noodles only need a few minutes to cook. If you stir gently and keep checking, you'll know when they're ready to be taken off the heat.
Once they're cooked just right, you can't help but get excited about the delicious meal coming up!
Step 4. Add Seasoning Packet
Pour the seasoning directly into the pot, and watch as it swirls around, mixing with the warm broth. You can already smell the amazing aroma filling the kitchen!
If you're feeling adventurous, you can even add a little extra spice or some of your favorite toppings now.
Stir the noodles gently again to make sure every strand is coated in that savory goodness. You'll notice the color of the broth changing, becoming a rich, inviting hue. This is when the noodles really start to soak up all those yummy flavors.
Don't rush this part—take a moment to enjoy the delightful smells and the colorful sight in your pot.
You're just a few steps away from a delicious bowl of ramen or ramyun! So, let's keep the excitement going as we move on to the next step!
Step 5. Simmer for Three Minutes
With the seasoning fully blended into the broth, it's time to let the flavors meld together. This is where the magic happens!
You'll want to bring your pot to a gentle simmer. If you've got the heat just right, you'll see tiny bubbles rising to the surface, and you can even hear a soft bubbling sound.
Now, set a timer for three minutes. This is the perfect amount of time for the noodles to soak up all that delicious broth. It's so exciting to watch them transform!
As they cook, give them a gentle stir every now and then to make sure they're all getting cozy in that flavorful soup.
While you wait, think about what toppings you might want to add. Maybe some green onions, a soft-boiled egg, or even some crispy seaweed?
Once the timer goes off, take a moment to admire your creation. The noodles will be perfectly tender, and the broth will smell amazing!
Now you're ready to serve up your masterpiece. Grab your chopsticks or a fork, and enjoy every delicious bite of your homemade ramen or ramyun! Pair your steaming bowl of noodles with a side of banh giay Vietnamese rice cake for a delightful fusion of textures and flavors. The soft, chewy rice cake perfectly complements the rich broth and tender toppings, creating a meal that’s both satisfying and memorable. Don’t forget to garnish with freshly chopped herbs or a squeeze of lime to elevate your dish even further!
Final Thoughts
When it comes to the world of noodles, the debate between ramen and ramyun often stirs passionate opinions. You might love the rich flavors and textures of ramen, or perhaps you enjoy the spicy kick of ramyun.
Both options have their own special qualities that make them unique. Ramen usually comes with fresh ingredients and a deep broth, while ramyun is quick, easy, and perfect for a late-night snack.
Choosing between the two really depends on your mood. If you're looking for a cozy meal, ramen can be a warm hug in a bowl. On the other hand, if you want something fast and flavorful, ramyun can hit the spot in just a few minutes.
Frequently Asked Questions
Can Ramen and Ramyun Be Interchanged in Recipes?
You can often interchange ramen and ramyun in recipes, but keep in mind their texture and flavor differences. Adjust cooking times and seasonings to suit your taste, ensuring a delicious meal regardless of which you choose.
What Are the Main Ingredients in Ramen and Ramyun?
Ramen's main ingredients include wheat noodles, broth, and toppings like meat and vegetables. Ramyun typically uses instant noodles, seasoning packets, and often includes spicier flavors. You'll enjoy exploring these unique components in each dish!
Are There Vegetarian Options for Ramen and Ramyun?
Yes, you can find vegetarian options for both ramen and ramyun. Many places offer veggie broths and toppings like mushrooms, tofu, and vegetables. Just check the menu or ask for vegetarian choices when you order.
How Do Ramen and Ramyun Differ in Flavor Profiles?
When you taste ramen, you'll notice its rich, savory broth and complex seasonings. In contrast, ramyun often features a spicier, bolder flavor profile, reflecting its Korean roots. Each offers a unique culinary experience you'll enjoy!
Which Is Healthier: Ramen or Ramyun?
When considering health, you'll find that ramyun often contains more preservatives and sodium. Ramen can be healthier if you choose fresh ingredients and control seasoning, but it's essential to check the nutrition labels for each option.
Mai is a passionate chef specializing in Vietnamese cuisine. From fragrant pho to fresh spring rolls and banh mi, Mai’s dishes showcase the balance of sweet, salty, sour, and spicy that defines Vietnamese cooking. Her recipes emphasize fresh herbs, flavorful broths, and the light, vibrant ingredients that make Vietnamese food so special.
-
Brazilian Cuisine3 months ago
Tacacá
-
Brazilian Cuisine3 months ago
Caldeirada
-
Polish Comfort Food3 months ago
Krupnik (Barley Soup)
-
Brazilian Cuisine3 months ago
Chicken in Brown Sauce
-
Southern Comfort Food3 months ago
Cheese Straws
-
African Cuisine3 months ago
Kedjenou (Ivory Coast)
-
Polish Comfort Food3 months ago
Vegetable Salad
-
Ethiopian Cuisine3 months ago
Ye’selata (Ethiopian Salad)