American Diner Classics
Macaroni and Cheese
Prepare to embark on a delectable journey through the rich history and endless possibilities of the beloved comfort food classic, macaroni and cheese.
Macaroni and cheese is a classic comfort food that's been delighting taste buds for centuries! It all started in Italy back in the 13th century, with delicious pasta and cheese combinations. Over the years, the dish has evolved, with Thomas Jefferson bringing a pasta machine from Italy to America in the 1700s. Today, you can enjoy macaroni and cheese in countless ways – from baking it with a crispy top to experimenting with different cheeses and seasonings. It's a timeless dish that's loved by all ages, and there's always more to discover about this beloved comfort food classic.
Key Takeaways
- Macaroni and cheese originated in Italy in the 13th century and became a comfort food classic enjoyed worldwide.
- The dish evolved over the years with various cheeses, seasonings, and baking techniques.
- Proper preparation techniques, including preheating the oven and creating a creamy cheese sauce, are crucial for achieving the desired texture and flavor.
- Experimenting with different cheese types and adding spices can enhance the dish's flavor profile.
- Sharing the homemade macaroni and cheese with others can be a joyful experience.
History
Macaroni and cheese has a rich history, dating back to the 13th century. You might be surprised to learn that this beloved dish originated in Italy, where people were enjoying pasta and cheese combinations long before it became a staple in American homes.
The earliest known recipe for something resembling modern mac and cheese was written down in the 1300s, and the dish quickly spread across Europe.
In the 1700s, Thomas Jefferson, one of the Founding Fathers of the United States, brought a pasta machine back from Italy and served a version of macaroni and cheese at a state dinner. This helped popularize the dish in America.
Over the years, mac and cheese evolved, with home cooks and chefs experimenting with different cheeses, seasonings, and baking techniques.
Today, it remains a comfort food classic, enjoyed by people of all ages around the world.
Cooking Steps
Preheat your oven to 350°F.
Now, grab a large pot and fill it with water. Bring the water to a boil over high heat. Once it's boiling, add a generous pinch of salt and the macaroni. Cook the pasta according to the package instructions, usually around 8-10 minutes, until it's nice and tender.
Drain the cooked macaroni in a colander and set it aside.
In the same pot, melt the butter over medium heat. Whisk in the flour to create a smooth paste, known as a roux. Slowly pour in the milk, whisking constantly to prevent lumps from forming. Let the sauce simmer until it thickens, about 5 minutes.
Remove the pot from the heat and stir in the shredded cheese until it's melted and the sauce is creamy.
Add the cooked macaroni and mix well. Transfer the cheesy pasta to a baking dish and sprinkle the breadcrumbs on top.
Bake for 20-25 minutes, until the top is golden brown and bubbly. Enjoy your homemade macaroni and cheese!
Step 1. Preheat Oven to 350°F
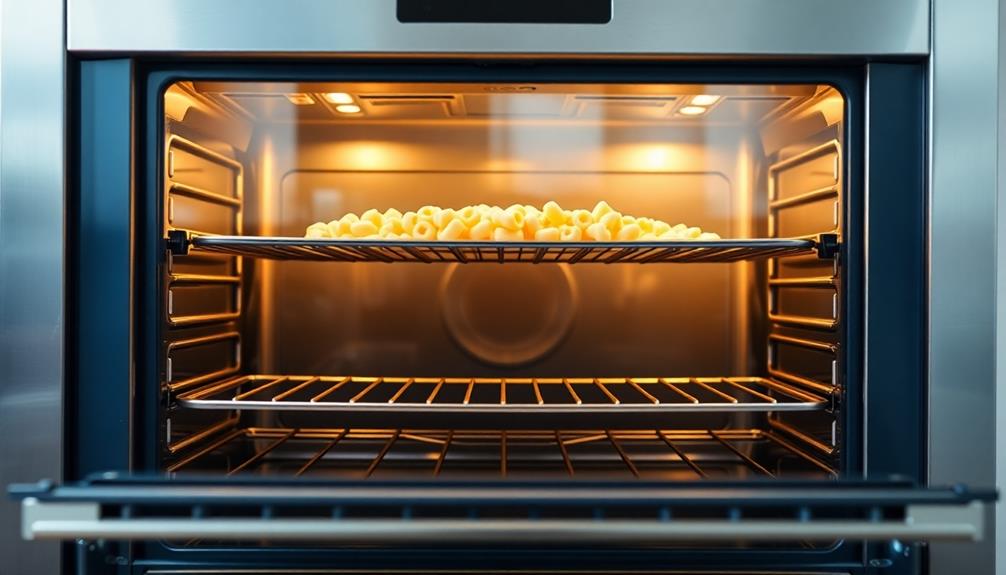
To begin the cooking process, you'll need to preheat your oven to 350°F. This is a crucial step that ensures your macaroni and cheese bakes evenly and perfectly. Set your oven to the desired temperature and give it a few minutes to fully heat up.
While you wait, you can start preparing the other ingredients.
Once the oven has reached 350°F, you're ready to move on to the next step. This even, consistent heat is essential for the cheese sauce to melt and meld seamlessly with the macaroni. The high temperature will also help create a beautifully golden, crispy top layer on your baked macaroni and cheese.
Be sure to keep an eye on the oven as it preheats, and don't forget to set a timer to remind you when it's ready. With the oven preheated, you can now begin assembling your delicious macaroni and cheese dish.
Step 2. Add Butter to Pot
Next, add 2 tablespoons of butter to a large pot.
Make sure the pot is big enough to hold all the ingredients – you don't want it to overflow!
Once the butter is in, turn the heat to medium and let it melt.
Using high-quality butter, such as grass-fed butter, will enhance the flavor of your macaroni and cheese.
Stir it around a bit with a wooden spoon to help it melt faster.
As the butter melts, it'll start to sizzle and bubble.
This is exactly what you want – the sizzling butter is going to help infuse all the other ingredients with delicious flavor.
Keep stirring the melted butter until it's fully incorporated.
It should have a rich, golden color.
Now you're ready for the next step – adding the macaroni!
This is where the magic really starts to happen.
Get ready for cheesy, creamy goodness.
Step 3. Add Cheese to Pot
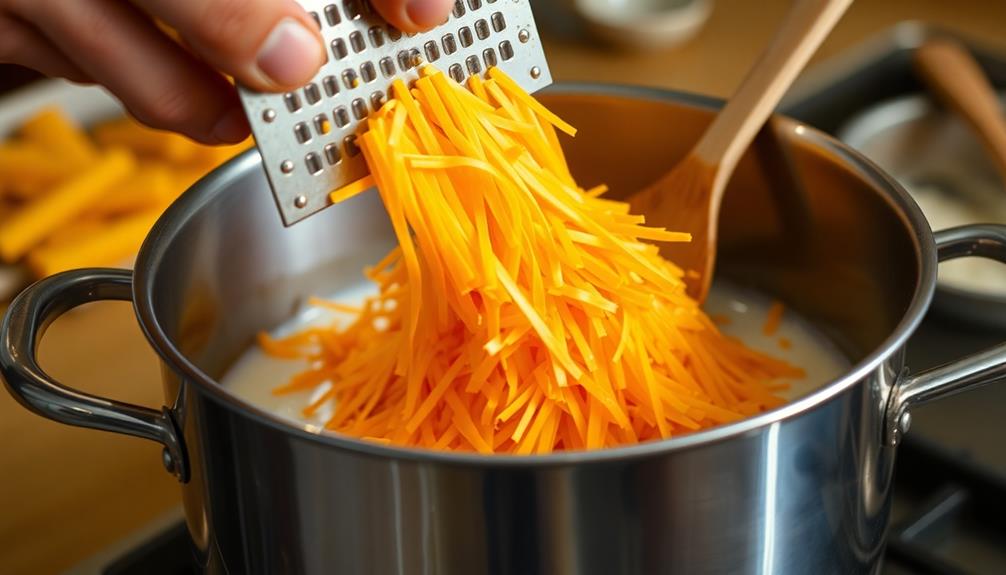
After the butter has melted, it's time to add the cheese! This is where the magic really starts to happen. Grab a handful of your favorite shredded cheese and sprinkle it into the pot. Keep stirring as you add the cheese, making sure it melts evenly throughout the macaroni.
For a delightful twist, consider incorporating a sprinkle of celery juice powder for added nutrients and flavor, as it retains the beneficial properties of fresh celery known for hydration and electrolyte balance support.
The key is to go slowly and add the cheese a little at a time. This way, the cheese has a chance to fully incorporate into the sauce, creating a rich, creamy texture. You can experiment with different types of cheese, too – cheddar, Gruyère, or even a blend for extra flavor.
Once all the cheese is melted and combined, your macaroni and cheese is starting to take shape. The sauce should be smooth and velvety, coating every noodle.
Give it a taste and add any additional seasonings, like salt and pepper, to suit your personal preferences. With the cheese added, you're one step closer to cheesy, comforting perfection! If you like a little kick, you can also add a pinch of cayenne pepper or a few dashes of hot sauce. This tasty tomato soup recipe is a versatile dish that can be enjoyed on its own, or paired with a grilled cheese sandwich for a classic comfort meal. Whether you’re serving it for a cozy night in or as an appetizer at a dinner party, this soup is sure to be a crowd-pleaser.
Step 4. Add Milk and Stir
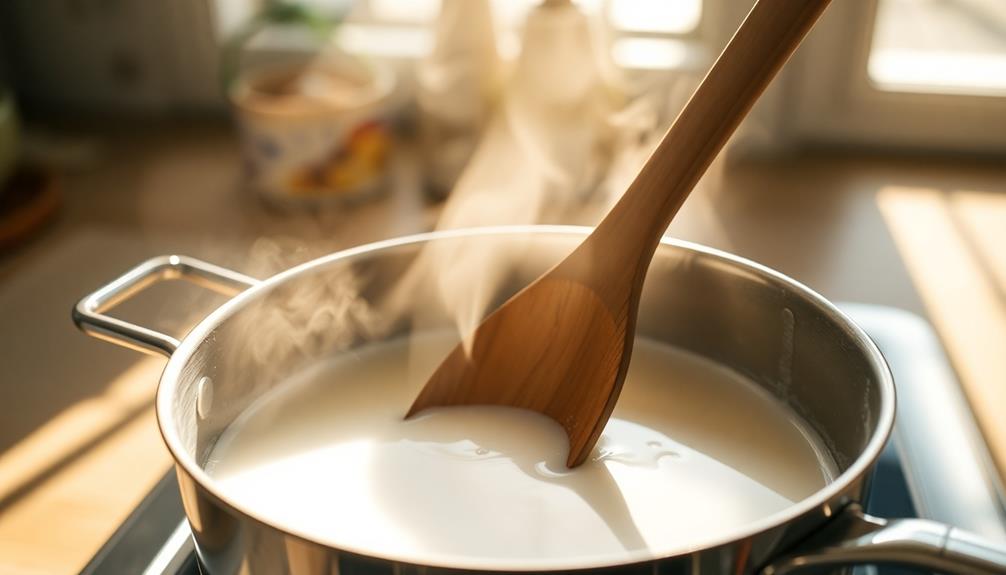
Adding the milk and stirring is a crucial step in achieving the desired creamy texture for your macaroni and cheese. Pour in the milk slowly, while continuously stirring the mixture with a wooden spoon or whisk. This helps the milk fully incorporate into the cheese, creating a smooth, velvety consistency.
Stir the pot with purpose, making sure to scrape the bottom and sides to prevent any clumps from forming. The key is to stir steadily and patiently until the sauce thickens to your liking. Don't be tempted to rush this process, as it's essential for achieving the perfect creamy texture.
Once the sauce has reached your desired consistency, you're ready to move on to the next step. Taste the macaroni and cheese, and add any additional seasonings or ingredients to customize the flavor to your preference.
With the milk and stirring complete, you're well on your way to creating a delicious, homemade macaroni and cheese dish.
Step 5. Add Pasta to Pot
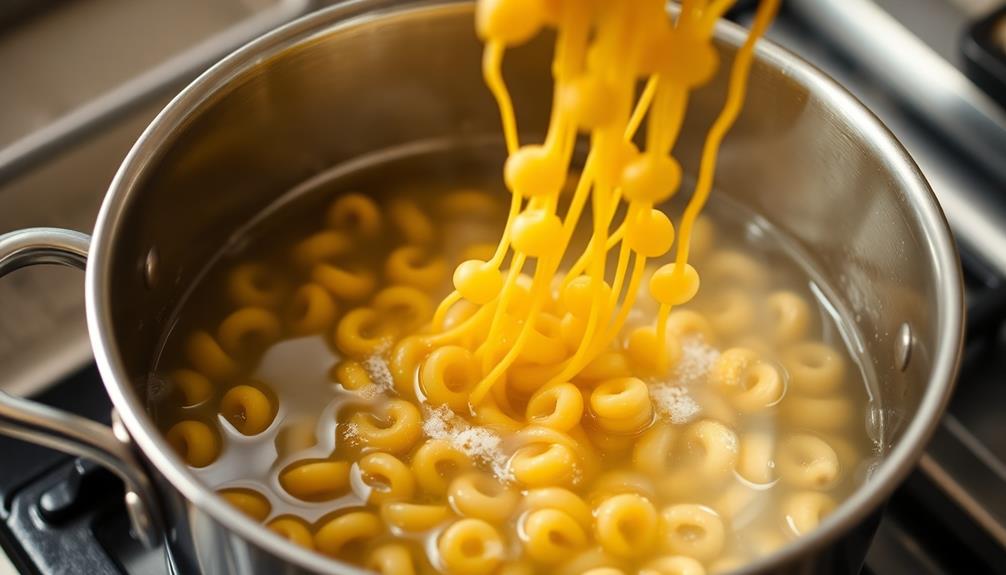
With the milk and stirring complete, you can now turn your attention to adding the pasta to the pot.
Grab the box of elbow macaroni and carefully pour it into the pot. Make sure to do this slowly, as you don't want the pasta to spill over the sides. Once all the pasta is in, give it a gentle stir with your spoon to ensure it's evenly distributed.
Now, it's time to turn on the heat. Crank the dial to medium-high and let the pot come to a boil. As the water starts to bubble, you'll see the pasta begin to soften and expand.
Keep a close eye on it, giving it an occasional stir, until the pasta is al dente – tender, but still with a slight bite to it. This should take around 7-10 minutes, depending on the type of pasta you're using.
Once the pasta is cooked to perfection, it's time to move on to the next step: draining the pot.
Carefully grab the handle of the pot and pour the contents into a colander in the sink, making sure not to lose any of those precious noodles.
Final Thoughts
Ultimately, making delectable macaroni and cheese requires more than simply following a recipe. It's about embracing the process, experimenting with flavors, and finding the perfect balance that suits your taste buds.
Don't be afraid to get creative! Try adding a pinch of paprika or a sprinkle of garlic powder to give your dish a little extra zing. And don't forget the most important ingredient – your own personal touch.
As you continue on your macaroni and cheese journey, remember to have fun with it. Experiment with different cheeses, noodle shapes, and toppings. The possibilities are endless!
Who knows, you might just discover your new favorite combination. So, dive in, get your hands a little messy, and enjoy the process. After all, the best part of making macaroni and cheese is sharing it with those you love.
Frequently Asked Questions
How Long Can Leftover Mac and Cheese Be Stored?
Leftover mac and cheese can last for 3-4 days in the fridge when stored properly.
Just make sure to keep it in an airtight container and reheat it thoroughly before eating. This way, you can enjoy your cheesy goodness for a few more days without worrying about it going bad.
Just be sure to give it a good sniff before digging in – if it smells off, it's best to toss it out.
Can I Use Different Types of Cheese in the Recipe?
Absolutely! You can use all sorts of cheeses in your mac and cheese recipe.
Try mixing cheddar with parmesan, or even adding in some gouda or gruyere for extra flavor. The possibilities are endless!
Just be sure to shred or crumble the cheese so it melts smoothly into the dish.
Experiment and have fun – that's the best part of cooking, isn't it? You never know what delicious creation you'll come up with.
What Is the Best Way to Reheat Mac and Cheese?
The best way to reheat mac and cheese is to pop it in the oven!
Preheat your oven to 350°F, then place the mac and cheese in an oven-safe dish. Cover it with foil to keep it moist, and bake for 15-20 minutes until it's hot and melty again.
You can also reheat it on the stovetop over low heat, stirring frequently to prevent sticking. Just be sure to add a splash of milk or cream to keep it creamy and delicious!
Can I Make Mac and Cheese in the Slow Cooker?
You can absolutely make mac and cheese in the slow cooker!
It's a super easy way to create a creamy, cheesy dish without all the hands-on work. Just toss your ingredients into the slow cooker, let it do its thing, and you'll have a delicious meal waiting for you when you're ready to eat.
The slow cooker keeps the cheese nice and smooth, so you don't have to worry about it drying out or getting grainy.
Give it a try – you'll love how effortless it is!
How Can I Make the Cheese Sauce Creamier?
To make your cheese sauce creamier, start by using a blend of cheeses. Sharp cheddar gives great flavor, while softer cheeses like Parmesan or cream cheese add extra creaminess.
Grate the cheese finely, then melt it slowly into your milk or cream over low heat, stirring constantly. You can also try adding a bit of cornstarch or flour to thicken the sauce.
Just be sure not to overheat it, or the cheese could get grainy. With a few simple tricks, you'll have a super creamy cheese sauce in no time!
Rachel is all about nostalgic comfort food with a modern twist. She brings the flavors of classic American diners to Cook if Ya, with her takes on burgers, fries, and milkshakes. Rachel’s love for simple, hearty meals brings a bit of retro flair to the table, reminding us all of the joys of classic diner dishes.
American Diner Classics
The Quintessential Club Sandwich: Layers of Diner History
Dive into the rich history and evolution of the iconic American club sandwich, a beloved diner classic that has stood the test of time.
The club sandwich is an iconic American diner classic that has evolved over generations. It all started in the late 1800s when the sandwich was created to satisfy busy, affluent patrons who craved a substantial, portable meal. Today, this layered delight features toasted bread, savory bacon, turkey or chicken, crisp lettuce, juicy tomatoes, and creamy mayonnaise – a harmonious balance of flavors and textures that keeps diners coming back for more. The club sandwich remains a beloved symbol of comfort, nostalgia, and culinary tradition in American dining culture. There's so much more to discover about this quintessential diner staple.
Key Takeaways
- The club sandwich emerged in the late 19th century in elite social clubs and upscale hotels to satisfy busy, affluent patrons seeking a substantial, portable meal.
- The club sandwich has remained a staple, symbolizing American dining culture and culinary evolution, reflecting changing tastes and preferences over time.
- The quintessential club sandwich consists of three slices of toasted bread, layered with bacon, turkey or chicken, lettuce, tomato, and mayonnaise.
- The layered construction and balancing of flavors and textures in the club sandwich contribute to its iconic status and enduring popularity as a comfort food.
- The club sandwich's versatility in preparation and ingredient choices allows for customization, accommodating diverse dietary preferences and culinary experimentation.
History
The origins of the club sandwich can be traced back to the late 19th century, when the dish first emerged as a popular menu item in elite social clubs and upscale hotels.
It's believed that the club sandwich was created to satisfy the cravings of busy, well-to-do patrons who wanted a substantial, yet portable meal. The classic combination of toasted bread, crispy bacon, juicy slices of turkey or chicken, fresh lettuce, and tangy condiments quickly became a favorite among the upper class.
Over the decades, the club sandwich evolved, with different variations popping up in diners and restaurants across the country.
Some added avocado or tomato, while others experimented with different meats or sauces. No matter the twist, the club sandwich remained a beloved classic, representing the rich history and flavors of American dining culture.
Today, it continues to be a staple on menus, satisfying taste buds and reminding us of the simple pleasures of a well-crafted sandwich.
Recipe
The club sandwich is a classic and beloved creation that has graced the menus of diners, cafes, and restaurants around the world. This layered sandwich is a testament to the ingenuity of culinary enthusiasts who sought to combine a variety of flavors and textures into a single, satisfying dish. The use of fresh, seasonal ingredients can elevate the flavors, similar to how a fermented vegetable plate enhances nutritional value and probiotics.
At its core, the club sandwich is a masterfully constructed assemblage of toasted bread, crisp bacon, juicy turkey or chicken, fresh lettuce, ripe tomatoes, and a creamy mayonnaise or other spread. The interplay of these ingredients creates a harmonious balance of flavors and a delightful contrast of textures that has made the club sandwich a timeless favorite.
Ingredients:
- 3 slices of toasted bread (such as white, wheat, or sourdough)
- 2-3 slices of cooked bacon
- 2-3 slices of roasted turkey or grilled chicken
- 1-2 leaves of fresh lettuce
- 1-2 slices of ripe tomato
- 2-3 tablespoons of mayonnaise or other preferred spread
Instructions:
Layer the toasted bread slices with the cooked bacon, turkey or chicken, lettuce, and tomato slices. Spread the mayonnaise or preferred spread between the layers, and on the top and bottom slices of bread. Secure the sandwich with toothpicks or skewers, if desired, and serve immediately.
When preparing the club sandwich, it's important to use high-quality, fresh ingredients to ensure the best flavor and texture. Additionally, toasting the bread helps to create a sturdy foundation for the layered components, preventing the sandwich from becoming soggy.
Feel free to experiment with different protein options, such as roast beef or grilled seafood, to customize the club sandwich to your personal taste preferences.
Cooking Steps
Alright, let's get started on those cooking steps! First, you'll want to toast up some bread to get it nice and crispy.
A clean kitchen supports a healthier lifestyle by promoting cleanliness and hygiene, which is essential while preparing food.
Next, spread a generous layer of creamy mayonnaise on each slice. Then, add some delicious sliced turkey and top it off with melty cheese slices and juicy tomato slices.
Can't wait to see how your club sandwich turns out!
Step 1. Toast Bread
After selecting the perfect bread for your club sandwich, it's time to toast the slices. Toasting the bread is a crucial step that adds a delightful crunch and enhances the overall flavor of your sandwich.
First, preheat your toaster or toaster oven to the desired setting. You want the bread to be golden brown, not too dark or burnt. Carefully place the bread slices into the toaster, making sure they don't overlap. Listen for the satisfying crackle as the bread begins to toast.
Once the toasting is complete, remove the bread slices with care. They'll be hot, so use tongs or a fork to handle them. Inspect each slice, ensuring it's evenly toasted on both sides. If any spots seem undercooked, you can always pop them back in for a quick touch-up.
With your perfectly toasted bread ready, you can now move on to the next step in assembling your delicious club sandwich. Get ready to layer on the tasty ingredients!
Step 2. Add Mayonnaise to Bread Slices
With your toast perfectly crisped, it's time to spread a layer of mayonnaise on each slice. Mayonnaise is the perfect condiment to add a creamy, tangy flavor and help the other ingredients stick together.
Grab your favorite brand of mayonnaise and use a butter knife to evenly coat the surface of the toast. Don't be shy – you want a nice, thick layer that will soak into the bread and provide a delicious base for the rest of your club sandwich.
Once both slices are coated, you're ready to start building your masterpiece. The mayonnaise will act as a glue, holding the layers of meat, cheese, and vegetables in place.
Feel free to get a little messy – the key is to make sure every bite is packed with flavor. Take your time and enjoy the process of assembling your club sandwich. With the mayonnaise as your foundation, you're on your way to creating a true diner classic.
Step 3. Add Sliced Turkey
Next, place 2-3 slices of high-quality sliced turkey onto the mayonnaise-coated bread. The turkey adds a savory element, complimenting the other flavors.
Be sure to arrange the slices in an overlapping pattern to cover the bread completely. The turkey should hang off the edges slightly, creating a generous and visually appealing layer.
This step is crucial, as the turkey is one of the main components that defines the classic club sandwich. Feel free to add an extra slice or two if you want a heartier, more substantial filling.
The key is to achieve the perfect balance of flavors and textures, with the turkey playing a starring role. With the turkey in place, you're one step closer to assembling the ultimate club sandwich.
Step 4. Add Cheese Slices
Atop the savory turkey, add a layer of your preferred cheese slices. Whether you fancy cheddar, Swiss, or provolone, the cheese will melt beautifully, creating a harmonious blend of flavors. The gooey, melted cheese contrasts wonderfully with the crisp, toasted bread, making each bite a delightful experience.
When selecting your cheese, consider the overall flavor profile you're aiming for. A sharp cheddar will provide a bold, tangy note, while Swiss cheese offers a milder, nutty taste. Provolone, on the other hand, has a slightly sweet and creamy texture that complements the other ingredients perfectly.
Arrange the cheese slices evenly across the turkey, ensuring each layer is well-covered. As the sandwich toasts, the cheese will melt, seeping into the other fillings and creating a cohesive, mouthwatering combination.
The cheese adds a satisfying richness that elevates the club sandwich to new heights of deliciousness.
Step 5. Add Tomato Slices
Slice the juicy tomatoes into even rounds, ensuring each slice is approximately the same thickness. Lay the tomato slices atop the cheese, creating another layer of flavor and texture.
The vibrant red color of the tomatoes provides a stunning visual contrast, making the sandwich even more appetizing. Carefully place the tomato slices, overlapping them slightly to cover the entire surface area. This step adds a burst of freshness and acidity, balancing the richness of the other ingredients.
The juicy tomatoes also help to keep the sandwich moist and prevent it from becoming dry. With each layer, the club sandwich becomes more complete, building towards a delightful and satisfying dining experience.
The addition of the tomato slices is a crucial step in creating the perfect club sandwich, elevating the dish to new heights of flavor and presentation.
Final Thoughts
Although the history of the club sandwich provides insight into the evolution of American cuisine, its lasting popularity ultimately speaks to its enduring appeal as a satisfying and versatile meal option.
The club sandwich has been a beloved classic for generations, gracing the menus of diners, cafes, and homes alike. Its iconic layered construction, with crisp bacon, juicy tomatoes, and tender turkey or chicken, creates a harmonious balance of flavors and textures that never fails to satisfy.
Just like other diner classics such as corned beef hash and pancakes with maple syrup, the club sandwich embodies the comforting qualities that draw people to American diners.
What's more, the club sandwich's versatility allows for endless variations, making it a canvas for culinary creativity. Whether you prefer it toasted or untoasted, with or without mayonnaise, the club sandwich remains a timeless comfort food that brings people together.
As you savor each bite, you can't help but appreciate the rich history and enduring appeal of this truly iconic American dish.
Frequently Asked Questions
What Are the Health Benefits of the Club Sandwich?
While the club sandwich may seem indulgent, it can provide some health benefits. The combination of lean protein, vegetables, and whole grains can offer a balanced nutritional profile if consumed in moderation as part of an overall healthy diet.
Can I Make a Vegetarian Version of the Club Sandwich?
Sure, you can make a delicious vegetarian version of the club sandwich. Replace the meat with grilled or roasted veggies, sliced avocado, and use a variety of fresh, crisp greens. Get creative with the fillings to make it your own!
How Long Does It Take to Assemble a Club Sandwich?
Assembling a club sandwich can take around 5-10 minutes, depending on your familiarity with the process. You'll need to layer the bread, fillings, and toppings carefully to create the signature triple-decker sandwich.
What Are the Best Side Dishes to Serve With a Club Sandwich?
When serving a club sandwich, pair it with classic diner-style sides like crispy fries, creamy coleslaw, or a simple green salad. These complementary dishes enhance the sandwich's flavors and provide a balanced, satisfying meal.
Can I Freeze the Club Sandwich for Later Consumption?
You can definitely freeze a club sandwich for later enjoyment. Just wrap it tightly in plastic wrap or aluminum foil before freezing. When you're ready to eat it, let it thaw in the fridge overnight for best results.
Rachel is all about nostalgic comfort food with a modern twist. She brings the flavors of classic American diners to Cook if Ya, with her takes on burgers, fries, and milkshakes. Rachel’s love for simple, hearty meals brings a bit of retro flair to the table, reminding us all of the joys of classic diner dishes.
American Diner Classics
Pie À La Mode: the Timeless Diner Dessert Combo
Craving a sweet and irresistible dessert experience? Discover the captivating history and mouthwatering combination of Pie à la Mode, the classic American diner treat.
Get ready for the ultimate diner dessert experience – Pie à la Mode! This classic American treat has delighted taste buds for over a century. It all starts with a flaky, homemade pie crust, filled with sweet, fruity goodness. Top it off with a scoop of creamy, vanilla ice cream, and you've got a heavenly combination that brings back fond memories of family gatherings and cozy diners. Whether you prefer classic apple or adventurous new flavors, Pie à la Mode promises a delightful contrast of warm and cool, rich and refreshing. Keep reading to discover the captivating story behind this timeless dessert.
Key Takeaways
- Pie à la mode originated in the late 19th century in the United States and became a beloved diner staple.
- The term "à la mode" referred to the fashionable practice of serving ice cream with desserts.
- Pie à la mode represents a fusion of baked goods and frozen treats, creating a delightful contrast of temperatures and textures.
- Pie à la mode evokes feelings of nostalgia and comfort, contributing to its enduring popularity across generations.
- Pie à la mode encourages experimentation with various pie and ice cream flavors, inspiring new creative dessert combinations.
History
Pie à la mode has a long and storied history, dating back to the late 19th century. This classic dessert combo first gained popularity in the United States, where it quickly became a beloved diner staple.
The origins of pie à la mode can be traced to the late 1800s, when the term "à la mode" was used to describe the fashionable practice of serving ice cream alongside other desserts. As the tradition of serving pie with ice cream grew, the two components became inseparable, creating the iconic pie à la mode we know and love today.
Over the years, pie à la mode has evolved, with bakers and diners experimenting with different pie and ice cream pairings. From classic apple pie to decadent chocolate cream, the possibilities are endless.
Yet, no matter the flavor, the combination of warm, flaky pie and cool, creamy ice cream remains a timeless treat.
Recipe
Pie À La Mode is a classic American dessert that combines the rich, flaky crust of a pie with the creamy, indulgent topping of ice cream. This dish is the perfect balance of sweet and satisfying, making it a beloved treat for all ages.
The key to a successful Pie À La Mode is using high-quality ingredients and paying attention to the details. The combination of a perfectly baked pie and a scoop of your favorite ice cream creates a symphony of flavors and textures that's sure to delight your taste buds.
Ingredients:
- 1 pre-made or homemade pie crust
- 3 cups of your preferred fruit (such as apples, berries, or pumpkin)
- 1 cup of sugar
- 1/4 cup of all-purpose flour
- 1/2 teaspoon of ground cinnamon
- 1/4 teaspoon of ground nutmeg
- 1/4 cup of unsalted butter, cubed
- Vanilla ice cream
Instructions:
Preheat your oven to 375°F (190°C). In a large bowl, combine the fruit, sugar, flour, cinnamon, and nutmeg. Mix well until the fruit is evenly coated.
Pour the fruit mixture into the pie crust and dot the top with the cubed butter. Bake the pie for 45-55 minutes, or until the crust is golden brown and the filling is bubbly. Allow the pie to cool completely before serving.
When ready to serve, scoop a generous portion of vanilla ice cream onto each slice of pie. The contrast between the warm, fragrant pie and the cold, creamy ice cream is simply divine.
Enjoy this Pie À La Mode as a perfect ending to a meal or as a special treat any time of day.
Cooking Steps
First, prepare the pie crust according to the recipe. A flaky pie crust is essential for the perfect dessert experience, much like the comforting qualities of corned beef hash that diners are famous for.
Next, get ready the ice cream you'll be serving alongside the pie. Then, assemble the pie and the ice cream – you're almost there!
Bake the pie crust until it's a lovely golden brown, and you're ready to serve up a delicious Pie à la Mode, warm and inviting.
Step 1. Prepare Pie Crust According to Recipe
To prepare the pie crust, you'll need to follow the recipe closely. First, gather all your ingredients – flour, salt, butter, and ice water.
In a large bowl, combine the flour and salt. Then, use a pastry cutter or your fingers to work the cold butter into the flour until it resembles coarse crumbs.
Slowly add the ice water, a tablespoon at a time, mixing gently until the dough just begins to come together. Be careful not to overmix.
Once the dough forms a ball, divide it in half, shape each half into a disk, wrap in plastic, and refrigerate for at least 30 minutes. This resting period allows the gluten to relax, making the dough easier to roll out.
When ready to use, lightly flour your work surface and roll out the dough into a circle, large enough to fit your pie pan.
Gently transfer the crust to the pan, crimp the edges, and you're ready to fill and bake your delicious pie!
Step 2. Prepare Ice Cream
Preparing the ice cream is the next step in creating the perfect pie à la mode. First, gather your ingredients – heavy cream, sugar, and vanilla extract.
In a large bowl, use a hand mixer to whip the heavy cream until it forms stiff peaks. Slowly add the sugar, a little at a time, while continuing to mix. Once the sugar is fully incorporated, stir in the vanilla extract.
Next, transfer the whipped cream to a freezer-safe container and place it in the freezer. Every 30 minutes, take the container out and use a fork to stir the mixture, breaking up any ice crystals that form. This helps create a smooth, creamy texture. Freeze for 2-3 hours, or until the ice cream reaches your desired consistency.
Once the ice cream is ready, scoop it onto your freshly baked pie crust, creating the classic pie à la mode. Enjoy this timeless diner dessert combo!
Step 3. Assemble Pie and Ice Cream
With the ice cream chilled and ready, it's time to assemble the pie à la mode.
First, grab your freshly baked pie and let it cool completely. Once it's at room temperature, it's time to scoop and serve!
Place a generous slice of the warm, fragrant pie onto a plate. Top it with a scoop or two of the cold, creamy ice cream. The contrast of the hot and cold, the sweet and rich, is simply divine.
Drizzle a bit of chocolate or caramel sauce over the top, if desired. The gooey, decadent topping takes this classic dessert to new heights.
Finally, sprinkle on a few toasted nuts or a dollop of whipped cream for the finishing touch.
Serve your pie à la mode immediately, while the ice cream is still frozen and the pie is at its warmest.
This timeless combination is sure to delight and satisfy any sweet tooth. Enjoy every bite of this beloved diner classic!
Step 4. Bake Pie Crust Until Golden Brown
Once your pie has cooled completely, it's time to bake the crust until it's a beautiful golden brown. Preheat your oven to 400°F (200°C).
Carefully place the filled pie on a baking sheet to catch any drips. This will help keep your oven clean.
Bake the pie for 20-25 minutes, or until the crust is a rich, golden color. Keep a close eye on it, as the crust can go from perfectly baked to burnt in a matter of minutes.
You'll know it's ready when the crust is crisp and has a lovely shine.
Once the crust is baked, let the pie cool on a wire rack for at least 30 minutes before serving. This allows the filling to set and the flavors to meld together.
Now you're ready to top your warm, flaky pie with a scoop of cold, creamy ice cream. Enjoy the perfect combination of textures and temperatures in every bite!
Step 5. Serve Pie À La Mode Warm
A delightful way to serve your freshly baked pie is à la mode. The warm, flaky crust paired with a scoop of cool, creamy vanilla ice cream creates a heavenly contrast that tantalizes the taste buds.
As you spoon into the dessert, the ice cream melts into the pie, creating a rich, indulgent experience. Serve the pie à la mode straight from the oven, allowing the warmth to gently melt the ice cream.
The combination of the two temperatures and textures is simply divine. Encourage your guests to dig in and savor each bite, savoring the way the flavors and sensations dance on their tongues.
For an extra special touch, consider drizzling the pie with a touch of caramel or chocolate sauce. The sweet, gooey toppings complement the buttery crust and smooth ice cream beautifully.
Enjoy this timeless diner classic in all its glory, and indulge in the pure joy of pie à la mode.
Final Thoughts
As you've savored the delightful flavors of pie à la mode, it's time to reflect on your culinary journey. This timeless diner dessert combo has charmed generations of sweet tooth enthusiasts, and for good reason. The contrast of warm, flaky pie and cold, creamy ice cream creates a symphony of textures and temperatures that dance on your tongue.
Whether you've indulged in a classic apple pie or ventured into more adventurous flavors, the experience has been nothing short of delightful. The combination of the pie's rich, fruity filling and the ice cream's refreshing coolness is a true delight.
As you savor the last bite, you can't help but feel a sense of nostalgia and appreciation for this timeless dessert.
As you embark on your next culinary adventure, remember the joy and satisfaction that pie à la mode has brought you. It's a timeless classic that will continue to bring smiles to the faces of dessert lovers everywhere.
Frequently Asked Questions
Can Pie À La Mode Be Served Warm or Cold?
You can serve pie à la mode either warm or cold, depending on your preference. The warm option highlights the contrast between the hot pie and the cold ice cream, while the cold version creates a more refreshing dessert experience.
What Are Some Popular Variations of Pie À La Mode?
Some popular variations of pie à la mode include apple pie à la mode, pecan pie à la mode, and cherry pie à la mode. You can also find seasonal variations like pumpkin pie à la mode or berry pie à la mode.
How Long Can Leftover Pie À La Mode Be Stored?
Leftover pie à la mode can generally be stored in the refrigerator for 3-5 days. Make sure to keep the pie and ice cream separate, and reheat the pie gently before serving. Enjoy your treat while it's fresh!
Can the Ice Cream Be Substituted With Other Frozen Desserts?
Certainly, you can substitute the ice cream with other frozen desserts in your pie à la mode. Feel free to experiment with sorbet, gelato, or even frozen yogurt – the possibilities are endless to customize this classic treat.
What Is the Recommended Ratio of Pie to Ice Cream?
The recommended ratio of pie to ice cream is typically around 1:1. You'll want enough ice cream to complement the pie, but not so much that it overwhelms the flavors. Play with the portions to find your perfect balance.
Rachel is all about nostalgic comfort food with a modern twist. She brings the flavors of classic American diners to Cook if Ya, with her takes on burgers, fries, and milkshakes. Rachel’s love for simple, hearty meals brings a bit of retro flair to the table, reminding us all of the joys of classic diner dishes.
American Diner Classics
Chicken Fried Steak: the Southern Comfort Dish With a Crispy Twist
Tapping into the rich culinary heritage of the South, this iconic dish blends European and Native American influences to create a crispy, tender, and irresistible meal.
Chicken fried steak is a beloved Southern comfort dish that features a crispy, golden exterior and tender, flavorful beef. Originating in the late 1800s, this iconic meal blends European and Native American culinary influences, creating a cherished symbol of Southern hospitality. To make it, you'll start by tenderizing the beef in buttermilk, then dredge it in a seasoned flour mixture before frying until perfectly crisp. Serve it up with a rich, creamy gravy, and you've got a hearty, satisfying dish that's sure to delight. If you're curious to learn more about the history and preparation of this Southern classic, keep reading.
Key Takeaways
- Chicken fried steak is a classic Southern comfort food featuring a crispy breading and tender beef.
- The dish has its origins in the American South, influenced by European and Native American cooking traditions.
- The key to a successful chicken fried steak is mastering the breading and frying technique to achieve the perfect texture.
- Serving chicken fried steak with creamy gravy and comfort food sides, such as mashed potatoes, enhances the overall dining experience.
- Chicken fried steak remains a cherished symbol of Southern cuisine, representing hospitality and nostalgia for generations.
History
The origins of chicken fried steak can be traced back to the American South, where it emerged as a beloved regional dish in the late 19th century.
The dish's history is closely tied to the traditions and culinary influences of the area, blending European and Native American cooking techniques. Settlers from Germany and Austria brought their love of breaded and fried meats, which they combined with the readily available beef found in the South.
Meanwhile, Native American tribes, such as the Choctaw and Creek, had been frying meat in animal fat for centuries. This fusion of culinary traditions gave birth to the iconic chicken fried steak – a tender cut of beef, breaded and fried to crispy perfection.
Over time, the dish became a staple on Southern menus, served with creamy gravy, mashed potatoes, and other comfort food classics.
Today, chicken fried steak remains a beloved symbol of Southern cuisine, cherished for its satisfying, homestyle flavors and the memories it evokes of family gatherings and good old-fashioned hospitality.
Recipe
Chicken fried steak is a classic Southern comfort food dish that combines tender beef, a crispy breading, and a rich, creamy gravy. This dish is a beloved staple in many households and can be enjoyed for a hearty meal any time of the day.
The key to a delicious chicken fried steak is in the preparation. By tenderizing the beef, creating a flavorful breading, and mastering the gravy, you can elevate this dish to new heights of culinary delight.
- 1 lb tenderized beef cube steak, cut into 4 pieces
- 1 cup all-purpose flour
- 1 teaspoon salt
- 1/2 teaspoon black pepper
- 1/2 teaspoon garlic powder
- 1/2 teaspoon paprika
- 2 eggs, beaten
- 1 cup milk
- Vegetable oil for frying
To cook the chicken fried steak, first, season the beef cubes with salt and pepper. In a shallow dish, combine the flour, garlic powder, and paprika. Dip the beef cubes in the beaten eggs, then coat them thoroughly in the seasoned flour mixture.
Heat 1/4 inch of vegetable oil in a large skillet over medium-high heat. Fry the breaded beef cubes for 3-4 minutes per side, or until golden brown and crispy. Transfer the fried steaks to a paper towel-lined plate.
For the gravy, pour off all but 2 tablespoons of the oil from the skillet. Whisk in 2 tablespoons of the seasoned flour, and cook for 1 minute. Gradually whisk in the milk, and bring the mixture to a simmer, stirring constantly until the gravy thickens, about 5 minutes.
Season the gravy with additional salt and pepper to taste. Serve the chicken fried steak hot, smothered in the creamy gravy.
Cooking Steps
Let's get started on cooking up some delicious chicken fried steak!
First, you'll want to soak the meat in a tangy buttermilk mixture.
Then, dredge the meat in a savory seasoned flour mixture.
Next, carefully fry the coated meat until it's golden brown.
Once it's cooked, let the meat rest a bit before serving.
And don't forget to make a creamy, flavorful gravy to drizzle over the top!
Step 1. Soak Meat in Buttermilk Mixture
After seasoning the meat, it's time to soak the chicken-fried steak in a buttermilk mixture. This essential step tenderizes the steak and helps the crispy coating stick better.
Grab a large, shallow dish and pour in some tangy buttermilk. Gently lower the seasoned steak into the mixture, making sure it's fully submerged. Cover the dish and pop it in the fridge for at least 30 minutes, or up to 2 hours. The longer you let it soak, the more flavorful and tender the steak will become.
While the steak soaks, prepare the breading station. You'll need some all-purpose flour, salt, pepper, and other seasonings of your choice.
When the steak is ready, remove it from the buttermilk one piece at a time, letting any excess drip off. Dredge it through the seasoned flour, coating all sides evenly.
Now your steak is ready for the next step – frying to golden, crispy perfection!
Step 2. Dredge in Seasoned Flour Mixture
With the steak now soaked in the tangy buttermilk, it's time to prepare the breading.
First, grab a shallow bowl and mix together the all-purpose flour, garlic powder, onion powder, paprika, and a pinch of salt and pepper. This seasoned flour mixture will give your chicken fried steak that irresistible crunch.
Next, take the steak and dredge it through the flour mixture, making sure to coat both sides evenly. Gently shake off any excess flour – you don't want a thick, heavy crust. The key is to have a light, crispy coating that will sizzle when it hits the hot oil.
Once the steak is fully coated, you're ready to fry it up to golden-brown perfection. Get your oil nice and hot, then carefully add the coated steak.
Let it cook until the crust is crispy and the meat is tender. Flip it over and repeat on the other side. With just a few simple steps, you'll have a homemade chicken fried steak that's sure to satisfy.
Step 3. Fry the Coated Meat
Once the steak is fully coated, you're ready to fry it up to golden-brown perfection.
Heat a large skillet over medium-high heat and add enough oil to come about 1/4 inch up the sides. You want the oil to be hot, but not smoking.
Carefully lower the coated steak into the oil and let it sizzle. Fry the steak for 3 to 4 minutes per side, or until it's a beautiful golden-brown color. Be gentle when flipping the steak to maintain the crispy coating.
When the steak is done, transfer it to a paper towel-lined plate to drain any excess oil. The outside should be wonderfully crispy, while the inside remains tender and juicy.
Now you can serve your homemade chicken fried steak piping hot, with your favorite sides like mashed potatoes and gravy. Get ready for the ultimate Southern comfort food experience!
Step 4. Let Meat Rest Before Serving
Let the fried steak rest for 5 to 10 minutes before serving. This resting period is crucial, as it allows the juices to redistribute throughout the meat.
While it's tempting to dig in right away, letting the steak rest ensures the meat stays moist and flavorful. During this time, the steak will continue to cook slightly, reaching its optimal doneness.
The crispy breading will also have a chance to set, creating that satisfying crunch you crave. Resist the urge to slice into the steak immediately – you'll be rewarded with a perfectly cooked, juicy interior.
Once the resting time is up, you're ready to serve your delicious chicken fried steak. Pair it with your favorite sides, like creamy mashed potatoes or a fresh salad, for a complete and satisfying meal.
Enjoy the comforting flavors and textures of this Southern classic!
Step 5. Make Creamy Gravy
Making the creamy gravy is the next important step. To start, you'll want to scoop up any browned bits left in the pan from cooking the steak. These bits are packed with flavor, so you don't want to miss them!
Next, whisk in some all-purpose flour to create a roux. Cook the roux for a minute or two, stirring constantly, until it turns a light golden color. Slowly pour in some milk, continuing to whisk as you go. This will help the gravy thicken up nicely.
Season the gravy with a bit of salt and pepper to taste. Let it simmer, stirring occasionally, until it reaches your desired consistency. The creamy gravy should coat the back of a spoon.
Serve the gravy warm over the crispy chicken fried steak. The savory, velvety gravy is the perfect complement to the crunchy exterior and tender interior of the steak. Get ready for an incredibly satisfying meal!
Final Thoughts
Though chicken fried steak may seem like a simple dish, it requires careful attention to detail to achieve the perfect crispy exterior and tender interior. When done right, the combination of a crispy, golden crust and the juicy, well-seasoned meat is simply irresistible.
The creamy, peppery gravy ties the whole dish together, making it a true Southern comfort food classic. As you've learned, the keys to success are using high-quality ingredients, properly breading the meat, and mastering the frying technique.
With a little practice, you'll be whipping up chicken fried steak that rivals the best diners and home cooks in the South. Serve it up hot, with a side of mashed potatoes or biscuits, and enjoy the comforting flavors that have made this dish a beloved staple for generations.
Whether you're a longtime fan or trying it for the first time, chicken fried steak is sure to become a new favorite in your household.
Frequently Asked Questions
Is Chicken Fried Steak the Same as Country-Fried Steak?
Yes, chicken-fried steak and country-fried steak are the same dish. They both refer to a tenderized beef steak that's coated in a seasoned batter, then fried until crispy and golden brown.
How Do I Keep the Breading From Falling Off?
To keep the breading from falling off your chicken fried steak, you should first dredge the meat in flour, then dip it in beaten eggs, and finally coat it with breadcrumbs or panko. This triple-dip method helps the breading adhere better.
Can I Make Chicken Fried Steak Ahead of Time?
You can make chicken fried steak ahead of time, but it's best to reheat it in the oven or air fryer to keep the breading crispy. Frying it fresh yields the optimal texture and flavor.
What Sides Pair Best With Chicken Fried Steak?
When pairing sides with chicken fried steak, you'll want to choose complementary flavors like mashed potatoes, creamy gravy, buttered corn, or a fresh green salad. These classic Southern sides will balance the richness of the steak perfectly.
Is Chicken Fried Steak Gluten-Free or Low-Carb?
Unfortunately, chicken fried steak isn't typically gluten-free or low-carb. The breading and frying process usually includes wheat flour, which is high in carbs. You'd need to find a recipe that uses gluten-free alternatives to enjoy this dish while following a restricted diet.
Rachel is all about nostalgic comfort food with a modern twist. She brings the flavors of classic American diners to Cook if Ya, with her takes on burgers, fries, and milkshakes. Rachel’s love for simple, hearty meals brings a bit of retro flair to the table, reminding us all of the joys of classic diner dishes.
-
Brazilian Cuisine3 months ago
Tacacá
-
Polish Comfort Food3 months ago
Krupnik (Barley Soup)
-
Brazilian Cuisine3 months ago
Caldeirada
-
Brazilian Cuisine3 months ago
Chicken in Brown Sauce
-
Southern Comfort Food3 months ago
Cheese Straws
-
African Cuisine3 months ago
Kedjenou (Ivory Coast)
-
Polish Comfort Food3 months ago
Vegetable Salad
-
American Diner Classics3 months ago
The Maillard Reaction: Understanding the Chemistry of Browning {Food Science and Cooking}