African Cuisine
Tuwo Shinkafa: A Taste of Northern Nigeria’s Favorite Dish
You’ll be captivated by the aromatic, communal delight of Tuwo Shinkafa, a beloved staple dish that showcases the rich culinary heritage of Northern Nigeria.
Tuwo Shinkafa, a beloved staple of Northern Nigeria, whisks you away to the region's vibrant culinary heritage. This mouthwatering dish combines the aroma of steamed rice with the warmth of communal gatherings, creating a symphony of flavors. Crafted with care over generations, Tuwo Shinkafa reflects the resilience and ingenuity of the Northern Nigerian people. Served during special occasions like weddings and festivals, it symbolizes joy and connection. The meticulous cooking process, using local ingredients and traditional methods, ensures authenticity. Tuwo Shinkafa's comforting texture and rich flavor leave a lasting impression, inviting you to further explore the depths of Northern Nigerian cuisine.
Key Takeaways
- Tuwo Shinkafa is a traditional dish from Northern Nigeria, reflecting the region's cultural heritage and community traditions.
- The dish is made by soaking, grinding, and cooking rice into a smooth, fluffy paste, which is then shaped into round balls.
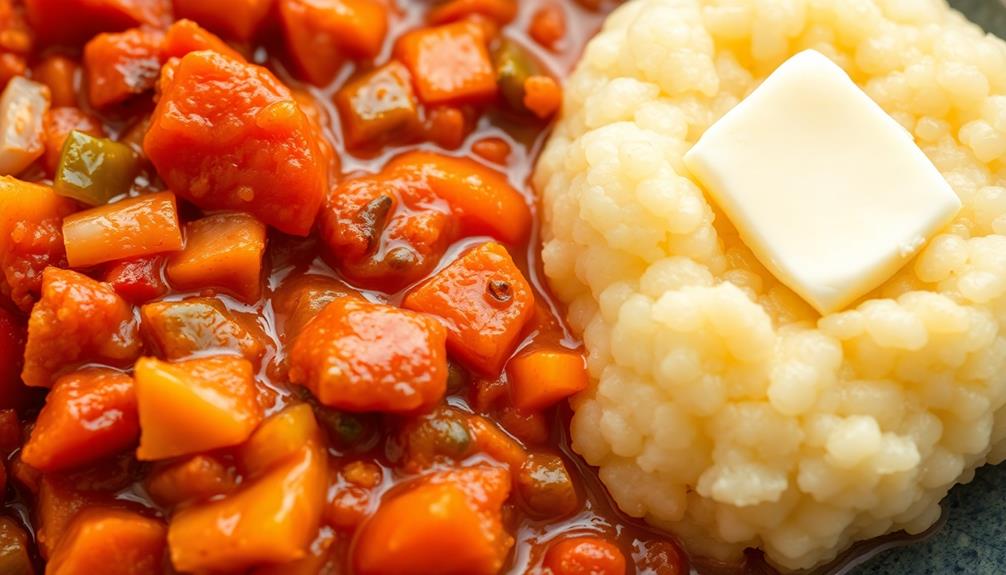
- Tuwo Shinkafa is often served with various stews and sauces, offering a unique and comforting flavor profile.
- Preparation of Tuwo Shinkafa involves careful attention to detail, including continuous stirring during cooking to achieve the desired texture.
- Tuwo Shinkafa serves as a gateway to exploring Northern Nigerian cuisine, fostering cultural exchange and appreciation for traditional culinary practices.
History
Tuwo Shinkafa's origins can be traced back to the rich culinary traditions of Northern Nigeria. For centuries, this beloved dish has been a staple in the region, reflecting the local culture and ingredients.
Traditionally, it's made from steamed and pounded rice, creating a fluffy, pillowy texture that's simply irresistible.
The process of making Tuwo Shinkafa is a labor of love. First, the rice is carefully selected and soaked, then steamed until perfectly cooked.
Next, it's pounded and kneaded by hand, a technique passed down through generations. This attention to detail ensures the final product is smooth, consistent, and packed with flavor.
Tuwo Shinkafa is often enjoyed during special occasions, such as weddings, festivals, and family gatherings.
It's commonly served with a variety of delectable stews and sauces, each offering a unique taste experience.
Whether you're a seasoned Tuwo Shinkafa enthusiast or a newcomer to this culinary delight, it's a dish that's sure to leave you craving more.
Recipe
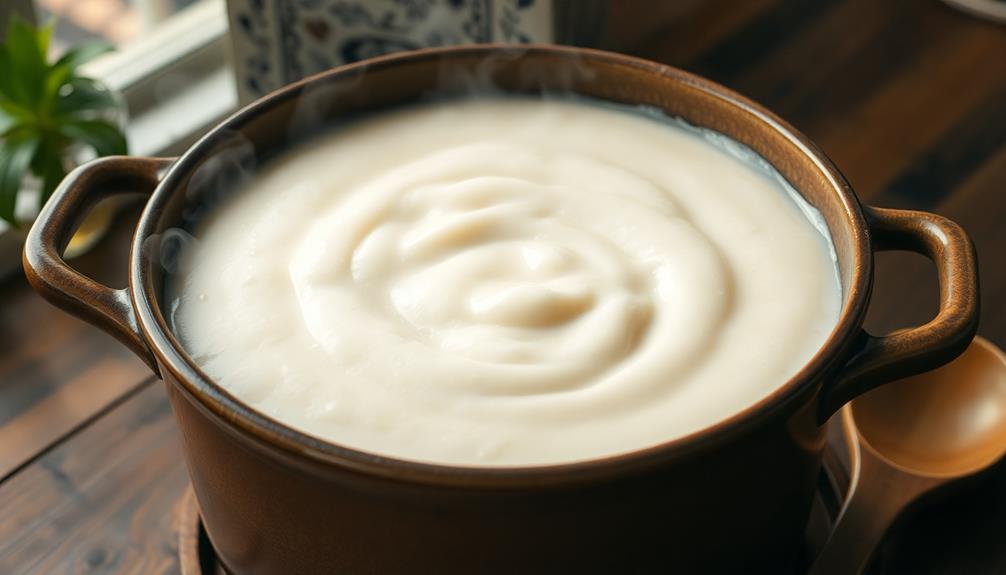
Tuwo Shinkafa is a traditional staple dish from Northern Nigeria. It's a thick, soothing porridge made from rice flour that's a beloved comfort food in the region. The dish is often served as a side or as the main course, accompanied by various stews and sauces.
Preparing Tuwo Shinkafa requires a bit of patience and technique, but the end result is a nourishing and satisfying meal. The process involves carefully cooking the rice flour to achieve the desired creamy and smooth texture.
Ingredients:
- 2 cups rice flour
- 6 cups water
- 1 teaspoon salt
Instructions:
Bring the water to a boil in a large pot. Gradually whisk in the rice flour, stirring continuously to prevent lumps from forming.
Reduce the heat to low and continue to cook, stirring frequently, for about 15-20 minutes until the mixture thickens to a smooth, porridge-like consistency. Add salt and stir to combine. Serve hot, accompanied by your choice of stew or sauce.
Tips:
When cooking Tuwo Shinkafa, it's important to add the rice flour gradually and stir continuously to ensure a lump-free texture.
The porridge should be cooked at a low heat to allow the flour to fully hydrate and reach the desired thickness. If the mixture becomes too thick, you can add a bit of hot water to thin it out.
Tuwo Shinkafa is best enjoyed freshly made, but it can also be reheated if needed.
Cooking Steps
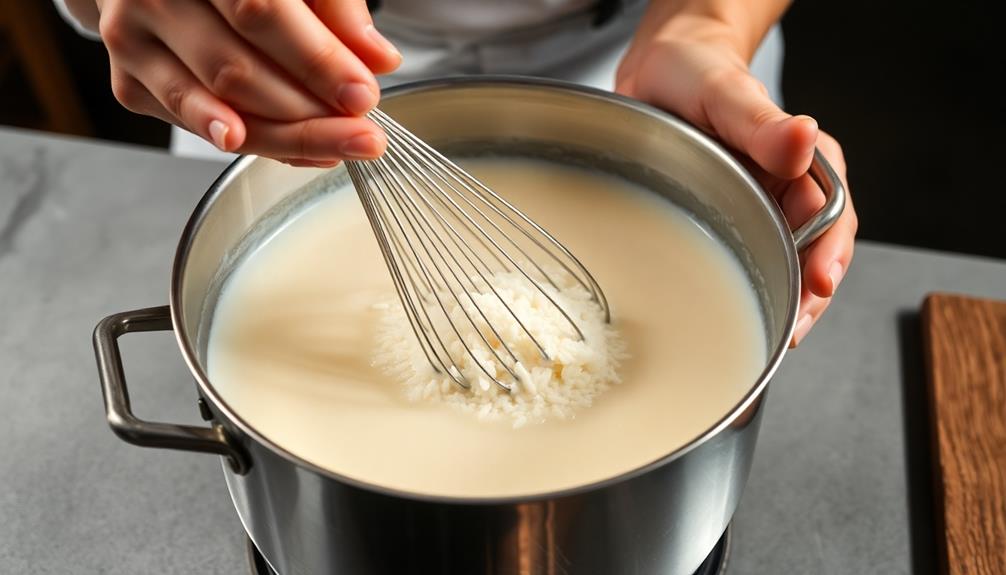
First, you'll want to soak the rice in water overnight.
Drain it well, then grind the soaked rice into a smooth batter.
Next, heat and stir the ground rice until it thickens into a soft, doughy consistency.
Step 1. Soak Rice in Water Overnight
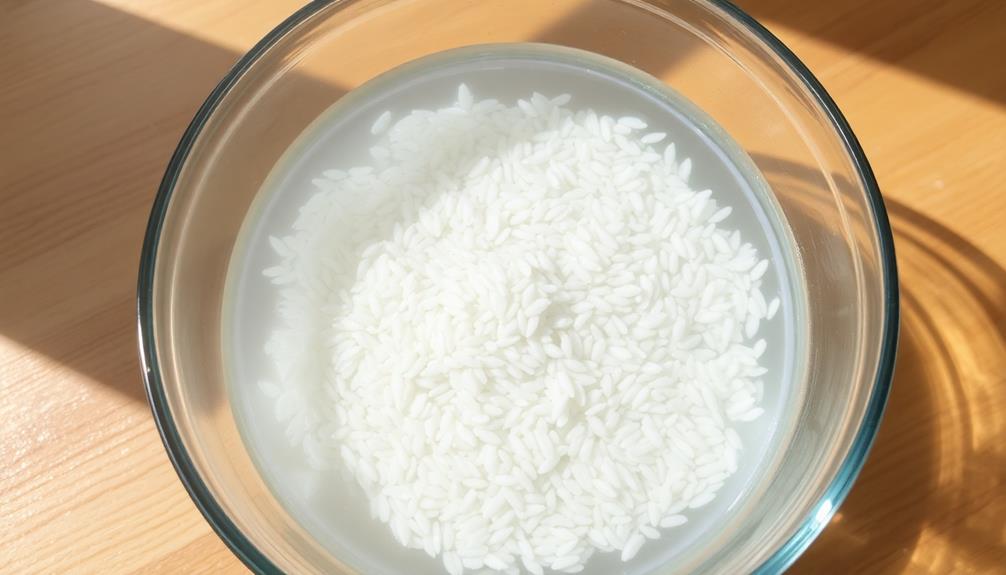
The overnight rice-soaking process is a crucial initial step in crafting the beloved Tuwo Shinkafa.
You'll want to start by rinsing the rice thoroughly, removing any impurities. Then, transfer the rice to a large bowl and cover it completely with clean water. Let it soak overnight, or for at least 8 hours. This step softens the grains, making them easier to grind into a smooth, lump-free batter.
In the morning, you'll notice the rice has absorbed the water, swelling to a plump, fluffy texture.
Drain the soaked rice, discarding the water. Now, you're ready to move on to the next step – grinding the rice into a fine paste. This ensures your Tuwo Shinkafa will have that signature silky-smooth consistency that Northern Nigerians adore.
Get ready to savor the delicious flavors and comforting aromas of this beloved traditional dish!
Step 2. Drain and Grind the Soaked Rice
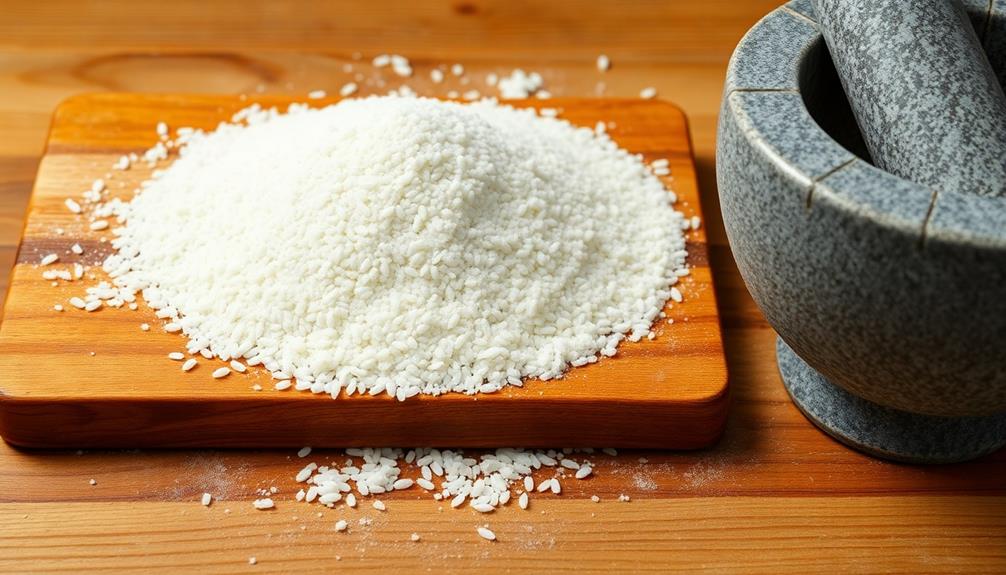
After draining the soaked rice, you're ready to grind it into a fine paste. This step is crucial for achieving the smooth, creamy texture that makes Tuwo Shinkafa so special.
Grab your mortar and pestle or a high-powered blender, and get to work!
Start by pouring the drained rice into the mortar or blender. Slowly add small amounts of water, just enough to help the rice break down into a smooth, lump-free consistency.
Be patient and take your time – the goal is to create a silky-smooth puree, without any gritty bits.
Once the rice is fully ground, the mixture should have a thick, pudding-like texture.
Taste it and add a pinch of salt if desired, to enhance the flavors.
Now, you're ready to move on to the next step of the Tuwo Shinkafa preparation process!
Step 3. Heat and Stir the Ground Rice
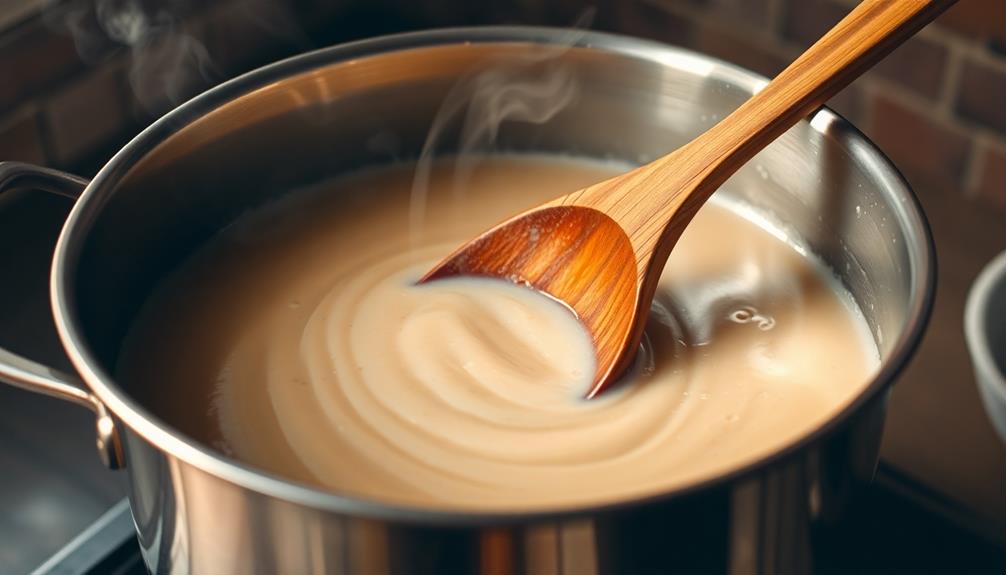
Next, place the ground rice puree into a heavy-bottomed pot and set it over medium heat. As the pot heats up, start stirring the rice continuously with a wooden spoon.
You'll want to keep a close eye on it, as the rice can thicken up quickly.
Stir, stir, stir! The rice should start to come together into a smooth, velvety mound. Don't be afraid to put some elbow grease into it – the more you stir, the better the texture will be.
As the rice cooks, you'll notice it becoming thicker and more cohesive.
Keep stirring until the rice has reached your desired consistency, about 10-15 minutes. It should have a soft, porridge-like texture that's perfect for scooping and serving.
Taste it occasionally to check the doneness. Once it's ready, remove the pot from the heat and get ready to enjoy this northern Nigerian delicacy!
Step 4. Shape Into Balls
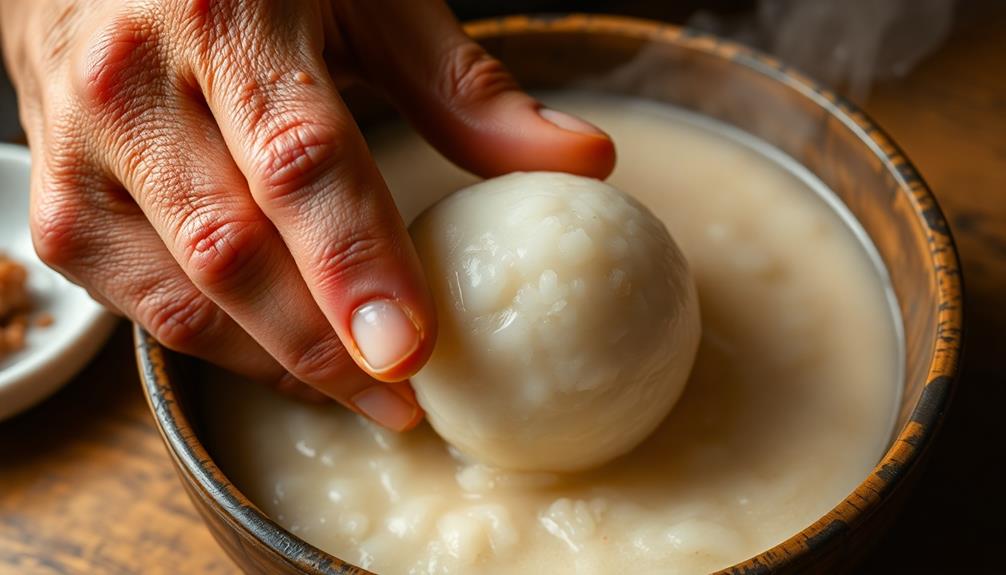
With the tuwo shinkafa now at the desired consistency, you can begin shaping it into balls. Grab a palm-sized portion of the steaming hot dough and gently roll it between your palms, forming a smooth, round ball. Be careful not to squeeze too hard, as the delicate texture can easily be disrupted.
As you work, envision the joyful faces of your family and friends eagerly awaiting these tasty tuwo shinkafa balls. Imagine their delight as you present the platter, each sphere a perfect golden-brown. The anticipation will be palpable, their mouths watering in anticipation of sinking their teeth into the soft, fluffy interior.
Continue shaping the tuwo shinkafa, creating a uniform batch that will ensure every bite is as satisfying as the last. With each ball you form, let your excitement build, knowing that you're about to share a beloved Northern Nigerian tradition with those you love.
Step 5. Serve Warm With Stew or Soup
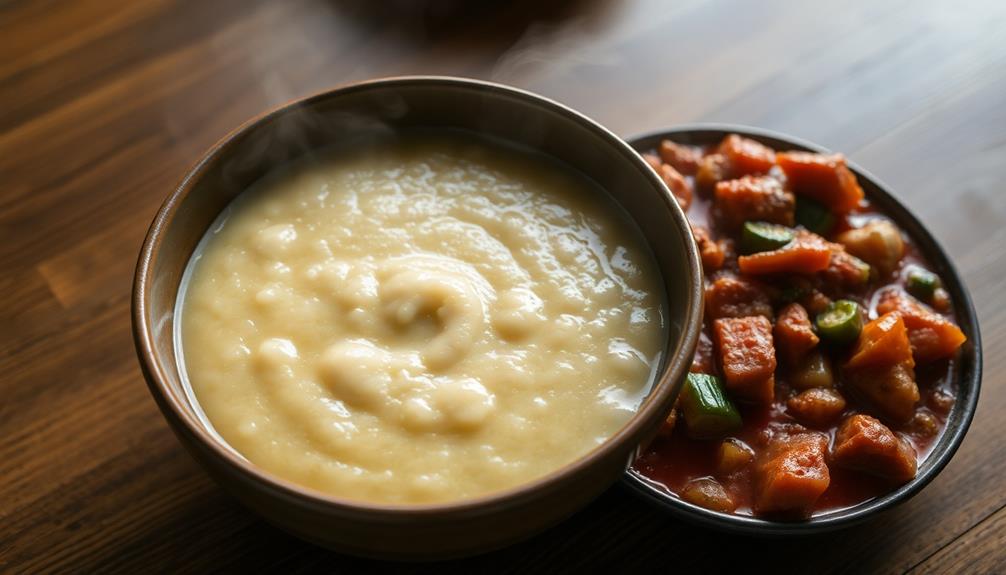
Serve the freshly shaped tuwo shinkafa balls warm alongside your preferred stew or soup. This classic pairing is a beloved tradition in Northern Nigeria, bringing families and communities together.
The soft, fluffy texture of the tuwo shinkafa complements the rich, flavorful stew or hearty soup perfectly. Ladle the hot stew or soup over the tuwo shinkafa balls, allowing the flavors to mingle. The combination of the comforting warmth and the delightful aromas will tantalize your senses.
Encourage everyone to dig in and enjoy the satisfying meal. For a festive gathering, arrange the tuwo shinkafa balls on a platter and surround them with various stew or soup options. This allows your guests to customize their dish to their liking.
Encourage them to experiment and discover their favorite pairings. Whether it's a weeknight dinner or a special occasion, serving tuwo shinkafa with stew or soup is a delightful way to savor the rich culinary heritage of Northern Nigeria.
Final Thoughts
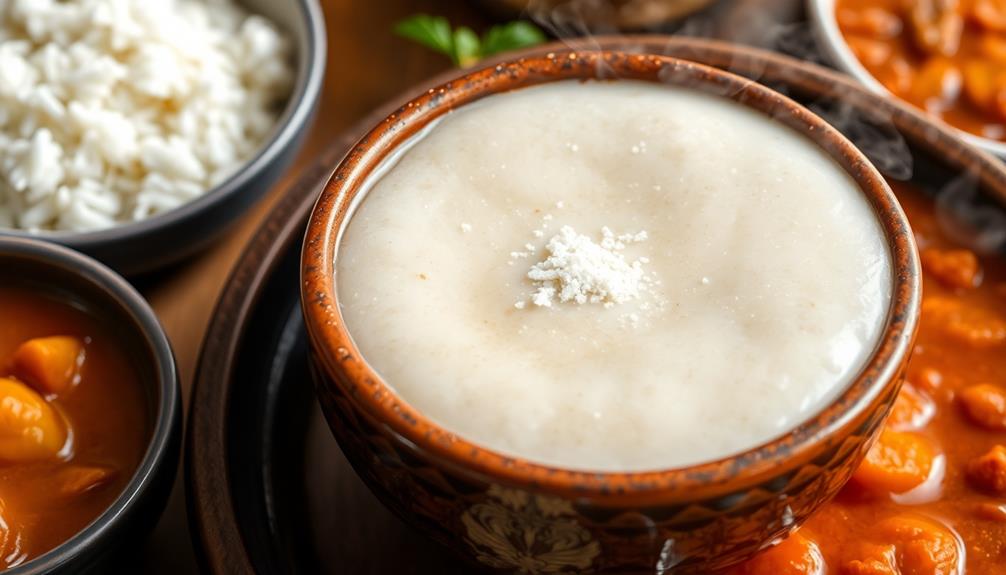
Tuwo shinkafa has long been a staple in Northern Nigeria, cherished for its comforting texture and rich flavor. As you savor this delectable dish, you can't help but feel a sense of nostalgia and connection to the vibrant culture that birthed it.
Whether enjoyed at a family gathering or a community celebration, tuwo shinkafa has the power to bring people together, sharing in the warmth and joy that radiates from every bite.
Beyond its gastronomic delights, this staple holds a deeper significance. It represents the resilience and ingenuity of the Northern Nigerian people, who've thoughtfully crafted and perfected this recipe over generations.
Each step, from the careful selection of ingredients to the meticulous preparation, is imbued with tradition and a deep appreciation for the land that nourishes them.
As you bid farewell to this culinary journey, remember that tuwo shinkafa is more than just a dish – it's a testament to the rich tapestry of Northern Nigerian heritage, a flavor that will linger long after the last morsel has been savored.
Frequently Asked Questions
What Is the Nutritional Value of Tuwo Shinkafa?
Tuwo shinkafa is a nutritious dish packed with carbohydrates, providing sustained energy. It's also a good source of fiber, which supports digestive health. Don't forget the essential vitamins and minerals it contains, making it a well-rounded meal option.
How Long Can Tuwo Shinkafa Be Stored?
You can store tuwo shinkafa for up to 3 days in the fridge. However, it's best consumed fresh as it'll start to dry out and lose its soft, fluffy texture over time. Enjoy it at its prime!
What Are the Traditional Serving Accompaniments for Tuwo Shinkafa?
Traditionally, tuwo shinkafa is often served with various savory stews or soups, like miyan kuka or miyan taushe. You can also enjoy it with grilled or fried fish, meat, or vegetables for a complete and flavorful meal.
Are There Any Vegetarian or Gluten-Free Variations of Tuwo Shinkafa?
Yes, there are vegetarian and gluten-free variations of tuwo shinkafa. You can make it with alternative flours, like millet or sorghum, and serve it with vegetable stews or soups instead of the traditional meat-based accompaniments.
Does Tuwo Shinkafa Have Any Cultural Significance in Northern Nigeria?
Tuwo shinkafa holds deep cultural significance in Northern Nigeria. It's a staple dish that's often served at important events, reflecting the region's heritage and traditions. Its preparation and consumption are woven into the fabric of Northern Nigerian culture.

Amara brings her deep knowledge of African cuisine to the table, with a focus on the rich and hearty flavors of Senegal. She loves to share slow-cooked dishes like thieboudienne (rice and fish), which reflect the warmth and hospitality of African cooking. Amara’s approach to food is all about creating comforting meals that nourish the soul.
African Cuisine
The Nigerian Staple: What Exactly Is Garri?
Aromatic, flaky, and deeply rooted in West African culinary heritage, garri is a captivating Nigerian staple that offers a world of delectable flavors and cultural history.
Garri, the beloved Nigerian staple, is a versatile cassava-based food with a rich history and delightful taste! For centuries, West African communities have been peeling, grating, fermenting, and toasting cassava roots to create this flaky, slightly sour treat. The preparation involves several steps, including dewatering the grated cassava pulp and roasting the fermented mixture to achieve the signature nutty flavor. Enjoyed as a snack or hearty meal, garri can be paired with a variety of toppings like fried fish, eggs, or roasted groundnuts. The creation process takes time and expertise, but the end result is truly worth it – and there's so much more to discover about this captivating Nigerian staple!
Key Takeaways
- Garri is a staple food in West Africa, made from peeled, grated, fermented, and toasted cassava roots, preserving nutrients and providing a distinct flaky texture and slightly sour taste.
- The preparation of garri involves a multi-step process, including dewatering the grated cassava pulp, fermenting the dewatered pulp, and roasting the fermented pulp to enhance its flavor.
- Garri can be consumed in various forms, such as porridge or as a side dish, often paired with toppings like fried fish, egg, or roasted groundnuts.
- Garri has gained global recognition and is enjoyed beyond West Africa, with its unique texture and flavor adaptable for different culinary applications.
- The traditional methods of garri production have evolved over time, but the essence of the dish remains unchanged, reflecting the rich cultural heritage of West African communities.
History
Garri's origins trace back centuries, emerging as a staple food among West African communities. This versatile cassava-based product has been a beloved part of cultural traditions for generations.
Traditionally, garri was made by peeling, grating, fermenting, and then toasting cassava roots. This process not only preserves the root's nutrients but also gives garri its signature flaky texture and slightly sour taste.
Over time, the preparation methods have evolved, but the core essence of this nourishing food remains unchanged.
Garri's popularity has spread far beyond its West African roots, making it a recognized global food. Today, it's enjoyed in various forms, from the classic dry granules to creamy porridge-like dishes.
Whether as a quick snack or a hearty meal, garri continues to be a cherished part of many communities' culinary heritage.
Recipe
Garri, also known as gari or cassava flour, is a staple food in many parts of Africa, particularly West Africa. It's made from the cassava root, which is peeled, grated, fermented, and then toasted to create the dry, granular product we know as garri.
Garri is incredibly versatile and can be enjoyed in a variety of ways. One popular way to prepare it is by cooking it into a porridge-like dish, often served as a breakfast or snack.
Ingredients:
- 1 cup garri
- 2 cups water
- 1 teaspoon salt
- 2 tablespoons sugar (optional)
- 1 cup milk (optional)
Cooking Instructions:
Bring the water to a boil in a saucepan. Gradually add the garri, stirring constantly to prevent lumps from forming.
Reduce the heat to low and continue cooking, stirring frequently, for 5-10 minutes until the garri has thickened to your desired consistency. Stir in the salt and sugar (if using). For a creamier porridge, stir in the milk.
Tips:
When cooking garri, it's important to add the garri gradually and stir constantly to prevent the formation of lumps.
The texture of the final dish can be adjusted by adding more or less water, depending on your preference. Garri can also be enjoyed with additional toppings such as fried fish, egg, or roasted groundnuts.
Cooking Steps
Peel and grate that cassava with care, then squeeze out the liquid to get the pulp just right.
Next, let the pulp ferment for a bit – this'll make the flavor divine!
Step 1. Peel and Grate the Cassava
The next step in the garri-making process involves carefully peeling and grating the cassava roots.
First, you'll need to grab a sharp knife and peel off the tough, brown outer skin of the cassava. Be sure to remove all the peel, leaving only the white, starchy flesh.
Next, you'll take the peeled cassava and grate it using a traditional grater or a modern food processor. Grate the cassava into long, thin shreds, being careful to avoid grating your fingers! This step is crucial, as the grated cassava is what'll be used to make the final garri product.
Once you've grated enough cassava, it's time to move on to the next step in the process.
The grated cassava will need to be fermented and dried before it can be toasted into the delicious garri we all know and love. Get ready for the next exciting stage of the garri-making journey!
Step 2. Dewater the Cassava Pulp
After grating the cassava, the next crucial step is to dewater the cassava pulp.
You'll want to squeeze out as much liquid as possible from the freshly grated roots. This can be done by using your hands or a clean, heavy cloth. Grab a handful of the pulp and firmly squeeze, letting the liquid drip out. Keep squeezing and squeezing until the pulp feels drier to the touch.
Next, spread the dewatered cassava pulp out on a large, clean surface. This could be a table, a tarp, or even the floor, as long as it's clean.
Let the pulp air-dry for several hours, stirring occasionally to ensure even drying. The goal is to reduce the moisture content as much as possible, making the pulp ready for the next step of processing into garri.
With the cassava pulp properly dewatered, you're one step closer to creating this beloved Nigerian staple.
Keep up the good work – the garri-making process is just getting started!
Step 3. Ferment the Dewatered Cassava Pulp
Next, you'll want to ferment the dewatered cassava pulp. This key step develops the signature sour taste of garri.
First, gather the pulp in a clean container. Add a bit of water, just enough to moisten the mixture. Then, cover the container and let it sit for 2-3 days. As the pulp ferments, it will release gases and develop that classic garri aroma.
Once the pulp has fully fermented, it's time to sieve it. Use a large mesh strainer to separate the coarse, fibrous parts from the soft, smooth garri. Discard the tough bits and keep the fine garri flour.
Now, you can start the roasting process! Spread the garri evenly over a wide, flat pan and heat it over a medium flame. Stir constantly to prevent burning and achieve an even, golden-brown color. The roasting brings out the garri's nutty, toasted flavors.
Get ready – the best part is coming up next!
Step 4. Roast the Fermented Cassava Pulp
With the fermented cassava pulp ready, it's time to roast it! Get ready for the sizzling sounds and delightful aromas that will fill your kitchen.
First, spread the fermented pulp evenly on a large, shallow pan. It's important to create a thin layer to ensure even cooking.
Next, place the pan over medium heat and let the magic begin! Stir the pulp occasionally, making sure it doesn't burn. As it cooks, the pulp will start to dry out and turn a golden-brown color.
Keep an eye on it, and when the pulp has reached your desired level of roastiness, remove the pan from the heat. Let it cool slightly, and then transfer the roasted cassava pulp to a clean bowl.
This is the final step in creating the beloved Nigerian staple, garri. Get ready to enjoy this versatile and delicious ingredient in all sorts of tasty dishes!
Step 5. Sieve the Roasted Cassava Granules
Once the cassava pulp has been roasted to your desired doneness, it's time to sieve the granules.
Grab your trusty sieve and get ready to shake, shake, shake! Gently pour the roasted cassava onto the sieve and start shaking. The fine granules will fall through, leaving behind the larger, coarser pieces.
Now, don't be too rough – you want to keep those precious garri granules intact! Shake the sieve back and forth, side to side, until you've separated all the small, fluffy bits.
These are the star of the show – the garri that will be used to make your favorite dishes.
- Collect the sieved garri in a bowl or container.
- Discard the larger pieces that didn't make it through the sieve.
- Repeat the sieving process until you've gathered all the delightful garri granules.
With your freshly sieved garri, you're one step closer to enjoying the delicious, versatile staple of Nigerian cuisine!
Final Thoughts
Garri is a staple food in many parts of the world, particularly in Africa, where it serves as a vital source of sustenance. This versatile cassava-based product can be enjoyed in a variety of ways, from a simple snack to a hearty meal.
Whether you're sprinkling it on top of your favorite stew or mixing it into a porridge, garri is a fantastic addition to any culinary adventure.
As you've learned, the process of creating garri is a labor of love, requiring patience and expertise. From sieving the roasted cassava granules to drying them to perfection, each step is crucial in producing the delightful texture and flavor that garri is known for.
But the best part? Garri is incredibly adaptable, allowing you to get creative in the kitchen.
Frequently Asked Questions
How Long Can Garri Be Stored?
You can store garri for up to 6 months if you keep it in an airtight container in a cool, dry place. Proper storage helps maintain the texture and flavor of this versatile West African staple.
Is Garri Suitable for People With Diabetes?
Garri can be suitable for people with diabetes, as it has a low glycemic index. You can enjoy garri in moderation as part of a balanced diet, but always consult your healthcare provider for personalized dietary guidance.
Can Garri Be Frozen for Later Use?
You can definitely freeze garri for later use. Just place it in an airtight container or freezer bag, and it'll stay fresh for several months. This makes it a convenient pantry staple for busy households.
What Are the Health Benefits of Garri?
Garri is a nutritious cassava-based food that offers several health benefits. It's rich in carbohydrates, providing sustained energy, and contains vitamins and minerals essential for overall wellbeing. Incorporating garri into your diet can support a healthy lifestyle.
How Do I Know if the Garri Is Authentic?
To know if the garri is authentic, look for a fine, granular texture and a light, creamy color. Authentic garri should also have a mild, nutty flavor and a lack of impurities or foreign matter.
Amara brings her deep knowledge of African cuisine to the table, with a focus on the rich and hearty flavors of Senegal. She loves to share slow-cooked dishes like thieboudienne (rice and fish), which reflect the warmth and hospitality of African cooking. Amara’s approach to food is all about creating comforting meals that nourish the soul.
Ethiopian Cuisine
Ethiopian Delight: Discovering the Flavors of Quanta Firfir
Behold the captivating dance of flavors in Quanta Firfir, an Ethiopian staple that has enchanted palates for centuries. Delve deeper to unravel its rich cultural heritage and culinary delights.
Unravel the captivating flavors of Quanta Firfir, a beloved Ethiopian staple that's been delighting taste buds for centuries! This vibrant dish combines tender beef or lamb with the aromatic punch of berbere spice and fragrant niter kibbeh. Tear into fluffy injera to scoop up the zesty sauce, savoring the comforting warmth and cultural heritage with every bite. Quanta Firfir is a true culinary delight, reflecting Ethiopia's rich culinary tradition and the importance of shared meals. Discover more about this delectable dish and the intriguing world of Ethiopian cuisine.
Key Takeaways
- Quanta Firfir is a traditional Ethiopian dish that showcases the country's rich culinary heritage and cultural identity through its spice blends and communal dining experience.
- The dish combines injera, a staple flatbread, with a flavorful sauce made from meat, berbere spice, and niter kibbeh, reflecting the ingenuity of Ethiopian cooks.
- Quanta Firfir offers a harmonious blend of tangy, spicy, and earthy flavors, inviting exploration of the diverse and vibrant cuisine of Ethiopia.
- Sharing meals and using injera to scoop up the food are central to Ethiopian dining culture, fostering connection and strengthening relationships among family and friends.
- Discovering Quanta Firfir can serve as an introduction to the broader culinary landscape of Ethiopia, encouraging culinary curiosity and a deeper appreciation for its rich cultural heritage.
History
Originating from the ancient Ethiopian tradition, quanta firfir's history can be traced back to the country's gastronomic roots. This beloved dish has been a staple in Ethiopian cuisine for centuries, passed down through generations and celebrated as a symbol of cultural identity.
The term "quanta firfir" refers to the technique of tearing injera, the spongy, sourdough flatbread, into bite-sized pieces and mixing it with a spicy, flavorful sauce. This method not only adds texture and depth to the dish but also allows the flavors to mingle and infuse the injera, creating a harmonious culinary experience.
The signature spices that define quanta firfir, such as berbere and niter kibbeh, are carefully blended to strike the perfect balance of heat, aromatics, and richness.
These spice mixes have been perfected over time, reflecting the ingenuity and culinary artistry of Ethiopian cooks.
Recipe
Quanta Firfir is a beloved traditional Ethiopian dish that combines the vibrant flavors of berbere spice, niter kibbeh (seasoned clarified butter), and injera (spongy flatbread). This dish is a staple in many Ethiopian households and is often enjoyed as a comforting, flavorful meal.
The key to a delicious Quanta Firfir lies in the careful preparation of the berbere spice blend and the niter kibbeh. Berbere is a complex seasoning that lends a warm, earthy, and slightly spicy character to the dish, while the niter kibbeh adds a rich, aromatic depth.
- 1 lb (450g) beef or lamb, cut into bite-sized pieces
- 1 onion, diced
- 3 cloves garlic, minced
- 2 tablespoons berbere spice blend
- 2 tablespoons niter kibbeh (or clarified butter)
- 1 cup (240ml) beef or chicken stock
- Salt and pepper to taste
- Injera, for serving
In a large skillet or heavy-bottomed pot, heat the niter kibbeh over medium-high heat. Add the diced onion and sauté until translucent, about 5-7 minutes.
Add the minced garlic and cook for an additional 1-2 minutes, until fragrant. Stir in the berbere spice blend and the cubed meat, and sauté for 5-7 minutes, or until the meat is lightly browned.
Pour in the stock and season with salt and pepper to taste. Bring the mixture to a boil, then reduce the heat to low, cover, and simmer for 30-40 minutes, or until the meat is tender and the flavors have melded together. Adjust seasoning as needed.
Serve the Quanta Firfir hot, accompanied by fresh injera. The spongy texture of the injera pairs beautifully with the rich and flavorful Quanta Firfir. Enjoy this authentic Ethiopian delight!
Cooking Steps
First, you'll want to soak the dried anchovies overnight to soften them up.
Then, sauté the onions in a pan until they're nice and translucent.
Once that's done, add in the chopped garlic and ginger for an extra burst of flavor.
Step 1. Soak Dried Anchovies Overnight
Soak the dried anchovies in water overnight. This helps soften them up and brings out their delightful, savory flavors.
Just place the anchovies in a bowl, cover them with water, and let them soak until morning. The anchovies will plump up and become nice and tender, ready to add to your Quanta Firfir.
Once the anchovies have soaked, drain them and give them a quick rinse. This removes any excess saltiness.
Then, you're all set to chop them up and toss them into your Quanta Firfir. The anchovies will add a tasty umami punch that complements the other flavorful ingredients perfectly.
Get ready for an explosion of Ethiopian delight in every bite!
Step 2. Sauté Onions Until Translucent
Next, sauté the onions until they become translucent. This step is crucial for building the foundation of flavor in your quanta firfir.
Grab your trusty skillet and heat it over medium heat. Add a drizzle of oil, just enough to coat the bottom. Once the oil is shimmering, toss in the chopped onions. Stir them around, making sure they're in an even layer.
Now, be patient and let them cook, stirring occasionally, until they turn soft and transparent. This should take about 5-7 minutes. Keep a close eye, as you don't want the onions to burn. They should gently sizzle and release their sweet aroma.
Once they reach that perfect translucent stage, you're ready to move on to the next step in your Ethiopian culinary adventure. Get excited, because the flavors are about to intensify!
Step 3. Add Chopped Garlic and Ginger
With the onions now softened and translucent, it's time to ramp up the aromatics. Grab a few cloves of fresh garlic and give them a good chop. The sharp, pungent aroma will instantly fill your kitchen, awakening your senses and setting the stage for the bold flavors to come.
Next, grab a knob of ginger and slice it into thin matchsticks. The warm, slightly spicy notes of the ginger will complement the garlic perfectly, adding depth and complexity to the dish. Be generous with the ginger – you want to make sure its flavor shines through!
Once the garlic and ginger are prepped, toss them into the pan with the sautéed onions. Stir everything together, allowing the flavors to meld and the aromas to intensify. The sizzling sound and enticing scents will have your mouth watering in anticipation.
Get ready for the next step in this flavorful Ethiopian adventure!
Step 4. Add Spices and Simmers
With the aromatic garlic and ginger now sizzling in the pan, it's time to introduce the spices that will truly elevate this Ethiopian dish. First, add a generous pinch of cumin, its earthy aroma mingling with the fragrant garlic.
Next, sprinkle in some paprika, which will lend a warm, smoky flavor. Don't forget the turmeric – its vibrant golden hue will transform the dish into a vibrant medley of colors. For an added health boost, consider incorporating nutritional benefits like chia seeds, which are high in fiber and omega-3 fatty acids.
Now, it's time to let the flavors mingle. Reduce the heat to low and let the mixture simmer gently, allowing the spices to infuse the firfir with their bold and tantalizing essence.
Stir occasionally, ensuring every morsel is coated in the harmonious blend of spices. As the minutes tick by, the kitchen will be filled with the most inviting aroma, making your mouth water in anticipation.
With just a few simple steps, you're well on your way to creating an authentic and delightful Ethiopian delight.
Step 5. Add Lemon Juice and Serve
After the spices have simmered and infused the firfir with their robust flavors, it's time to add the final touch – a bright and tangy burst of lemon juice.
Simply squeeze a generous amount of fresh lemon over the steaming firfir, allowing the tart and citrusy notes to dance with the earthy spices. Stir everything together, ensuring the lemon juice is evenly distributed.
The lemon juice not only brightens the dish but also helps balance the richness of the butter and spices. It adds a refreshing zing that'll make your taste buds tingle with delight.
Serve the Quanta Firfir hot, garnished with a sprinkle of chopped parsley or cilantro for a vibrant pop of color.
The combination of the firfir's comforting warmth and the lemon's zesty punch creates a truly irresistible dish that'll transport you straight to the heart of Ethiopia. Enjoy every flavorful bite!
Final Thoughts
As you savor the last bites of this Ethiopian delight, Quanta Firfir, let the flavors linger on your palate. The tangy, spicy blend of injera, vegetables, and seasoned meat creates a symphony of tastes that dance on your tongue. The aroma of the berbere spice mix, with its earthy notes and subtle heat, will have you craving more.
Quanta Firfir is a true celebration of Ethiopian cuisine. Vibrant colors, bold flavors, and a sense of community come together in this dish.
Whether shared with family or friends, it's a meal that brings people together and fosters connection.
As you reflect on your experience, remember the joy of discovering new culinary horizons. Ethiopian food is a delightful adventure, and Quanta Firfir is just the beginning.
Embrace the flavors, explore the culture, and let your taste buds be your guide on this delicious journey.
Frequently Asked Questions
What Is the Origin of the Name "Quanta Firfir"?
You wonder about the origin of the name "quanta firfir." It's likely a local Ethiopian term, combining the word "quanta" which refers to a type of injera, and "firfir" which describes the shredded, spicy preparation of the dish.
How Long Can Quanta Firfir Be Stored For?
Quanta firfir can be stored for up to a week when refrigerated in an airtight container. The spices and herbs used in its preparation help preserve its fresh flavors, allowing you to enjoy this delightful dish for several days.
Is Quanta Firfir Suitable for Vegetarians or Vegans?
Quanta firfir is suitable for vegetarians and vegans, as it's a plant-based dish made from shredded kale or other leafy greens. You can enjoy this flavorful Ethiopian staple without any animal-derived ingredients.
Can Quanta Firfir Be Served as a Standalone Dish?
Yes, quanta firfir can certainly be served as a standalone dish. It's a flavorful and nutrient-dense option that can make for a satisfying meal on its own, without the need for additional accompaniments.
Are There Any Variations or Regional Differences in Quanta Firfir?
Yes, there are regional variations in quanta firfir. Different parts of Ethiopia may use distinct spice blends, ingredients, or cooking methods that lend unique flavors and textures to this traditional dish.
Amara brings her deep knowledge of African cuisine to the table, with a focus on the rich and hearty flavors of Senegal. She loves to share slow-cooked dishes like thieboudienne (rice and fish), which reflect the warmth and hospitality of African cooking. Amara’s approach to food is all about creating comforting meals that nourish the soul.
African Cuisine
Sukuma Wiki in English: The Leafy Green Known as Collard Greens
Discover the fascinating history and versatile culinary uses of sukuma wiki, the staple leafy green also known as collard greens, in this informative article.
Sukuma wiki, also known as collard greens, has a fascinating history that spans West Africa, East Africa, and the Americas. This leafy green is a staple in many African diets, reflecting rich culinary traditions. To prepare it, you'll first rinse the greens thoroughly, then chop them into bite-sized pieces. Next, sauté the collards in oil or butter until tender, seasoning them with salt, pepper, and a squeeze of lemon juice for a refreshing tang. Serve the warm, vibrant greens garnished with toasted seeds for added crunch. Sukuma wiki is a versatile and nutritious choice that can enhance any meal – and there's more to discover about this beloved African ingredient.
Key Takeaways
- Sukuma wiki, also known as collard greens, is a staple leafy green that originated in West Africa and is widely consumed in African and African-American cuisines.
- Sukuma wiki translates to "push the week" in Swahili, reflecting its role in sustaining food supplies and traditional culinary practices in African countries.
- Collard greens, the American counterpart to sukuma wiki, have gained popularity over time and remain an integral part of Southern U.S. cuisine and African-American cultural heritage.
- Sukuma wiki is prepared by thoroughly rinsing, chopping, and sautéing the greens, often seasoned with salt, pepper, and lemon juice to balance the bitterness.
- Sukuma wiki is a nutritious and versatile ingredient that can be incorporated into various dishes, from soups and stews to salads, providing essential vitamins and minerals.
History
The Sukuma wiki, also known as collard greens, has a rich history rooted in African culinary traditions. This hardy, nutrient-dense green vegetable has been a staple in the diets of people across the African continent for centuries.
Originating in West Africa, the Sukuma wiki was later introduced to other parts of the continent, including East Africa, where it became a beloved ingredient in local cuisines.
The name "Sukuma wiki" literally translates to "push the week" in Swahili, reflecting the vegetable's ability to stretch limited food supplies and sustain families throughout the week.
As communities migrated and shared their culinary practices, the Sukuma wiki gradually made its way to the Americas, where it became known as collard greens and gained popularity in Southern U.S. cuisine.
Today, this versatile green remains an important part of many African and African-American cultural traditions, a testament to its enduring significance in global food history.
Cooking Steps
Once the collard greens have been thoroughly washed and chopped, you can begin the cooking process.
Start by heating a large pot or skillet over medium heat. Add a bit of oil or butter and let it heat up. Then, add the chopped collard greens and stir them around, making sure they're evenly coated with the oil or butter.
Next, pour in some broth, water, or even a splash of vinegar. This will help the greens become nice and tender. Cover the pot and let the greens simmer for about 15-20 minutes, stirring occasionally. The greens should become nice and soft, with a vibrant green color.
Once the collard greens are cooked through, you can season them with salt, pepper, or any other spices you enjoy.
Some people like to add a touch of sugar or lemon juice to balance out the bitterness. Serve the collard greens hot, as a delicious and nutritious side dish.
Step 1. Rinse Collard Greens Thoroughly
Thoroughly rinse the collard greens under cool running water. Don't be afraid to really get in there and give them a good scrub! You want to make sure you remove any dirt, debris, or impurities that might be hiding in the leaves.
Gently separate the leaves and run your fingers through them to dislodge any stubborn particles. The crisp, fresh greens will thank you for the extra attention.
Once they're squeaky clean, you can move on to the next step. Chopping the collard greens into bite-sized pieces will make them easier to cook and eat.
Use a sharp knife to slice the leaves crosswise into thin strips. You can also stack the leaves and cut them lengthwise for longer, ribbon-like pieces.
However you choose to chop them, the goal is to create evenly sized greens that will cook quickly and evenly.
Step 2. Chop Collard Greens Into Thin Strips
With the collard greens now cleaned, it's time to get chopping. Grab a sharp knife and cutting board, and let's break down these leafy greens into thin, bite-sized strips.
Start by stacking a few leaves on top of each other, then gently roll them up into a tight cylinder. Slice the cylinder crosswise, creating thin ribbons of collard greens. Keep going until all the leaves are chopped.
Make sure the strips are around 1/4 inch wide – not too thin or they'll overcook, but not too thick either. The goal is to create tender, evenly cooked pieces that will soak up all the delicious flavors you're about to add.
Once you've finished chopping, give the strips a gentle toss to separate any pieces that have stuck together. You're now ready to move on to the next step in your Sukuma Wiki journey!
Step 3. Sauté Collard Greens in Oil
Next, let's sauté the collard greens.
Heat a large skillet over medium heat and add a few tablespoons of olive oil. Once the oil is hot, add the chopped collard greens and give them a good stir. Let the greens sauté for a few minutes, stirring occasionally, until they start to wilt and become tender.
Now, add a splash of water or vegetable broth to the pan. This will help the greens steam and soften even more.
Season with a pinch of salt and a sprinkle of black pepper. Continue sautéing for another 5-7 minutes, until the collard greens are completely wilted and tender.
You can also add a clove or two of minced garlic towards the end of the cooking time. The garlic will infuse the greens with amazing flavor.
Once the collard greens are cooked to your liking, remove the pan from the heat and give the greens a final stir. They're now ready to enjoy as a tasty side dish!
Step 4. Add Lemon Juice Before Serving
To finish off the collard greens, add a squeeze of fresh lemon juice right before serving. This simple step brightens up the dish and adds a tangy, refreshing flavor. The lemon juice also helps balance out the slight bitterness of the collard greens.
Additionally, incorporating healthy fats from nut butters and seeds can enhance the overall nutritional profile of your meal.
Start by cutting a lemon in half. Gently squeeze the juice from one half directly over the sautéed collard greens. Use a spoon to stir the lemon juice into the greens, making sure it gets distributed evenly. You'll notice the vibrant green color of the collard greens become even more vivid.
The lemon juice not only enhances the flavor, but it also aids in digestion. Collard greens can sometimes sit heavy, but the citrus helps break them down.
Serve the lemon-infused collard greens hot, alongside your favorite main dish. The bright, zesty notes will complement the meal perfectly. Get ready to savor the delicious harmony of flavors in every bite!
Step 5. Serve Warm, Garnished With Seeds
Once the lemon juice has been incorporated, serve the warm collard greens immediately. The heat will help to intensify the flavors and make the leaves tender.
Garnish the greens with a sprinkle of toasted seeds, such as sunflower or sesame seeds. The crunchy texture of the seeds provides a delightful contrast to the soft, leafy greens.
You can serve the collard greens as a side dish or as the main component of a meal. They pair well with grilled or roasted proteins, like chicken or fish.
The warmth of the greens and the crunch of the seeds create a satisfying and nutritious dish.
Remember to handle the greens carefully when serving, as they can be delicate. Use tongs or a large spoon to scoop the greens onto plates or bowls.
Encourage your family and friends to enjoy the warm, flavorful collard greens as soon as they're ready. The combination of the tender leaves and the toasted seeds is a true delight.
Final Thoughts
Ultimately, Sukuma Wiki, or collard greens, is a versatile and nutritious vegetable that deserves a place in any home cook's repertoire. Not only are they packed with essential vitamins and minerals, but their hearty texture and mild flavor make them incredibly versatile.
You can sauté them, add them to soups and stews, or even enjoy them raw in salads. Additionally, incorporating greens like collard greens into your meals can contribute to a balanced budget-friendly diet, helping you manage both your health and finances.
The best part? Collard greens are incredibly easy to prepare. With just a few simple steps, you can transform this humble green into a delicious and satisfying dish.
Whether you're looking to add more greens to your diet or simply want to try something new, Sukuma Wiki is a fantastic choice. So why not give it a try? You might be surprised by just how much you enjoy this nutritious and flavorful vegetable.
Frequently Asked Questions
What Are the Health Benefits of Sukuma Wiki?
Eating sukuma wiki provides you with essential vitamins and minerals like vitamins A, C, and K, as well as calcium and iron. It's a low-calorie veggie that can support your overall health and well-being.
How Does Sukuma Wiki Differ From Other Leafy Greens?
Sukuma wiki differs from other leafy greens in its unique taste and texture. It's heartier and more robust than spinach or kale, making it a versatile ingredient in stews, curries, and sautés.
Can Sukuma Wiki Be Grown in Home Gardens?
Yes, you can grow sukuma wiki in your home garden. It's a hardy, fast-growing green that thrives in a variety of climates and soil types, making it a great addition to any backyard vegetable patch.
How Long Does Sukuma Wiki Take to Cook?
It typically takes 15 to 20 minutes to cook sukuma wiki. You'll want to sauté the greens until they're tender and the stems are soft. Adjust the cooking time based on your desired texture.
Is Sukuma Wiki Commonly Available in Grocery Stores?
Sukuma wiki is commonly available in many grocery stores, though its availability may vary by region. You can usually find it in the produce section alongside other leafy greens like kale or spinach.
Amara brings her deep knowledge of African cuisine to the table, with a focus on the rich and hearty flavors of Senegal. She loves to share slow-cooked dishes like thieboudienne (rice and fish), which reflect the warmth and hospitality of African cooking. Amara’s approach to food is all about creating comforting meals that nourish the soul.
-
Brazilian Cuisine3 months ago
Tacacá
-
Brazilian Cuisine3 months ago
Caldeirada
-
Polish Comfort Food3 months ago
Krupnik (Barley Soup)
-
Brazilian Cuisine3 months ago
Chicken in Brown Sauce
-
Southern Comfort Food3 months ago
Cheese Straws
-
African Cuisine3 months ago
Kedjenou (Ivory Coast)
-
Polish Comfort Food3 months ago
Vegetable Salad
-
American Diner Classics3 months ago
The Maillard Reaction: Understanding the Chemistry of Browning {Food Science and Cooking}