Connect with us

African Cuisine

Mandazi (East Africa)

Kindly explore the scrumptious Swahili doughnuts, mandazi, that have captivated East African cuisine with their rich history and cherished culinary traditions.

Published

on

east african fried dough

Mandazi, the scrumptious Swahili doughnuts, are a beloved part of East African cuisine! These fluffy, lightly sweetened treats have a rich history, tracing back to ancient spice trade routes. Local cooks blended exotic flavors with traditional recipes, creating a snack that's now a cherished part of community gatherings. To make them, you'll knead dough, let it rise, then fry the pillowy triangles to a golden crisp. Served warm, mandazi pair perfectly with a steaming cup of chai, fostering shared culinary traditions. You'll be hooked after just one bite – and there's plenty more to discover about this delightful East African delicacy.

Key Takeaways

  • Mandazi are lightly sweetened fried breads that originated from ancient trading routes and are a staple in East African food culture.
  • These Swahili doughnuts are characterized by a soft, pillowy texture with a crisp exterior and are often enjoyed with chai.
  • The authentic preparation of mandazi relies on a balance of ingredients and proper frying technique to achieve the desired texture and flavor.
  • Mandazi are deeply rooted in East African traditions, representing community, hospitality, and the diverse cultural heritage of the region.
  • Mandazi can be served warm, either plain or with accompaniments like honey, jam, or powdered sugar, making them a versatile snack for various occasions.

History

The origins of mandazi, a beloved East African fried dough pastry, can be traced back to the ancient trading routes connecting Africa, the Middle East, and the Indian subcontinent.

As spice merchants and traders traveled these historic pathways, they brought with them a variety of culinary influences that would eventually shape the creation of mandazi.

Over time, local cooks and bakers in East Africa began experimenting with these new ingredients and techniques, blending them with their own traditional recipes to produce the distinctive flavor and texture of mandazi.

Today, this delightful snack remains a cherished part of the region's food culture, enjoyed by people of all ages.

Whether served warm and freshly fried or paired with a steaming cup of chai, mandazi continues to delight the senses and bring people together through the power of shared culinary traditions.

Advertisement

Recipe

Mandazi, also known as Swahili doughnuts, are a beloved East African delicacy. These lightly sweetened fried breads are a staple in the region, often enjoyed for breakfast or as a snack. The texture is soft and pillowy, with a slightly crisp exterior that gives way to a tender, subtly flavored interior.

The key to making authentic mandazi lies in the balance of ingredients and the proper frying technique. This recipe will guide you through the process, ensuring you can recreate the warm, comforting flavors of this traditional treat in your own kitchen.

Ingredients:

  • 3 cups all-purpose flour
  • 1 tablespoon white sugar
  • 1 teaspoon baking powder
  • 1/2 teaspoon salt
  • 1/4 cup unsalted butter, melted
  • 1 cup warm milk
  • Vegetable oil for frying

Instructions:

In a large mixing bowl, combine the flour, sugar, baking powder, and salt. Stir to blend.

Pour in the melted butter and warm milk, and use a wooden spoon or your hands to mix the ingredients until a soft, slightly sticky dough forms. Knead the dough briefly on a lightly floured surface until it comes together.

Advertisement

Heat about 2-3 inches of vegetable oil in a large, heavy-bottomed pan or Dutch oven to 350°F (175°C). Carefully drop tablespoon-sized portions of the dough into the hot oil, frying in batches to avoid overcrowding.

Cook the mandazi for 2-3 minutes per side, or until golden brown. Drain the fried mandazi on a paper towel-lined plate.

Tips:

For best results, let the dough rest for 30 minutes before frying. This allows the gluten to relax, resulting in a more tender texture.

Additionally, it's important to maintain the oil temperature throughout the frying process to ensure even cooking and prevent the mandazi from becoming greasy. Serve the warm mandazi with your desired accompaniments, such as honey, jam, or a sprinkle of confectioners' sugar.

Advertisement

Cooking Steps

First, you'll need to gather and measure all your ingredients.

Once you've got everything ready, knead the dough on a lightly floured surface until it's nice and smooth.

Then, let the dough rise before shaping it into those classic mandazi triangles.

Step 1. Gather and Measure Ingredients

measure and gather ingredients

To make delectable mandazi, you'll need to gather and measure your ingredients carefully. First, you'll want to round up all-purpose flour – about 2 cups should do the trick.

Next, grab some baking powder and salt – just a teaspoon of each. For sweetness, you'll need a few tablespoons of white sugar.

Don't forget the milk and butter too – around a cup of milk and 2 tablespoons of melted butter. Finally, an egg will help bind everything together.

Advertisement

Now that you have all your ingredients, it's time to start measuring. Use a measuring cup for the flour, milk, and sugar, and a teaspoon for the baking powder and salt.

Crack the egg into a small bowl. Melt the butter in the microwave or on the stovetop.

With your mise en place ready, you can start mixing and rolling out the dough for some delicious homemade mandazi!

Step 2. Knead Dough on Lightly Floured Surface

knead dough on floured surface

Next, knead the dough on a lightly floured surface. Sprinkle a bit of flour on your clean countertop or table to prevent sticking.

Gently press the dough down with the palms of your hands, then fold it over itself. Give it a quarter turn and repeat this process. Keep kneading for about 5 minutes, until the dough becomes smooth and elastic.

You'll know it's ready when you poke it and the dough springs back. Kneading helps develop the gluten, which gives mandazi their chewy, fluffy texture. If the dough sticks to your hands, just add a sprinkle more flour.

Advertisement

Knead with confidence – you've got this! The motion is soothing, almost like a gentle dance. Enjoy the way the dough feels, squishing between your fingers.

Soon, you'll have a perfectly kneaded ball, ready for the next step.

Step 3. Let Dough Rise Before Shaping

let dough rise first

After kneading the dough, let it rest and rise for about an hour. This gives the yeast time to work its magic, making the dough light and fluffy.

During this time, the dough will puff up and double in size – it's pretty amazing to watch!

Once the dough has risen, it's time to shape it into those classic mandazi triangles. Lightly flour your work surface, then gently roll or pat the dough out until it's about 1/2 inch thick.

Use a sharp knife or pizza cutter to cut the dough into triangles. Be careful not to overwork the dough – you want it to stay nice and soft.

Advertisement

Now you're ready to fry up those delicious, golden mandazi! Heat some oil in a pan and carefully add the dough triangles, cooking until they're crispy and brown on both sides.

Serve them warm, maybe with a sprinkle of powdered sugar or a drizzle of honey. Mmm, can you already smell that irresistible aroma? Your taste buds are in for a real treat!

Step 4. Fry the Mandazi in Batches

fry mandazi in batches

Once the dough has been cut into triangles, you're ready to start frying the mandazi.

Heat up a large skillet or pot with about an inch of oil over medium-high heat. When the oil is shimmering, it's time to add a few of the dough triangles. Don't overcrowd the pan – fry them in batches to keep the oil at the right temperature.

Gently lower the dough into the hot oil and let it sizzle and turn golden brown, about 2-3 minutes per side. Use a slotted spoon to carefully flip the mandazi and ensure they cook evenly.

Once they're a lovely shade of honey-brown, transfer the fried mandazi to a paper towel-lined plate to drain off any excess oil.

Advertisement

Repeat this process, frying the dough in small batches, until all the mandazi are golden and delicious. The aroma will fill your kitchen, making your mouth water in anticipation.

Serve the warm, freshly fried mandazi right away for the ultimate East African treat!

Step 5. Drain Excess Oil Before Serving

drain oil before serving

Once the mandazi are golden and cooked through, use a slotted spoon to transfer them to a paper towel-lined plate or rack. This helps drain the excess oil, making the mandazi nice and crispy.

You don't want them to be too greasy, so be sure to let that extra oil drip off. Give the mandazi a gentle pat with the paper towels to soak up any lingering oil. This step is important for achieving the perfect texture – not too soggy, but not too dry either.

The mandazi should be light and fluffy on the inside, with a delightful crunch on the outside. Once drained, you can serve the mandazi warm, perhaps with a sprinkle of powdered sugar or a drizzle of honey for added sweetness.

Enjoy these delectable East African treats with family and friends!

Advertisement

Final Thoughts

Mandazi are a beloved East African delicacy, and their rich history and cultural significance are worth celebrating. Whether you enjoy them for breakfast, as a snack, or at a special gathering, these fluffy, golden-brown treats are sure to delight your taste buds.

Imagine biting into the soft, pillowy interior, the slightly crisp exterior giving way to a burst of flavor. The aroma of warm spices like cardamom and cinnamon wafts through the air, transporting you to the bustling markets of Tanzania or Kenya.

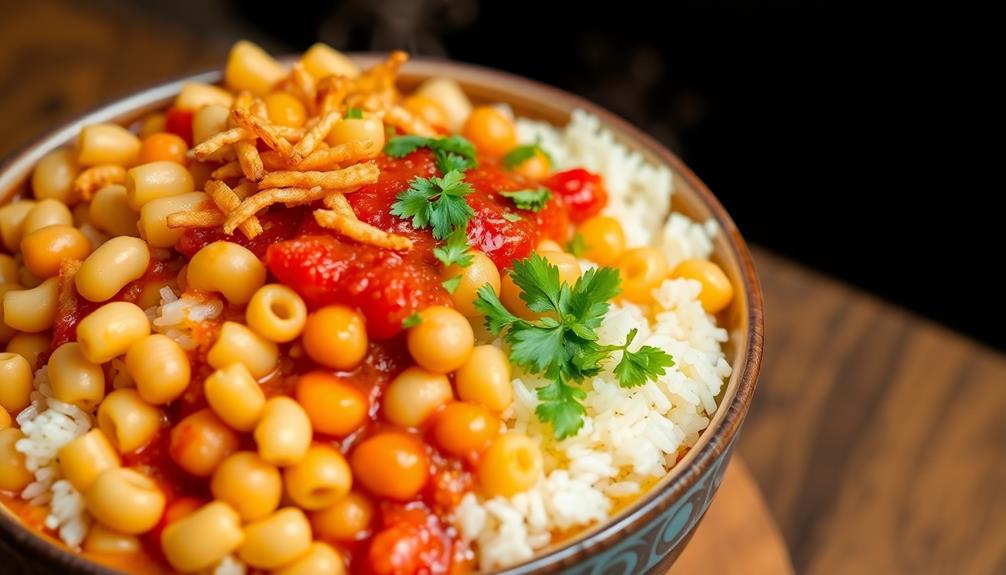
Beyond their delicious taste, mandazi hold a special place in the hearts of East Africans. They're often shared as a symbol of community and connection, bringing people together over a shared love of this beloved pastry.

As you savor your mandazi, remember the rich cultural heritage and traditions they represent, and feel a deeper appreciation for the diverse flavors and traditions that make East African cuisine so extraordinary.

Frequently Asked Questions

What Is the Origin of the Name "Mandazi"?

You're curious about the origin of the name "mandazi," aren't you? Well, it likely comes from the Swahili word for the fried dough pastry, which has been enjoyed in East Africa for centuries as a beloved traditional delicacy.

Advertisement

Are There Any Cultural or Religious Significance to Mandazi?

Are there any cultural or religious significance to this traditional snack? While its origins may be debated, mandazi holds an important place in many East African communities, often served at celebrations and events with cultural and spiritual meaning.

How Long Do Mandazi Typically Last Before Going Stale?

Typically, homemade mandazi will last around 2-3 days before going stale. However, the exact shelf life can vary depending on how they're stored and the ingredients used. To maintain freshness, be sure to keep them in an airtight container.

Can Mandazi Be Frozen for Later Consumption?

Yes, you can freeze mandazi for later consumption. When frozen properly, they can last several months without losing their texture or flavor. Just be sure to thaw them before reheating to enjoy their fresh-baked taste.

What Are Common Accompaniments or Dipping Sauces for Mandazi?

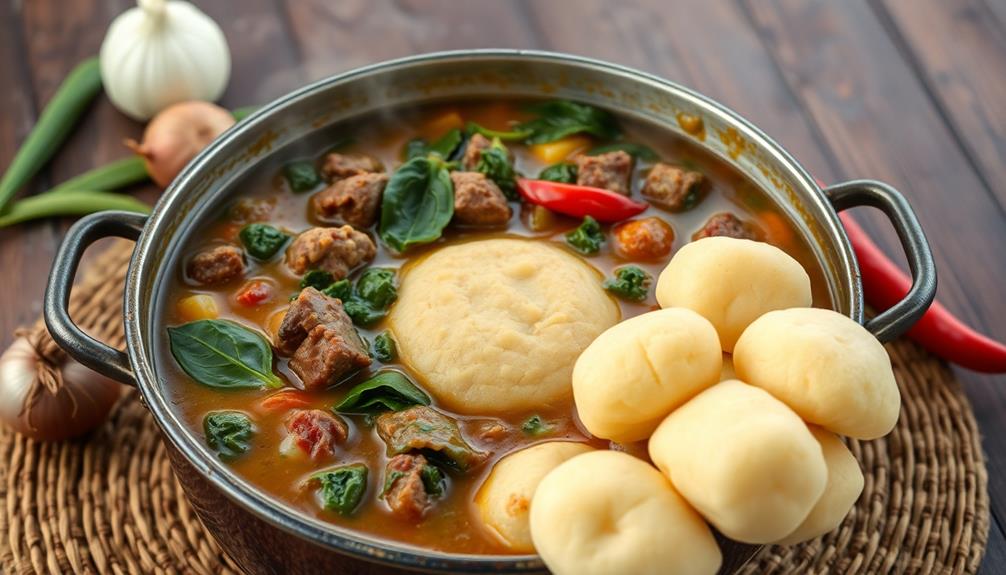
Mandazi are often enjoyed with a variety of accompaniments or dipping sauces. You can try them with honey, jam, or even a savory option like a vegetable or meat stew for a delightful flavor experience.

Advertisement
Continue Reading
Advertisement

African Cuisine

Kedjenou (Ivory Coast)

Onlookers are captivated by the mouthwatering aromas of Kedjenou, the beloved chicken or guinea fowl stew that has been delighting Ivorians for generations, and now invites you to…

Published

on

spicy chicken stew recipe

Kedjenou is a mouthwatering stew that's been delighting folks in Ivory Coast for generations! This dish has deep roots in the country's Baoulé culture, and it's a beloved part of their vibrant culinary heritage. The savory chicken or guinea fowl simmers with veggies like tomatoes, peppers, and eggplant until it's fall-off-the-bone tender. The flavors just melt together in this hearty, comforting meal. Kedjenou is often enjoyed at special gatherings, showcasing the warm hospitality of Ivorian culture. You'll find it served with fluffy rice or crusty bread – a real treat for your senses! Let's dive in and explore more about this tasty West African classic.

Key Takeaways

  • Kedjenou is a traditional meat and vegetable stew from Ivory Coast, with roots dating back centuries and strong cultural significance.
  • The dish is slow-cooked in a sealed pot, allowing flavors to meld and requiring minimal water as it relies on natural juices.
  • Kedjenou is often made with chicken or guinea fowl, along with vegetables like eggplant, tomatoes, and onions, and seasoned with spices like ginger and garlic.
  • The stew is a beloved part of Ivory Coast's culinary heritage, typically served during special occasions and gatherings, reflecting the country's hospitality.
  • Kedjenou is often served with rice or couscous, and can be garnished with fresh herbs for added flavor and contrast.

History

Kedjenou, a traditional dish from Ivory Coast, has roots dating back centuries. This savory stew was first created by the Baoulé people, who lived in the central region of the country. They'd slow-cook chicken or meat with vegetables in a tightly sealed pot, allowing the flavors to meld together beautifully.

Over time, the dish spread throughout Ivory Coast, becoming a beloved part of the country's rich culinary heritage.

Today, Kedjenou is a source of pride for Ivorians, who cherish the dish's unique blend of spices and tender, succulent meat. The process of preparing Kedjenou is an art form, requiring patience and skill to achieve the perfect texture and depth of flavor.

Whether served at a family gathering or a community celebration, this timeless dish connects people to their cultural roots and brings a taste of Ivory Coast's vibrant history to the table.

Recipe

Kedjenou is a traditional dish from Ivory Coast, West Africa. It's a slow-cooked meat and vegetable stew that's known for its unique flavor and tender texture. The name "kedjenou" comes from the French word "étuver," which means "to stew."

Advertisement

The traditional method of cooking kedjenou involves placing the ingredients in a sealed pot and slowly simmering them over a low heat, allowing the flavors to meld together. This gentle cooking process helps to tenderize the meat and infuse the vegetables with the savory juices.

  • Chicken, cut into pieces
  • Onions, diced
  • Tomatoes, diced
  • Bell peppers, diced
  • Eggplant, diced
  • Garlic cloves, minced
  • Ginger, grated
  • Chili peppers, diced (optional)
  • Chicken or vegetable broth
  • Salt and pepper to taste

In a large, heavy-bottomed pot or Dutch oven, arrange the chicken pieces in a single layer. Scatter the onions, tomatoes, bell peppers, eggplant, garlic, and ginger over the chicken. If using, add the chili peppers.

Pour in enough broth to just cover the ingredients. Cover the pot tightly and place it over low heat. Simmer the kedjenou for 1.5 to 2 hours, or until the chicken is very tender and the vegetables are cooked through.

It's important to resist the temptation to lift the lid during the cooking process, as this can release the steam and slow down the tenderizing of the meat.

Serve the kedjenou hot, with rice or couscous, and enjoy the rich, complex flavors of this beloved Ivorian dish.

Cooking Steps

First, season the chicken with your favorite spices.

Advertisement

Next, add some colorful veggies like onions, tomatoes, and bell peppers.

Then, let the dish simmer until the chicken is nice and tender.

Serve it over a bed of fragrant rice and sprinkle some fresh parsley on top for a tasty finishing touch!

Step 1. Season Chicken

season chicken thoroughly first

After cleaning the chicken, you'll want to season it thoroughly. Grab a big handful of spices and herbs – things like aromatic thyme, savory rosemary, and fragrant garlic powder.

Sprinkle them all over the chicken, making sure to get the seasoning into every nook and cranny. Rub it in with your fingers so the flavors really sink in.

Next, squeeze in the tangy juice of a few fresh limes. The citrus will help tenderize the meat and add a lovely zing.

Advertisement

Don't forget to season the inside of the chicken too – that's where all the good stuff goes! Once it's fully coated, let the chicken sit for a bit so the seasonings can work their magic.

Now your chicken is ready for the next step. Get excited, because the flavors are about to really come alive as it cooks!

Step 2. Add Vegetables

incorporate fresh vegetables

Next, you'll want to add the vegetables to the dish.

You'll start by chopping up some colorful bell peppers – maybe some red, yellow, and green ones. Toss those vibrant veggies right into the pot with the chicken.

Then, slice up some juicy tomatoes and stir them in too. The tomatoes will add a lovely sweetness that will complement the savory chicken.

Don't forget the onions! Chop up a couple of those and add them to the mix. The onions will give the dish a nice aromatic flavor that'll have your mouth watering.

Advertisement

Finally, grab a handful of fresh green beans and snap them into bite-sized pieces. These crunchy veggies will add a lovely texture to the kedjenou.

Once you've added all the veggies, give the pot a good stir.

Now, you'll let the flavors meld together as the dish simmers. Soon, your kitchen will be filled with the most tantalizing aroma!

Step 3. Simmer Until Chicken Is Tender

simmer chicken until tender

With the vegetables incorporated, it's time to let the dish simmer until the chicken becomes fork-tender. Grab your pot and turn up the heat – you're in for a delightful culinary adventure!

Gently place the chicken back into the simmering mixture, making sure each piece is submerged. As the flavors meld together, the kitchen will fill with the mouthwatering aroma of the Ivorian spices.

Be patient and let the chicken cook slowly, checking it every 10 minutes or so. You'll know it's ready when the meat easily separates from the bone with just a light touch of your fork. The chicken should be cooked through, with a tender, juicy texture.

Advertisement

Resist the urge to rush – good things come to those who wait! Once the chicken is perfectly tender, you're one step closer to enjoying an authentic taste of Ivory Coast. Get ready to savor the delicious results of your hard work.

Step 4. Serve Over Aromatic Rice

serve with aromatic rice

Serving the tender, flavorful chicken over a bed of aromatic rice is the final step in this captivating Ivorian dish. The rice, infused with the fragrant flavors of the Kedjenou, provides the perfect complement to the succulent chicken.

As you spoon the chicken and its rich, savory sauce over the fluffy, fragrant grains, the aromas will fill the air, enticing your senses. The warmth of the rice contrasts beautifully with the tenderness of the meat, creating a harmonious blend of textures that will delight your palate.

Whether you choose to serve the Kedjenou over plain white rice or a more aromatic variety, such as jasmine or basmati, the combination is sure to be a hit. Savor each bite, allowing the flavors to dance on your tongue and transport you to the vibrant culinary traditions of the Ivory Coast.

This is a meal that will leave you satisfied and eager to explore more of this captivating West African cuisine.

Step 5. Garnish With Chopped Parsley

garnish with chopped parsley

Typically, you'll want to finish the Kedjenou by garnishing the dish with a sprinkle of freshly chopped parsley. This bright, fragrant herb adds a lovely pop of color and a delightful freshness to the savory stew.

The parsley's delicate leaves will dance on top of the tender meat and vegetables, inviting you to take a deep breath and savor the aroma.

Advertisement

Don't be shy with the parsley – you'll want to be generous with the garnish. The more you add, the more the flavors will come alive.

Imagine the crisp, leafy greens contrasting with the rich, aromatic sauce. As you take a bite, you'll enjoy the delightful crunch of the parsley paired with the melt-in-your-mouth texture of the Kedjenou.

It's the perfect finishing touch to this flavorful West African dish.

Final Thoughts

Kedjenou, the iconic Ivorian dish, is a true reflection of the country's culinary heritage. This savory stew is a delightful blend of flavors, and you'll love how the tender chicken and vegetables meld together in perfect harmony.

As you take that first bite, you'll be transported to the vibrant marketplaces of Abidjan, where the aromas of spices and simmering pots fill the air.

Advertisement

Kedjenou is more than just a meal – it's a cultural experience. Each family has their own unique twist on the recipe, passed down through generations.

Whether you enjoy it with a side of fragrant rice or a piece of crusty bread, this dish is sure to leave you satisfied and craving for more.

As you savor the last delicious morsel, remember that Kedjenou isn't just a meal – it's a taste of Ivory Coast's rich culinary heritage.

Bon appétit!

Frequently Asked Questions

How Long Does It Take to Prepare Kedjenou?

Preparing this dish typically takes around 1-2 hours. You'll need to slowly simmer the ingredients, allowing the flavors to meld together. The exact time may vary depending on the quantity you're making and your cooking method.

Advertisement

What Type of Meat Is Traditionally Used in Kedjenou?

Traditionally, kedjenou uses chicken as the primary meat. You'll often find chicken thighs or a whole chicken cut into pieces being used in this slow-cooked, flavorful West African dish.

Can Kedjenou Be Made With Vegetarian Ingredients?

Absolutely! You can easily make a delicious vegetarian version of this dish. Simply swap out the traditional meat for your favorite plant-based protein like tofu, tempeh, or even a blend of mixed vegetables. Get creative and enjoy!

Is Kedjenou Gluten-Free or Suitable for Special Diets?

Yes, kedjenou can be made gluten-free by using gluten-free ingredients. It's also suitable for special diets like paleo or low-carb since it's typically made with vegetables, meat, and spices without any grains or wheat.

Where Can I Find the Traditional Kedjenou Cooking Pot?

To find the traditional kedjenou cooking pot, you can search online retailers that specialize in international cookware or visit African grocery stores and markets. Many of these shops carry the unique clay pots used for this traditional West African dish.

Advertisement
Continue Reading

African Cuisine

Muamba De Galinha (Angola)

Pulsing with the vibrant flavors of Angola, Muamba De Galinha is a beloved chicken stew that beckons you to discover its mouthwatering depths.

Published

on

angolan chicken stew dish

Discover the mouthwatering delight of Muamba de Galinha, Angola's beloved chicken stew! This traditional dish bursts with layers of flavor, from the tender chicken to the aromatic spices and tangy tomato-based sauce. The vibrant blend of ingredients, including piri-piri peppers for a zesty kick, creates a truly satisfying meal that's been passed down through generations. Enjoy this Angolan staple during special occasions or family gatherings, savoring the rich culinary heritage it represents. As you dive into this delectable dish, you'll be transported to the heart of Angolan culture and the agricultural bounty that inspires its cuisine.

Key Takeaways

  • Muamba de Galinha is a traditional Angolan chicken stew with origins rooted in the nation's culinary heritage and agricultural practices.
  • The dish features tender chicken, aromatic spices, palm oil, tomato-based sauce, and okra, showcasing the rich flavors of Angolan cuisine.
  • Preparation involves soaking the chicken in salt water, sautéing onions, and simmering the ingredients together for a depth of flavor.
  • Muamba de Galinha is often served during special occasions and family gatherings, reflecting its cultural significance in Angolan society.
  • The dish is typically accompanied by side dishes like white rice or funge (cassava porridge) and is enjoyed for its vibrant flavors and connection to Angolan heritage.

History

According to historical accounts, the origins of Muamba de Galinha can be traced back to the traditional cuisine of Angola. This beloved chicken stew has been a staple dish in Angolan households for generations, passed down through families and refined over time.

The dish's name, "Muamba de Galinha," translates to "chicken stew" in the local Kimbundu language. The recipe combines tender chicken with a flavorful blend of spices, vegetables, and palm oil, creating a comforting and satisfying meal.

Over the years, Muamba de Galinha has become an integral part of Angolan culture, often served during special occasions and family gatherings.

The preparation of this dish is a true art form, with each step carefully executed to ensure the perfect balance of flavors. From the selection of the freshest ingredients to the meticulous simmering process, Muamba de Galinha embodies the rich culinary heritage of Angola.

Recipe

Muamba De Galinha, a classic Angolan chicken dish, is a beloved comfort food that showcases the rich flavors of African cuisine. This dish is a harmonious blend of aromatic spices, tender chicken, and a vibrant tomato-based sauce, creating a truly delightful and satisfying meal.

Advertisement

The key to a successful Muamba De Galinha lies in the careful selection and preparation of the ingredients. Each element contributes to the overall depth of flavor, making this dish a true culinary experience.

  • 1 whole chicken, cut into 8 pieces
  • 1 onion, diced
  • 3 cloves of garlic, minced
  • 2 tomatoes, diced
  • 1 cup of tomato sauce
  • 1 cup of water
  • 2 tablespoons of palm oil
  • 1 teaspoon of paprika
  • 1 teaspoon of cumin
  • 1 teaspoon of cayenne pepper
  • Salt and black pepper to taste

To prepare the Muamba De Galinha, start by heating the palm oil in a large pot over medium heat. Add the onion and garlic, and sauté until fragrant and translucent.

Next, add the chicken pieces and brown them on all sides. Pour in the tomato sauce, diced tomatoes, water, paprika, cumin, cayenne pepper, salt, and black pepper. Cover the pot and simmer for approximately 45 minutes, or until the chicken is cooked through and the sauce has thickened.

It's important to note that the cooking time may vary depending on the size and cut of the chicken pieces. To ensure the dish is cooked to perfection, it's recommended to use a meat thermometer to check the internal temperature of the chicken, which should reach a minimum of 165°F (75°C).

Serve the Muamba De Galinha hot, accompanied by your choice of side dishes, such as white rice or funje (a traditional Angolan cornmeal porridge). Enjoy this authentic and flavorful Angolan delicacy!

Cooking Steps

First, you'll want to soak the chicken in some salty water to get it nice and tender.

Advertisement

Next, chop up those onions and sauté them until they're nice and golden.

Then, add in the tomato paste and your favorite spices – let it all simmer together for a bit.

Finally, toss in those peas and let everything cook until it's perfectly tender.

Can't wait for you to dig in!

Step 1. Soak Chicken in Salt Water

brining chicken in salt

After preparing the chicken, the next step is to soak it in a salt water solution. This helps remove any impurities and give the meat a delightful, clean flavor.

Simply fill a large bowl or container with cool water, then stir in a generous pinch of salt. Gently place the chicken pieces into the salty water, making sure they're fully submerged. Let the chicken soak for about 30 minutes, giving it time to absorb all that wonderful saltiness.

Advertisement

Once the time is up, carefully take the chicken out of the water and pat it dry with some paper towels. You'll notice the skin has a nice, even color now – no more blotchy spots!

This short soak is an important part of the process, as it helps season the meat from the inside out. Now that your chicken is prepped and ready, it's time to move on to the next exciting step in creating your delicious Muamba de Galinha!

Step 2. Chop and Sauté Onions

chop and saut onions

With the chicken now properly prepped, it's time to begin the cooking process. Grab a sharp knife and cutting board – you'll need to chop up some onions!

Carefully slice the onions in half from top to bottom. Then, lay the halves flat and thinly slice them. The onion slices should be nice and thin so they'll cook quickly.

Once you've chopped all the onions, it's time to sauté them. Heat a large skillet over medium heat and add a few tablespoons of oil. Toss the onion slices into the hot pan and let them sizzle!

Stir the onions frequently as they cook, so they don't burn. You'll know they're done when they're soft, tender, and have a lovely golden-brown color.

Advertisement

The kitchen will be filled with the mouthwatering aroma of the sautéed onions – it'll make your stomach rumble with anticipation for the delicious Muamba de Galinha to come!

Step 3. Add Tomato Paste

incorporate tomato paste now

The next step is to add the tomato paste to the sautéed onions. Grab that small can of tomato paste and give it a good stir into the onions.

You'll see the mixture turn a lovely reddish-orange color as the paste blends in. The tomato paste will add a deep, rich flavor that's essential for this Angolan chicken stew.

Make sure to cook the paste for a minute or two, letting it toast slightly. This brings out all the wonderful tomatoey goodness.

Now the base of the stew is really starting to come together! The fragrant onions and savory tomato paste create a mouthwatering aroma that will have everyone's stomachs rumbling.

Up next, you'll add the chicken to the pot. Get ready for the flavors to really start building – this dish is going to be delicious!

Advertisement

Step 4. Add Spices and Simmer

add spices simmer gently

Next, stir in the spices. Sprinkle in a dash of paprika, a pinch of cumin, and a teaspoon of chili powder.

These vibrant seasonings will bring warmth and depth to your Muamba De Galinha. Breathe in the enticing aroma as the flavors mingle and meld.

Now, let the dish simmer gently on the stovetop. As the minutes tick by, the chicken will become deliciously tender, and the sauce will thicken to a rich, velvety consistency.

Keep an eye on it, stirring occasionally to prevent sticking. Soon, your kitchen will be filled with the mouthwatering scents of this authentic Angolan dish.

Be patient – the flavors need time to fully develop. After about 30 minutes, your Muamba De Galinha will be ready to serve.

Steaming hot and bursting with flavor, it's sure to satisfy even the heartiest of appetites.

Advertisement

Step 5. Add Peas and Cook Until Tender

add peas cook tender

Add the frozen peas to the simmering chicken and sauce. They'll thaw right up and soak in all that wonderful flavor!

Stir them in gently and let them cook for about 10 minutes until they're nice and tender. You'll know they're ready when they're bright green and you can easily pierce them with a fork.

While the peas are cooking, keep an eye on the pot and give it a stir every so often. You want to make sure the sauce doesn't dry out. If it's looking a little thick, just add a splash of chicken broth or water to thin it out.

Once the peas are tender, your Muamba de Galinha is almost ready! The chicken should be fall-off-the-bone tender by now.

Give it all one final stir to combine everything, then serve it up hot over a bed of fluffy white rice. Yum! Get ready for your tastebuds to do a happy dance.

Final Thoughts

Ultimately, the Muamba de Galinha dish is a beloved staple in Angolan cuisine that encapsulates the nation's rich culinary heritage.

Advertisement

This vibrant and flavorful chicken stew is a true delight for the senses – the aroma of fragrant spices fills the air, while the tender chicken and silky peanut sauce dance across your tongue.

As you tuck into a hearty bowl of Muamba de Galinha, you'll be transported to the bustling markets of Angola, where fresh ingredients are locally sourced and prepared with great care.

The blend of traditional seasonings, such as palm oil, okra, and piri-piri peppers, creates a symphony of tastes that's both comforting and exciting.

Whether you're enjoying it as a family meal or sharing it with friends, this dish is sure to leave you feeling satisfied and connected to the rich cultural tapestry of Angola.

Frequently Asked Questions

What Are the Cultural Origins of Muamba De Galinha?

The cultural origins of this dish can be traced back to the culinary traditions of a specific region or country. Its unique flavors and preparation methods likely stem from local ingredients, cooking techniques, and traditional recipes passed down through generations.

Advertisement

How Does Muamba De Galinha Differ From Other Angolan Dishes?

Angolan dishes often feature unique combinations of ingredients and flavors. How does this particular dish stand apart? It likely has distinct preparation methods, spices, or serving traditions that set it apart from other local cuisine.

What Are the Nutritional Benefits of Muamba De Galinha?

As a nutritious dish, it provides essential vitamins and minerals. The combination of protein-rich chicken and fiber-filled vegetables make it a well-balanced meal that can support your overall health and wellbeing. Enjoy this delicious and nourishing dish!

Can Muamba De Galinha Be Made With Alternative Proteins?

Yes, you can make this dish with alternative proteins. Substitute the chicken with other lean meats, fish, or even tofu to enjoy the same flavors and nutritional benefits of this hearty and versatile meal.

How Long Does Muamba De Galinha Typically Take to Prepare?

Typically, it takes around 1-2 hours to prepare this dish, depending on the complexity of the recipe and the experience of the cook. The preparation time can vary based on the specific ingredients and cooking method used.

Advertisement
Continue Reading

African Cuisine

Kitfo (Ethiopia)

Whet your appetite for a tantalizing raw beef dish that encapsulates the rich culinary heritage of Ethiopia’s Gurage people.

Published

on

ethiopian raw minced meat

Kitfo is a beloved raw beef dish from the Gurage people of central Ethiopia. It's a cherished part of Ethiopia's rich culinary heritage, representing family gatherings and cultural pride. To make kitfo, you'll grind savory beef with spices and the aromatic niter kibbeh. Then, you'll serve it warm on a platter with injera bread, gomen (collard greens), and creamy ayib cheese. The flavors melt together beautifully, and the textures captivate your senses. Kitfo is an adventurous dish that offers a delicious peek into Ethiopia's diverse cuisine and the traditions that make it so special.

Key Takeaways

  • Kitfo is a traditional raw beef dish that originates from the Gurage people of central Ethiopia.
  • It is a cherished aspect of Ethiopian culture, often served during family gatherings and special occasions.
  • The dish features a unique blend of spices, including mitmita and niter kibbeh, which provide bold flavors and aromatic notes.
  • Kitfo is typically served with injera, a staple Ethiopian flatbread, along with side dishes like gomen (collard greens) and ayib (fresh cheese).
  • The preparation and consumption of kitfo foster community bonding and strengthen family ties, representing the resourcefulness and creativity of Ethiopian cuisine.

History

Kitfo, a celebrated Ethiopian dish, has a rich history that can be traced back to the Gurage people of central Ethiopia. These resourceful folks have been enjoying the savory delights of raw, minced beef seasoned with mitmita, a fiery chili powder, and the nutty flavor of niter kibbeh, a clarified butter, for generations.

Over time, the dish has evolved, with some preferring to lightly cook the beef. No matter how you enjoy it, kitfo remains a cherished part of Ethiopian culture, bringing families and communities together around the table.

The preparation of kitfo is an art form, with skilled cooks meticulously chopping the beef into a fine texture and blending the spices to perfection.

As you take your first bite, you'll be transported to the heart of Ethiopia, where the rich history and vibrant flavors of this beloved dish come alive.

Kitfo is more than just a meal; it's a cultural experience that celebrates the culinary traditions of this remarkable country.

Advertisement

Recipe

Kitfo is a beloved raw beef dish from the Ethiopian culinary tradition. It's typically enjoyed with injera, a spongy flatbread, and served alongside other Ethiopian staples such as gomen (collard greens) and ayib (fresh cheese).

The preparation of authentic kitfo involves carefully mincing the beef to a fine texture, then blending it with a flavorful spice mixture known as mitmita. The dish is then warmed slightly, allowing the flavors to meld while preserving the raw, tender quality of the beef.

Ingredients:

  • 1 lb ground beef (or finely minced beef)
  • 2 tbsp mitmita (Ethiopian spice blend)
  • 1 tbsp niter kibbeh (Ethiopian spiced clarified butter)
  • 1 tsp ground cardamom
  • 1 tsp ground cumin
  • 1/2 tsp ground fenugreek
  • 1/4 tsp ground cloves
  • Salt to taste

Instructions:

Combine the ground beef, mitmita, niter kibbeh, cardamom, cumin, fenugreek, and cloves in a bowl. Mix well until the spices are evenly distributed throughout the beef.

Cover and refrigerate for at least 30 minutes to allow the flavors to meld. When ready to serve, transfer the seasoned beef to a skillet and warm over low heat, stirring occasionally, just until the beef is heated through but still raw in the center. Adjust seasoning with salt to taste.

Advertisement

Serving Tip:

For the traditional presentation, serve the warm kitfo on a platter lined with injera. Provide additional injera, gomen, and ayib on the side for a complete Ethiopian-style meal.

Enjoy the kitfo by using pieces of injera to scoop up and wrap the raw, spiced beef.

Cooking Steps

First, you'll grind the beef with a blend of aromatic spices and fresh herbs for a fragrant, zesty filling.

Then, you'll mix in plenty of rich, creamy butter or the traditional niter kibbeh.

Advertisement

Serve this tasty Kitfo alongside fluffy injera bread, and don't forget the optional cheese topping and a sprinkle of roasted, spiced seeds for a little extra crunch.

Step 1. Grind Meat With Spices and Herbs

grind meat with spices

To prepare the kitfo, begin by thoroughly grinding the beef using a meat grinder or food processor. This step is crucial, as you want the meat to have a nice, smooth texture.

Next, gather your spices and herbs – you'll need some spicy chili powder, fragrant cardamom, and aromatic garlic and ginger. Toss these flavorful ingredients right into the ground beef and give it a good mix. Don't be afraid to get your hands dirty! The more you blend the spices into the meat, the more amazing the final dish will taste.

With the meat all spiced up, it's time to add the final touch – the niter kibbeh, a clarified butter infused with even more spices. Drizzle this rich, golden liquid over the seasoned beef and give it one last gentle stir.

Now your kitfo is ready to serve! Pair it with some injera bread and enjoy the burst of flavors in every bite.

Step 2. Add Butter or Niter Kibbeh

add butter or niter

Adding the niter kibbeh, a richly spiced clarified butter, is the final step in preparing the kitfo.

You'll want to melt the niter kibbeh in a pan over medium heat until it's nice and warm. Be careful not to let it get too hot – you don't want it to burn! Once it's melted, you can add it right into the ground meat mixture.

Advertisement

Stir it all together until the niter kibbeh is evenly distributed. The butter will melt into the meat, making it silky-smooth and infusing it with those wonderful spices.

The niter kibbeh really takes the kitfo to the next level, adding a rich, aromatic flavor that complements the freshness of the meat.

Go ahead and take a big bite – the texture is divine, with the tender, succulent meat and the luxurious, melted butter. Mmm, it's so good!

Serve the kitfo warm, maybe with some injera bread on the side. Your family and friends will be amazed at your authentic Ethiopian cooking skills.

Step 3. Serve With Injera Bread

serve with injera bread

Typically, you'll want to serve the fragrant kitfo with some injera bread on the side. This traditional Ethiopian flatbread is the perfect accompaniment, with its spongy, slightly tangy texture that soaks up all the rich, spiced flavors of the raw minced beef.

Tear off a piece of the injera and use it to scoop up bites of the tender, seasoned kitfo. The combination of the soft, warm bread and the bold, vibrant kitfo is simply divine.

Advertisement

Injera has a unique appearance, with its web-like holes and slightly bumpy surface. It's made from teff flour, a tiny, ancient grain that's a staple in Ethiopian cuisine. The batter is fermented for a day or two, giving injera its signature tang.

When it's time to serve, you'll want to lay the injera out on a large platter, perhaps even placing the kitfo right on top so everyone can dig in. The interplay of the cool, slightly chewy injera and the hot, luscious kitfo is a true delight for the senses.

Step 4. Optional Cheese Topping

optional cheese topping added

While the kitfo and injera combination is divine on its own, you can also choose to top the dish with a delightful cheese. This optional addition takes the textures and flavors to new heights.

The cool, creamy cheese complements the spicy, savory meat, creating a harmonious balance. You can select from a variety of cheeses, such as fresh cottage cheese or the traditional Ethiopian cheese called ayib.

Simply spoon a generous dollop of your chosen cheese over the top of the kitfo and let it melt into the dish. The contrast of the soft, crumbly cheese against the tender, ground beef is simply irresistible.

Don't be afraid to get a little creative and experiment with different cheese pairings. Whether you opt for a mild or tangy variety, the cheese topping will elevate your kitfo experience to something truly special.

Advertisement

Step 5. Garnish With Roasted Spiced Seeds

garnish with spiced seeds

Beyond the optional cheese topping, another way to elevate your kitfo dish is by garnishing it with a sprinkle of roasted, spiced seeds.

These crunchy, fragrant seeds add a delightful textural contrast and a burst of flavor that complements the rich, savory meat perfectly.

To make the roasted, spiced seeds, simply toss a handful of your favorite seeds, such as sesame, pumpkin, or sunflower, with a pinch of Ethiopian spices like berbere or mitmita.

Toast them in a dry skillet over medium heat, stirring occasionally, until they're lightly golden and fragrant.

Let them cool, then sprinkle them generously over your freshly prepared kitfo.

The toasted seeds not only add a delightful crunch but also impart a subtle, earthy warmth that ties the whole dish together.

Advertisement

Their vibrant colors also make for a visually stunning presentation, transforming your kitfo into a true feast for the senses.

Give this easy garnish a try and elevate your kitfo experience to new heights!

Final Thoughts

Kitfo's final allure lies in its blend of rich flavors and cultural significance. From the moment you take your first bite, you'll be captivated by the harmonious interplay of spices that dance across your tongue. The tender, melt-in-your-mouth beef is a true delight, while the buttery, herbaceous notes of the niter kibbeh provide a comforting backdrop.

But Kitfo is more than just a delicious dish – it's a cherished part of Ethiopia's culinary heritage. The ritual of preparing and sharing this traditional meal brings families and communities together, fostering a sense of connection and pride.

As you savor each flavorful morsel, you can't help but feel a deeper appreciation for the vibrant culture that gave birth to this extraordinary dish.

Advertisement

Whether you're an adventurous eater or simply seeking a new culinary adventure, Kitfo is sure to captivate your senses and leave you with a greater understanding of the richness of Ethiopian cuisine.

Frequently Asked Questions

What Is the Cultural Significance of Kitfo in Ethiopia?

As a cornerstone of Ethiopian cuisine, kitfo holds deep cultural significance. It's more than just a dish – it's a reflection of the country's rich culinary heritage and a symbol of hospitality, tradition, and community.

Can Kitfo Be Made With Alternative Meat Options?

Sure, you can experiment with alternative meat options for this dish. While the traditional version uses raw beef, you can try substituting other lean proteins like bison, venison, or even plant-based meat alternatives to suit your preferences and dietary needs.

How Does the Presentation of Kitfo Vary Across Different Regions?

How the dish is presented can vary across regions. You may see it served raw, partially cooked, or fully cooked, often accompanied by different regional breads or sides. The presentation reflects local preferences and traditions.

What Are the Typical Accompaniments Served With Kitfo?

Typically, kitfo is accompanied by artisan breads, spiced butters, and a variety of condiments that complement the flavors. You'll often find it served with injera, a traditional Ethiopian flatbread, as well as berbere spice blend and cottage cheese.

Advertisement

Are There Any Health Considerations to Be Aware of When Eating Kitfo?

When enjoying raw or undercooked meat dishes, you should be aware of potential health risks, such as bacterial infections. It's important to consider food safety and consult with a healthcare professional before consuming raw or undercooked items.

Continue Reading
Advertisement

Affiliate Disclaimer
As an affiliate, we may earn a commission from qualifying purchases. We get commissions for purchases made through links on this website from Amazon and other third parties.

Advertisement

Latest

delicious mini cheesecake treats delicious mini cheesecake treats
Graduations/Birthdays3 mins ago

Cheesecake Bites

Bite-sized bliss that melts in your mouth, these cheesecake bites offer a creamy indulgence that will leave you craving more....

tangy citrus dessert squares tangy citrus dessert squares
Graduations/Birthdays8 mins ago

Lemon Bars

Unlock the secrets to making the perfect lemon bars, a classic American dessert that combines a buttery crust with a...

delicious chocolate dessert squares delicious chocolate dessert squares
Graduations/Birthdays14 mins ago

Brownies

Joyful and decadent, the story of brownies dates back to a historic culinary mishap, unveiling a rich legacy of chocolate-infused...

delicious homemade chocolate treats delicious homemade chocolate treats
Graduations/Birthdays19 mins ago

Chocolate Chip Cookies

Homemade chocolate chip cookies with their buttery, crispy edges and soft, chewy centers have captivated taste buds for generations, but...

celebratory dessert for gatherings celebratory dessert for gatherings
Graduations/Birthdays25 mins ago

Sheet Cake

Discover the delectable world of sheet cake, a versatile and crowd-pleasing dessert that has captured the hearts of celebrations for...

delicious baked sweet treats delicious baked sweet treats
Graduations/Birthdays31 mins ago

Cupcakes

Baking cupcakes is a delightful endeavor that unveils a world of endless possibilities, from classic flavors to imaginative creations.

creamy egg salad delight creamy egg salad delight
Graduations/Birthdays36 mins ago

Egg Salad Sandwiches

Unlock the secrets to crafting the perfect egg salad sandwich, a timeless classic that delights the senses and satisfies the...

fresh mozzarella tomato basil fresh mozzarella tomato basil
Graduations/Birthdays41 mins ago

Caprese Sandwiches

Indulge in the irresistible blend of creamy mozzarella, juicy tomatoes, and fragrant basil that makes the Caprese sandwich a beloved...

turkey avocado wrap recipe turkey avocado wrap recipe
Graduations/Birthdays46 mins ago

Turkey and Avocado Wraps

Craving a quick, nutritious, and delicious lunch that satisfies your taste buds? Discover the irresistible combination of Turkey and Avocado...

stuffed flatbread delights stuffed flatbread delights
Graduations/Birthdays51 mins ago

Pita Pockets

Juicy fillings, crisp veggies, and savory grilled meats come together in these versatile pita pockets that are easy to prepare...

bacon lettuce tomato delight bacon lettuce tomato delight
Graduations/Birthdays57 mins ago

BLT Sandwiches

A timeless classic, the BLT sandwich captivates with its harmonious blend of crisp bacon, fresh lettuce, and juicy tomatoes, leaving...

artisanal melted cheese delight artisanal melted cheese delight
Graduations/Birthdays1 hour ago

Gourmet Grilled Cheese

Mouth-watering gourmet grilled cheese sandwiches with artisanal breads and premium cheeses that transform this lunchtime classic into an indulgent culinary...

Advertisement

Trending