African Cuisine
West African Comfort: The Heartiness of Afang Soup
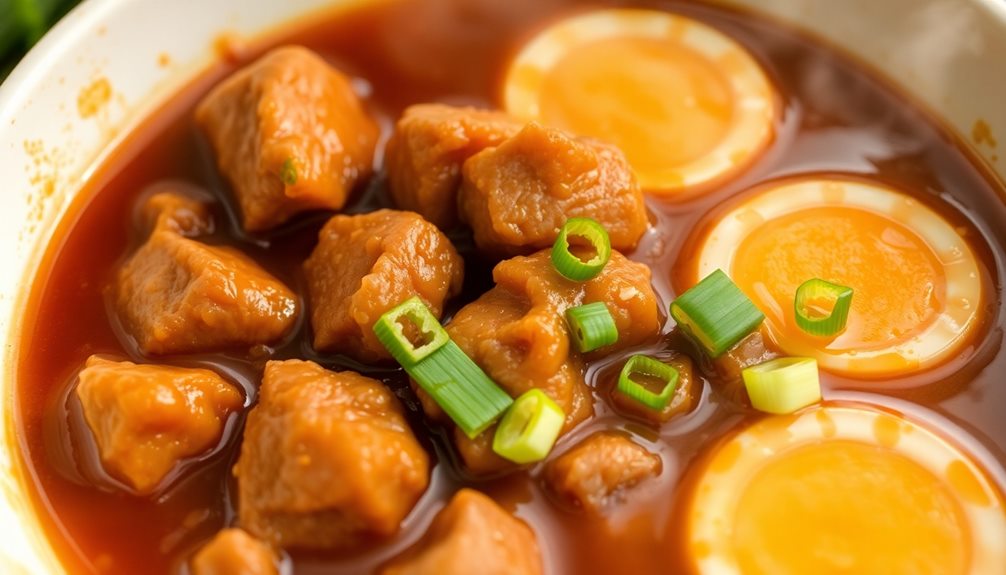
Your taste buds are in for a delightful journey as you explore the rich, umami-packed flavors of afang soup, a beloved West African comfort food that…
Get ready for a culinary adventure that'll transport you to the vibrant heart of West Africa! Afang soup, a beloved comfort food from southeastern Nigeria, is a heartwarming delight. This nutrient-dense dish features the distinctive bitterness of afang leaves balanced by savory umami flavors. Traditionally served during festive celebrations, the recipe has been passed down through generations, showcasing the essence of West African culture. Chopped afang leaves simmer in a rich broth, mingling with smoky protein and aromatic spices. Whether enjoyed on a cozy night or a celebratory feast, afang soup is sure to leave you feeling nourished and joyful. There's so much more to discover about this culinary treasure.
Key Takeaways
- Afang soup is a traditional West African dish that showcases the rich culinary heritage of the Efik and Ibibio people of southeastern Nigeria.
- The dish's distinct bitterness and umami flavors come from the nutrient-dense afang leaves, which are simmered and combined with various proteins and seasonings.
- Afang soup is typically served during festive celebrations, where it is enjoyed alongside starches like garri, eba, or fufu, fostering a sense of community and cultural identity.
- The recipe and preparation techniques for afang soup have been passed down through generations, highlighting the importance of preserving traditional culinary knowledge.
- The hearty and nourishing profile of afang soup makes it a comforting West African dish that can be enjoyed on both casual and formal occasions.
History
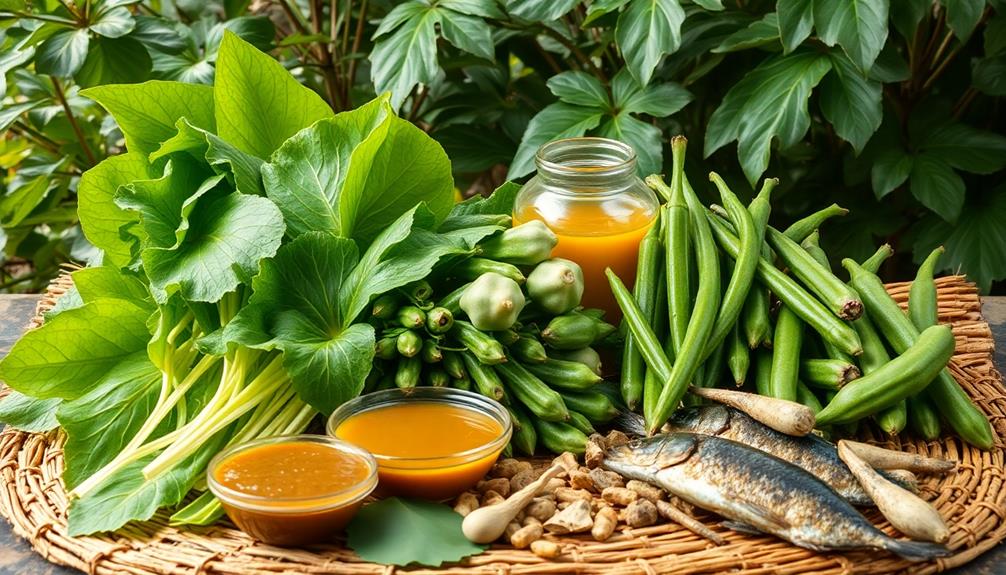
Afang soup has a rich history rooted in the culinary traditions of West Africa. This beloved dish traces its origins to the Efik and Ibibio people of southeastern Nigeria. For generations, families have gathered around the table to enjoy the hearty, flavorful broth and its signature leafy greens.
The key ingredient, afang leaves, are harvested from the Gnetum africanum vine, a plant native to the region. These nutrient-dense greens lend the soup its distinct bitterness, which is balanced by the rich, umami flavors of smoked fish, dried shrimp, and ground crayfish.
In festive celebrations, Afang soup is often served alongside staple dishes like eba (gari) and pounded yam, creating a truly mouthwatering and satisfying meal.
The preparation of this soup has been passed down through generations, with families cherishing their unique recipes and techniques.
Recipe
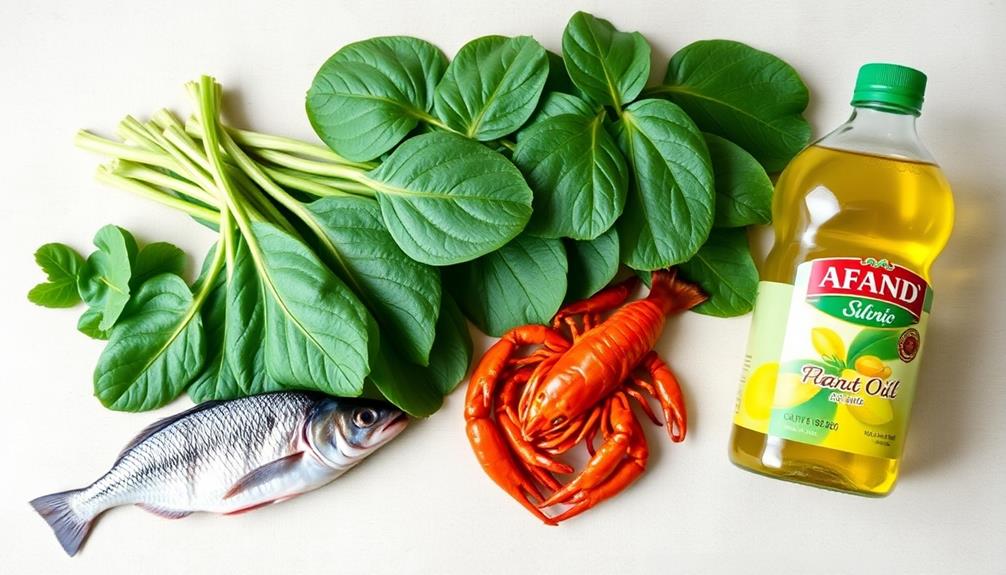
Afang Soup is a popular Nigerian dish that combines fresh greens, meat or fish, and an array of aromatic spices. This hearty soup isn't only nourishing but also bursting with flavor.
The key to a delicious Afang Soup lies in the careful selection and preparation of the ingredients. By following this recipe, you can recreate the authentic taste of this beloved West African specialty in your own kitchen.
- Afang leaves (fresh or dried)
- Goat meat or smoked fish
- Palm oil
- Onions
- Crayfish
- Stock cube
- Salt and pepper to taste
To prepare the soup, start by boiling the meat or fish until tender. In a separate pot, sauté the onions in palm oil until translucent.
Add the Afang leaves, crayfish, and stock cube, and continue cooking until the leaves are wilted and the flavors have melded together. Season with salt and pepper to taste.
Serve the Afang Soup hot, accompanied by a starch such as garri, eba, or fufu.
When preparing this dish, be mindful of the texture of the Afang leaves. If using fresh leaves, chop them finely to ensure a smooth consistency.
If using dried Afang, be sure to soak and rehydrate them before adding to the pot. Additionally, adjust the cooking time as needed to achieve your desired level of tenderness in the meat or fish.
Cooking Steps
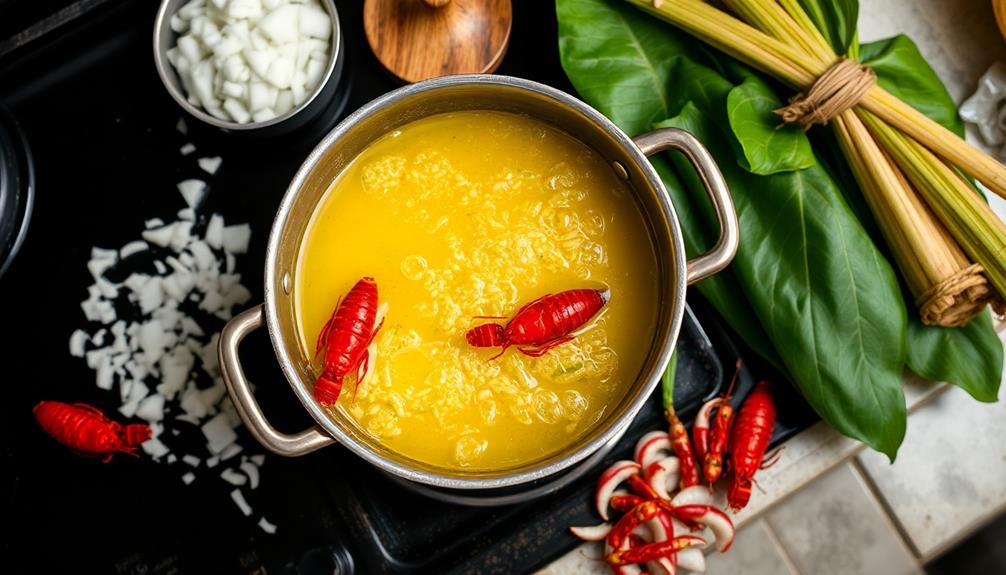
Chop up those Afang leaves into small, bite-sized pieces.
Bring a pot of water to a boil, then add the Afang and let it simmer.
Stir in some palm oil, toss in your favorite seasonings, and finish it off with a delicious protein of your choice.
Step 1. Chop Afang Leaves Into Small Pieces
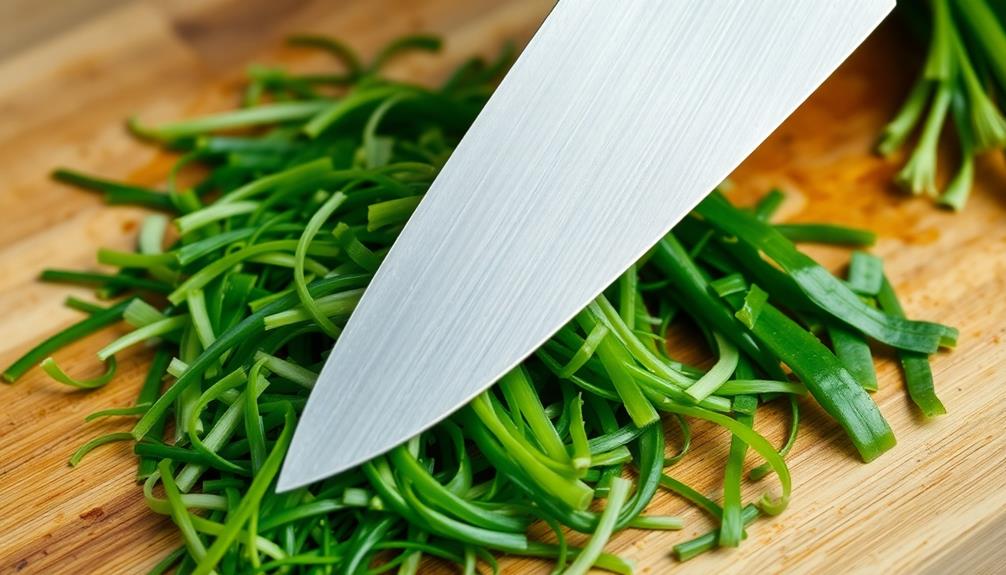
With a sharp knife, carefully chop the afang leaves into small, bite-sized pieces. The key is to slice them evenly, so they'll cook through quickly.
Don't worry if they're not perfect – the more rustic, the better! Gather the chopped leaves and set them aside. You'll want them handy when it's time to add them to the soup.
Next, take a moment to admire the deep green color of the afang leaves. Aren't they lovely? They'll really make your soup pop with vibrant flavor.
Just wait until you taste the finished dish – the tender leaves will melt in your mouth, complementing the rich broth and hearty ingredients.
Now that your afang is prepped, you're one step closer to enjoying a comforting bowl of this West African classic.
Keep up the good work – the rest of the recipe is just as easy. Soon, you'll be serving up a steaming hot serving of afang soup, perfect for sharing with family and friends.
Step 2. Boil Afang Leaves in Water
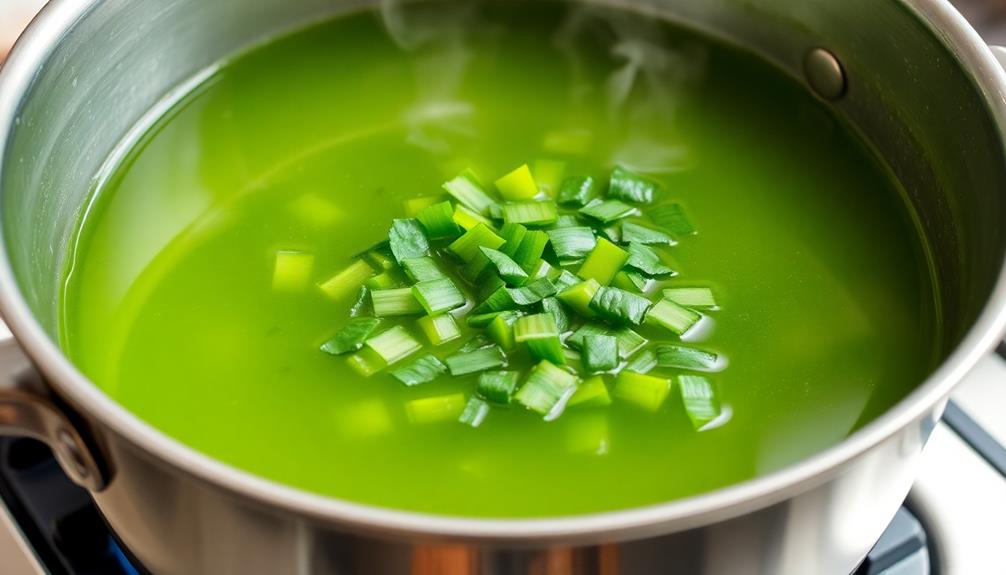
After chopping the afang leaves, add them to a pot of boiling water. The leaves will quickly wilt, releasing their delightful earthy flavor.
Gently simmer the leaves for about 10 minutes, until they're tender and have turned a vibrant green color. Be sure to stir the pot occasionally to ensure even cooking.
Next, drain the cooked afang leaves, reserving the flavorful afang broth. This broth will serve as the base for your soup, so don't let a drop go to waste!
The afang leaves are now ready to be combined with the other ingredients in your Afang Soup recipe.
Step 3. Add Palm Oil

Next, add a generous amount of palm oil to the pot. This rich, golden oil will infuse your Afang soup with a delightful, aromatic flavor.
Swirl it around, letting it heat up and shimmer. Ah, can you smell that? The nutty aroma is simply divine!
Now, it's time to add your chopped onions. Toss them in and watch them sizzle.
Stir everything together, ensuring the onions are coated in that delectable palm oil. As the onions cook, they'll become soft and translucent, adding a lovely depth of flavor to your soup.
Don't forget to season with some salt and pepper. A sprinkle here and a dash there will enhance the overall taste.
Taste as you go, adjusting the seasonings to your preference. The perfect balance of savory and earthy notes is key for an incredibly satisfying Afang soup.
Step 4. Add Seasoning
Flavor is the cornerstone of a great Afang soup. As you've added the rich, nutty palm oil, it's time to season this dish to perfection.
First, grab a handful of dried shrimp and crush it into the pot. This adds a delightful umami punch. Next, sprinkle in some ground crayfish – it'll bring a bold, seafood-y essence.
Don't forget the spices! A teaspoon each of cayenne pepper and ground ginger will give your Afang a pleasant kick.
Finish with a few shakes of dried thyme and a pinch of salt and black pepper. Stir it all together and let those flavors meld.
The aroma filling your kitchen is simply mouthwatering. Your family will be drawn to the table, eager to savor every spoonful of this hearty, well-seasoned Afang soup.
With the right balance of seasonings, you're well on your way to creating a comforting West African classic.
Step 5. Add Protein
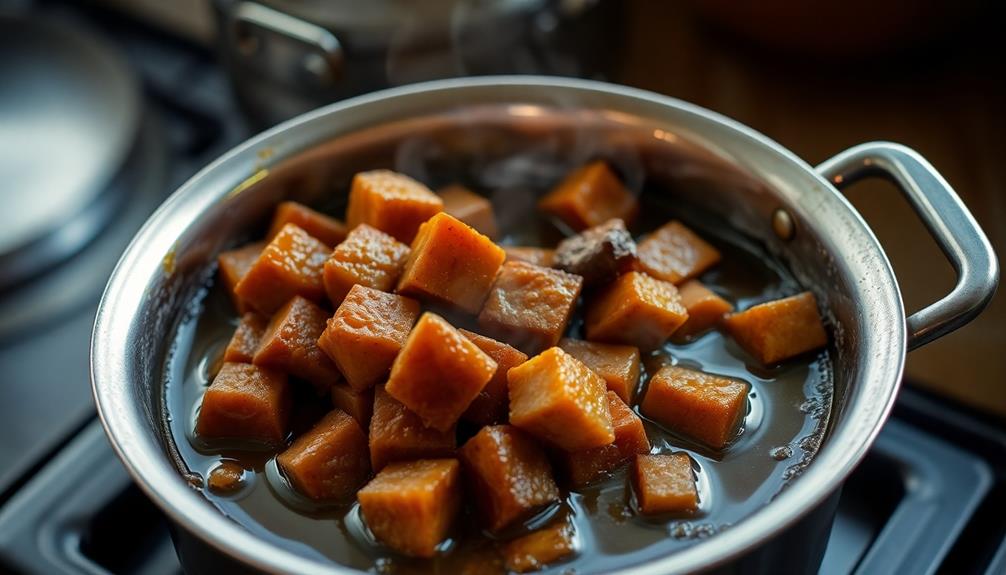
With the seasonings perfectly blended, you can now turn your attention to adding the protein that will truly transform this Afang soup.
Afang is traditionally made with smoked fish, often mackerel or herring, which lends a delightful, smoky depth of flavor. Simply add your chosen fish to the simmering pot, ensuring it's submerged in the aromatic broth.
Don't forget about the versatility of this dish – you can also use shrimp, chicken, or even beef to create your perfect Afang.
Just be sure to adjust the cooking time accordingly, as different proteins will require varying amounts of time to become tender and fully incorporated.
For a special touch, you might even consider adding a hard-boiled egg or two, which will soak up all the incredible flavors of the soup.
No matter which protein you select, you can rest assured that it will meld seamlessly with the complex, earthy notes of the Afang.
Final Thoughts
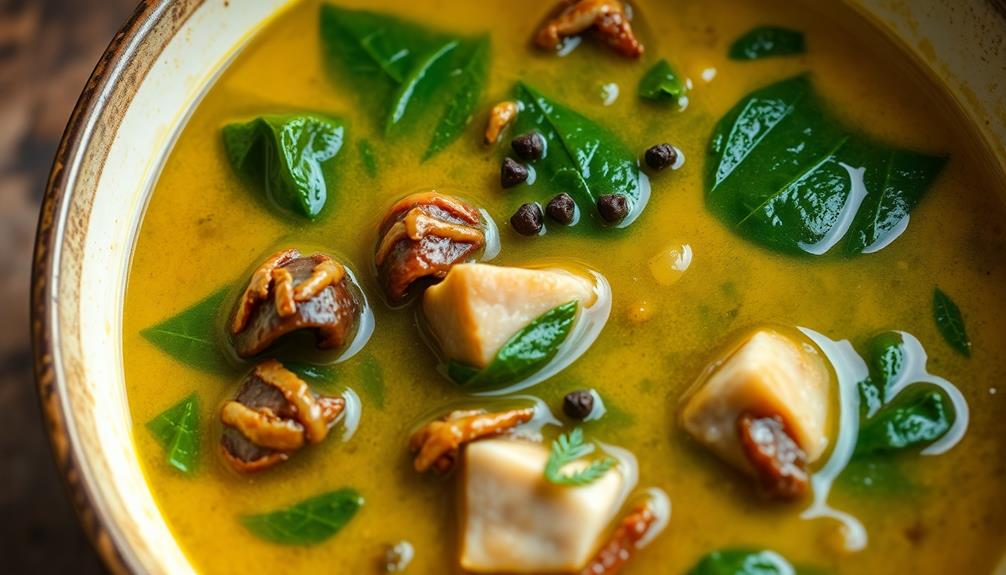
Afang soup is a delightful dish that encapsulates the vibrant flavors of West African cuisine. Once you've added your protein of choice, the final step is to simply sit back, relax, and savor every spoonful.
The complex blend of leafy greens, aromatic seasonings, and hearty ingredients come together to create a truly satisfying and comforting meal.
You'll find that Afang soup is a versatile dish that can be enjoyed year-round, whether as a cozy weeknight dinner or a celebratory feast.
The richness of the broth, the tenderness of the meat, and the burst of flavors in every bite will leave you craving more.
So, gather your loved ones, share this special dish, and revel in the warmth and joy that Afang soup brings to the table.
It's a culinary adventure that will transport you to the heart of West Africa, one delectable spoonful at a time.
Frequently Asked Questions
Is Afang Soup Suitable for Vegetarians or Vegans?
No, afang soup is not suitable for vegetarians or vegans as it typically contains meat, such as beef or fish. The traditional recipe includes ingredients like smoked fish, dried shrimp, and beef that would not be appropriate for plant-based diets.
How Long Can Afang Soup Be Stored Before Spoiling?
You can store afang soup for up to 3-4 days in the refrigerator if you keep it in an airtight container. However, it's best to consume it within a couple of days for optimal freshness and flavor.
What Are the Common Substitutes for the Key Ingredients?
When preparing afang soup, you can substitute the key ingredients like afang leaves with similar leafy greens like bitter leaves, kale, or spinach. Periwinkle can be replaced with shrimp, crayfish, or oysters. Get creative with what's available to you.
Can Afang Soup Be Frozen and Reheated Later?
You can freeze afang soup and reheat it later. The soup's hearty flavors and textures hold up well to freezing, allowing you to enjoy its comforting warmth even on a busy weeknight.
Is Afang Soup Considered a Traditional Dish in Other Regions?
Afang soup is considered a traditional dish in other regions of Africa, though it's most commonly associated with the cuisine of Nigeria and Cameroon. You'll find variations of this hearty, flavorful soup across West and Central Africa.
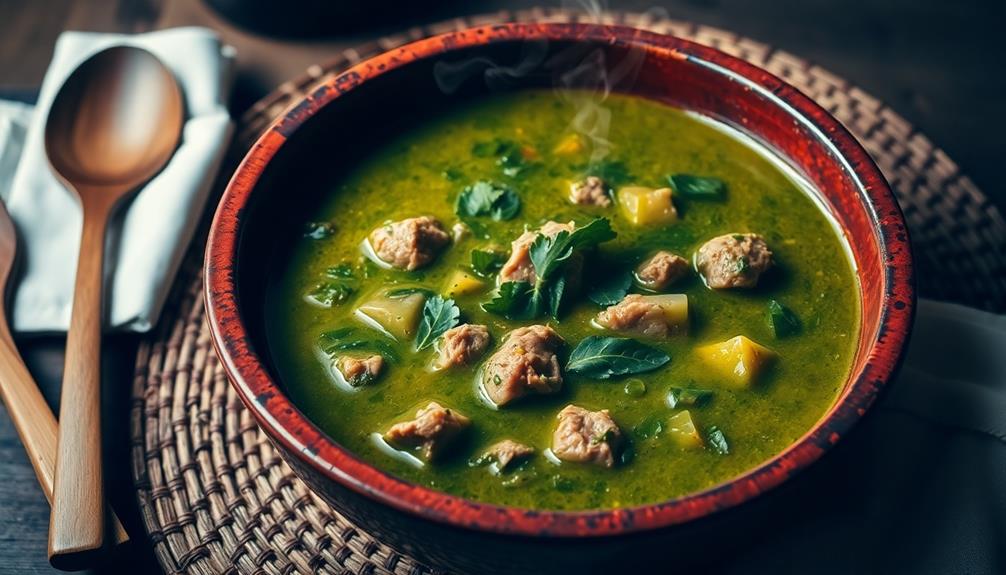
Amara brings her deep knowledge of African cuisine to the table, with a focus on the rich and hearty flavors of Senegal. She loves to share slow-cooked dishes like thieboudienne (rice and fish), which reflect the warmth and hospitality of African cooking. Amara’s approach to food is all about creating comforting meals that nourish the soul.
African Cuisine
Sweet and Savory African Breakfast: Plantain Porridge Recipe
Joyfully wake up your taste buds with the sweet and savory delight of African-inspired plantain porridge, a nourishing start to your day.
Get ready to wake up your taste buds with the sweet and savory delight of plantain porridge, a treasured African breakfast staple! This creamy and comforting dish showcases the vibrant culinary heritage of the continent. You'll love how the natural sweetness of ripe plantains blends seamlessly with aromatic spices, creating a truly nourishing and satisfying start to your day. Top it off with your favorite toppings, like toasted coconut or crunchy nuts, for a delightful textural contrast. Dive in and discover the rich flavors that make this plantain porridge a true celebration of African cuisine.
Key Takeaways
- Plantain porridge is a comforting and nutritious West African breakfast dish made by cooking ripe plantains in milk or water for a smooth, creamy texture.
- The natural sweetness of plantains is enhanced by savory spices, creating a versatile flavor profile that can be enjoyed with various toppings.
- Plantains are a dietary staple in Africa, and plantain porridge has roots in the communal cooking traditions of rural African communities, reflecting the vibrant culinary heritage.
- The dish can be customized with a variety of toppings, such as toasted coconut, crunchy nuts, and sweeteners like honey or maple syrup, adding texture and flavor.
- Plantain porridge offers a nourishing and fragrant breakfast option that celebrates the tradition and comfort of African cuisine.
History
Plantains, a close cousin of the banana, have long been a dietary staple across tropical regions. These starchy, savory fruits have been a part of African cuisine for centuries, with their cultivation and culinary uses deeply intertwined with the continent's rich cultural heritage.
From the lush rainforests of West Africa to the sun-drenched highlands of East Africa, plantains have been celebrated as a versatile and nourishing ingredient, serving as the foundation for many traditional breakfast dishes, including the beloved plantain porridge.
This beloved dish has its roots in the communal cooking traditions of rural African communities, where families would gather early in the morning to prepare a hearty and satisfying meal to fuel their day.
The simple act of mashing and simmering plantains with spices and milk or water has been passed down through generations, evolving into a cherished culinary ritual that brings people together and celebrates the flavors of the land.
Recipe
Plantain Porridge is a comforting and nutritious dish that's popular in many West African countries. This creamy and flavorful porridge is made by cooking ripe plantains in milk or water, creating a smooth and satisfying meal.
The natural sweetness of the plantains pairs perfectly with the creaminess of the milk, making this porridge a delightful breakfast or snack option. It's a versatile dish that can be enjoyed on its own or served with additional toppings and accompaniments.
Ingredients:
- 4 ripe plantains, peeled and sliced
- 2 cups milk or water
- 1 teaspoon vanilla extract
- 1/2 teaspoon ground cinnamon (optional)
- 1/4 teaspoon ground nutmeg (optional)
- Pinch of salt
Cooking Instructions:
In a medium saucepan, combine the sliced plantains and milk or water. Bring the mixture to a boil over medium heat, then reduce the heat and let it simmer, stirring occasionally, until the plantains are soft and the porridge has thickened, about 15-20 minutes.
Stir in the vanilla extract, cinnamon (if using), nutmeg (if using), and a pinch of salt. Adjust the seasoning to your taste.
Tips:
For a creamier consistency, you can use a combination of milk and water or substitute the milk with coconut milk. If the porridge becomes too thick, you can add a bit more liquid to reach your desired consistency.
Serve the plantain porridge warm, and consider adding your favorite toppings such as chopped nuts, dried fruits, or a drizzle of honey for an extra touch of sweetness.
Cooking Steps
Peel the plantains and slice them diagonally.
Add the sliced plantains to a pot, then pour in some water and give it a good stir.
Simmer the mixture until the plantains are nice and soft, then mash them up to create a delightful porridge.
Step 1. Peel and Slice Plantains Diagonally
To begin, take the firm, green plantains and carefully peel away their thick, tough skins with a knife or vegetable peeler.
Once the skins are removed, you'll be left with the starchy, banana-like flesh. Next, slice the peeled plantains diagonally into coins about 1/2 inch thick. This diagonal cut not only looks lovely, but it also helps the plantains cook evenly.
Be sure to make the slices uniform in size so they'll cook at the same rate. As you work, keep in mind that the plantains may discolor a bit, but don't worry – that's totally normal.
Just try to work quickly to minimize browning. Once all the plantains are sliced, you're ready to move on to the next step in creating your delicious, homemade plantain porridge!
Step 2. Add Sliced Plantains to Pot
With the plantains now sliced, you'll want to add them to a pot. Carefully place the golden slices into a large pot, making sure they're in a single layer. This will help them cook evenly and absorb all the delicious flavors.
Next, pour in enough water to just cover the plantains. You don't want them drowning, but you want enough liquid to create a creamy porridge. Bring the pot to a boil over medium-high heat, then reduce the heat to medium-low.
Let the plantains simmer for 15-20 minutes, stirring occasionally, until they're tender and the water has thickened into a porridge-like consistency.
As the plantain porridge cooks, the kitchen will be filled with the sweet, comforting aroma. Get ready to savor this traditional African breakfast treat!
Once the porridge is ready, you can serve it warm, topped with your favorite toppings like honey, cinnamon, or even a sprinkle of coconut flakes. Mmm, delicious!
Step 3. Add Water and Stir
Next, pour in enough water to just cover the plantains. You'll want to add about 3 cups of water for this recipe.
Stir the mixture gently to combine. The water should barely skim the top of the sliced plantains.
Now, turn the heat up to medium and let the porridge come to a gentle simmer. As it heats, the plantains will start to soften and break down, thickening the porridge.
Stir occasionally to prevent sticking or burning on the bottom of the pot.
Simmering the plantain porridge for 10-15 minutes will create the perfect creamy, luscious texture. The plantains will become tender and the mixture will take on a wonderfully sweet aroma.
Keep a close eye on it, adjusting the heat as needed to maintain an active, but gentle simmer.
Once the porridge has reached your desired consistency, it's ready to serve!
Ladle the warm, comforting plantain porridge into bowls and get ready to enjoy this delicious African-inspired breakfast.
Step 4. Simmer Until Plantains Are Softened
The gentle simmer is key to achieving the perfect plantain porridge texture. Once you've added the water, reduce the heat to medium-low and let the mixture gently bubble. This slow cooking process will allow the plantains to soften and break down, creating that irresistibly creamy consistency you're after.
Don't be tempted to crank up the heat – patience is a virtue when making this delightful dish!
Stir the porridge occasionally, scraping the bottom of the pot to prevent any sticking or burning. After about 15-20 minutes, the plantains should be fork-tender. You'll know they're ready when they practically melt into the liquid, creating a luscious, velvety texture.
The longer you simmer, the more the flavors will develop and meld together. Just be sure to keep an eye on the pot, adding a splash of water if it starts to look too thick.
Step 5. Mash the Softened Plantains
Once the plantains have softened to your liking, it's time to mash them right in the pot. Grab a potato masher or the back of a sturdy spoon and start mashing away!
Mash the plantains until they're nice and smooth, with a few chunky bits still remaining. This texture will add some delightful variety to your porridge.
As you mash, you'll notice the plantains becoming creamier and more inviting. Keep mashing until you've achieved your desired consistency. Some folks like their porridge on the thicker side, while others prefer it a bit thinner. Go with whatever suits your taste buds best!
Once the plantains are perfectly mashed, give the pot a good stir to incorporate all the flavors.
Now, you're ready to move on to the next step – adding in the remaining ingredients to create your delightful plantain porridge!
Final Thoughts
Ultimately, you should feel proud of creating this nourishing plantain porridge. The fragrant aroma and creamy texture are sure to delight your family's senses. This dish isn't only delicious but also packed with essential nutrients to fuel your day.
The sweetness of the plantains blends harmoniously with the savory spices, making it a versatile option for breakfast, brunch, or even a satisfying snack. Additionally, incorporating herbs like chamomile can enhance the dish's soothing qualities, making it even more comforting.
Don't be afraid to get creative! Try adding your favorite toppings, like toasted coconut, crunchy nuts, or a drizzle of honey. The possibilities are endless.
This recipe is a wonderful way to introduce new flavors to your loved ones and celebrate the vibrant culinary traditions of Africa. So, savor each spoonful, and enjoy the comfort and nourishment that this plantain porridge provides.
Frequently Asked Questions
What Are the Health Benefits of Plantain Porridge?
Plantain porridge offers a nutritious start to your day. It's rich in fiber, vitamins, and minerals that can boost your digestion, heart health, and energy levels. Plus, it's a gluten-free and filling breakfast option.
How Long Can Leftover Plantain Porridge Be Stored?
Leftover plantain porridge can be stored in the refrigerator for 3-4 days. Make sure to store it in an airtight container to maintain its freshness and prevent it from drying out or absorbing unwanted flavors.
Can I Substitute Other Types of Plantains in the Recipe?
You can certainly substitute other types of plantains in the recipe. Green, yellow, and red plantains all have distinct flavors and textures that can work well, though the cooking time may need to be adjusted accordingly.
How Do I Adjust the Sweetness Level of the Porridge?
To adjust the sweetness level of the porridge, you can add more or less sugar to taste. Start with a small amount and gradually increase it until you reach your desired level of sweetness.
Can I Add Additional Toppings or Ingredients to the Porridge?
Absolutely! You can customize the porridge by adding your favorite toppings or ingredients. Try nuts, dried fruit, cinnamon, honey, or even a dollop of yogurt to amp up the flavor and texture.
Amara brings her deep knowledge of African cuisine to the table, with a focus on the rich and hearty flavors of Senegal. She loves to share slow-cooked dishes like thieboudienne (rice and fish), which reflect the warmth and hospitality of African cooking. Amara’s approach to food is all about creating comforting meals that nourish the soul.
African Cuisine
Egg Sauce Mastery: A Versatile African Classic
Nourish your palate with the captivating flavors of egg sauce, an African culinary gem that effortlessly elevates any dish into a memorable gastronomic experience.
Egg sauce, a beloved African classic, transforms simple ingredients into a versatile and satisfying meal that has captivated culinary enthusiasts for centuries. You'll love its rich flavors and creamy texture, which enhance various dishes for special occasions and everyday meals. Featuring perfectly poached eggs, this sauce pairs well with fluffy rice, savory pasta, and crunchy veggies. Plus, you can customize it with spices, proteins, and creative toppings to suit your taste. Mastering the techniques behind this African gem will open up a world of culinary possibilities – you'll be whipping up mouthwatering meals in no time!
Key Takeaways
- Egg sauce is a beloved African classic with a rich history tracing back to ancient Roman and Greek culinary traditions.
- The versatile dish features perfectly poached eggs as a key ingredient, offering a silky-smooth texture that enhances various dishes.
- The recipe combines essential ingredients like mayonnaise, sour cream, and Dijon mustard to create a creamy and flavorful sauce.
- Egg sauce can be served over steamed rice, pasta, or used as a dip for fresh vegetables, making it a versatile option for various occasions.
- Mastering techniques like poaching eggs and balancing flavors is crucial for achieving the perfect consistency and taste in this African classic.
History
The origins of egg sauce can be traced back centuries, with references to similar savory preparations found in ancient Roman and Greek culinary texts. Over time, this delightful dish has become a beloved African classic, passed down through generations and celebrated for its delicious versatility.
Across the African continent, you'll find countless regional variations, each with its own unique twist. Some versions may feature a blend of spices, while others showcase the natural richness of the eggs. What unites them all is the ability to transform simple ingredients into a truly comforting and satisfying meal.
Whether served as a side dish, a topping, or the main event, egg sauce has a way of bringing people together. Its inviting aroma and creamy texture have made it a staple at family gatherings, celebrations, and even casual weeknight dinners.
As you delve into the history of this beloved dish, you'll discover a story of cultural exchange, culinary innovation, and the timeless power of good food to nourish the soul.
Recipe
Egg Sauce is a delightful and versatile condiment that can elevate a variety of dishes. This creamy, flavorful sauce is a staple in many cuisines and is particularly beloved for its ability to add a rich and tantalizing touch to various meals.
The key to mastering Egg Sauce lies in the perfect balance of ingredients and the careful execution of the preparation process. With a few simple steps, you can create a sauce that will leave your taste buds craving more.
- 2 hard-boiled eggs, peeled and finely chopped
- 1/4 cup mayonnaise
- 2 tablespoons sour cream
- 1 tablespoon Dijon mustard
- 1 tablespoon lemon juice
- 1 tablespoon finely chopped parsley
- Salt and pepper to taste
In a medium bowl, combine the chopped hard-boiled eggs, mayonnaise, sour cream, Dijon mustard, and lemon juice. Mix well until all the ingredients are thoroughly incorporated. Stir in the chopped parsley and season with salt and pepper to taste.
To ensure the best possible outcome, it's important to use fresh, high-quality ingredients and to pay close attention to the cooking process. The key is to perfectly hard-boil the eggs, allowing them to cool completely before peeling and chopping. This will ensure a smooth and creamy texture in the final sauce.
Additionally, be mindful of the proportions of the ingredients, as the balance of flavors is crucial for creating a well-rounded and delectable Egg Sauce.
Cooking Steps
Get ready to whip up a delicious egg sauce! First, gather your ingredients and equipment.
Next, sauté the aromatic veggies until they're fragrant and bursting with flavor.
Then, whisk the eggs right into the sauce, letting it simmer until it's nicely thickened.
Serve this creamy delight over a bed of steamed rice for a satisfying meal.
Step 1. Prepare Ingredients and Equipment
Before you can begin cooking the egg sauce, you'll need to gather the necessary ingredients and equipment.
Start by cracking 6 fresh eggs into a medium-sized bowl. Gently whisk them together until they're smooth and well-combined.
Next, gather your trusty saucepan and a wooden spoon. You'll also want to have some milk, butter, and a pinch of salt and pepper on hand.
Measure out 1/2 cup of milk and 2 tablespoons of butter. These will help create the creamy, velvety texture you're after.
Don't forget the salt and pepper – just a small sprinkle will do the trick!
Once you have everything ready, it's time to start cooking. Place the saucepan over medium heat and melt the butter.
Carefully pour in the whisked eggs and stir constantly with your wooden spoon. Keep an eye on the mixture, gently incorporating the milk as it thickens.
With a little patience and the right tools, you'll be on your way to egg sauce mastery!
Step 2. Sauté Aromatics Until Fragrant
With the eggs and other ingredients ready, begin by sautéing the aromatics in the butter over medium heat. The fragrant blend of onions, garlic, and ginger will soon fill your kitchen with mouthwatering aromas!
Stir the vegetables occasionally, letting them sizzle and soften until they're nicely browned and irresistibly fragrant. This step adds a depth of flavor that's essential to the egg sauce.
As the aromatics cook, their natural sugars caramelize, creating a rich, savory base for the sauce. Be sure to keep a close eye on the pan, adjusting the heat as needed to prevent burning. The goal is to coax out maximum flavor without letting the aromatics go too far.
Once the onions, garlic, and ginger are perfectly sautéed, you're ready to move on to the next step in creating your delectable egg sauce.
Get ready for an explosion of taste as you continue to build this African classic!
Step 3. Whisk Eggs Into Sauce
Now that the aromatic base is ready, it's time to whisk the eggs into the sauce. This is the key step that transforms a simple sauce into a rich, velvety delight! Grab a whisk and crack 2-3 fresh eggs directly into the simmering sauce. Whisk vigorously to incorporate the eggs, creating a smooth, creamy texture.
Don't be afraid to really put some muscle into it – you want those eggs to blend in seamlessly! As the eggs cook, the sauce will thicken and develop a luxurious mouthfeel. Keep whisking until it reaches your desired consistency. Taste and season with salt and pepper as needed. The egg adds a lovely silkiness that coats the back of your spoon. Mmm, can you just imagine how heavenly this is going to taste?
Once the egg is fully incorporated, your egg sauce is ready to serve! Ladle it over steaming hot rice or your favorite protein for an authentic African feast. Get ready for compliments galore – this recipe is a total crowd-pleaser.
Step 4. Simmer Sauce Until Thickened
The sauce's simmering now begins the process of thickening. Gently let it bubble away on the stove, stirring occasionally with a wooden spoon. As the liquid reduces, the eggs will coagulate, creating a rich, velvety texture.
Keep a close eye, as you don't want the sauce to overcook and curdle.
After 5-7 minutes, the sauce should start thickening nicely. To test, dip the back of your spoon into the mixture. If the sauce coats the spoon, it's ready. If it's still too thin, let it simmer a little longer. Just be patient and resist the urge to crank up the heat – slow and steady is the key.
Once the desired thickness is achieved, remove the pan from the heat. The carryover cooking will continue to thicken the sauce.
Now you're ready to dress your dish! Whether you're serving it over rice, pasta, or vegetables, this luscious egg sauce is sure to delight.
Step 5. Serve Over Steamed Rice
Serve the thickened egg sauce over a bed of fluffy, steamed white rice. The creamy, savory sauce pairs perfectly with the light and fluffy grains, creating a harmonious blend of flavors and textures. Gently spoon the sauce over the rice, ensuring each bite is infused with the rich, eggy goodness.
For the best experience, serve the dish piping hot. The warmth will enhance the aroma, enticing your senses and setting the stage for a truly delightful meal.
Don't forget to accompany the dish with your favorite condiments, such as sliced scallions, chopped cilantro, or a sprinkle of toasted sesame seeds. These vibrant garnishes will add a pop of color and an extra layer of flavor to your culinary creation.
Enjoy this classic African dish with your family and friends, savoring each mouthful of the velvety egg sauce and fluffy rice. It's a comforting and satisfying meal that's sure to leave everyone feeling nourished and content.
Final Thoughts
With all the techniques you've mastered, you're well on your way to egg sauce perfection. From perfectly poached eggs to the silky-smooth texture, you can now whip up this beloved African dish with confidence.
Delight your family and friends by serving this versatile sauce over steamed rice, pasta, or even as a dip for fresh vegetables. The possibilities are endless!
Get creative and try topping your egg sauce with chopped tomatoes, onions, or a sprinkle of fresh herbs. For a heartier meal, stir in some cooked chicken or beef. And don't forget the beauty of leftovers – the flavors only improve as the sauce sits.
Whether you're hosting a special occasion or simply enjoying a comforting weeknight dinner, mastering egg sauce is a skill that will bring joy to your table time and time again.
Savor every bite, and take pride in your newfound culinary prowess. Bon appétit!
Frequently Asked Questions
How Long Does Egg Sauce Keep in the Refrigerator?
Egg sauce will keep in the fridge for up to 3-4 days when stored in an airtight container. Be sure to refrigerate it promptly after cooking and consume it within that time frame for best quality and safety.
Can I Substitute the Eggs With Another Ingredient?
You can certainly substitute the eggs with another ingredient. Try substituting the eggs with tofu, mushrooms, or even a plant-based protein to create a different take on the dish. Just adjust the seasoning accordingly.
Is Egg Sauce Suitable for Vegetarians?
Certainly, egg sauce can be adapted for vegetarians. You can substitute the eggs with firm tofu or soy-based protein to create a delicious and satisfying meatless version that aligns with a vegetarian diet.
How Can I Thicken the Consistency of the Egg Sauce?
To thicken the consistency of the egg sauce, you can try adding a bit of flour or cornstarch. Gradually stir in small amounts until you reach your desired thickness. You can also let the sauce simmer to allow it to reduce and thicken naturally.
What Are Some Recommended Serving Suggestions for Egg Sauce?
You can serve egg sauce over rice, couscous, or pasta. It also pairs well with roasted or grilled meats, fish, or vegetables. Feel free to get creative and enjoy the versatility of this flavorful African dish.
Amara brings her deep knowledge of African cuisine to the table, with a focus on the rich and hearty flavors of Senegal. She loves to share slow-cooked dishes like thieboudienne (rice and fish), which reflect the warmth and hospitality of African cooking. Amara’s approach to food is all about creating comforting meals that nourish the soul.
African Cuisine
Nutritious and Earthy: Cooking With Cassava Leaf
Indulge in the vibrant flavors of cassava leaf, a nutritious and versatile ingredient that can transform your meals into a culinary masterpiece.
Cassava leaf is a true culinary gem! This earthy and nutritious vegetable has long been a staple in many cultures, from South America to Africa and beyond. Rich in vitamins, minerals, and fiber, it's a powerhouse of goodness. Dive into the vibrant flavors by sautéing chopped leaves in oil, then simmering in creamy coconut milk. Season with zesty spices like cumin and cayenne for a flavor explosion. Whether you serve it over fluffy rice or alongside other traditional dishes, cassava leaf is a versatile ingredient that'll have your taste buds dancing. Get ready to discover its delicious potential and delight your family!
Key Takeaways
- Cassava leaf is a versatile, nutrient-dense ingredient with a rich history, thriving in diverse climates and deeply woven into global culinary traditions.
- The leaves are a valuable source of essential vitamins, minerals, and fiber, contributing to overall health and supporting digestive well-being.
- Cooking cassava leaves involves soaking, chopping, sautéing, and simmering in coconut milk, creating a creamy, aromatic, and customizable dish.
- Proper preparation is crucial to remove any toxic compounds, ensuring a safe and delicious culinary experience.
- Cassava leaf's earthy flavor profile allows for a wide range of spice blends and flavor combinations, encouraging creativity in the kitchen.
History
Originating from South America, cassava leaf has a rich history as a dietary staple across many parts of the world. For centuries, indigenous communities in regions like Africa, Asia, and the Caribbean have relied on this versatile vegetable as a crucial source of nutrition.
Cassava leaf's adaptability to diverse climates and its ability to thrive in poor soil conditions have made it a beloved ingredient, deeply woven into the culinary traditions of many cultures.
Today, cassava leaf continues to hold a special place in the hearts and kitchens of people around the globe. Whether simmered in soups, sautéed as a side dish, or incorporated into savory stews, this earthy, nutrient-dense leaf has endured as a time-honored ingredient.
Its resilience and versatility have allowed it to transcend geographic boundaries, becoming a cherished part of the world's diverse culinary tapestry.
Recipe
Cassava leaf is a staple vegetable in many parts of the world, especially in Africa and the Caribbean. It's a versatile ingredient that can be used in a variety of dishes, from stews to sautés. Cooking with cassava leaf can be a delightful experience, as it offers a unique flavor and texture.
Cassava leaves are rich in vitamins, minerals, and fiber, making them a nutritious addition to any meal. They're often used in traditional dishes, but can also be incorporated into modern recipes to add depth and complexity.
- 2 cups chopped cassava leaves
- 1 onion, diced
- 2 cloves garlic, minced
- 1 tomato, diced
- 2 tablespoons peanut oil
- 1 teaspoon ground crayfish (optional)
- 1 cup coconut milk
- Salt and pepper to taste
In a large pot, heat the peanut oil over medium heat. Add the onion and garlic and sauté until fragrant, about 2-3 minutes. Add the chopped cassava leaves and sauté for another 5 minutes, stirring occasionally.
Pour in the coconut milk and add the diced tomato. Season with salt, pepper, and ground crayfish (if using). Simmer the mixture for 15-20 minutes, or until the cassava leaves are tender and the flavors have melded together.
It's important to note that cassava leaves contain a compound called linamarin, which can be toxic if not properly prepared. Be sure to thoroughly wash and cook the leaves before consuming them.
Additionally, you can adjust the spice level to your personal preference by adding more or less ground crayfish. Enjoy your delicious cassava leaf dish!
Cooking Steps
Start by soaking the cassava leaves in water to remove any dirt or impurities.
Once they're clean, drain the leaves and chop them into bite-sized pieces.
Next, sauté the chopped leaves in a bit of oil until they're tender.
For a delightfully creamy texture, stir in some coconut milk and season with your favorite spices to taste.
Step 1. Soak Cassava Leaves in Water
After purchasing the cassava leaves, it's time to soak them in water. This step helps remove any dirt, debris, or impurities that may be clinging to the leaves.
Simply fill a large bowl or sink with clean, cool water and gently submerge the cassava leaves. Let them soak for about 15-20 minutes, giving them a gentle swish every now and then. This will ensure the leaves are thoroughly cleaned and ready for the next step in the cooking process.
Once the soaking is complete, carefully lift the leaves out of the water, making sure to drain off any excess liquid. The leaves are now clean and prepped, so you can move on to chopping them up for your delicious cassava leaf dish.
Remember to handle the leaves with care, as they can be quite delicate. With a little bit of TLC, you'll have perfectly prepared cassava leaves, ready to be transformed into a flavorful and nutritious meal.
Step 2. Drain and Chop Leaves
With the cassava leaves now thoroughly cleaned, it's time to move on to the next step. First, drain the leaves in a colander to remove any excess water. Don't worry if a few drops remain – they'll cook off nicely.
Next, grab a sharp knife and chop the leaves into bite-sized pieces. This will help them cook evenly and make them easier to eat. Try to keep the pieces around an inch or two in size.
As you're chopping, you might notice the leaves have a slightly tough, leathery texture. That's perfectly normal! Cassava leaves are hearty greens, and a little chopping is all they need to become tender and delicious.
Once you've chopped the entire batch, give the leaves a gentle fluff with your fingers to separate any clumps. Now you're ready to move on to the next stage of cooking. Get excited – the best is yet to come!
Step 3. Sauté Chopped Leaves in Oil
Next, heat a drizzle of oil in a large skillet over medium heat. Once the oil is shimmering, add the chopped cassava leaves.
Sauté the leaves, stirring frequently, until they're wilted and fragrant, about 5 minutes. Be sure to keep an eye on the leaves, as they can go from perfectly sautéed to burnt in the blink of an eye.
Adjust the heat as needed to prevent any scorching. You want the leaves to soften and develop a delicious, earthy aroma without drying out.
When the leaves are tender and cooked through, remove the skillet from the heat. Season the sautéed leaves with a pinch of salt and a sprinkle of pepper, to taste.
Give everything a final stir to combine the flavors. Your cassava leaves are now ready to be incorporated into your favorite dishes or enjoyed on their own as a flavorful side.
Step 4. Add Coconut Milk for Creaminess
To take the sautéed cassava leaves to the next level, stir in some creamy coconut milk. The rich, velvety texture of the coconut milk will complement the earthy flavor of the leaves, creating a truly scrumptious dish.
Grab a can of full-fat coconut milk and pour it right into the skillet with the sautéed leaves. Gently heat and stir until the coconut milk is fully incorporated. The coconut milk will thicken the mixture, resulting in a luscious, creamy consistency.
For extra flavor, you can also add a pinch of salt, a squeeze of lime juice, or a sprinkle of your favorite spices. Cilantro or green onions make a fresh, vibrant garnish.
Serve this coconut-infused cassava leaf dish over steamed rice for a complete and satisfying meal.
The creamy coconut milk takes this humble vegetable to new heights of deliciousness. Your family is sure to love this flavorful and nourishing cassava leaf dish.
Step 5. Add Spices to Taste
Add any desired spices to the coconut milk-infused cassava leaves.
Experiment with aromatic spices like cumin, coriander, and turmeric to enhance the earthy flavors. A sprinkle of smoked paprika can lend a delightful smoky note, while a dash of cayenne pepper adds a lively kick.
Don't be afraid to get creative! You can even try a blend of spices, like a Cajun seasoning or a Caribbean curry powder, to take your cassava dish on a global flavor adventure.
Final Thoughts
Cassava leaf's versatility is a true kitchen marvel, allowing you to craft mouthwatering dishes that captivate the senses. From hearty stews to vibrant salads, the humble cassava leaf can transform any meal into a culinary adventure.
Its earthy, slightly sweet flavor pairs beautifully with a symphony of spices, creating a unique taste experience that will have your family and friends raving.
As you explore the world of cassava leaf cooking, don't be afraid to experiment. Play with different flavor combinations, and let your creativity shine.
Whether you're looking to impress at a dinner party or simply enjoy a comforting homemade meal, cassava leaf is a fantastic ingredient that will never let you down.
Frequently Asked Questions
Is Cassava Leaf Gluten-Free?
Yes, cassava leaf is gluten-free. Cassava, the plant from which cassava leaf is derived, does not contain gluten, a protein found in certain grains like wheat, barley, and rye. So you can enjoy cassava leaf without worrying about gluten.
How Long Can I Store Cooked Cassava Leaf?
You can store cooked cassava leaf in the refrigerator for up to 3-5 days. Make sure to store it in an airtight container to maintain freshness. Avoid leaving it at room temperature for too long to prevent spoilage.
Can I Substitute Cassava Leaf for Other Greens?
You can substitute cassava leaf for other greens, but keep in mind the unique flavor and texture. It works well in dishes that call for hardy, earthy greens like kale or collards.
Are There Any Health Risks Associated With Cassava Leaf?
While cassava leaf is generally safe, it can contain cyanogenic compounds that may be harmful in large quantities. Consult your healthcare provider before consuming it, especially if you have any underlying medical conditions.
How Do I Select the Freshest Cassava Leaves?
When selecting cassava leaves, look for ones that are vibrant green, crisp, and free of any discoloration or wilting. Gently feel the leaves – they should be firm yet pliable. Avoid leaves that appear dried out or damaged.
Amara brings her deep knowledge of African cuisine to the table, with a focus on the rich and hearty flavors of Senegal. She loves to share slow-cooked dishes like thieboudienne (rice and fish), which reflect the warmth and hospitality of African cooking. Amara’s approach to food is all about creating comforting meals that nourish the soul.
-
Brazilian Cuisine3 months ago
Tacacá
-
Brazilian Cuisine3 months ago
Caldeirada
-
Polish Comfort Food3 months ago
Krupnik (Barley Soup)
-
Southern Comfort Food3 months ago
Cheese Straws
-
Brazilian Cuisine3 months ago
Chicken in Brown Sauce
-
Polish Comfort Food3 months ago
Vegetable Salad
-
American Diner Classics2 months ago
The Maillard Reaction: Understanding the Chemistry of Browning {Food Science and Cooking}
-
African Cuisine3 months ago
Kedjenou (Ivory Coast)